Hello dear reader, I know you enjoy a cuddly crochet project just as much as I do! After the delightful super-huggable Octopus Crochet Pattern, I’m thrilled to bring you this fantastic Crochet Corgi Project from the same talented crochet designer today. Get ready for plenty of wonderfully squishy fun! So, let’s have a look!
The Cuddly Crochet Pets Book
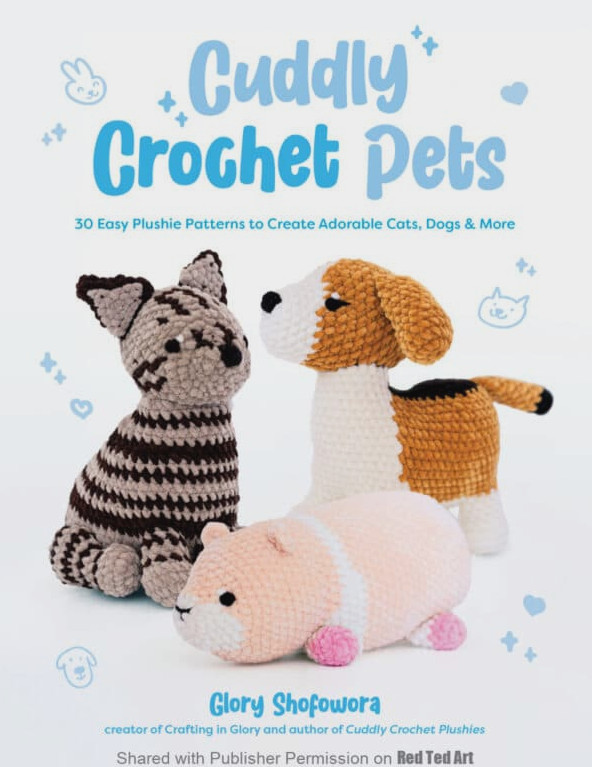
Not long ago, I was delighted to introduce you to Glory Shofowora and her brilliant book, Cuddly Crochet Plushies. If the charming Octopus Crochet Plushie sample project didn’t win you over already, perhaps the news that she has released BOOK TWO, Cuddly Crochet Pets, will do the trick!
As I mentioned before, she is undoubtedly the queen of plushies. You can discover her on Instagram, Etsy, and her personal website under the name Crafting in Glory! In short, if you’re searching for an especially cuddly or squishy crochet design, Glory is the creator to follow. Her collection is packed with adorable, snuggly makes that you’ll never want to put down once they’re finished!
Now you can discover even more delightful patterns while venturing into the world of PETS! In Cuddly Crochet Pets, you’ll come across a variety of Dog Crochet Patterns, each more adorable than the last, along with an assortment of irresistibly huggable Cat Crochet Patterns. There are also fantastic fish, hamsters, and plenty more… what’s not to adore?!
Purchase a copy of this fantastic Crochet Book on Amazon or from all major bookstores (from 4th August 2026).
Published with permission from Cuddly Crochet Pets by Glory Shofowora. Page Street Publishing Co. 2026. Photo credit: Juliana Buenrostro & Glory Shofowora.
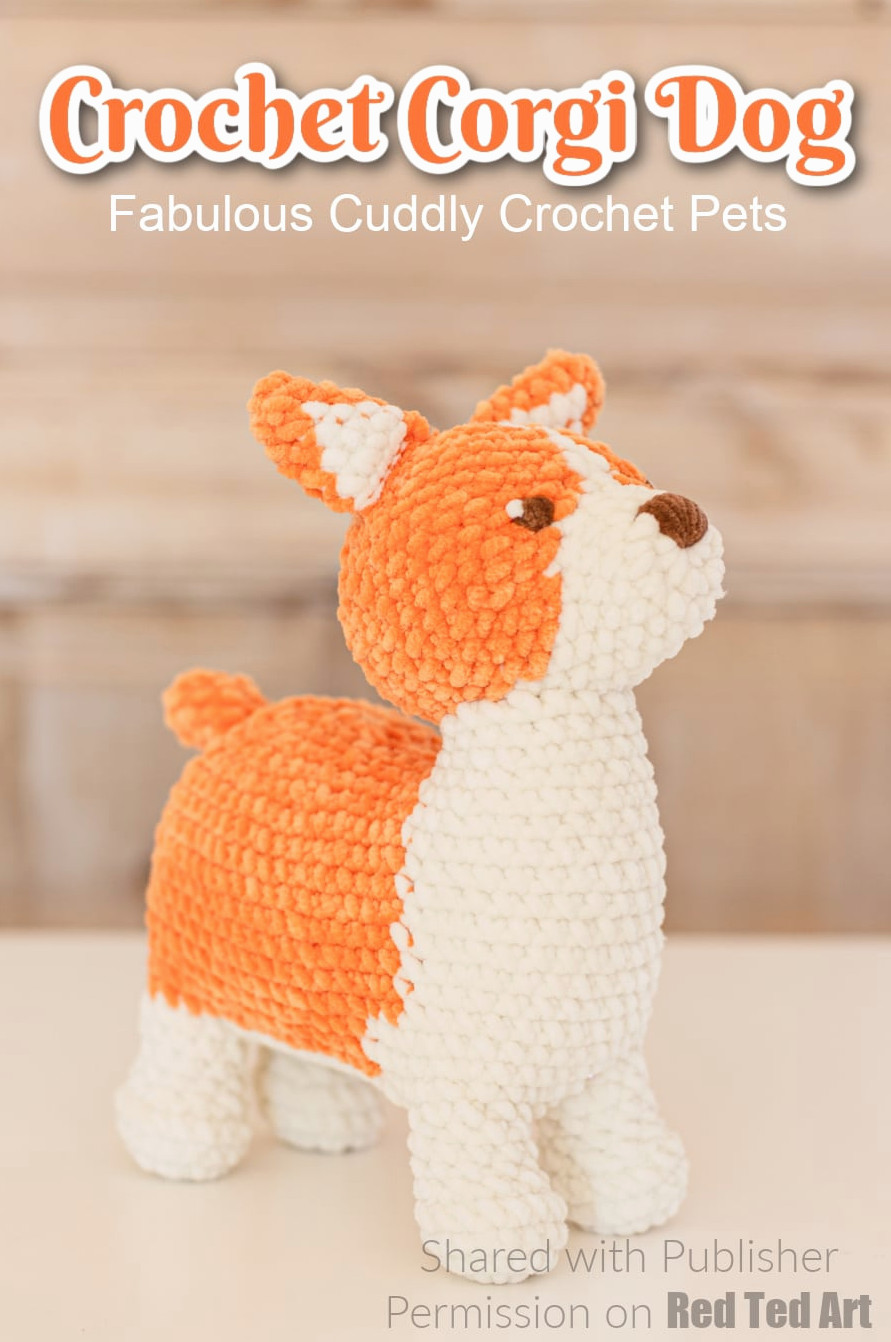
Callen the Corgi
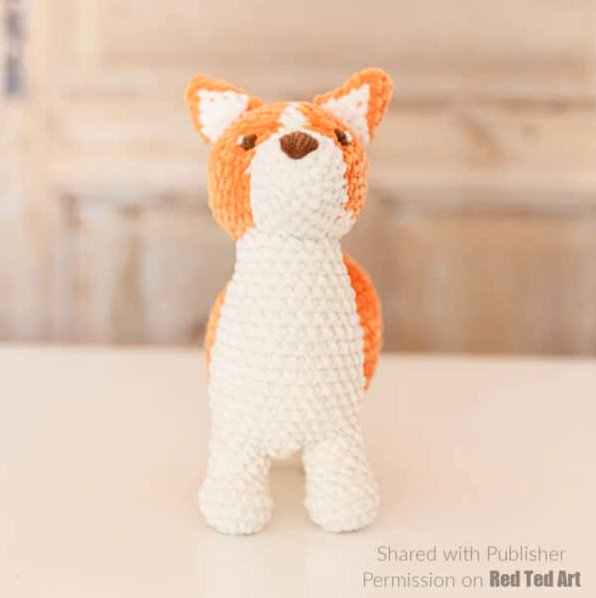
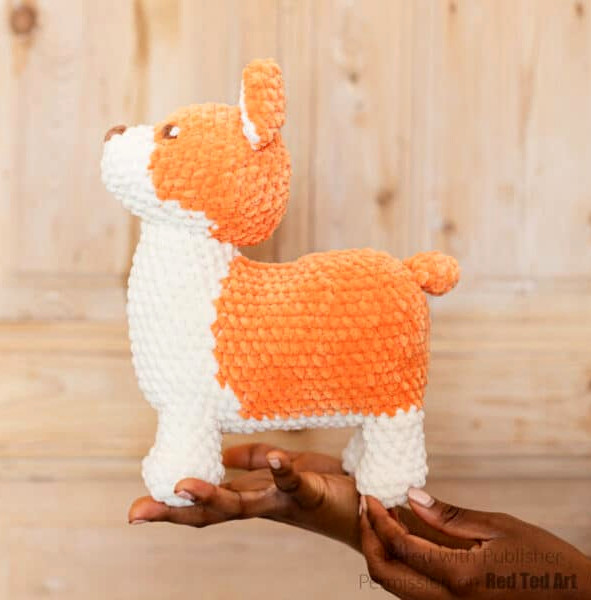
Corgis are well known for their short, compact bodies—in fact, their name comes from the Welsh language and means dwarf dog! So, pick up your hook and prepare to create this adorable pup with petite legs and a generously rounded tummy.
Skill Level
Intermediate
Size
Approximately 6 inches (15 cm) in length, 7 inches (18 cm) in width, and 10 inches (25.5 cm) in height
Yarn
Hooks
US size H-8 (5mm)
Notions
Gauge
20 sc x 5 rounds = 4 inches (10 cm)
Crochet Abbreviations
All crochet shorthand uses U.S. terminology. If you’d like to review any of the stitches, visit our Crochet Beginner Basics, which also includes an alternative to the Magic Ring—a technique that some beginners find slightly challenging at first!
- MC = main color – note: NOTE magic circle/ magic ring as is commonly written in other patterns
- MR = magic ring
- C1 = color 1
- C2 = color 2
- MR = magic ring
- Ch(s) = chain(s)
- Sc = single crochet
- St(s) = stitch(es)
- Dec = decrease (crochet 2 sc together)
- Inc = increase (work 2 sc into one stitch)
- Flo = front loop only
Callen the Corgi Pattern
Legs (make 4)
Using C1, create an MR, then work 8 sc into the MR (8 sts).
Rnd 1: Inc in every st (16 sts).
Rnds 2–3 (2 Rnds): Sc in every st (16 sts).
Rnd 4: Sc 4, dec 6 times (10 sts).
Rnds 5–7 (3 Rnds): Sc in every st (10 sts).
Join with a sl st into the 1st st of Rnd 7.
Fasten off, leaving a 3-inch (7.5-cm) tail. Put aside.
Waggy Dog’s Tail
With MC, form an MR, then crochet 8 sc into the MR (8 sts).
Rnds 1–4 (4 Rnds): Sc in every st (8 sts).
Fasten off and retain a 12-inch (30.5-cm) tail for stitching.
The Corgi Dog’s Body
With C1, ch 16.
Work an inc in the 2nd chain from the hook, sc in the following 13 chs, then inc twice in the final ch. Rotate your work 180 degrees clockwise to crochet along the other side of the chain. Next, sc in the following 13 chs and inc in the last ch (34 sts).
Rnd 1: Inc in the first 2 sts, sc 13, inc in the next 4 sts, sc 13, inc in the final 2 sts (42 sts).
Rnd 2: Sc 2. To attach Leg 1, insert your hook into the 6th st of the Leg and the next st of the Body. Sc the sts together. Sc the 5th st of the Leg together with the next st of the Body. Then sc the 4th st of the Leg and the next st of the Body together. Sc 12. Attach Leg 2 in the same manner as the first Leg. Sc 3. Attach the third Leg by inserting your hook into the 1st st of the
Leg and the next st of the Body. Sc the sts together. Sc the 10th st of the Leg and the next st of the Body together. Sc the 9th st of the Leg and the next st of the Body together. Sc 12. Join the final Leg using the same method as the previous Leg. Sc in the last st (42 sts).
Rnd 3: Sc 2. Sc across the remaining 7 sts of Leg 1. Sc across the next 12 sts of the Body. Sc across the remaining 7 sts of Leg 2. Sc across the next 3 sts of the Body.
Sc across the remaining 7 sts of Leg 3. Sc across the next 12 sts of the Body. Sc across the remaining 7 sts of Leg 4. Sc into the last remaining st of the Body (58 sts).
Rnd 4: With C1, sc 11. With MC, sc 38. With C1, sc 9 (58 sts).
Rnd 5: With C1, sc 12. With MC, sc 37. With C1, sc 9 (58 sts).
Rnd 6: With C1, sc 12. With MC,
sc 38. Using C1, sc 8 (58 sts).
Rnd 7: Using C1, sc 10. Using MC, sc 42. Using C1, sc 6 (58 sts).
Rnd 8: Using C1, sc 11. Using MC, sc 41. Using C1, sc 6 (58 sts).
Rnd 9: Using C1, sc 11. Using MC, sc 42. Using C1, sc 5 (58 sts).
Rnd 10: Using C1, sc 12. Using MC, sc 41. Using C1, sc 5 (58 sts).
Rnd 11: Using C1, sc 12. Using MC, sc 42. Using C1, sc 4 (58 sts).
Rnd 12: Using C1, sc 13. Using MC, sc 41. Using C1, sc 4 (58 sts).
Rnd 13: Using C1, sc 13. Using MC, sc 42. Using C1, sc 3 (58 sts).
Rnd 14: Using C1, sc 14. Using MC, sc 41. Using C1, sc 3 (58 sts).
Rnd 15: Using C1, sc 14. Using MC, sc 6, (dec, sc 3) 6 times, sc 6. Using C1, sc 2 (52 sts). Stuff the Legs.
Rnd 16: Using C1, sc 15. Using MC, sc 35. Using C1, sc 2 (52 sts). Begin filling the Body.
Rnd 17: Using C1, sc 15. Using MC, sc 5, (dec, sc 2) 6 times, sc 7. Using C1, sc in the final st (46 sts).
Rnd 18: Using C1, sc 16. Using MC, sc 23. From the beginning of the round, place a st marker in the 22nd st. Insert your hook into the next st of the Body and the marked st. Join the sts with a sl st.
Continue in the same manner with the next st of the Body and the 21st st, then the next st of the Body and the 20th st, the next st of the Body and the 19th st, the next st of the Body and the 18th st, and the next st of the Body and the 17th st. (There will now be 12 sts joined in the center of the Body, along with 2 openings containing 17 sts each.) Using C1, sc into the final st of the Body (40 sts). Break MC.
Take out the st marker.
Rnd 19: Using C1, sc 16. Sc in the final st (17 sts).
Rnd 20: Sc in every st (17 sts).
Fasten off, leaving a 12-inch (30.5-cm) tail for stitching.
To complete the Body, using MC, insert your hook into the 23rd st of Rnd 18. Sc into that same st. Decrease 8 times across the remaining 16 sts (9 sts). Finish filling the Body.
Rnd 21: (Dec, sc) 3 times (6 sts).
Fasten off, then stitch the opening shut.
Corgi’s Head
Using C1, form a MR, then work 8 sc into the MR (8 sts).
Rnd 1: Inc in every st (16 sts).
Rnds 2–4 (3 Rnds): Sc in every st (16 sts).
Rnd 5: Using C1, sc 7. Using MC, inc 3 times in the flo. Using C1, sc. Using MC, sc, inc 3 times. Using C1, sc in the final 2 sts (22 sts).
Rnd 6: Using C1, sc 7. Using MC, (inc, sc) 3 times. Using C1, sc 2. Using MC, (inc, sc) 3 times. Using C1, sc in the final st (28 sts). If desired, place the safety eyes on this Rnd, 7 sts apart.
Rnd 7: Using C1, sc 7. Inc in the following st. Using MC, sc 10. Using C1, sc. Using MC, sc 9. Using C1, sc in the final st (28 sts).
Rnd 8: Using C1, sc 7. Inc in the next st. Using MC, (sc 2, inc) 2 times, sc 3. Using C1, sc 1. Using MC, (inc, sc 2) 3 times. Using C1, sc in the final st (34 sts).
Rnd 9: Using C1, sc 9. Using MC, sc 12. Using C1, sc. Using MC, sc 12 (34 sts).
Rnd 10: Using C1, sc 10. Using MC, sc 11. Using C1, sc. Using MC, sc 12 (34 sts).
Rnd 11: Using C1, sc 10. Using MC, sc 24 (34 sts). Break C1.
Rnd 12: Using MC, sc in every st (34 sts).
Rnd 13: Sc 9, (dec, sc 2) 3 times, sc 5, (dec, sc 2) 2 times (29 sts).
Rnd 14: Dec, sc 27 (28 sts).
Rnd 15: Sc in every st (28 sts).
Rnd 16: Sc 11, (dec, sc) 5 times, dec (22 sts).
Rnd 17: (Dec, sc 3, dec, sc 4) 2 times (18 sts).
Rnd 18: (Dec, sc) 6 times (12 sts).
Rnd 19: Dec 6 times (6 sts).
Fasten off and stitch the opening closed.
Crochet Ears (make 2)
Using MC, form a MR, then work 6 sc into the MR (6 sts).
Rnd 1: Sc in every st (6 sts).
Rnd 2: Using MC, inc. Using C1, sc 1. Using MC, sc 1, inc, sc 2 (8 sts).
Rnd 3: Using MC, sc 2. Using C1, sc 2. Using MC, sc 4 (8 sts).
Rnd 4: Using MC, inc, sc. Using C1, sc 2, inc. Using MC, sc 3 (10 sts).
Rnd 5: Using MC, inc, sc 2. Using C1, sc 2, inc, sc 2. Using MC, sc 2 (12 sts).
Fasten off and retain a 12-inch (30.5-cm) tail for sewing.
Assembly of your Crochet Corgi
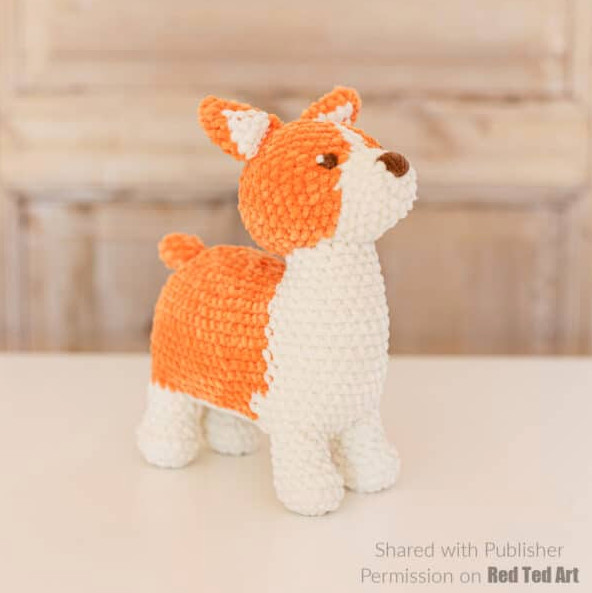
Attach each Ear to Rnd 12 of the Head, leaving 4 sts between them. Stitch the Tail to the back of Rnd 20 of the Body. Join the Head to the Body’s neck. When safety eyes are not being used, embroider two eyes onto Rnd 6 of the Head, 8 sts apart. To finish, embroider a triangle-shaped nose on the Head, measuring 2 Rnds tall and 3 sts wide at its broadest point.
Ta-da.. your adorable Corgi Crochet Pattern is now COMPLETE!! Why not pick up a copy of this fantastic Crochet Book on Amazon or from all major bookstores (from 4th August 2026).
Reproduced with permission from Cuddly Crochet Pets by Glory Shofowora. Page Street Publishing Co. 2026. Photo credit: Juliana Buenrostro & Glory Shofowora.
Below are additional delightful Sample Patterns from Page Street Authors, featuring irresistible books worth exploring (I thought I would choose the Seaside theme!):