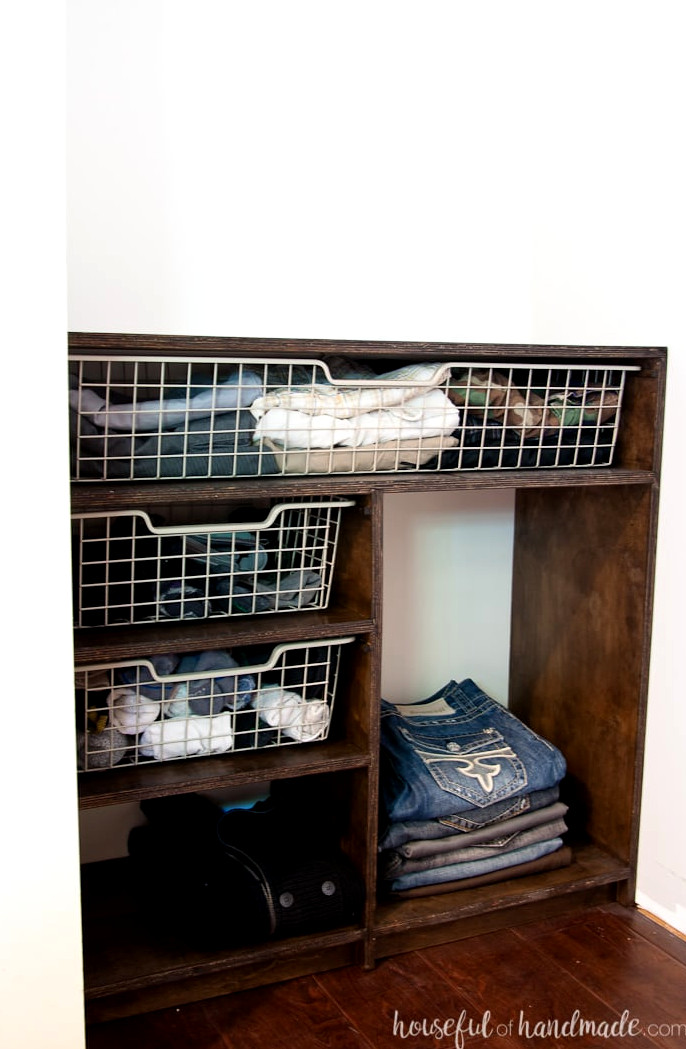
Transform a basic closet into a tidy area with this DIY closet organizer.
A well-arranged closet simply makes everyday life easier! Best of all, a custom closet does not need to be expensive.
This DIY closet organizer can be made from plywood for less than $100!
Creating your own closet system can save a great deal of money compared with buying a custom or ready-made one. Even better, you can tailor it to suit your closet and clothing collection.
Below, you will find all the information and construction plans for our plywood closet shelves so you can make one yourself!
A $100 Room Makeover
I created this custom closet organizer for a $100 Room Challenge. During the challenge, you refresh one room within a single month while spending only $100!
It sounds unrealistic, doesn’t it? But it can be done! I have already finished an impressive office/craft room renovation and farmhouse laundry room makeover on the same very limited budget.
Most of our custom closet transformation focused on adding plenty of storage through the plywood closet organizer system.
I was tired of relying only on hanging rods to store all our clothes.
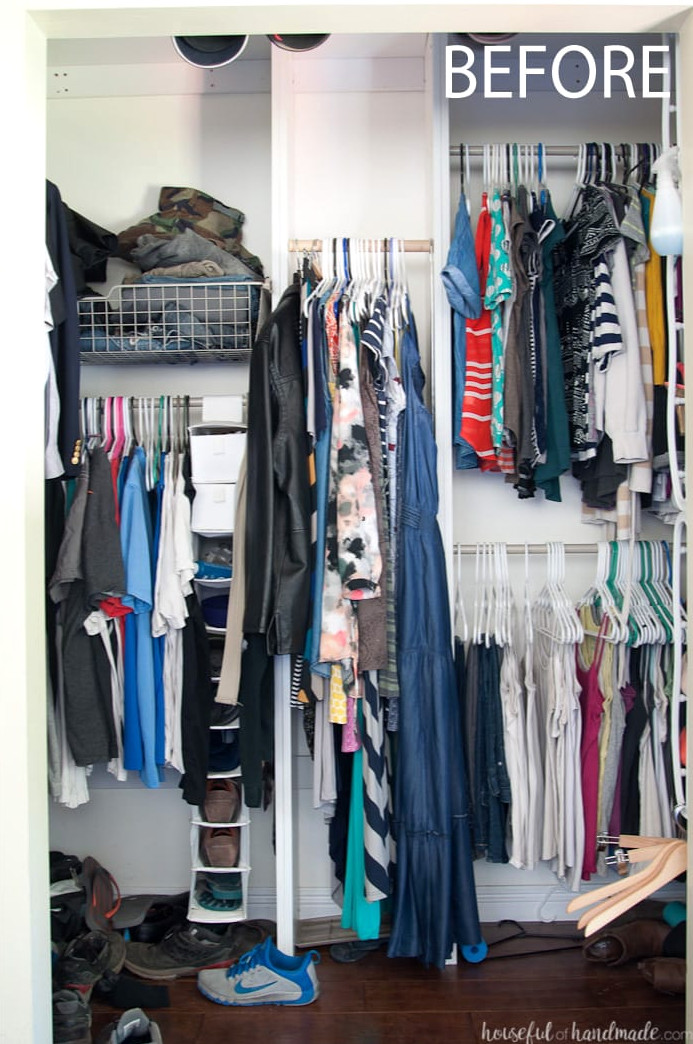
Did you know knitted garments should not be hung? The majority of my clothes are knitwear!
When I work on projects, I really enjoy the comfort of knit clothing. However, hanging these pieces may cause them to stretch.
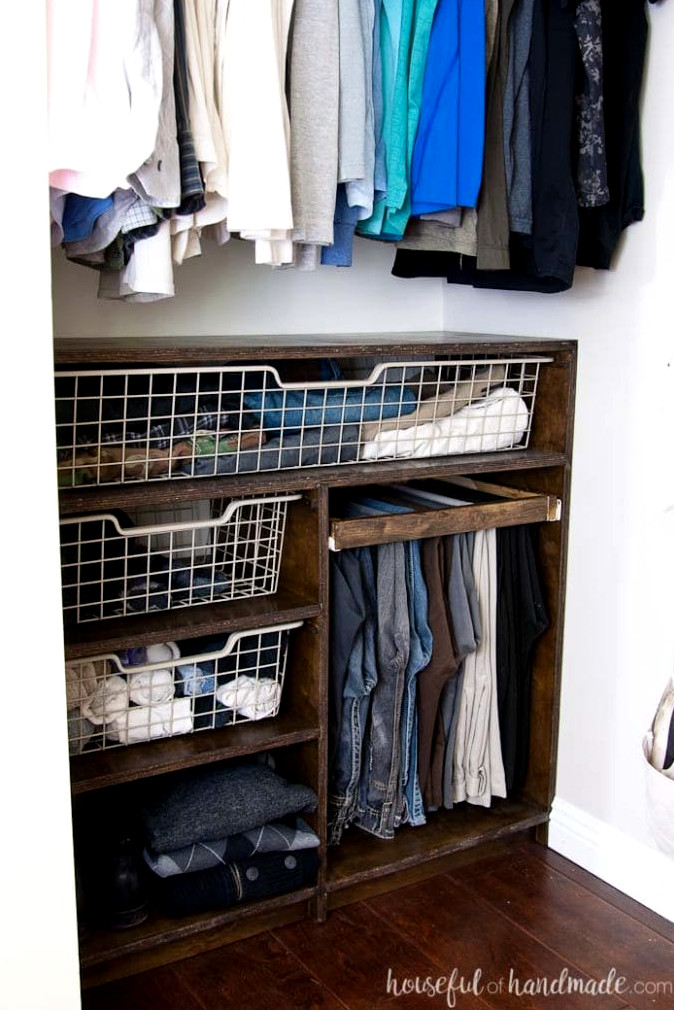
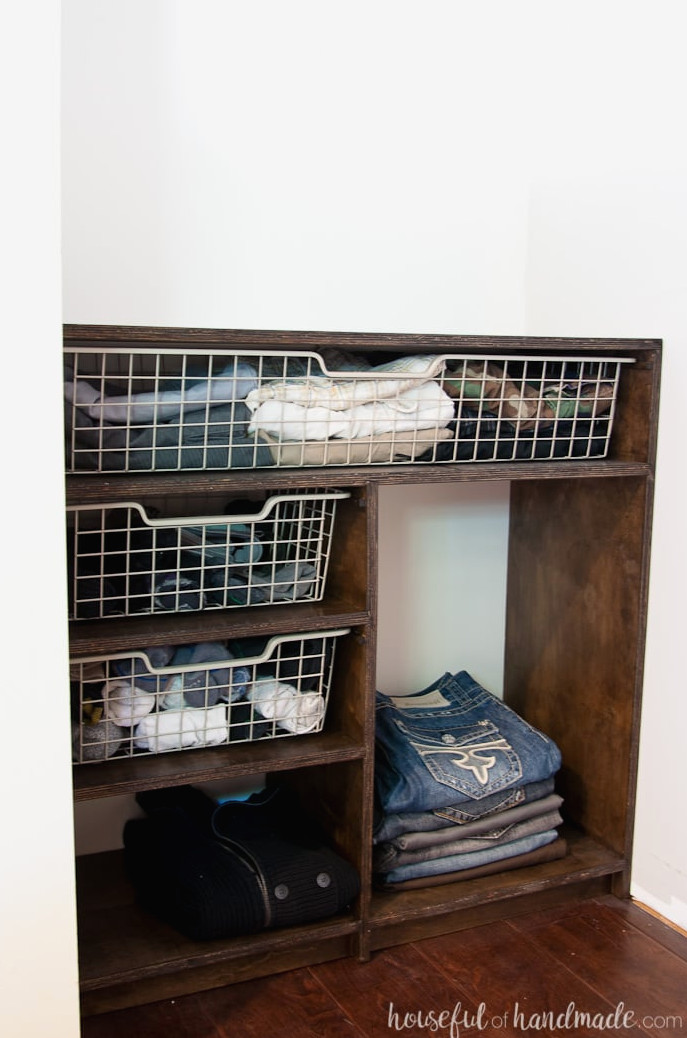
The closet shelves created space for baskets and drawers to hold all those knits, along with room for shoes, pants, and more!
How Can I Organize My Closet Inexpensively?
- Install plenty of shelves and cubbies using affordable plywood
- Cover boxes to create attractive storage containers for keeping belongings
- Search your home for unused baskets that can be placed in the closet
- Take advantage of wall space for storing shoes
- Replace your hangers with matching ones to immediately give the closet a neater appearance
- Reduce your wardrobe and accessories – fewer items are simpler to arrange
How to Build Closet Shelves from Plywood
Because our closet renovation had to stay within a strict budget, making our own closet shelving units was the best solution.
I could afford to purchase two sheets of 3/4″ plywood, so I planned to build two personalized closet storage systems with them.
Each closet unit would include the areas needed to meet the specific requirements of both of us.
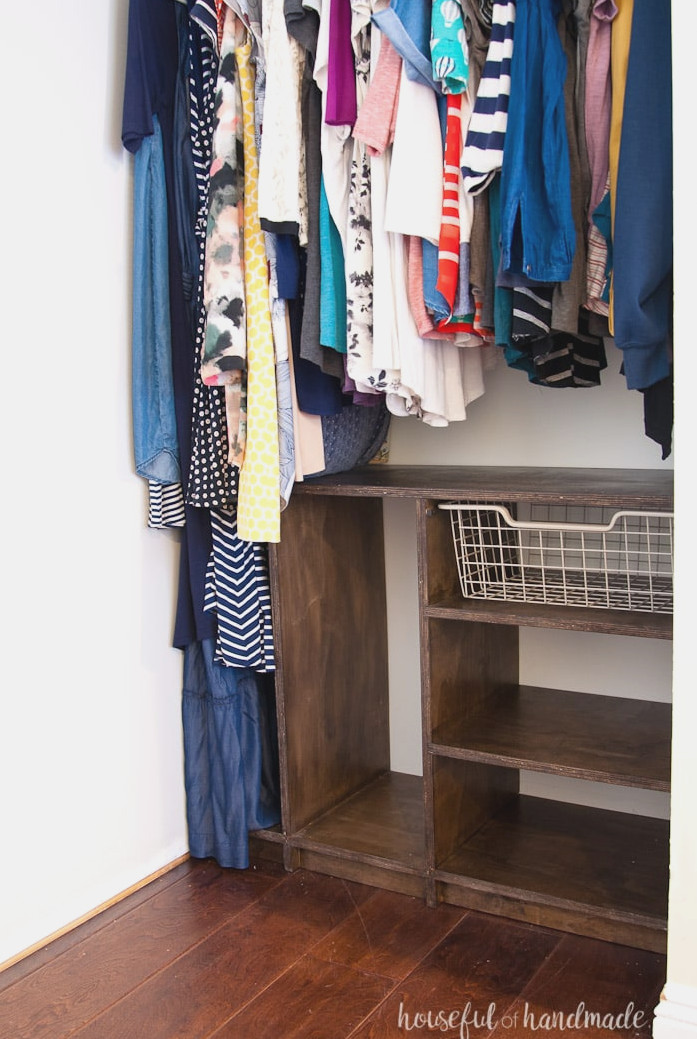
The outcome is already far better than it was previously!
Rather than having a cramped closet filled with hidden areas, we now have an open walk-in space where you can even get dressed.
Instead of impractical shelves and unused areas, we have attractive shelving with a specific place for everything, plus extra room.
Which Plywood Is Best for a Custom Closet?
Plywood comes in many varieties. If you plan to stain your closet, cabinet-grade plywood is the ideal choice. These plywood sheets feature a wood veneer exterior, helping the shelves have a natural wood appearance.
For a painted closet, MDF (medium density fiberboard) is also an excellent alternative. It is durable, easy to cut, and very smooth, which allows it to look beautiful after painting. Many painted cabinet doors feature an MDF center panel.
Plywood used for shelving should be at least 1/2″ thick. However, 3/4″ plywood is preferable because it creates sturdier shelves that support more weight without sagging.
Cabinet-grade plywood is available in a wide range of qualities and prices.
Less expensive varieties generally contain more voids, making them weaker and sometimes leaving holes visible along the cut edges. They may also need additional sanding to achieve a smoother finish.
Since I was following a $100 budget, I chose pine plywood from Home Depot. Each 4’x8′ sheet was priced at $35.
To complete our plywood closet organizers, I made several pull-out racks for pants (this is the feature my husband is especially thrilled about) and found boxes to cover and place on some of the shelves.
I have already found a few boxes that fit the openings perfectly!
Now I need to determine the best method for arranging our shoe collection without filling the beautiful open area that we both enjoy.
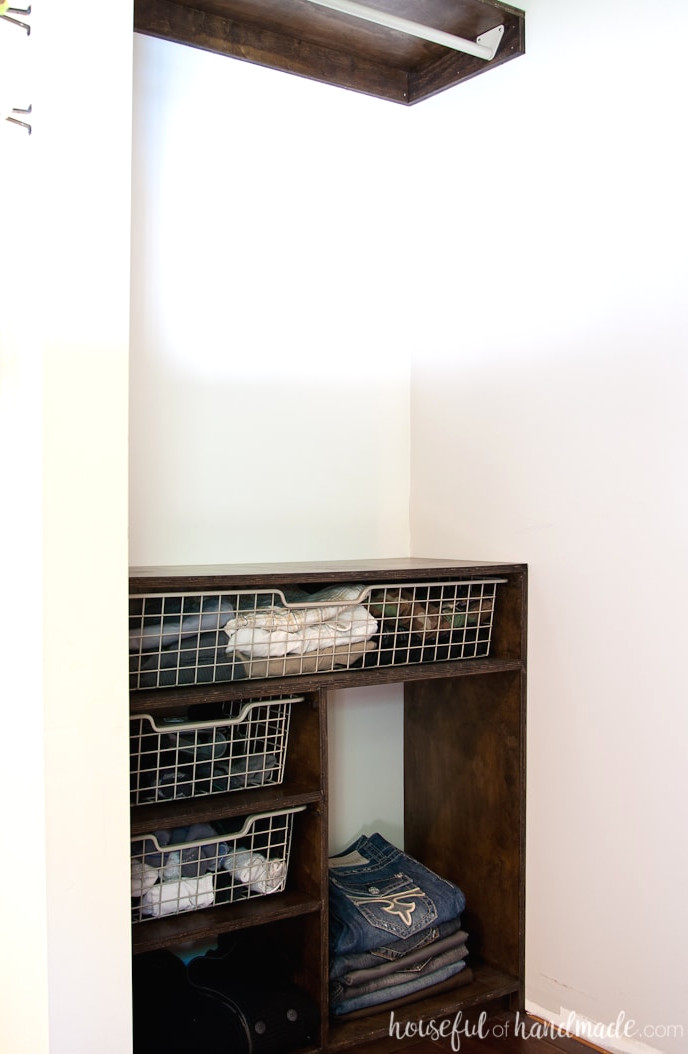
You can use these suggestions as inspiration for designing your own custom plywood closet organizer, or download the plans below!
Building a Plywood Closet Organizer
Tools & Supplies
Overall Measurements
Both closet organizers were planned to occupy a 38 1/2″-wide area. The taller unit measures 36 3/4″ in height, while the shorter one is 28 3/4″ tall.
If your closet is wider, you can install more shelves on one side or include a hanging rod.
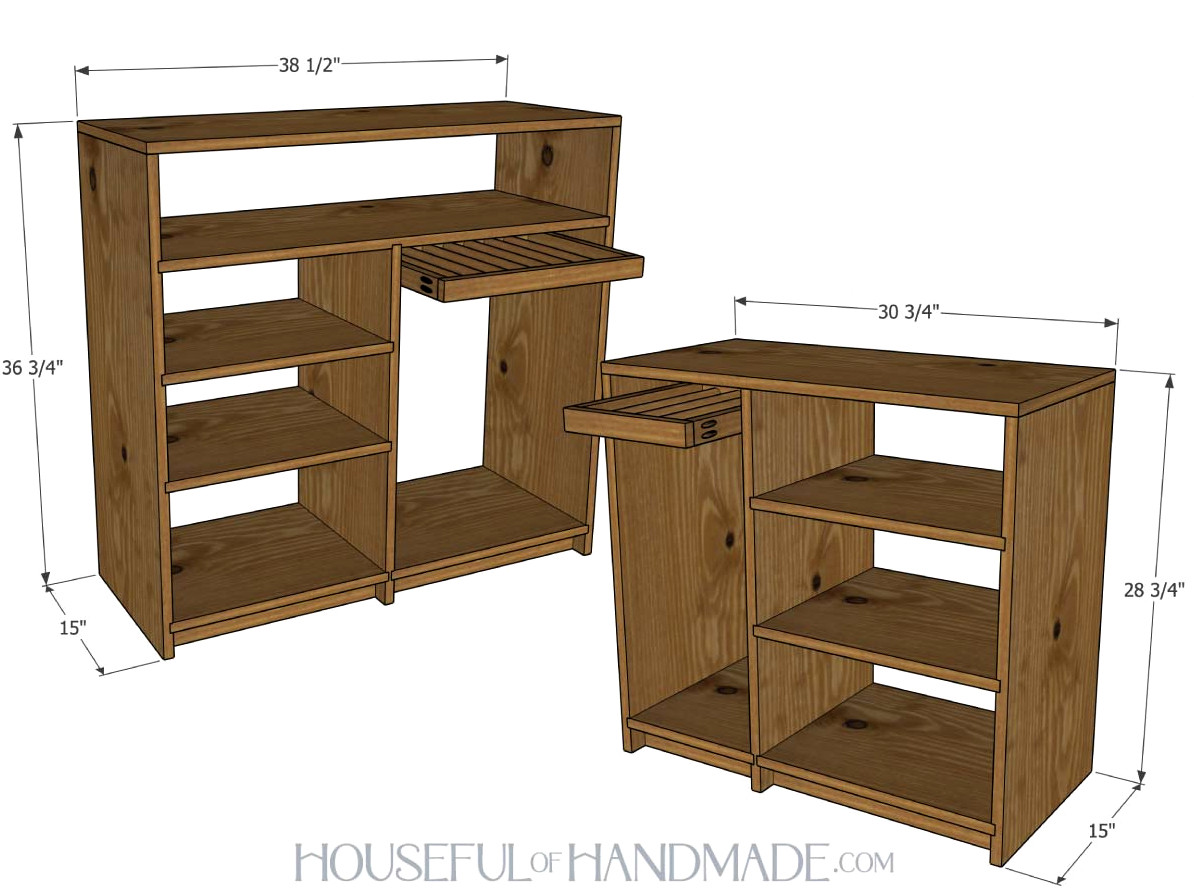
Cutting Guide
Cut the components according to the simple-to-follow table included in the premium PDF plans.
Download the Premium PDF Woodworking Plans
PDF plans feature- Clear Cut List, Shopping List, Suggested Tools, Detailed Instructions with 3D illustrations, & Useful Resources
BONUS- 3D SketchUp Model
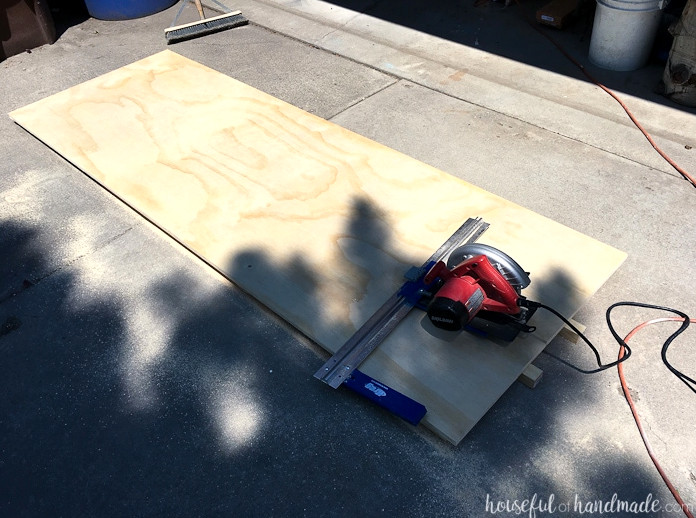
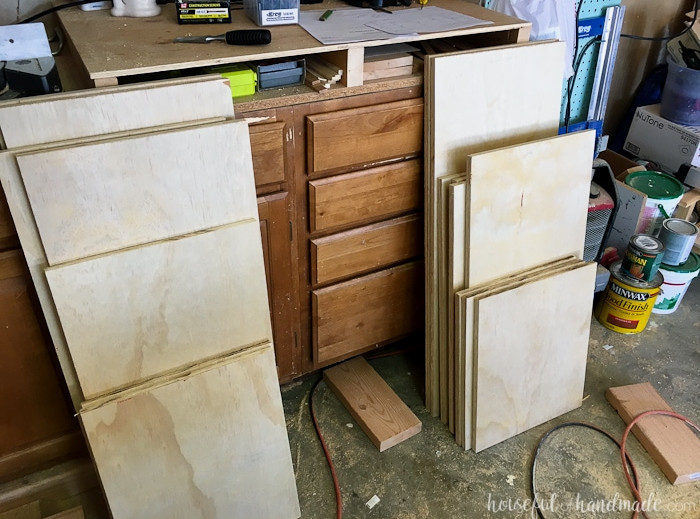
Begin by cutting the entire plywood sheet into strips.
I used my circular saw along with a Kreg Rip Cut for this task. You may also be able to have them cut at the home improvement store.
Learn how I prefer to cut plywood using my circular saw here.
Keep the roughly 2 1/2″ end section, since it is required for the toe kick.
Next, crosscut the ripped boards into the widths required for each closet organizer.
To avoid wasting lumber, always cut the biggest possible piece from any remaining boards.
There will be a small amount of flexibility (though not much) when building these closets exactly as shown.
If you are adapting your own plywood closet organizer, increase each shelf by 1/2″ so it can rest inside the routed dados.
Step 1- Test Fit the Pieces
Because my cabinet will occupy the complete closet area, I performed a dry fit to verify that the dimensions were accurate.
Doing this prevents plenty of frustration later on.
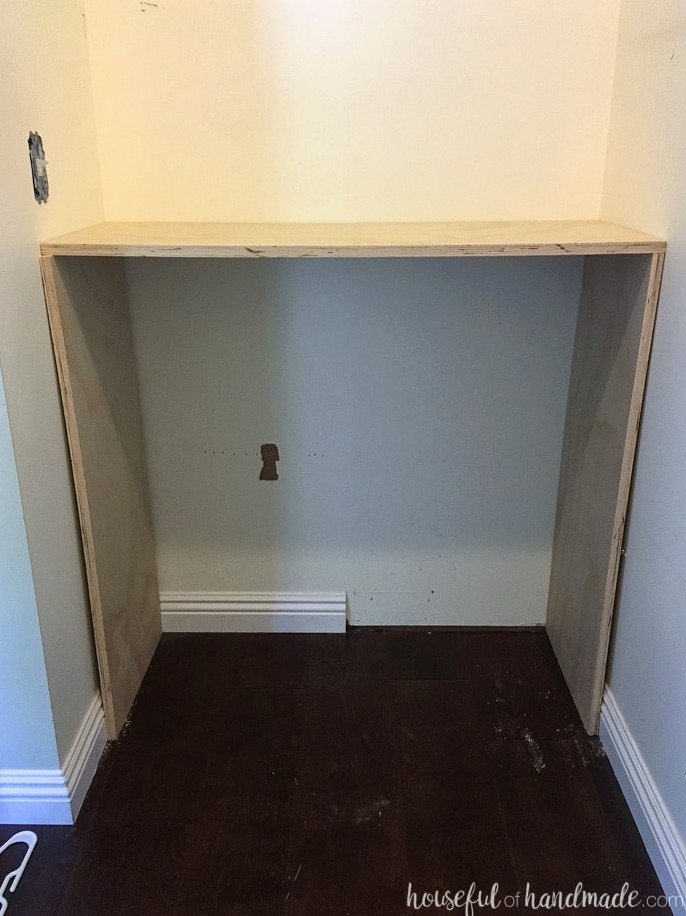
However, I found a problem on the opposite side of the closet even though I had completed a dry fit.
Since the cabinet did not occupy the whole area (I needed space for long dresses to hang), I assembled the full cabinet.
Afterward, I decided to install a toe kick and lower shelf beneath the dresses to prevent dust and dog hair from reaching my clothes.
I positioned the cabinet in the opening and then test fitted the toe kick piece. It fit properly, so I assembled it.
Later, I discovered that the closet curved slightly near the front, meaning the assembled cabinet could not slide into the opening (I’ll explain how I corrected this later). Be sure to check for this during the dry fit too.
STEP 2- Rout Grooves for the Shelves
With the router, make 1/4″-deep channels in the board sides where the shelves will be installed (these channels are called dados).
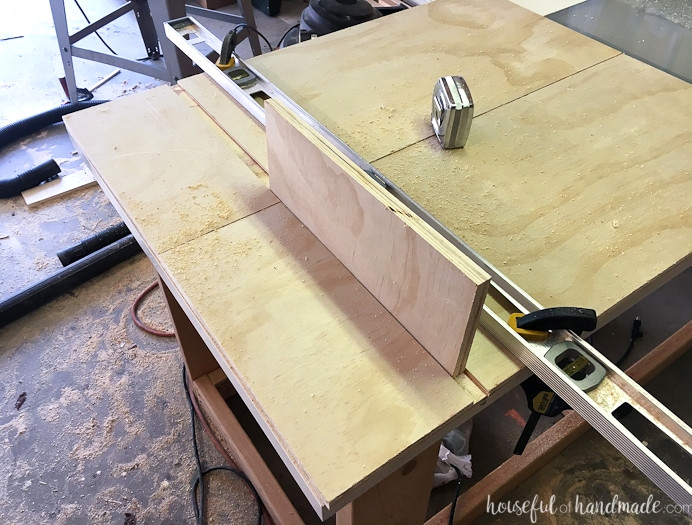
I don’t own a 3/4″ dado router bit, so I marked the location where the 3/4″ dado had to go.
Next, I ran the 1/2″ bit along both edges of the 3/4″ opening. The result was not flawless, but it saved me the $20 cost of purchasing the bit.
I’ll likely buy one later if I end up building many more cabinets, perhaps for our kitchen.
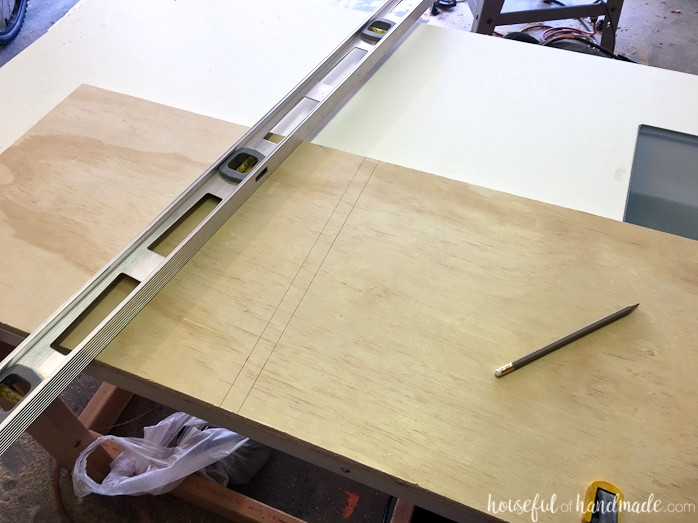
Before routing the dado, place the two side panels together and clamp them so the router path matches on both sides of the shelf.
Secure a straightedge, such as a level, to the board to guide the router in a straight path.
I determined the required distance between the straightedge and my mark by measuring from the edge of the router bit to the router’s edge.
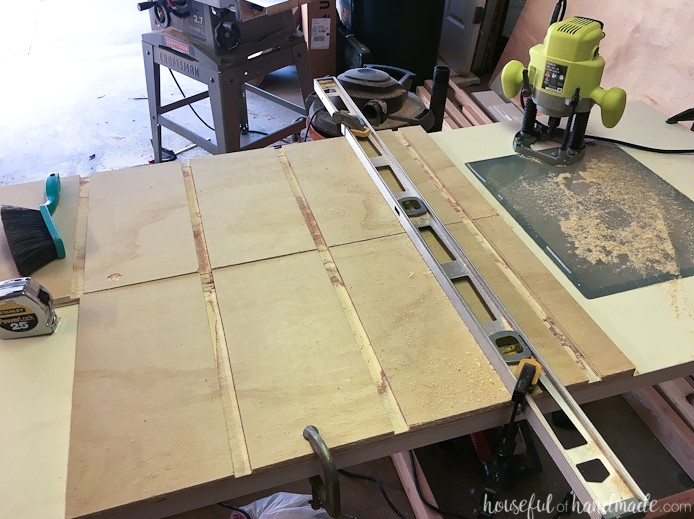
At the cabinet base, I installed a toe kick to stop dust and dog hair from collecting underneath.
To create it, route the dado 2″ above the cabinet bottom for the lower shelf, then cut a second dado 1″ back from the cabinet front, extending from the board bottom up to the lower shelf dado.
Rather than clamping a level to guide the router for this section, I found it simpler to nail a scrap of wood onto the boards. The nail holes were placed where the toe kick would conceal them.
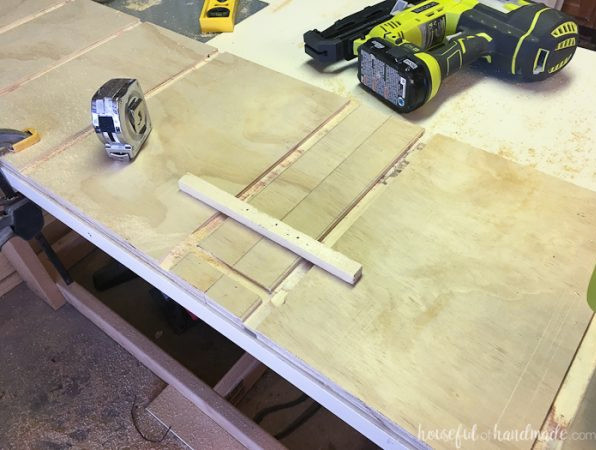
For the boards positioned in the center of the closet, you will need to rout dados on both sidesto align with the shelf arrangement.
STEP 3- Put Together the Plywood Cabinets
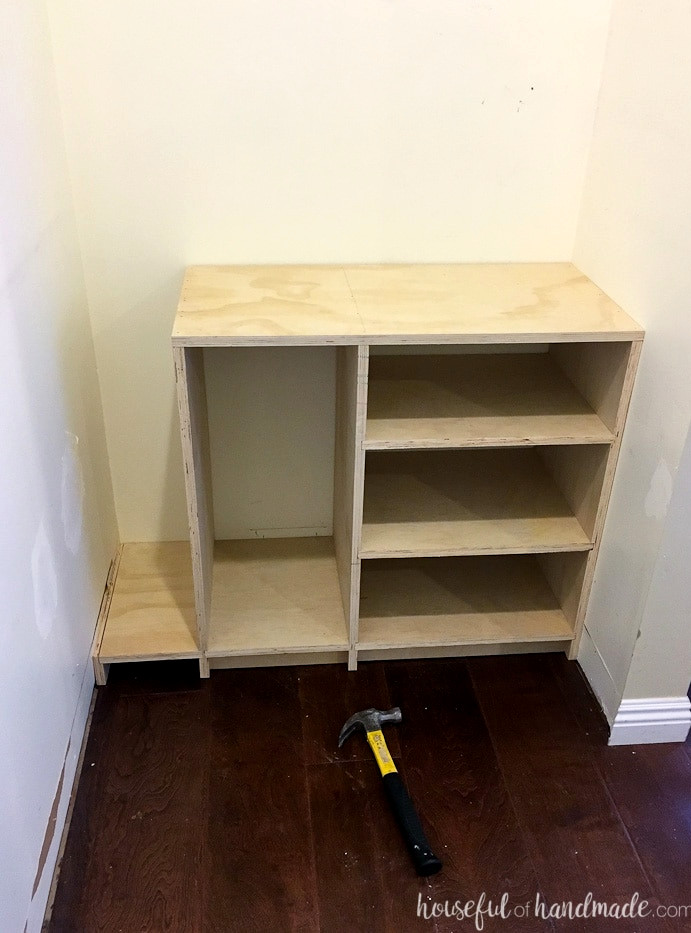
After cutting all the dados into the cabinet sides, you can begin assembling everything. Thanks to the preparation already completed, this step moves along quickly!
Apply a generous amount of wood adhesive inside the dados, then set the shelf into place.
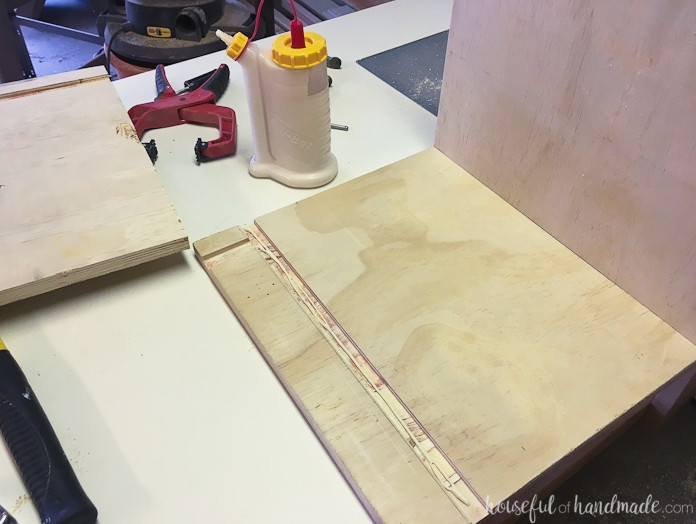
Fit all of the shelf sections onto one side panel.
Spread glue along the board edges, then position the remaining side panel on top, just like assembling a puzzle. You may need to shift things around slightly so every piece slides into its corresponding dado.
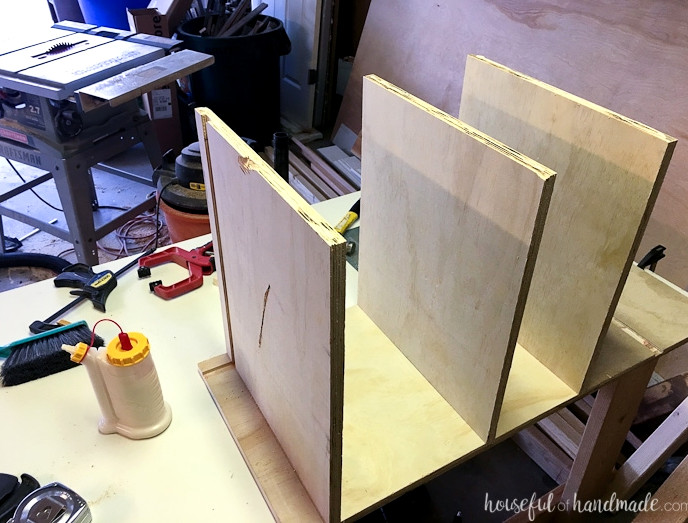
Clamp the cabinet in position, then fasten the shelves with several 1 1/4″ nails driven into the ends.
Draw a straight line across the outside of the shelf section to ensure the nails enter the shelves properly and do not protrude into the cabinet.
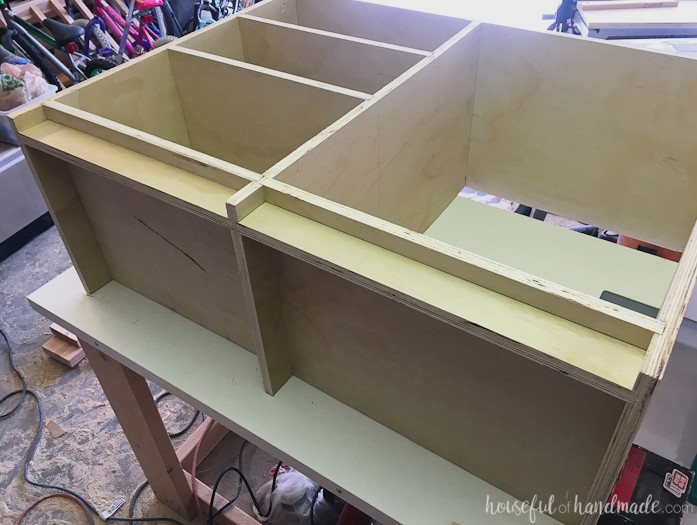
For the toe kick, rip the remaining plywood piece to a width of 2 1/4″. Next, cut it to match the width of the shelf above.
Apply wood glue inside the dados and slide the toe kick into position. Keep it clamped until the glue has dried.
I used only a few nails for this section since it will not shift once the cabinet is resting on top of it.
STEP 4- Install Basket Ledges & Pant Rack
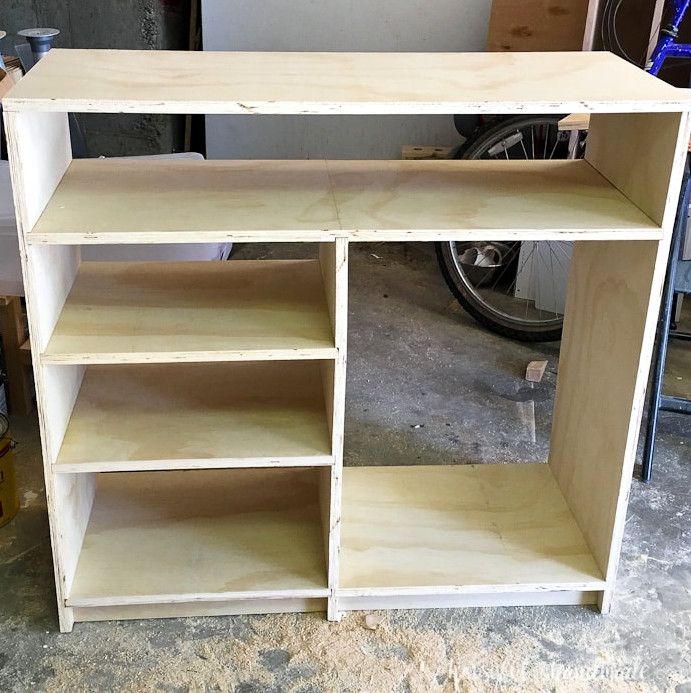
At this point, you could stop and use boxes, or leave these attractive shelves open for storing your clothes.
However, I wanted to reuse the Ikea baskets from our old closet, so I installed ledges for the baskets to rest and slide on.
Trim the 3/8″ square dowels so they match the depth of your basket.
Apply wood glue to the back, then attach it to the drawer front 3/4″ below the top edge. I used clamps to keep it steady while hand-nailing 5/8″ finishing nails into place.
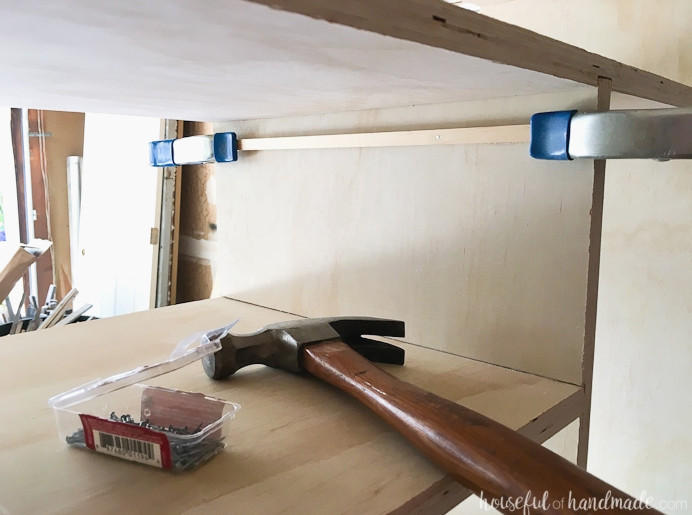
Next, cut a second short section of dowel for the back.
This prevents the basket from sliding completely toward the rear of the cabinet.
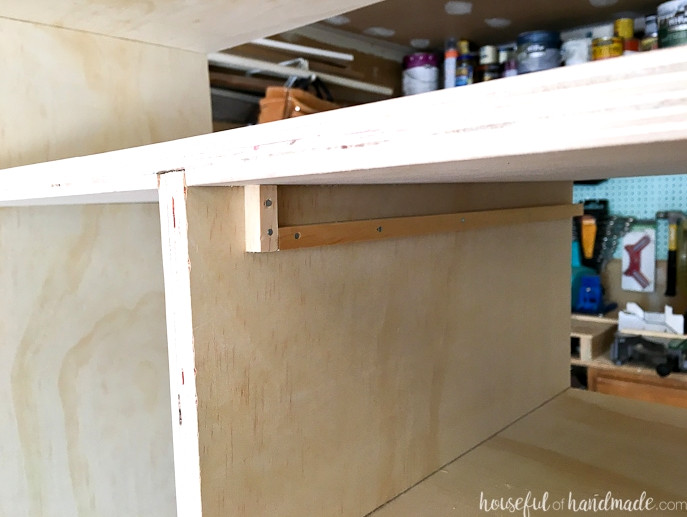
Construct the pull-out pant racks using 1×2 boards and dowels, following the PDF construction plans.
STEP 5- Smooth and Finish
Now it is time to sand, stain, and seal the completed closet organizer.
I decided to keep the plywood edges exposed because I enjoy the appearance of the layered plywood. It gives the piece a slightly industrial feel.
If you prefer not to see the unfinished plywood edges, cover them with iron-on banding or wood strips cut to 3/4″ x 1/4″.
STEP 6- Fit the Cabinets
If you measured carefully and completed a proper dry fit, you should now be able to slide the cabinets directly into your closet!
When the floor is uneven, place wood shims underneath to level the plywood closet organizer system.
If things do not go as smoothly, as happened on my side of the closet, you may need to trim some plywood so everything fits.
I decided to reduce the toe kick platform beneath my dresses. Sanding away enough material did not work, so I used a wood chisel to remove a couple of plywood layers.
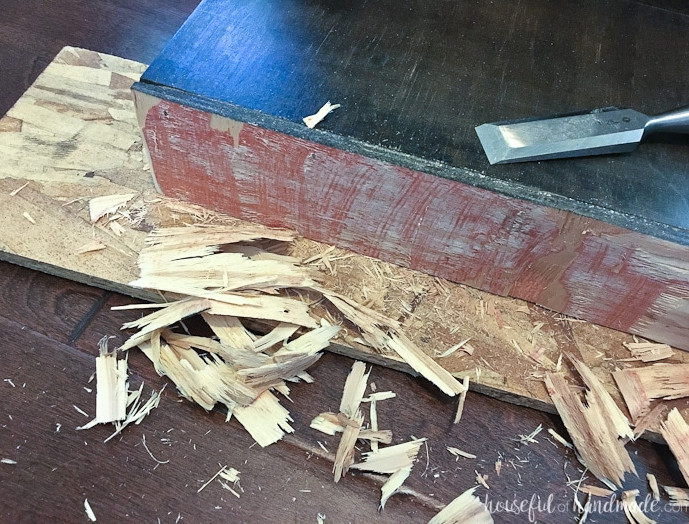
Next, I measured the closet opening to locate its widest section, where the wall does not curve inward by 1/2″, and raised the cabinet into that area.
To shield the cabinet edge, I placed a scrap piece of wood against it and tapped the cabinet into the closet using a hammer. Alternate between both sides so it gradually enters the opening without becoming stuck against one wall.
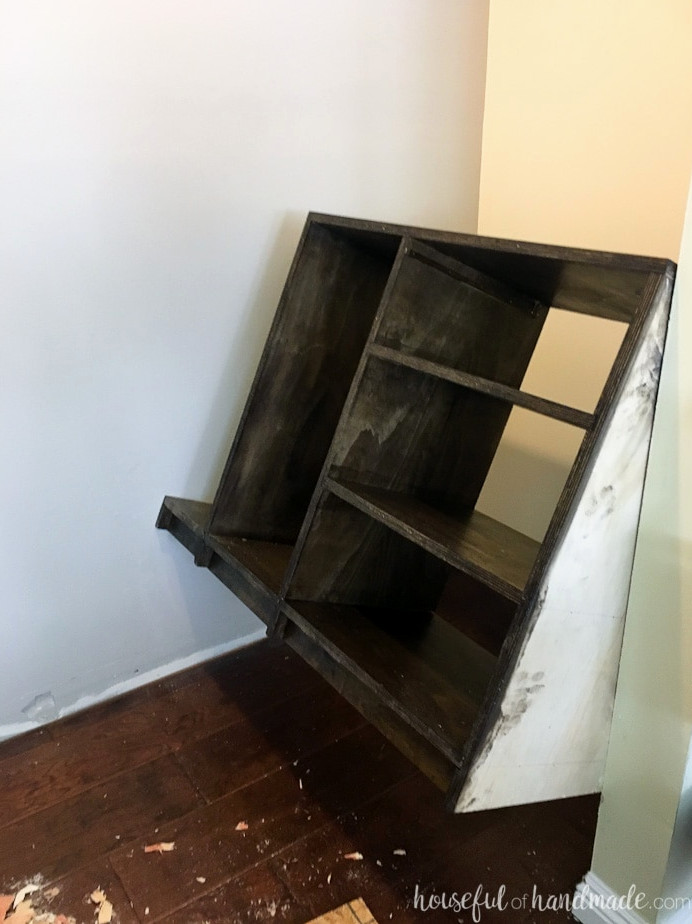
I won’t pretend this step was easy! I wrestled with the cabinet for two hours, measuring, chiseling, tapping, and repeating until it finally slid into position. Still, that made the victory feel even sweeter!
Fasten the cabinets to the wall studs with a few screws. Mine fit quite snugly, so they did not require much additional support.
STEP 7- Fit Upper Closet Shelves
Using the remaining plywood strips, which were approximately 2 1/2″ wide, cut one piece to the closet’s width for the rear shelf support.
Then cut two additional pieces measuring 14 1/4″ for the side supports.
I did not have enough leftover plywood for all three shelves, so I used scrap lumber for three of the side-support pieces.
Sand and stain the support boards.
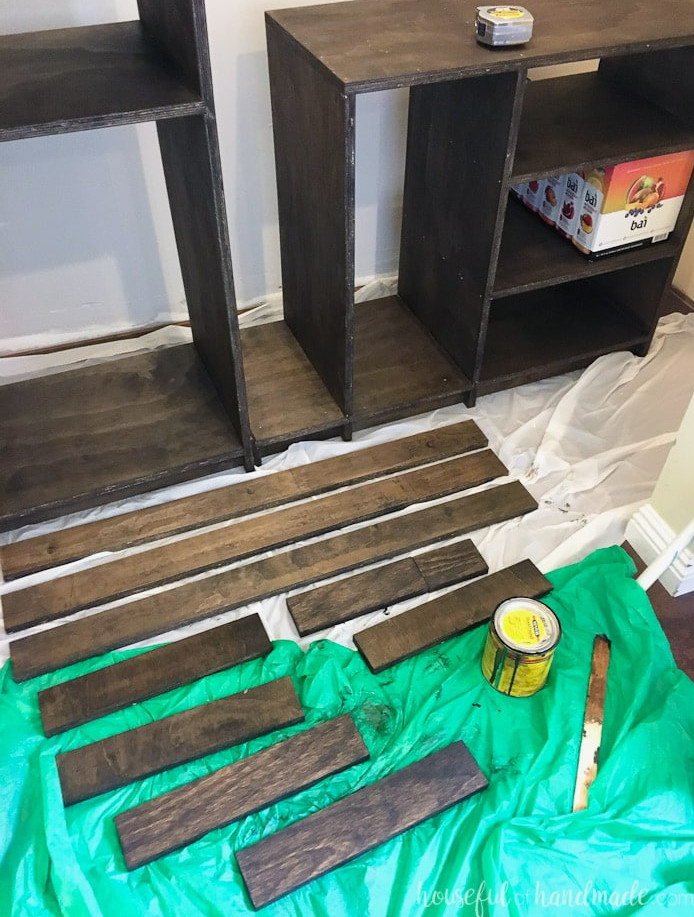
Apply a bead of construction adhesive (also called liquid nails) to the board’s back, then secure it to the wall with 2 1/2″ nails driven into the studs.
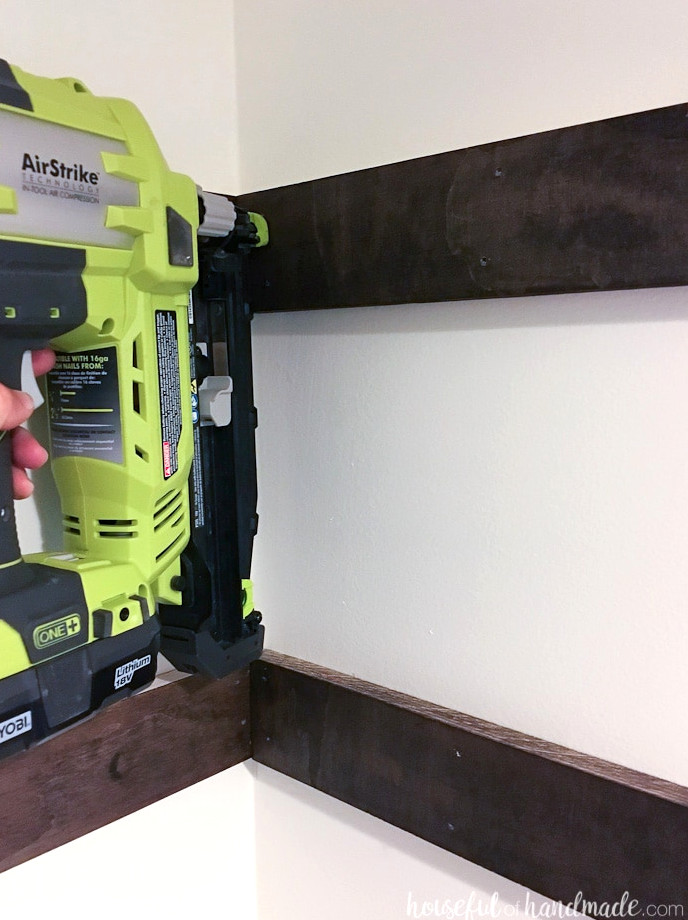
Check that the shelves are perfectly level with a level. Install the rear boards first, then fasten the side boards in front of them.
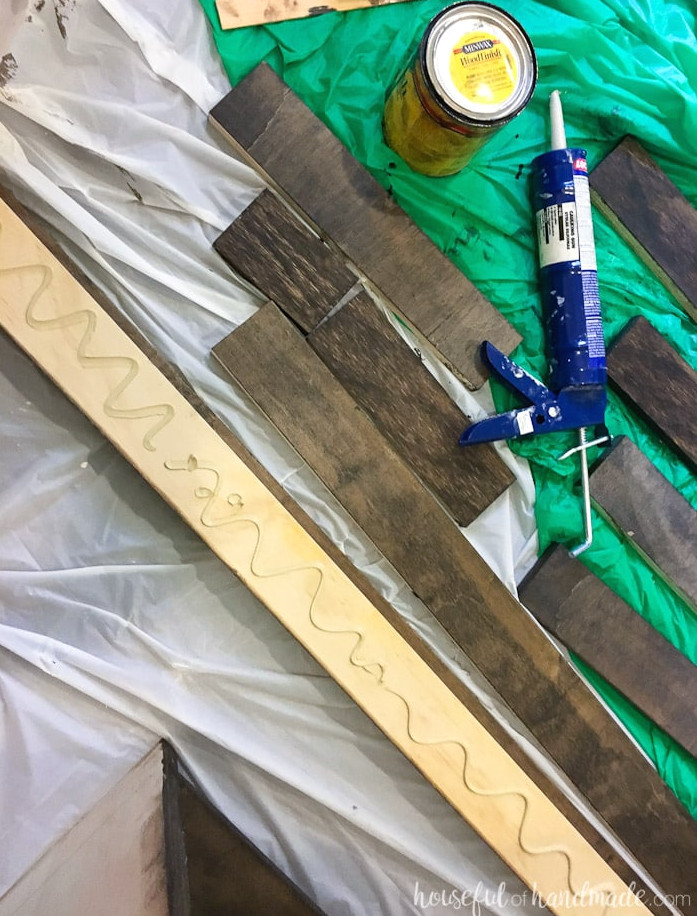
Whenever possible, drive the nails into the studs, though the construction adhesive will help hold the boards firmly in place after it cures.
And unless they are loaded with an unreasonable amount of weight (which I do not plan on doing since they are inside my clothing closet), they should be extremely solid.
Trim your 15″ plywood boards so they rest properly on the shelf supports. Set them in place without fastening them first to confirm the fit.
Afterward, sand and stain the boards before positioning them on the supports. Attach them with a few 1 1/4″ nails along the back.
Finally, protect the shelves with two coats of polyurethane, and they will be ready to use!
STEP 8- Add a Hang Bar
Attach a hang bar to the shelf supports (this lets you fasten the bar without having to locate a stud).
To resize the hang bars from our previous closet, I used a pipe cutter because they were roughly 1/2″ too long.
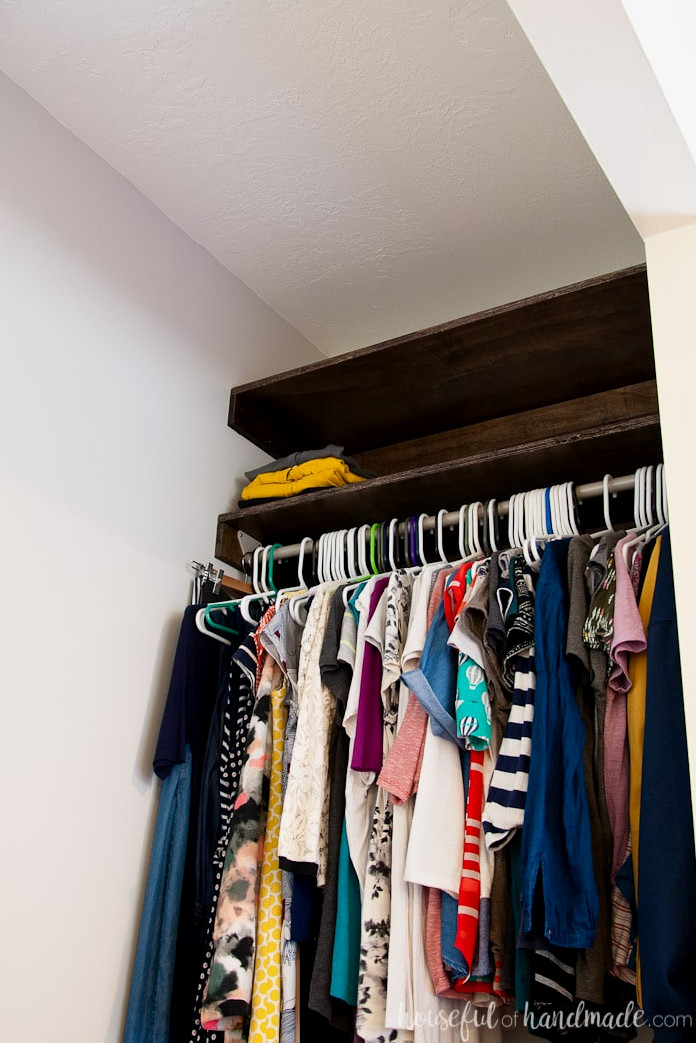
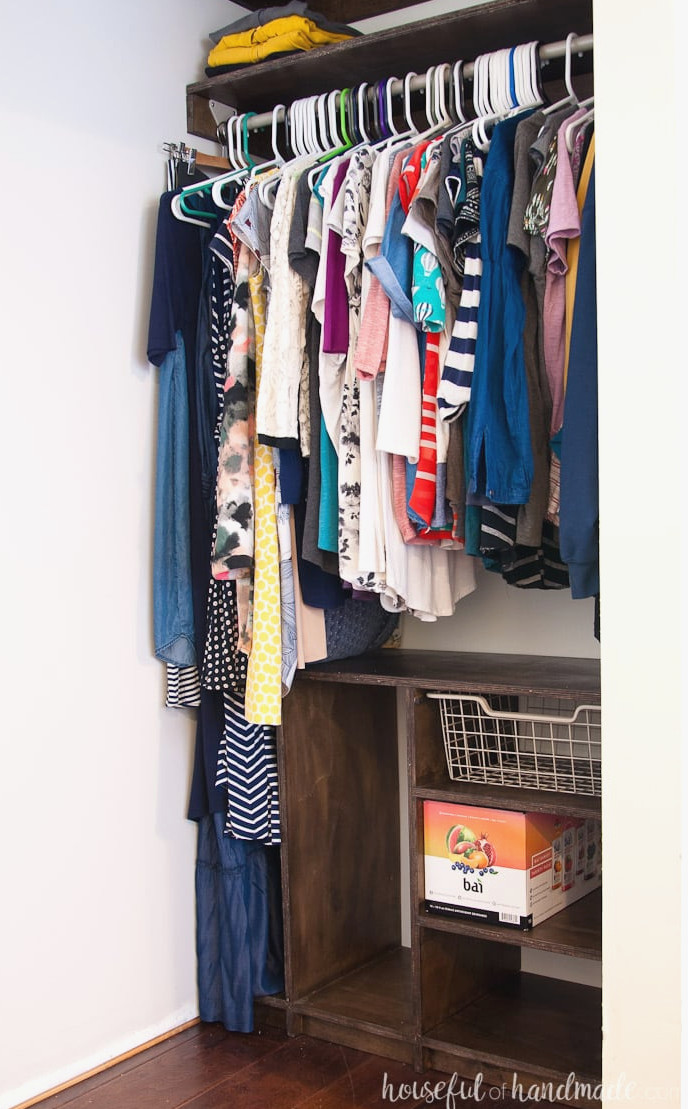
Next, begin filling the closet. I cannot believe how much room I have now!
It appears considerably smaller, but the improved layout and lack of concealed corners allow everything to fit far more efficiently. I really wish I had completed this sooner.
What a remarkable change already, and the project is not finished yet! Check back next week as I hopefully complete this makeover.
Remember to Get the Printable PDF Plans Here!
Premium plans feature:
- Suggested Tools
- Shopping checklist
- Simple-to-follow cut list table
- Cutting diagrams
- Detailed instructions with 3D renderings
- Useful resources
- BONUS: 3D SketchUp file
Closet Renovation Progress
To keep up with the complete closet makeover, take a look at the additional weeks below:
Closet Remodel Plan || Week 2 || Closet Reveal
I enjoy showing how our budget is progressing. It is slightly intimidating because I already know I want to make many more additions to the room.
- (2) plywood sheets = $35 each
- (3) 3/8″ square dowels = $3
- Nails & wood adhesive = already had
- Wood stain & polyurethane finish = already had
- Paint = remaining paint from the living room
- Painting supplies = mostly already owned, but I needed to purchase a $3 roller like these on amazon.
- Closet rods = reused from the previous closet
- Baskets = already belonged to the old closet
- Boxes = kept from delivered packages
At this point, we have used $76 of our $100 budget.
I realize the pant racks will consume a significant portion of the remaining $24. That means the shoe storage must be inexpensive!!!!
That should be enjoyable since my husband and I are both passionate about shoes 😉