4 Simple Step-by-Step Projects + Complete Care Guide
For a fun and straightforward DIY activity, making your own air plant terrarium is an excellent project to try. Using only a handful of basic supplies and some imagination, you can create a living miniature landscape for your home or workspace.
These delightful little plants need no soil and can thrive with a light misting or soaking once every week or so. They’re also available in many different shapes and sizes, which makes them ideal for terrariums.
Today I’m presenting four unique air plant terrarium projects—from seaside shells and suspended jellyfish to a stormy beach scene preserved in glass and a sparkling miniature desk garden. Whether you’re new to plants or an experienced plant crafter, you’ll find something to enjoy here.
Getting to Know Air Plants
About Air Plants:
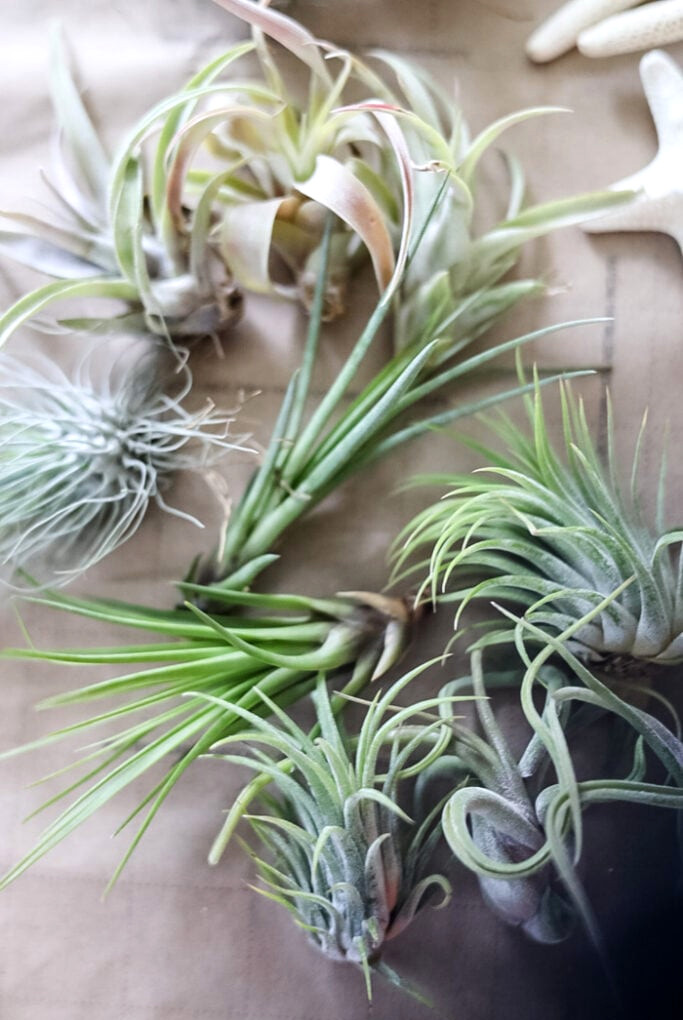
Air plants, or Tillandsia, originate in the Americas and grow naturally from the southern United States all the way to Argentina.
They are classified as epiphytes, meaning they survive without soil by growing on other plants or surfaces. Instead, their leaves take in moisture and nutrients from the air.
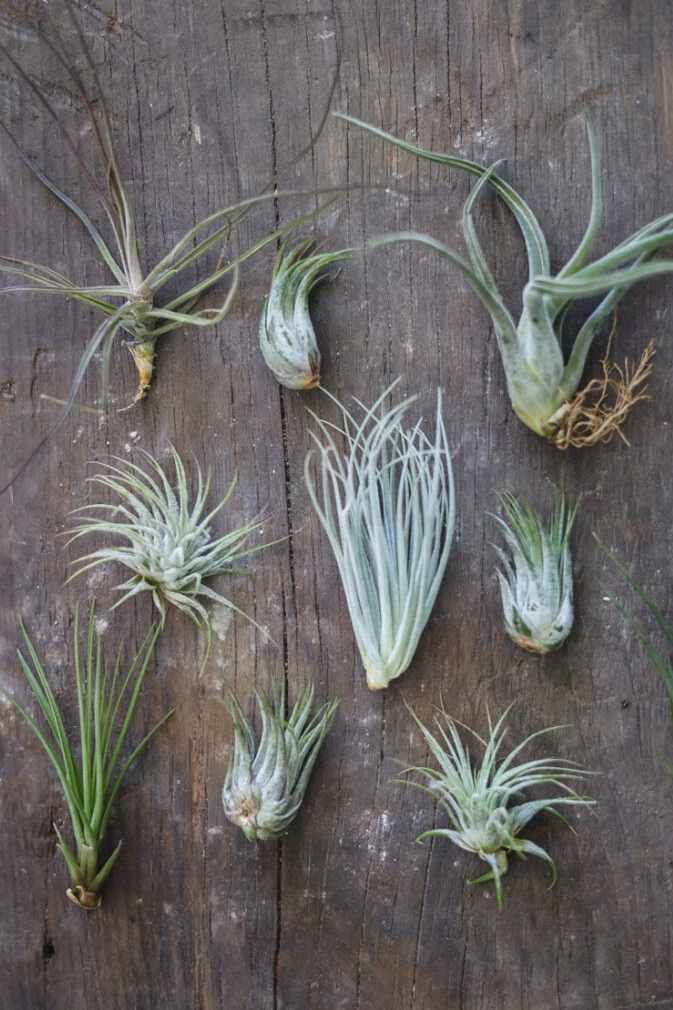
With hundreds of varieties available, air plants differ in shape, size, and color. Some have spiky, sculptural forms, while others appear delicate and feathery. Their incredible diversity makes them wonderfully addictive to collect.
Care and Upkeep
Caring for air plants is fairly simple, and they need very little upkeep. Follow these suggestions to help them stay healthy:
Air Plant Care & Upkeep
Water:
- Misting: Spray them 2-3 times weekly, increasing the frequency when conditions are especially dry.
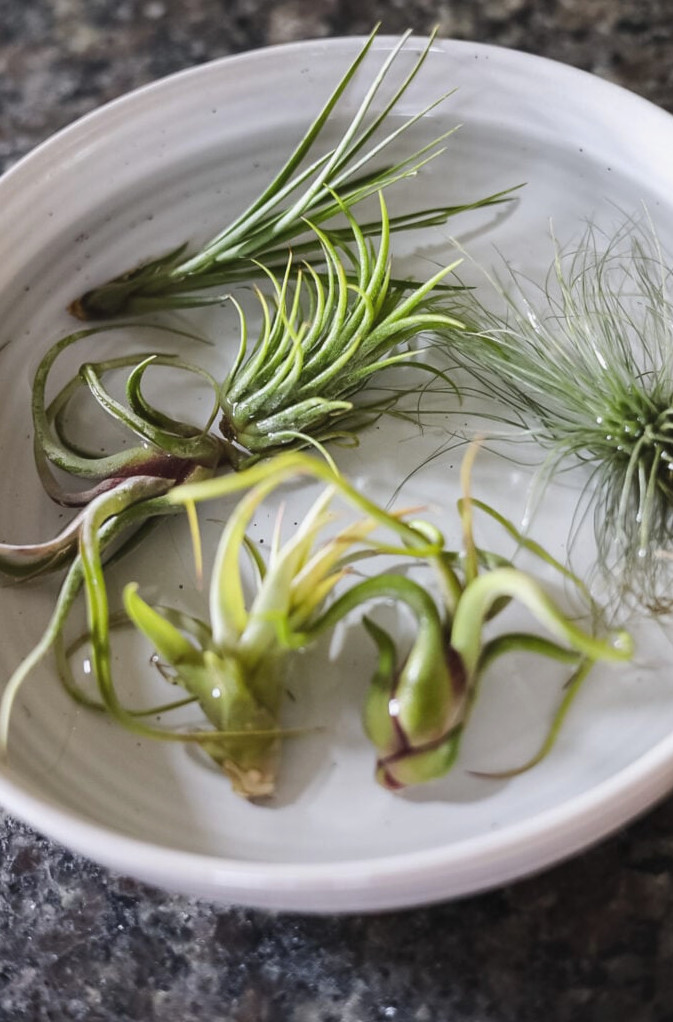
- Soaking: Once each week, place your air plants in room-temperature water for 30 minutes. Filtered or distilled water works best.
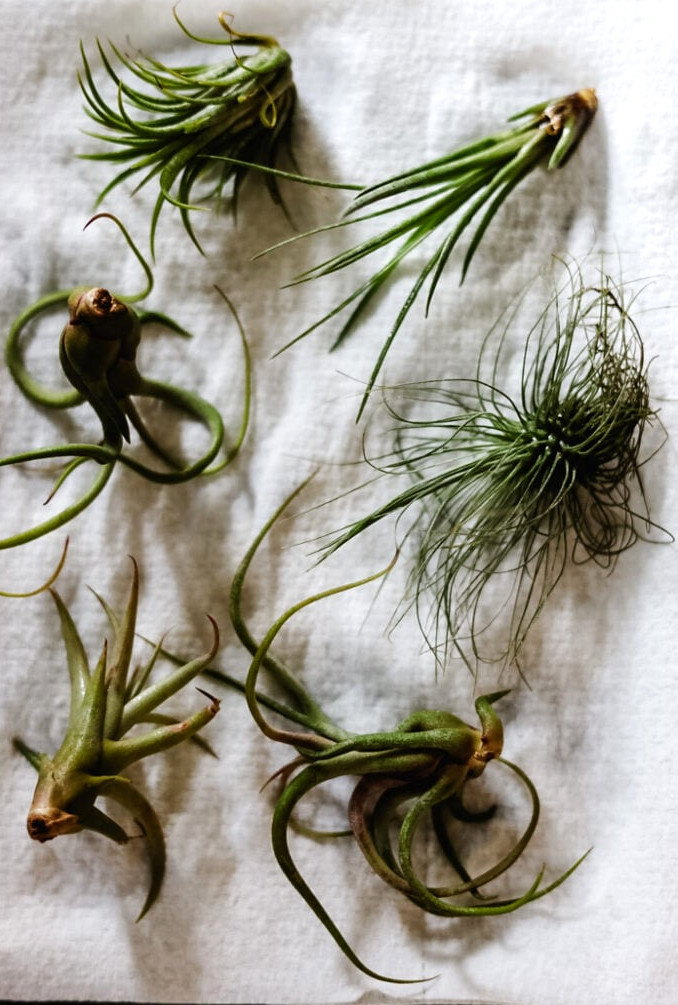
- Critical Step: Once they have soaked, shake away any excess water and set them upside down on a paper towel until fully dry before placing them back in the terrarium. This helps prevent rot and fungal growth.
Light:
- Air plants thrive in bright, indirect light. A window facing north or east is perfect. Keep them out of direct sunlight, as it may scorch their leaves.
Air Circulation:
- Proper airflow is vital. Avoid packing them inside small, airtight containers—open vessels are preferable.
Fertilizer:
- During spring and summer, air plants may benefit from a monthly application of fertilizer. Choose a formula made specifically for air plants (here is one I like).
Seasonal Adjustments:
- During winter, dry indoor air may mean misting them every other day. When summer humidity rises, reduce watering to 2-3 times weekly. Pay attention to your plants—they’ll show you what they require.
There’s an air plant sitting on my desk, and honestly? Every time I look at it, it lifts my spirits. It’s such a tiny detail, yet it gives my mood a surprisingly big boost.
Over the years, I’ve discovered that their watering routine shifts with the seasons, so I try to notice those changes. When the heater runs during winter and the air becomes parched, I mist them daily. During the humid heart of summer, once every 3 days is more than enough.
The weekly bath is essential. On Sunday mornings, I usually place mine in a bowl of water for 30 minutes while I straighten up the room. It has become a comforting little habit.
Here’s the important part: drying matters just as much as soaking. After their bath, I gently shake them, arrange them on a paper towel, and leave them there until they are entirely dry. Sometimes that takes an hour, and sometimes two. This helps protect the plants from rot. It truly is that easy.
Why Create a DIY Air Plant Terrarium?
As a devoted plant lover (seriously, I can’t leave a home improvement store without bringing home another plant baby!!), I’m constantly searching for fresh ways to add greenery throughout my home.
Even if you’re just getting started, a DIY terrarium makes an ideal first project. Air plants require no soil and can be arranged in imaginative, unexpected displays—which makes them incredibly enjoyable!
I have plenty of reasons for creating my own terrariums instead of purchasing ready-made versions, but the main ones for me are affordability and imagination.
At Cottage on Bunker Hill, I’m always looking for ways to share the most economical ideas with you. Crafting your own terrarium costs considerably less than buying one that’s already assembled. On top of that, you’re able to tailor it perfectly to your personal taste and style.
Selecting Your Container & Materials
Look for a container that offers your air plants some room to breathe. It shouldn’t be overly tight or surrounded by too much empty space. They’re adaptable, but the right proportions help the arrangement appear more deliberate.
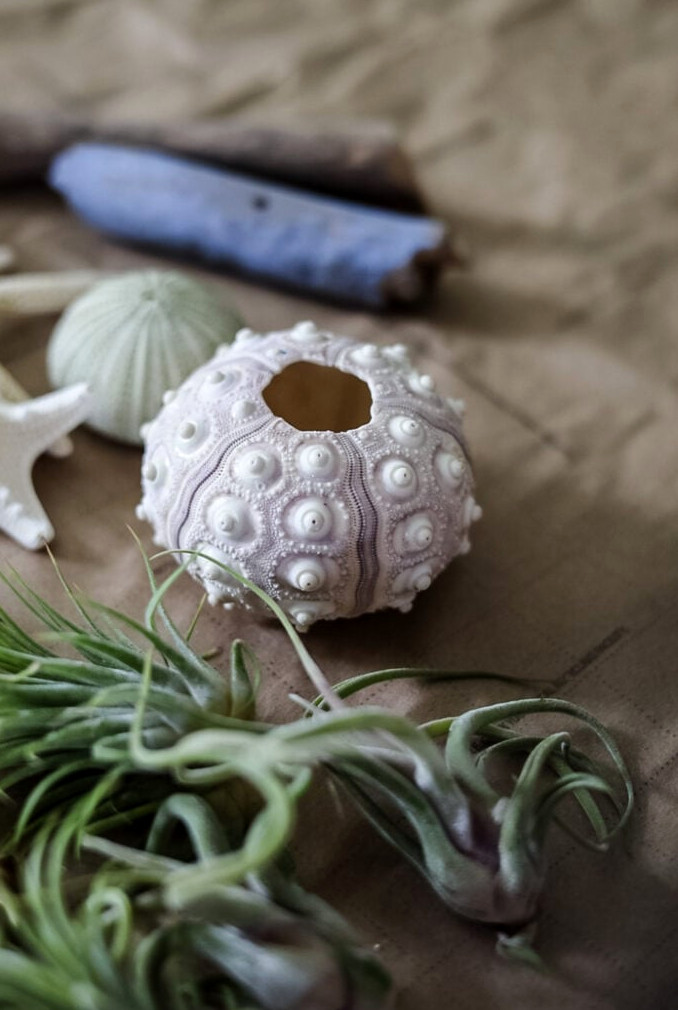
The air plants I’m featuring today are relatively small. I purchased this collection from Amazon and was happily impressed by how healthy they were and how carefully they had been packaged.
What makes this guide so useful?It suits terrariums of every size. You might be using a miniature dish on a dorm desk, or maybe you discovered a large statement piece at a thrift shop. The approach remains the same. Simply adjust the amount of supplies to match your idea (and the area you have available!).
Places To Get Containers
- Thrift stores: I come across incredible glass bowls, vases, and candleholders for just a few cents
- Home goods stores: The clearance aisles are full of treasures
- Your own cabinets: That attractive dish or vase sitting unused? It could become a terrarium
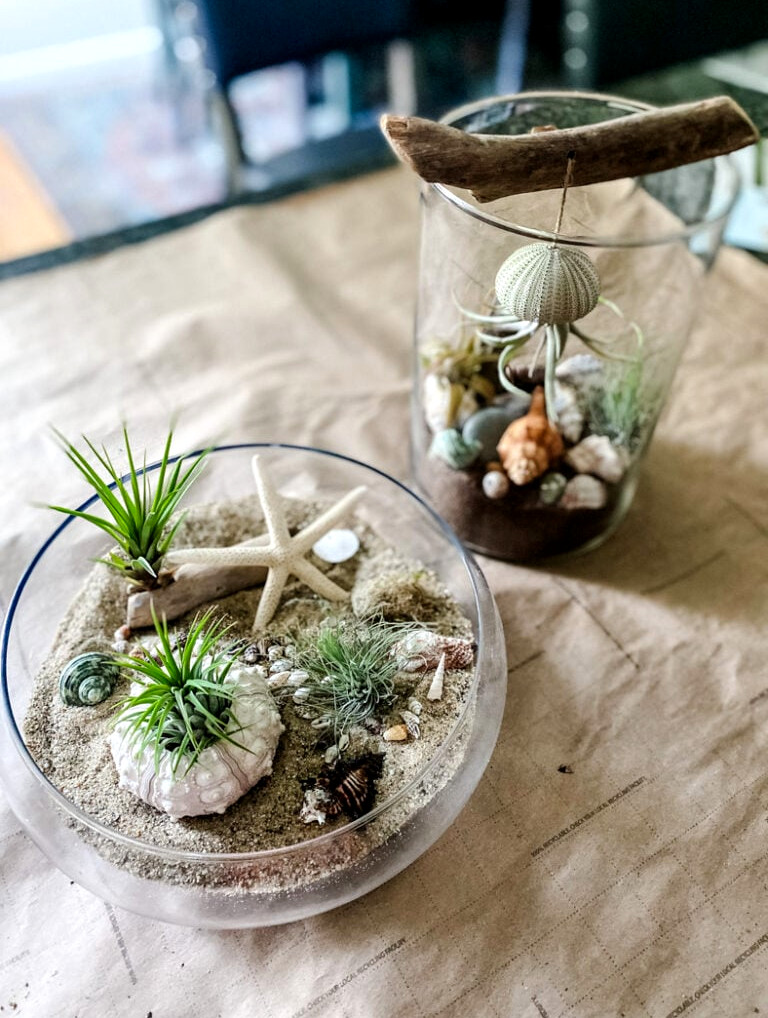
Essential Materials For Creating Air Plant Terrariums
4 Air Plant Terrarium Ideas
Want to try four simple air plant terrarium projects? Unlike conventional planters or enclosed terrariums, these require no soil, no layering, and no complications—only you, a few lovely items, and several minutes for arranging everything.
Project 1: Seaside Seashell Bowl
A gathered, coastal look that’s ideal for a bright windowsill.
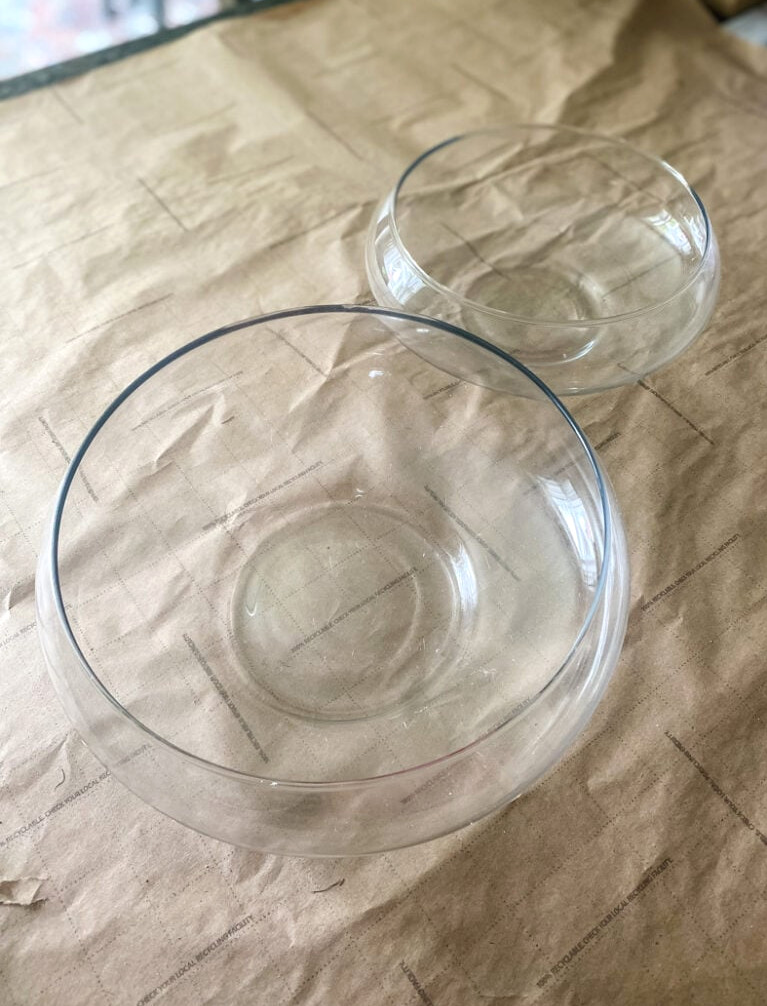
Container:Wide, shallow glass bowl
Materials:
- Sand for the foundation
- A piece of driftwood featuring a natural opening
- A variety of seashells and starfish
- Sea urchin shell
- 3-4 small to medium-sized air plants
For this first terrarium, I’ll demonstrate how to create a bowl arrangement. A broad, transparent glass container gives you room to decorate with bigger shells and include additional air plants.
Thrift shops are excellent spots to search for terrarium containers! Whenever I go thrifting, I regularly come across plenty of clear glass pieces.
Step 1: Build The Foundation
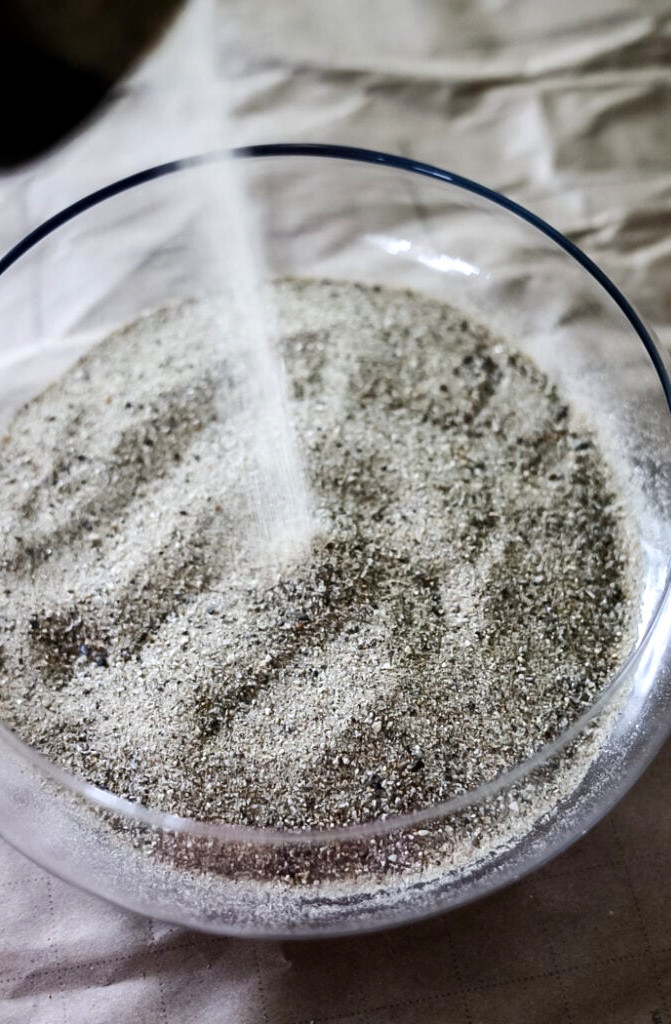
Build the foundation:Add a layer of sand across the bottom of your bowl. Because this terrarium has a beach-inspired, coastal theme, I chose sand to cover the base. Small pebblesor stones are also suitable for an air plant terrarium because soil isn’t required.
Add the finishing touches:Place smaller, colorful shells around the base and tuck in some moss to create a softer look.
Step 2: Include Driftwood
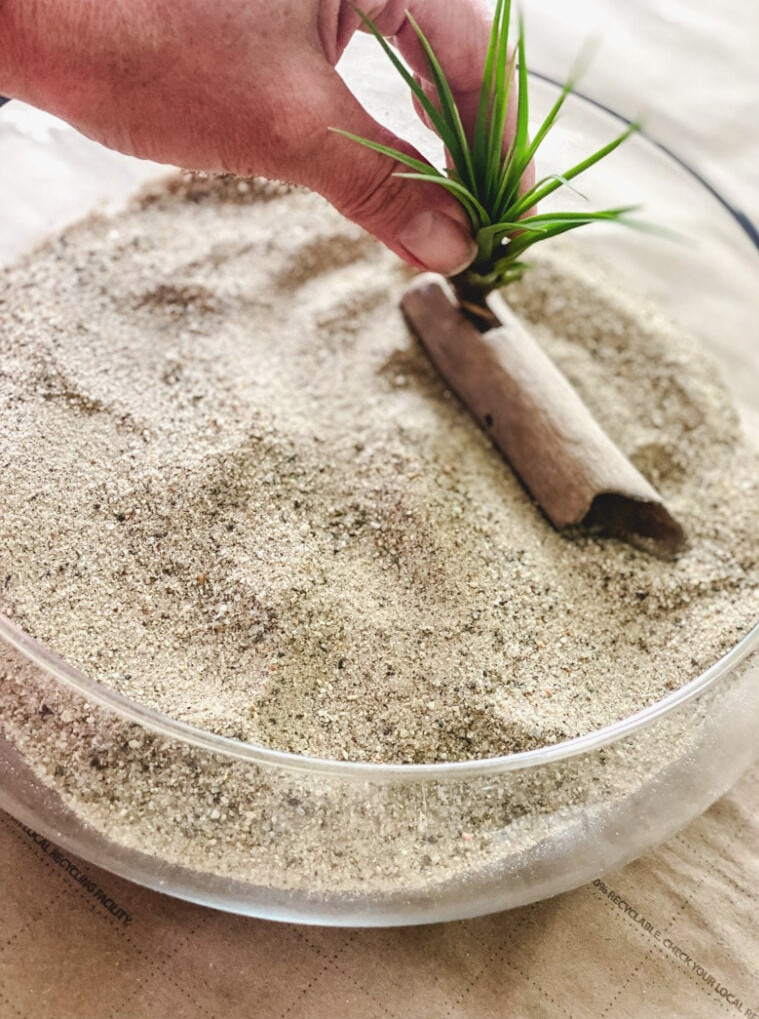
Place the driftwood:Settle a piece of driftwood into the sand. Choose one with a naturally formed crevice—it will provide an ideal spot for an air plant.
I began with a piece of driftwood featuring a natural split that happened to be just the right size for one of the air plants!
Growing up in coastal New England, I have always enjoyed gathering driftwood and shells. I’m using driftwood I already owned for these terrariums. If driftwood isn’t available, search for some intriguing sticks!
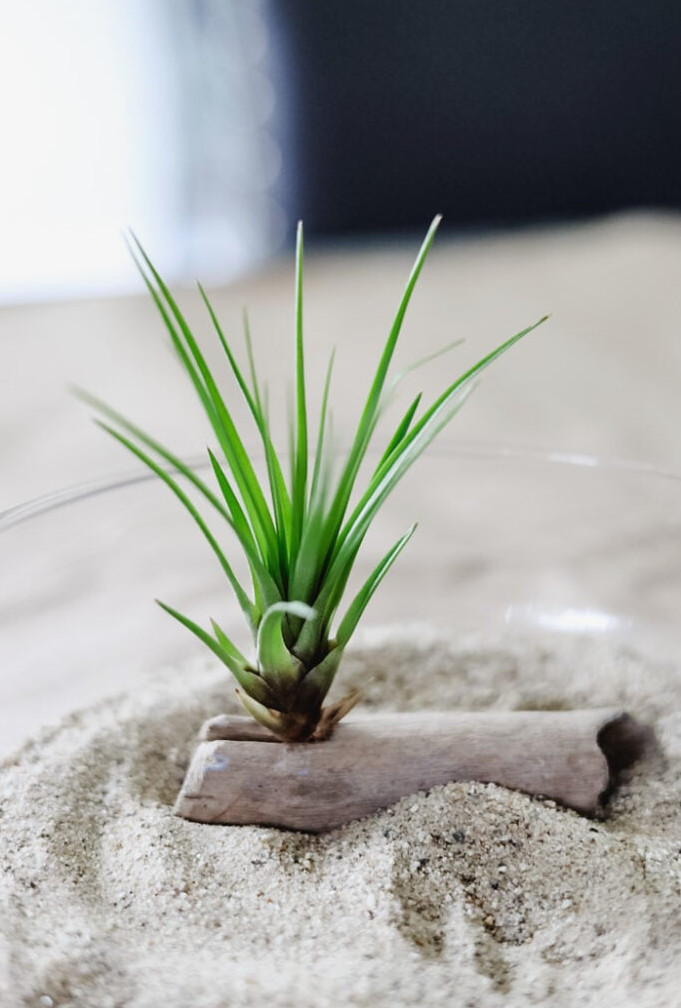
The air plant remains securely in position! The opening was broad enough for the plant to stand upright, while still allowing easy removal when soaking is needed.
Step 3: Play With Shells
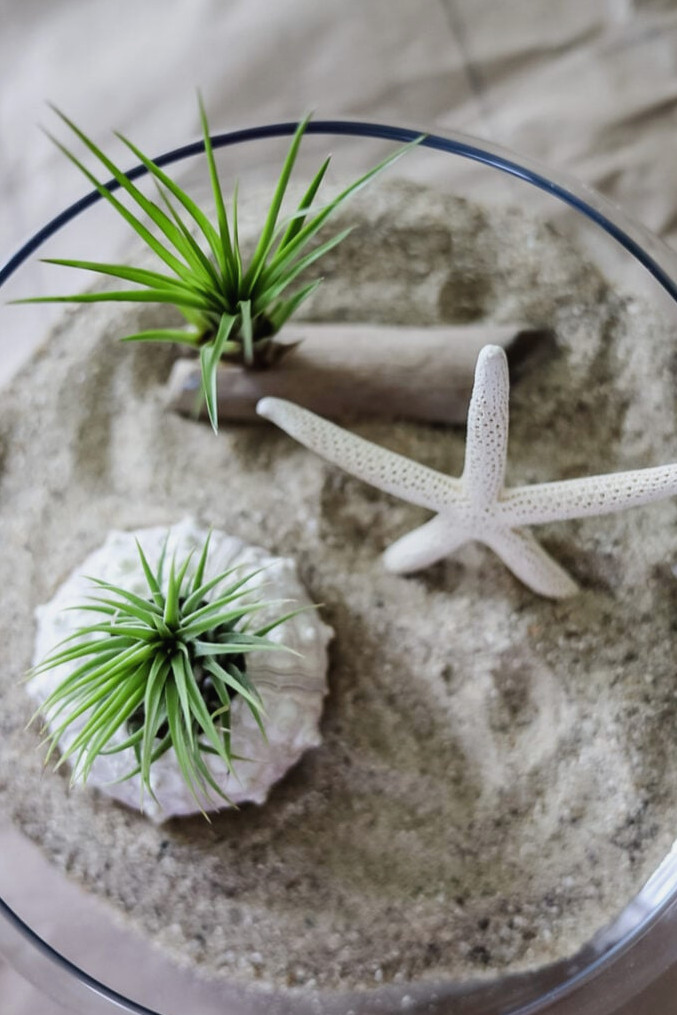
Insert the shells:Set a lovely urchin shell into the sand and place an air plant inside. Use a starfish or bigger shells to create eye-catching accents.
Next, I’ll place a gorgeous urchin shell in the terrarium, with one of the air plants nestled inside it. After that, I added a starfish directly onto the sand.
Step 4: Position The Air Plants
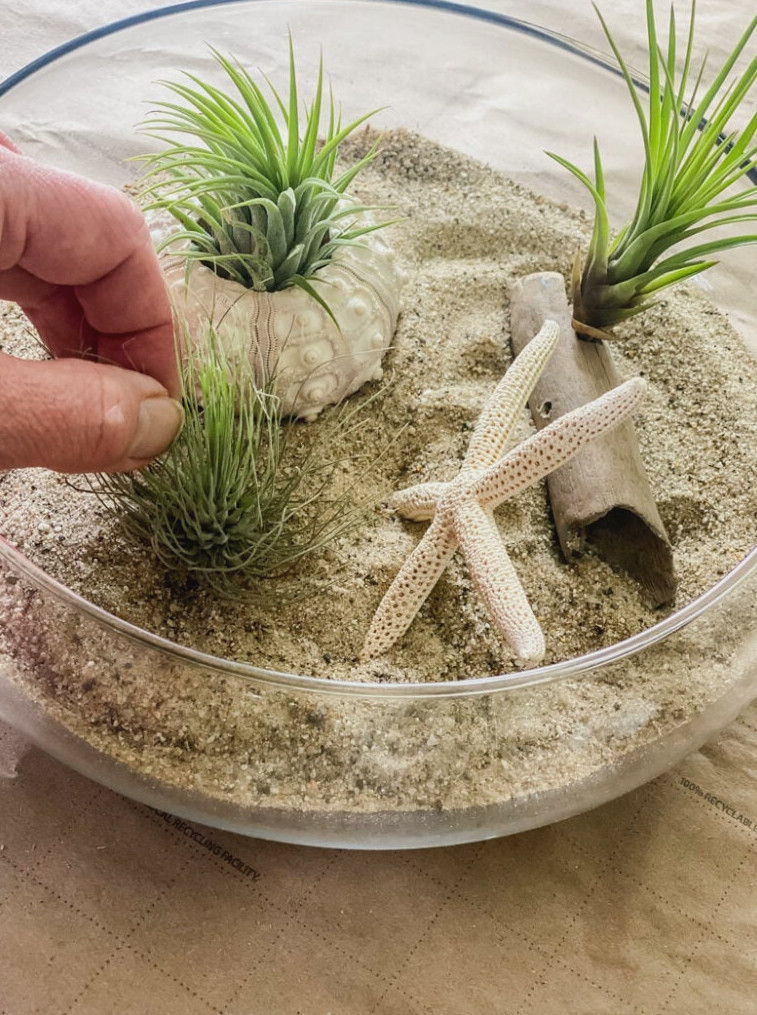
Place your plants:Arrange the remaining air plants throughout the bowl. Set one in the driftwood’s opening, while others can rest in shells or settle on the sand.
For this walkthrough, I’m using just 3 air plants so the details are easy to see, though a container of this size could hold several more.
Step 5: Add The Final Touches
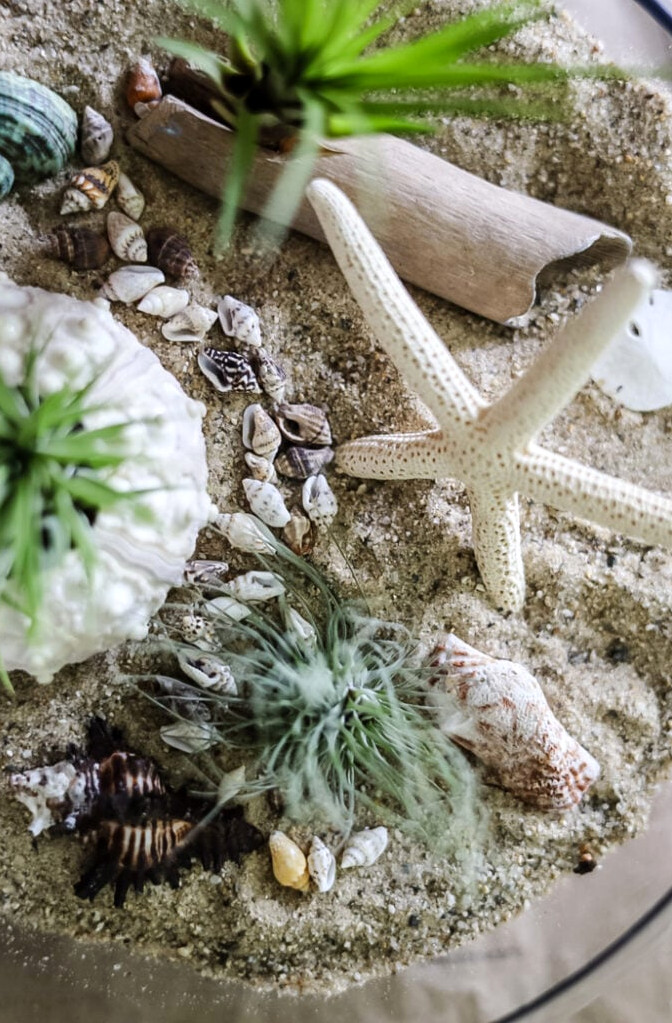
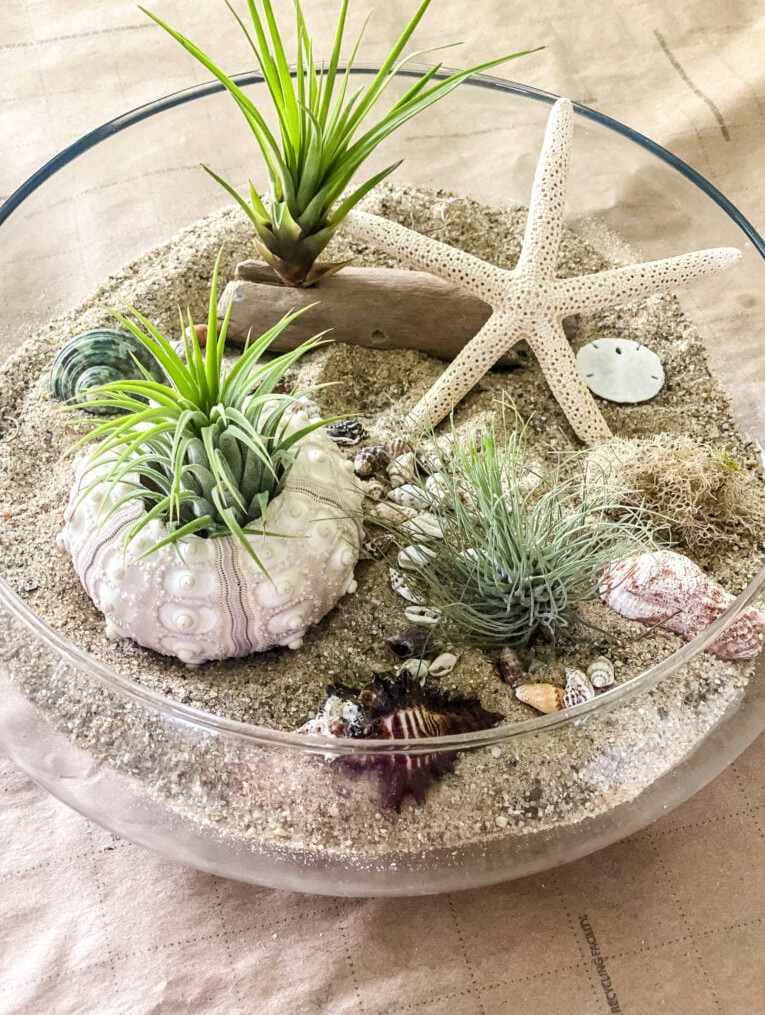
Add the finishing touches:Place smaller, vibrant shells around the bottom, then nestle in a little moss to create a softer look.
For the final touches, I placed several bright shells across the sand along with a small piece of moss.
The enjoyable part of designing a terrarium is making it reflect your personal style. Rather than shells, you could use a distinctive piece of wood or some unusual stones to decorate yours.
Completed Coastal Seashell Bowl
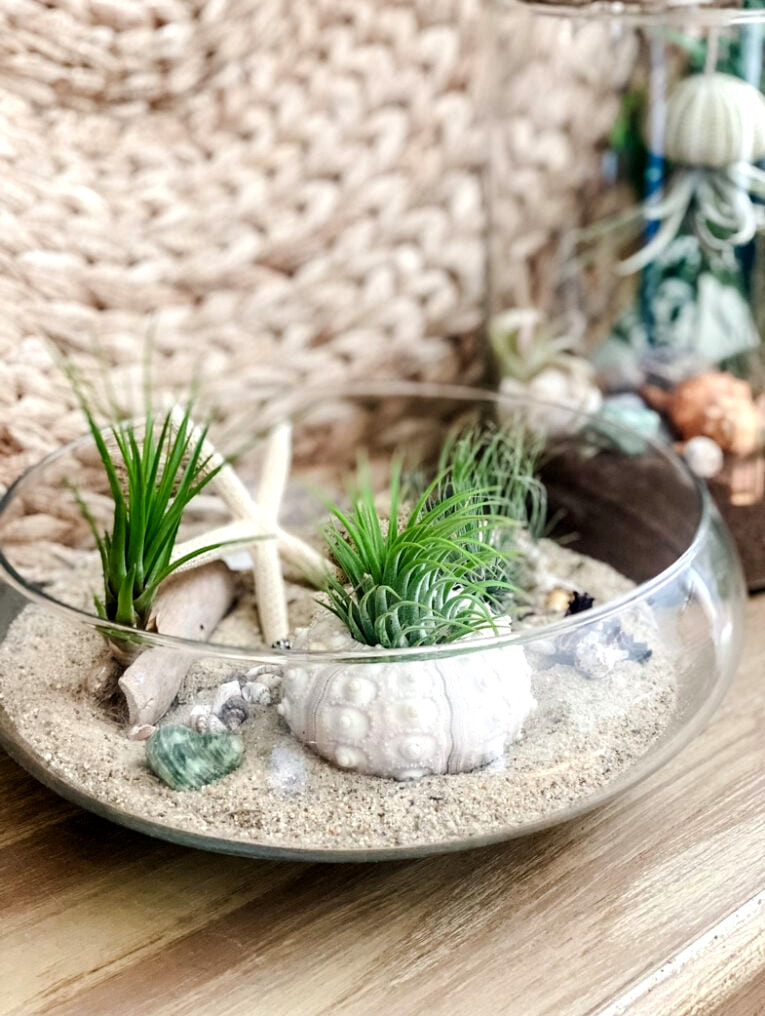
What makes it special:Regardless of the time of year, this design brings the feeling of a beach day. It’s easygoing, flexible, and allows you to include as many or as few details as you prefer.
Project 2: Suspended Jellyfish Terrarium
Playful, surprising, and the project that consistently received the biggest “ooh, that’s so cool!”
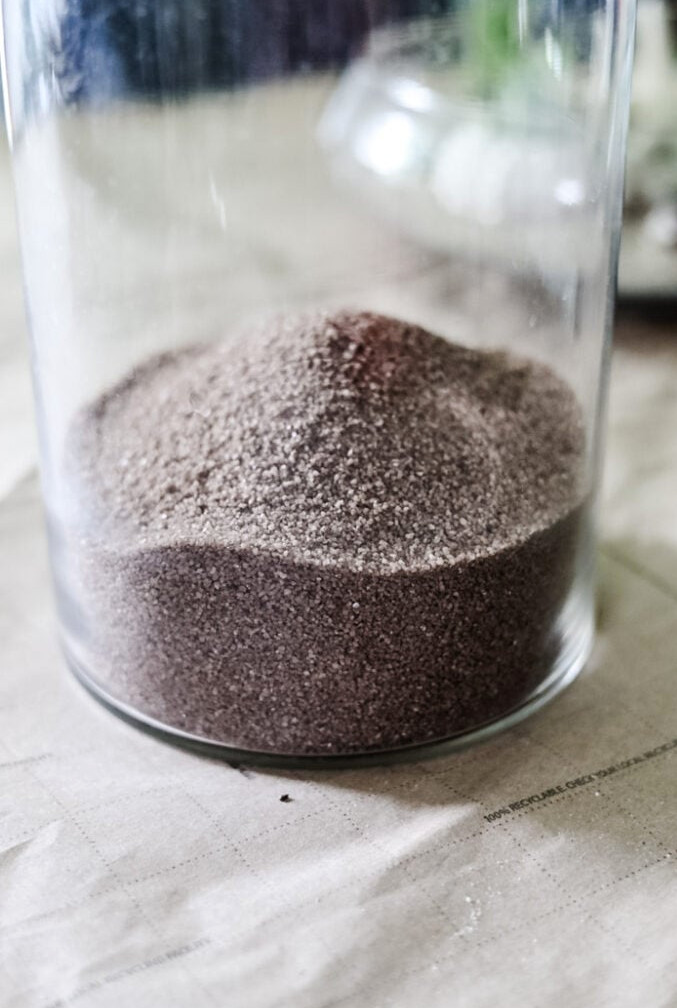
Container:A tall glass cylinder vase (6″ wide x 9″ tall or a comparable size)
Materials:
- 3-4 air plants, one of them aTillandsia Caput Medusae
- Sand to cover the bottom
- A variety of shells, driftwood, and coastal stones
- Urchin shell featuring a naturally formed opening at the top
- A driftwood piece broad enough to span the vase opening
- Jute cord or transparent fishing line
- Drill (or simply wind the twine around the wood)
I’m using a tall glass cylinder vase for this terrarium. This particular one measures 6 inches across and 9 inches high. Choose a vessel with an opening wide enough for placing the plants inside.
Step 1: Assemble The Foundation
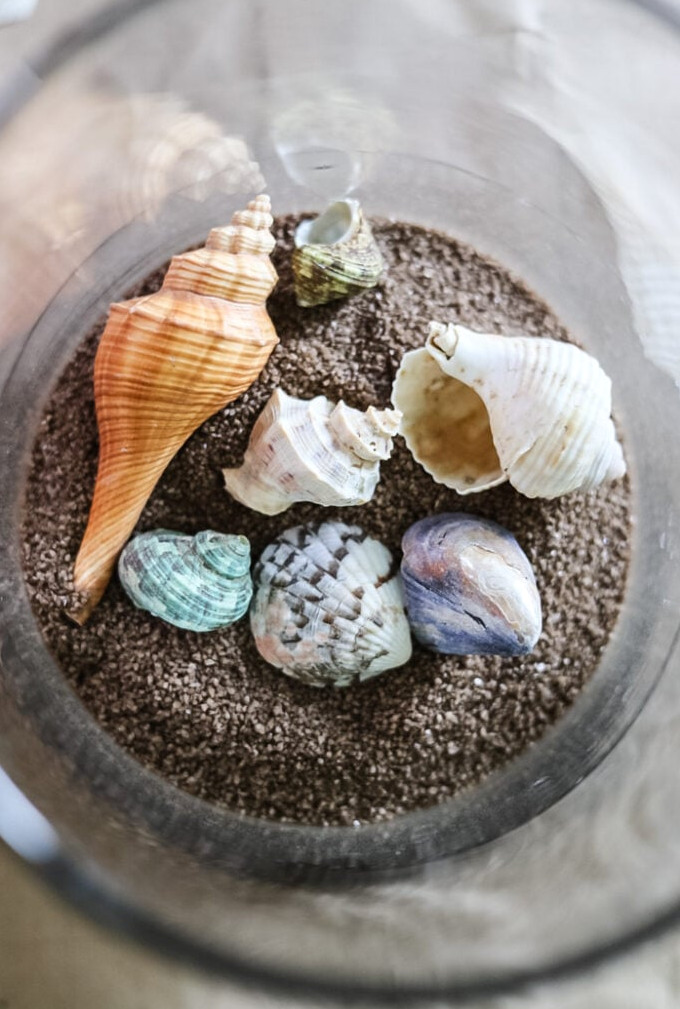
Prepare the foundation:Start by adding a layer of sand to the cylinder’s bottom. Arrange larger shells, coastal stones, and short pieces of driftwood throughout it.
Step 2: Form The Jellyfish
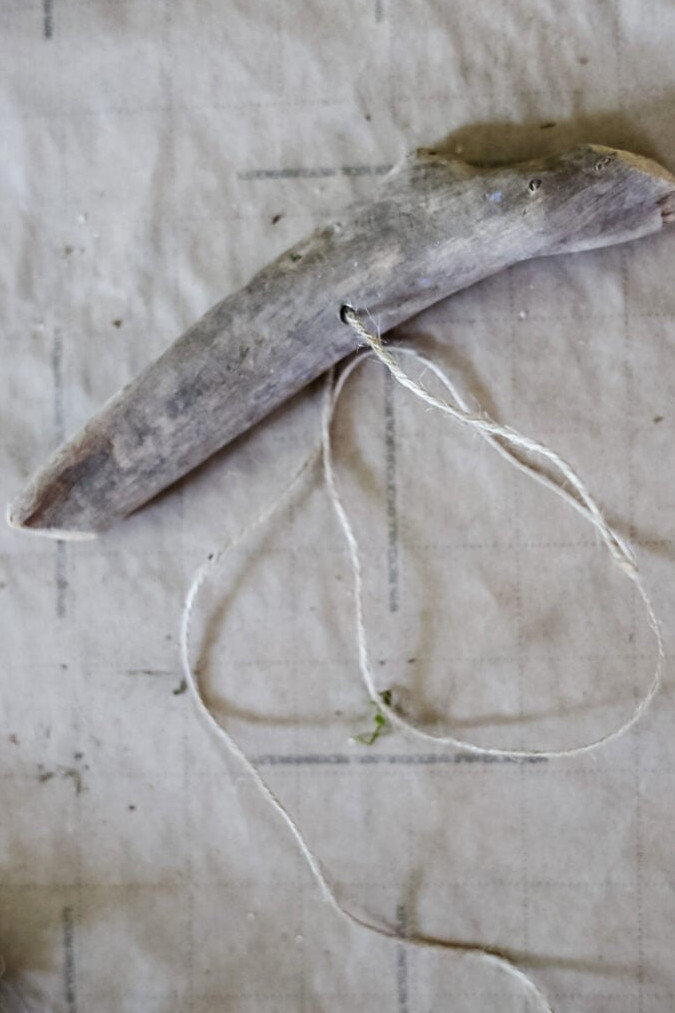
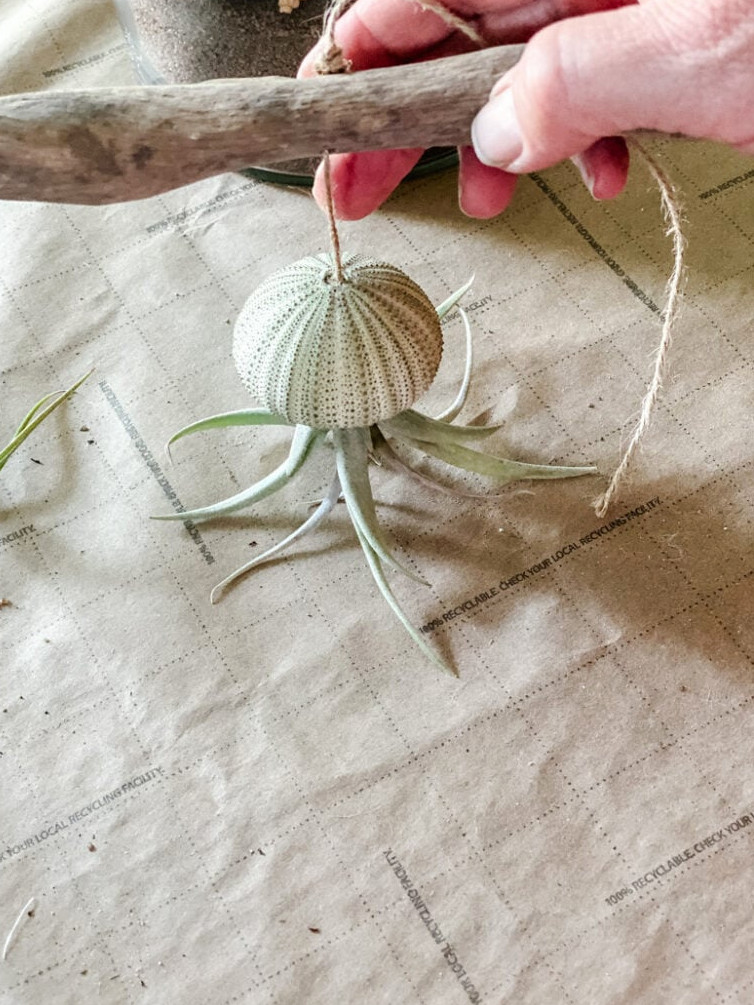
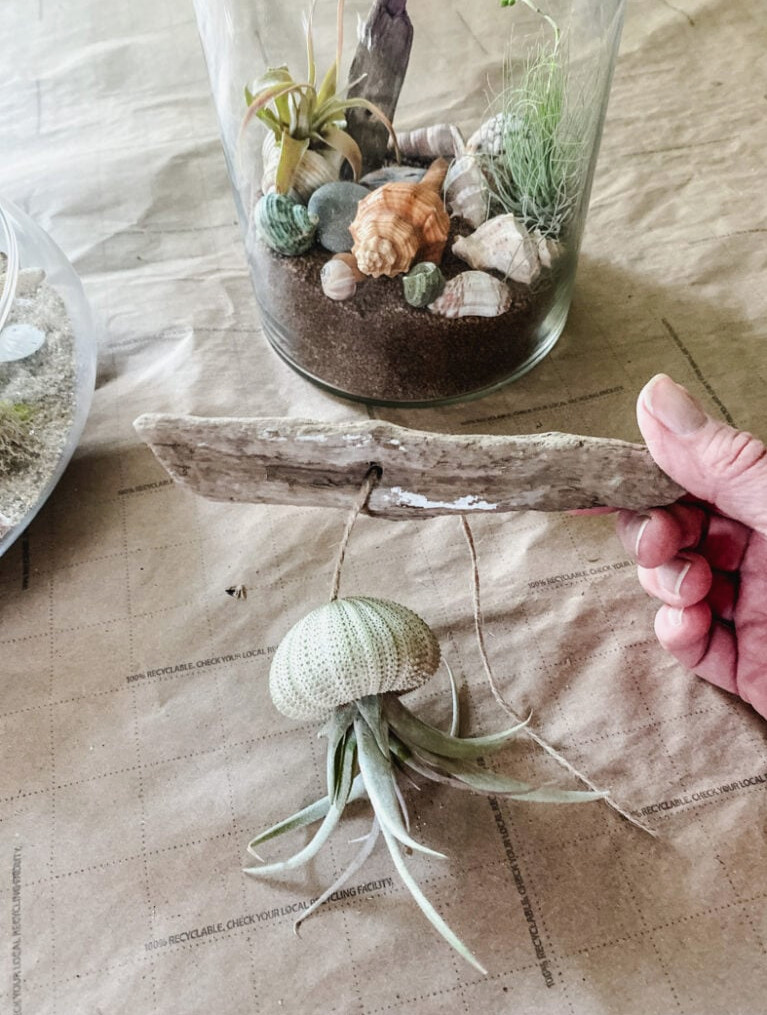
Now comes the most enjoyable part…turning an air plant and an urchin shell into a “jellyfish”! To suspend it inside the terrarium, I’m using a piece of driftwood that is broad enough to rest across the top of the glass cylinder vase.
I began by deciding how far down I wanted the urchin to hang inside the vase (I held the driftwood against the vase’s edge while holding the urchin with my other hand). Next, I shortened the jute string and tied several knots at the end to prevent it from sliding out of the urchin shell.
I tested several air plants to determine which one would fit firmly into the bottom of the urchin. One nestled in perfectly and remained secure. Alternatively, you could apply a few small drops of glue to the base of the air plant and fasten it to the upper inside portion of the urchin shell.
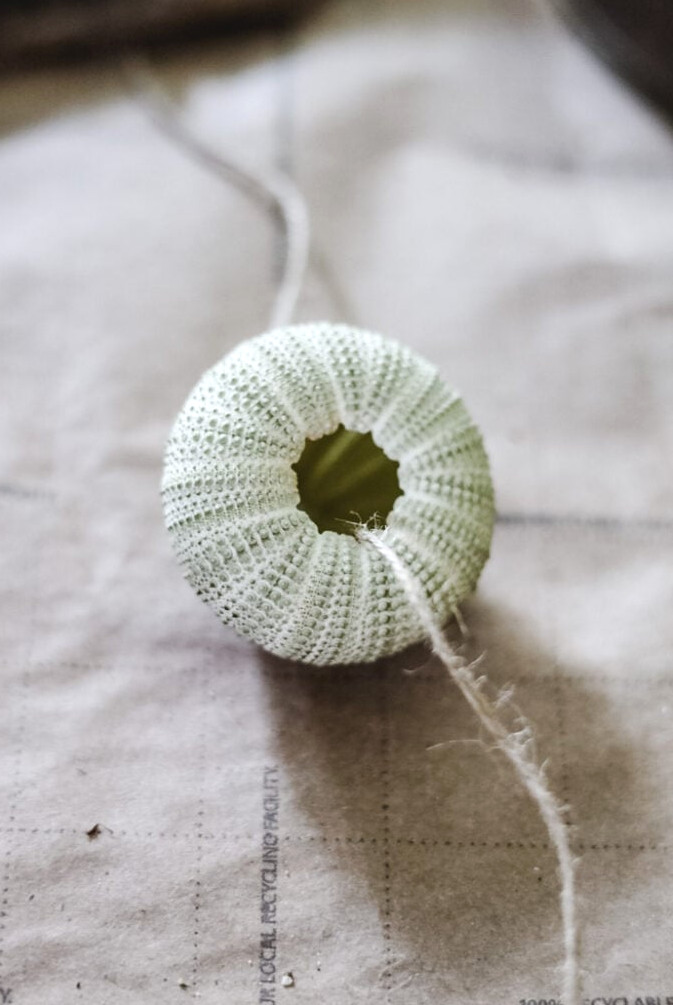
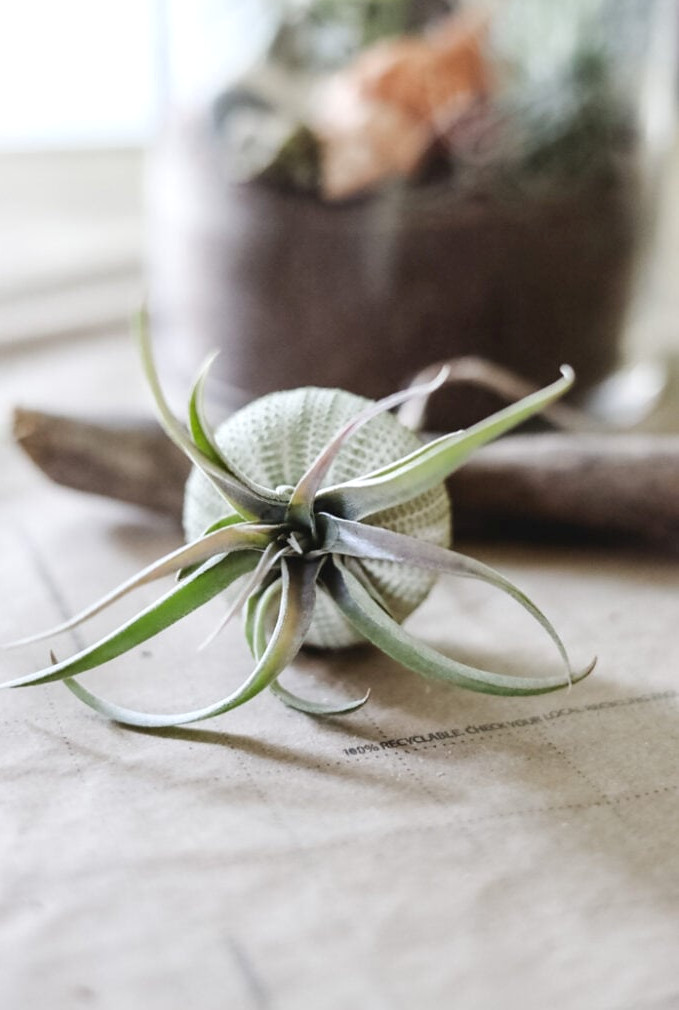
- Prepare the driftwood:Make a small hole through the driftwood and pass the opposite end of the jute twine through it. Secure it with a knot on top. (Don’t have a drill? Just wind the twine around the wood a few times.)
- Create the “jellyfish”:Pass a length of jute twine through the opening in the urchin shell. Knot the end several times to keep it from slipping through. Cut it to the hanging length you prefer.
- Attach the air plant:Set aCaput Medusae(or another air plant with a snug-fitting base) into the urchin’s opening. It should remain in place by itself—if it doesn’t, apply a minuscule dab of glue.
Step 3: Put Together The Terrarium
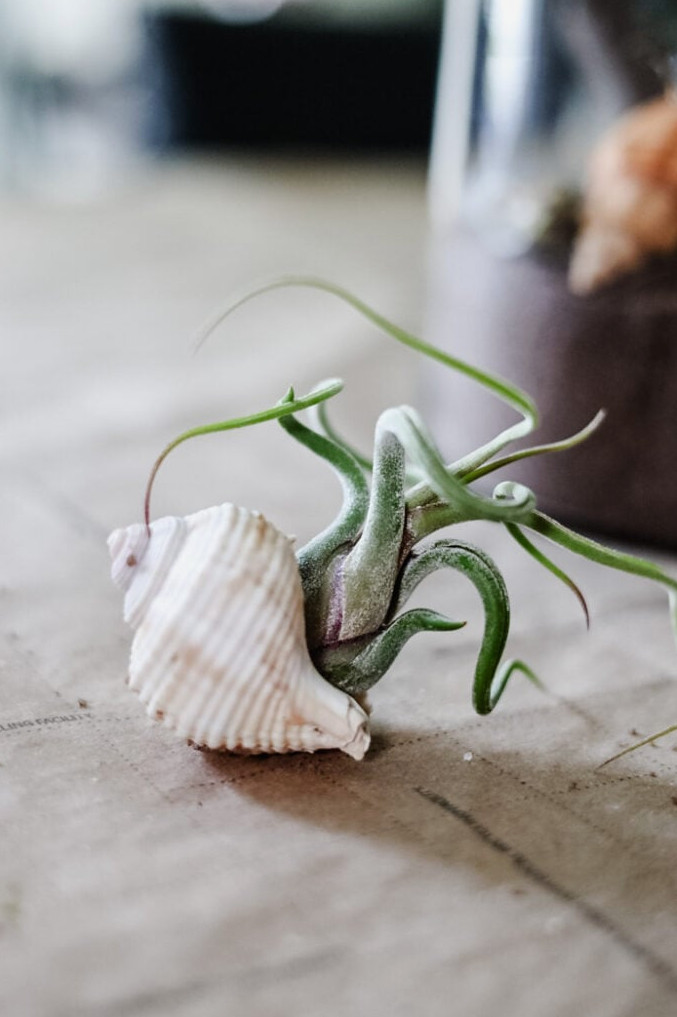
- Add finishing touches:Place a few additional air plants around the base
- Assemble:Position the driftwood over the vase opening, allowing the “jellyfish” to dangle inside the terrarium. Modify the length if necessary.
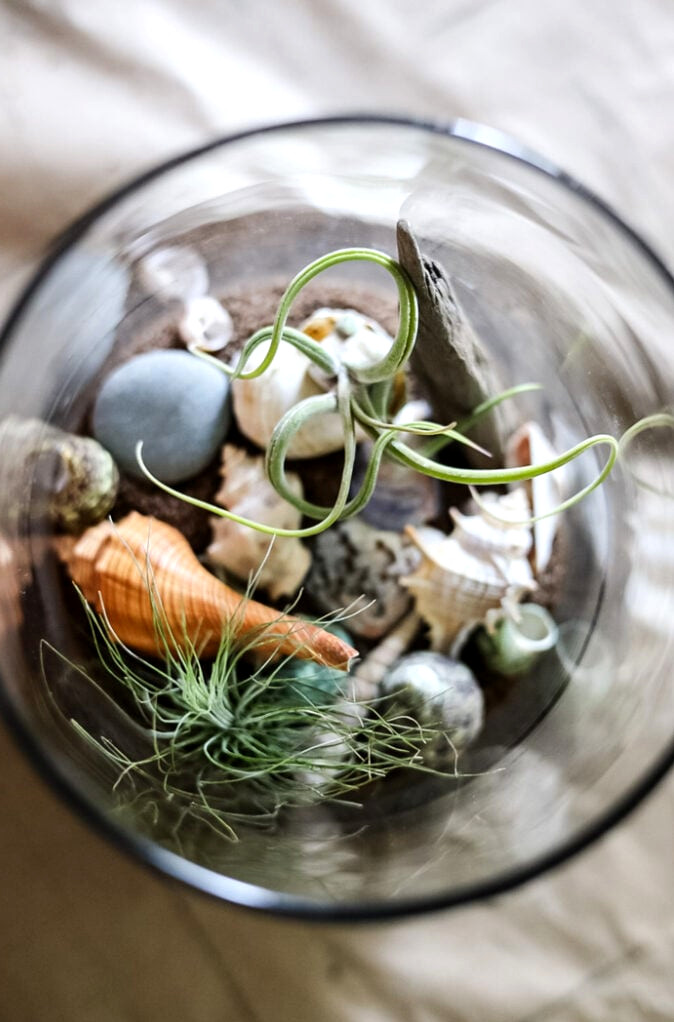
After arranging everything, the only thing remaining was to suspend the driftwood over the terrarium’s opening.
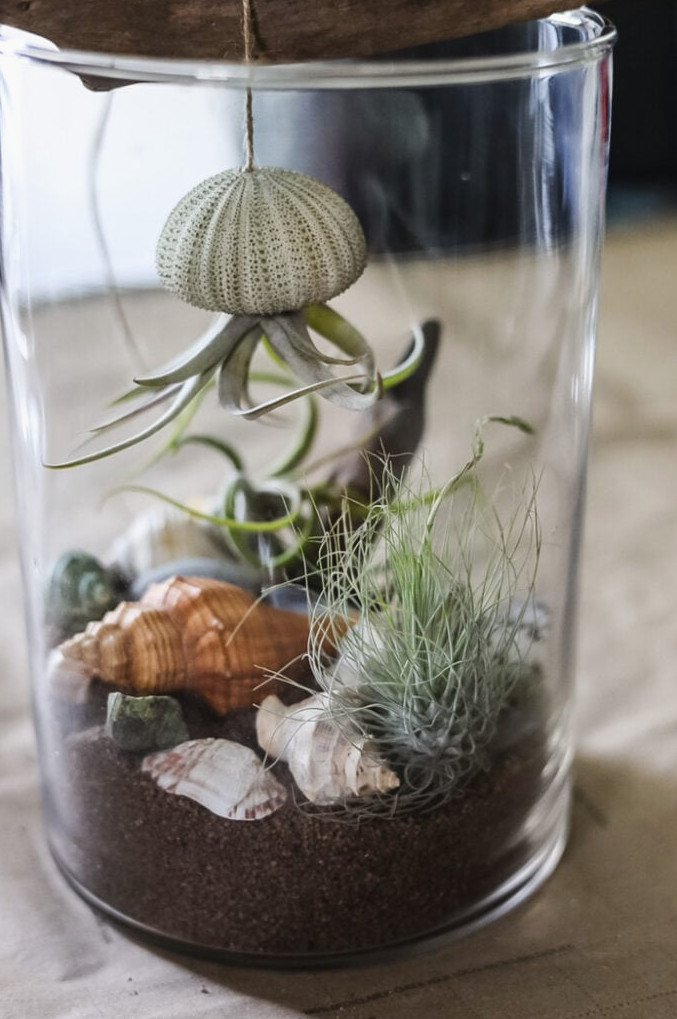
Completed Jelly Fish Terrarium
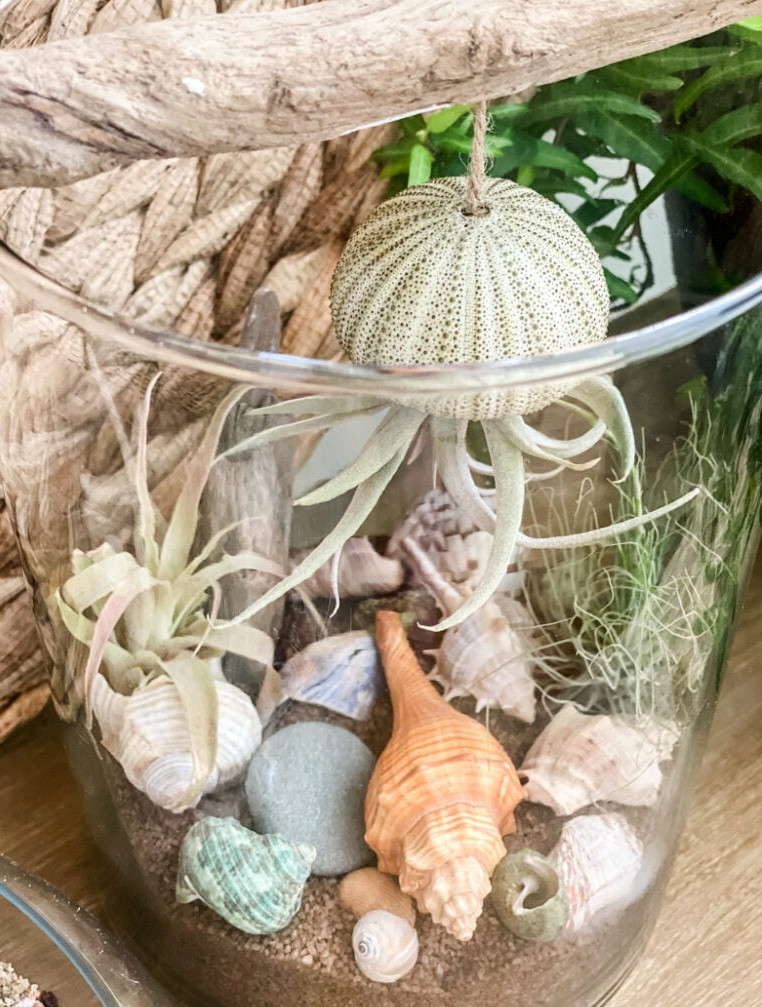
Why I adore it:This project brings a smile to my face each time I pass by it. It shows that a touch of imagination can transform simple materials into something genuinely surprising.
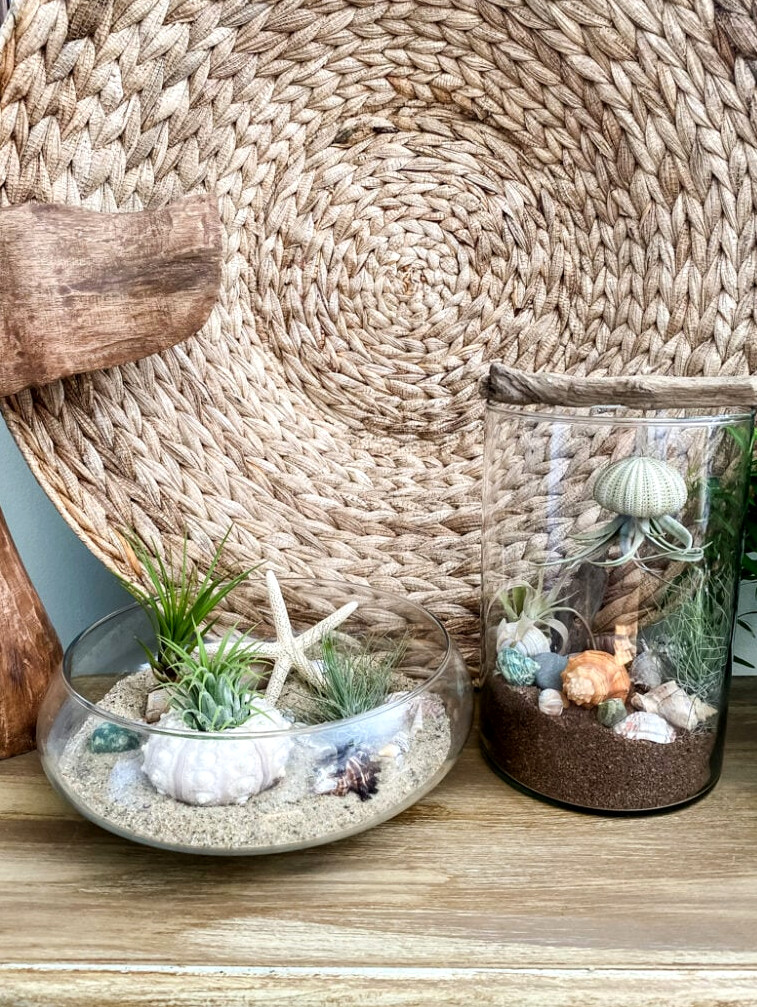
I absolutely suggest trying this DIY project! It was incredibly simple to make, and I felt quite proud of the result! It would also be an enjoyable summer craft to create with your children or grandchildren.
Project 3: Rye Beach Stroll Terrarium
A tribute to a windswept beach walk, preserved in glass. The driftwood extends past the vessel, ignoring every rule.
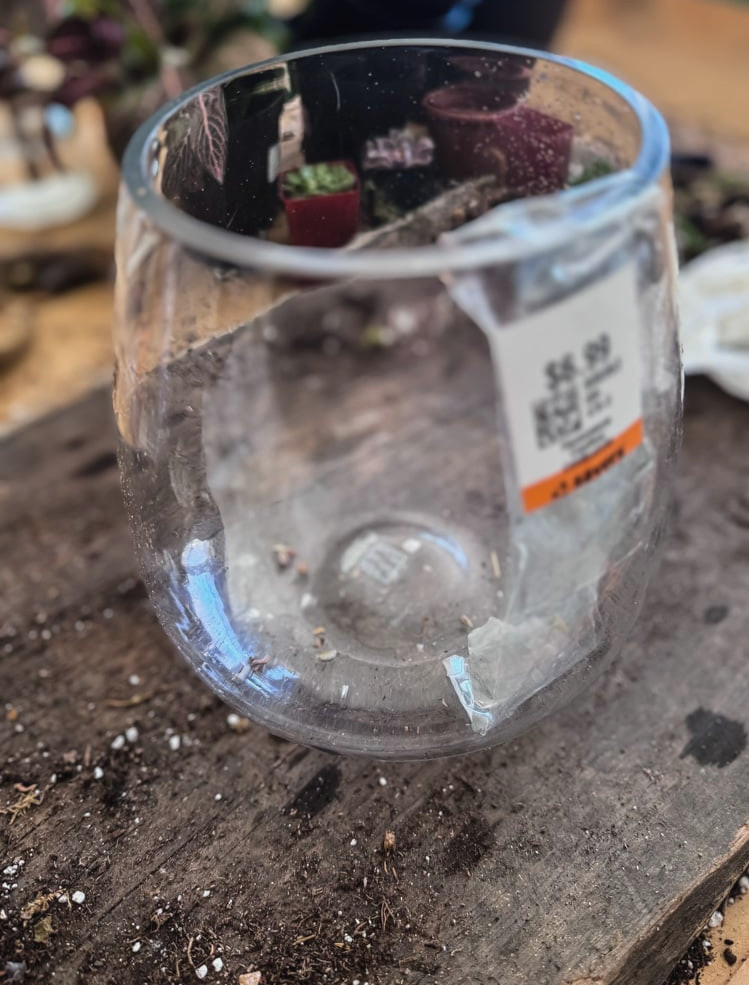
Being near the ocean is wonderful throughout the year, yet the morning following a powerful storm feels particularly enchanting. A Nor’easter rolls in, the waves toss all night, and by sunrise the shore is covered in little treasures. Driftwood, sea glass, stones smoothed by the surf. That’s when I go out to search the beach.
On this specific outing, I returned with an armful of driftwood, while my coat pockets were filled with rocks and shells. This terrarium grew out of that beach walk.
Vessel: Sturdy secondhand glass container (originally a pillar candle holder)
Materials:
- Tiny pebbles and sand
- A twisted, gnarled driftwood branch full of character
- Additional small driftwood pieces & branches
- Shoreline stones and miniature shells gathered from the beach
- 5 air plants (I chose Tillandsia Caput Medusae along with several small green varieties)
Step 1: Build The Base Layer
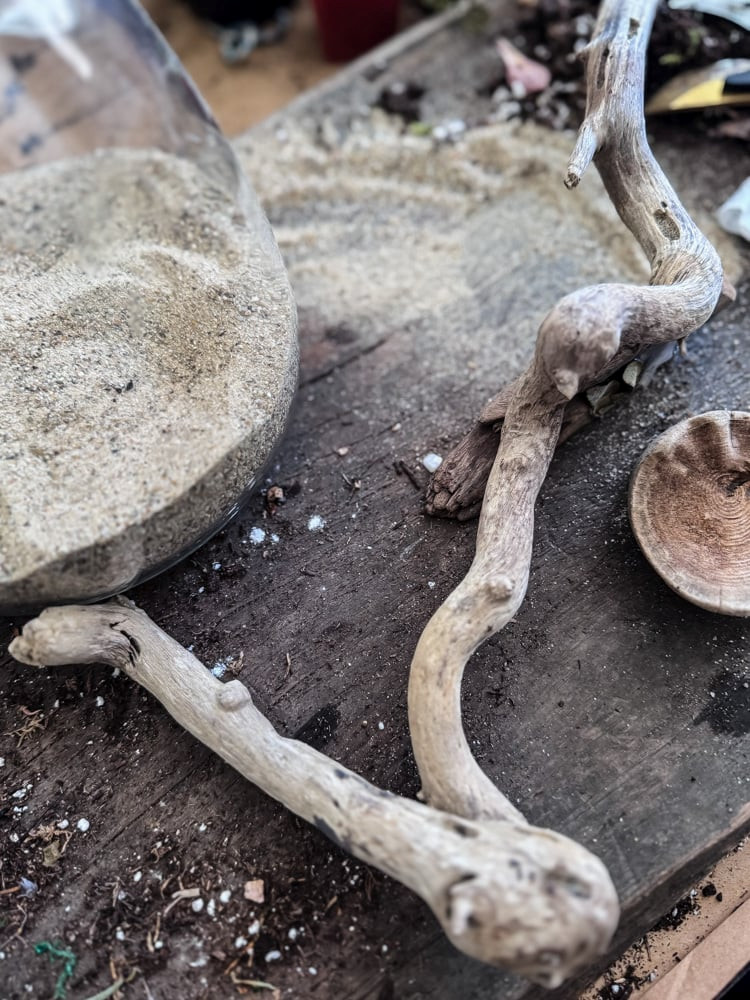
Create the base layer: I began by adding a few inches of sand to form a foundation that resembles and feels like the beach itself. I chose ordinary play sand (it’s affordable and readily available), though this is also a wonderful opportunity to experiment with color! Lovely shades such as soft pink, seafoam green, and pale blue would look beautiful in a project like this. Alternatively, leave out the sand and try fine pebbles or crushed sea glass for varied texture and shimmer.
Step 2: Secure The Driftwood
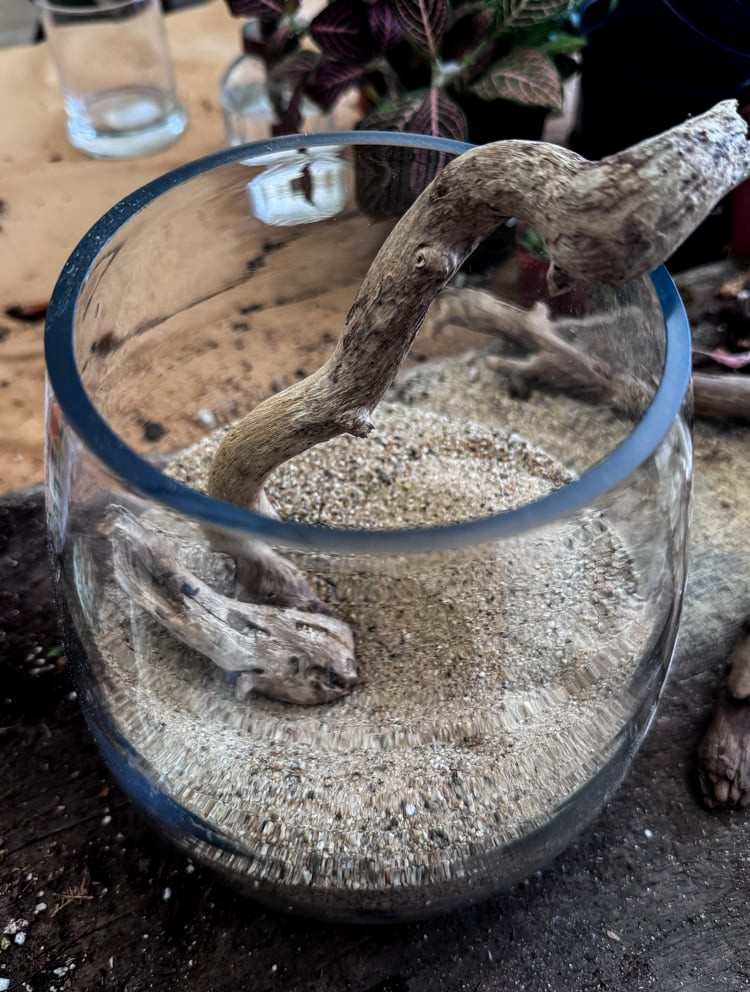
Secure the driftwood: Set your twisted driftwood branch inside the container, arranging it so it naturally leans against the glass and reaches above the rim. This is where the transformation begins.
Step 3: Create The Terrarium Floor
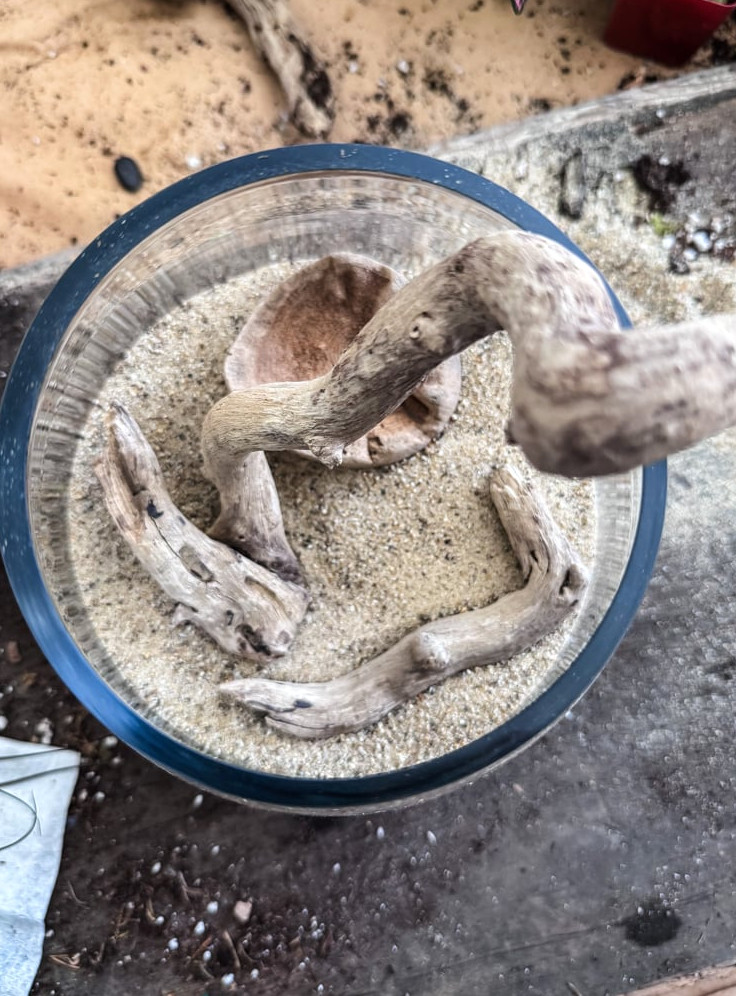
Provide support for the air plants: Place a smaller piece of driftwood and a branch onto the sand. These pieces will help hold the air plants in place.
Step 4: Add The Coastal Treasures
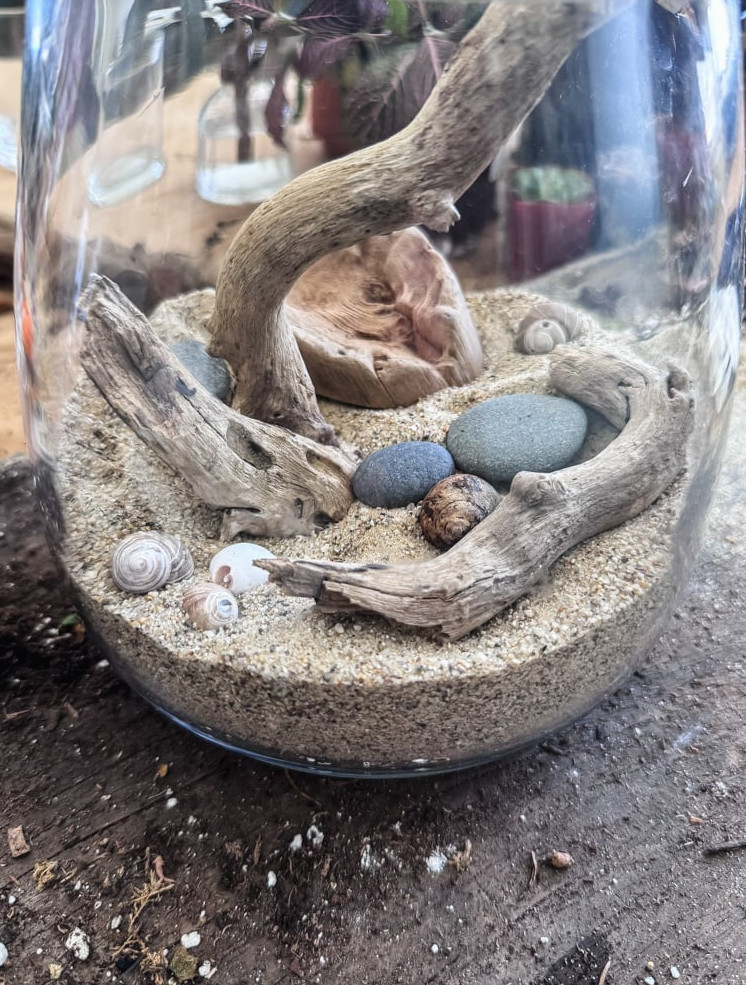
Distribute beach treasures: Arrange your gathered stones and little shells around the base, partly covering them with sand as though the tide has recently receded.
Step 5: Position Your Plants
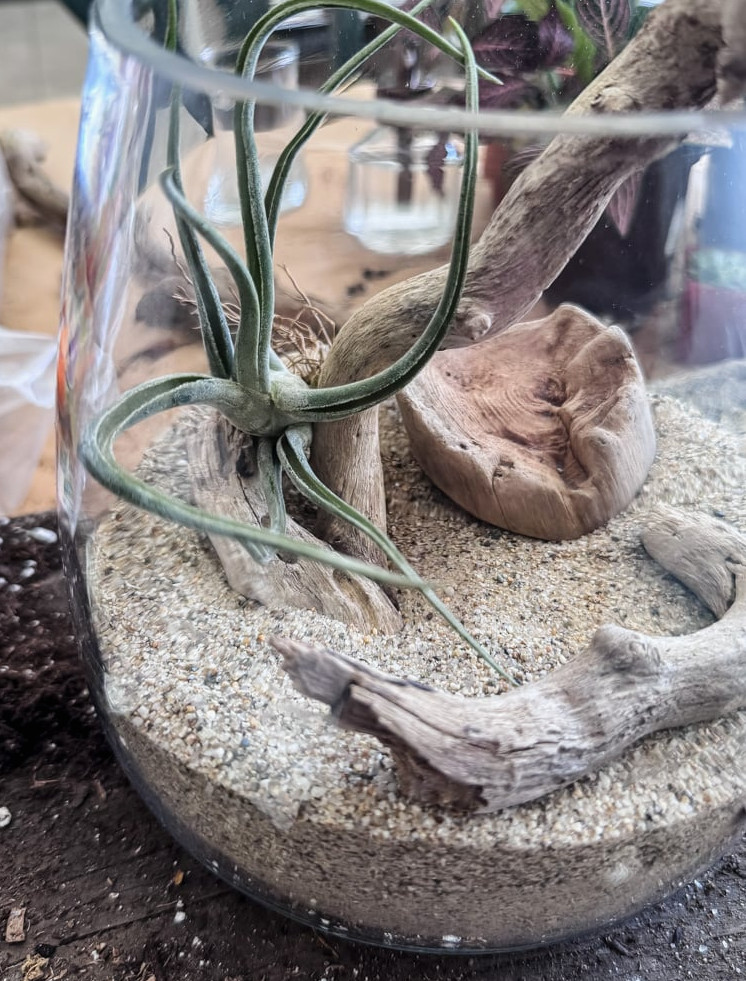
Position your plants: Set a Medusae into the “bend” of the twisted branch, keeping it safely elevated above the sand. Place several additional small air plants between the rocks at the base.
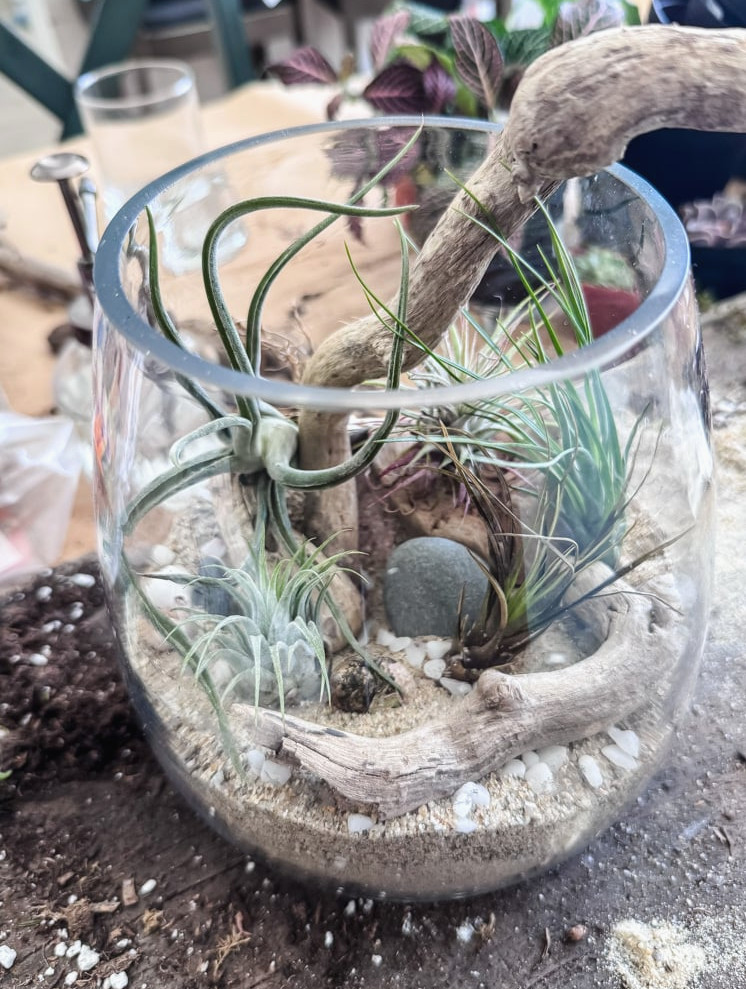
Completed Beach Walk Terrarium
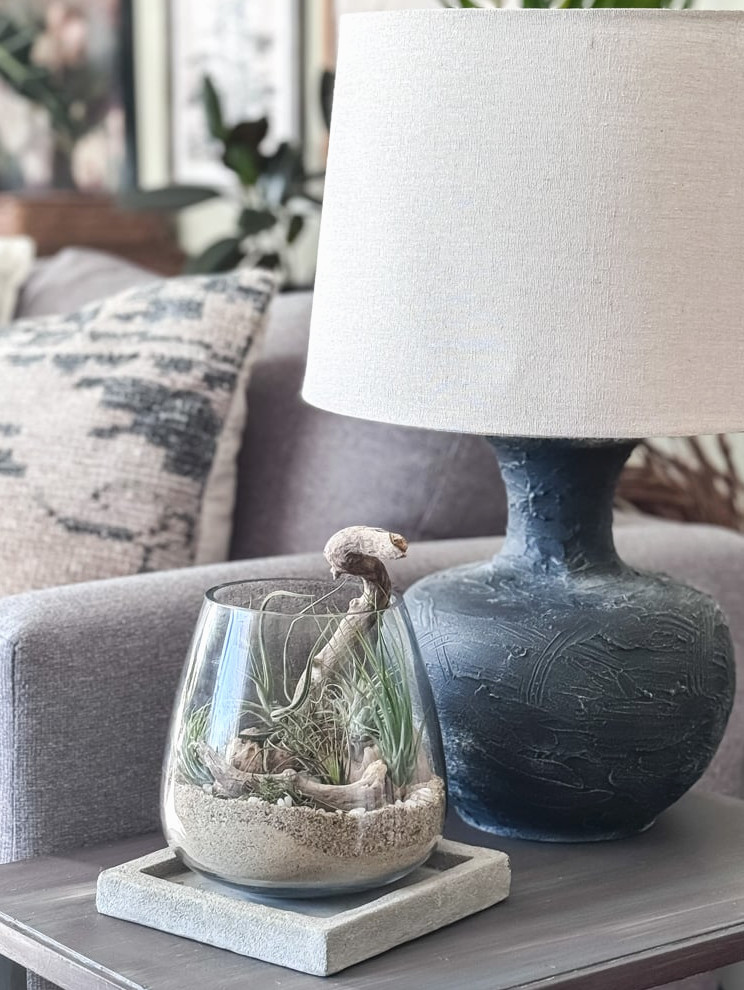
Why it speaks to me: This terrarium isn’t confined entirely within its vessel. The branch extends outward, balances on the edge of the glass, and declines to stay contained. It serves as a reminder that the finest projects come from trusting your instincts rather than following instructions. Whenever I see it, I’m transported to Wallis Sands beach, with my pockets filled with stones and the breeze tousling my hair.
Project 4: The Geode Desk Garden
Compact, uncomplicated, and softly radiant. All you need is five minutes and a single dollar.
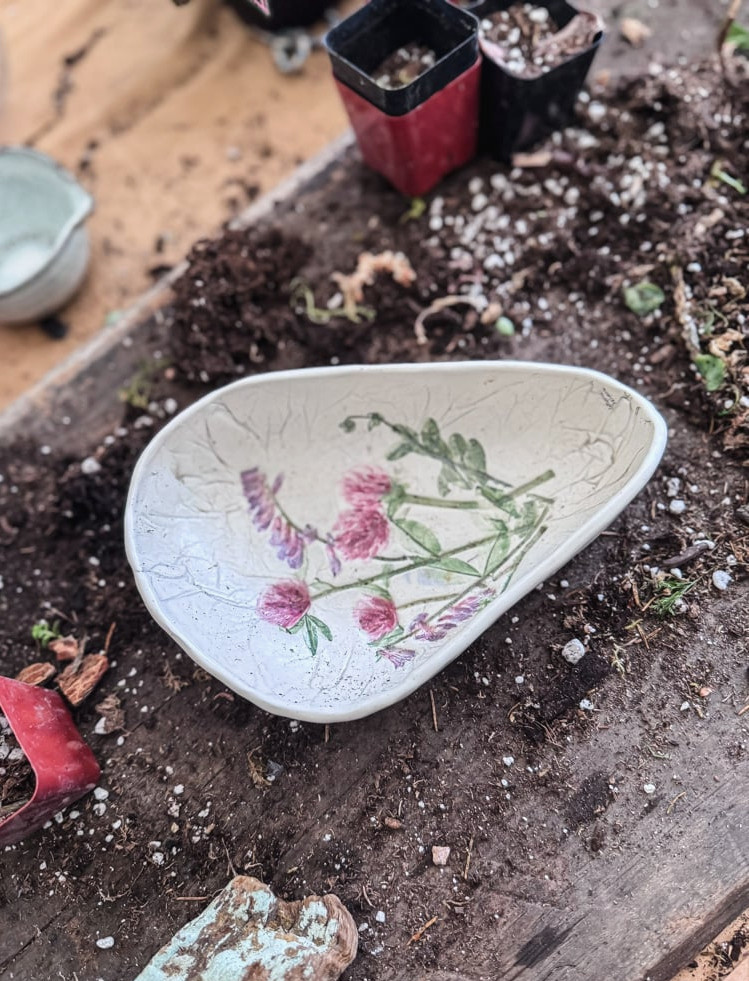
I’ll admit something: whenever I’m browsing thrift shops and come across a handmade ceramic item, whether it’s an unusual mug, an uneven bowl, or a tiny dish covered in imperfect glaze, I nearly always take it home. I simply can’t resist. Someone, somewhere, formed it by hand. They molded the clay, selected the shade, and marked the base. Now it rests on a shelf, hoping for another opportunity.
How could I possibly abandon it? I paid one dollar for this small clay dish last year. I had no idea how I would use it. I only knew it deserved another chance to be cherished.
But here’s what happened: once I brought it home, I spotted a little marking on the underside-Mill Brook Kiln, Vermont. Curious, I looked it up online. As it turns out, these pieces sell for considerably more than a dollar. That isn’t what makes it special to me, though. I love it because one person created it, another person released it, and somehow it ended up with me, exactly when I had the ideal little project for it.
Vessel: Thrifted handmade clay dish, purchased for $1
Supplies:
- Fine-grained sand
- One elegant piece of driftwood
- 3-4 petite air plants
- A few quartz geodes or glittering stones
Step 1: Add The Sand
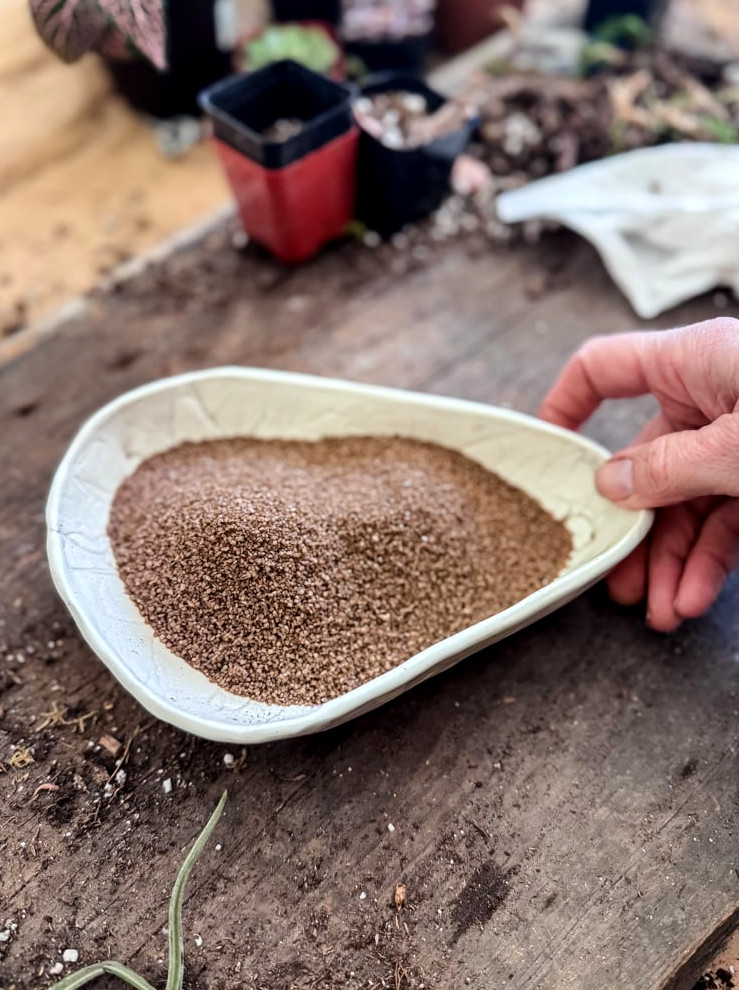
Add the sand: Spread a smooth, uniform layer of sand across the dish. For this version, I’m working with a deeper-toned decorative sand.
Step 2: Arrange Decorative Elements
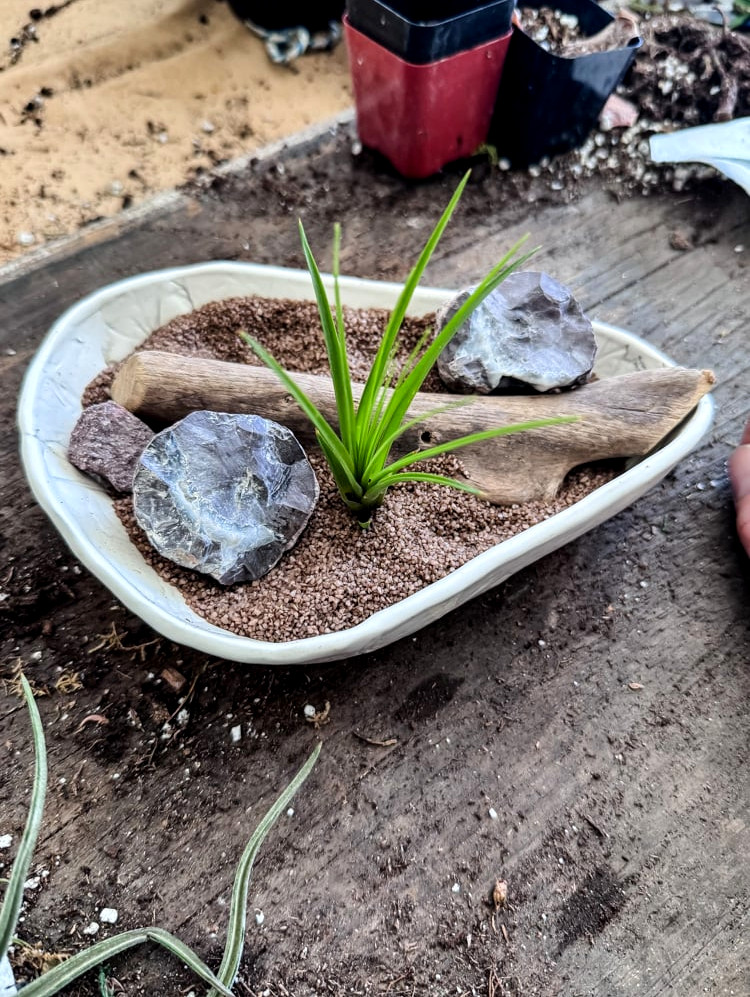
- Position the driftwood: Set the driftwood slightly to one side to create an organic, uneven arrangement
- Bring in some shimmer: Arrange your quartz geodes
Step 3: Place The Air Plants
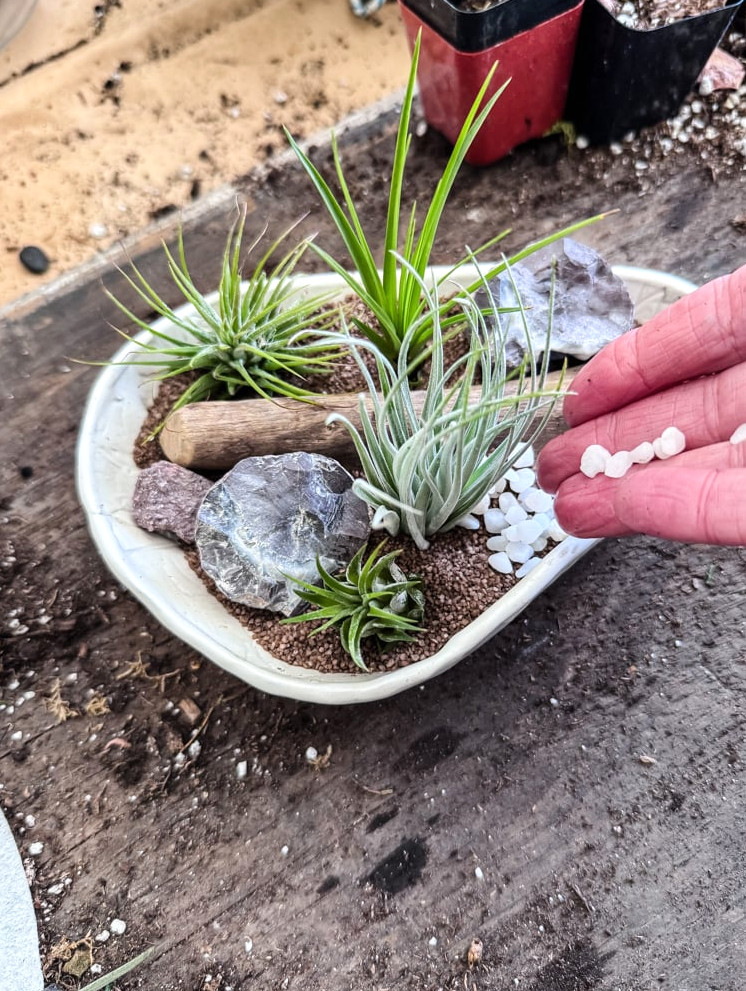
- Settle in the plants: Place your small air plants straight into the sand, arranging them among the geodes and driftwood.
- I completed the arrangement with a handful of tiny white pebbles.
Completed Air Plant Dish
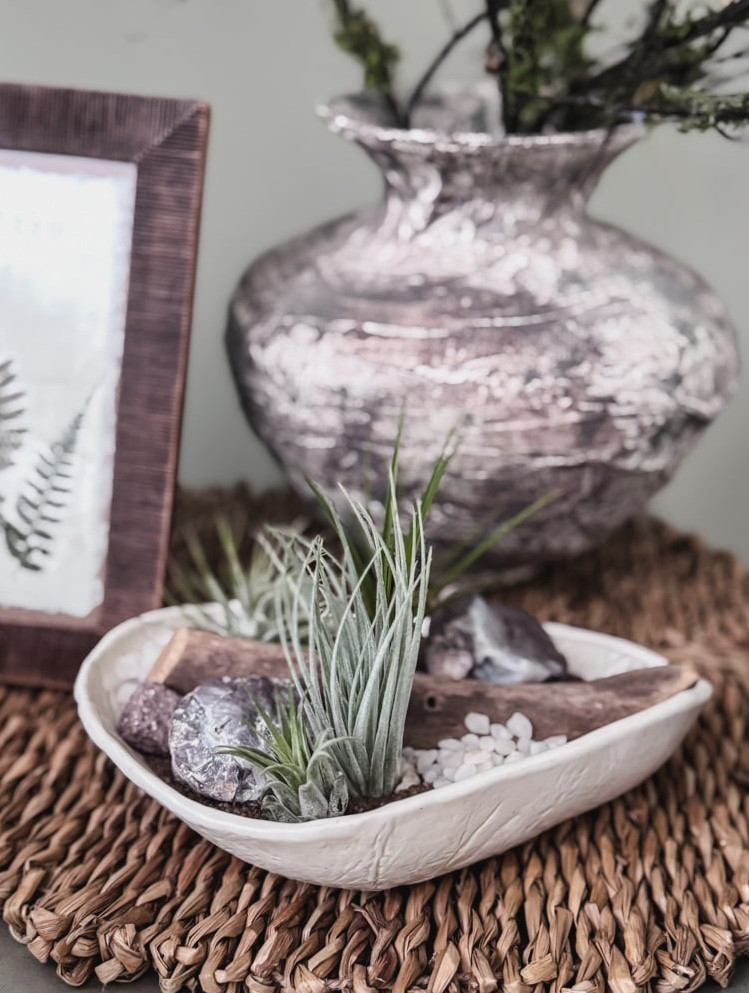
Why it appeals to me: This project shows that creating something lovely doesn’t require much. With a $1 thrifted dish and just a few minutes, your desk can suddenly feature a small, tranquil landscape. The quartz reflects the afternoon light, giving the whole arrangement an extra touch of magic.
At a Glance: Choosing the Best Project for You
|
Project |
Style |
Container |
Duration |
Difficulty |
|---|---|---|---|---|
|
Coastal Seashell Bowl |
Collected, seaside |
Shallow glass bowl |
20 min |
Novice |
|
Suspended Jellyfish |
Playful, sculptural |
High cylinder |
30 min |
Moderate |
|
Rye Beach Keepsake |
Natural |
Secondhand glass |
20 min |
Easy+ |
|
Geode Desktop Garden |
Simple, glittering |
Earthenware dish |
5 min |
Super Easy |
Tips for Creating a Successful DIY Air Plant Terrarium
Keep these few points in mind:
- Provide sufficient light: Air plants flourish in bright, indirect light. Avoid setting them in direct sunshine, since it may burn the leaves.
- Spray them often: Air plants take in moisture through their foliage, making regular misting essential. Fill a spray bottle with filtered or distilled water and mist the plants every two or three days.
- Feed them from time to time: Although air plants can live without fertilizer, occasional feeding can support healthy growth. Choose a fertilizer formulated for air plants. Apply it monthly throughout the growing period (spring and summer), then discontinue during dormancy (fall and winter).
With these suggestions, you can make a lovely, thriving air plant terrarium that adds a small touch of the outdoors to your home.
Solving Common Problems
Let’s go over several typical air plant concerns and ways to resolve them.
Issue #1: Browning or Drying Leaves
When the leaves on your air plants begin turning brown or becoming dry, underwatering is often the cause. To remain healthy, air plants require regular misting or soaking. Without sufficient moisture, they will begin displaying signs of stress.
To resolve the problem, mist your air plants more frequently or submerge them in water. It may also help to use filtered or distilled water rather than tap water, since tap water can contain chemicals that may damage your plants.
Issue #2: Mold or Fungus Growth
The appearance of mold or fungus on your air plants generally indicates overwatering. Because air plants should not remain wet all the time, leaving them in standing water too long may lead to mold or fungal growth.
To correct this problem, avoid giving your air plants too much water. Mist or soak them only once they have dried, and provide plenty of air movement. You could also use a fungicide to eliminate mold or fungus that is already present.
Issue #3: Wilting or Drooping Leaves
Wilting or sagging leaves usually point to underwatering or excessive direct sunlight. Although air plants flourish in bright, indirect light, prolonged exposure to direct sun can harm their leaves.
To address this issue, ensure your air plants receive adequate water and are protected from extended periods of direct sunlight. You may also want to relocate them somewhere with greater shade or filtered light.
Final Thoughts
Air Plant Care Cheat Sheet
•Soak weeklyfor 30 minutes, then dry upside down
•Mist 2-3x per weekbetween soaks
•Good airflow— open vessels only!
•Monthly fertilizerin spring/summer
•Remove dead leavespromptly
All in all, I strongly suggest giving a DIY air plant terrarium a try if you want an enjoyable and simple project. You’ll create a lovely decorative piece while also discovering just how charming these adorable plants can be!
Making my own air plant terrariums has grown into one of my favorite creative activities. No two are alike: some are gathered, some are playful, and some hold deep personal meaning. These little projects require very little but offer so much in return: peaceful concentration, a bond with nature, and a touch of beauty for your everyday surroundings.
Now it’s your opportunity! I’d truly enjoy seeing what you make. Submit photos of this project or any other creation you were inspired to make from me for a chance to be featured on the Reader’s Spotlight page. Send them in to me at cottageonbunkerhill@gmail.com
xo, Jennifer
Enjoy projects like this?Don’t miss out! Join my newsletter familyfor more warm, affordable DIY ideas sent straight to your inbox. You’ll receive special tips, advance access to tutorials, and all the inspiration required to make your home feel personal and lovingly handmade.
More Fun Ideas
Save This To Pinterest!