Create loads of storage with a stylish, contemporary cubby console.
Do you ever feel as though your home is lacking storage space?
It is incredible how much extra storage you can create with a single thoughtfully designed DIY furniture project. This attractive cube storage shelf is the perfect example.
You might assume that cube, or cubby, storage is inexpensive furniture, and I understand why. It brings to mind the ready-made particleboard pieces I remember from the past.
However, this cube storage unit is something else! It is a stunning console table crafted from solid wood. Add some fashionable legs, and it looks completely different from the inexpensive cube shelving sold by big-box stores while still offering all the practicality you need!
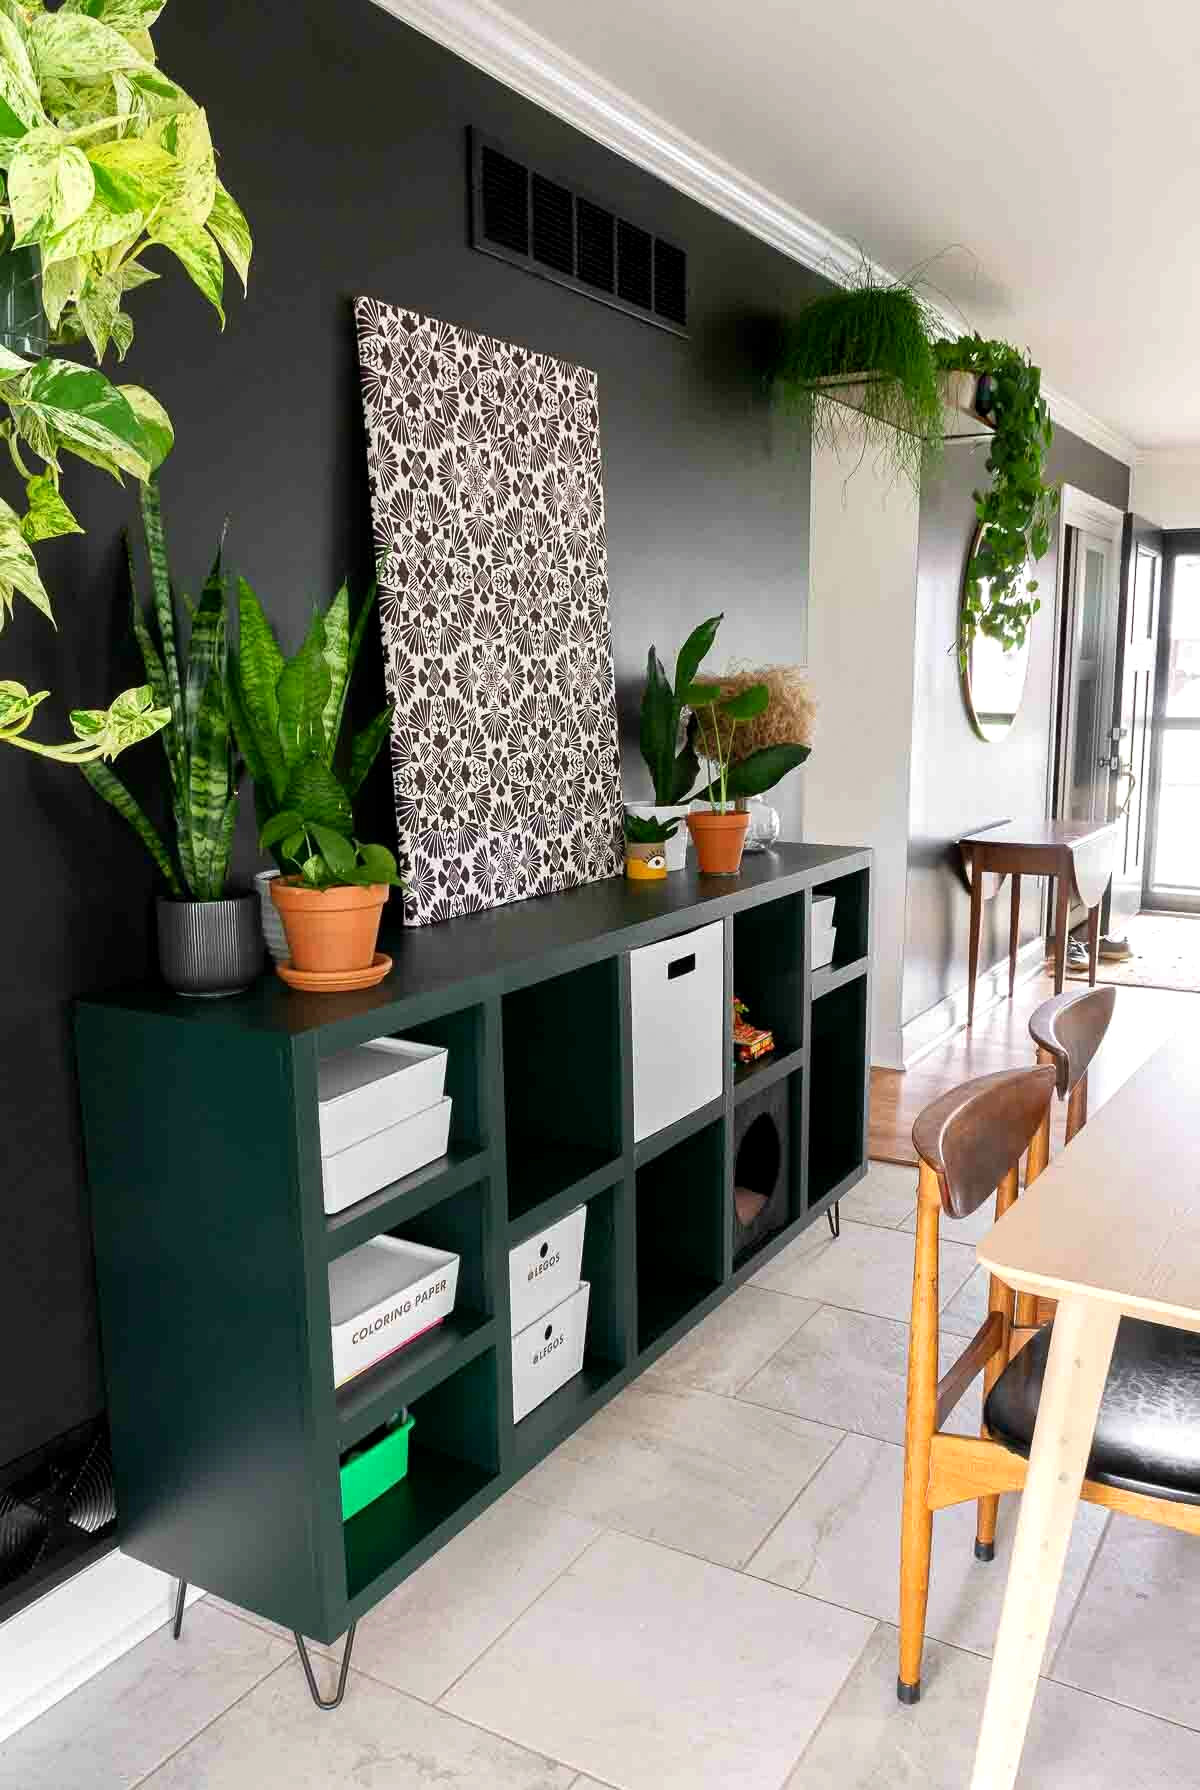
Kallax Shelf Upgrade
If you appreciate the storage offered by Ikea’s Kallax cube shelf but would prefer a more mature style, this console is sure to appeal to you!
The six central compartments are ideally sized for the Ikea fabric bins or plastic containers designed for the Kallax range.
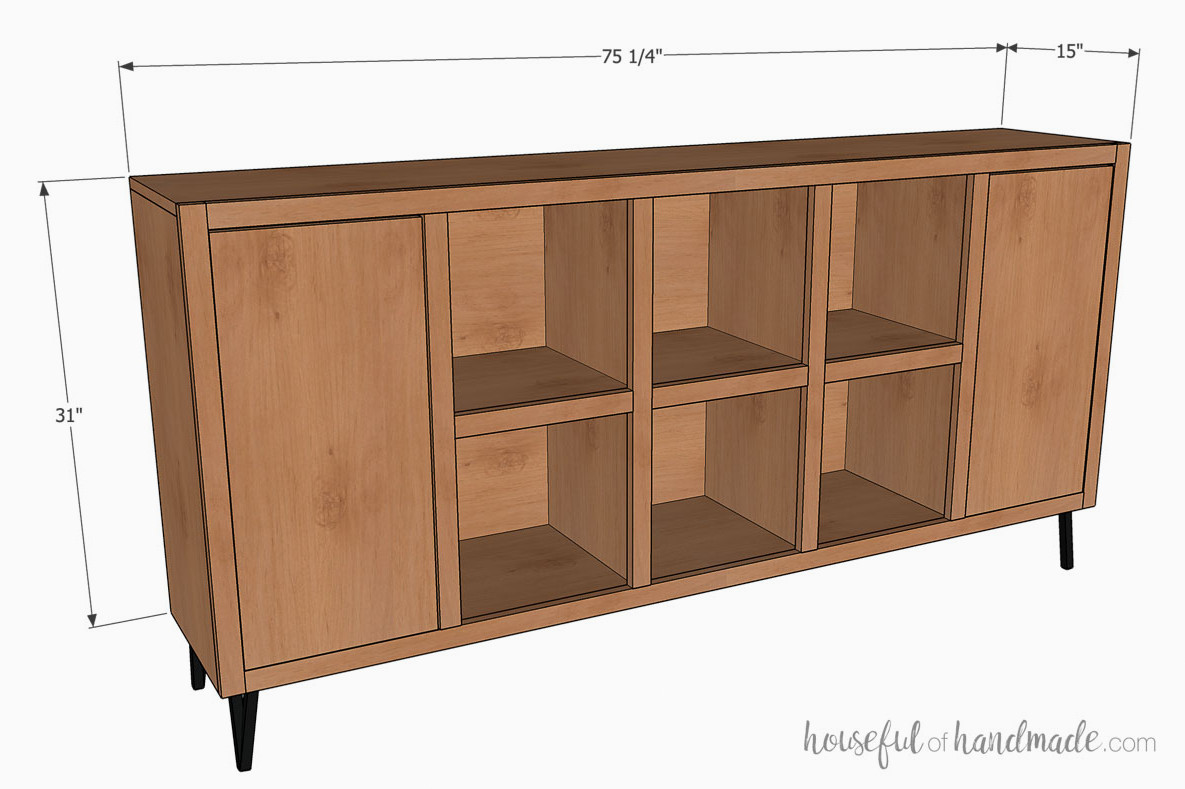
For the two outer sections, you can choose between shelves, either adjustable or fixed, and doors. Doors are an excellent way to conceal belongings while making your DIY storage cabinet look even more impressive.
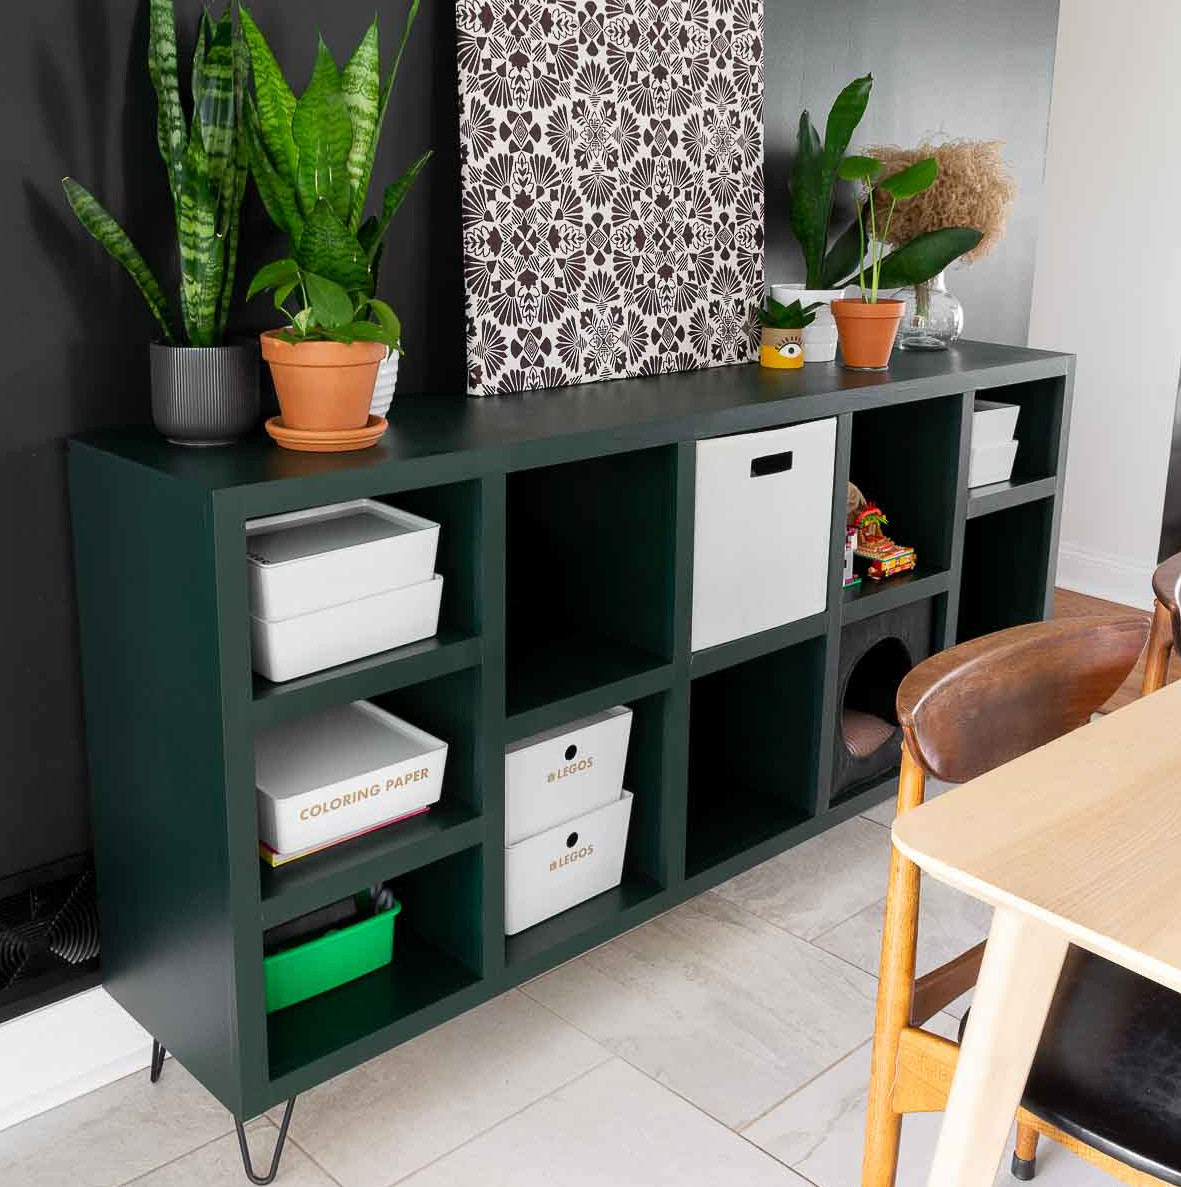
Although it may appear to be a substantial project, this build is quite straightforward. Use a circular saw to cut the plywood components, then assemble everything with simple yet durable pocket holes.
Afterward, enjoy staining or painting your new storage console so it coordinates with your home.
More Amazing Storage Builds
Create practical storage for every area of your home with these DIY woodworking plans.
How to Build a Cube Storage Console
Tools & Materials
Overall Dimensions
The completed cube storage shelf measures 75 1/4″ wide, 31″ high without the legs, and 15″ deep. Choose legs of any height to make the modern console as tall or low as you prefer.
I worked with Brittany from By Brittany Goldwyn, who constructed the cube storage shelf using these plans. Visit her article here for build-process details and photographs.
Cut List
Prepare the components by following the detailed plywood cutting diagram included in the PDF plans.
Download the Premium PDF Woodworking Plans
PDF plans include- An Easy-to-Follow Cut List, Shopping List, Suggested Tools, Step-by-Step Directions with 3D illustrations, & Useful Resources
BONUS- 3D SketchUp File
First, use your saw to rip the lengthy plywood strips. Once that is done, crosscut them to the required dimensions.
The Kreg RipCut and Accucut are my favorite tools for making plywood sheet cuts easier.
EXPERT TIP:
Place the plywood on a 2″-thick sheet of rigid foam so it remains fully supported during cutting. This also helps stop the saw from forcing the plywood out of position.
STEP 1- Assemble the cube frame
Adjust your pocket-hole jig for drilling into 3/4” material, since every pocket hole in this project is made in 3/4” lumber. Drill pocket holes into both sides of the cube shelves and the center divider pieces.
Following the diagram below, position the cube shelf components between the center dividers. Fasten them with 1 1/4” pocket-hole screws and wood glue.
EXPERT TIP:
If you prefer to avoid visible nail holes on the front face frame, use pocket holes to secure it instead. Before assembly, simply drill pocket holes into the front of each piece as well. A handful of pocket holes spaced 6-8” apart will be sufficient.
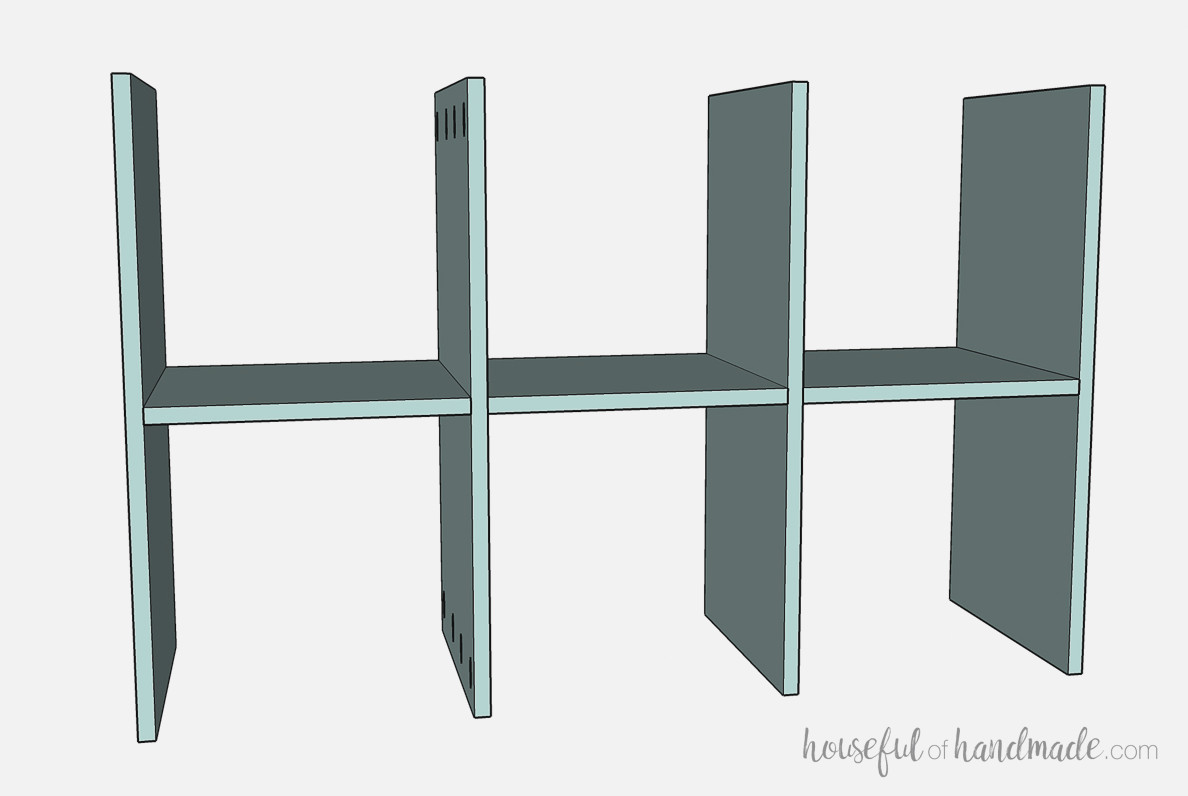
Make pocket holes on both sides of the bottom panel. If you like, you can also apply edge banding to the ends of the top panel. Next, secure the top and bottom panels to the center dividers as shown in the diagram.
All front edges should line up evenly, while the top and bottom panels will extend 1/4” beyond the back. This area will be routed later for the back, although you may route it beforehand if that is easier.
Use wood screws and 1 1/4” pocket-hole screws in the openings on the center divider pieces.
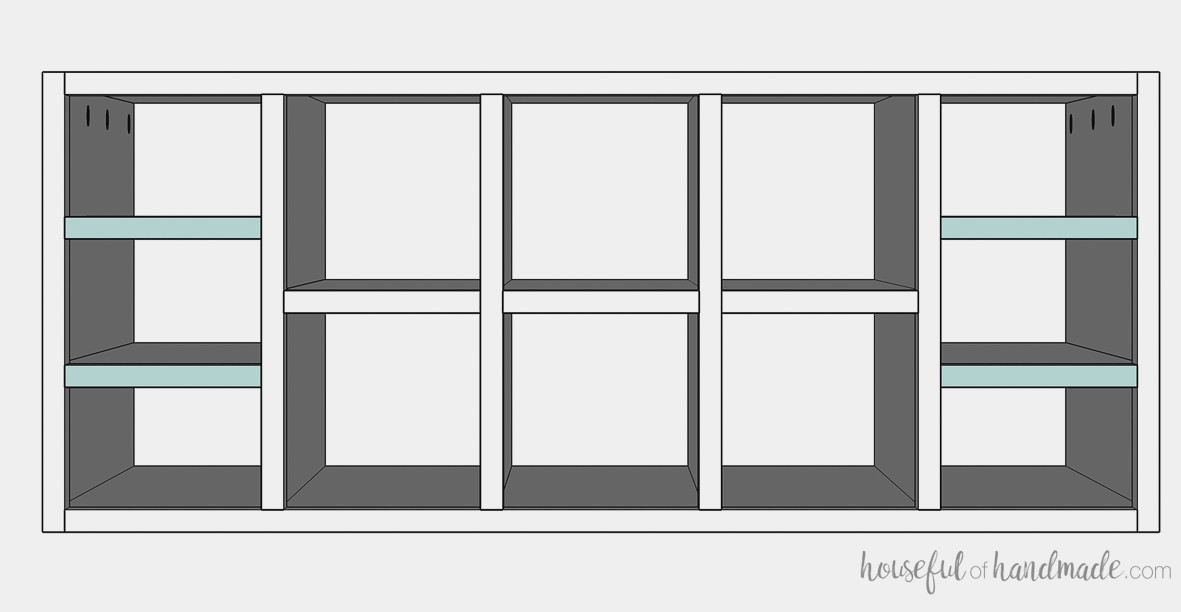
For fixed shelves, drill pocket holes into both sides of the shelf panels, then fasten them to the outside of the cube section with 1 1/4” screws and wood glue.
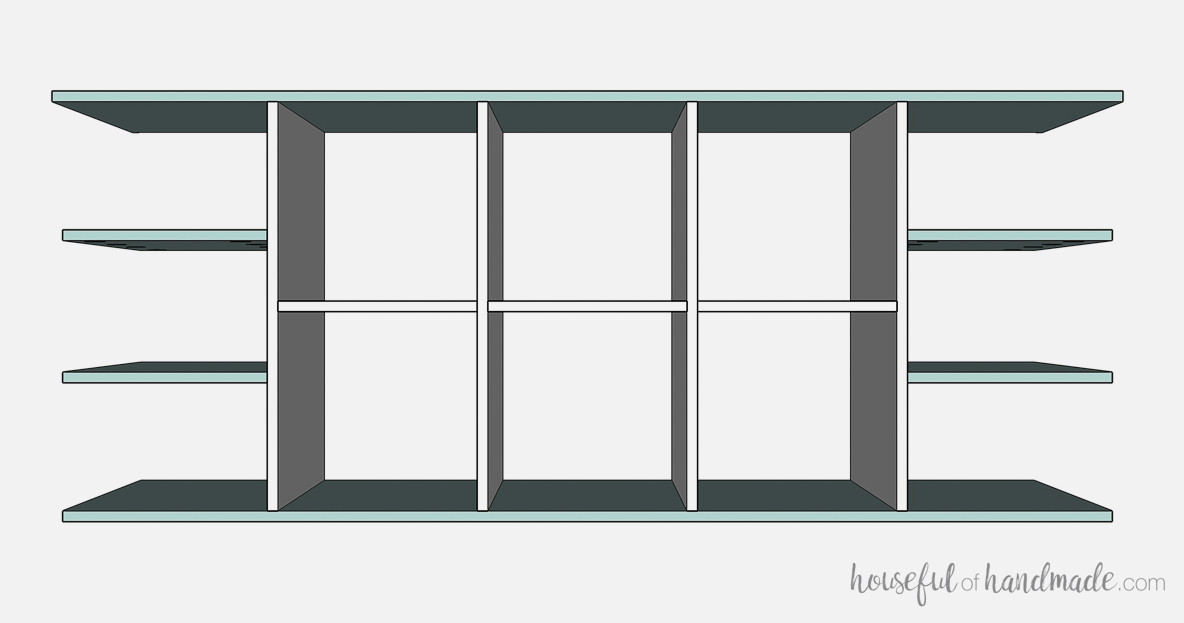
For adjustable shelves, make the shelf panels a little narrower and leave them unattached during this stage.
EXPERT TIP:
After assembling the cabinet, insert the shelf pins you plan to use into the holes. Measure the distance between them to determine the correct shelf width.
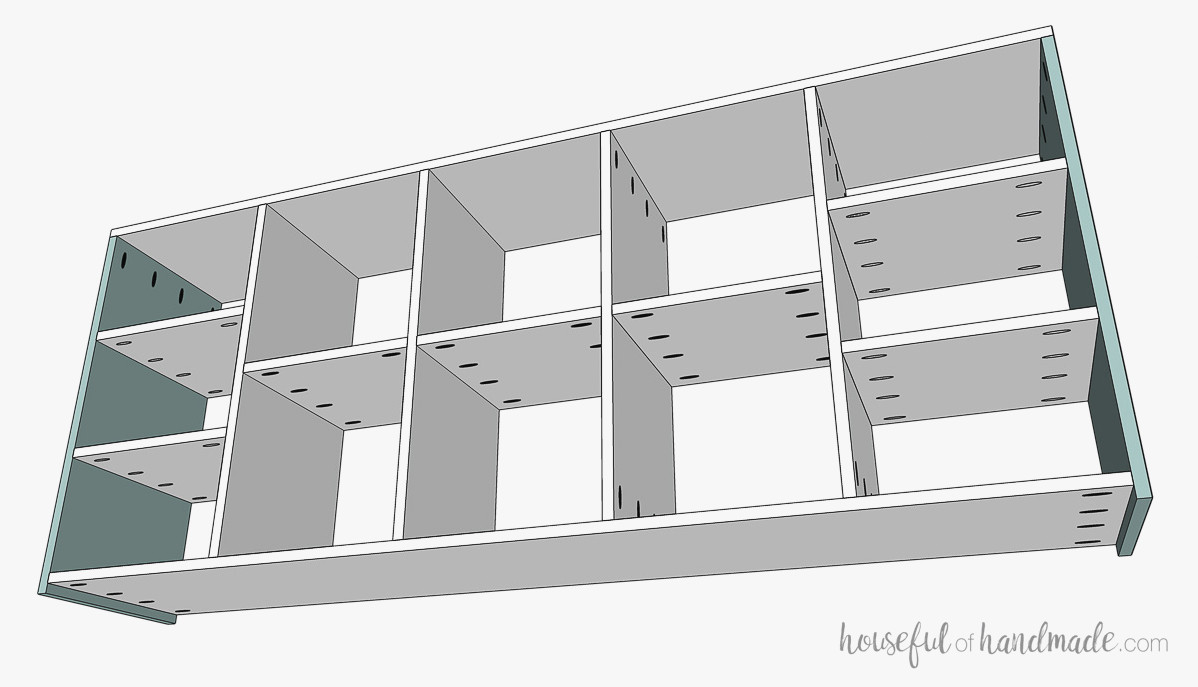
Fasten the sides with pocket-hole screws. Each side extends 3/4” below the bottom and sits flush with the top and bottom along the front and back. They are 1/4” deeper than the interior and shelves.
If you have already routed the top and bottom panels, route the inner faces of the side panels as well.
STEP 2- Attach the face frame
I like to construct the face frame first and install it afterward. This helps prevent cracks from forming in the joints as the wood expands and contracts over time. Alternatively, you can cut, glue, and nail each face frame piece individually.
To create the face frame, drill pocket holes and put the pieces together as shown in the plans’ diagram.
EXPERT TIP:
Use face frame clamps to hold the frame level while assembling it.
Measure the openings and make them correspond with the actual openings in the assembled cabinet boxes.
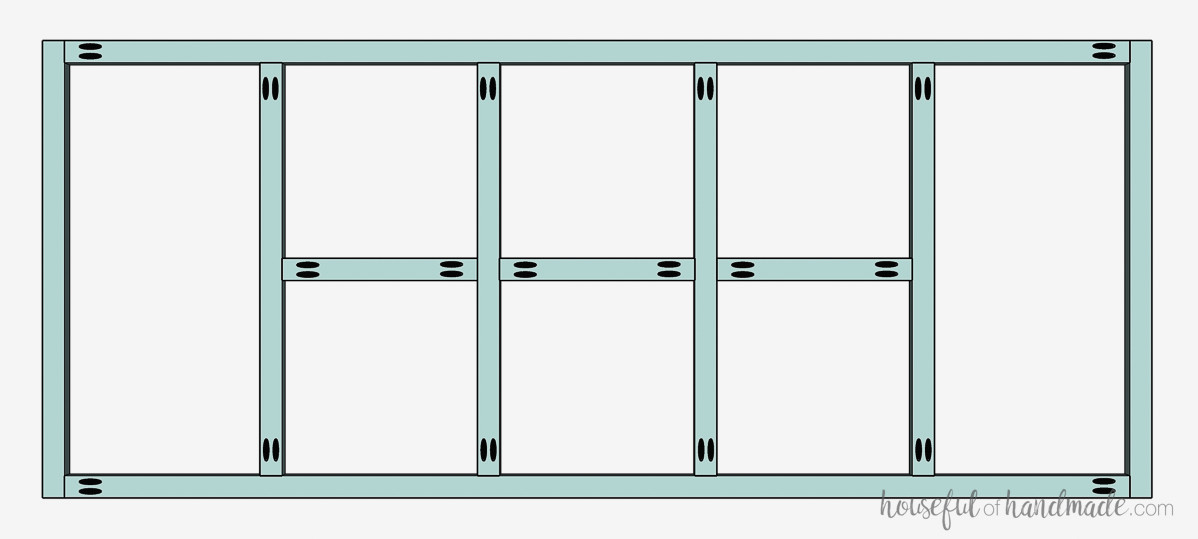
You can install the completed face frame using the previously drilled pocket holes or finish nails. Another option is to cut and secure each section individually with finish nails and glue.
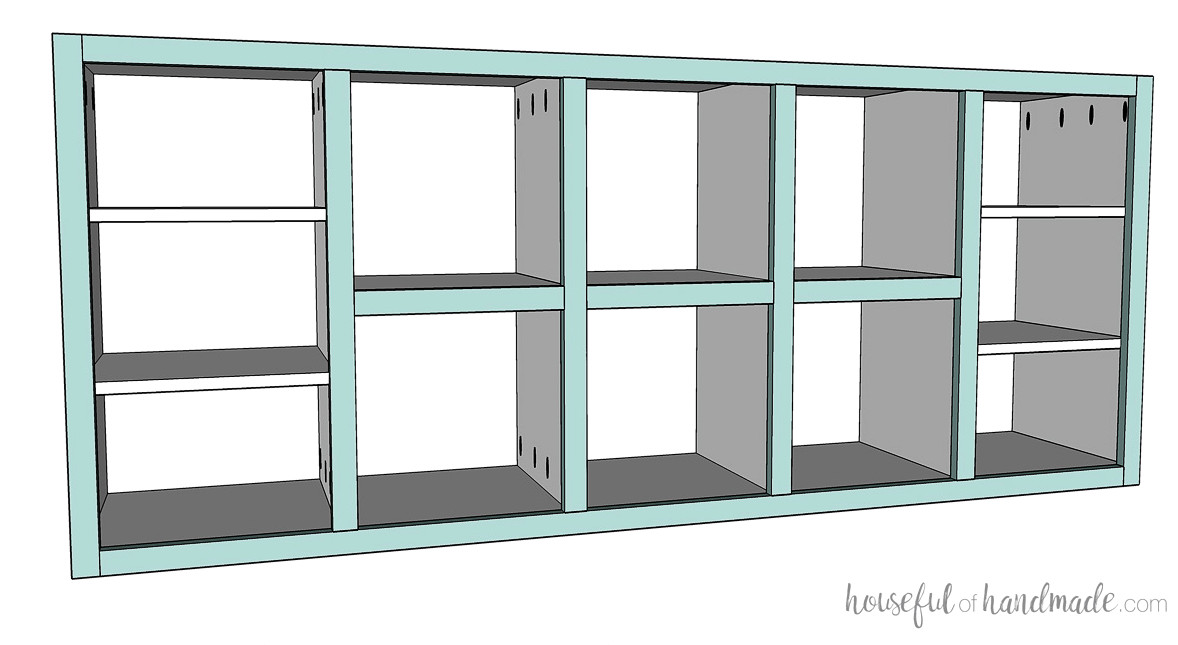
Position the face frame so that it is:
- Even with the top and sides
- The bottom edge aligns with the bottoms of the side pieces
- The center stiles are positioned in the middle of the wall pieces
- The center rails align with the tops of the cubby shelves
STEP 3- Apply the finishing details
Install the bottom supports beneath the bottom panel. The two outer supports should align with the sides, while the remaining one should be centered. These supports will be concealed within the lower part of the face frame.
Fasten them with wood glue and 1 1/4” finishing nails.
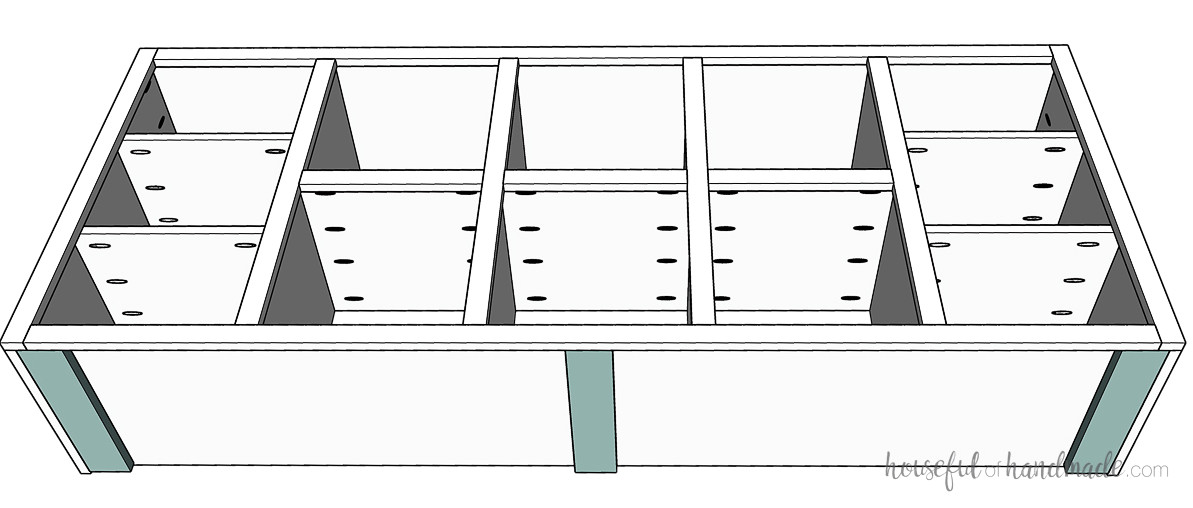
If the 1/4” groove has not yet been routed into the top, bottom, and side pieces, use a palm router to make a groove that is 1/4” deep and 1/4” wide for the back panel.
Some corner sections and areas between the cubby dividers may not be completely routed, so you will need to clean them out with a chisel.
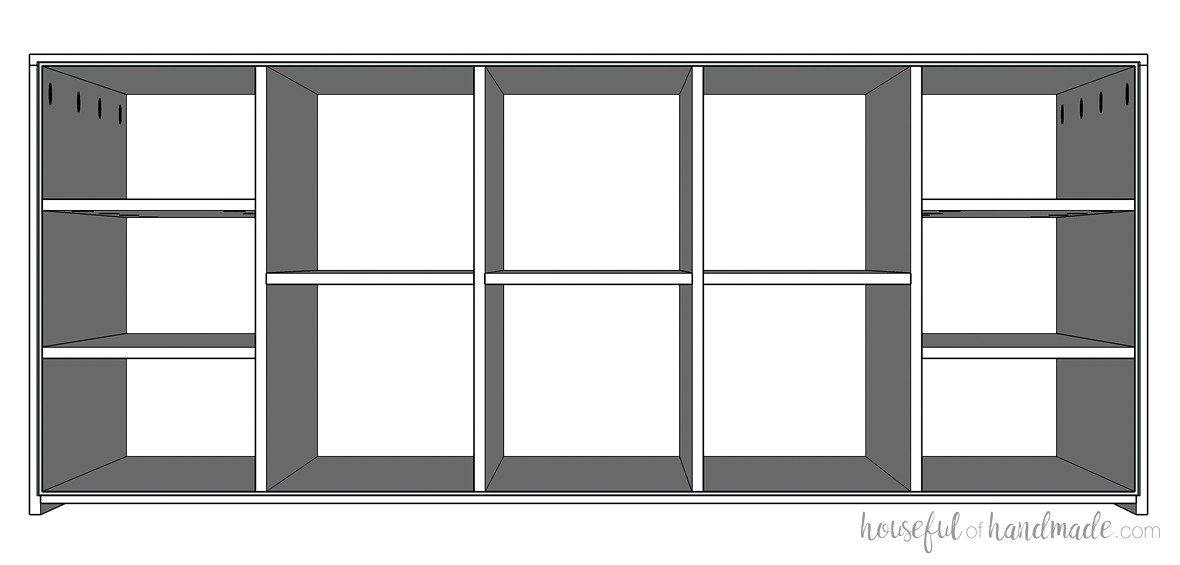
Slide the 1/4” plywood back panel into the routed channel. Adjust the cabinet until it is square if needed.
Use 3/4” finish nails to fasten it around the perimeter, walls, and shelves.
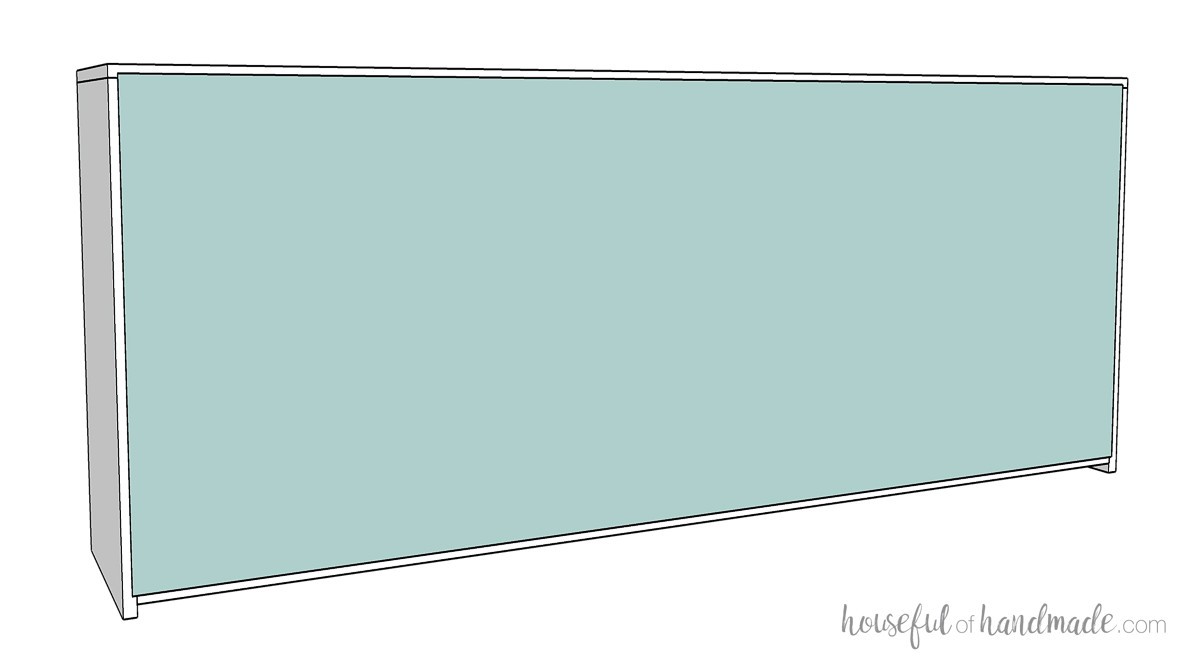
If you plan to install doors on the sides, cut the plywood pieces according to the cut list in the PDF plans. Then cover every plywood edge with edge banding.
Mount the doors using inset hinges designed for face frame cabinets. You can find additional information about various hinges here.
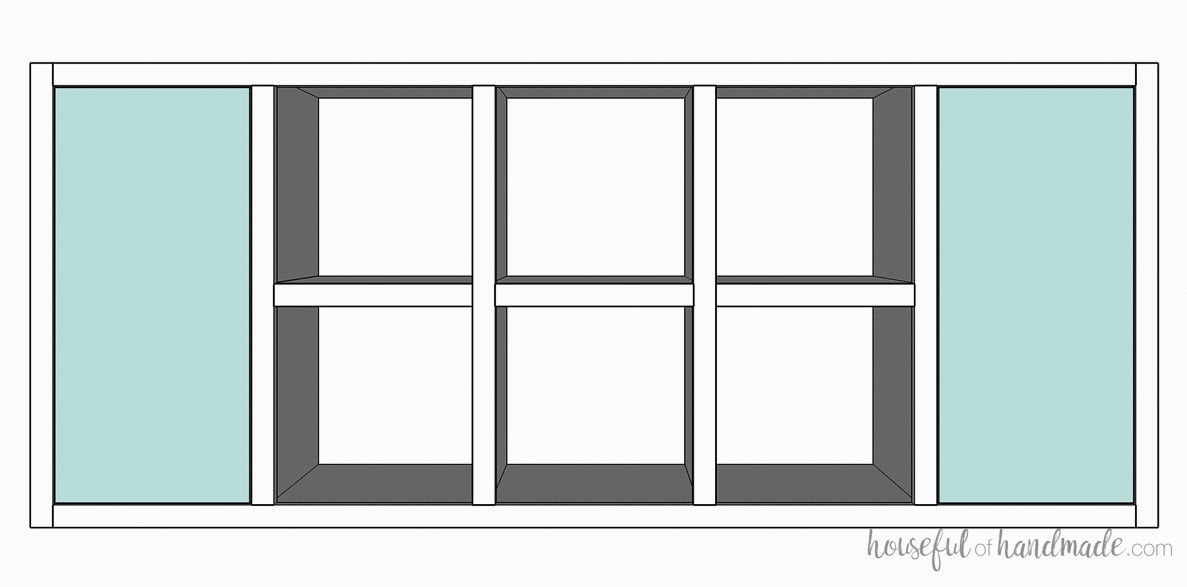
If you choose not to install doors, you can attach face frame sections to the fronts of the side shelves so they coordinate with the rest of the cabinet.
Alternatively, leave the shelf fronts simple and finish their edges with edge banding.
STEP 4- Sand & complete the console
Apply wood filler to any exposed pocket holes and nail holes. Afterward, sand the surface and seal or paint your new storage shelf.
Fasten feet beneath the cube storage unit. Place one at every corner and another in the middle on the bottom support pieces to help prevent sagging.
EXPERT TIP:
Choose furniture legs of any height to make the console as tall or low as you prefer.
For adjustable shelves, drill shelf pin holes into the sides of the shelf compartments. Then place the shelves in position.
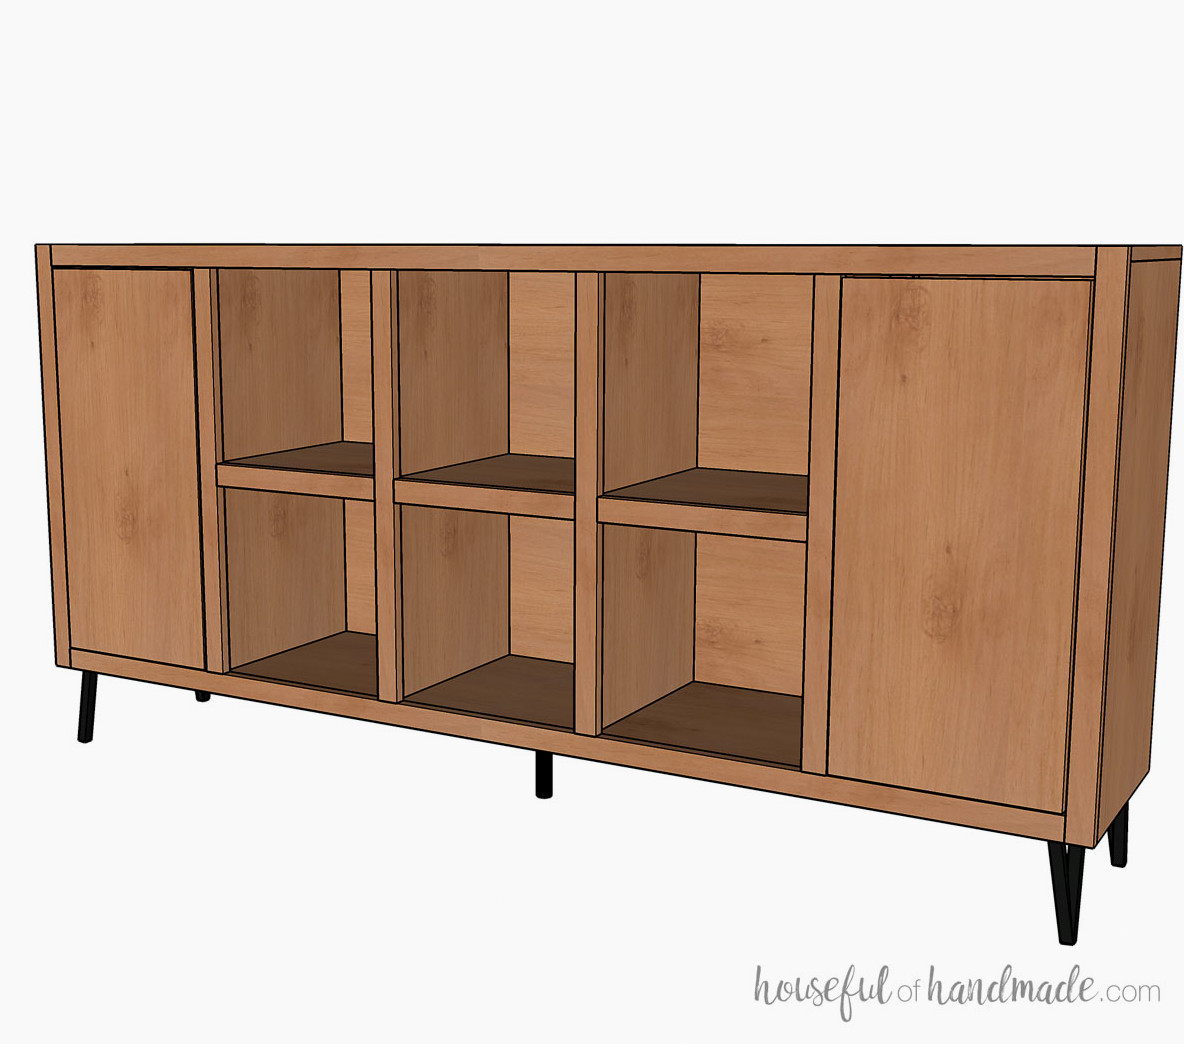
That’s it!
Remember to Get the Printable PDF Plans Here!
Premium plans feature:
- Suggested Tools
- Materials shopping list
- Simple-to-read cut list chart
- Cutting diagrams
- Detailed instructions with 3D renderings
- Useful resources
- BONUS: 3D SketchUp model
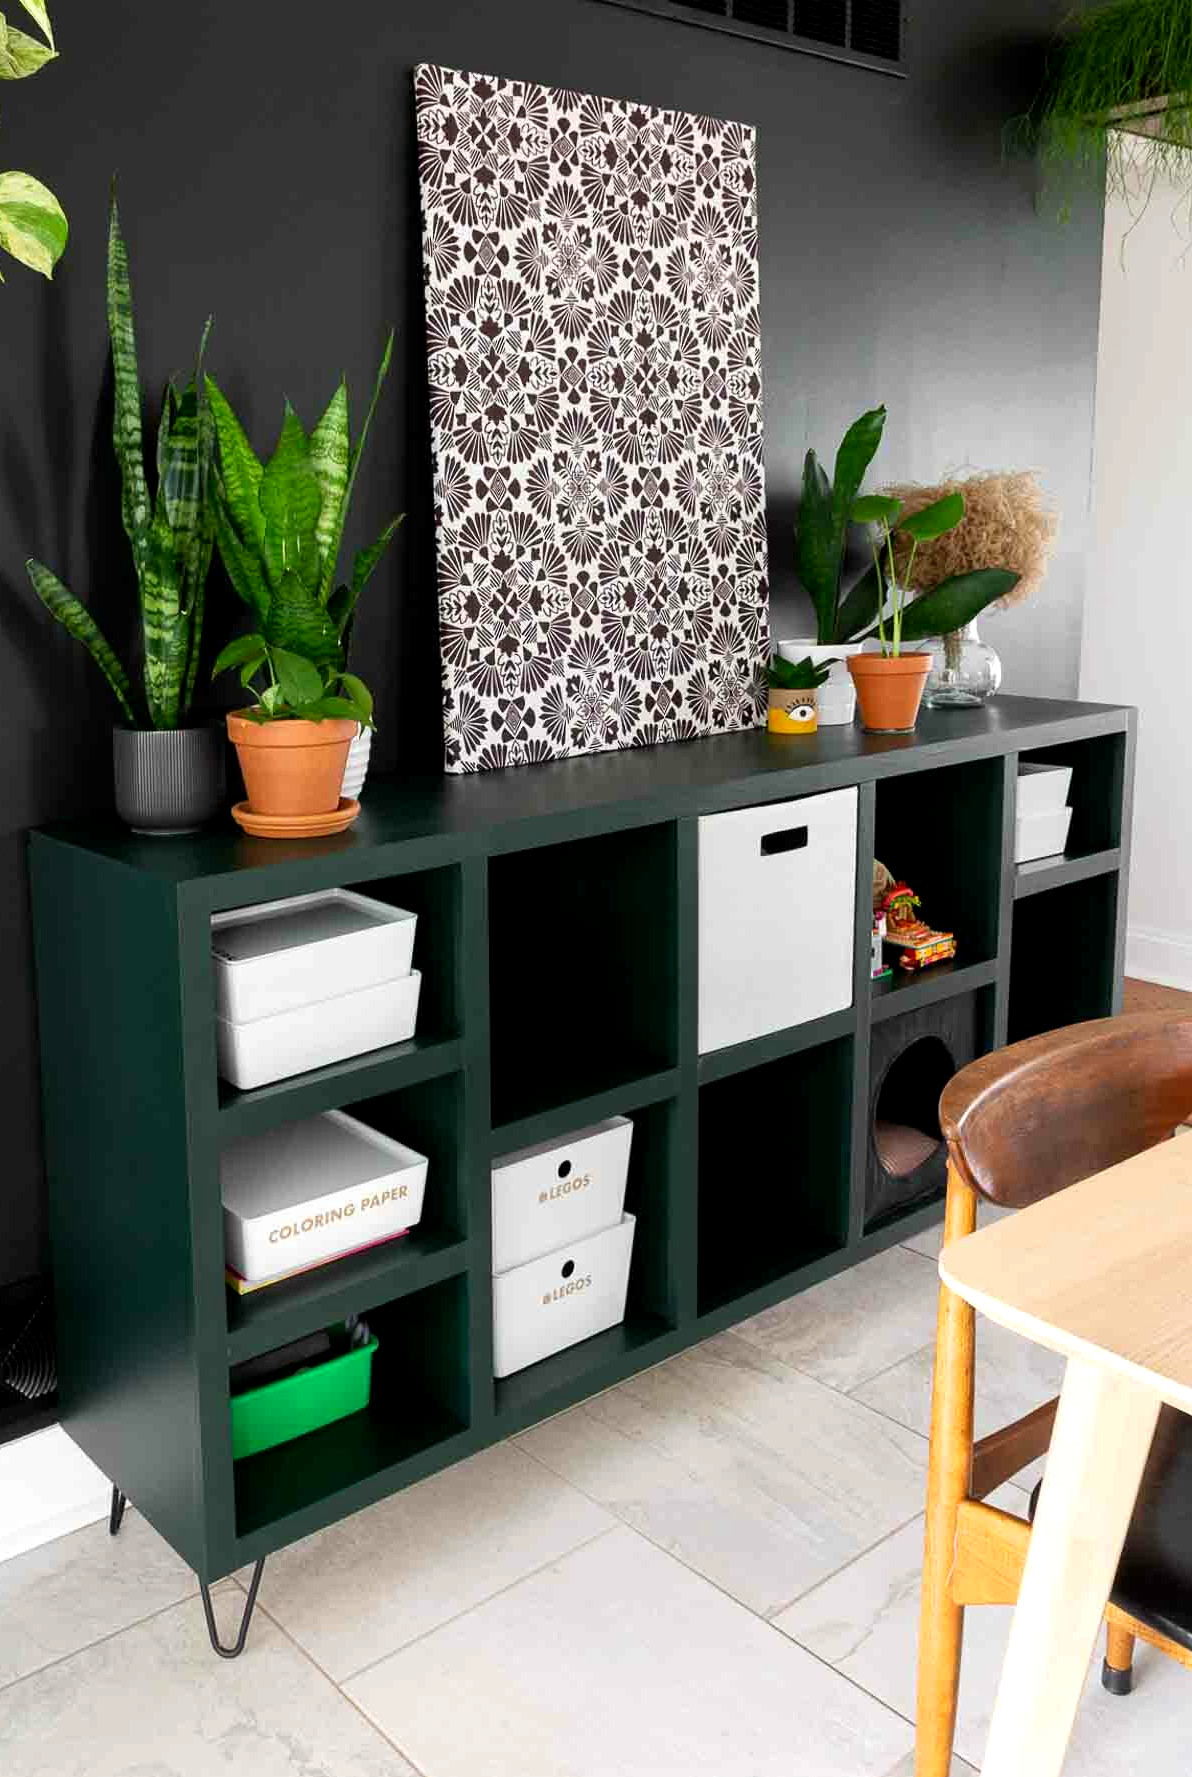
Make the most of all the extra storage you have brought into your home.
Brittany’s cube console came out beautifully. I especially love the dramatic shade she used to paint it. Just look at how much storage it provides.
Enjoy building!