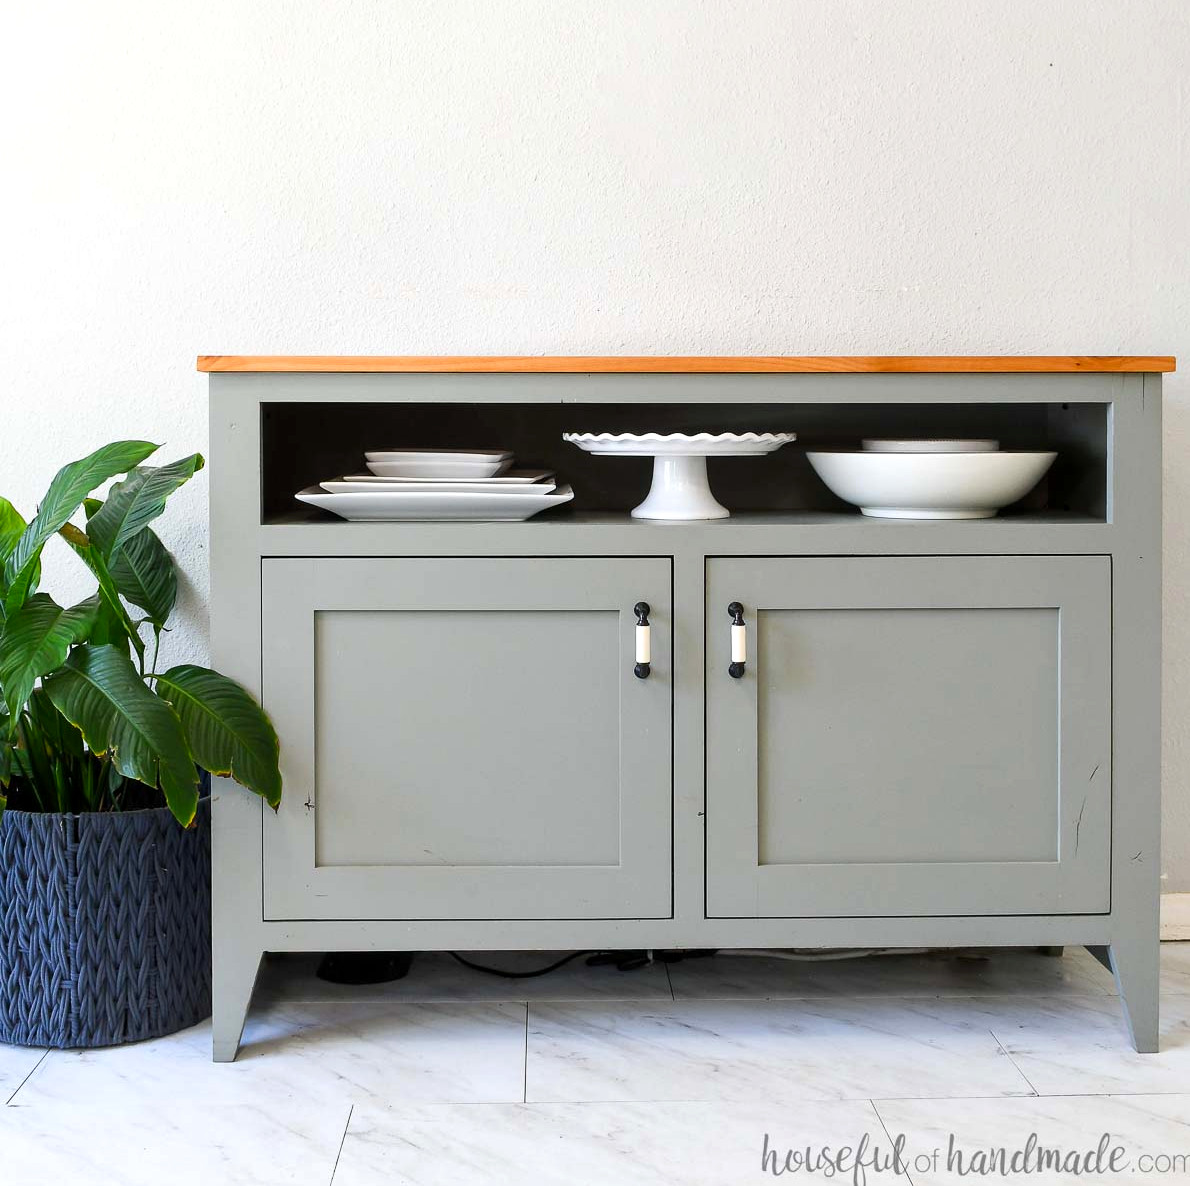
Create abundant storage and entertaining room in your home with a lovely buffet cabinet.

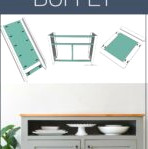
A sideboard, which is also known as a buffet, makes an excellent addition to any entertaining area.
Not only do these pieces provide extra storage, but their spacious tops are ideal for laying out food.
Sideboards are most often placed in dining rooms, although they can work in any area of the home. This is particularly useful if you enjoy hosting guests.
A buffet table can be practical in a living room, foyer, or patio, offering both storage and a convenient surface!
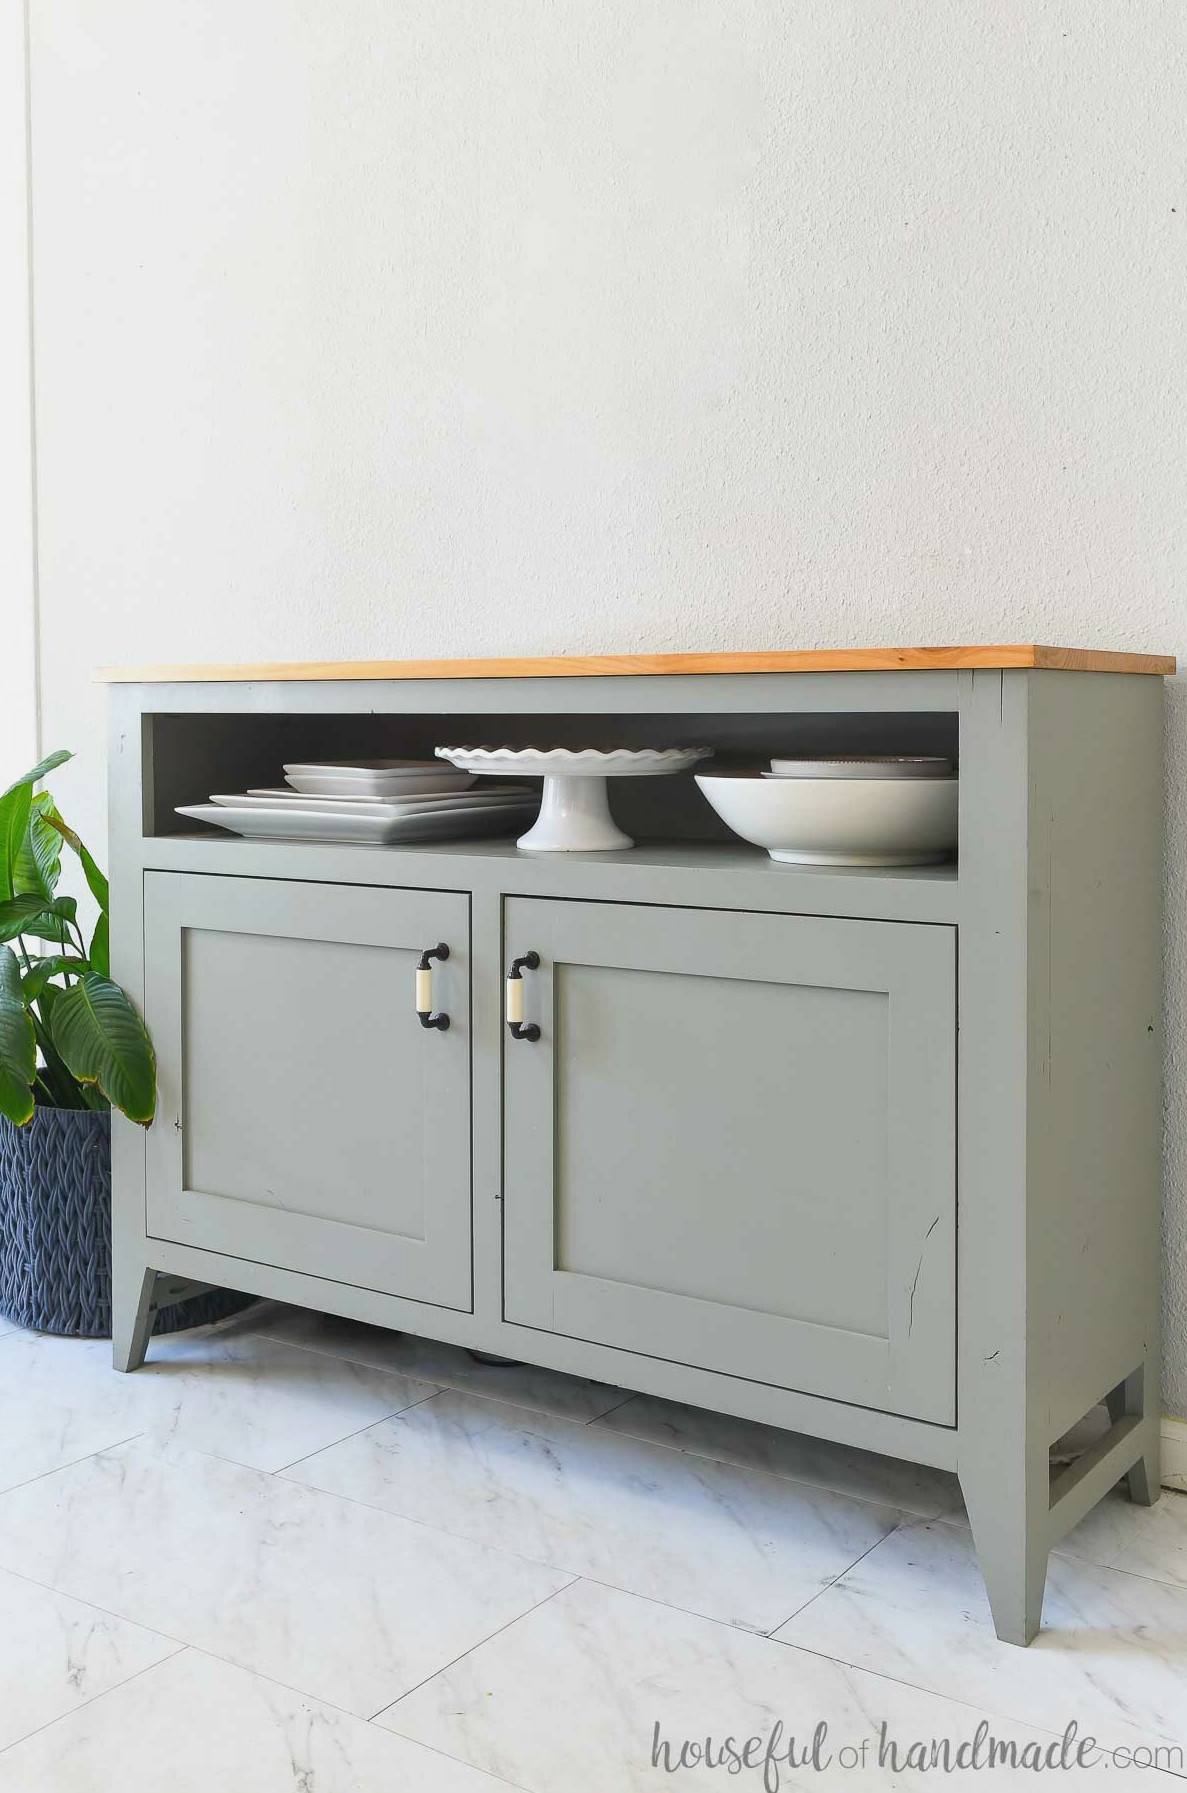
Storage for Serving Dishes
The dishes I use when serving food and entertaining are my favorite items to keep in a sideboard. These oversized pieces can be difficult to fit inside ordinary kitchen cabinets.
They are often too deep for wall cabinets, yet short enough to consume considerable room in deeper lower cabinets.
This sideboard buffet is the ideal cabinet for serving dishes. It is exactly right!
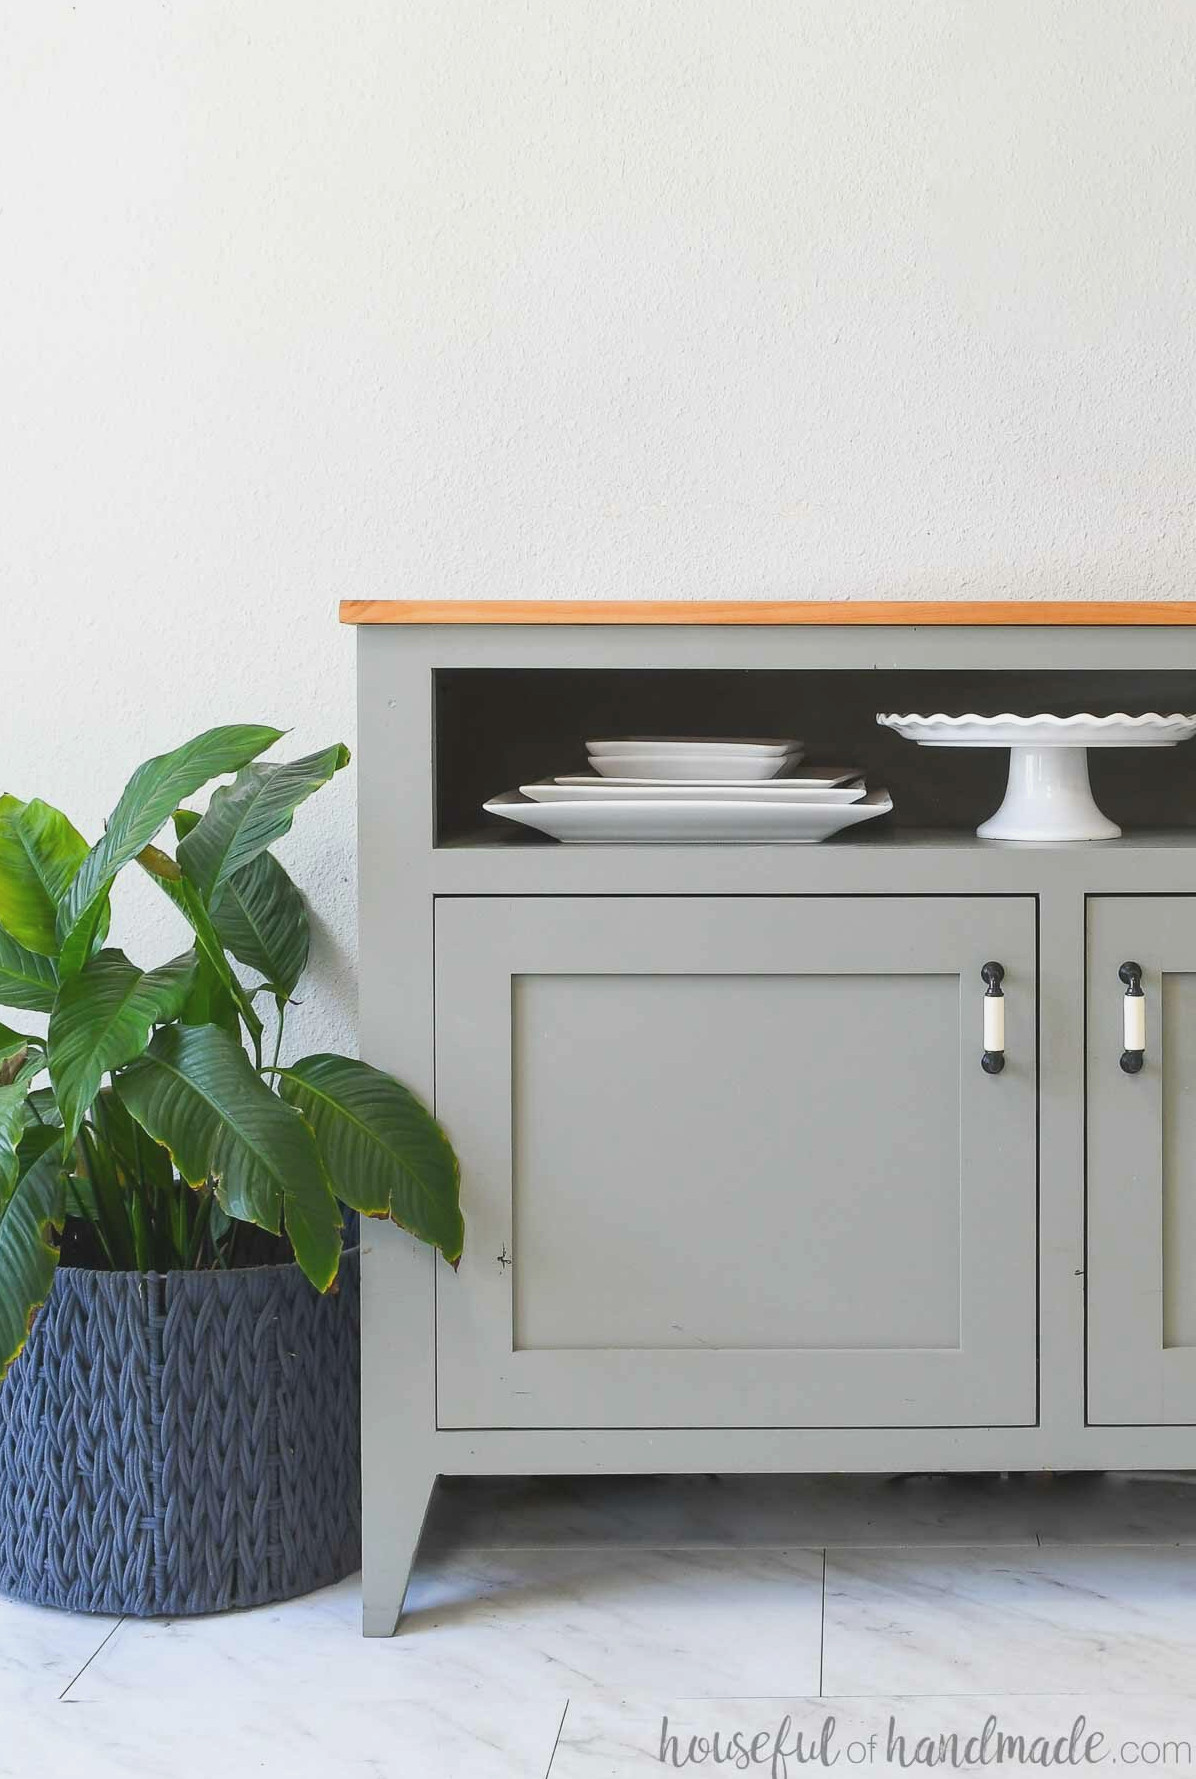
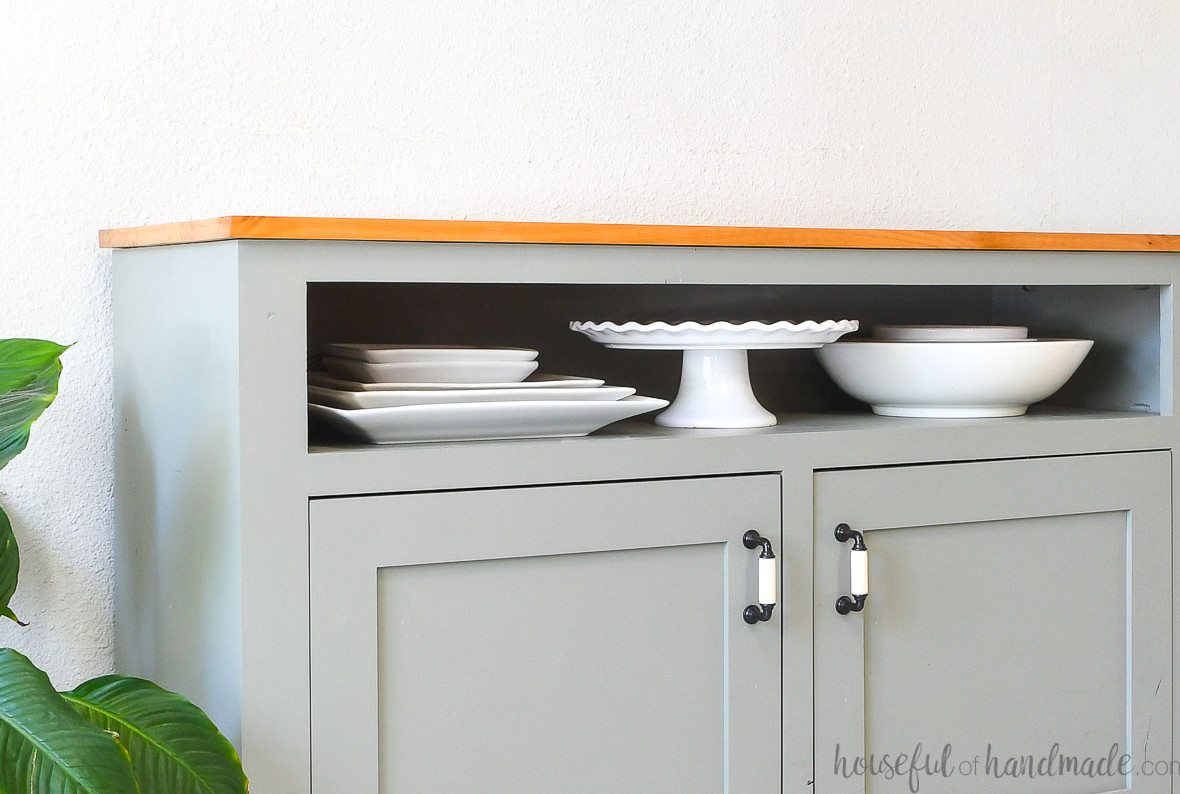
However, the standout feature of this sideboard is its attractive upper shelf, made to showcase and hold those dishes perfectly.
It makes excellent use of the available room by forming a shallow yet deep compartment for oversized platters. You will appreciate keeping them visible and within easy reach.
How to Build a Sideboard Buffet
Tools & Supplies
Overall Measurements
The completed sideboard measures 48″ wide, 16 1/2″ deep, and 34 3/4″ high.
The platter shelf measures 42″ wide and 6″ high, making it ideal for oversized serving dishes.
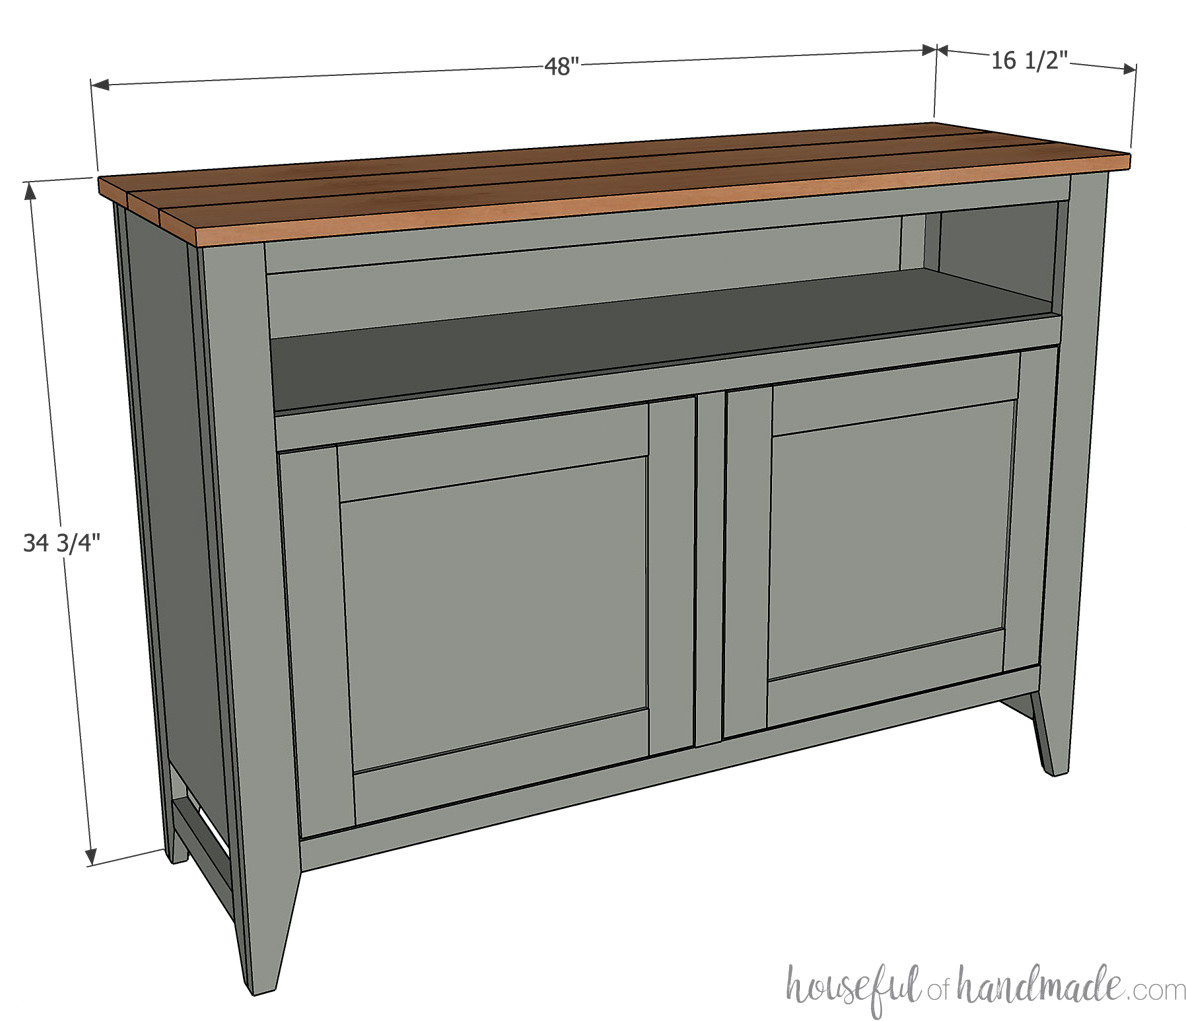
Want a bigger sideboard? Build plans are also available for this sideboard table with a 60″ width here.
Cutting Guide
Trim the components following the easy-to-follow cut chart included in the PDF build plans.
Download the Premium PDF Woodworking Plans
PDF plans contain- Clear Cut List, Shopping List, Suggested Tools, Detailed Instructions with 3D illustrations, & Useful Resources
BONUS- 3D SketchUp Model
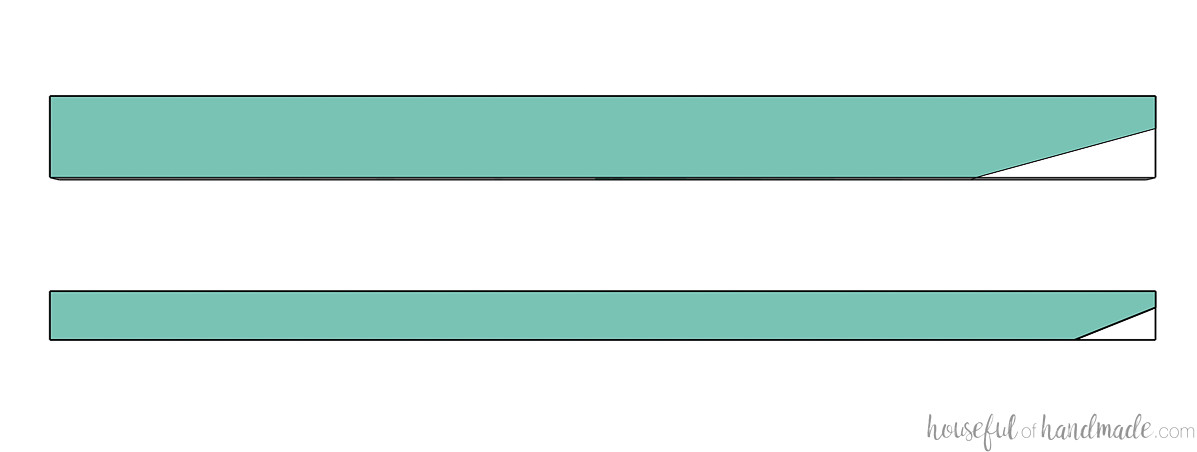
On the front leg components, mark 5 1/2″ upward from the bottom and 1 1/2″ inward from the lower edge, then draw a slanted line.
For the side leg components, measure 2 1/2″ upward from the bottom and 1″ inward from the lower edge, then draw an angled line.
Saw along these marks to taper the bottoms of the legs. Do this for all four leg pieces.
EXPERT TIP:
Use a basic tapered cutting jig with a table saw or a circular saw fitted with a guide track to make precise angled leg cuts.
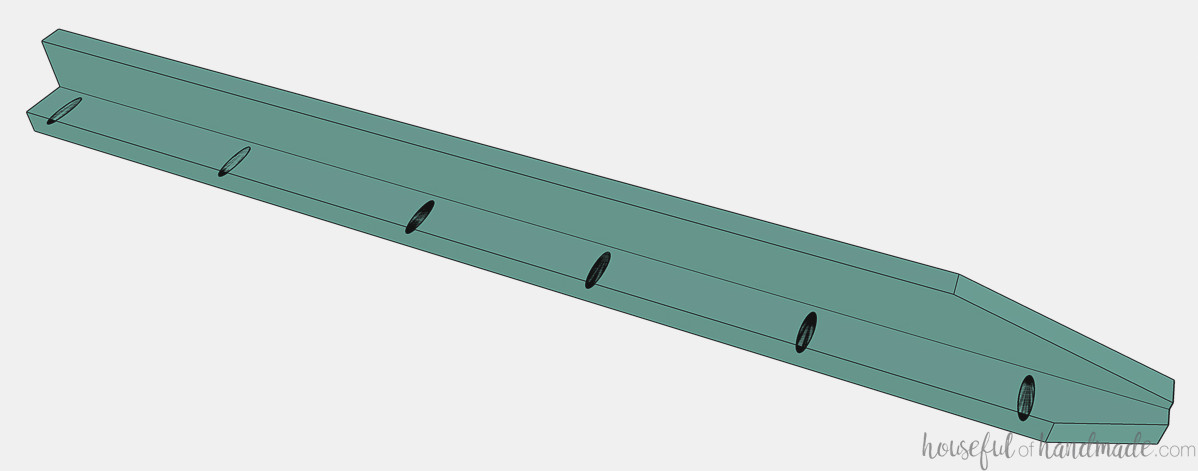
STEP 1- Assemble the sides
Form four L-shaped legs by joining one side component with one front component. Arrange them as mirror images and identify the inner faces of the side pieces.
Make pocket holes for 3/4″-thick material along the inside long edge of each side leg piece. Secure them to the front leg edges using wood glue and 1 1/4″ pocket-hole screws.
Do the same for all four legs. Be certain to mirror the legs so they align correctly during the later assembly.
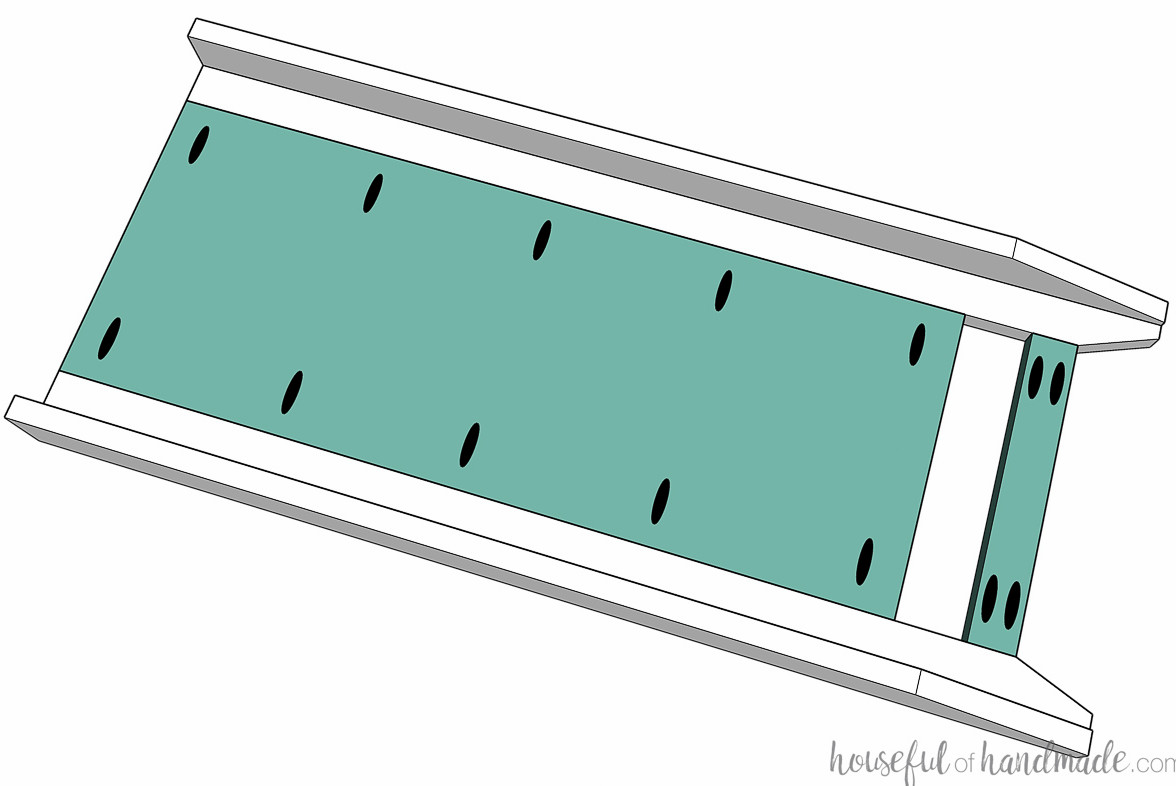
Prepare the 10 1/2″ x 27 3/4″ plywood side panels using the cutting diagram provided in the plans.
Create pocket holes for 3/4″-thick material at both ends of the plywood side panels and the side accent pieces.
Fit the plywood panel between two completed legs, keeping it even with the top. Install the side accent pieces so they sit level with the topof the leg’s angle.
Fasten using wood adhesive and 1 1/4″ pocket hole screws.
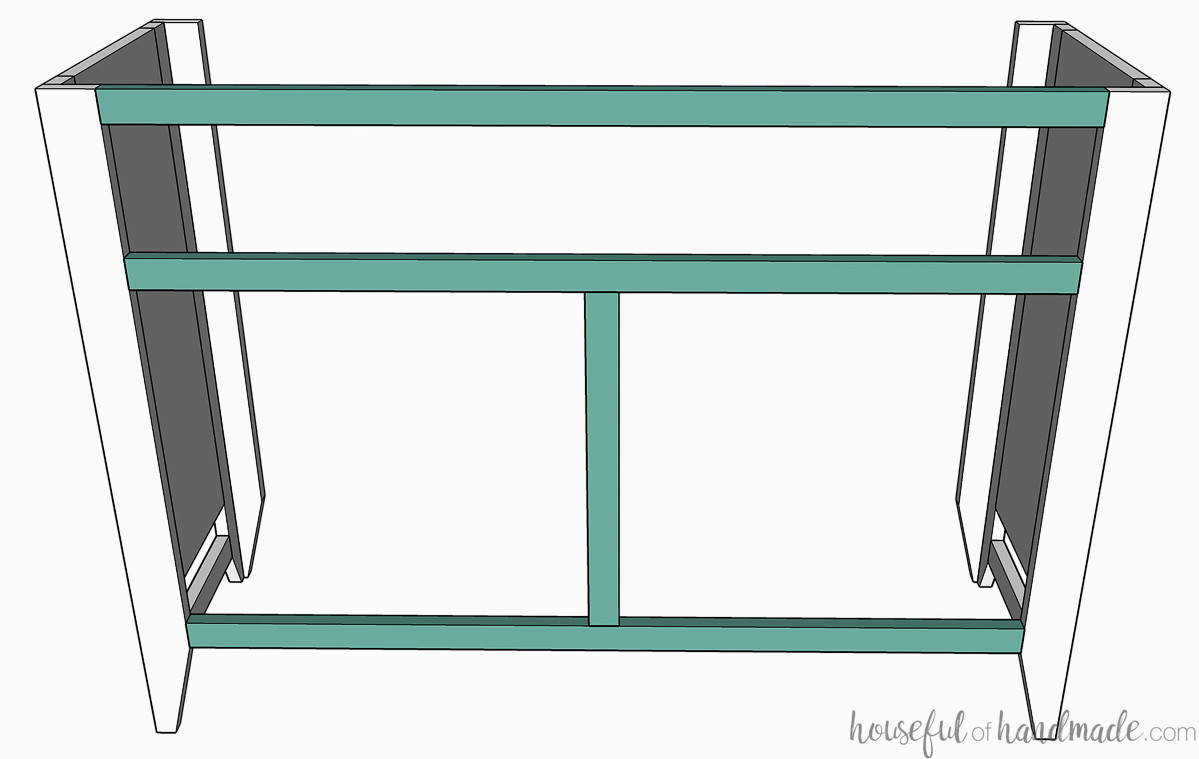
STEP 2- Join the sides
Make pocket holes sized for 3/4″ material at both ends of the face frame components.
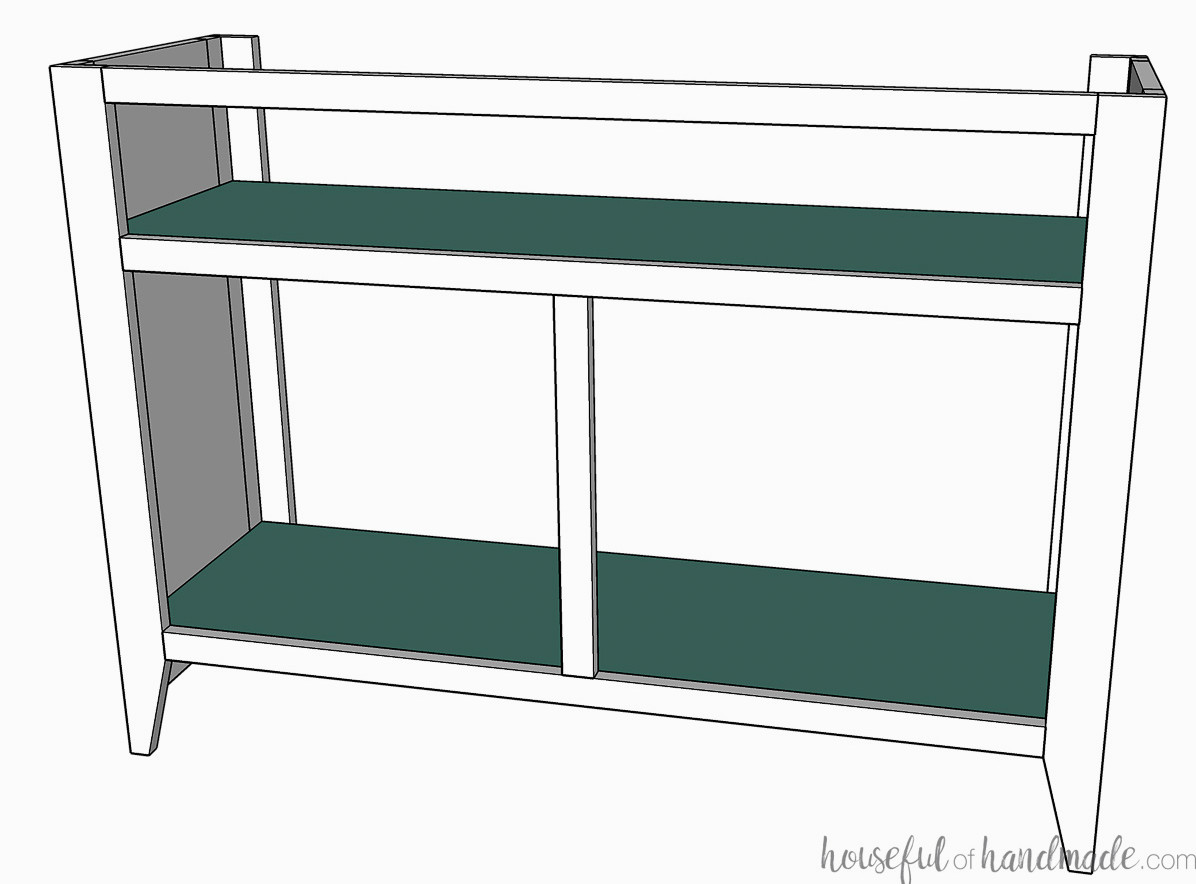
Position the rails with the upper one even with the leg tops, the center rail 6″ beneath it, and the lower rail level with the upper end of the taper on the leg front.
Trim and install the face frame stile so it sits centered within the sideboard between the lower and center rails.
Cut the buffet bottom and display shelf so they fit between the sides and front/back pieces, following the plywood cutting diagram in the PDF plans.
Create pocket holes for 3/4″ thick material along every side of the buffet shelf bottoms.
Install the buffet bottom so its surface aligns with the top of the lower face frame rail. Position the display shelf bottom flush with the upper edge of the center rail.
Fasten everything to the sides and face frame with wood glue and 1 1/4″ pocket hole screws.
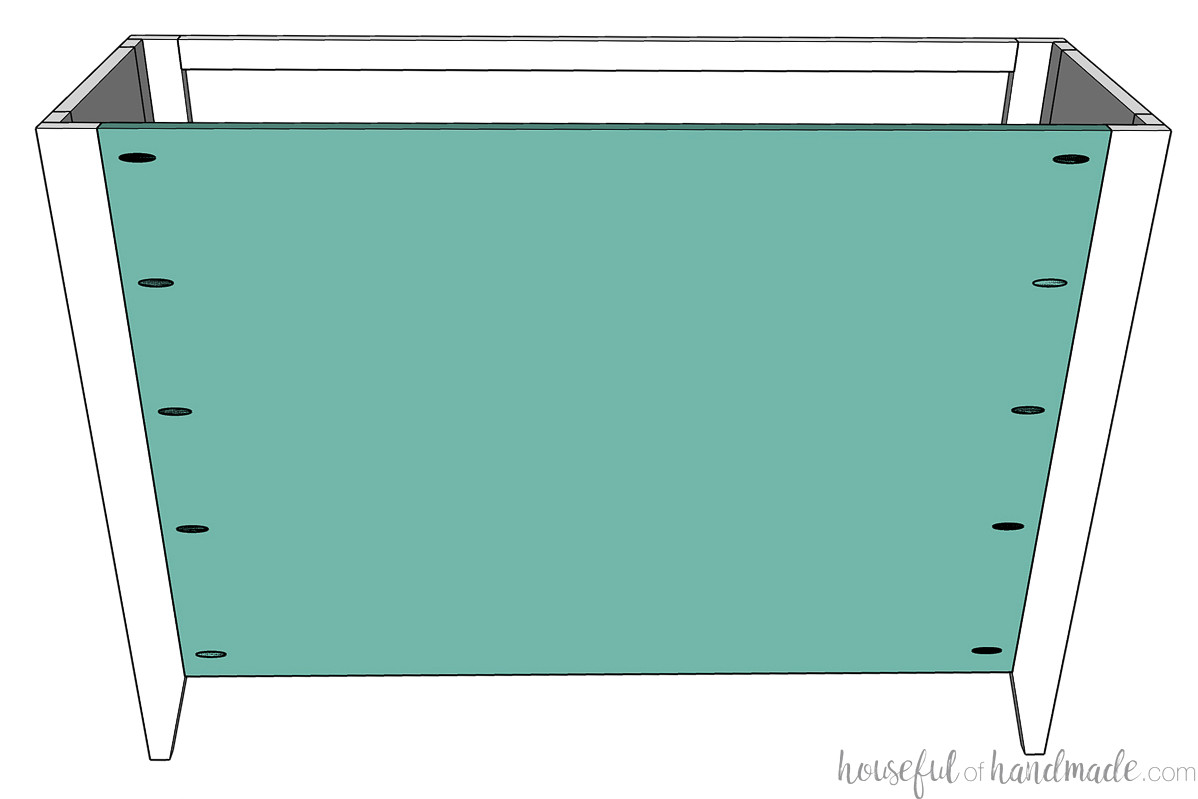
Cut the sideboard back piece from the plywood to the required size.
Make pocket holes along both sides of the back panel. Secure it to the rear legs with wood glue and 1 1/4″ pocket hole screws.
Next, fasten the bottom sections to the back panel using 1 1/4″ pocket hole screws in the holes drilled earlier.
STEP 3- Construct and install the top
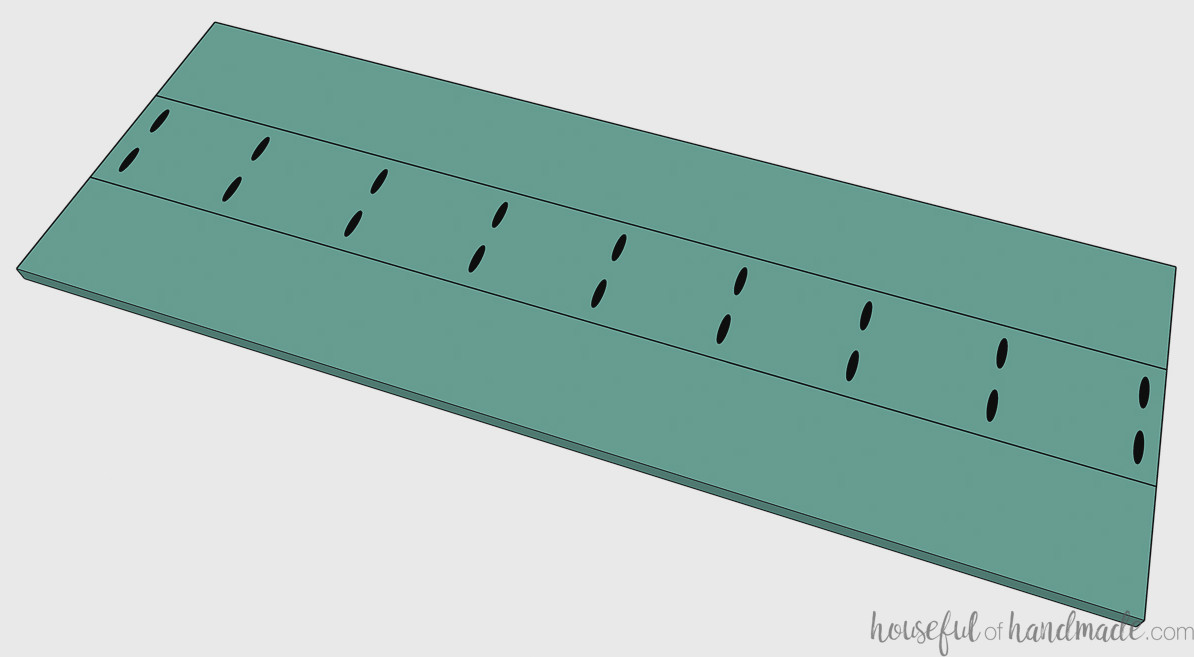
From the 1×6 boards, cut three 48″ sections for the sideboard top.
Arrange the boards so they join attractively and the wood grain has a pleasing appearance.
EXPERT TIP:
Examine the board ends to identify the growth-ring direction. Switch the ring direction from board to board to help keep the top from cupping as time passes.
Set pocket holes for 3/4″ thick material into both sides of the center board, spacing them every 5-6 inches. Fasten the remaining top boards on each side with wood glue and 1 1/4″ pocket hole screws.
Apply face clamps to keep the tops of all boards level while fastening them.
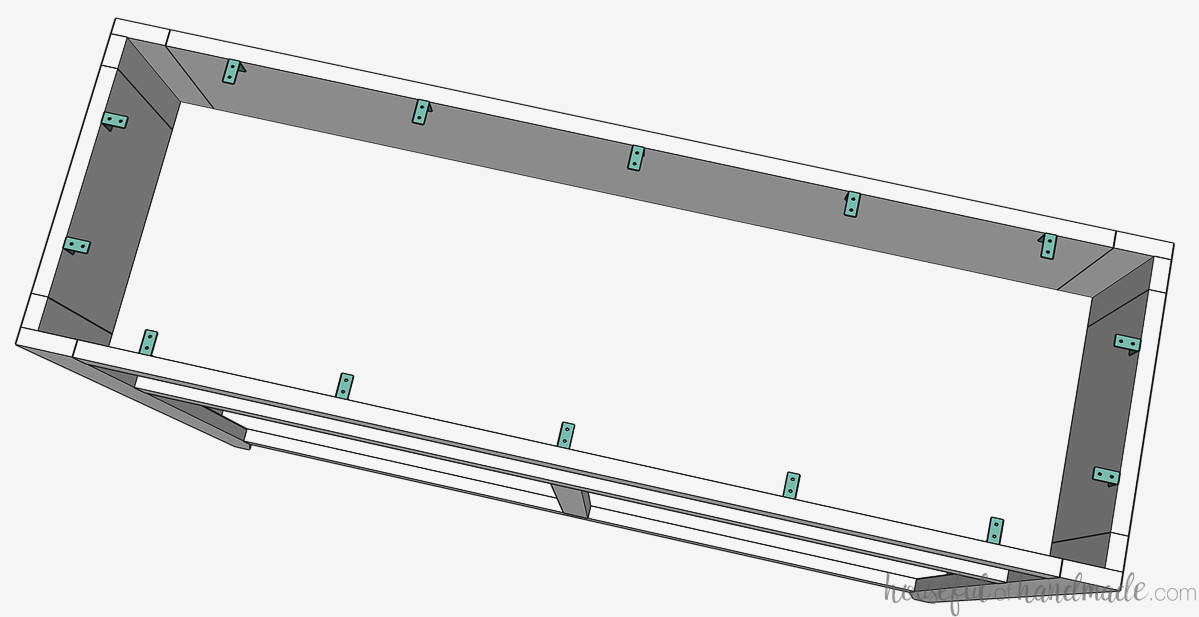
For mounting the buffet top, use 1″ corner braces. Fasten the braces around the perimeter inside the display shelf with 5/8″ wood screws.
Position the assembled top in the center of the sideboard. Secure it from below into the corner braces with 5/8″ screws.
Because the opening is narrow (just 6″), a right-angle drill or drill attachment will be necessary to drive the screws.
As another option, you can attach the top with figure 8 fasteners, as I did on this DIY dining table project.
STEP 4- Construct the doors
Use a router to cut a 1/4″ x 1/4″ channel along one side of the rails.
On the stiles, rout a 1/4″ x 1/4″ channel beginning 2 1/4″ from one edge and ending 2 1/4″ from the opposite edge.
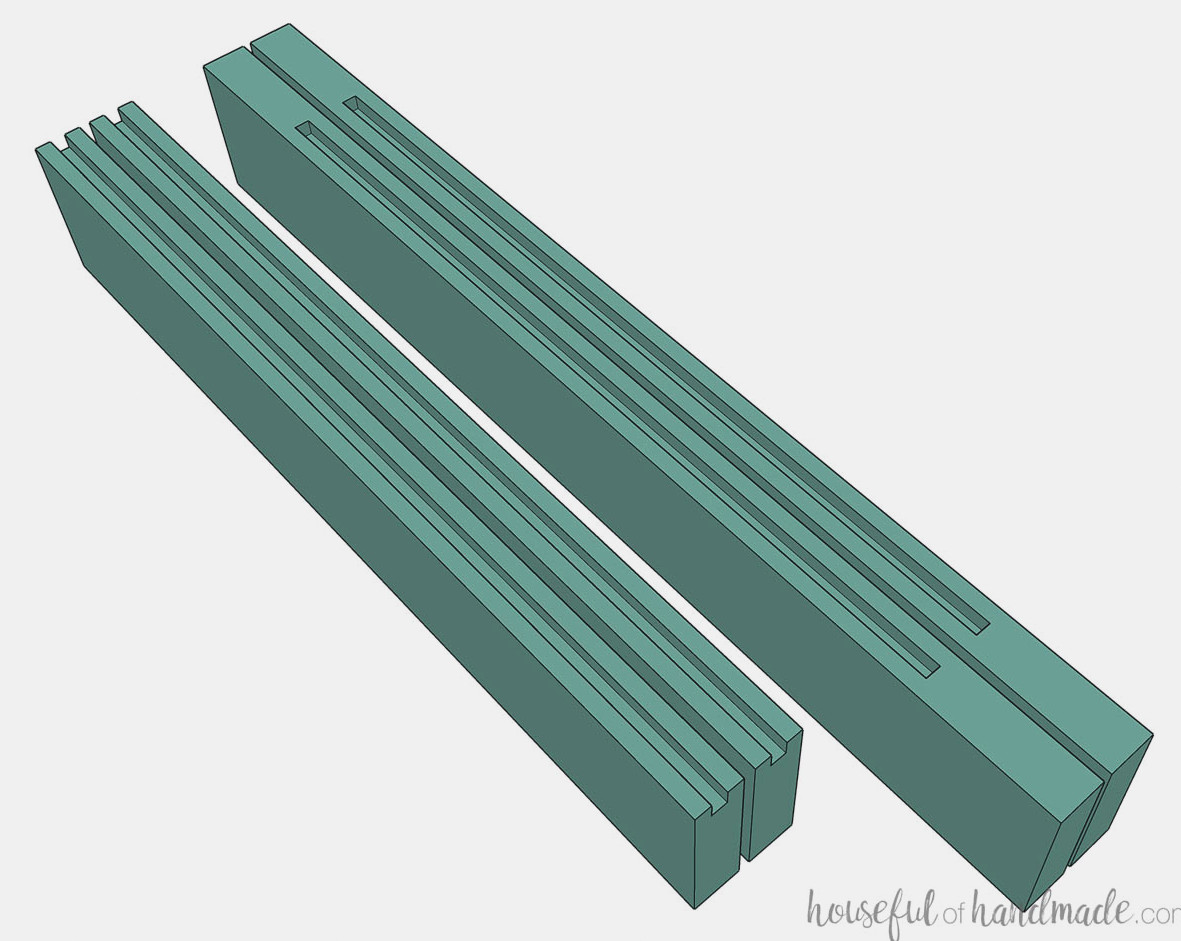
Drill pocket holes sized for 3/4″ thick material into the ends of the door rails.
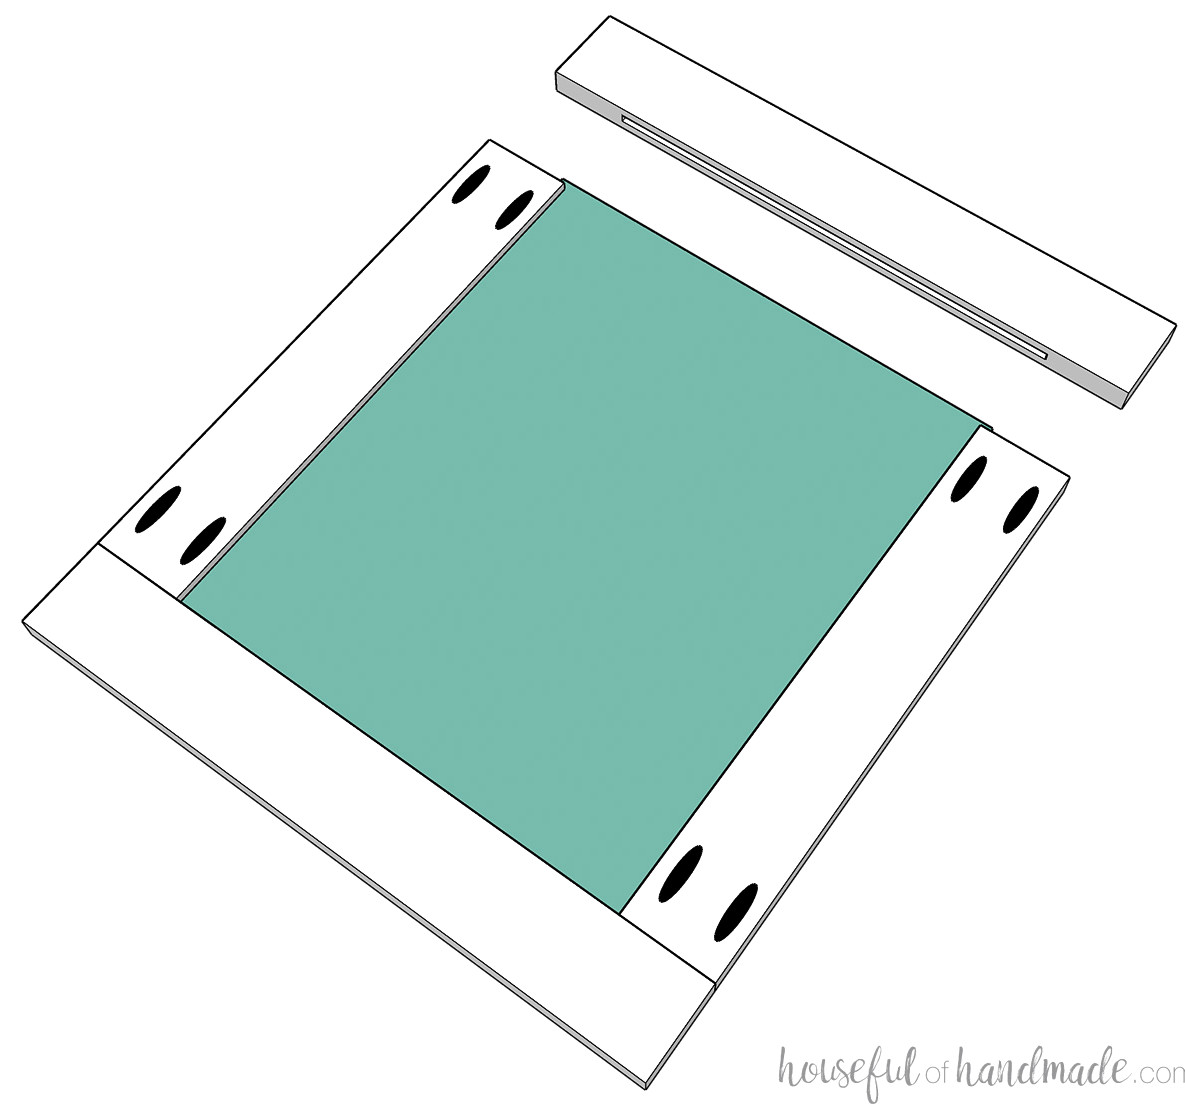
Using wood glue and 1 1/4″ pocket hole screws, fasten both rails to one door stile, ensuring the routed channel remains centered and the board exteriors are aligned.
EXPERT TIP:
Use face frame clamps to hold the door components flat while driving the screws. This keeps the channel properly aligned and minimizes sanding.
Insert the 1/4″ thick door panel into the channel. Attach the remaining stile to the end with wood glue and pocket hole screws.
STEP 5- Sand & Complete
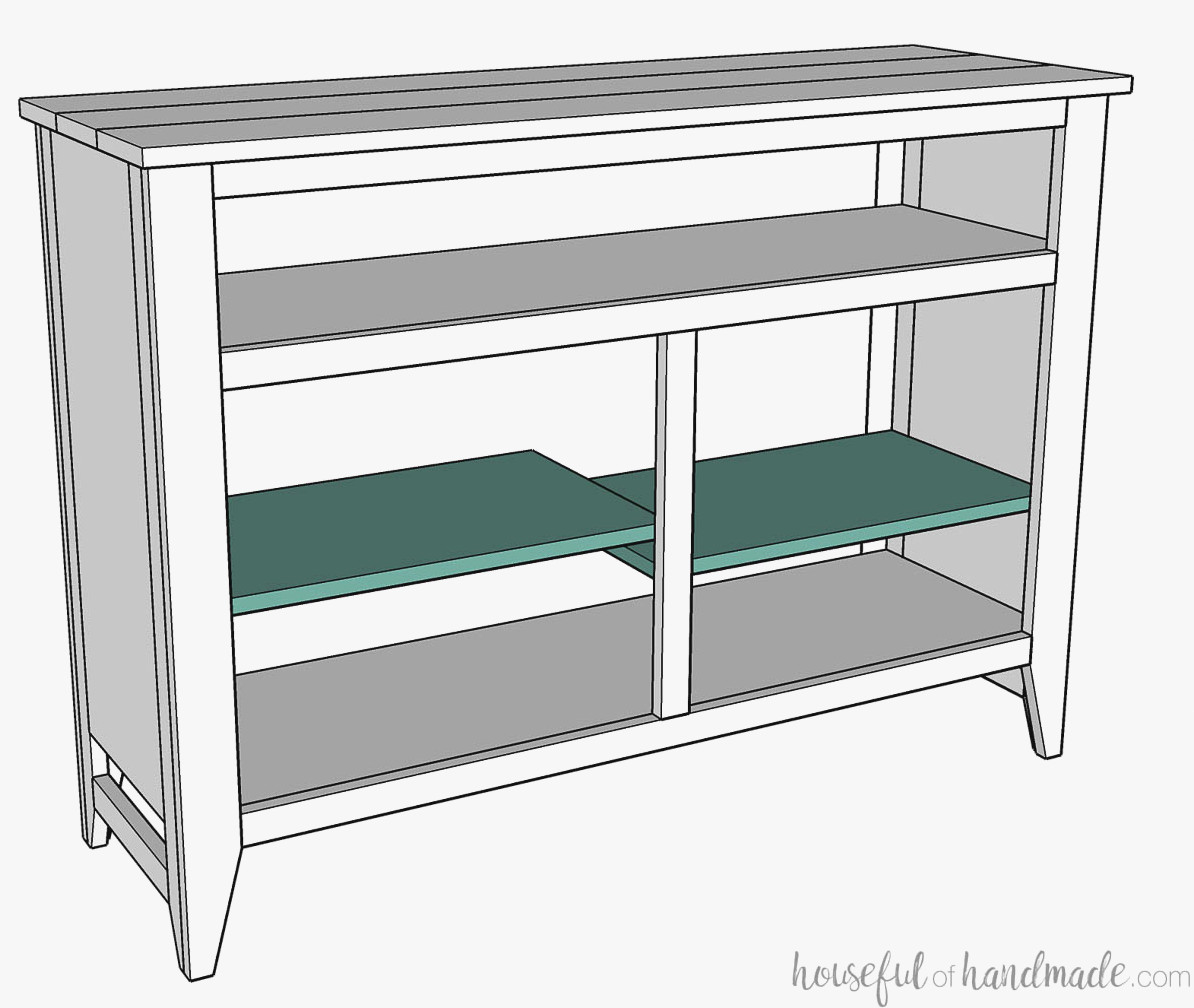
To include shelves inside your sideboard, make shelf-pin holes in the sides, the center back, and the middle face frame stile.
Because the buffet contains a broad open section with a center frame post, a single wide shelf cannot be installed. Instead, use two separate shelves, one on each side.
Cut the shelves slightly more than 1/2″ wider than the opening so they can rest across the center shelf-pin holes.
When installing the shelves, offset them because both use the shared center shelf-pin holes.
Plug the pocket holes if preferred. Sand, stain, and/or paint the buffet.
For my sideboard buffet, I used alder wood. I left the top unstained and protected it with 4 coats of wipe-on polyurethane. The base has a matte Behr Incognito paint finish.
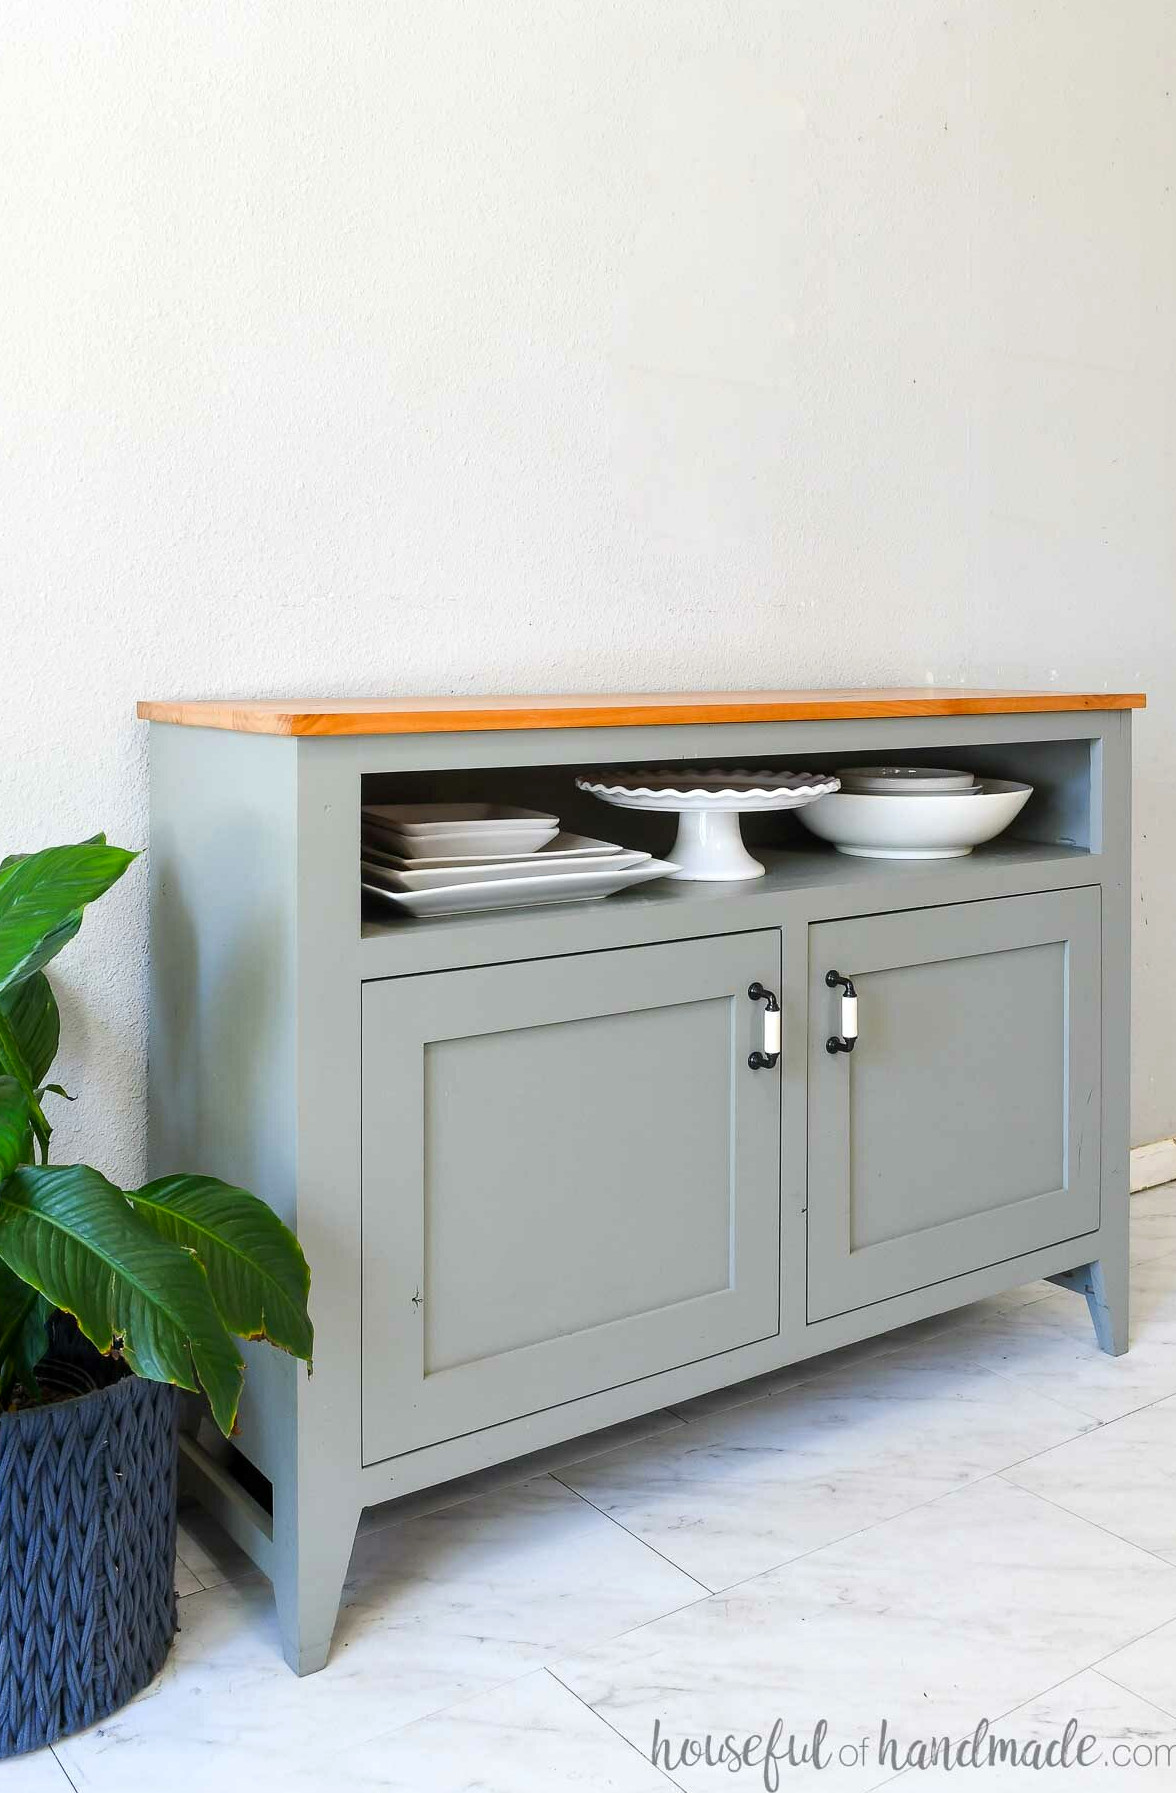
Mount the buffet doors using inset face-frame cabinet hinges. Finish by installing the door knob.
That’s it!
Don’t Forget to Get the Printable PDF Plans Here!
Premium plans feature:
- Suggested Tools
- Materials list
- Readable cut list chart
- Cutting diagrams
- Detailed instructions with 3D renderings
- Useful resources
- BONUS: 3D SketchUp model
You are now ready to fill your sideboard with all of your lovely serving dishes.
It seems party time!
Enjoy building!