There’s a unique charm to getting a handmade card. Not a factory-made one picked up at the checkout line, and not even an elegant boutique card that cost $8 and came tucked inside tissue paper.
A handmade card communicates something else. It tells you that someone paused, thought about you, and created something by hand especially for you. That doesn’t happen very often these days, and I believe that’s precisely why it feels so meaningful when it does.
The best part? You don’t have to be artistic. You don’t need costly materials. And you certainly don’t have to pay boutique prices to make something that appears as though you did. A handful of pressed flowers, some distinctive paper, a stamp or two, and you’ve got something truly lovely that no store-bought card could duplicate.
At a Glance
What: 5 DIY card tutorials featuring pressed flowers, botanical details, and basic materials. Skill level: Suitable for beginners. Time: 20–30 minutes for each card.
Essential supplies: White watercolor cards, brown natural cardstock, pressed flowers, Mod Podge, petite alphabet stamps, hot glue. Flowers included: Amazon pressed flower collection, fresh pansies, vibrant baby’s breath
Handmade Cards, 5 Styles: Pressed Flowers, Flower Pounding & More
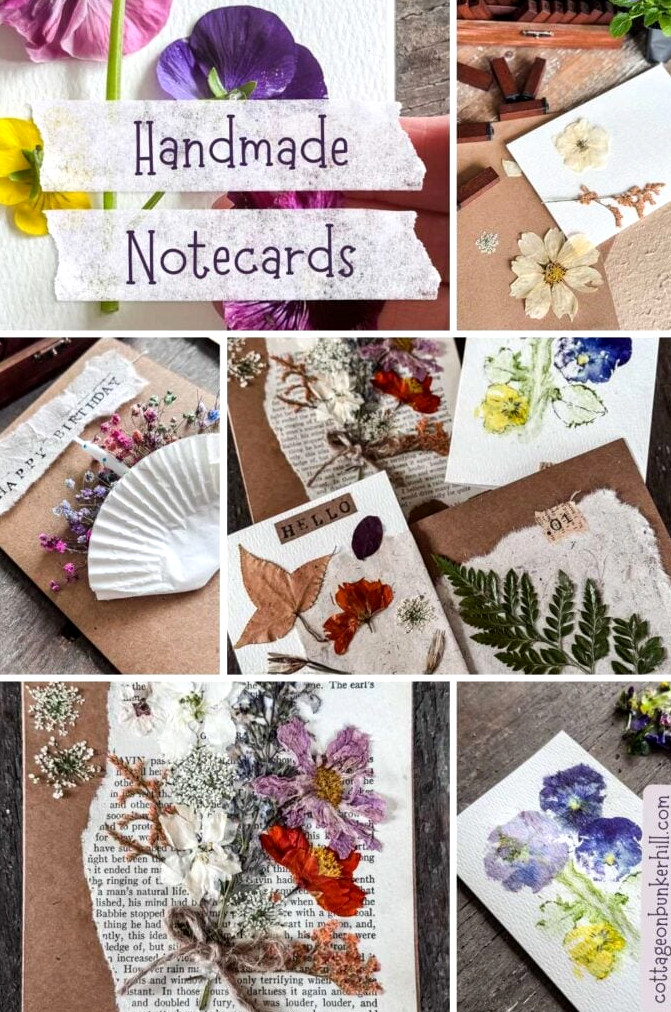
To be truthful, I already have a notecard tutorial. Pressed flower notecards have remained among my favorite projects since I first posted them, and I continue to make them often. Recently, though, I’ve felt inspired to take the concept a bit further and find out how many entirely different styles I could produce from that same straightforward idea.
So yesterday I spread out a stack of cards, a selection of pressed flowers, a few household craft supplies, and a $3.99 bunch of baby’s breath from Trader Joe’s. Then I created five cards that appear to have been made by five entirely different crafters.
Before we begin, there’s one detail I want to share: for most of these cards, I used a ready-made pressed flower collection from Amazon. I realize that not everyone owns a flower press or has a cutting garden, so I wanted these projects to be easy for anyone to recreate. I checked the quality before suggesting them, and I’m pleased to report that they’re beautiful: delicate, carefully pressed, and filled with a wonderful variety of botanicals. I’ll include a link below. For the book page card, I did use one flower I had pressed myself, simply because I needed a longer stem than the set provided.
There’s one other point, and it matters! I have to admit something about the stamping. I’m completely unable to stamp a straight line. Left-handed, endlessly hopeful, and reliably crooked. I’ve tested pencil marks, rulers, and pure determination. Nothing helps. So I decided to try hand-stamping a card before ruining it!
Instead, I stamped the greeting onto a narrow piece of contrasting paper and attached it to the card. A brown strip went on the white cards, while a white strip went on the brown cards. Honestly? I think the result is nicer than stamping directly onto the card. It also spared me from ruining at least three cards. You’re welcome.
Welcome! I’m Jennifer, and I’ve always felt that nature provides the loveliest art materials. For many years, I’ve preserved New England’s flowers and greenery by pressing, drying, and crafting with them. Let me show you how to preserve a small piece of the season and bring it inside~simply and beautifully.
Supplies You’ll Need For These Cards
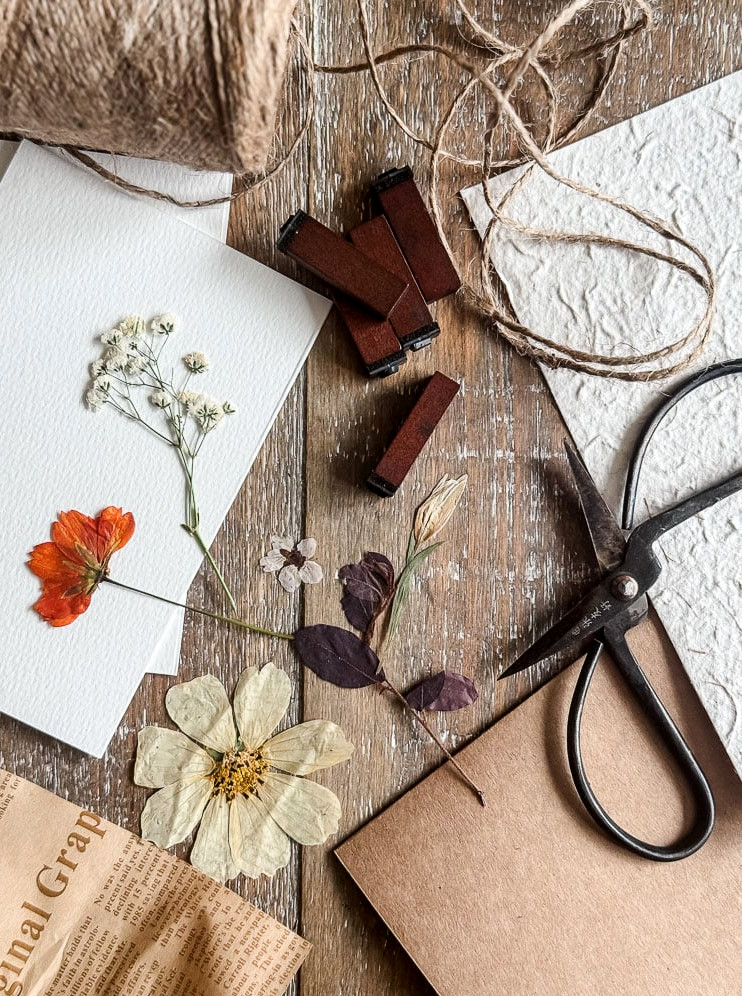
I’ve put together one complete supply list for all 5 card designs I’ll be showing you how to make. Each individual tutorial will outline the exact materials required for that card.
Materials For The 5 DIY Cards
- Cards:
- Flowers & Botanical Materials:
- Pressed flower collection from Amazon
- Fresh, colorful baby’s breath (I picked up a bunch at Trader Joe’s for $3.99)
- Your personal pressed flowers, if available, particularly helpful when longer stems are needed
- Glues & Adhesives:
- Paper Details:
- Stamping Supplies:
- Additional Items:
- Cupcake wrapper
- Birthday taper
- Scissors
- Jute cord
- Hammer
Card #1: Junk Journal Note Card
If you’ve ever wandered into a junk journal spiral on Pinterest,this card will seem instantly recognizable. If not, prepare to discover your next creative fixation! Nothing flashy or overly complicated. Instead, it combines layers of texture and botanical accents in a way that appears far more time-consuming than it actually was. If you’ve ever gotten lost in a junk journal spiral on Pinterest, this card will seem instantly recognizable. If not, get ready to discover your next creative fixation.
The foundation is a white watercolor card, with the design assembled in layers: first, a torn piece of natural paper, followed by pressed flowers and leaves arranged above it, plus a narrow torn strip of brown newsprint (originally used to package craft supplies I had delivered), and completed with a petite brown paper strip stamped with HELLO.
Step 1: Tear The Handmade Paper
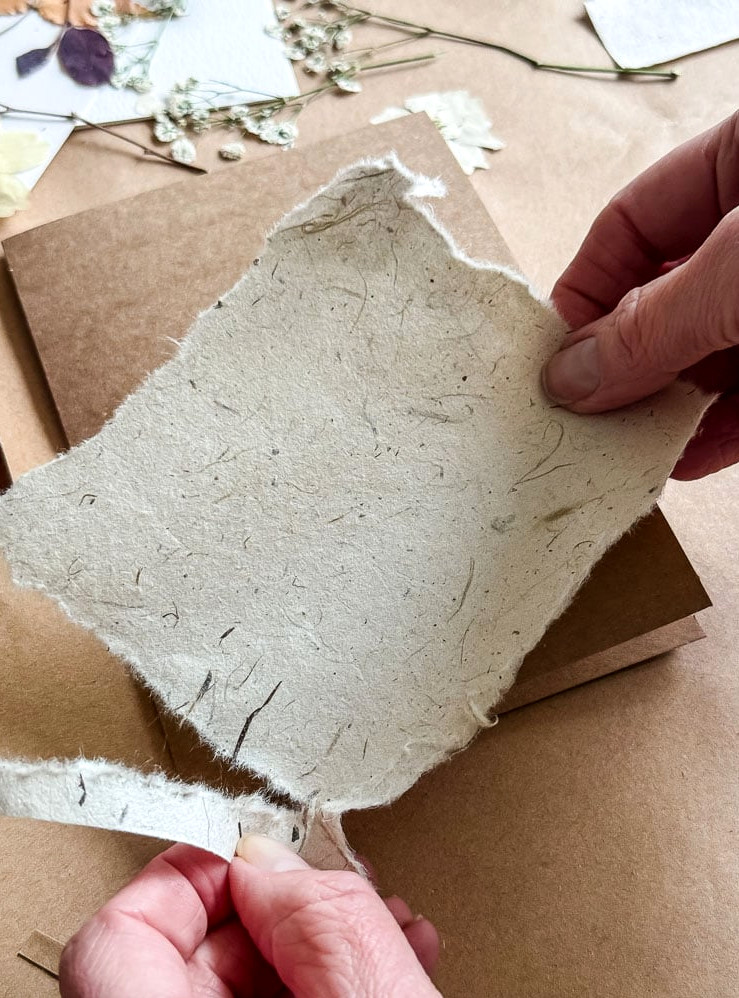
Tear off a piece of handmade paper. Avoid cutting it—the ragged edge contributes to the overall style. Place it along the card’s open side or on the opposite side (whichever you prefer!) and attach it using a light coat of Mod Podge. Carefully smooth it into place, then leave it to dry.
I attached a narrow piece of newsprint along the card’s spine.
Step 2: Arrange Your Pressed Flowers
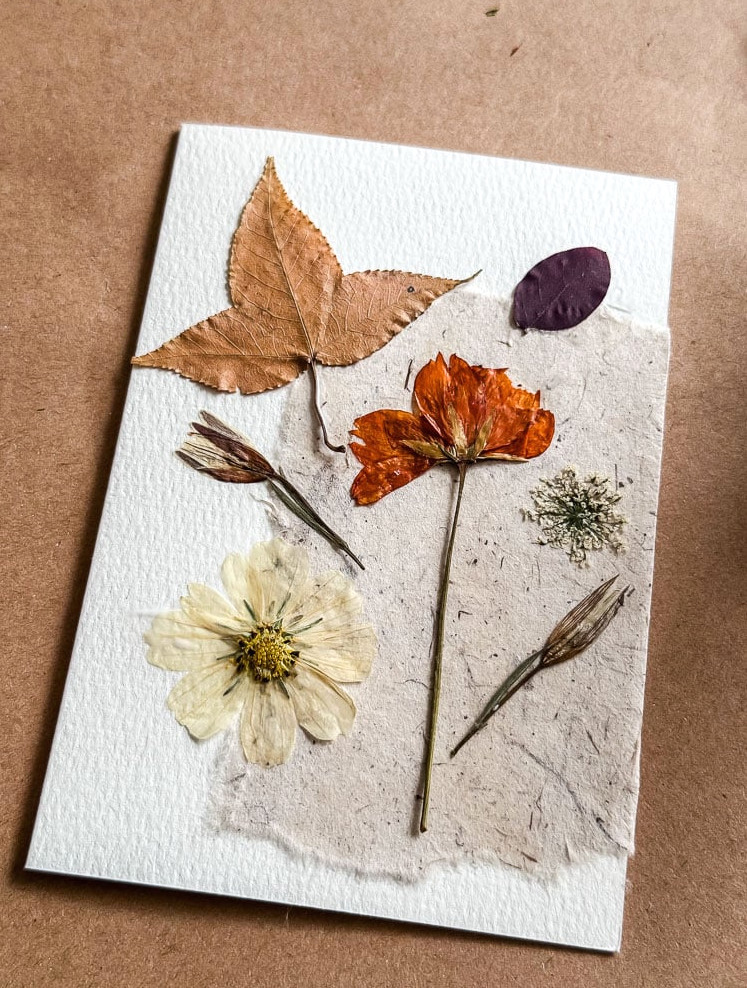
Experiment with the layout before making anything permanent. Set the flowers on the card and shift them around until their positioning looks right to you.
It looks particularly attractive when the flowers overlap the newsprint and the card’s edge. After settling on the arrangement, apply a thin coat of Mod Podge to the back of each flower and gently press it into place.
Whenever the flowers needed additional adhesive to remain flat, I softly brushed Mod Podge around their edges.
Step 3: Add Your Greeting.
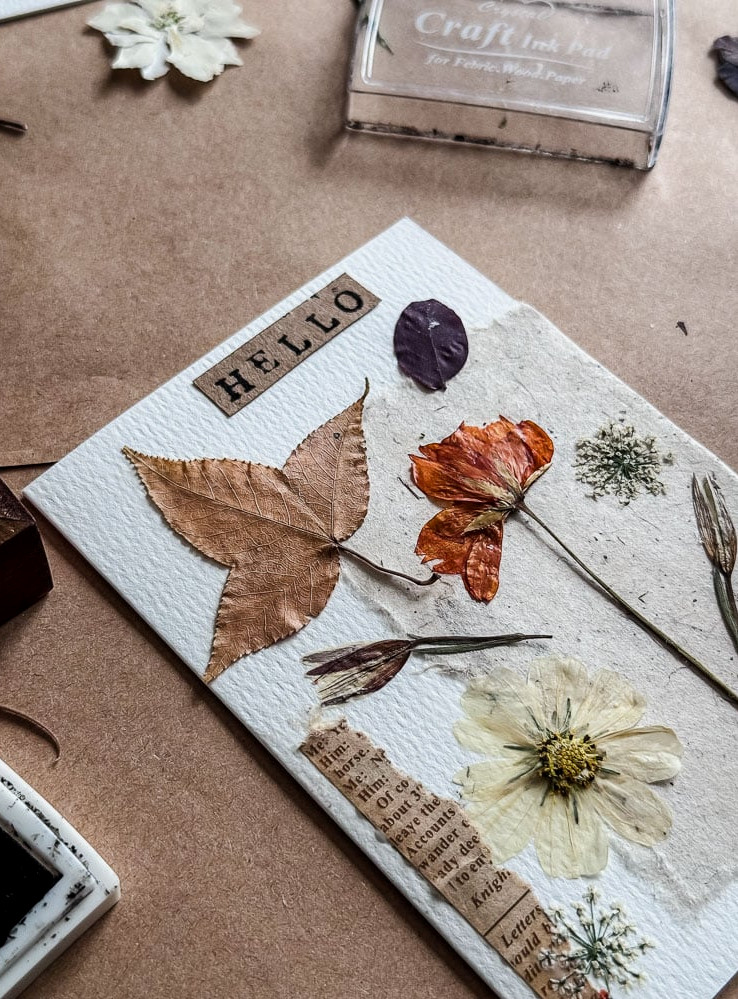
Stamp HELLO onto a narrow piece of brown paper and allow it to dry fully. Cut down the edges if necessary, then attach it to the card using Mod Podge or a glue stick. I positioned mine along the card’s upper edge.
Another option is to write a message by hand or stamp one straight onto the card (remember when I mentioned earlier that I’m terrible at both of those things!!)
Completed Notecard
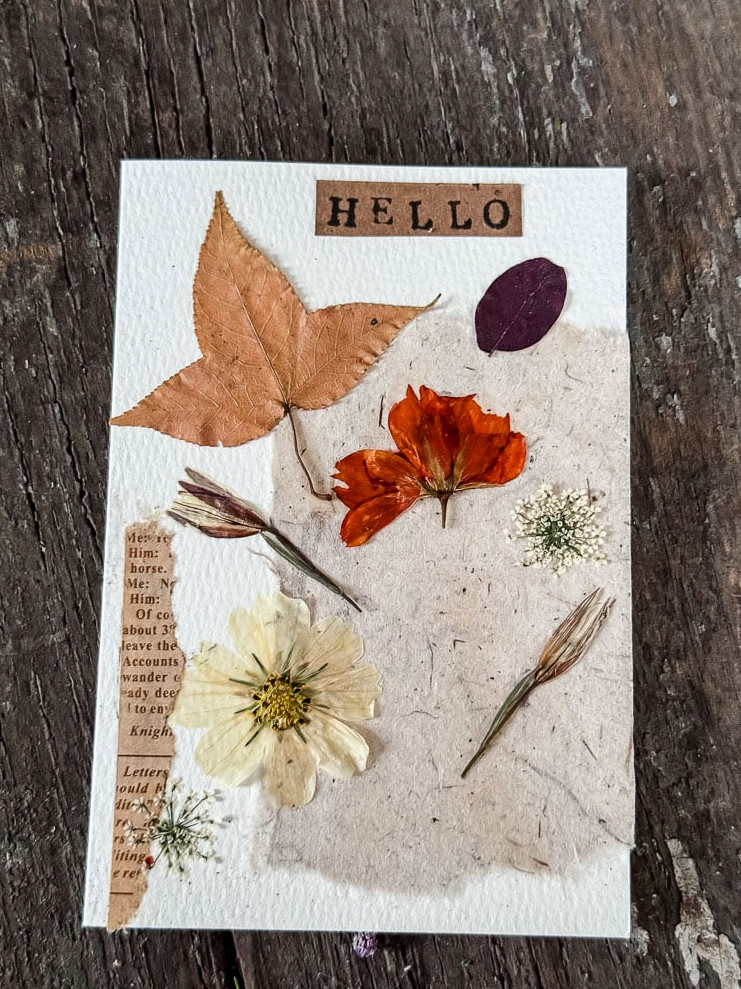
The completed card has such a charming, natural feel. The torn paper, the fragile pressed flowers, and that tiny HELLO emerging from the layered paper all work beautifully together. It’s uncomplicated, it’s lovely, and it resembles something you might discover in a stationery boutique.
Card #2: Botanical Fern Card
This is my favorite of the five cards because of its understated design. It brings to mind an antique botanical illustration.
A large fern I pressed myself takes center stage, spreading across a torn piece of natural handmade paper mounted on a brown cardstock card. A few ripped paper accents add extra detail. The .01 stamped onto a tiny scrap of newspaper brings in just the right touch of playful minimalism.
The finished piece feels earthy and thoughtfully gathered. Almost like a treasured find slipped inside the pages of a well-loved old book.
Supplies Used For This Card
Step 1: Tear Your Paper Pieces.
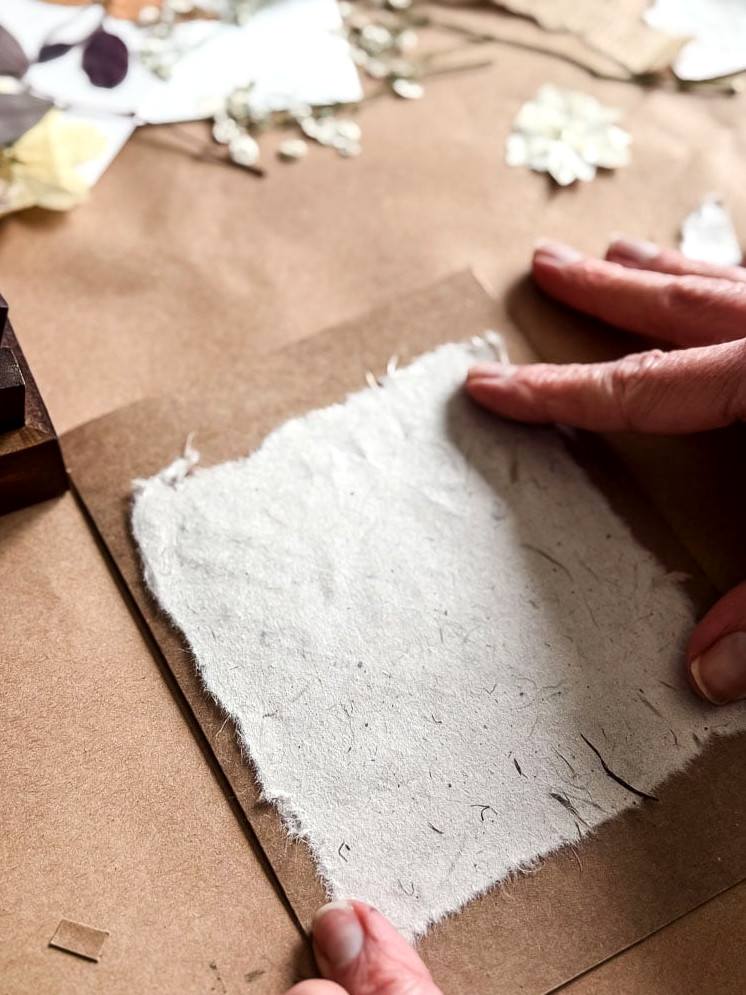
Tear 2-3 small paper scraps in varying sizes. Combining different textures works especially well here: newsprint, simple white paper, or any distinctive paper you have available. Arrange the pieces on the card with slight overlaps, then attach them using Mod Podge. Allow them to dry.
Step 2: Position Your Fern
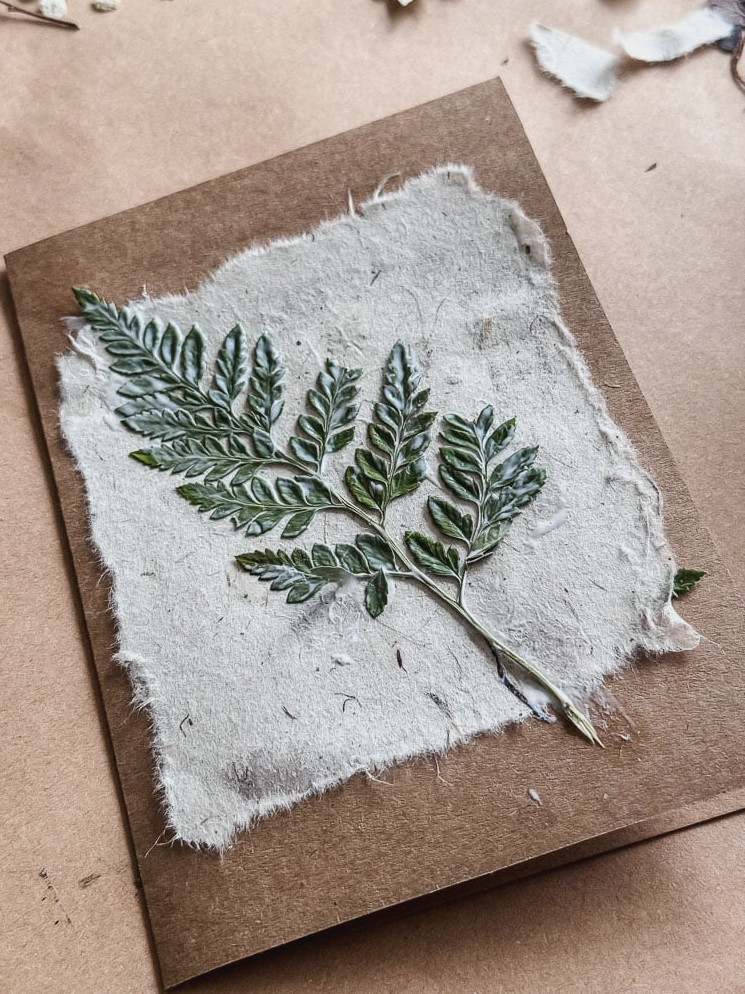
Take your time during this step. A large fern makes a bold statement, and its angle can completely alter the card’s appearance. Test it diagonally and slightly away from the center, with one end extending beyond the card’s edge. When the placement feels right, secure it with Mod Podge, smoothing gently from the middle outward, and finish with another light coat over the top. I generally keep the stem pressed down until it is firmly attached.
Step 3: Stamp Your Greeting
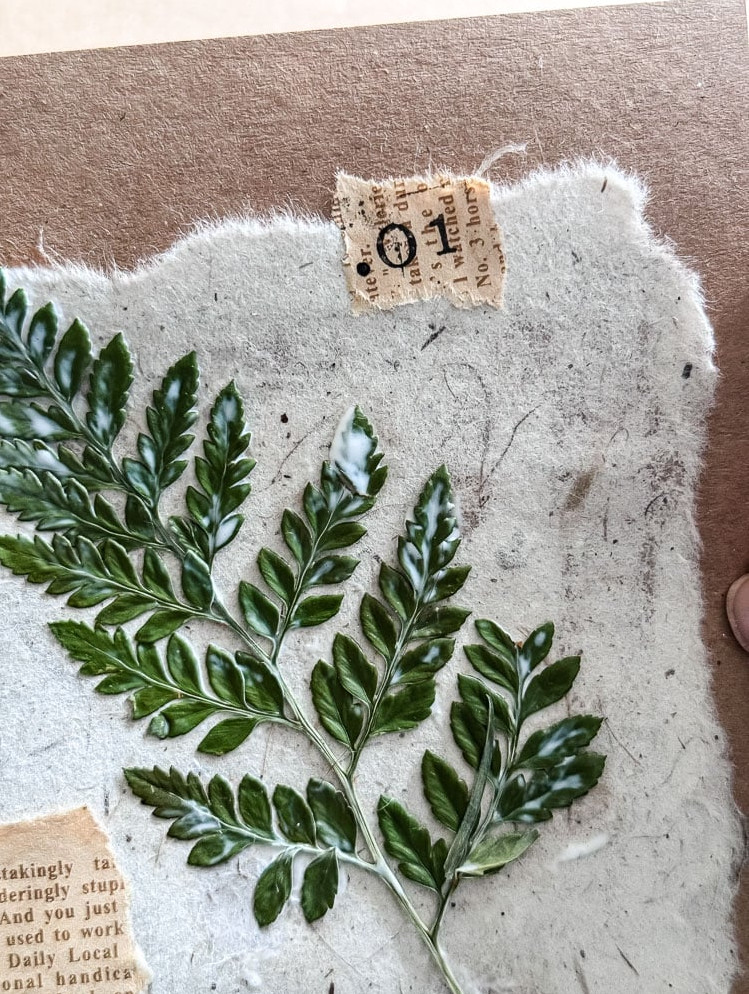
Stamp .01 onto a narrow piece of newsprint, allow it to dry, then nestle it into the design. I positioned mine on the fern’s right side. You might also stamp ‘FERN’ or another uncomplicated word to preserve the botanical illustration style.
Finished Fern Notecard
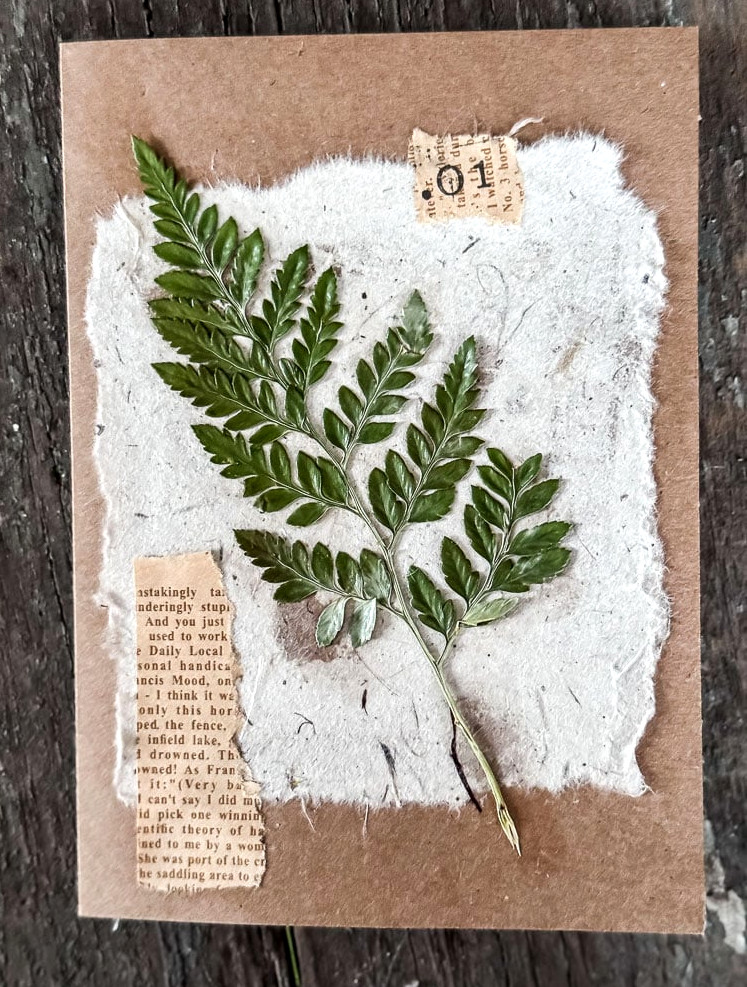
The completed card has a lovely layered appearance that seems much more elaborate than the actual time required. The fern carries most of the design. It is such an eye-catching botanical element that very little else is needed. Still, the torn paper layers add dimension and make the card feel genuinely distinctive.
Card #3: Pressed Flower Bouquet
This one has a romantic feel. While Card #2 resembles an artisan stationery boutique, this card calls to mind the small antique bookshop nearby, complete with creaky floors and cats napping on the windowsills. It feels literary and nostalgic, and is truly among the prettiest cards in the collection.
A ripped sheet from a vintage book serves as the background for a petite cluster of pressed flowers, with the stems joined at the bottom like a miniature hand-tied bouquet. Its design is sweet and uncomplicated, making it the sort of card someone may treasure well after reading the message inside.
This is the only card for which I combined one of my own pressed flowers with the Amazon collection. I wanted a longer stem to add structure and character to the bouquet. If you have pressed flowers of your own with extended stems, this project is an ideal way to feature them.
Materials For This Card
Step 1: Tear Your Book Page
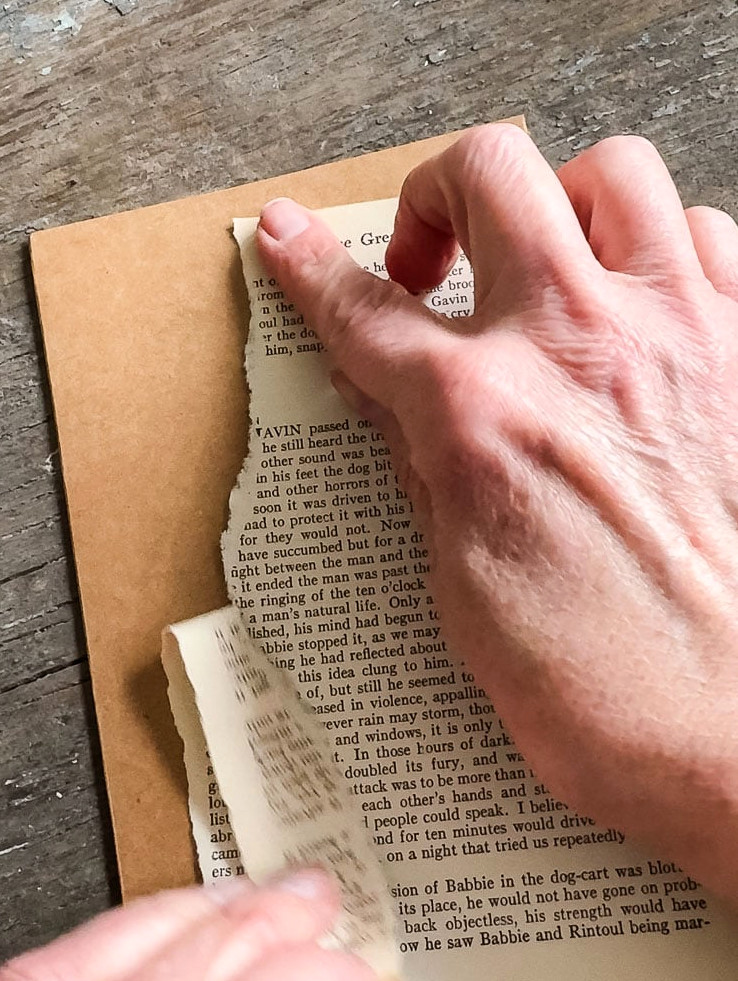
Tear a sheet from an old book; paperback pages are especially suitable, and the warm ivory shade looks lovely against both the white and brown cards.
Rather than covering the entire card, aim for roughly two-thirds, placing it a little off center. Secure it with Mod Podge and allow it to dry.
Step 2: Arrange your bouquet.
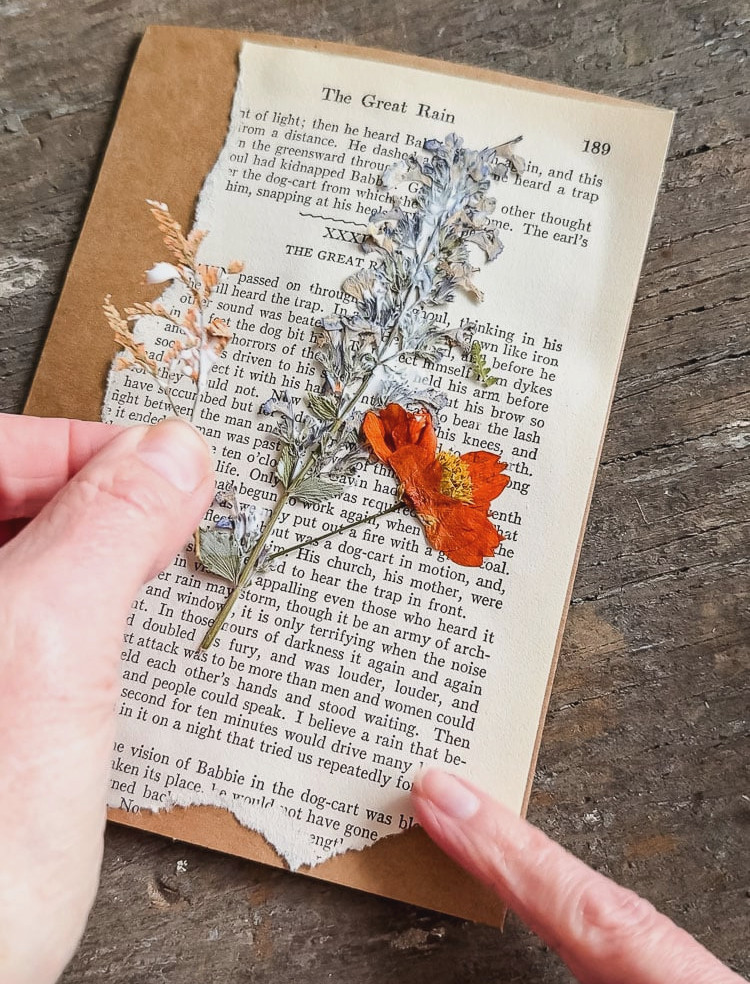
Here comes the enjoyable part. Collect your pressed flowers with their stems directed downward, as though they are being held: placing a taller stem in the middle and arranging smaller blossoms around it creates a lovely effect.
Position them on the book page, then adjust the layout until it resembles a small bundled bouquet.
When you’re satisfied with the design, attach everything using Mod Podge. Apply the Mod Podge to the flower’s back and press it firmly into place.
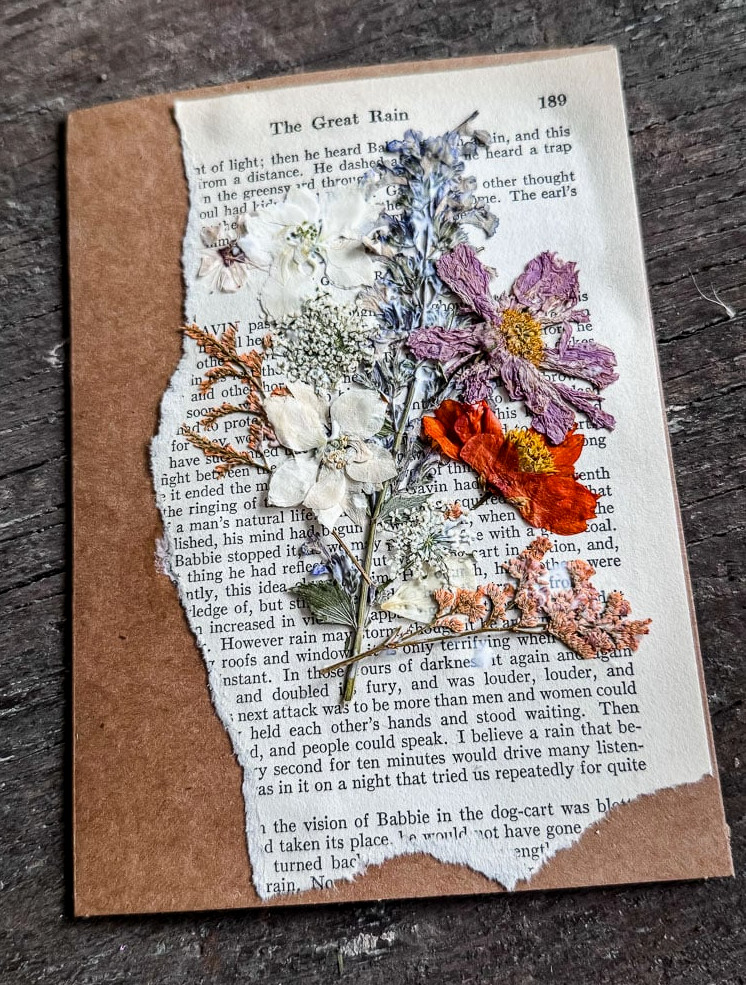
If the flower still refuses to lie flat, apply additional Mod Podge across the flower or its edges-it will become transparent as it dries.
Step 3: Add A Jute Bow
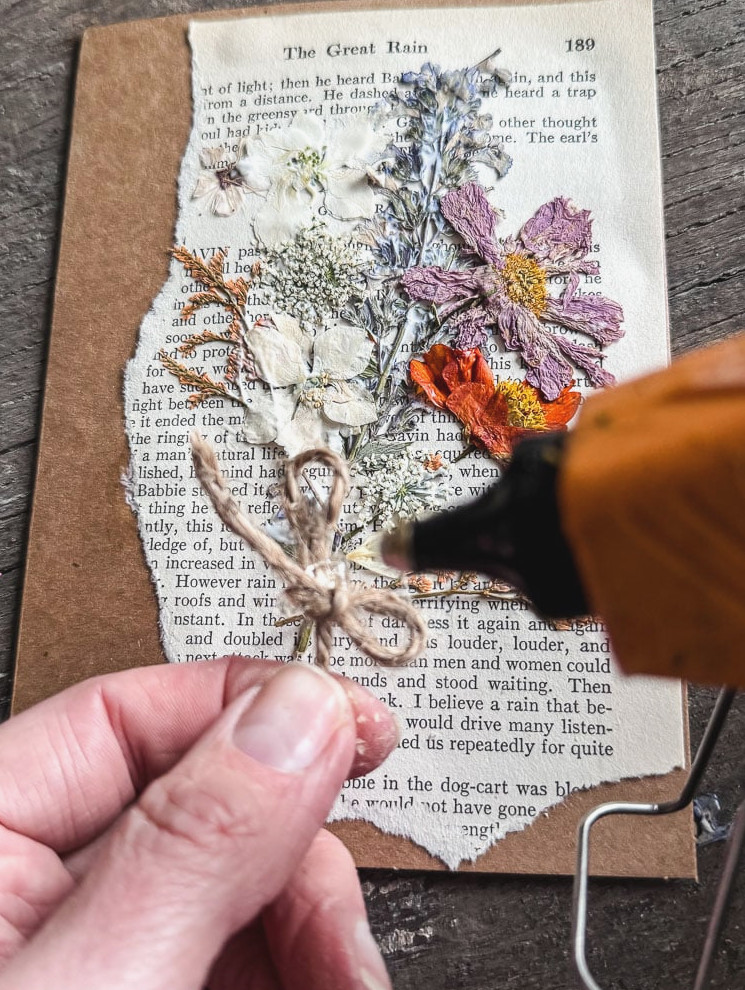
To ‘secure’ the bouquet, I fashioned a tiny bow from jute twine. You could also choose a short length of ribbon to introduce a splash of color.
Use hot glue to fasten the bow in position-it provides a more reliable hold than attempting to attach it with the Mod Podge used on the flowers.
Completed Bouquet Notecard
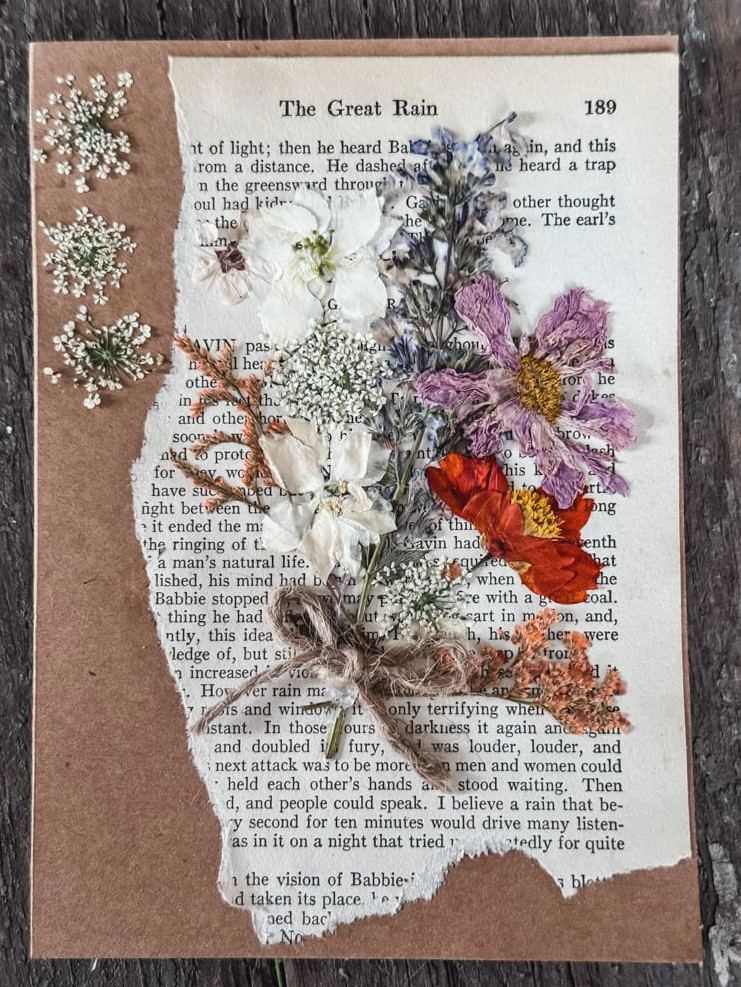
The completed card looks as though a Victorian botanist could have slipped it inside a love letter. The book page lends it an antique, literary feel, while the small gathered bouquet on top is utterly delightful. I’d choose this design for a birthday, a thank-you, or really any occasion when you want someone to know how genuinely much you thought of them.
Card #4: Pounded Pansy Flowers
This design is the collection’s centerpiece and the most rewarding one to create.
The flower-pounding method feels almost enchanted: set a fresh flower face down on paper, place a cover over it, strike it with a hammer, and reveal a flawless imprint of the blossom transferred straight onto the card. There’s no pressing, drying, or waiting involved. You get instant, vibrant, gorgeous results.
Pansies rank among the finest flowers for this process. Their level surfaces and delicate petals transfer wonderfully, and the color within their velvety blooms is remarkably intense: rich purples, vivid yellows, and gentle lavenders all move onto the paper with extraordinary definition.
If fresh pansies are available to you right now—and you’re in New England during early spring—the nurseries are stocked with them! It’s an ideal moment to give this a try.
I explain the flower-pounding process thoroughly in this post, along with my best advice and techniques for achieving excellent results, so I’ll direct you there for the full tutorial. For now, here’s the precise way I created this card.
Step 1: Get Your Pansy Ready
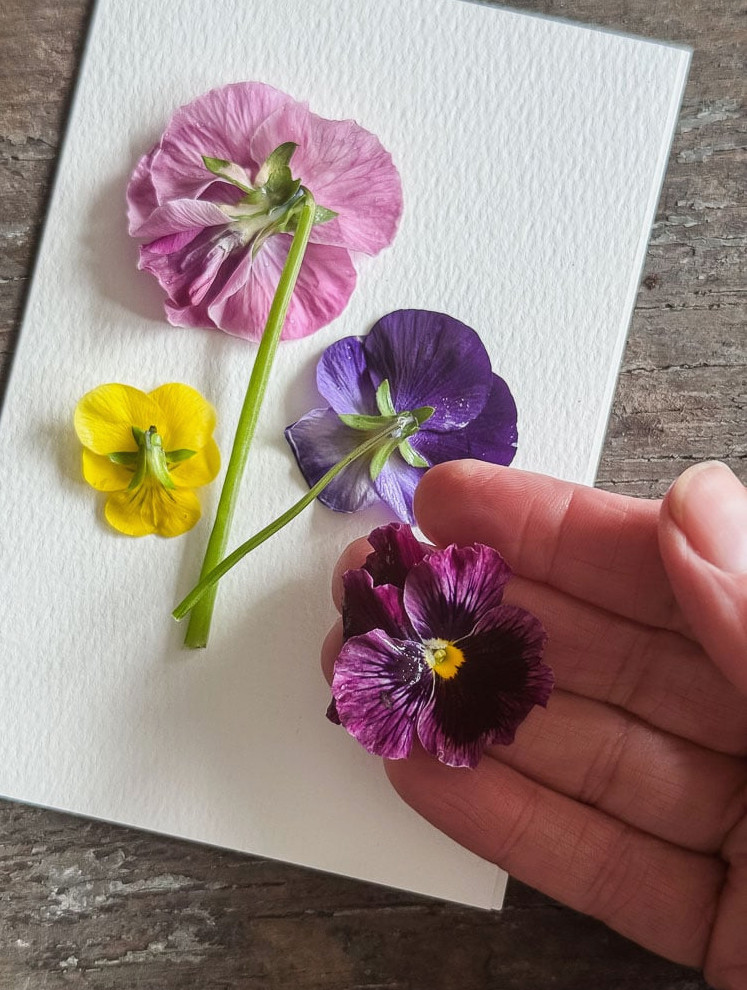
Unfold your card (the flower’s ‘ink’ may seep through the notecard). Set your pansies face down on the watercolor card, arranging them exactly where you want the design. I arranged mine to resemble a small bouquet.
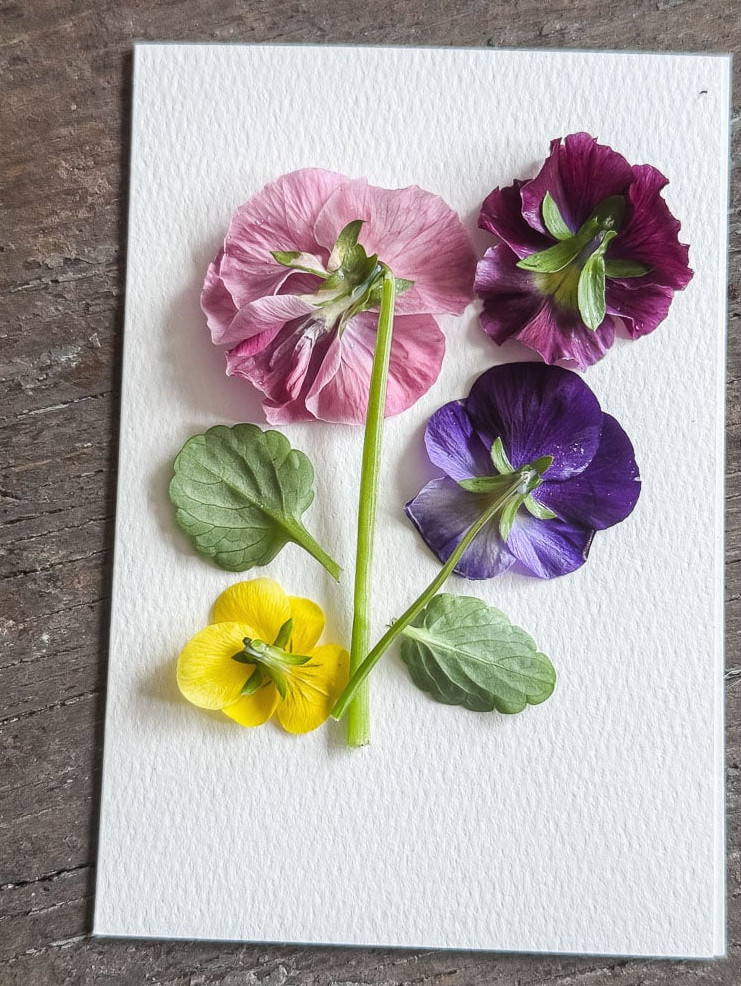
Include a few leaves to provide a touch of green contrast. Since the arrangement becomes fixed once you begin hammering, pause briefly to ensure everything is positioned correctly.
Step 2: Cover the Flowers and Pound
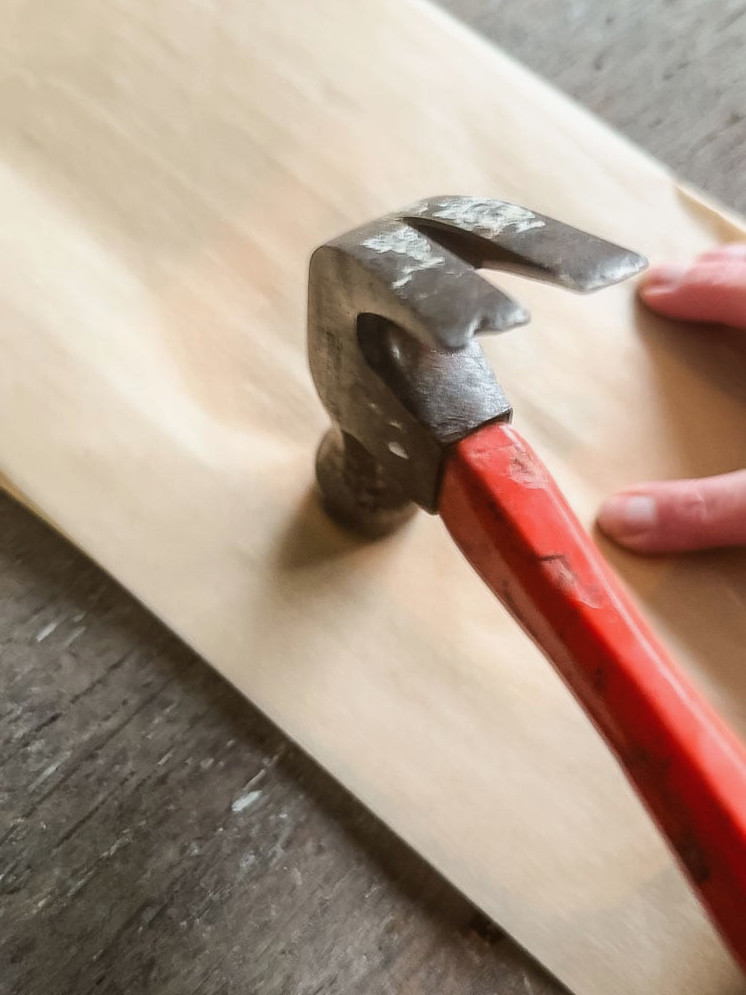
Place parchment paper over the blossoms to shield them and prevent the pigment from spreading excessively. Take your hammer and strike firmly and consistently across the whole flower.
Begin at the center and move outward, making certain to reach every petal. I often overlook some of the edges when using this method! Raise the parchment to inspect your work, then pound any sections that require additional coverage.
For this step, I hammered the flower for 1 minute. After lifting the parchment, I noticed that one pansy’s edge had been missed, so I gave that area a few extra taps!
Step 3. Take Away the Flower
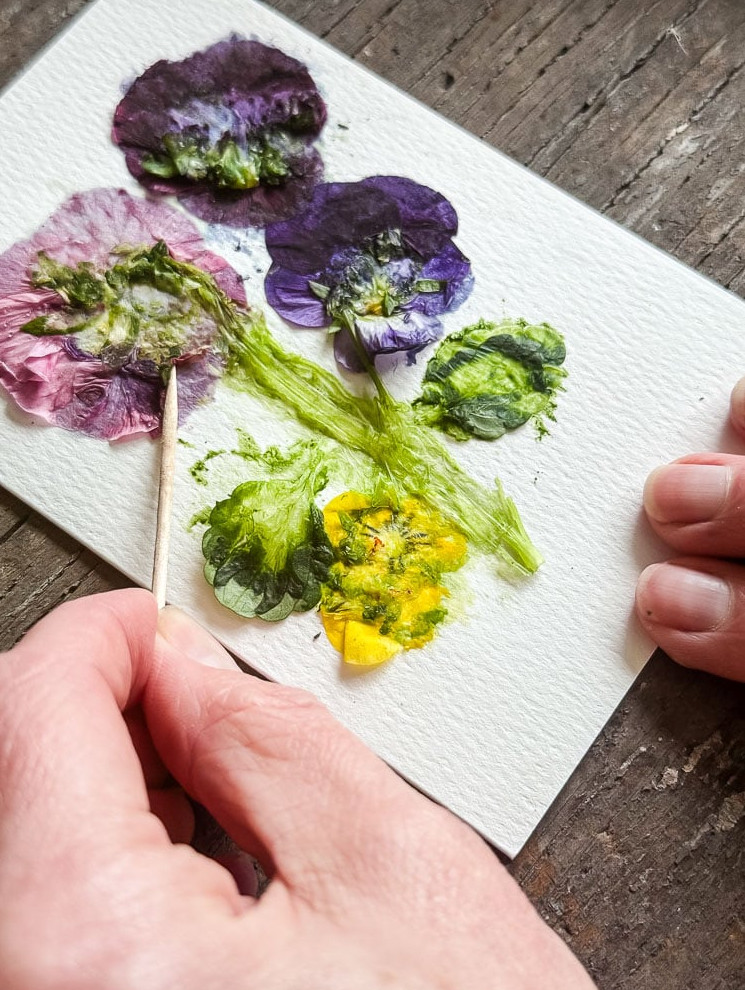
Gently remove the remaining pieces of the pansy. A toothpick is my favorite tool for this; it makes brushing and lifting away the crushed flower fragments easy.
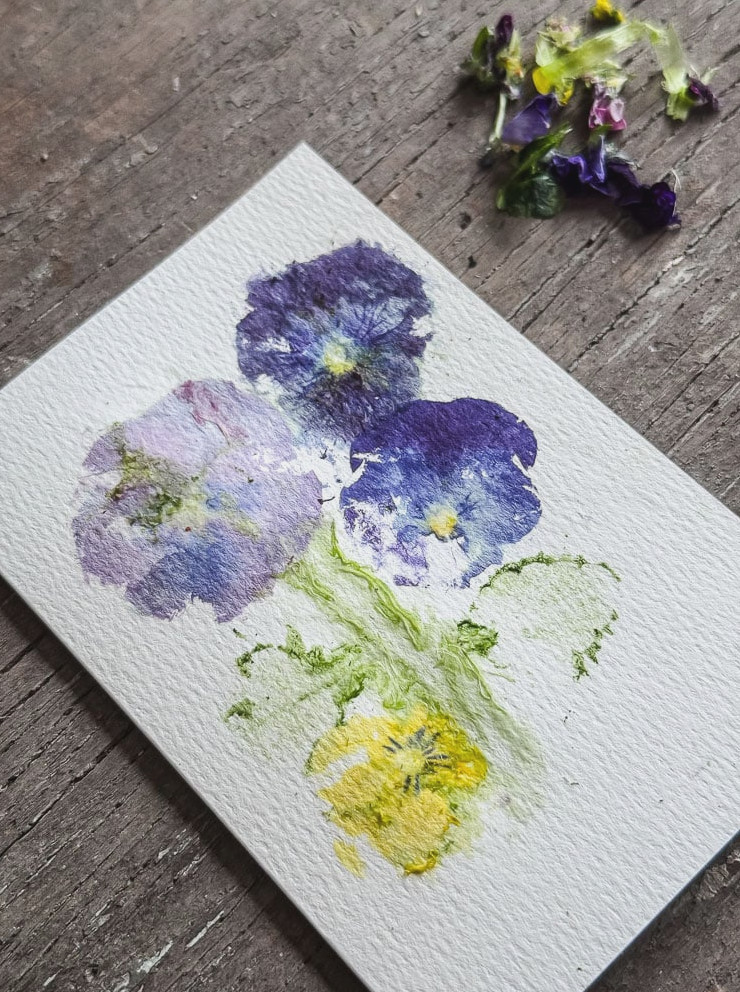
A bright, intricate image of the blossom will remain, pressed directly onto the card. Pause for a second to admire how amazing that is.
Step 4: Add Details (optional)
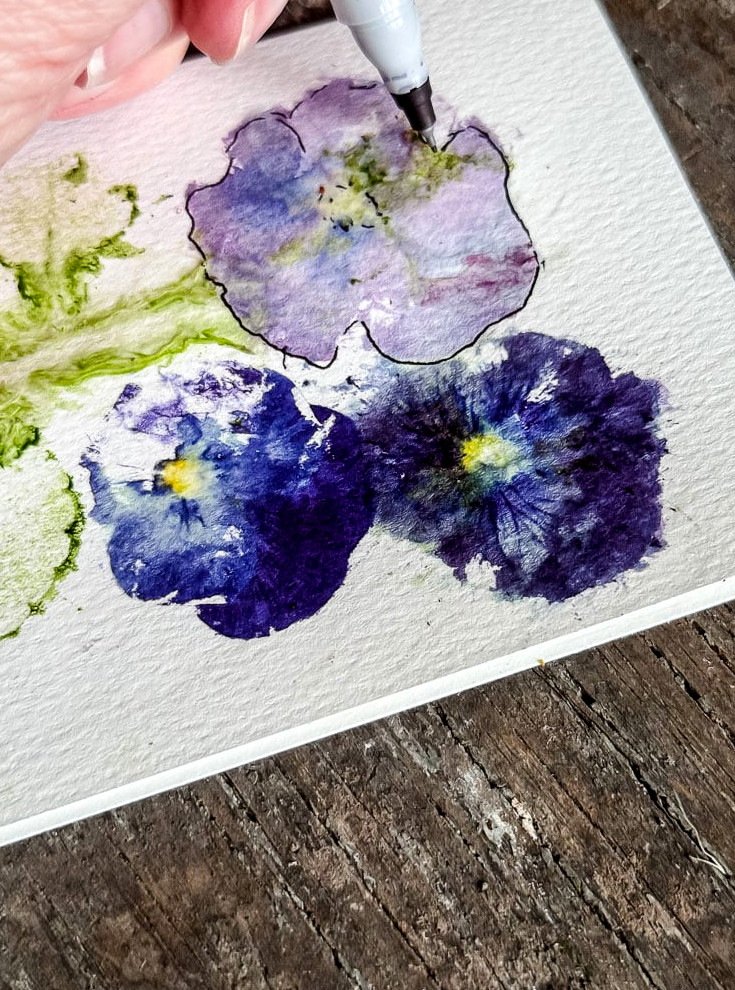
This part is entirely optional. I used a fine-point Sharpie to lightly trace around the pansies and foliage.
Step 5: Stamp A Greeting
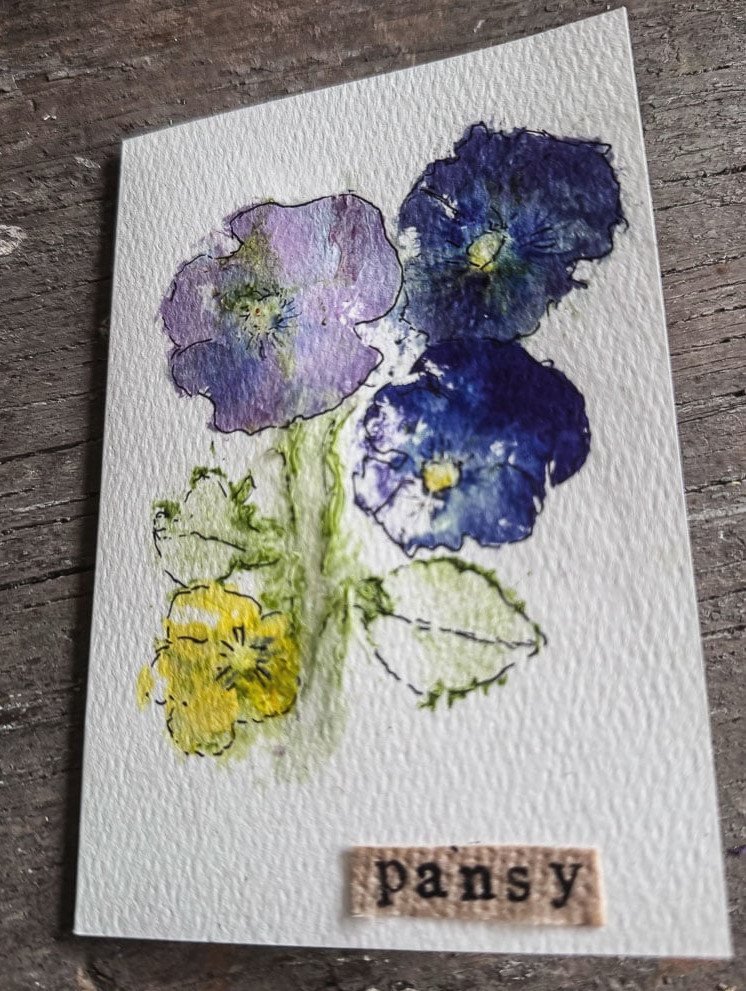
Place your message on a narrow brown paper strip, then attach it to the card along the lower edge or next to the floral print, where it feels wonderfully natural. I chose the straightforward word ‘PANSY.’
Naturally, you can write or stamp any message you prefer right onto the card.
Completed Pansy Notecard
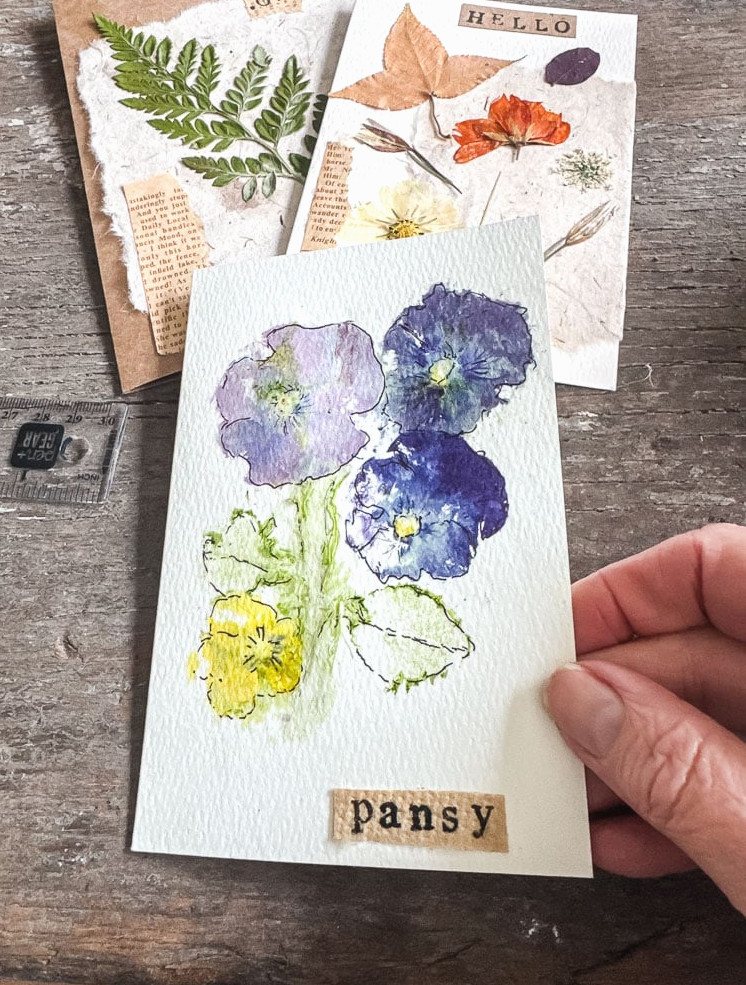
The completed card is truly gorgeous! It’s vibrant, striking, and entirely unique because no two pressed flower designs ever turn out exactly alike.
This is also the card from the collection that will have people asking, “How did you DO that?” and answering that question is always a pleasure.
**one note: the pansy’s color did seep through the notecard slightly, so I am going to attach a small piece of natural paper inside**
Card #5: The Birthday Cupcake Card
End with the best. This is the card that will bring a smile to anyone’s face as soon as they spot it. It’s fun, surprising, and unlike an ordinary handmade card.
No one will figure out that it came from a cupcake liner, a $3.99 bundle of baby’s breath from Trader Joe’s, and a birthday candle. No one.
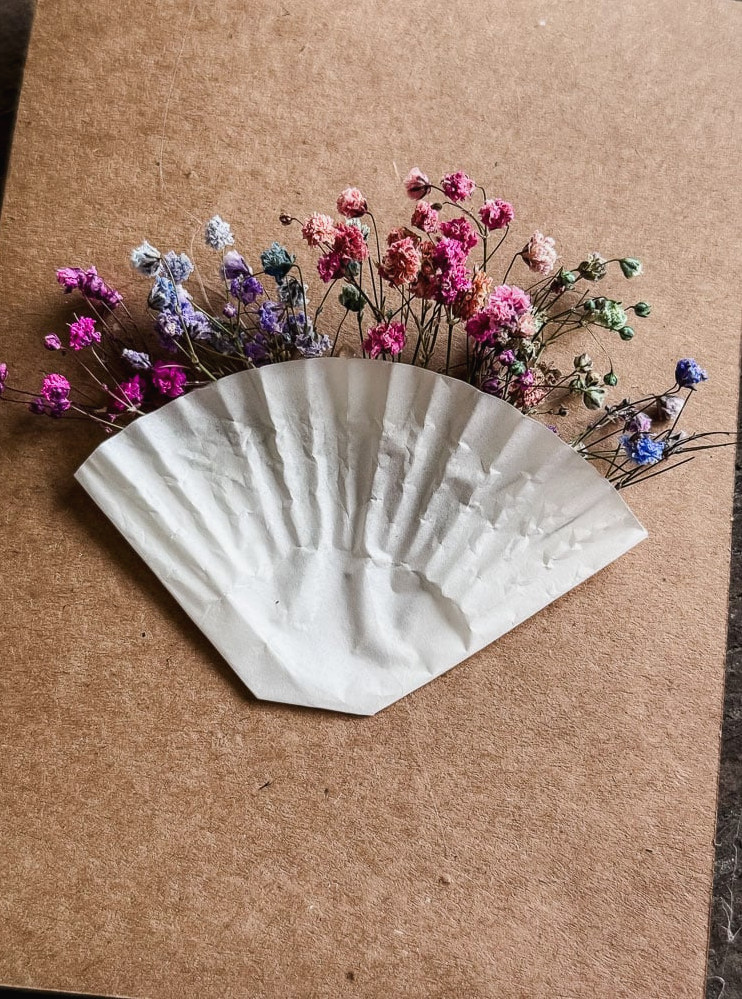
The idea is straightforward and utterly delightful: the cupcake liner becomes the “cupcake” base, vibrant baby’s breath is attached with hot glue to form soft, raised frosting, and an actual birthday candle is placed in the center.
It has dimension, brings plenty of joy, and is absolutely perfect for anyone who merits a little added celebration.
Before starting this project, I allowed the baby’s breath to air-dry for several days. Fresh sprigs of baby’s breath will also dry naturally when used for this craft.
Supplies You’ll Need:
- Brown 5×7 natural cardstock card
- Bright, fresh baby’s breath (I picked up a $3.99 bunch at Trader Joe’s)
- 1 cupcake liner
- 1 birthday candle
- Small strip of coordinating paper for stamping
- Letter stamps & ink pad
- Hot glue (though Mod Podge would also work, it would require drying time)
Step 1: Fold The Cupcake Liner
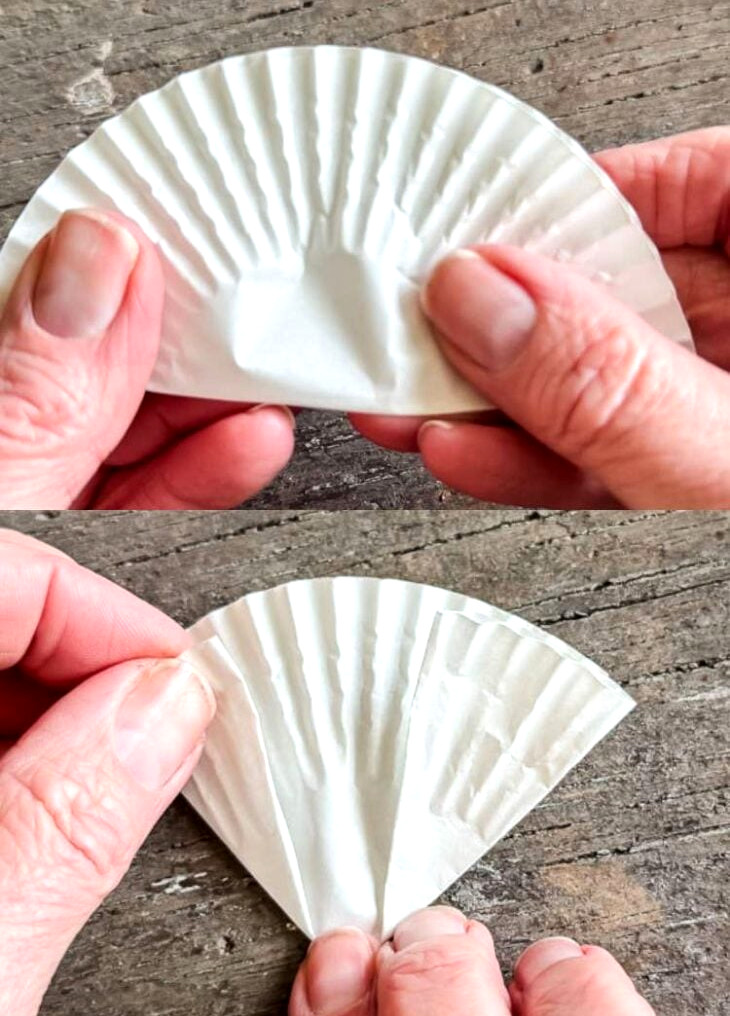
Begin by folding a paper cupcake liner in half. Next, fold both sides back toward the center. Handle it carefully so the liner’s ridged texture does not become flattened.
Step 2: Secure The Cupcake Liner.
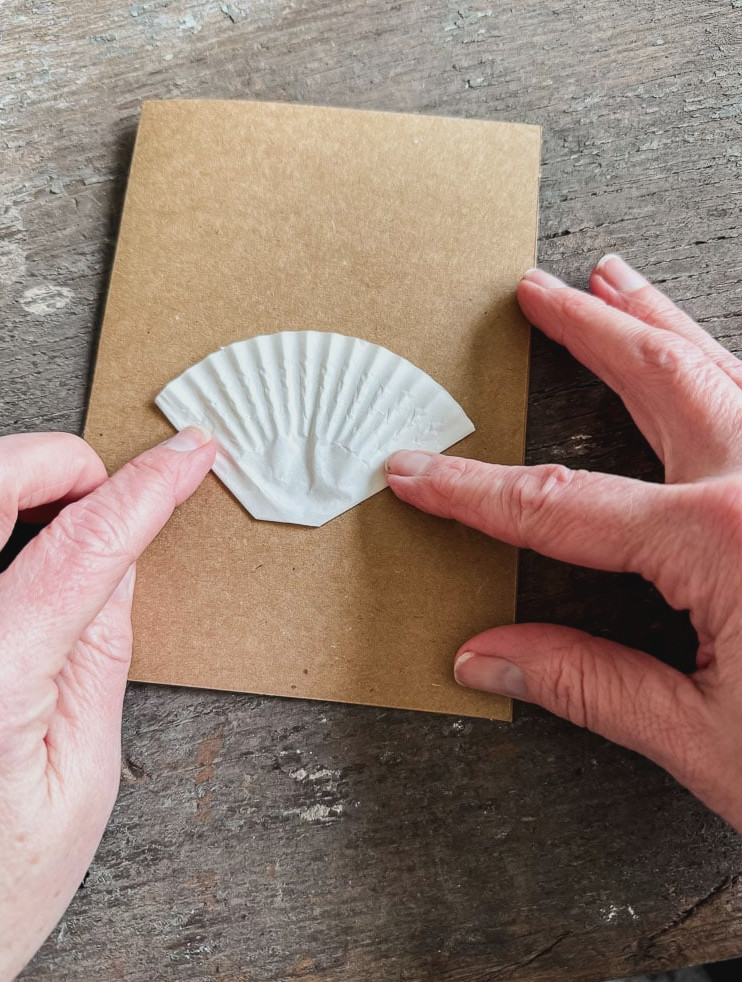
Set the cupcake liner on the bottom half of the card to form the cupcake base. Apply hot glue to the two ‘flaps’ and the bottom, keeping the middle area unglued so it can hold the flowers and candle. Allow the glue to harden.
For this project, I’m choosing hot glue, though a small amount of Mod Podge could also secure the liner and the baby’s breath.
Step 3: Create Your Frosting
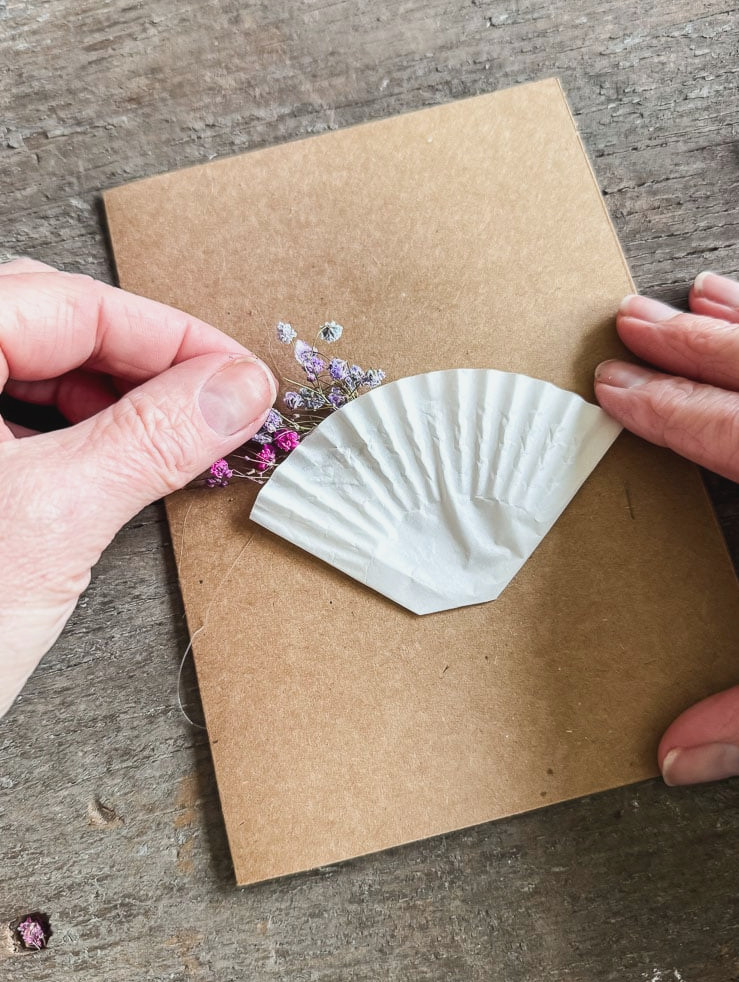
Now comes the enjoyable part. Snip small bunches of colorful baby’s breath, then hot glue them along the upper rim of the cupcake liner, stacking them upward for a soft, three-dimensional frosting look. Complete one small area at a time, layering and adding pieces until the top looks full and rounded. The colorful baby’s breath resembles tiny candy sprinkles. It’s incredibly cute.
Step 4: Place The Candle
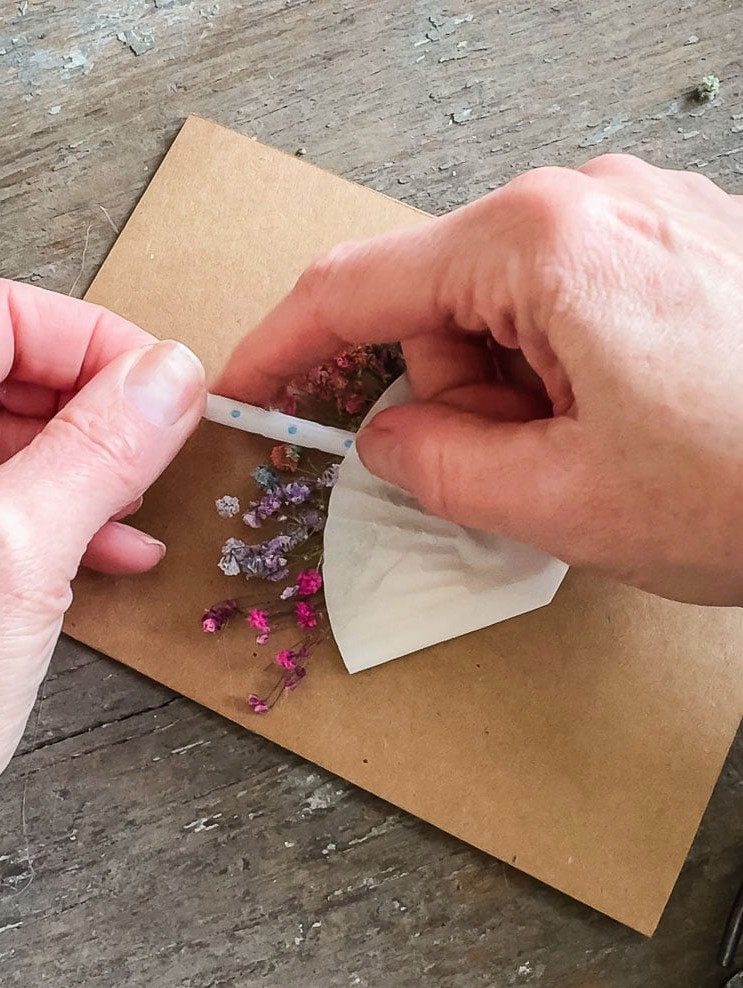
Apply hot glue to the birthday candle and position it directly in the middle of the baby’s breath frosting. This finishing touch brings the design together and clearly transforms it into a birthday card. Simply spread a thin line of hot glue along the candle’s back, then keep it pressed down until it sticks.
Step 5: Add Your Message
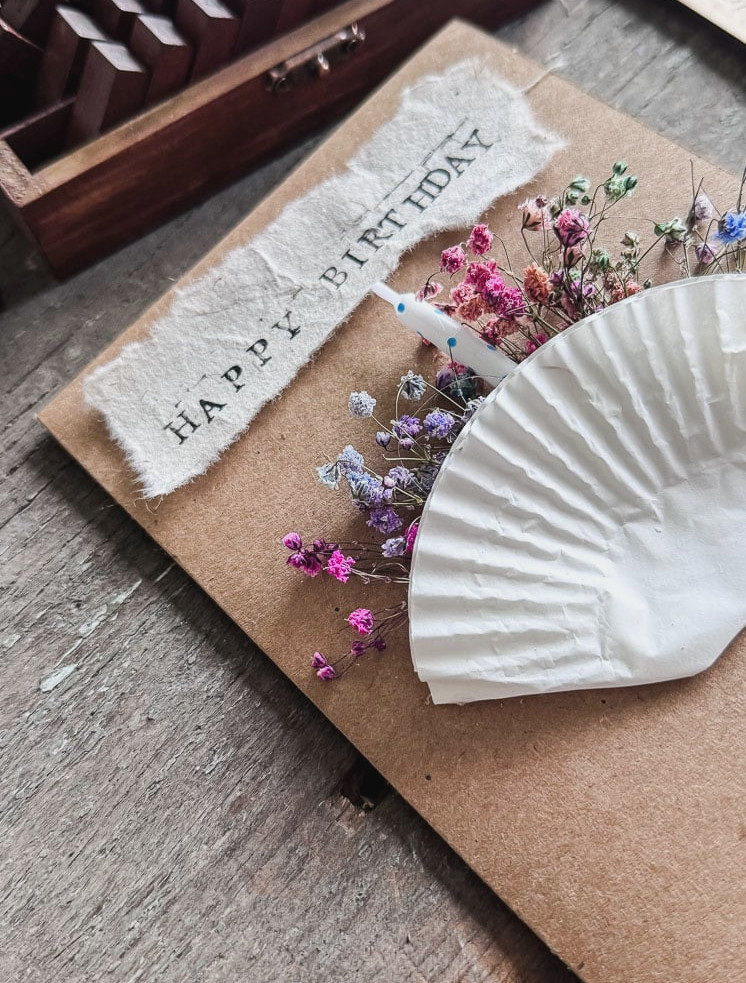
Write your birthday greeting on a narrow strip of contrasting paper, then attach it to the card. You can place it above the cupcake along the upper edge, or position it neatly across the bottom.
The Completed Cupcake Birthday Card
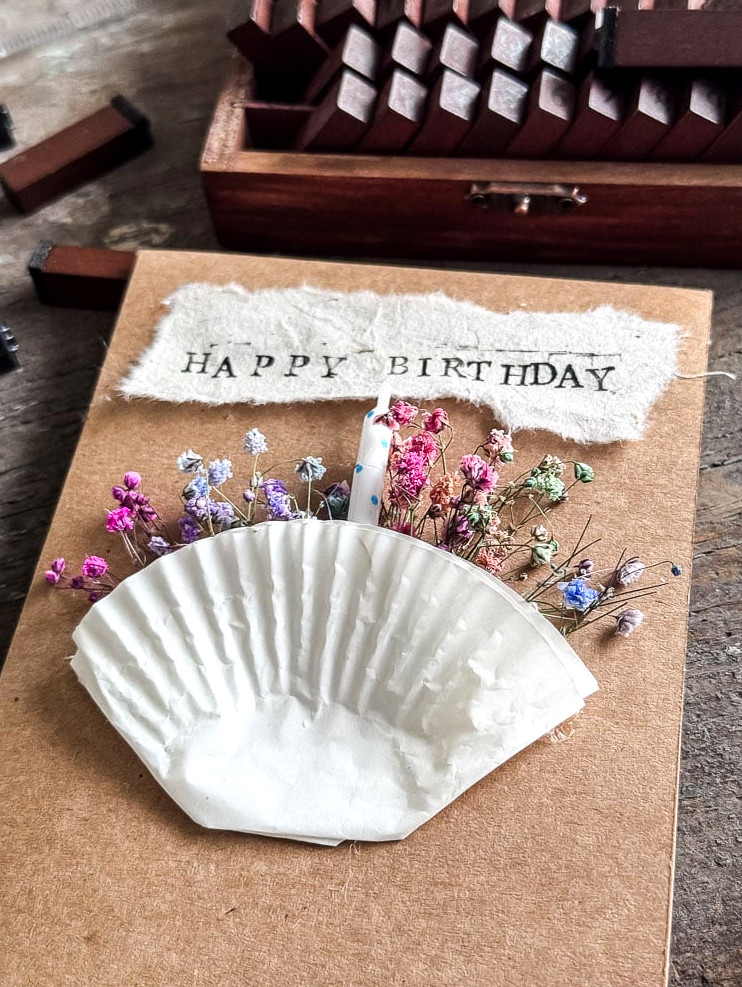
This completed card is pure delight. With its layers, bright colors, and wonderfully unexpected design, it costs next to nothing to create. I’m making it for a little girl’s first birthday celebration next month. I think it is incredibly sweet!!
Creating Cards Is a Present on Its Own
Handmade cards have a special quality that store-bought versions simply cannot match. They contain something no factory can produce or wrap: a little time, a little care, and a little piece of you.
My favorite part of this collection of five cards is how distinct each one feels. The pressed flower newsprint design is subtle and graceful.
The fern card feels natural and textured. The book-page bouquet is sentimental and bookish. The flower-pounded pansy card is vibrant and unexpected. And the birthday cupcake card is pure, unapologetic delight. Together, they show that handmade creations are never ordinary...they are the very opposite.
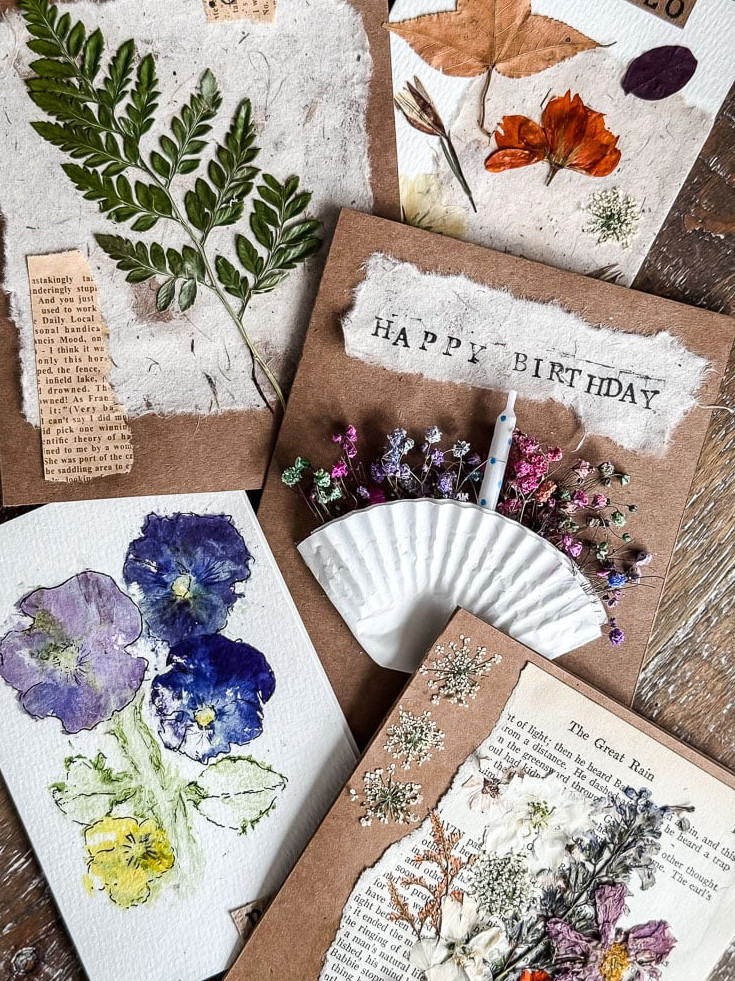
If you’re new to crafting handmade cards, my original pressed flower notecard tutorial is an excellent starting point. For a closer look at the flower-pounding method, you can find the complete guide right here.
Now create something lovely for someone special. It will stay with them forever.
Supplies I used
Floral Note Cards
My favorite materials & supplies for creating these note cards
Let me see your creations! If this project or any of my other DIY ideas inspires you, I’d be delighted to feature them in the Reader’s Spotlight gallery. Email me a photo at jennifer@cottageonbunkerhill.com
xo, Jennifer