The symbolism of the Tree of Life has always captivated me—growth, resilience, and unity. That’s why, after discovering a coil of nautical rope at the thrift store, I immediately knew what to create: a 3D wreath combining rustic texture with garden-inspired beauty.
The Ideal Garden Wreath: 3D Tree of Life
I’ll confess: I can’t get enough of crafting wreaths. This time, an unexpected shopping destination inspired my design—the thrift store! During a recent visit, I found two enormous bags of nautical craft rope, likely abandoned from an unfinished project, and immediately imagined their possibilities—not only for this ‘Tree of Life’ wreath, but also as a useful addition to my craft supplies!
For this design, the reclaimed rope served every purpose: winding branches, loose roots, and a trunk filled with such natural character that it appears to have been growing along my garden fence for ages. Combined with moss and gathered treasures, it became a dimensional piece to display in my garden this year.
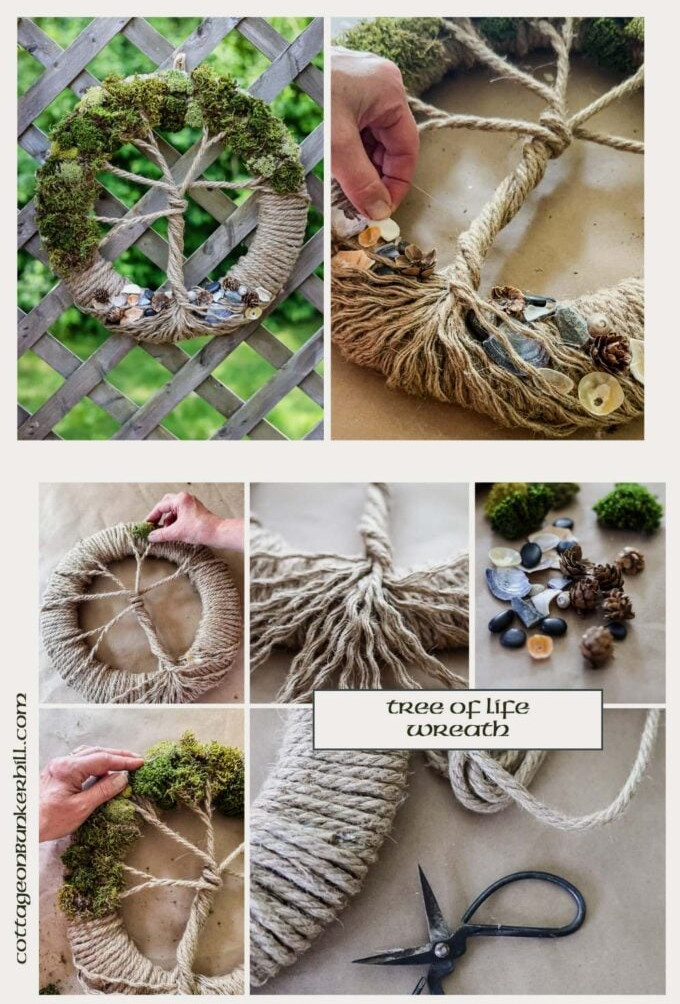
Supplies You’ll Need
The wonderful thing about this Tree of Life wreath is that it requires only a handful of simple materials—and you may already have several of them at home! Here’s what to gather:
- Wire wreath frame(I chose a 14″ one, though any size will do)
- Nautical rope(approximately 87 feet—but precise measurements aren’t necessary)
- Hot glue gun(your dependable crafting helper)
- Embellishments(this is your opportunity to be inventive! I used moss as foliage, along with cracked shells, tiny pinecones, and stones for the ‘ground.’)
Not interested in gathering natural items? No worries!Use faux greenery instead of moss, leave out the ground decorations, or add your own personal style. This project is beautiful because it can be customized so easily!
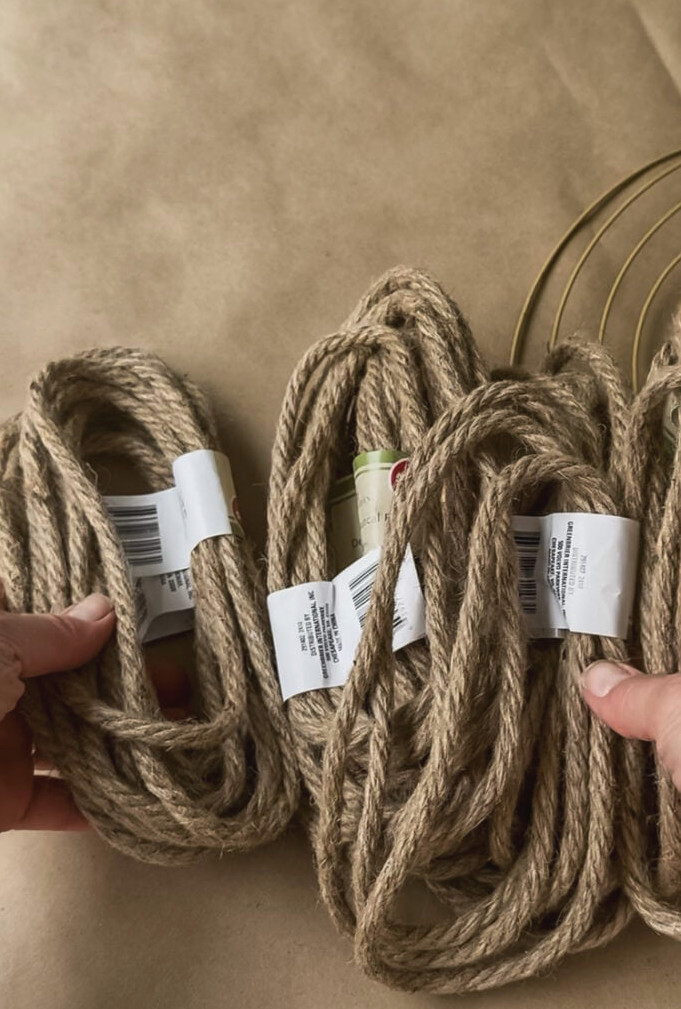
Materials for this Project
How to Create Your 3D Rope Tree of Life Wreath
Step 1: Cover the Wire Frame
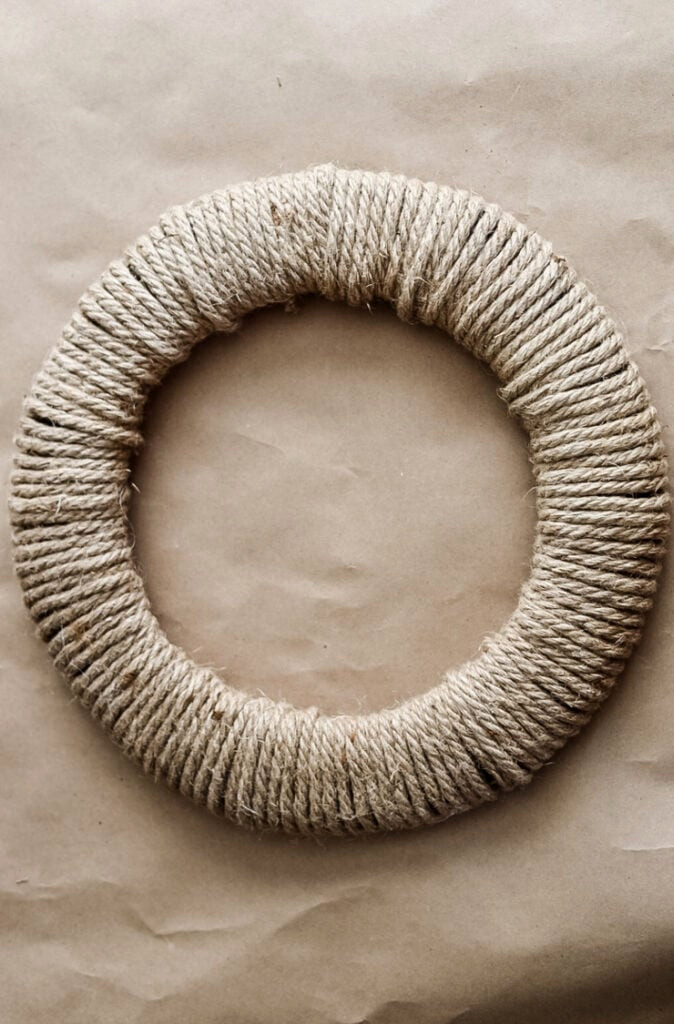
First, let’s turn the simple wire frame into the foundation of the wreath. Begin wrapping the nautical rope firmly around the frame, placing each loop closely beside the one before it. The goal is to conceal the entire frame without leaving any openings visible! As you continue around the circle, carefully press the loops together for an even, polished appearance.
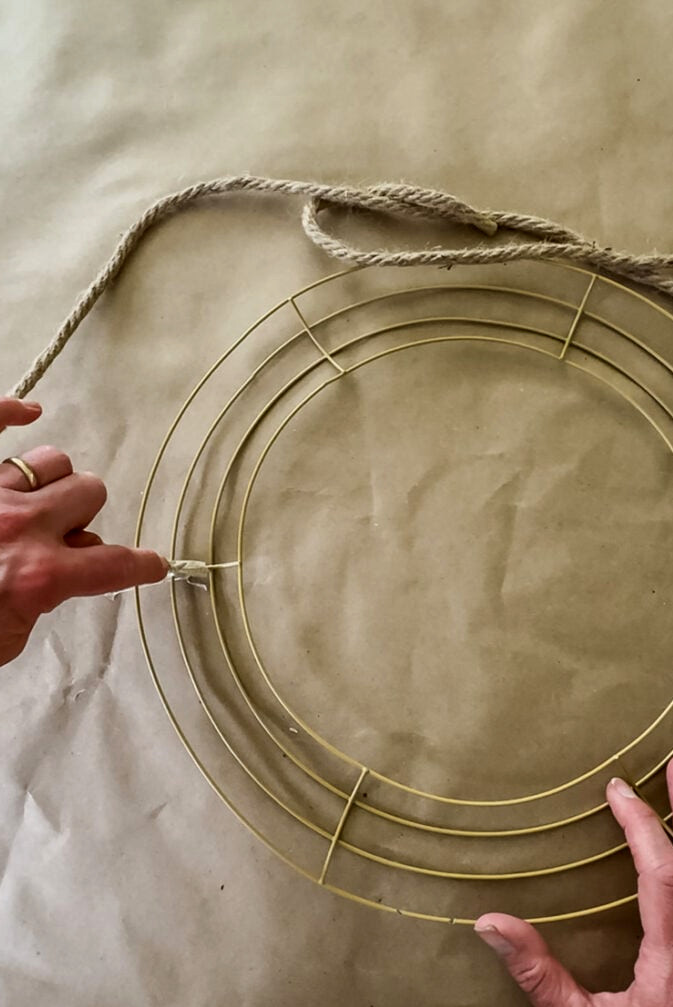
- Fasten the rope: Apply hot glue to attach the end of the nautical rope to the rear of the wire frame. When using Dollar Tree rope packs as I did, I glued the first end to the back, then began the next pack in the same location, attaching the fresh rope to the neighboring piece.
- Wrap firmly: Circle the rope around the frame, placing a small amount of glue every few inches to hold it securely(I applied glue between the ropes along the back of the wreath)
- Cut & attach the end: After the frame is completely wrapped, cut the rope and glue the loose end in position.
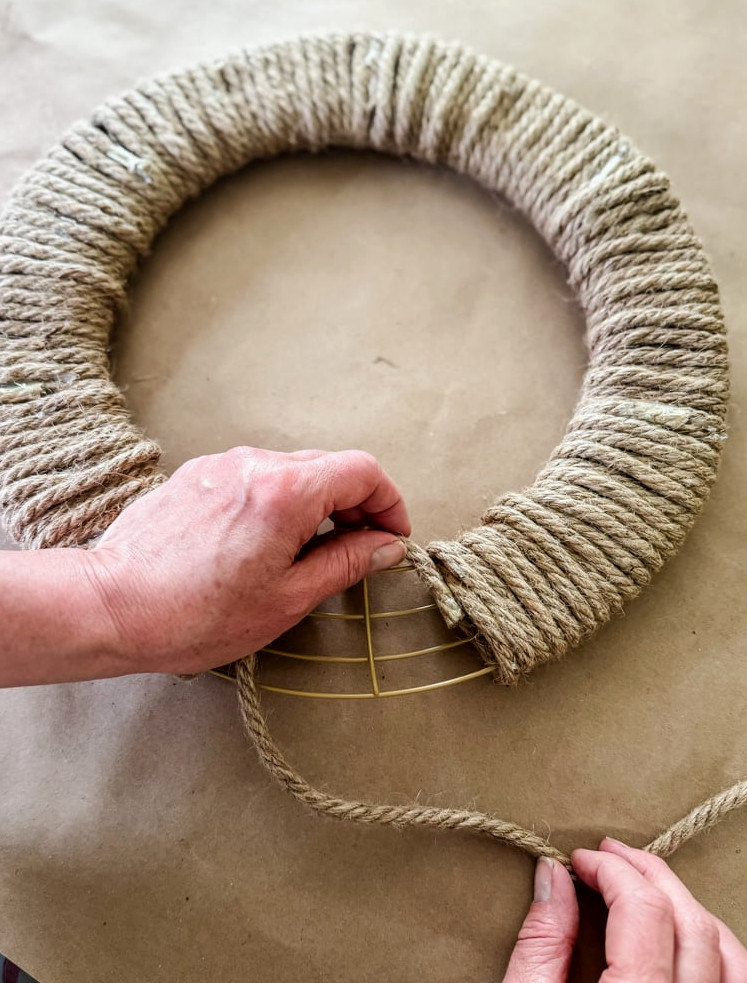
Using Dollar Tree rope packs? This is how I join them smoothly:
- Attach the first pack: Glue its starting end onto the back of the frame.
- As you near the end of a pack, glue the last section securely to the back.
- Begin the following packat the exact point where the previous one stopped – overlap the ropes by 1″ and glue both the new rope’s endandits side onto the preceding piece.
- Keep wrapping, maintaining steady tension to create a seamless connection.
Step 2: Shape the Tree’s Branches

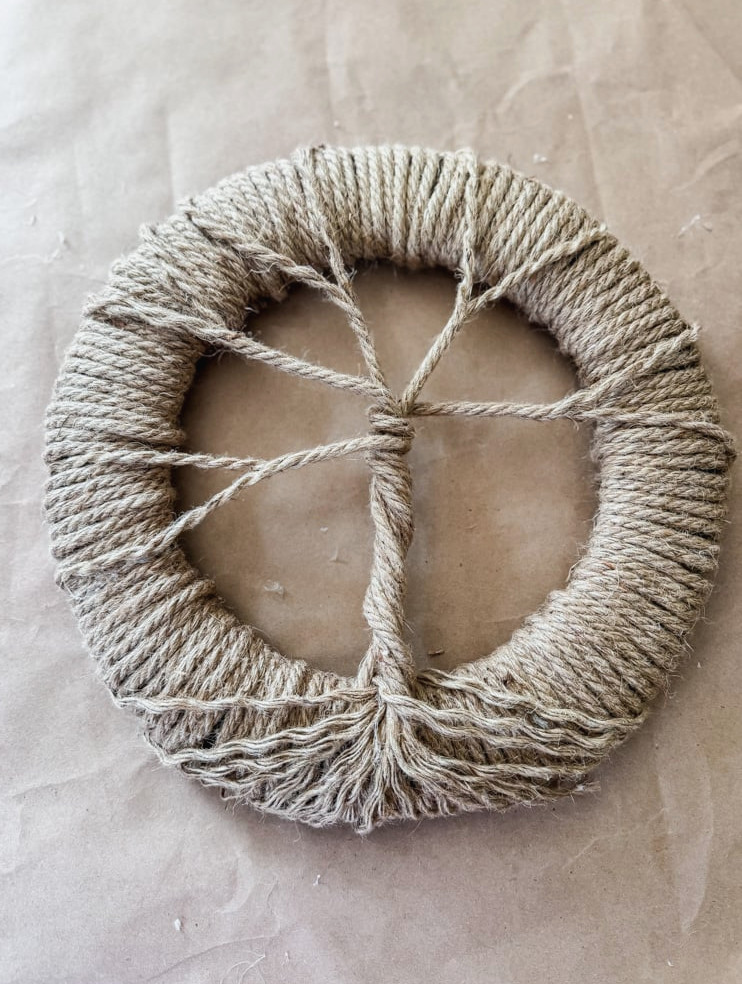
Slice rope strands: Cut five sections of nautical rope, each approximately twice the length of the wreath frame you are using. This additional length is necessary for the following stage of forming the tree branches, twisting the trunk, and loosening the roots.
What’s the purpose of the extra length?
- Allows you to arrange the branches with ease
- Cutting away excess is simpler than attaching more
- Leaves enough material to fray the tips into roots

- Create the canopy: Loosen the ends of the first rope strand to shape the branches. Spread the tips outward, then attach them to the wreath’s back using hot glue.
- Proceed with the remaining 4 lengths of rope, positioning the branches over the wreath’s upper half.

Step 3: Construct the Trunk & Roots

Twine the trunk: Bring all five strands together beneath the branches and wind them firmly around one another. I needed to repeat this a few times before the twist looked right. Apply hot glue to fasten the tree trunk to the wreath’s front at the lower center.

Loosen the tips: Unwind the ends of every rope strand to form untamed, delicate roots.

Arrange the “roots” over the wreath’s lower half, then attach them to the back with hot glue.
Not satisfied with your roots? That’s okay!
If the roots don’t appear the way you want, there’s no need to stress, because hot glue is flexible. You can lift off a strand that was just glued and move it into a new position while the glue remains warm.
Step 4: Include Moss & Decorations

Now comes the enjoyable part (at least, I found it especially fun!)—ornamenting the tree of life wreath and giving it personality! There are 2 simple stages: the tree canopy & the ground.
Tree Canopy
My dear friend Tammy (White Lilac Farmhouse blog) sent me a box filled with the most wonderful moss from her Maryland yard. I had been saving it for the ideal project, and this is the one!

Using hot glue, I attached little clusters of moss along the upper portion of the wreath, where the branches sit.
When choosing greenery for your wreath, there are plenty of beautiful possibilities!
- Mixed moss(ideal for a natural, earthy appearance)
- Dried greenery(wonderful for defined leaves)
- Floral accents(I imagine this would be incredibly charming!)
- Combination of greenery & petite flowers
Ground
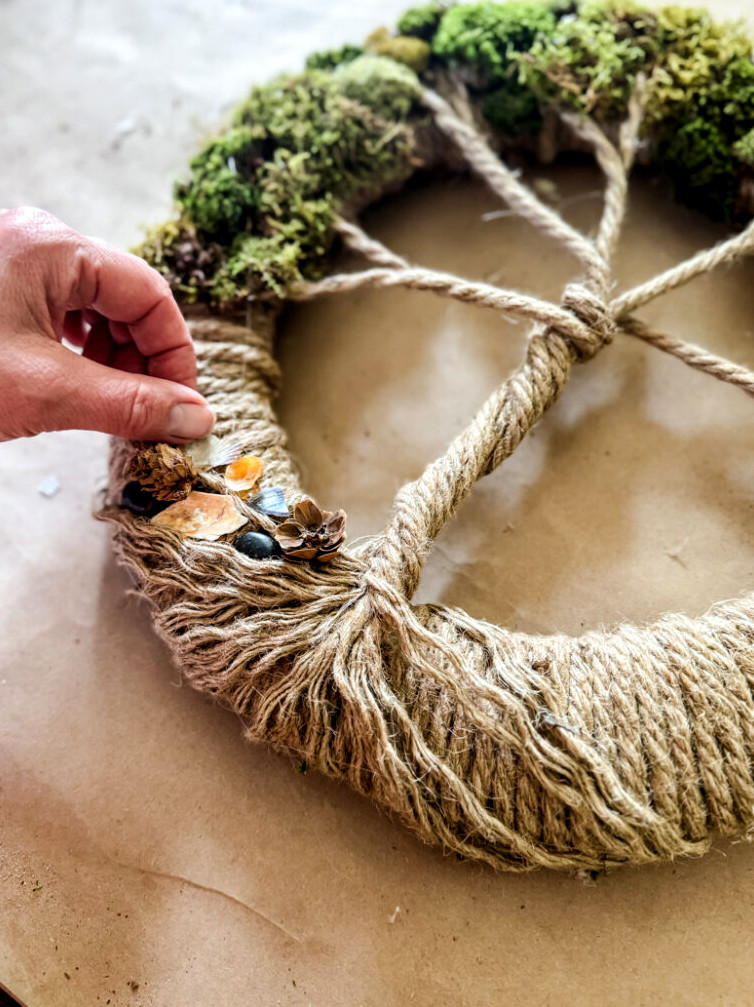
Add tiny natural treasures such as miniature pinecones, stones, or shells around the tree roots to embellish the “ground.”

For mine, I’m combining small fragments of broken shells, dark pebbles, and miniature pinecones.

Step 5: Hang Your Wreath!

Making a Basic Hanger:
- Cut a 6″ length of twine
- Pass it horizontallybeneath 2-3 wrapped ropes at theback centerof the wreath.
- Join the ends with a knotto create a small loop—large enough to slip onto a hook or nail.

- Display it: I placed mine on my garden fence, though this wreath would look lovely on a front door or porch wall as well.
- Protecting it from the elements: When using it outdoors, think about applying a light coating of clear UV-resistant sealant (such as Krylon)
Final Thoughts: A Wreath with Roots (and Stories!)
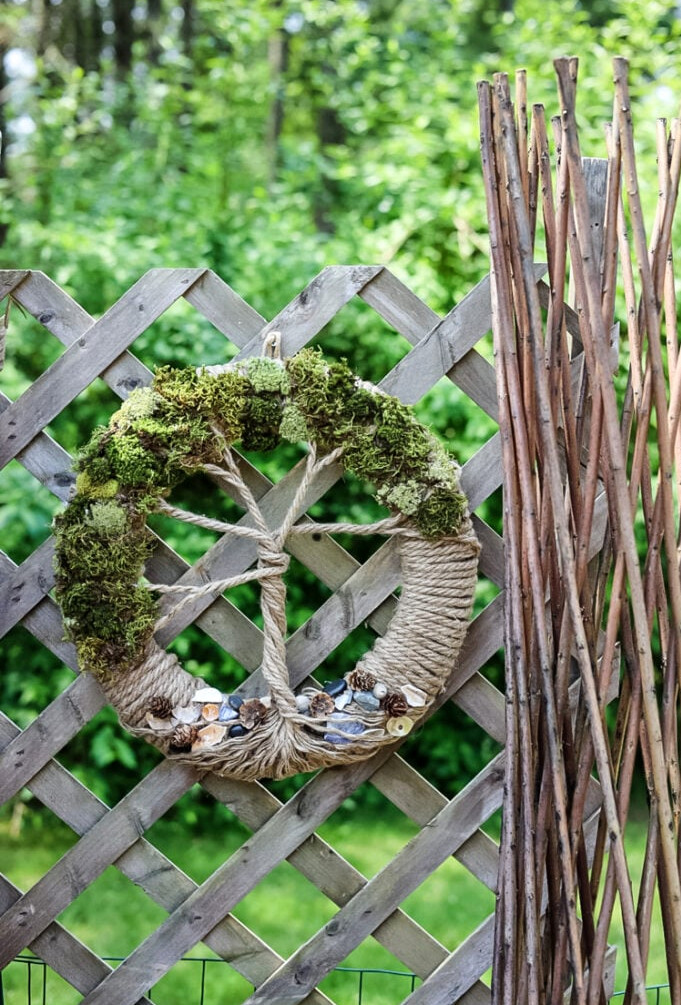
This 3DTree of Lifewreath has quickly grown into one of my favorite garden creations. It’s not only because of its rustic appeal, but also because it captures my passion for crafting distinctive decorations from thrifted finds. There’s something deeply rewarding about transformingoverlooked supplies (such as that discount-store nautical rope!) into distinctive creations that bring character to my garden.
Whether you’re someone who enjoys hunting for thrifted treasures like I do or simply delights in creating by hand, this project shows that beautiful results don’t require expensive materials. With its nature-inspired style, affordable supplies, and rich texture, what’s not to adore?
Want to see more wreaths?? Take a look at the 40+ DIY Wreaths I’ve created!
Now it’s your time to try!
- Tag me [@CottageOnBunkerHill on Facebook and @cottage_on_bunker_hill on Instagram] if you make one—I’d be thrilled to see your thrifted take on it!
- Pin this for future inspiration, or pass it along to a fellow DIY lover.
- P.S.Even more budget-friendly garden decor ideas are on the way… including how I repurposed theothertreasures from that thrift haul!
Enjoy crafting (and thrifting!), kindred friends!
Have your projects showcased! If this project—or any of my other DIY creations—inspired you, I’d be delighted to see your work and feature you in the Reader’s Spotlight gallery. Email a photo to jennifer@cottageonbunkerhill.com
xo, Jennifer