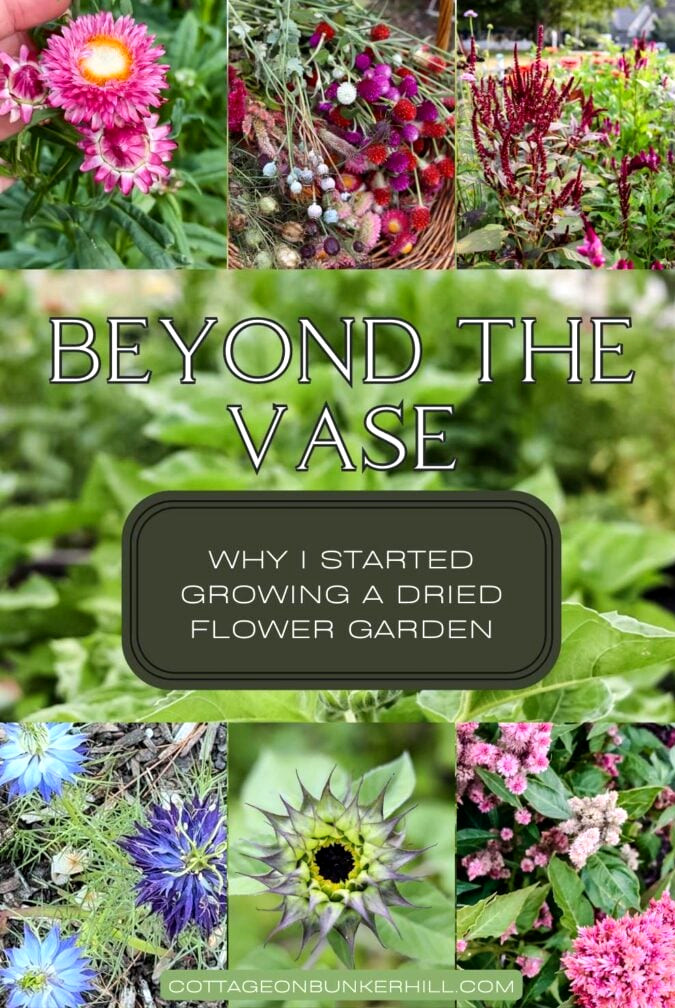
Five years ago, I created my own cut flower garden here at the Cottage. I was hoping to enjoy fresh bouquets, but I discovered something even more wonderful: strawflowers.
During that first year, I planted them on a whim and quickly fell in love with their delicate, papery petals and vivid, jewel-like hues. The true wonder, however, came after harvesting them. I suspended a bunch to dry, and several months later, those very same flowers brightened a winter wreath on my front door. That’s when inspiration struck.
From there, my gardening approach began to change. I started cultivating the garden for two reasons: to enjoy the temporary beauty of a vase on the kitchen table and to create enduring dried arrangements for the mantel. I added increasing numbers of varieties chosen especially for drying, and it soon became—and still is—one of my favorite parts of the gardening season.
This complete, circular process is incredibly rewarding. It extends the growing season, helps me use every seed wisely, and allows me to bring a real piece of my summer garden indoors throughout the year. If you’ve ever dreamed of growing your own “everlasting” bouquet for wreaths, arrangements, and charming water-free decor, this guide is meant for you. I’m revealing the eight flowers that form the foundation of my dried botanical creations, precisely how I raise them from seed, and how I use them to add cottage garden character to my home long after frost has arrived.
Hello! I’m Jennifer from Cottage on Bunker Hill. I’ve been a home gardener for more than 20 years, and for the past 5, I’ve concentrated on our cut flower garden. Through plenty of experimentation, mistakes, and muddy knees, I’ve learned what truly works. My goal is to grow flowers with intention, whether they’re destined for a kitchen-table vase or long-lasting projects, using straightforward, repeatable techniques that work for a genuinely busy life.
Best Flowers to Grow for Drying: A Complete Seed-to-Harvest Guide
Whether you’re an experienced gardener or preparing your very first seed tray, growing flowers for drying calls for a somewhat different approach than raising them for fresh bouquets. During the last five years at my Cottage garden, I’ve tested dozens of varieties to determine which ones preserve their color, retain their form, and remain beautiful in home decor over time.
This guide removes the uncertainty from the process. I’m outlining my “everlasting” routine: the specific steps I follow to achieve a successful harvest, beginning when the seed enters the soil and ending when the dried flower is placed into a wreath.
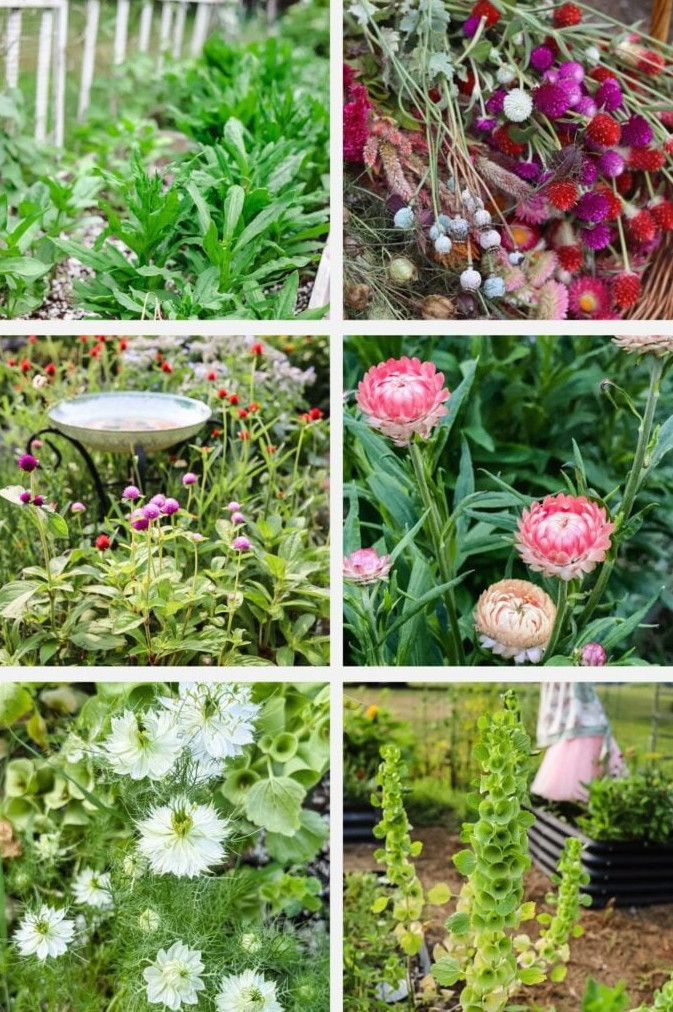
In This Guide, We Will Cover:
- My Faves: My carefully selected list of the most dependable flowers for drying.
- Starting for Success: Why I winter sow certain varieties and begin others beneath grow lights.
- The Harvest Window: The essential secret to gathering flowers before they “shatter” or fade.
- Drying for Longevity: The proper way to cure your botanicals for use throughout the year.
When you concentrate on these particular varieties, you’re doing more than planting a garden; you’re building a supply of materials for crafts that will make your home feel like a blooming cottage, even during the middle of January.
Why These Flowers?
The truth is, hundreds of annual and perennial flowers dry wonderfully. You could devote an entire garden to them! Still, when designing my cut flower beds, I prioritize annuals that are simple to grow from seed, highly productive, and capable of making a strong impression in both summer bouquets and winter creations. The varieties I selected are my own dependable, well-tested favorites. They have earned their place by consistently providing a beautiful assortment of colors, forms, and textures. Grow this combination, and you’ll have everything required to make full, captivating dried arrangements throughout the year.
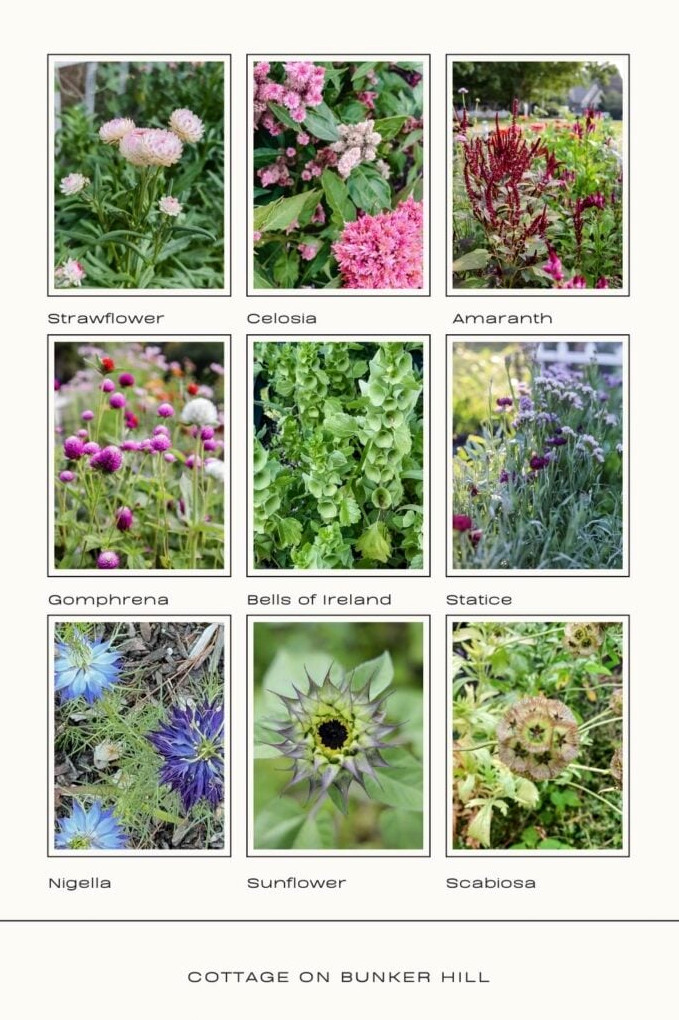
- Strawflowers- for their remarkable, papery blossoms in jewel-like shades.
- Celosia- available in every form: plush plumes, unusual cockscombs, and graceful wheat varieties. Their texture and autumn color are unmatched.
- Amaranth- for bold drama and elegant, cascading plumes.
- Gomphrena- for bright, clover-shaped bursts of color on remarkably sturdy plants.
- Bells of Ireland- for distinctive, architectural green forms that gradually soften into cream.
- Statice- for timeless, papery clusters that preserve their color remarkably well.
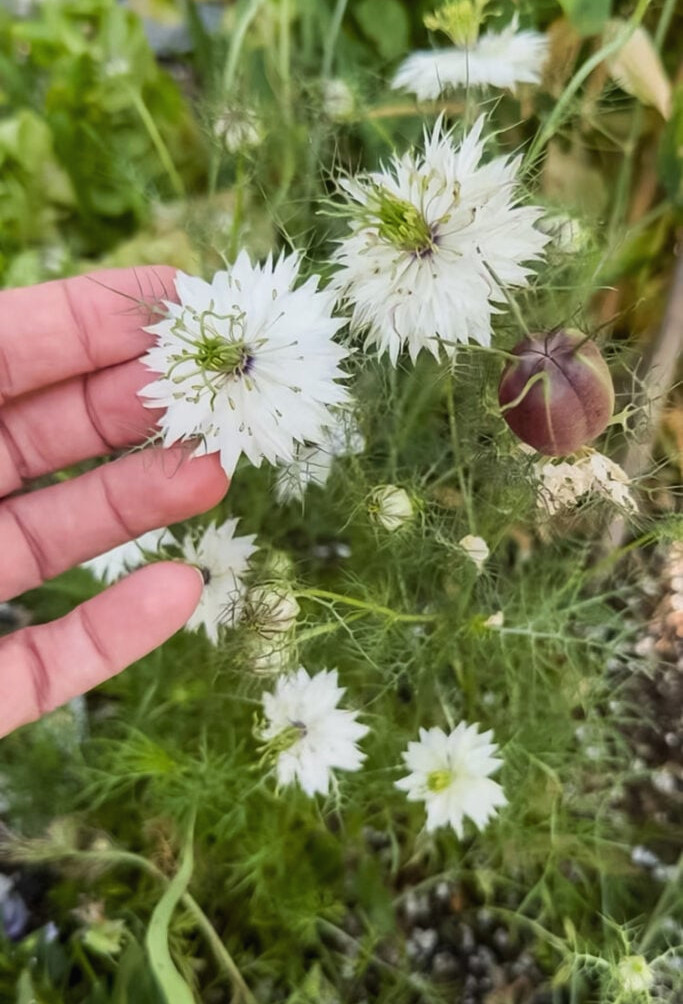
- Nigella- often known as ‘Love-in-a-Mist,’ valued for its delicate, pepper-shaker-like seed pods that bring an airy quality.
- Small Sunflowers- for that classic, cheerful shape once thoroughly dried.
- Scabiosa Starflower-an intriguing drumstick-like dried bloom (some seed companies call them ‘drumsticks’)
For friends who are new to gardening, I always recommend beginning with a manageable space. Create a colorful, uncomplicated bed filled with strawflowers, celosia, and zinnias. Here’s why: Although zinnias aren’t ideal dried flowers, they’re unbeatable when it comes to quick results. They’ll reward you with buckets of blossoms and the encouragement to grow even more.
How & When To Begin Your Everlasting Flowers
The best part about these flowers? Most are wonderfully easygoing. Still, proper timing is essential for enjoying a long harvest of blooms suitable for drying. I combine several approaches: I start certain varieties indoors for an early advantage, while I sow others directly in the places where they’ll grow. Here’s the approach I’m taking for this year’s “everlasting” garden.
Before making your plans, identify your growing zone. The USDA Plant Hardiness Zone Map is a helpful reference. I garden in zone 6a. However, gardening in New Hampshire has taught me to be ready for surprises, including Mother Nature’s late-season frost curveballs. My guideline? I wait until late May before setting out tender seedlings.
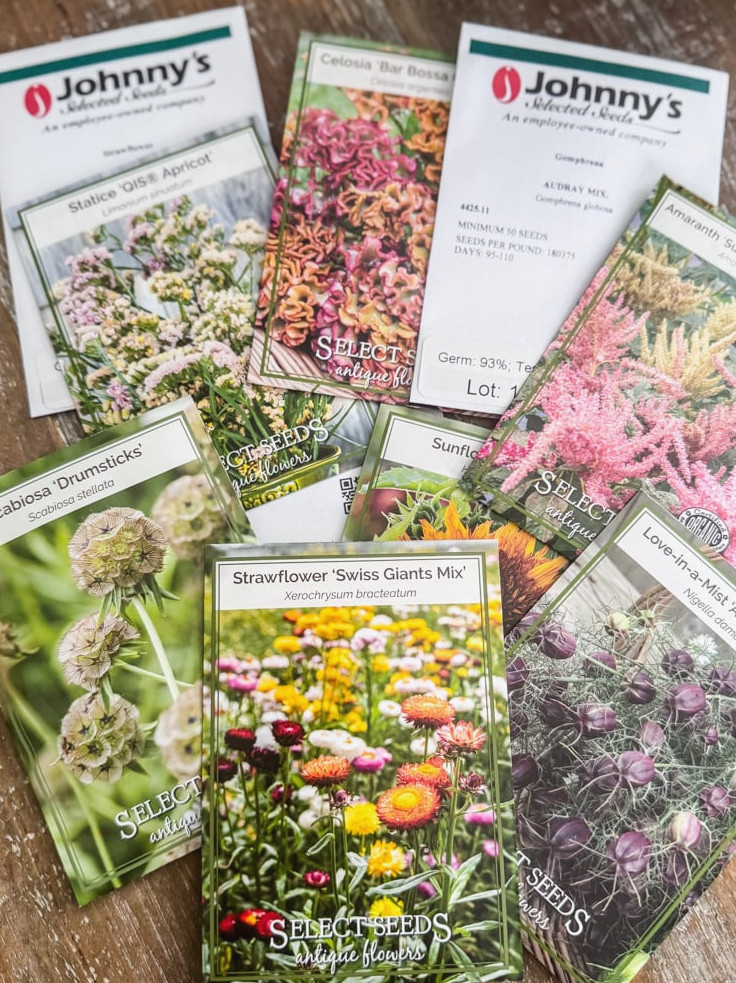
Before placing your order, visit the seed company’s website. You’ll find all the essential details there: whether a variety should be started indoors or sown directly, its days to maturity, and its lighting needs.
I organize my seed packets the same way. I separate them into two groups: seeds that must be started indoors (marked with the number of weeks before frost) and those meant for direct sowing. Since my indoor seed-starting area is small, I aim to direct sow or winter sow whenever I can!
What You’ll Need To Begin:
- Seeds for our flowers (my favorite suppliers are Johnny’s Select and Select Seeds; both are New England based farms )
- For starting seeds indoors: grow lights, seed-starting mix, & trays
- Plant labels (Believe me, you’ll forget!)
- A calendar for recording your final frost date and seed-starting schedule (Mine falls around mid-May, although Memorial Day weekend is the traditional time to plant).
- Read My Seed Starting Basics for guidance
My ‘Essential’ Everlasting Flowers
|
Flower |
My Chosen Method |
When to Begin |
Notes & Reasoning |
|---|---|---|---|
|
Strawflowers |
Start Indoors |
6-8 weeks before last frost |
They require a lengthy growing period. Direct sowing has worked poorly for me here—they simply need too much time to flower. |
|
Celosia |
Start Indoors |
4-6 weeks before last frost |
Warm soil is necessary for germination. By starting indoors, I have enormous, striking plumes ready by August. |
|
Amaranth |
Direct Sow |
After last frost, once soil is warm |
These grow quickly and strongly! I scatter the seeds along a sunny row, then thin the seedlings afterward. It couldn’t be simpler. |
|
Gomphrena |
Start Indoors |
6-8 weeks before last frost |
It starts slowly but becomes incredibly productive. Giving it an early start results in many more blooms. |
|
Bells of Ireland |
Winter Sow/ Or Direct |
I winter sow these in Feb. |
They need a cold period and are excellent candidates for winter sowing. They also reseed themselves quite well. |
|
Statice |
Start Indoors |
6-8 weeks before last frost |
Another slow-growing but rewarding bloomer. Since the seedlings are so small, starting them indoors provides better control. |
|
Nigella |
Direct Sow |
Early spring |
It dislikes being transplanted. Honestly, simply scatter the seeds wherever you want them to grow. |
|
Small Sunflowers |
Direct Sow |
After last frost |
They develop incredibly quickly. Sowing them directly helps create sturdy taproots. I plant a new batch every two weeks to extend the harvest. |
|
Scabiosa ‘Starflower’ |
Start Indoors/ Direct |
4-6 weeks before last frost. |
I’ve grown starflowers both ways—indoors and directly—and both methods have worked well for me. |
Summer Care in the Cutting Garden
Once your seedlings are planted in the ground and temperatures begin to rise, the real excitement starts. This is the stage when those young plants burst into growth. A little care at this point leads to armloads of flowers later on. My summer maintenance routine comes down to three easy tasks: pinching to encourage fullness, staking for support (when necessary), and cuttingconstantly.
-
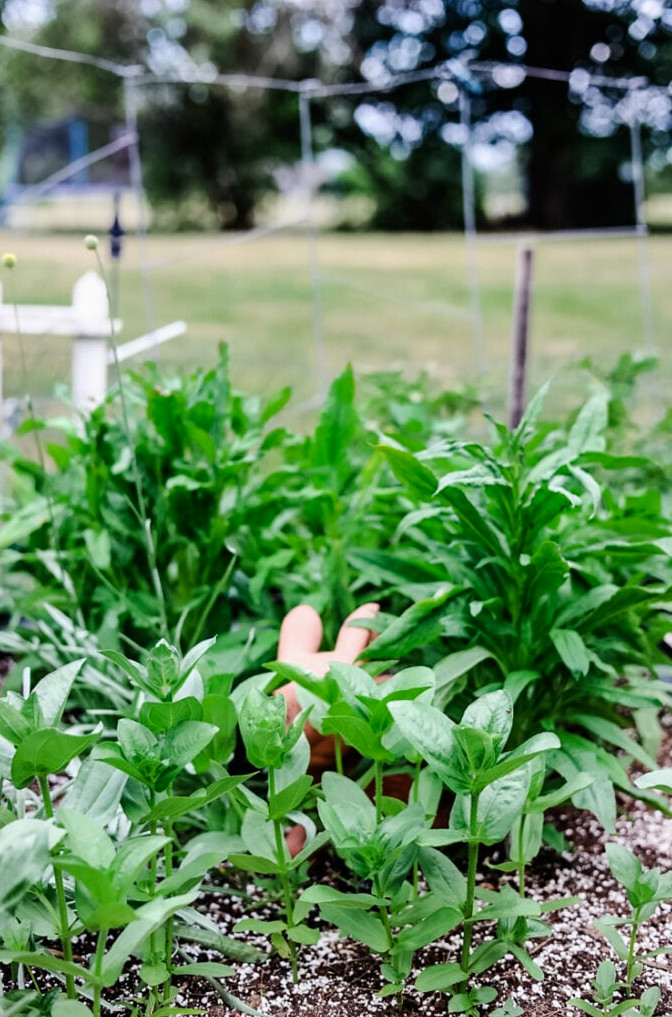
Strawflowers & Zinnias at the start of July -
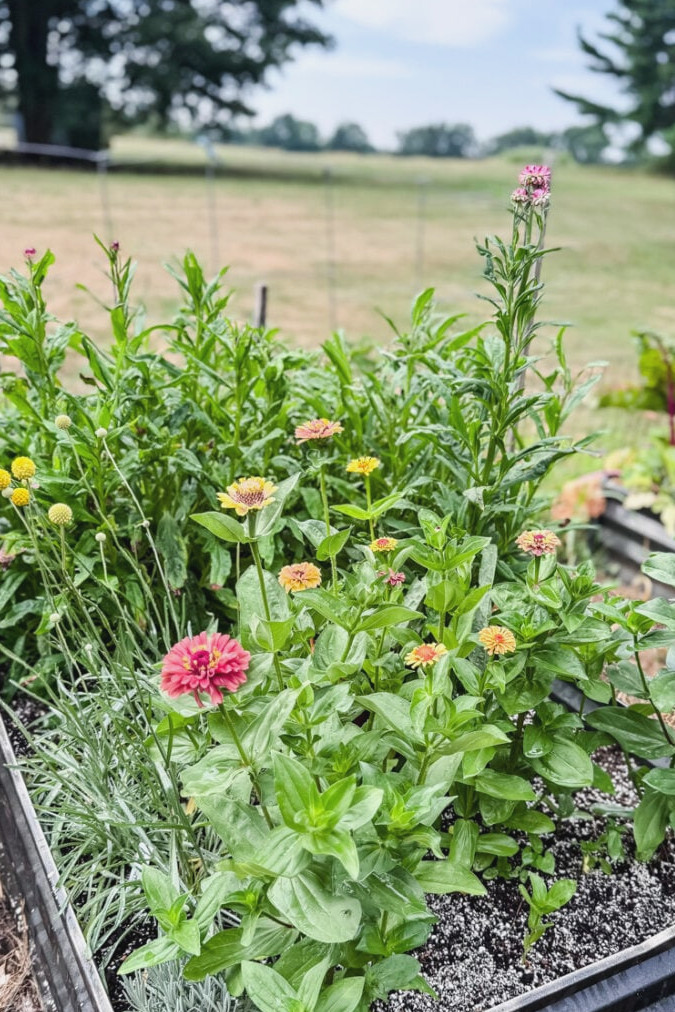
A few weeks afterward, the flowers have tripled in size and are blooming
What You’ll Need For Summer Gardening:
- Your fingers (for pinching!)
- Garden twine and solid stakes (bamboo, metal – use whatever is available)
- Sharp, sanitized snips or pruners
- A consistent watering schedule (morning is ideal)
- A little patience
1. Pinch For More Blooms (The Best Free Trick!)
It may seem backward, but believe me, pinching produces more flowers. When strawflowers, celosia, and amaranth reach approximately 8-12 inches tall, use your fingernails (or snips) to remove the uppermost few inches of the central stem, right above a pair of leaves.
Why You’ll Love This: This tells the plant to stop shooting upward and instead send out side branches. A single stem can turn into three, five, or even seven flowering stems. More branches give you many more blooms to cut and dry.
A Quick Pinching Guide:
- DO Pinch: Strawflowers, Celosia, & Amaranth
- DON’T Pinch: Gomphrena, Statice, Nigella, Bells of Ireland, Starflowers, & Sunflowers.
2. Stake Early, Before They Flop
Nothing is worsemore heartbreaking than a flawless celosia bloom lying face-down in the mud after a summer downpour! I learned this lesson the difficult way: stake ahead of time, before support becomes necessary.
My Easy Staking Technique When I’m supporting an entire row or patch of blooms, such as my amaranth, I rely on the “corral” approach. I place tall bamboo stakes at each corner of the garden bed, then circle the perimeter with twine at roughly mid-plant height. This keeps the flowers gently standing without taking attention away from the bed’s beauty. For single flowers with especially weighty heads, like sunflowers, I fasten each one to a strong individual stake as it grows, whenever support is needed.
Fortunately, our house and the woods behind us shelter the garden on most sides, meaning powerful winds usually aren’t something I have to contend with.
How To
Begin a Cut Flower Garden
When & How to Gather Flowers (Timing Is Crucial!)
Waiting too long to gather flowers is the most common error gardeners make. As I noted earlier, capturing those “vibrant, jewel-toned colors” depends entirely on proper timing. Once a bloom has completely opened in the garden, it will probably crumble or lose its form after drying. You want to harvest each flower when its color is at its richest, butbeforeit begins producing seeds, a sign that the plant is starting to fade and retreat.
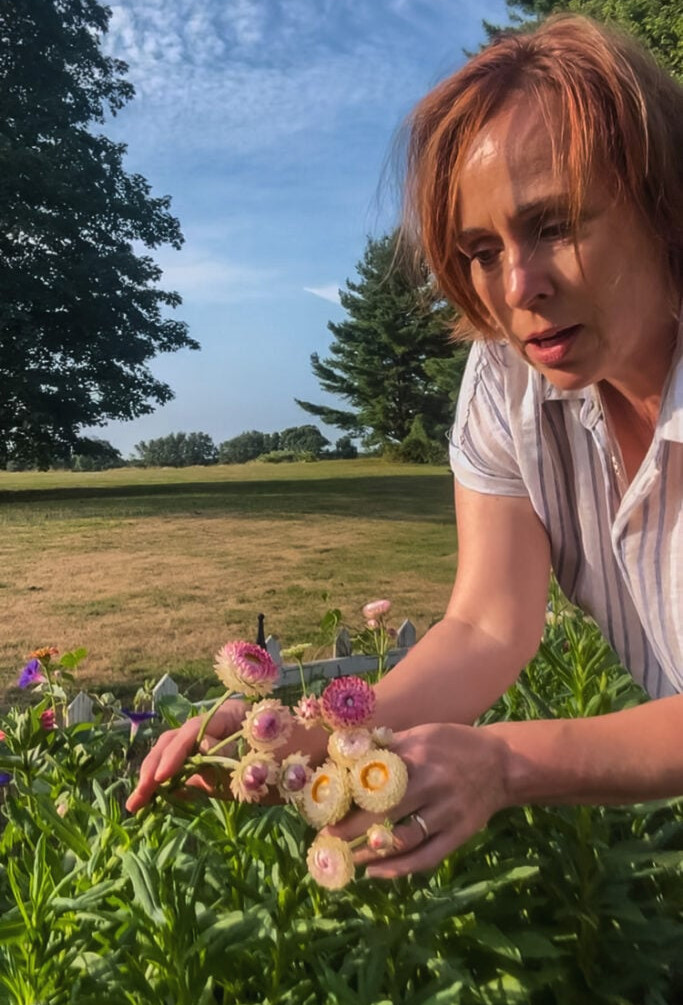
Harvest your flowers shortly after the morning dew has evaporated. If the morning opportunity passes, evening is the next ideal time—but be sure to look for drowsy bees resting inside the blossoms.
Here’s my most important advice: leave the stems as lengthy as possible when cutting. Extended stems make hanging flowers to dry far simpler, and you can always shorten them later when creating arrangements.
The Essential Harvesting Guidelines
- Timing Matters Most: Cut consistently in the late morning, once the dew has disappeared and before the intense midday sun arrives. At that point, the stems contain less moisture, helping reduce the chance of mold during drying.
- Look for Pollinators: When gathering flowers at dusk, carefully inspect each blossom for bees or butterflies that may be resting inside.
- Choose Lengthy Stems: Take each stem as long as the plant permits. Longer stems are simpler to bundle and suspend, while excess length can always be removed later for arrangements. It’s the one feature you cannot restore!
Supplies Needed For Harvesting
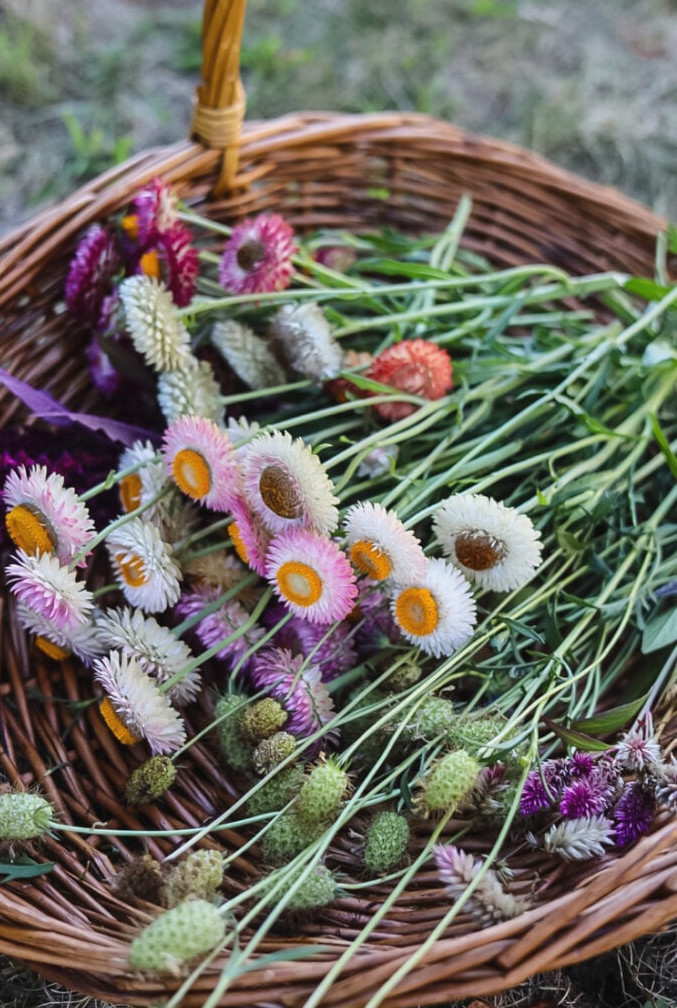
- Clean, sharp scissors or pruning shears
- A bucket or basket
- Rubber bands or twine for tying bundles
- A dark, dry, well-ventilated place for hanging (such as a shed, garage, or extra closet)
A Flower-by-Flower Guide to Harvesting:
Here’s precisely what I watch for in every flower variety.
Strawflowers
-
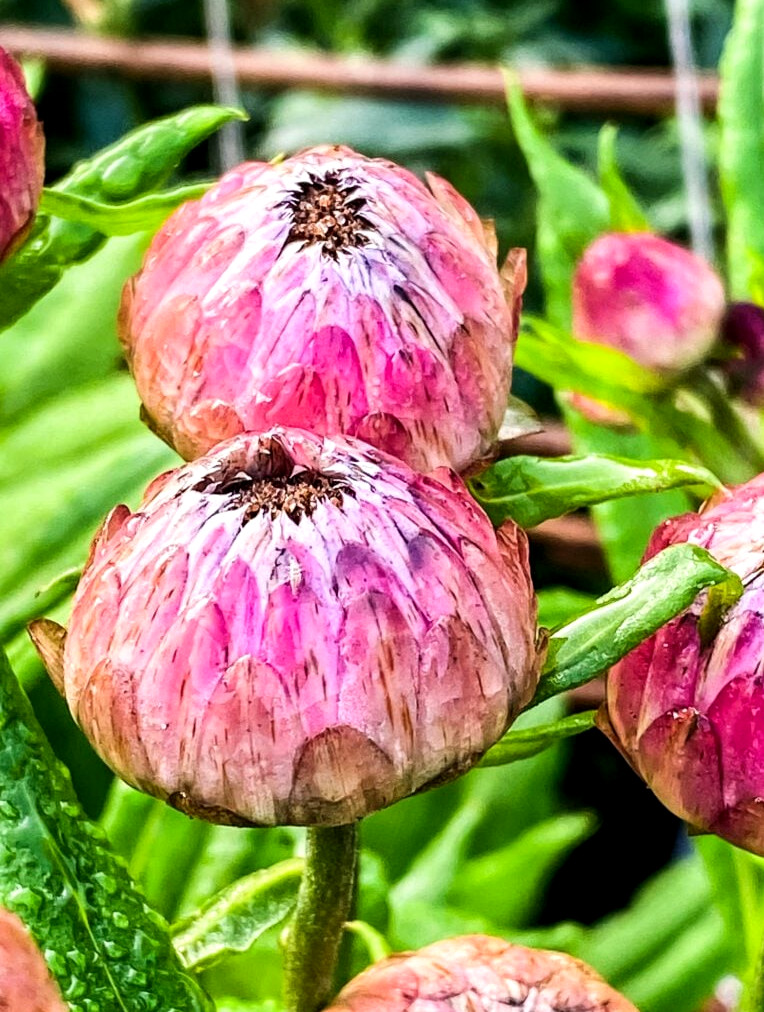
Strawflower prior to blooming -
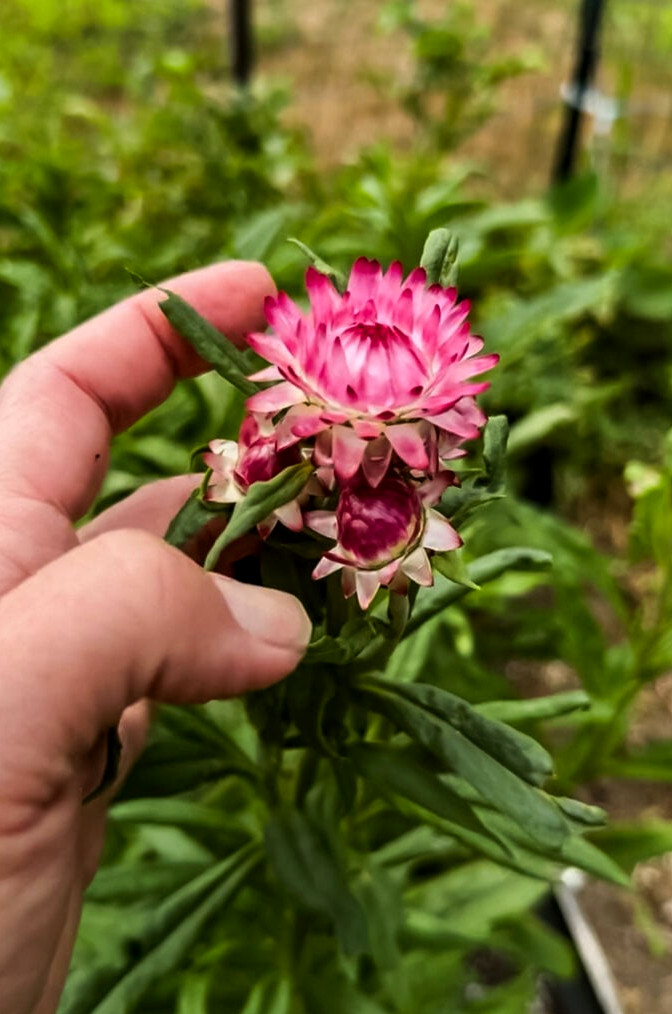
‘Bright Rose’ Strawflower variety -
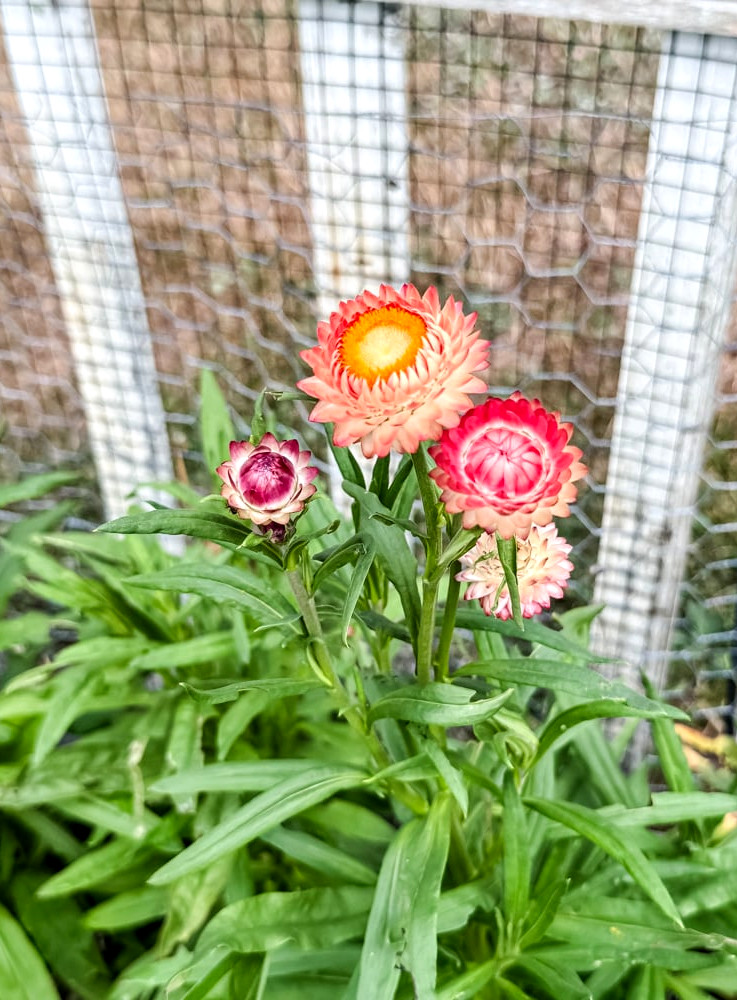
‘King Sized Salmon’ Strawflower variety -
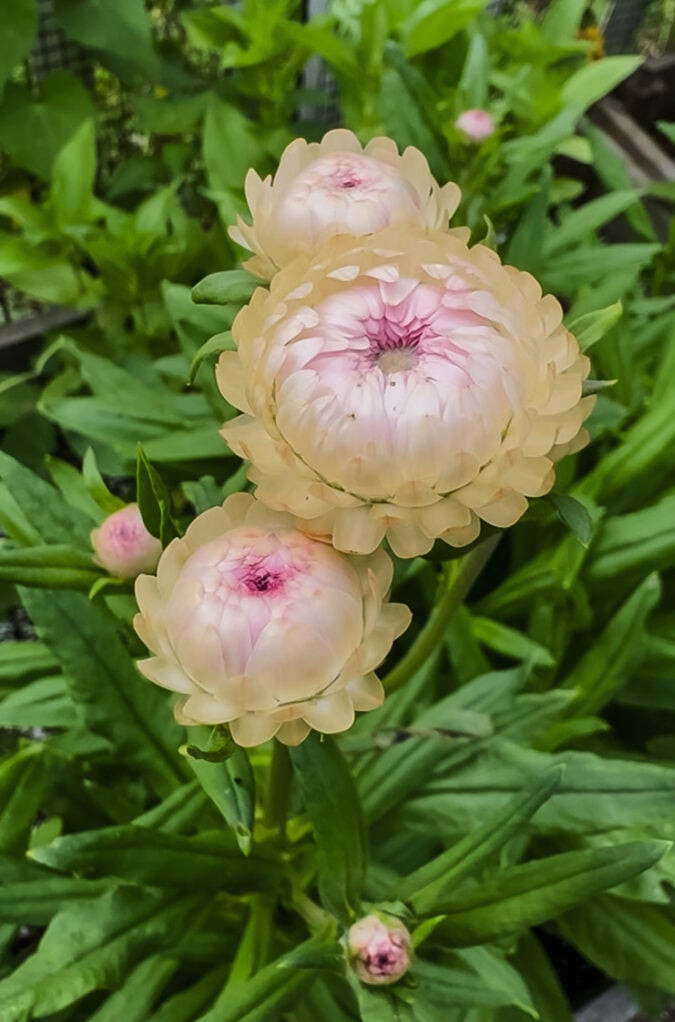
‘Silvery Rose’ Strawflower variety
Strawflowers:Gather the blooms when they areonly slightly open. The center should remain compact. Waiting until they have opened completely allows the center to shed its pollen, and the petals could break apart once dried.
Celosia
Harvest the plumes or cockscombs once they feel solid to the touch and their color has reached full intensity, but prior to the seeds near the flower’s base beginning to darken and fall.
Several celosia varieties shown above came from Floret Farms, although they are unavailable for the season. The purple celosia is ‘Asian Garden’ (Select Seeds)
Amaranth
Amaranth: For trailing types such as ‘Love-Lies-Bleeding,’ gather them when the tails are lengthy and striking while still retaining their vivid color. Upright plumes should be cut once fully developed, before they begin to take on a papery texture.
Gomphrena
Gomphrena: Harvest the round, globe-shaped heads when they are completely colored and sturdy. Their form and hue remain exceptionally well.
Bells of Ireland
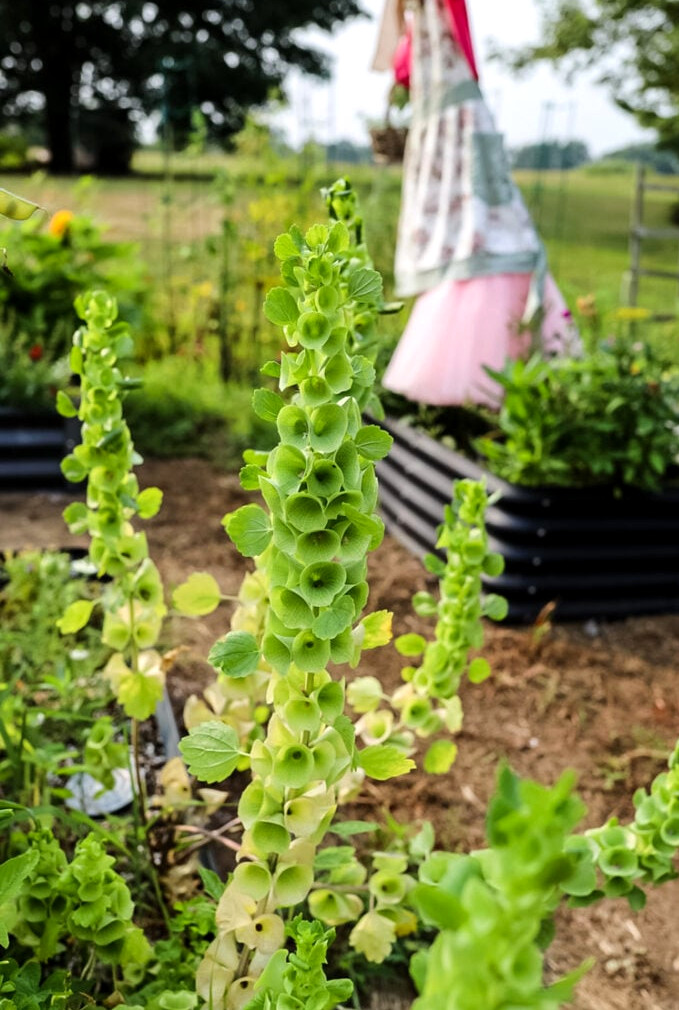
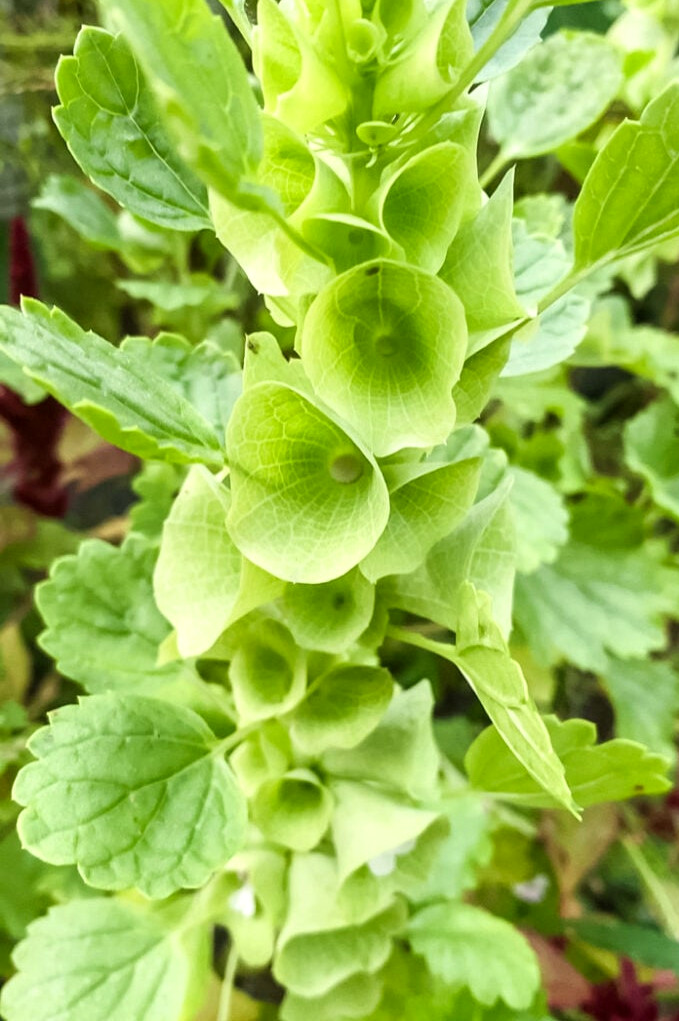
Bells of Ireland:Gather them once the green “bells” are vivid and the small white blossoms within have just appeared or dropped. They gradually fade into a beautiful cream shade.
I regularly find Bells of Ireland seeds at home improvement retailers/Walmart, so ordering online may not be necessary. I purchase my seeds from Select Seeds.
Statice
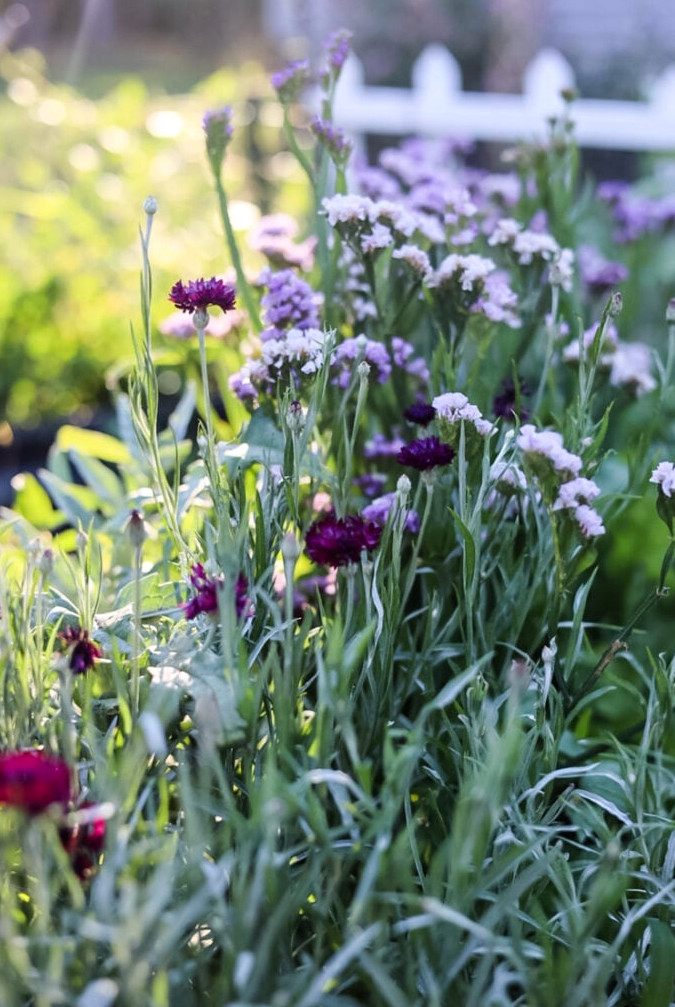
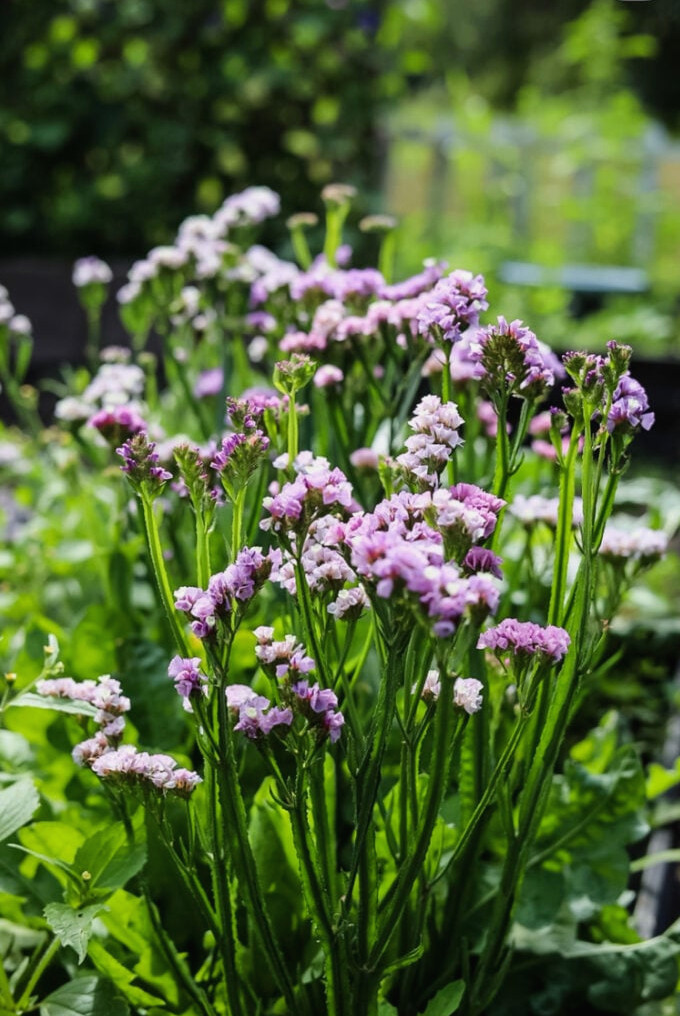
Statice:Harvest once the majority of the tiny blooms in each cluster are open and vivid in color. Do not cut them while only the papery calyces are visible.
Featured: ‘Pastel Shades’ Statice
Nigella
-
-
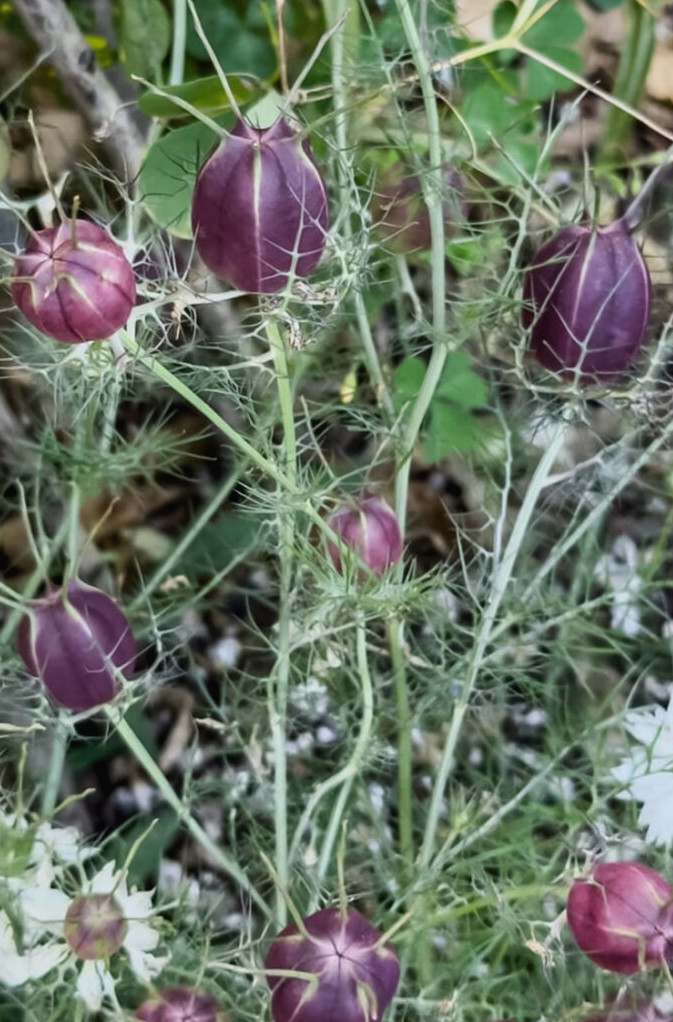
This is exactly why I cultivate them!
Nigella:Allow the lovely seed pods to develop completely and change to pale green, beige, purple, or striped brown. Wait for the fragile petals to drop first—you’re gathering the pod.
Sunflowers
Small Sunflowers: One of the flowers I most enjoy cultivating! They instantly bring a bright, happy feeling to the garden!
- A fascinating variety called ‘SunFill’ is one I plant every season. Its unusual blooms are perfect for adding to wreaths, and I cut them before the miniature petals unfold.
- Typically, the best harvest time is when the petals have opened completely while the center still appears fresh and has not begun developing seeds. The back of the flower head should remain green rather than turning yellow.
- During the Summer months, I sow my single-bloom sunflowers successively every 2 weeks so I have an abundant supply for vases and drying.
Scabiosa ‘Starflower’
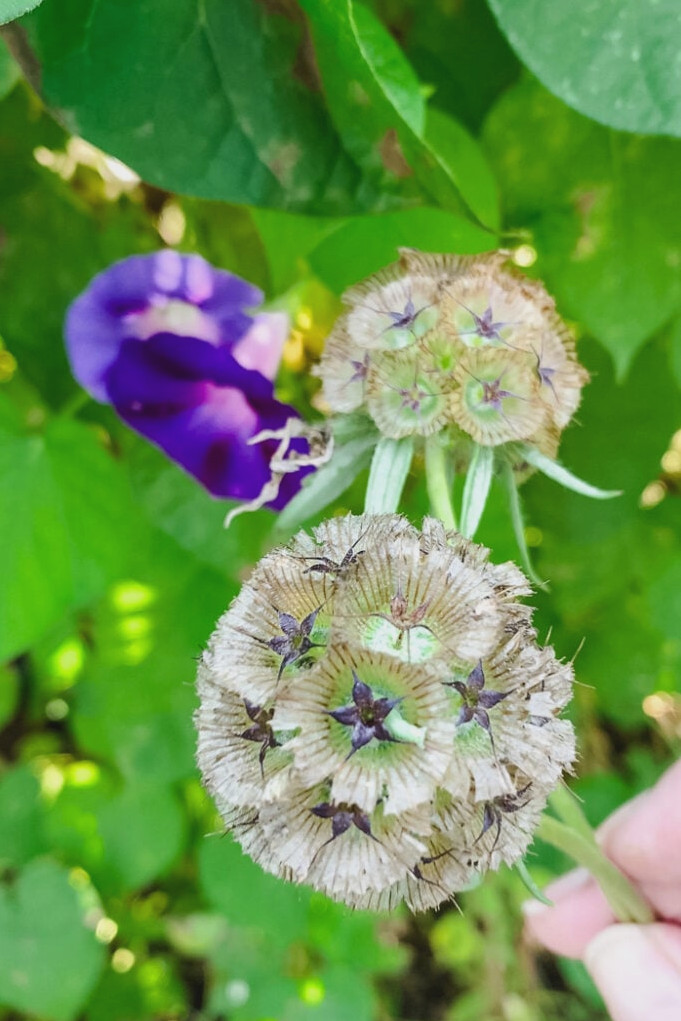
Scabiosa Starflower: Harvest when the edges become a deep bronze and the star-shaped centers are just starting to darken (they develop into a star shape).
My Simple Drying Technique: Effortless Air Drying
There’s no need for elaborate tools to preserve your botanicals. The oldest technique remains the most effective:air drying. It’s easy, reliable, and beautifully maintains the natural form and color of your flowers.
Supplies You’ll Need For Drying
- Cut flower bundles (from the earlier step!)
- Rubber bands (essential because they tighten as the stems contract)
- Twine, paperclips, or hanging hooks
- A cool, dark, dry, and well-aired location (such as an unused closet, garden shed, dry basement, or attic)
Easy Instructions For Air-Drying Flowers
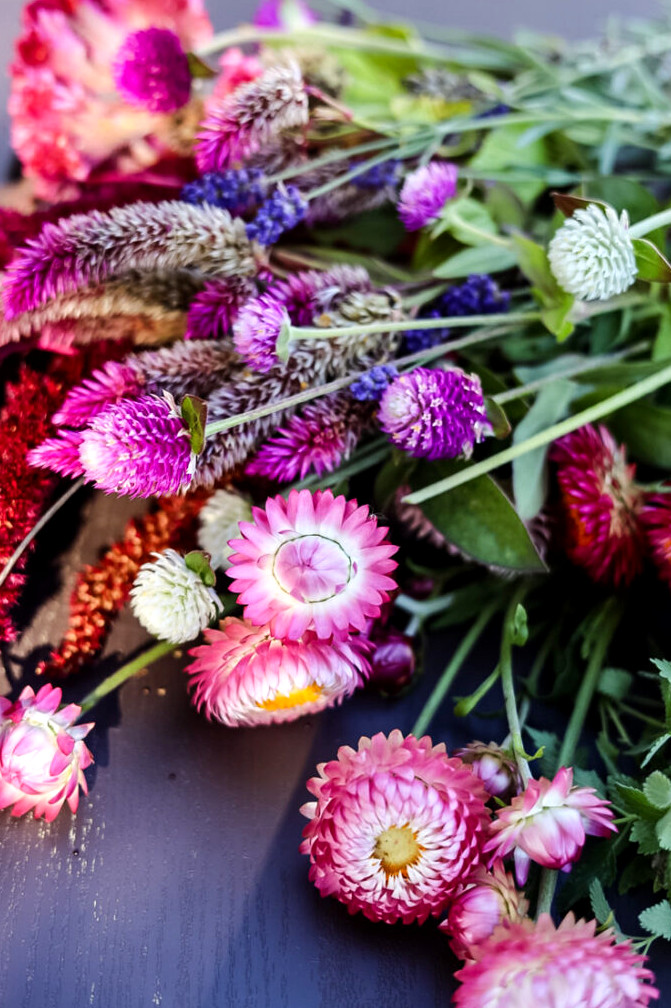
- Remove the Leaves: Strip every leaf from the stems. Foliage retains moisture, which may encourage mold, and it does not dry especially well.
- Make Bundles: Combine 5-10 stems from the same flower variety. Oversized bundles may hold in moisture and promote mold. Fasten them firmly with a rubber band (rather than twine; stems shrink while drying, causing twine to loosen).
- Hang: Secure each bundle upside down from a rod, hook, hanger, or even a tightly stretched string. I rely on an accordion-style coat peg rack. This position allows the stems to dry straight and prevents the flower heads from sagging.
- Allow Time: Leave the bundles undisturbed for 1 to 3 weeks. Drying time varies according to stem thickness and the humidity in your area. They are ready when the stems break cleanly and the flower heads feel thoroughly papery.
- Put Away: After they are completely dry, leave them in their bundles or carefully arrange them in a cardboard box lined with tissue paper to keep dust away. Store them in the same dark, dry spot until you are ready to use them.
Why This Method Works & My Best Advice
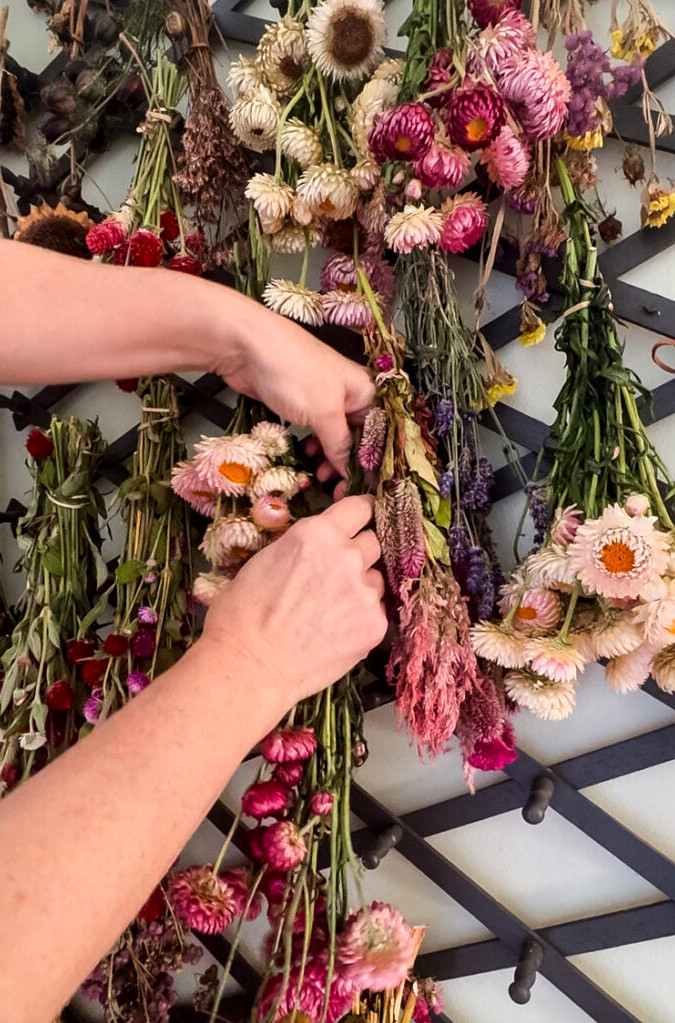
The winning combination is Dark + Dry + Airy. Shielding the flowers from sunlight helps retain their color, a dry environment limits mold, and steady airflow promotes uniform drying.
My #1 Takeaway: Leave generous room around your bundles. Avoid packing them tightly together like garments in a closet. Proper air circulation between bundles is the most effective defense against mildew, particularly for dense flowers such as celosia or statice.
A Note on Special Cases: For especially dense flowers, such as large zinnias or peonies, some gardeners choose silica gel to achieve quicker, more precise drying. However, for the everlasting flowers featured on our list, straightforward air drying does the job beautifully every time.
My Personal Drying Arrangement
I rely on a large accordion-style peg coat rack, discovered at a nearby antique shop, which I place in the hallway between my kitchen and living room.
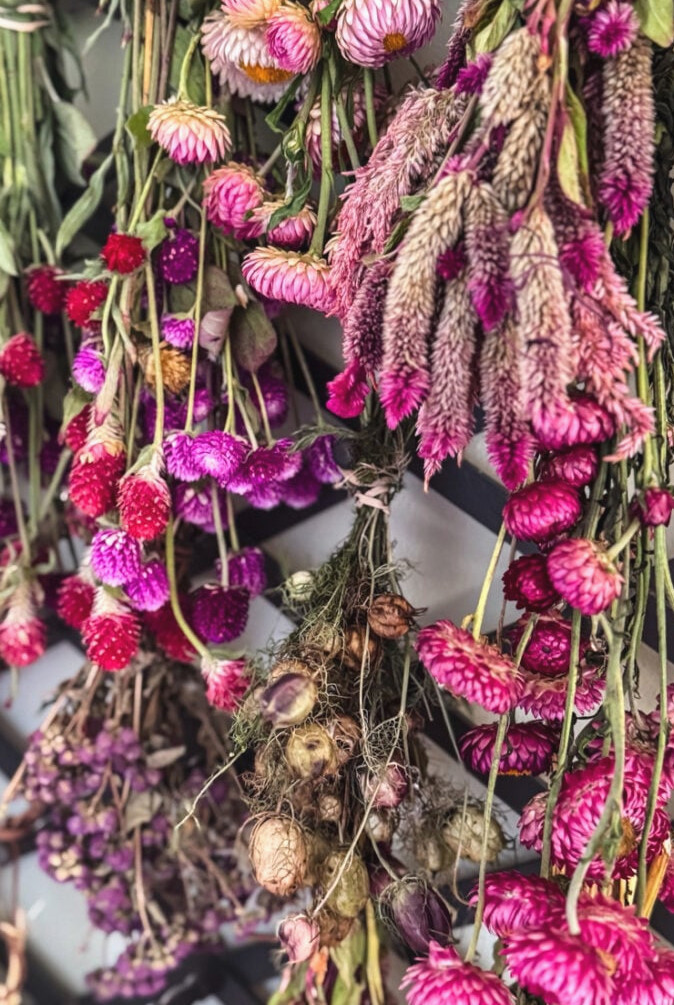
The rack sits out of direct sun and benefits from plenty of air circulation. This location suits me well since my basement becomes overly humid during summer, while the garage is excessively warm and bright. It can hold numerous bundles and adds a charming touch as the flowers dry!
The Reward: Bringing Your Everlasting Garden Inside
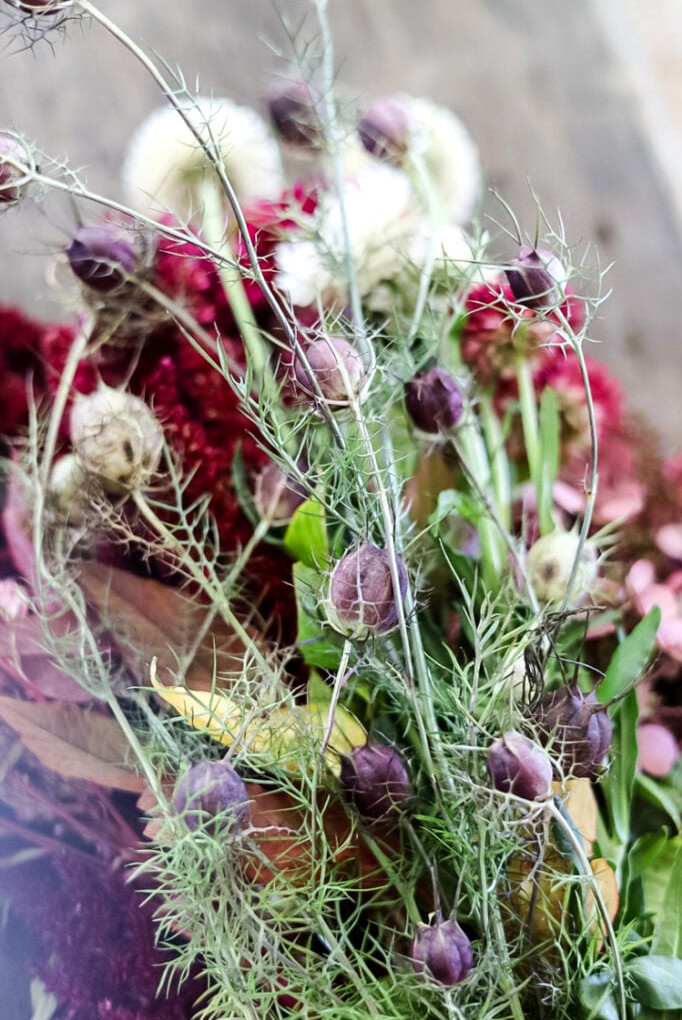
This is the most enjoyable part. Once the waiting is over, you finally get to create! Keeping a supply of flowers dried from your own garden feels like having a natural craft shop inside your home. These are my favorite ways to enjoy them, transforming summer’s plenty into cottage-style beauty all year long.
Supplies You’ll Need For Projects
- Your lovely dried flowers
- Florist’s wire (for wiring strawflowers)
- Hot glue gun with glue sticks
- Pruning shears or sturdy scissors
- A wreath form, frame, vase, or another base.
Raising flowers specifically for drying creates the most rewarding cycle: beginning with a seed, moving to garden splendor, and ending with a lasting piece of decor that preserves summer’s spirit through every season.I enjoy my dried flowers throughout the year, incorporating them into seasonal wreaths, festive centerpieces, and everyday displays. For more focused project ideas, you can always explore my complete collection ofFloral & Botanical Projects.
My Favorite Dried Flower Projects To Try
Long-Lasting Bouquets
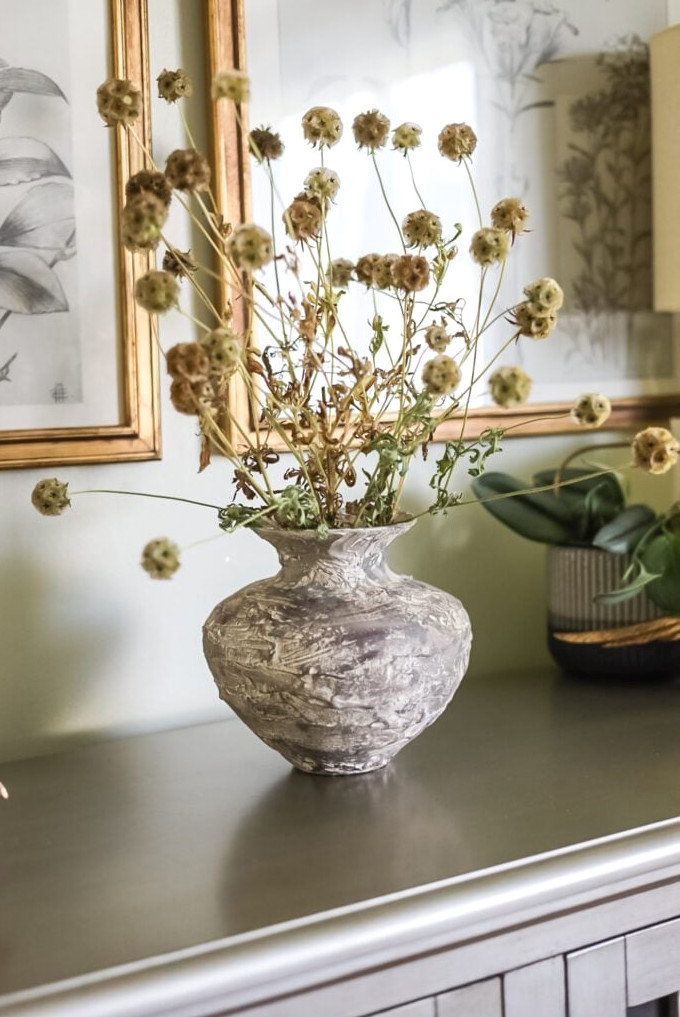
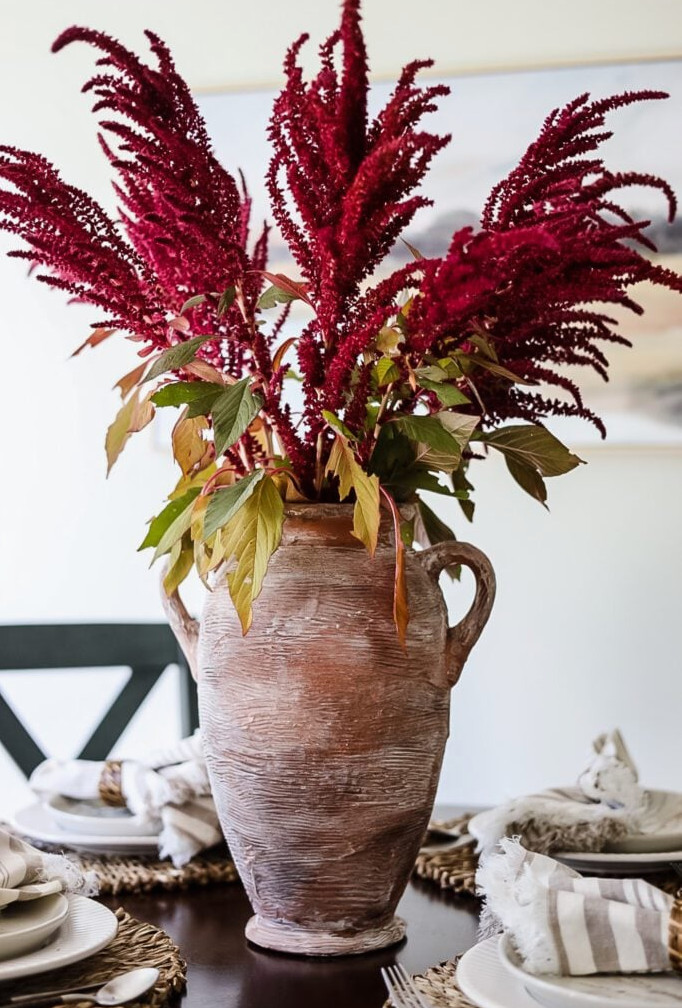
This is the simplest way to begin. Place a varied bunch in a vase you love. There’s no water required! I enjoy combining different textures, like celosia’s delicate plumes, gomphrena’s rounded bursts, and the structural bells. You can also use one flower variety alone, just as I did here!
Bright Front Door Wreath
This design is my trademark. I start with a basic grapevine wreath or even a straw form, then tuck flower clusters into it or attach them with hot glue. At times, while making a wreath, I gather flowers straight from the garden and let themdry directly on the wreath.
You can create a simple wreath featuring only a handful of dried flowers, or take a bolder approach by covering the whole wreath! For added dimension, combine different colors, forms & textures.
Wreaths Featured Above:
Comforting Decorations
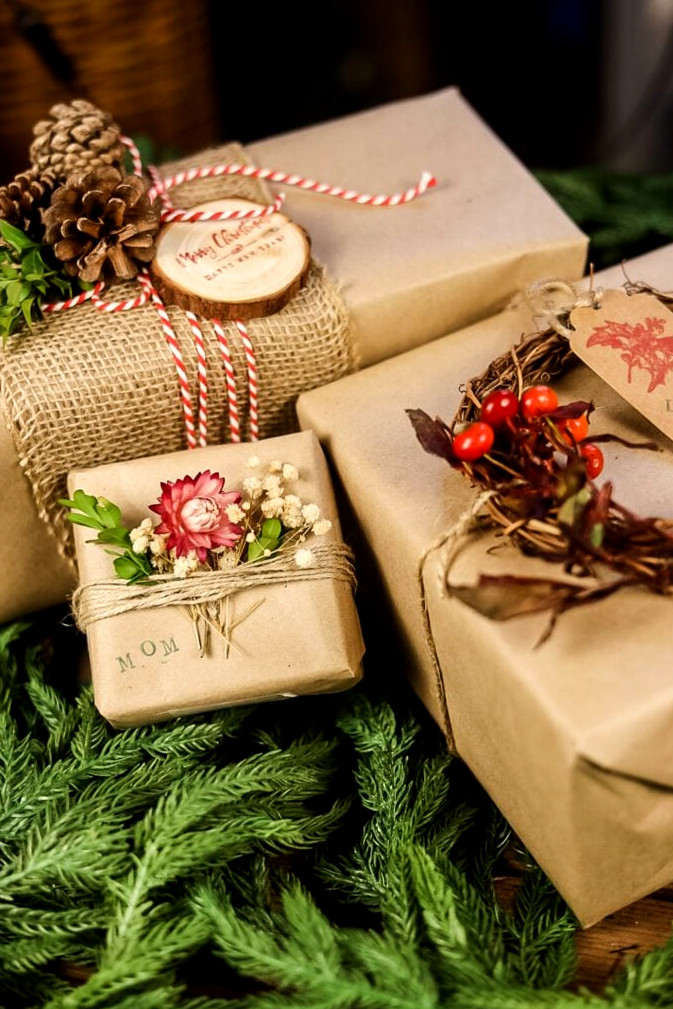
Have fun experimenting! I tuck a few tiny flowers onto wrapped gifts, attach them to simple notebooks, or fasten them to seasonal ornaments for a thoughtful accent. A petite bouquet secured with twine becomes an especially charming bookmark.
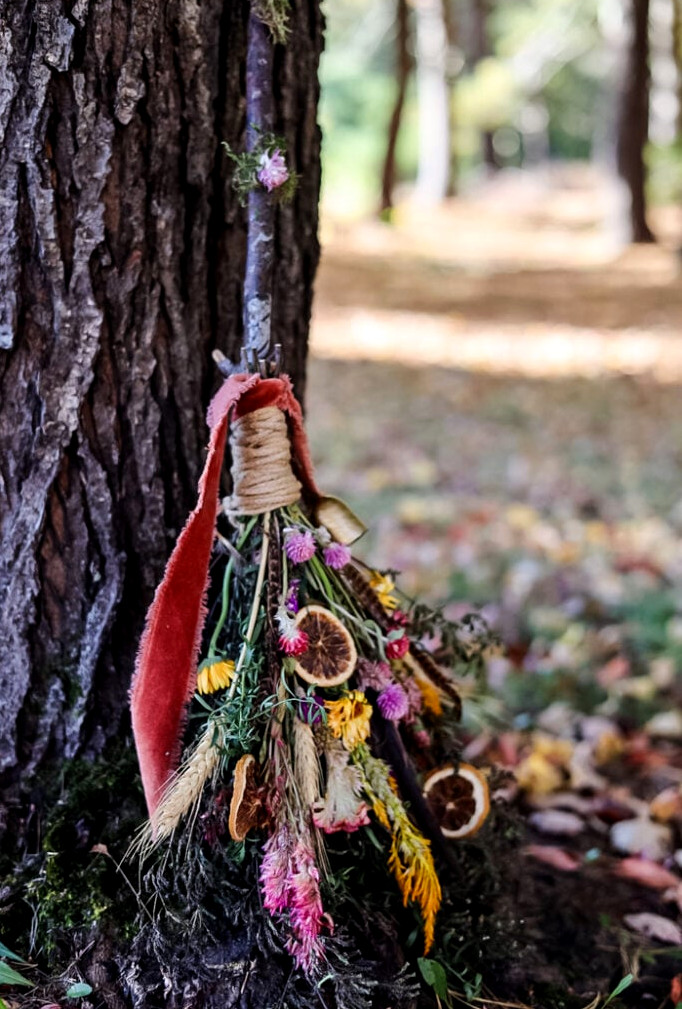
Enchanted Brooms
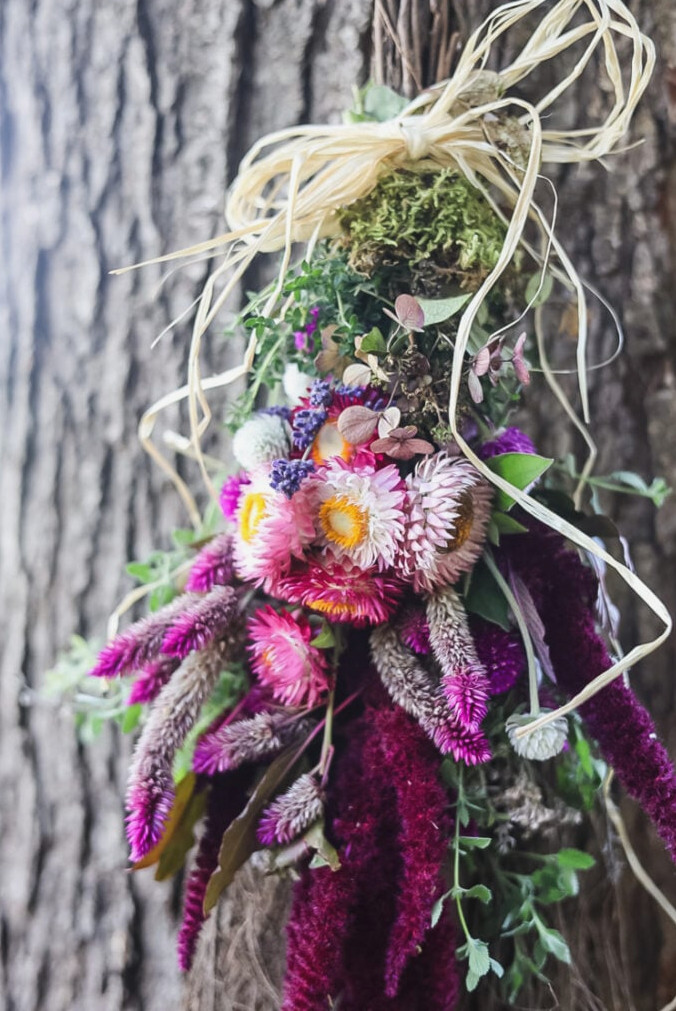
For the last two years, I’ve enjoyed creating a playful decorative witch broom. One year, I used a purchased cinnamon broom; another time, I made one myself with a branch and greenery.
Nature-Inspired Ornaments
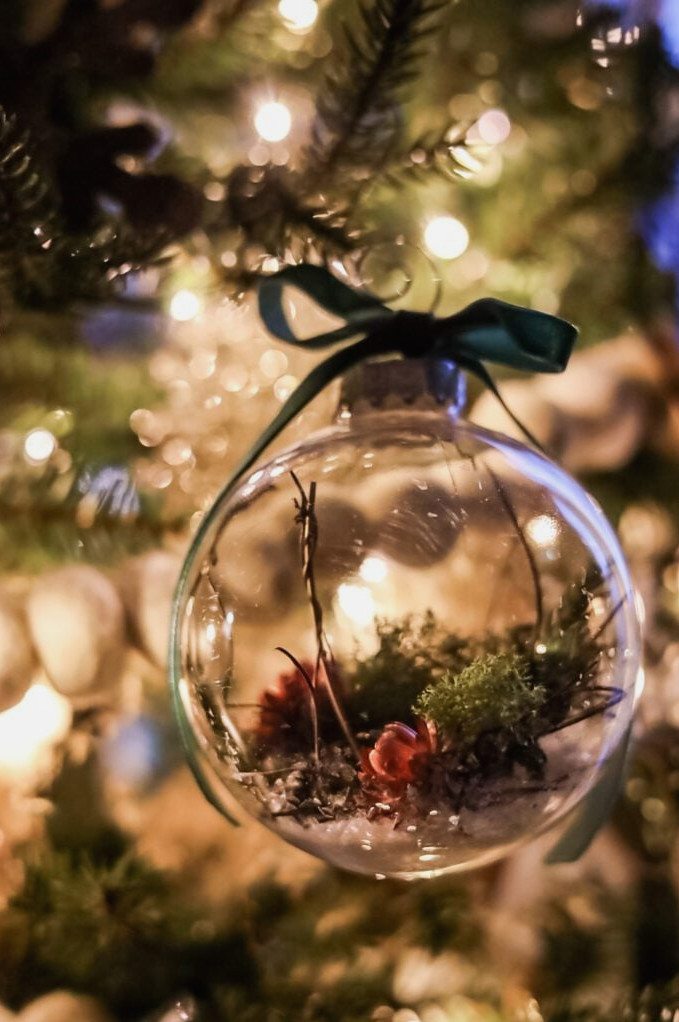
Don’t overlook Christmas! These uncomplicated glass botanical decorations add an organic accent to your tree while offering a lovely reminder of your Summer garden.
All set…
To create something lovely?This dried flower harvest marks only the start. Throughout the year, I incorporate my homegrown blossoms into various projects. For detailed tutorials, explore myFloral & Botanical Projectsgallery and discover endless inspiration.
Your Timeless Garden Is Waiting
When I think back to that first little patch of strawflowers five years ago, I never imagined it would grow into this: a garden designed not merely for summer vases, but for creativity throughout the year. That is the real wonder of cultivating flowers for drying: the pleasure is doubled. It begins with the lively, humming energy of the summer garden, then continues through the peaceful, rewarding work of transforming those blossoms into a lasting part of your home.
From quietly ordering seeds during winter, to tending seedlings in spring, gathering blooms on a sunlit summer morning, and eventually arranging them during a comfortable fall day, this journey has become one of the most meaningful patterns of my life at the cottage. It brings every season together in the most hands-on way.
I hope this guide has helped you see that creating your own natural decor is not just achievable, but wonderfully easy. Begin with a handful of these reliable flowers. Use my techniques, and soon you’ll have a special collection of your own to weave into wreaths, display as artwork, or simply enjoy in a vase on the mantel. Keep in mind, every seed carries two promises: a brief flash of beauty and one that endures. Why choose only one?
xo, Jennifer
additional garden guidance
Enjoy projects like this?Make sure you stay connected! Become part of my newsletter familyfor more warm, affordable DIY ideas sent directly to your inbox. You’ll receive special tips, advance tutorial access, and all the creative inspiration necessary to make your home feel personal, welcoming, and handmade.