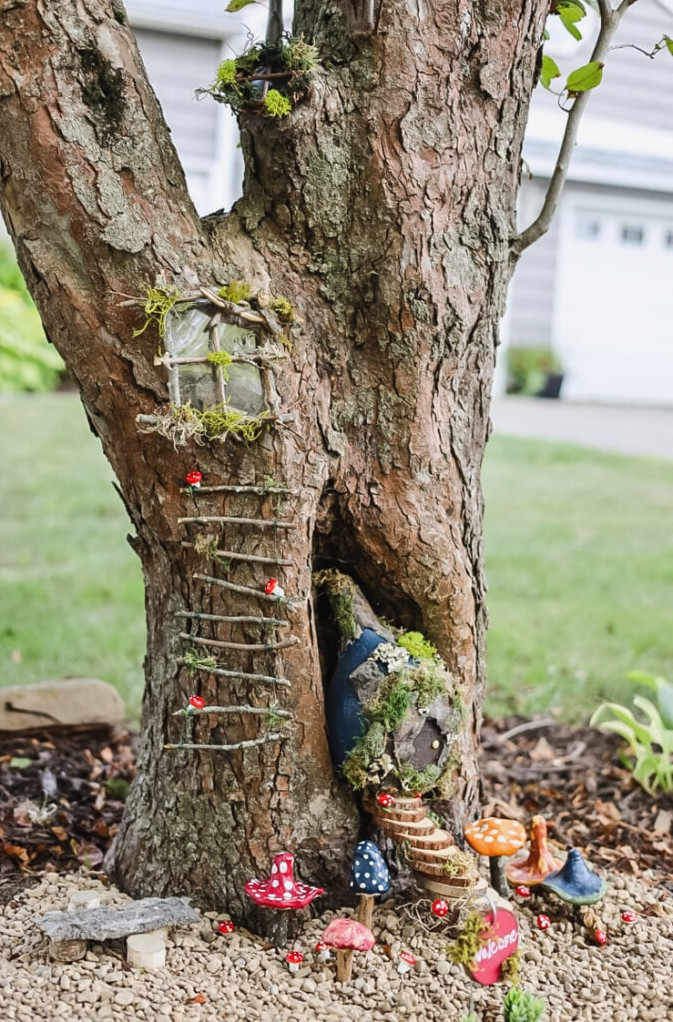
When I spotted the natural cavity at the bottom of our crabapple tree, I immediately saw its possibilities. Rather than letting it remain an ordinary garden detail, I chose to transform it into something enchanting—a fairy tree garden. The goal wasn’t to build a flawless fairy-tale setting (although it is wonderfully whimsical!), but to bring a touch of unexpected magic to our front yard with simple, natural materials.
The centerpiece of the display? A fairy house crafted from a homegrown gourd, covered with birch bark and nestled inside the tree. I kept the look rustic and natural, incorporating wood-slice stairs, a twig ladder, and handmade clay mushrooms to give it more character. Best of all, this project cost nearly nothing—only a little imagination and a handful of gathered materials.
If you have a distinctive tree (or even a shady garden nook), this DIY fairy tree offers an easygoing way to add a playful element to your outdoor area. There’s no need for fancy miniatures or purchased decorations—just some creativity and whatever treasures nature has to offer. Let’s get started!
How to Make a Fairy House in a Tree Hollow (Using Gourds & Foraged Finds!)
Alright! I’ll guide you through the process of making this charming little fairy garden with collected materials and a few everyday craft items. Affordable DIY projects are my favorite!
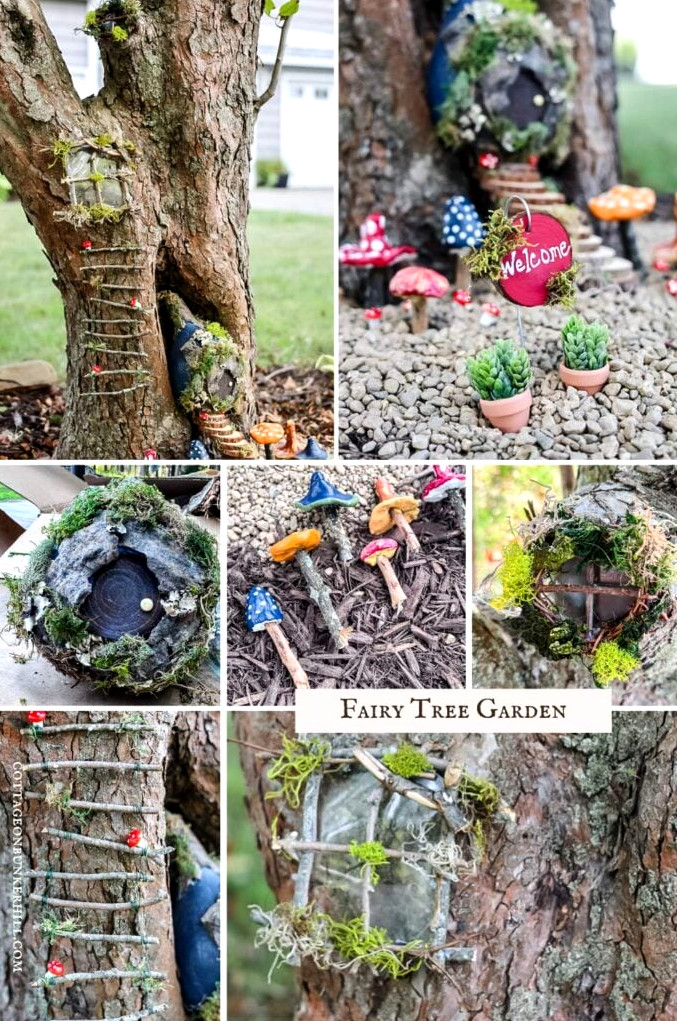
Fairy Tree Garden Supply List
The idea here is to work with whatever you already have! This is what I used, but you’re welcome to get creative
Collected Materials:
- Tree featuring a hollow(or choose a stump, log, or planter for the foundation)
- Dry gourd(for the fairy home—homegrown or purchased)
- Birch bark(or replace it with aged wood, acorn tops, or pinecones)
- Twigs & little branches(for ladders, windows, and support details)
- Moss(fresh or preserved)
- Small rocks or pebbles(for walkways and surrounding details)
Essential Craft Materials:
Optional (But Enjoyable!) Additions:
- Small fairy lights(battery-powered for a dreamy shine)
- Clay toadstools
- Miniature garden details(such as handmade signs, a fairy swing, or a pebble “firepit”)
Don’t Have a Gourd? No Worries! Fairy House Substitutes
You can find all of these at craft shops, dollar stores, or around your own yard!)
- Unfinished Wooden Birdhouse
- Why it works:It already has a basic form! Remove the perch, paint or stain it, then attach bark or moss.
- Bonus:Create a round entrance for a “hobbit hole” appearance.
- Upside-Down Terra Cotta Pot
- Why it works:Turn it over, paint a doorway, and add a roof using bark, twigs, or a saucer.
- Bonus:Use acrylic paint to imitate stone or brick.
- Half a Coconut Shell
- Why it works:It is naturally weather-resistant and rustic. Attach moss to the exterior to create a “living” roof.
- Tip:Look for them in grocery stores
- Pinecone “Log Cabin”
- Why it works:Arrange pinecones side-by-side into a square—an instant rustic cottage!
- For beginners:Start with a small cardboard box, then cover its surface with pinecones.
- Cut-and-Covered Plastic Bottle
- Why it works:Remove the base of a soda bottle, cover it with burlap or bark, and finish with a twig roof.
- Kid-friendly:Little ones can safely help decorate it!
- Miniature Milk Carton
- Why it works:Wash it, paint it, cut out an entrance, and cover it with glue plus sand or coffee grounds for a “stucco” finish.
Choosing the Ideal Tree Hollow (Or Making One Yourself!)
Not every garden includes a storybook-worthy fairy tree hollow—but that’s perfectly fine! With some imagination, you can turn everyday spaces into captivating fairy dwellings. Here are a few ways to discover (or create) the perfect backdrop.
1. Natural Features Worth Seeking
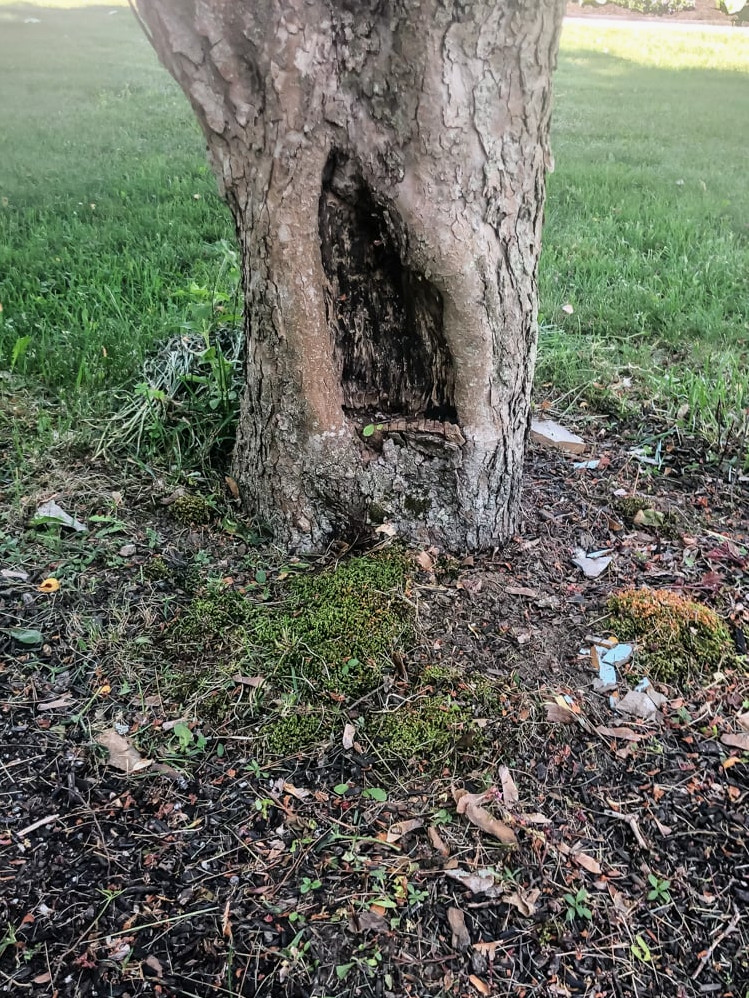
- Tree Cavities & Knotholes
- Ideal choices:Established maples, oaks, apple trees, or willows frequently form natural openings.
- Width is important:Most fairy houses fit inside a hollow that is at least 6–8 inches across.
- Safety inspection:Stay away from active bug nests or decaying timber (tap the tree—if it sounds hollow throughout, choose another spot).
- Visible Roots & Stumps
- Twisted roots form instant entrances—simply place a fairy house between them.
- Have an aged stump? Carve out a little recess with a chisel (or use it as a foundation to create a hollow).
- Downed Logs & Limbs
- Search for logs featuring natural bends or openings—they serve as instant fairy shelters.
2. No Hollow? No Problem! DIY Ideas
Option 1: Create a “Faux Hollow
- Aged log:Lean a carved-out log piece (found at garden centers) against a tree.
- Planter foundation:Turn a partly buried terracotta pot or wooden bowl into a pretend tree base. Disguise the rim with moss!
Option 2: Construct a Hollow
- Supplies:Chicken wire and papier-mâché (for lightweight forming), or layer birch bark pieces into a rounded wall.
- Helpful hint:Include lichen & moss to achieve a timeworn appearance.
Option 3: Reuse Garden Elements
- Rock gaps:Settle a miniature house between large stones.
- Thick shrubs:Shape a little “entrance” within the greenery.
3. Positioning Ideas for Extra Enchantment
Top Locations For Fairy Gardens
- Shaded & Protected Areas
- Fairies (along with their decorations!) enjoy filtered sunlight—beneath trees or next to shrubs.
- Skip direct sun (it bleaches paint and moss) and depressed spots (which may collect water).
- Beside Gardens or Walkways
- Position your fairy tree near flower borders, ferns, or stepping stones so it appears “discovered.”
- Along a pathway = Better visibility (and more grins from guests!).
- Illumination Counts
- Choose a location where morning or late-day sunlight creates a magical shimmer.
- Stay away from gloomy corners (your effort deserves attention!)
Making the Fairy House: An Easy, Rustic Guide
When I first imagined this fairy garden project, I knew my ever-expanding collection of DIY materials had to include the ideal foundation for a fairy house. Honestly—as a DIY blogger, I’ve turned into the ultimate ‘don’t toss that out, it could come in handy someday’ gatherer. (Admit it, you probably keep a collection like this too!)
After rummaging through my varied pile of craft materials and gathered treasures, I discovered the perfect option: a dried gourd from the previous year’s garden. But the best part is that you definitely don’t need a blogger’s supply stash to make something magical. Whether you’re giving a thrift-shop find, a kitchen leftover, or a backyard treasure a new purpose, I’ll explain how to use whatever you have available.
1. Painting the Gourd Foundation
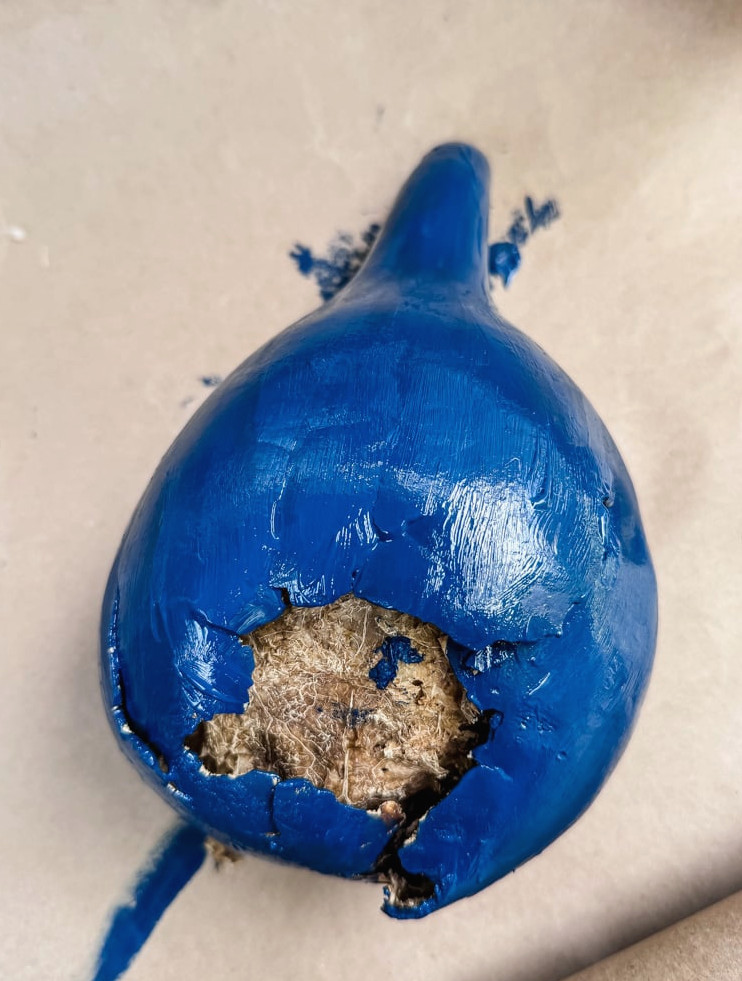

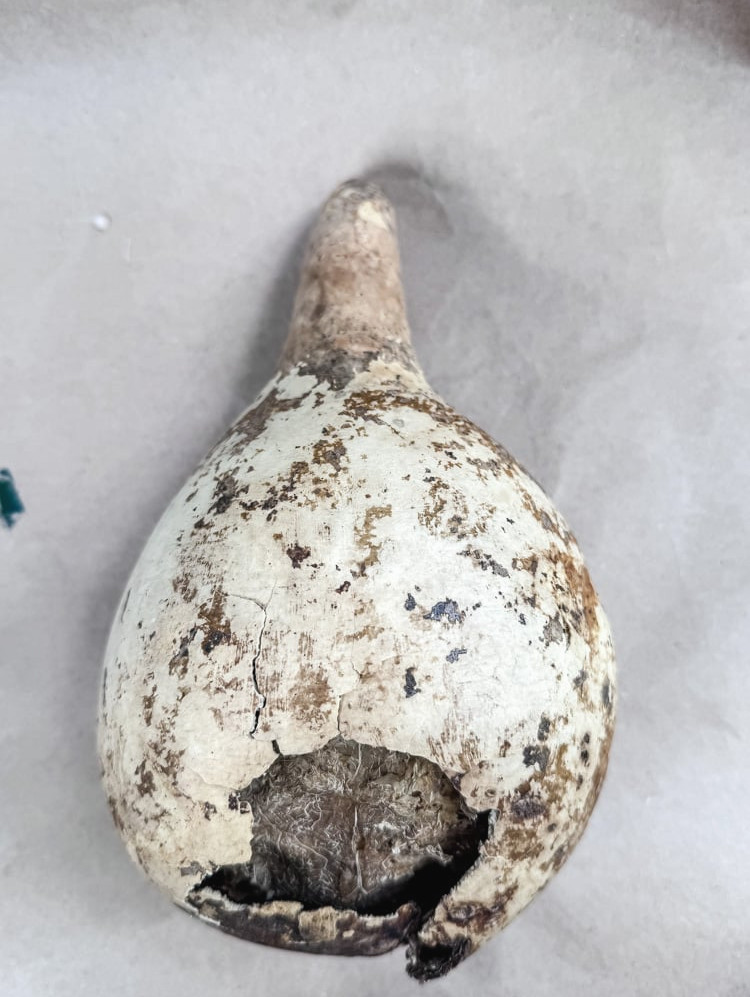
My fairy house began with this flawed dried gourd—featuring a natural ‘detail’ (an opening created when I dropped it!). If you’re working with a fresh bottleneck or birdhouse gourd:
- Allow it to dry fully (the seeds should rattle inside when you shake it)
- Gently cut a circular doorway with an Xacto knife – take your time to prevent cracks!
For the finishing touches:
- Base layer: Deep navy-blue acrylic paint
- Dry-brushing method: While the base coat remained slightly tacky, softly swept a lighter blue across the surface
Pro Tip: Those ‘mistake’ dents and openings? They bring personality – simply incorporate them into your design!
2. Making A Fairy Door
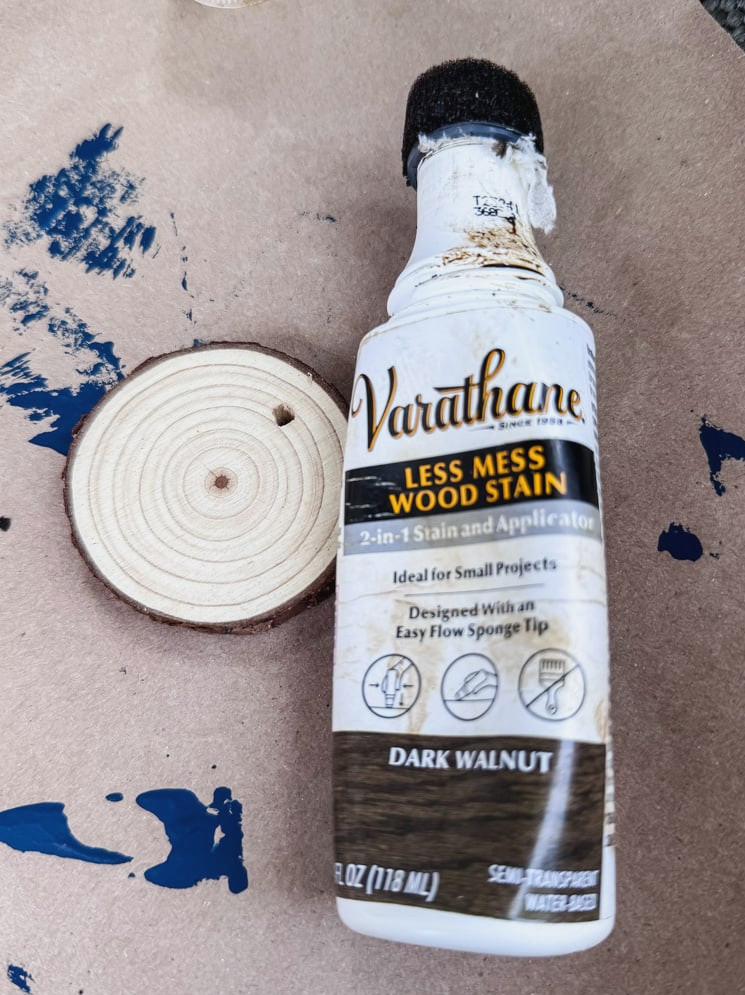
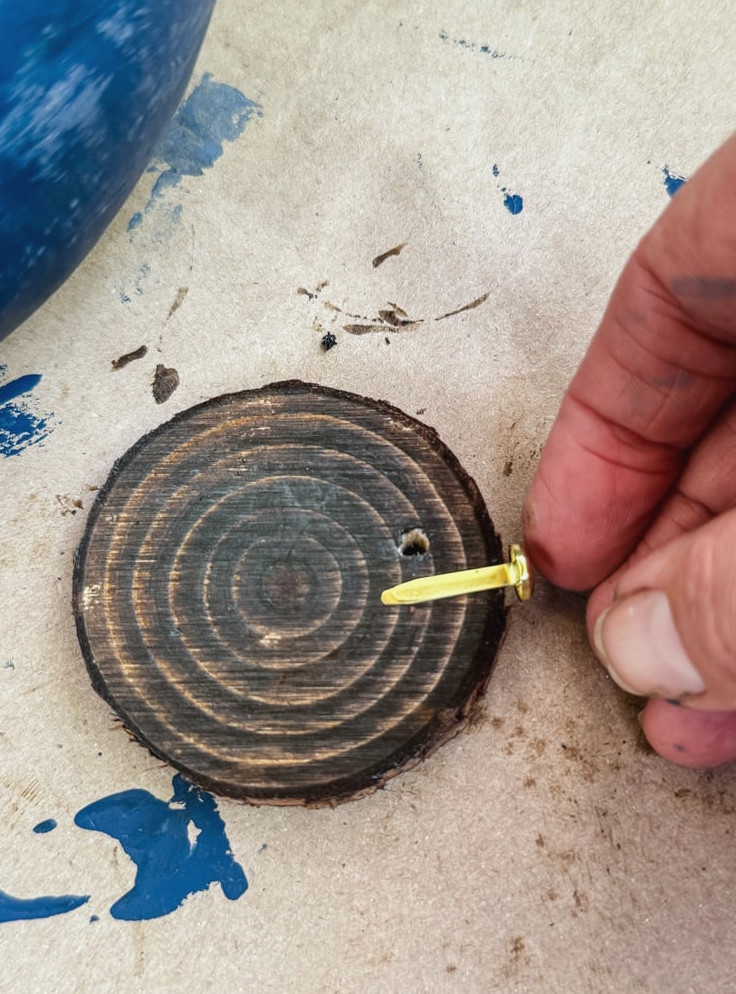
For the fairy door, I used a wooden craft slice and kept the design simple – here’s what I did:
- To begin, I applied Varathane’s Less Mess Wood Stain (honestly, it’s perfect for small projects – no messy drips!)
- Next, I created instant charm by using a brass paper fastener for the doorknob – poke it through, then fold the prongs at the back.
Total time? Around 5 minutes for the sweetest little fairy entrance you’ve ever seen!
3. Designing a Natural Exterior
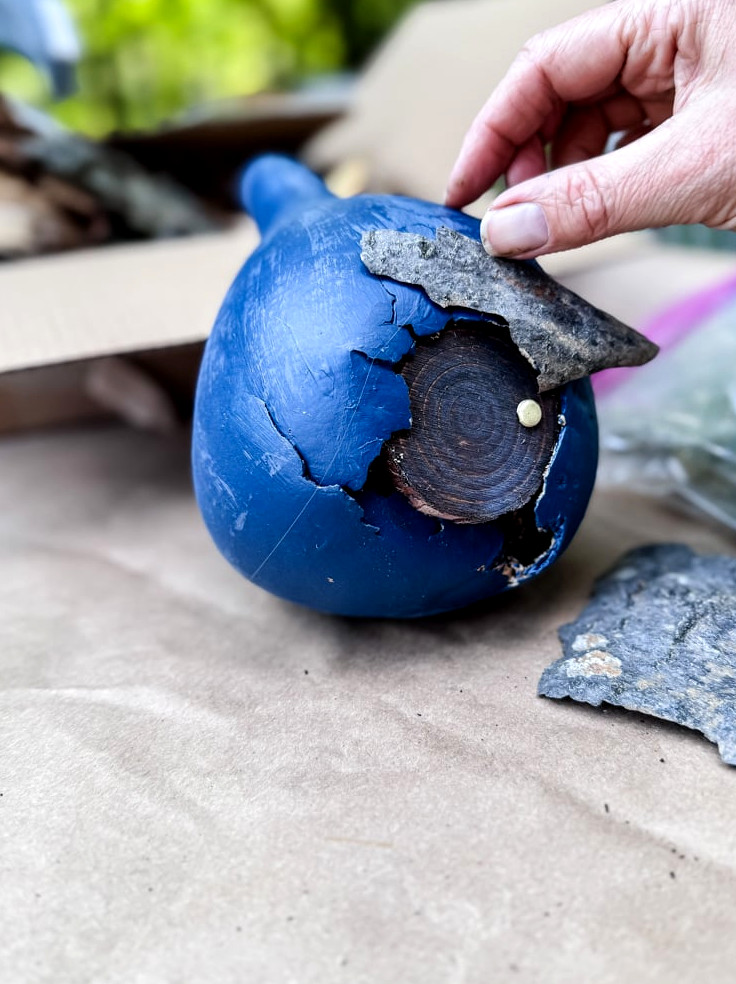
Once the paint had dried, I could turn this gourd into a true fairy cottage! Here’s how I gave it life:
- Supplies Used:
- Birch bark(gathered from fallen trees in my woodland)
- Moss & lichen(foraged outdoors or purchased from a craft store)
- Hot glue gun(for fast, durable bonding)
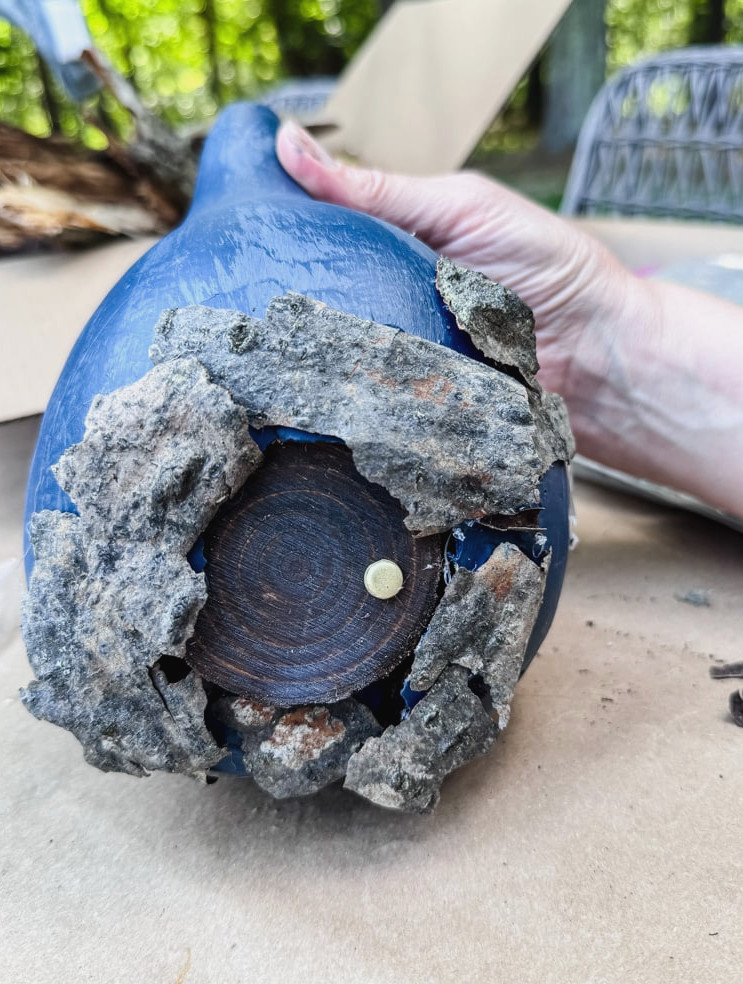
Application:
- Birch siding:Break the bark into small, irregular pieces and arrange them across the gourd, fastening everything with hot glue. I framed the doorway, spread birch over the gourd, and covered the “chimney” section as well.
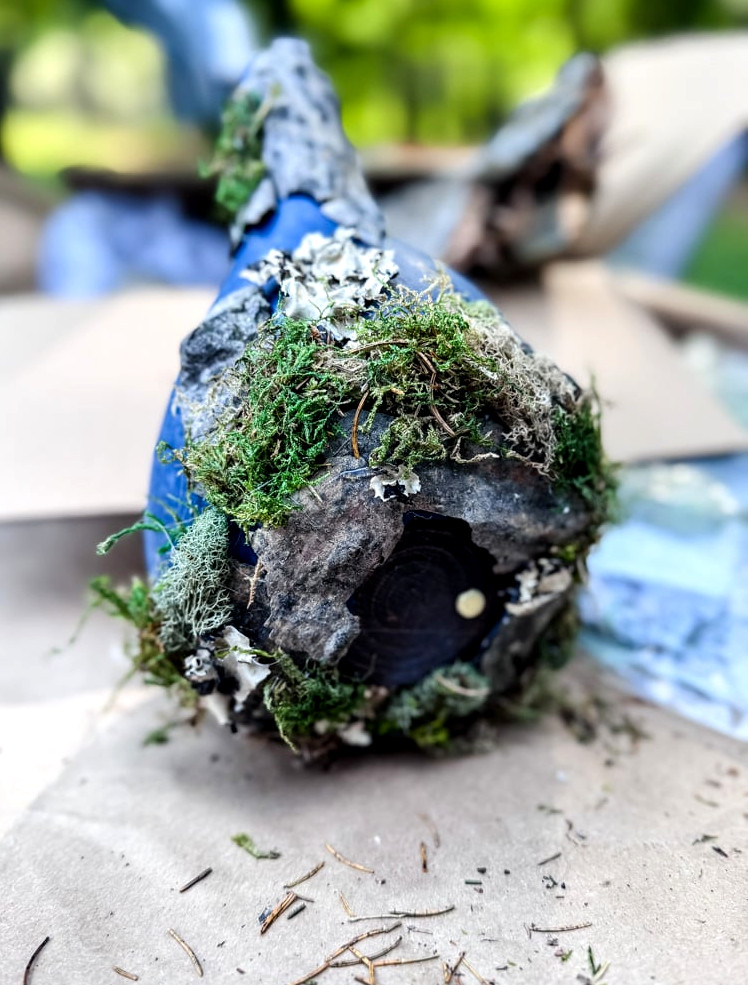
- Moss accents:Attach small clumps to the gourd and roof to create a weathered appearance.
- Lichen details:Place tiny bits across the gourd for added decoration.
Don’t have birch bark? Consider:
- Twigs(to create a log-cabin appearance)
- Acorn caps(to serve as tiny roof shingles)
- Pinecone scales(for richly textured siding)
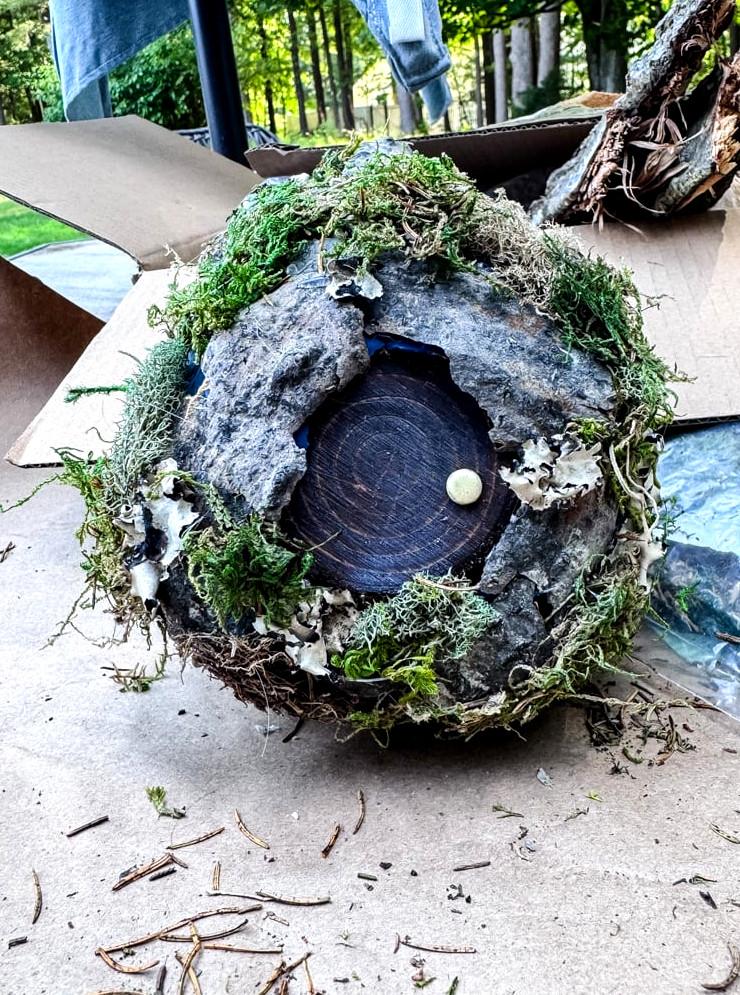
To finish the fairy house, I applied a layer of matte clear topcoat to shield it from the weather.
Decorating Your Fairy Tree Garden with Whimsical Accessories
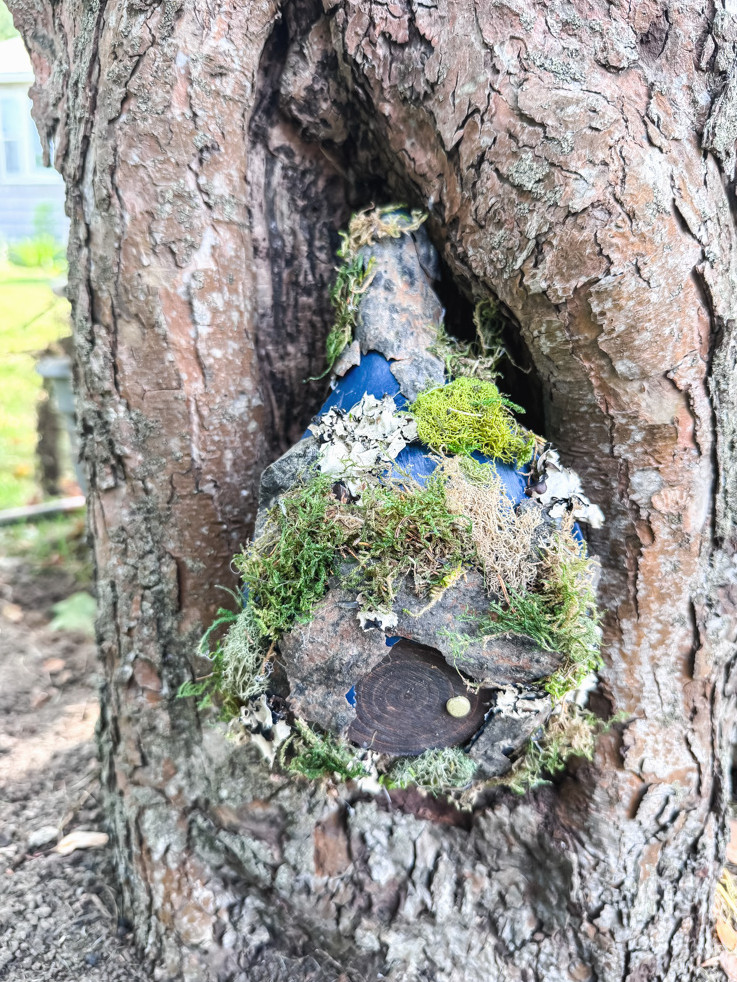
With my fairy house now tucked comfortably inside its tree hollow,it’s time to give the entire scene a magical makeover with charming little touches! These final details bring character and turn this fairy garden into a secret, enchanted realm.
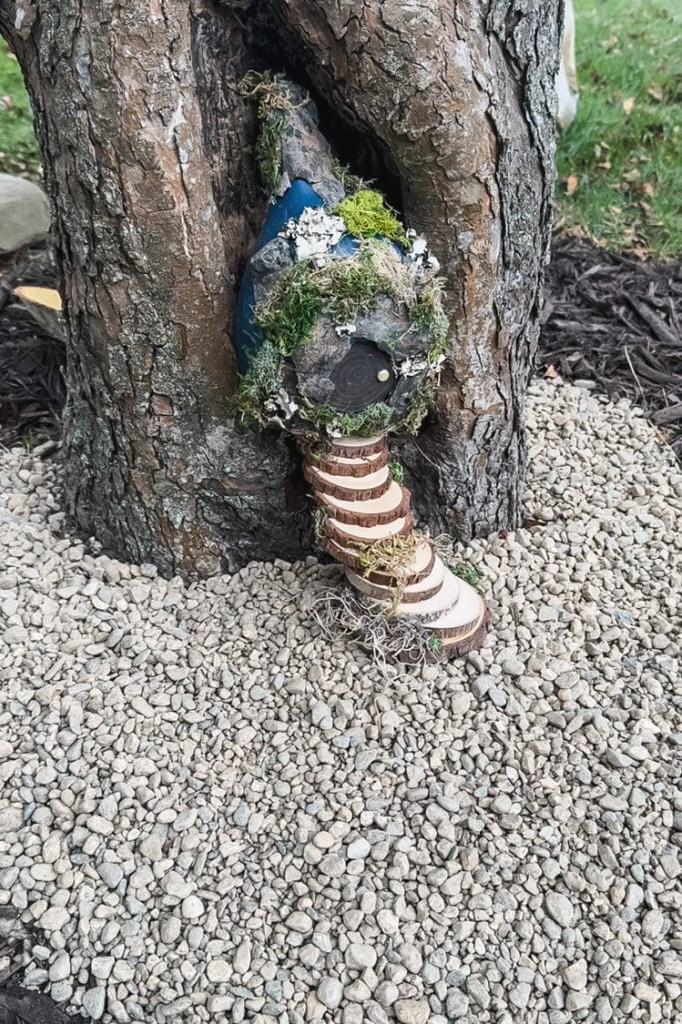
1. Designing a Fairy Garden Floor
- Stone Path:
- Scatter small, polished stones around the tree’s base to outline the area.
- Alternatively, lay them into a winding trail for an organic, “well-traveled” appearance.
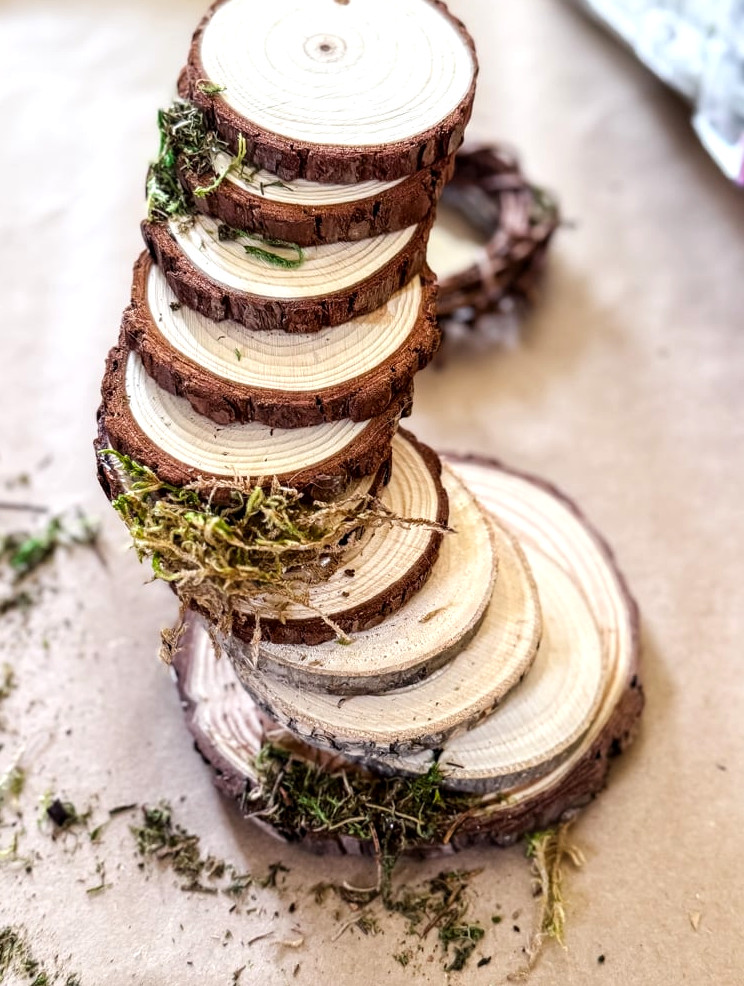
- Steps Leading to the Door:
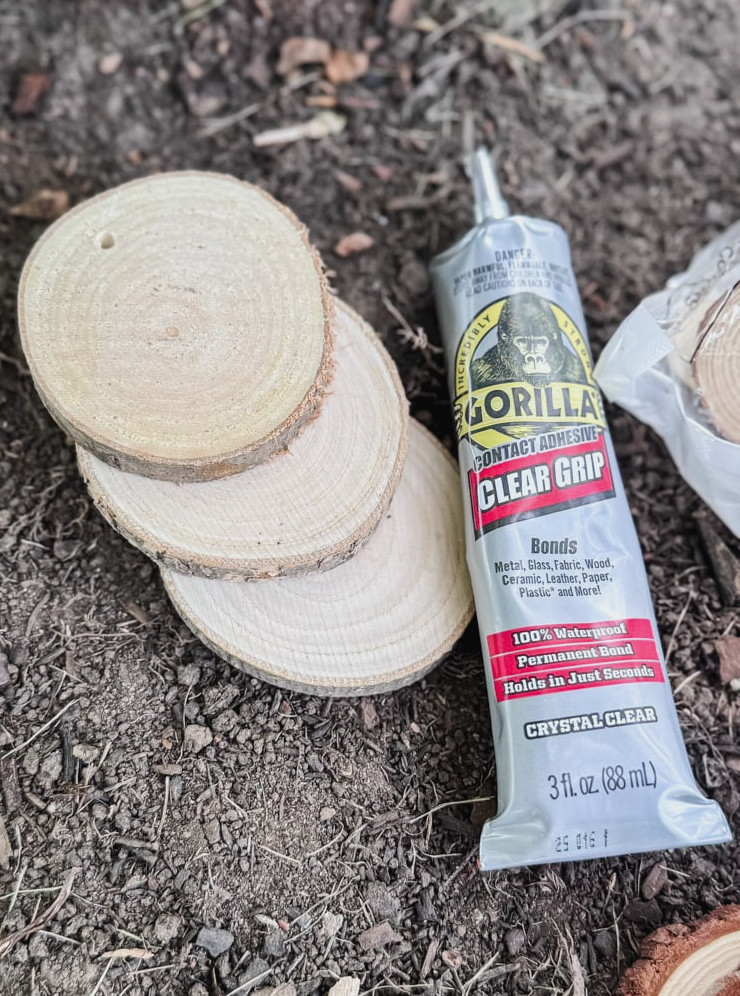
- Positioned 3 different sizes of wood slicesin an offset ‘stair’ arrangement
- Combined two adhesives—hot glue (quick grip) & Gorilla Glue (lasting hold)
- Finished with touches of moss to create a fairy-inspired appearance.
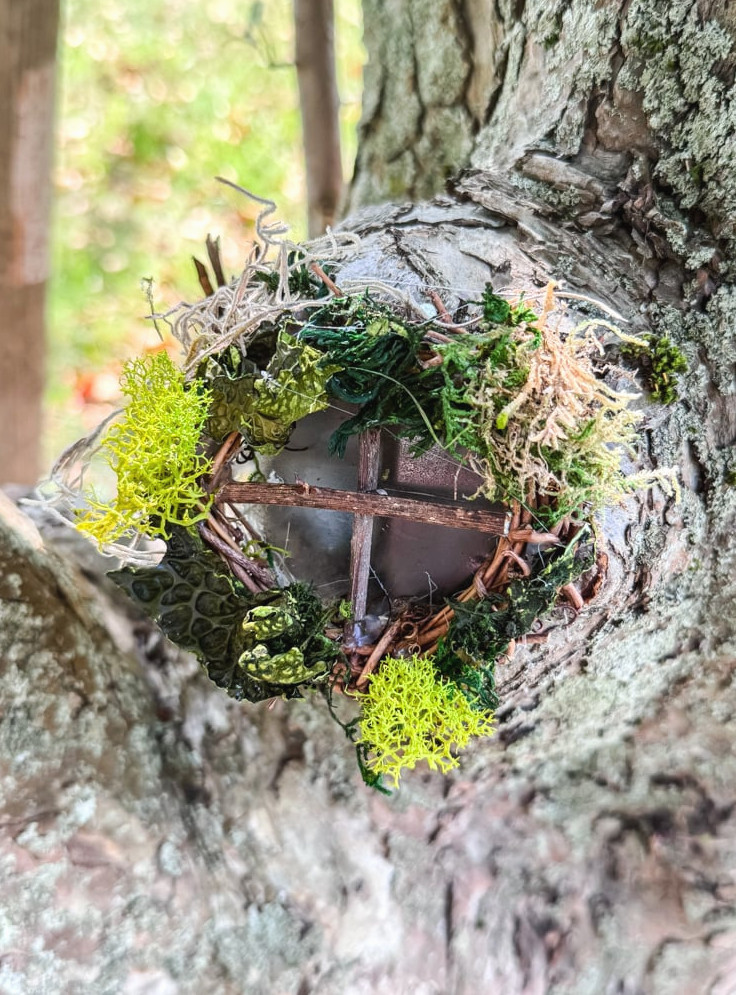
2. Enchanting Round Windows for the Tree
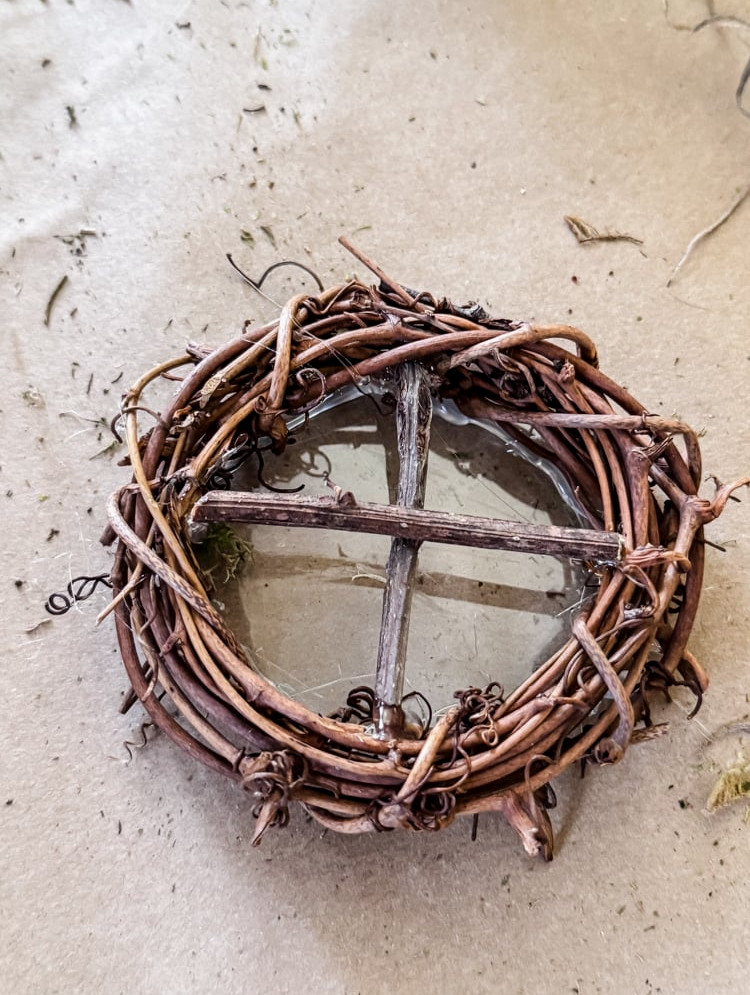
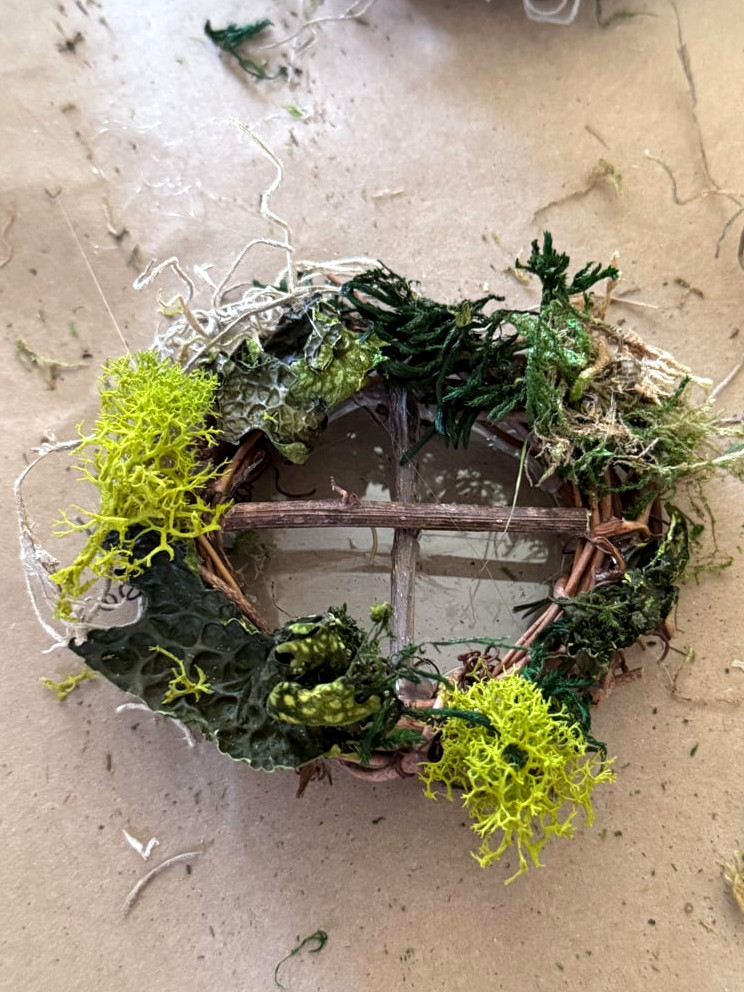
Round Window (For an Open Branch Area):
- Supplies:Small grapevine wreath, twigs, moss, transparent plastic (from packaging), tiny nail.
- Instructions:
- Secure twigs inside in a cross-shaped design.
- Fasten a transparent plastic backing for “glass”(trimmed from a salad container)
- Decorate the wreath with moss to form a “leafy” border.
- Mount it with a small nail above the cut branch area.
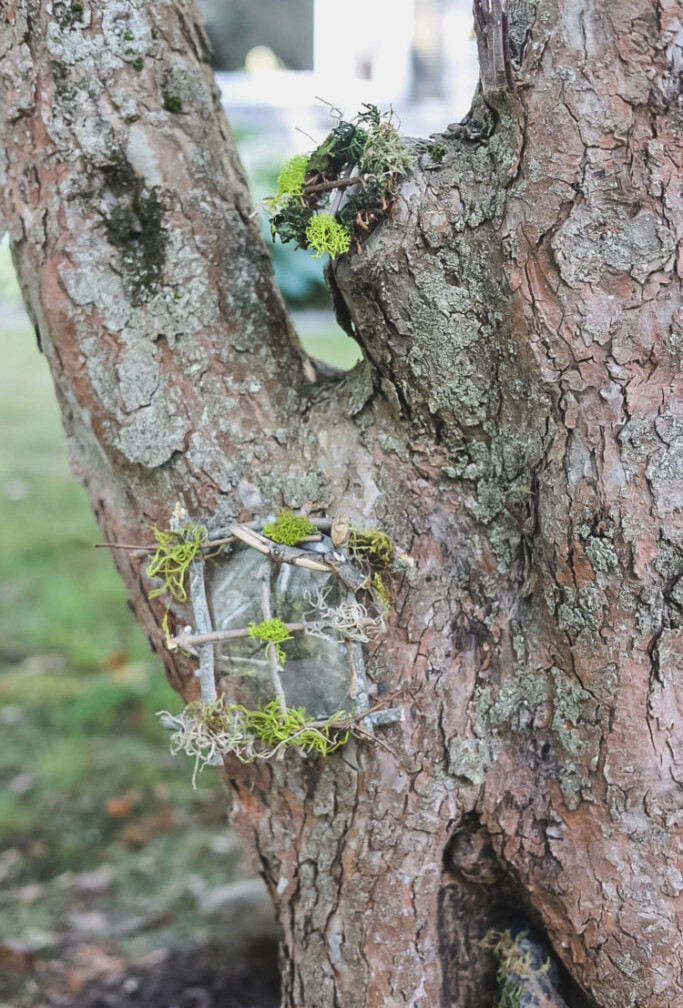
3. Rectangular Fairy Tree Window
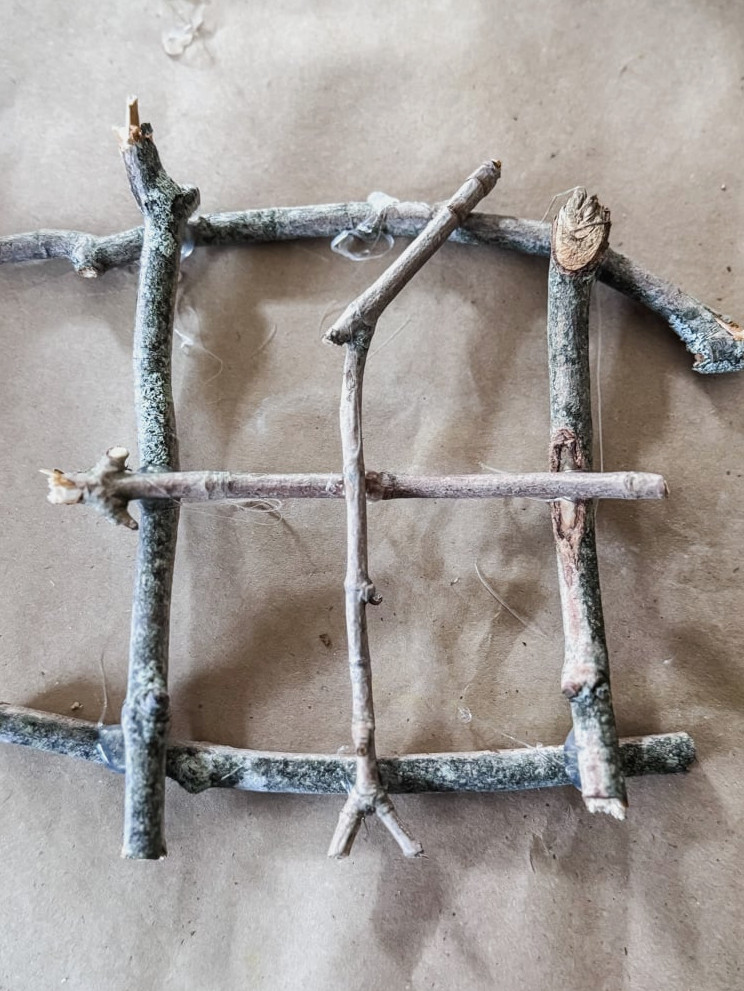

- Supplies:Small straight twigs, moss, plastic packaging, hot glue.
- Instructions:
- Join twigs together to form a rectangular frame.
- Install crosspieces to create a “paned” appearance.
- Attach moss around the borders for an earthy accent.
- I included a slightly crooked branch for extra character.
- Fasten plastic at the back to create a sparkling windowpane.
- Hang it on the tree with a small nail.
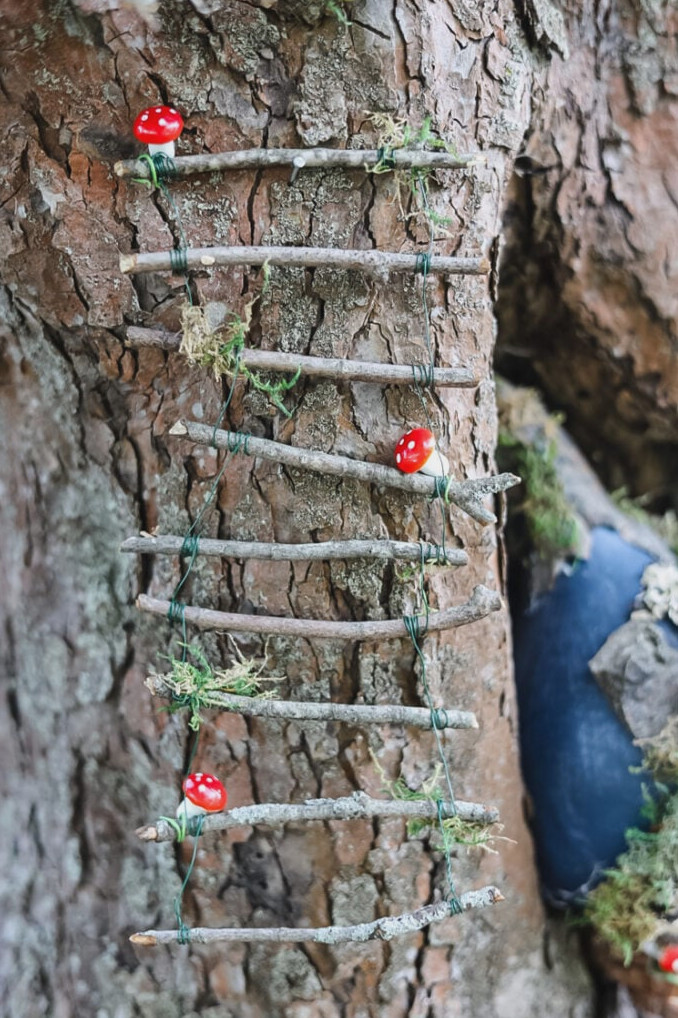
4. Fairy Ladder
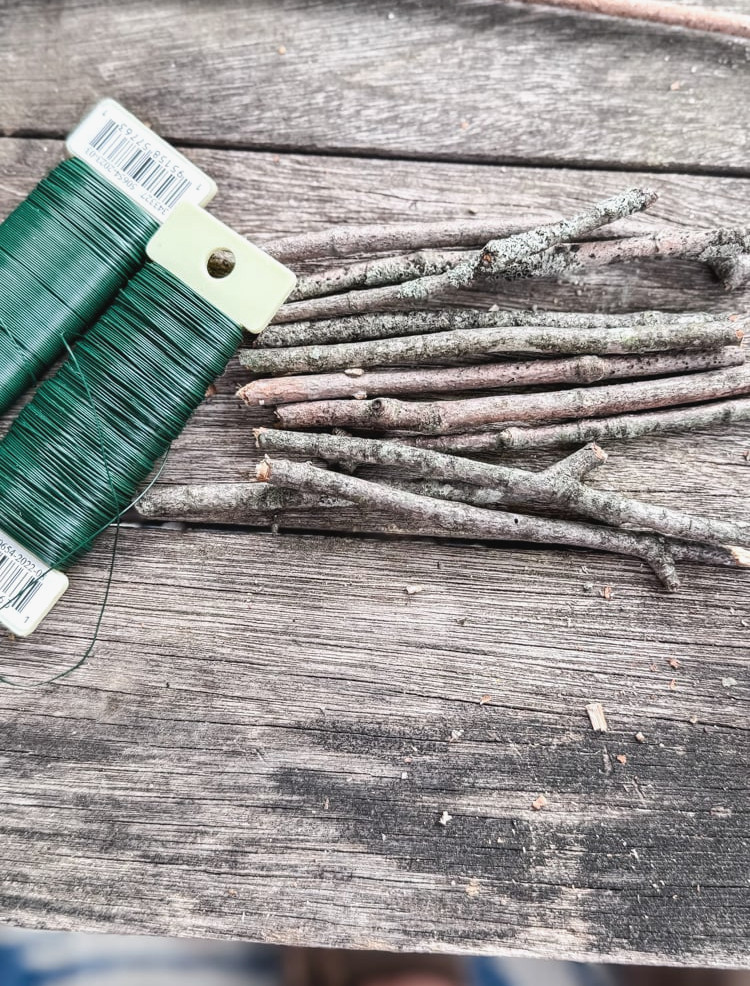
Then I wondered—how would the fairies descend from their windows? Naturally, they required a ladder! Here’s how I crafted one in only a few minutes:
- Cut a slender branch into 3-inch sections ( I sliced the first rung and used it as a template for the remaining pieces).
- I used 2 lengths of floral wire to speed up the process! Wind the wire close to the end of each branch “rung,” leaving 1.5-2 inches between each rung.
- Attached small pieces of moss to a few rungs (I secured the moss using the wire)
5. Welcome Sign
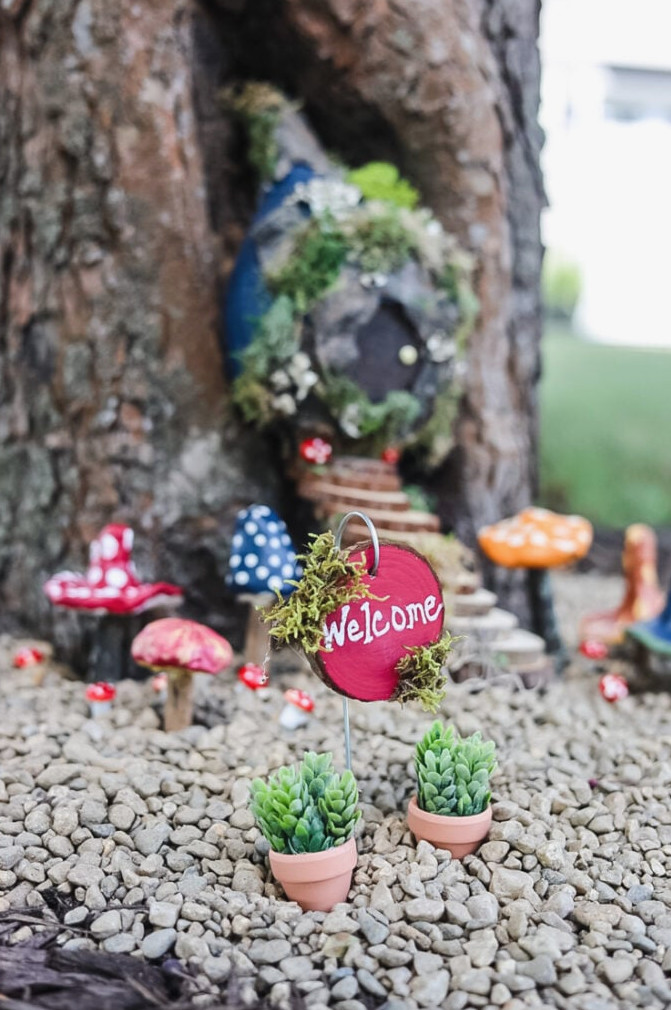
- Welcome Marker:
- Take a wood slice plant marker. I painted it crimson, wrote “Welcome” with a white paint pen, and attached small pieces of moss.
- Tiny Pots & Plants:
- Put pieces of faux succulents into miniature pots (fastened with hot glue)
- Set them beside the sign
6. Enchanted Mushrooms!
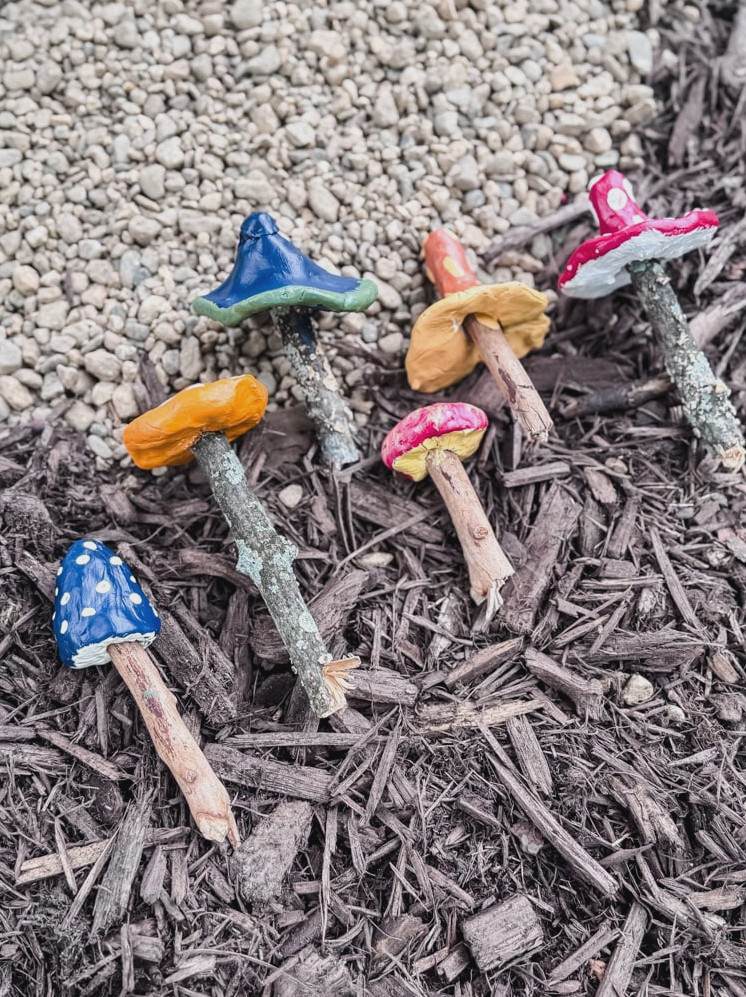
(Since this post is becoming lengthy—and these mushrooms merit their own moment in the spotlight!)
class=”wp-block-heading has-text-align-center has-theme-palette-7-background-color has-background” style=”border-width: 1px;”>The Finishing Touches & Now It’s Your Turn to Build!
Well, everyone, we’ve reached the finish line! What began as a basic tree hollow has blossomed into a charming fairy tree garden—with a gourd cottage, stone pathways, twig ladders, and those sweet little windows (which, yes, now offer fairies a proper entrance!).
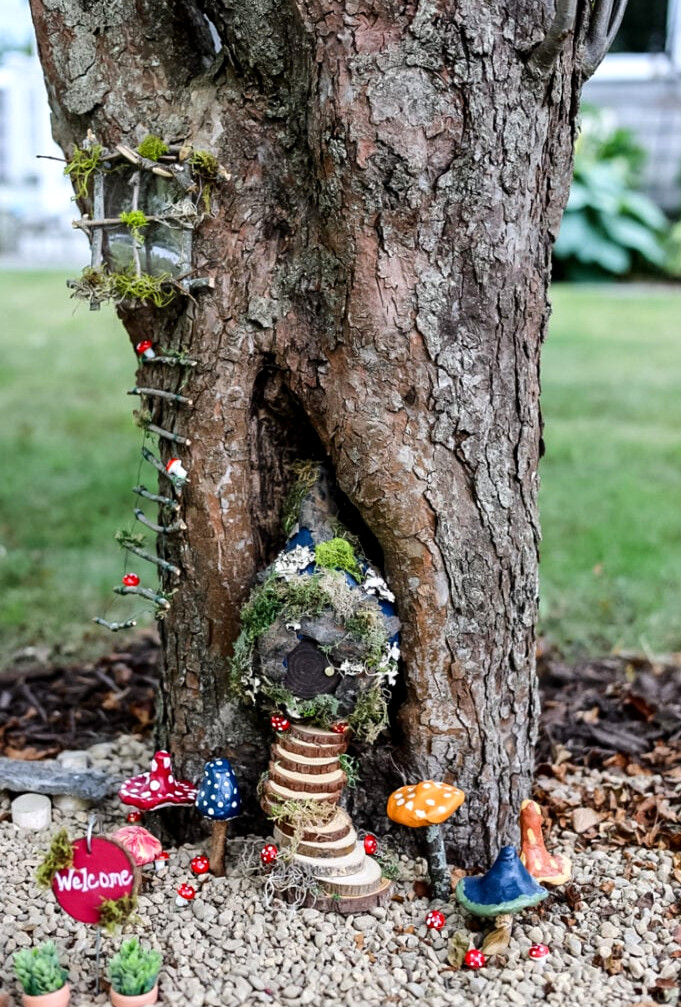
A Brief Look Back at the Enchantment:
- Gave a gourd a new purpose(or coconut shell, birdhouse—you decide!) as a snug fairy dwelling.
- Created a tiny landscapewith wooden-slice steps, stone trails, and gathered decorations.
- Included whimsical touchessuch as windows with “glass,” a greeting sign, and mushrooms.
Fairy gardens aren’t meant to be flawless—they’re meant to be fun. Ignore the guidelines, search through your recycling bin, and allow your inner child (or your real-life kids!) to take charge. Besides, the fairies certainly won’t mind if your ladder is slightly uneven!
Your Turn to Get Creative!
I’d be thrilled to see your fairy garden projects! Send your pictures to jennifer@cottageonbunkerhill.com so I can showcase them on the reader’s spotlight page. And please leave a comment below to:
- Tell us about your ingenious tips(because you inspire ME as well!)
- Respond to questionsabout your own creations
xo, Jennifer