I passed over $25 at the thrift store register… and left with everything I needed to give my garden a warm, vibrant refresh. Here’s how it unfolded!
Thrifted & Refreshed: My Budget-Friendly Cottage Garden Update
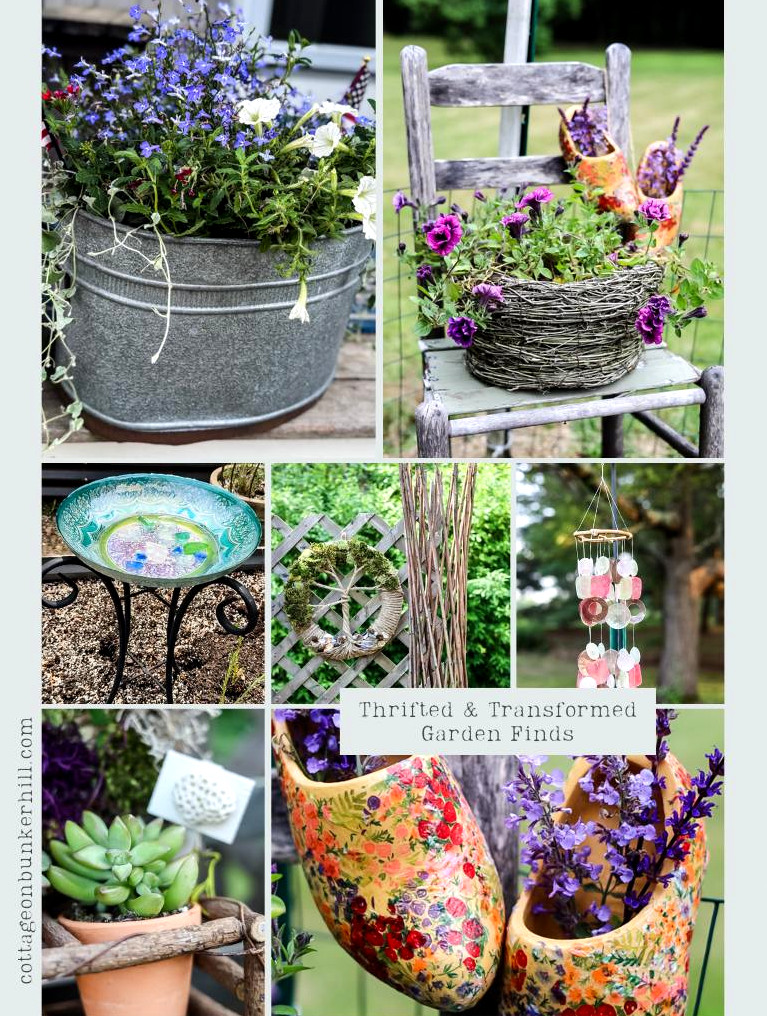
For me, garden thrifting is about more than spending less—it’s about spotting possibilities in overlooked items. That donated glass bowl? A future birdbath. The weathered tub? An instant vintage-style planter. This time, I gave myself a $25 limit for the thrifted ‘foundation pieces’ of every project (although I’ll confess, a few required small extras to complete). The outcome? A garden brimming with unique character, and every object carrying its own secondhand story.
How Thrifting Gives My Garden (and Home) Its Character
Here’s a small secret: almost every item in my home and garden has a second life and a story. Whether it’s an old chair displaying flowers or reclaimed shutters transformed into trellises, thrifting is more than a pastime—it’s my way of making spaces that feel full of personality. This year, I gave myself an enjoyable challenge: remake my garden with just $25 in thrifted pieces (along with a touch of DIY creativity, naturally). With cash in hand, a 20% off coupon tucked away, and an eye for possibilities, I visited my neighborhood thrift shop—and this is what came home with me!
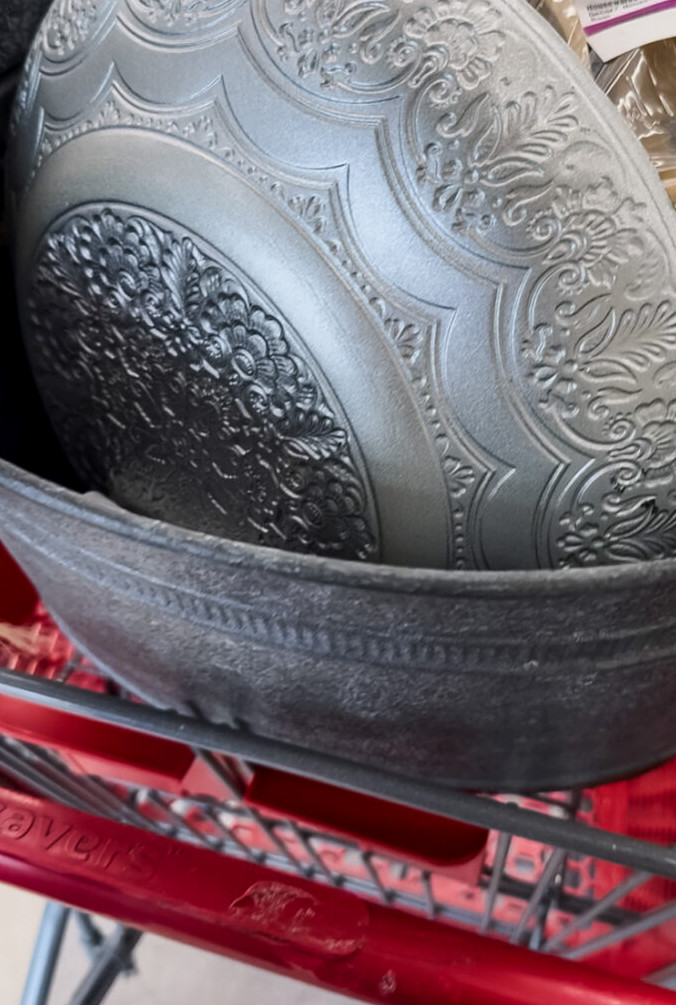
Here’s the collection that grabbed my attention—five neglected gems ready for a garden transformation. (Total cost: $24.95… because naturally, I kept track of every penny!)
Secondhand Store Finds
- Old-Fashioned Wall Planter– A charming tangle of pink satin ribbons and faux ivy, but beneath it all? A solid grapevine frame with petite terracotta pots—perfect for a succulent arrangement!
- Brilliant Blue Glass Serving Bowl– It appeared nearly new, and that shade?Instant birdbath appealin the sunshine.
- Glass Windchime– Covered in dust and completely quiet (could it be damaged? I took the chance for $4).
- Oversized Metal Tub–In excellent shape, featuring a copper-toned bottomthat wasready to cradle flowers.
- Nautical Rope Bundle– A sizable package of dollar-store craft rope, arriving at exactly the right moment since I already had a project planned and hadn’t purchased the rope yet.
At first sight, they may have looked unrelated—but I saw the beginnings of a cottage garden collection. Here’s how I gave each piece new life!
Giving a Thrifted Wind Chime New Life
The $4 Question: Would It Actually Work?
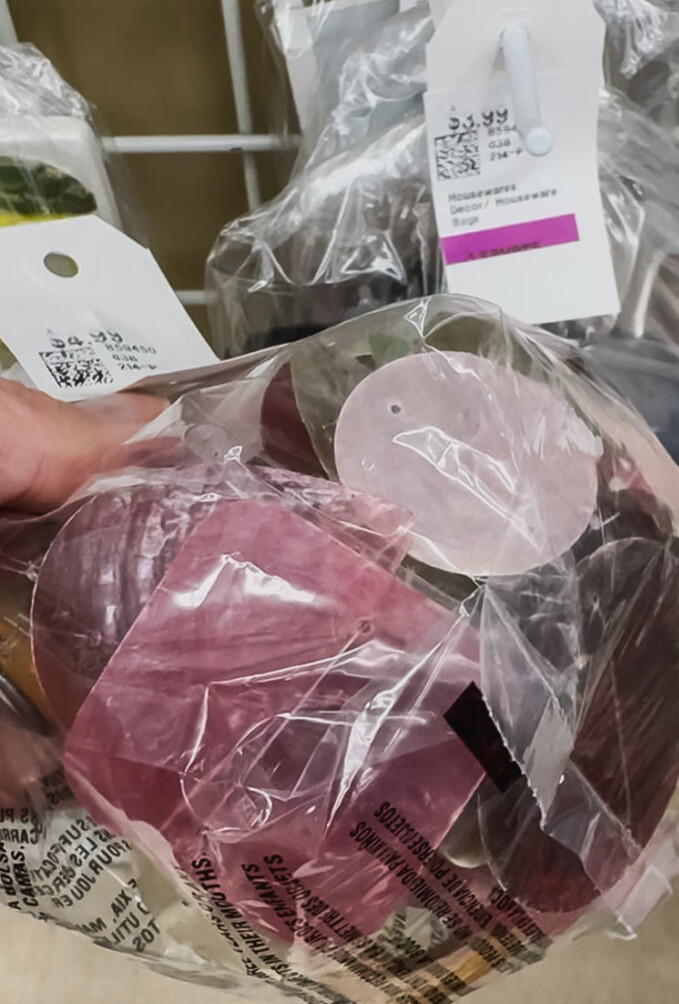
I have to admit—I grabbed this boxed glass wind chime from the shelf without giving it a trial run. For $4, I decided its possibilities were worth the risk. Its hues matched my garden beautifully, repeating the samecolor palette as the blooms.
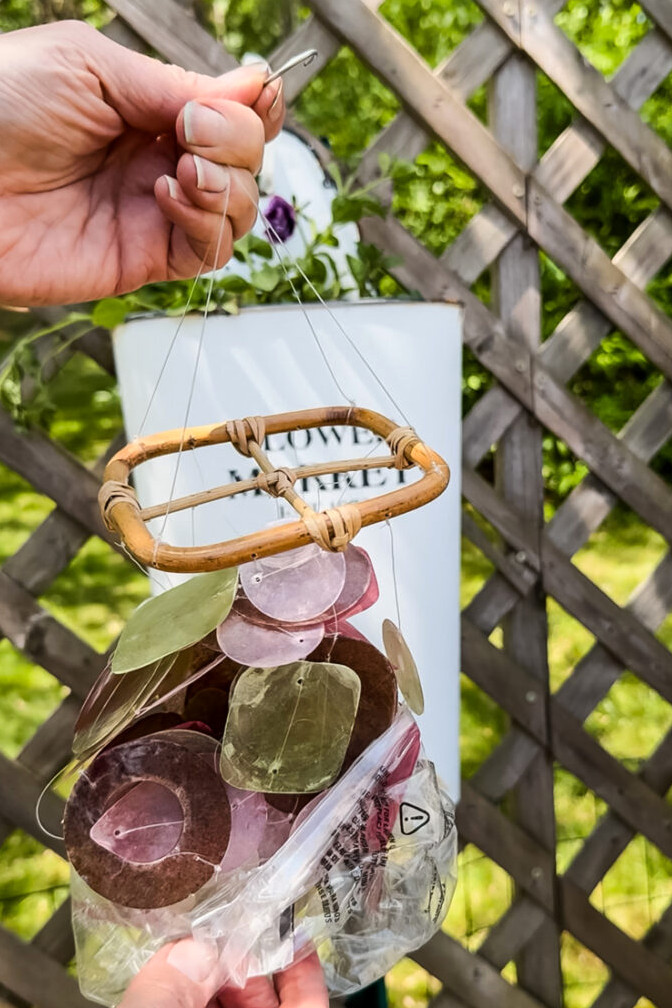
I was thrilled to open the bag at home and discover that it was completely intact, with no broken chimes at all.
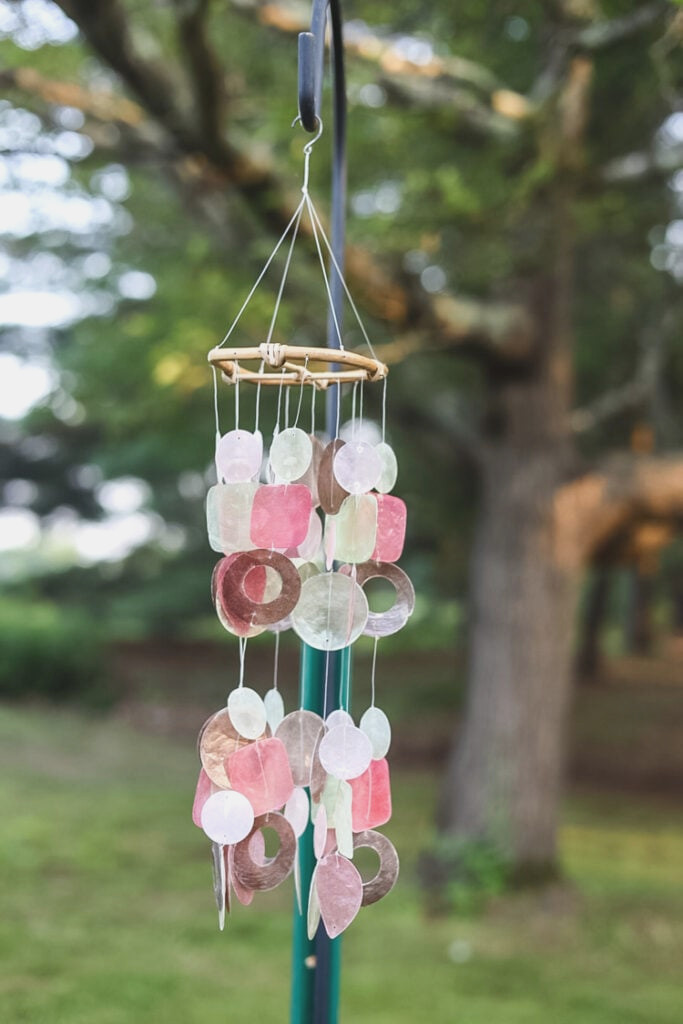
It now hangs in the garden’s back corner, suspended from a shepherd’s hook behind my wicker chairs and table. Listening to those chimes while enjoying an iced coffee break is such a pleasure!
One thrifted treasure complete, four still to go! Coming next: Theleastgarden-ready piece in my haul… that nautical rope bundle!
Giving Nautical Rope a New Purpose: A Tree of Life Wreath
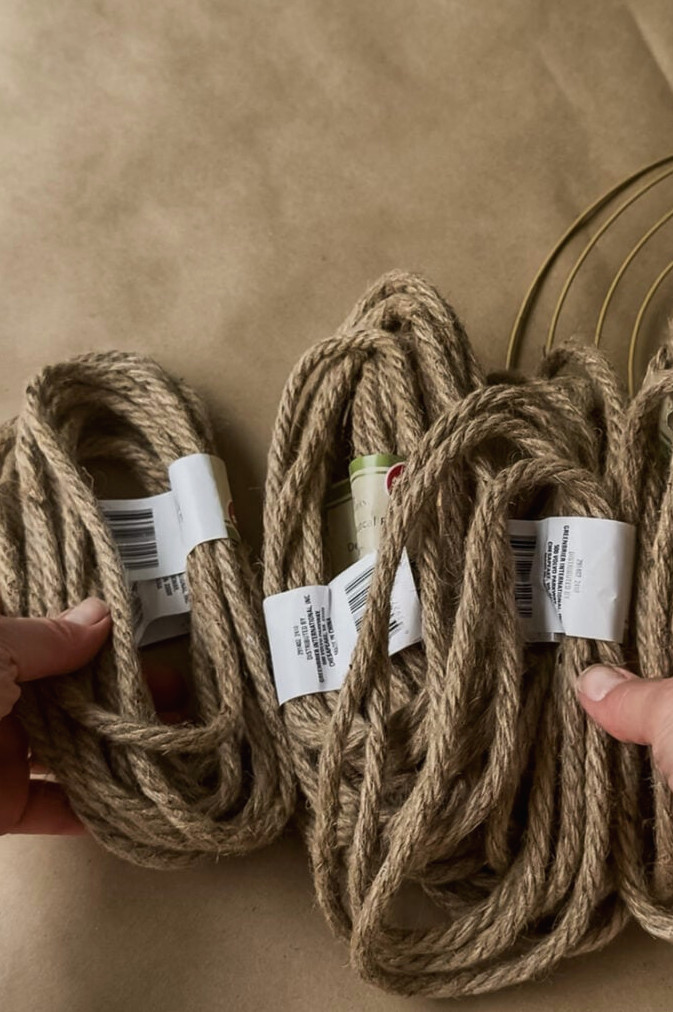
This bundle of crafting nautical rope was an incredible bargain! Whenever I visit my Savers thrift store, I make sure to browse the wall filled with assorted bags of treasures. This particular bag contained at least 10 coils of rope.
Since it was time to create a new garden wreath for the season, I already had a fun design in mind that would put this rope to good use.
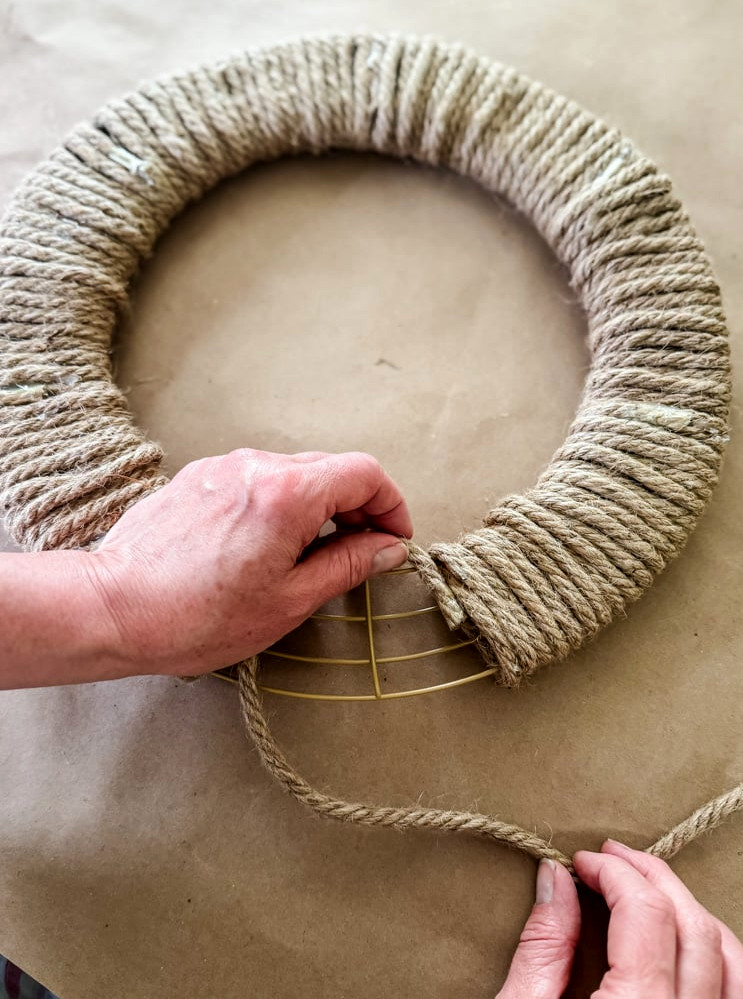
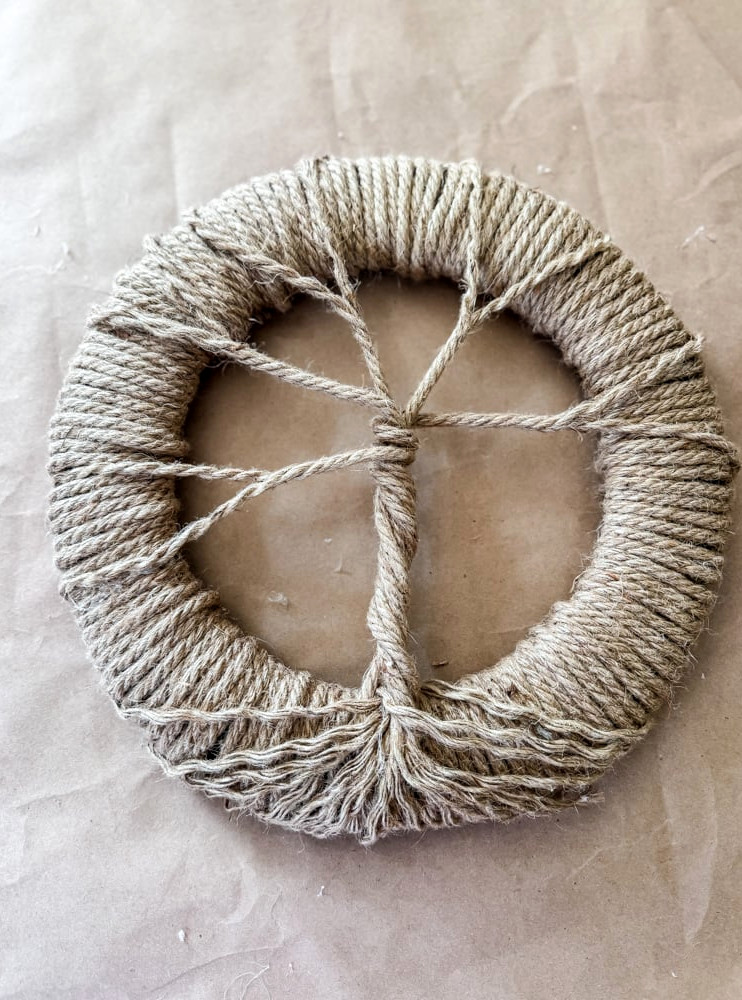
This design is known as a Tree of Life wreath. I created a complete tutorial for it, allowing you to craft your own by following the detailed, step-by-step directions. The completed wreath now hangs on the lattice behind the garden, beside the potting bench.
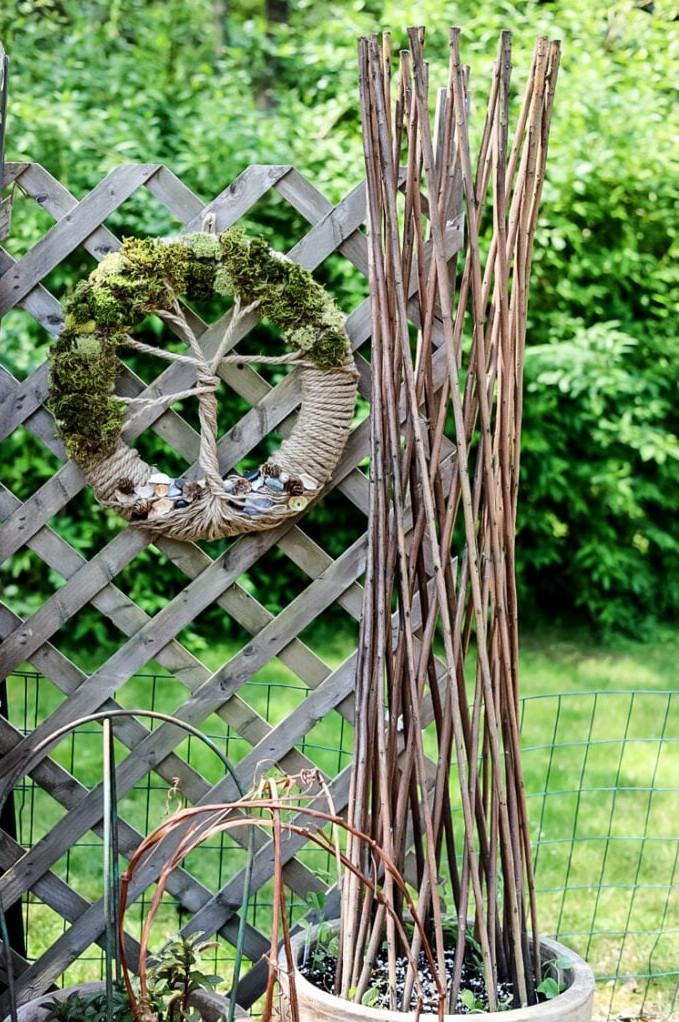
Overall Cost: rope-$4.50, $0 supplies (the wreath frame, moss, & shells were already on hand)
Effortless Style: The 2-Minute Thrifted Birdbath
A Fresh ‘Old’ Find for My Pollinating Visitors
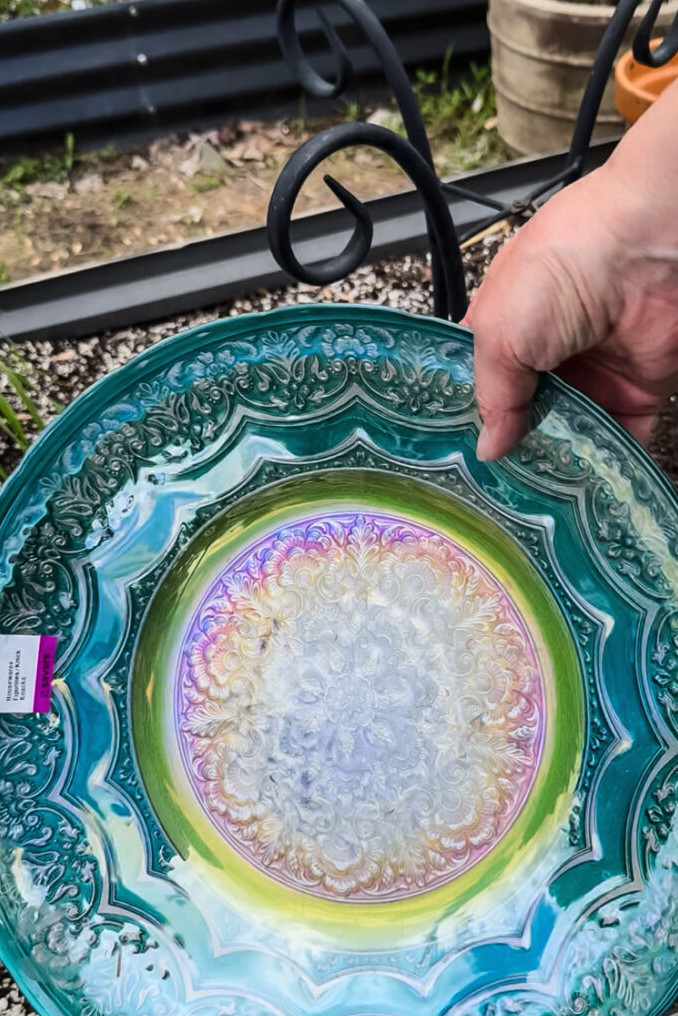
Certain thrift-store discoveries seem destined to find you—such as this spotless blue glass serving bowl, with its silver backing shining free of even one blemish. (Who would part with something this flawless? Their loss, my gain!) Better still, I had kept a metal birdbath stand for years after the original basin cracked. Luckily, the bowl matched the stand perfectly.
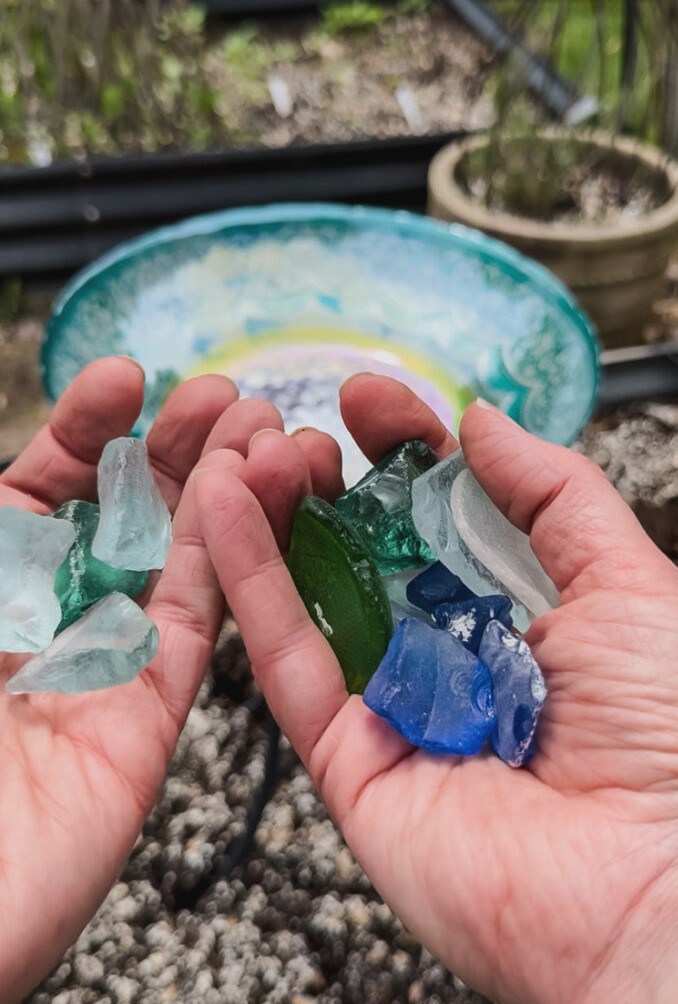
To give my visiting pollinators a few places to pause, I scattered some bright sea glass from my collection across the bowl (one perk of residing near the shore!)
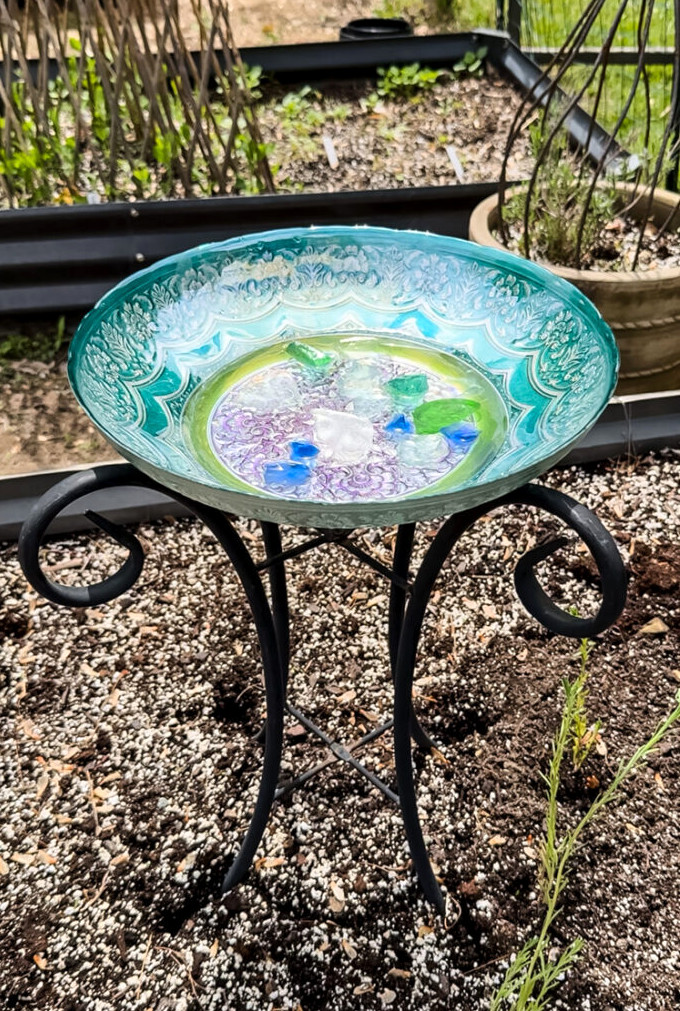
The ‘DIY’ (Though It Barely Qualifies):
- Set the bowlon the stand in my raised flower bed-no equipment required.
- Put sea glassat the base (so pollinators could touch down).
- Added water… then waited for the birds to arrive.
Total cost:$5 for the bowl(half-price tag day!) +$0 for the stand(thanks to my past self). It now captures the sunshine during the day and mirrors the evening glow—no work, plenty of wonder.
From Beverage Tub to Patriotic Garden Display
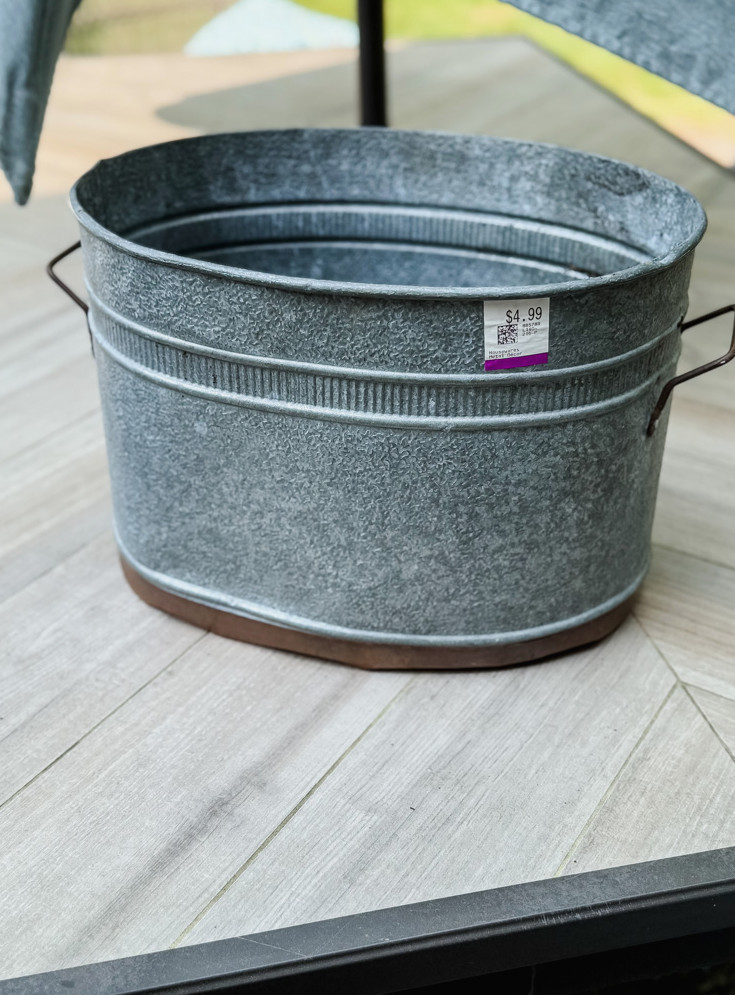
Another fantastic thrift shop find was thislarge metal tub, which was in excellent shape. It appeared to have been used for party beverages, since a bottle opener was attached to the handle. But for me? It offered the ideal home for Summer blooms.
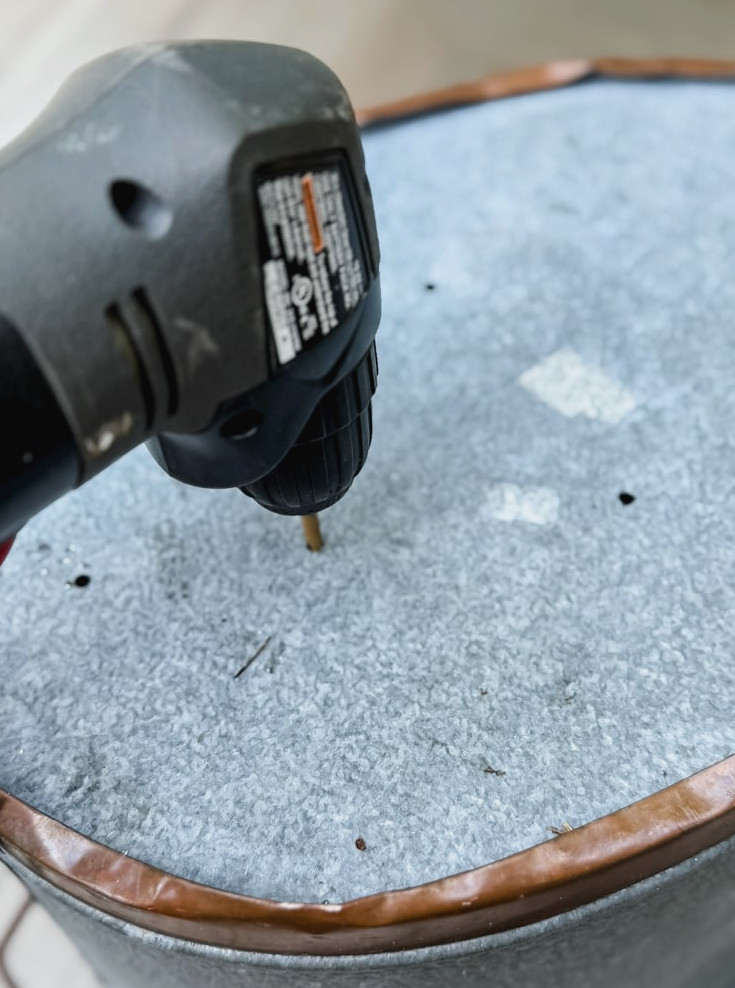
Alwaysdrill drainage holesin a secondhand planter before adding plants—waterlogged roots are a guaranteed recipe for unhappy greenery! Without a drill, ahammer and nailcan work just as well (simply tap several openings from the underside). It’s an easy adjustment with ahugeimpact!
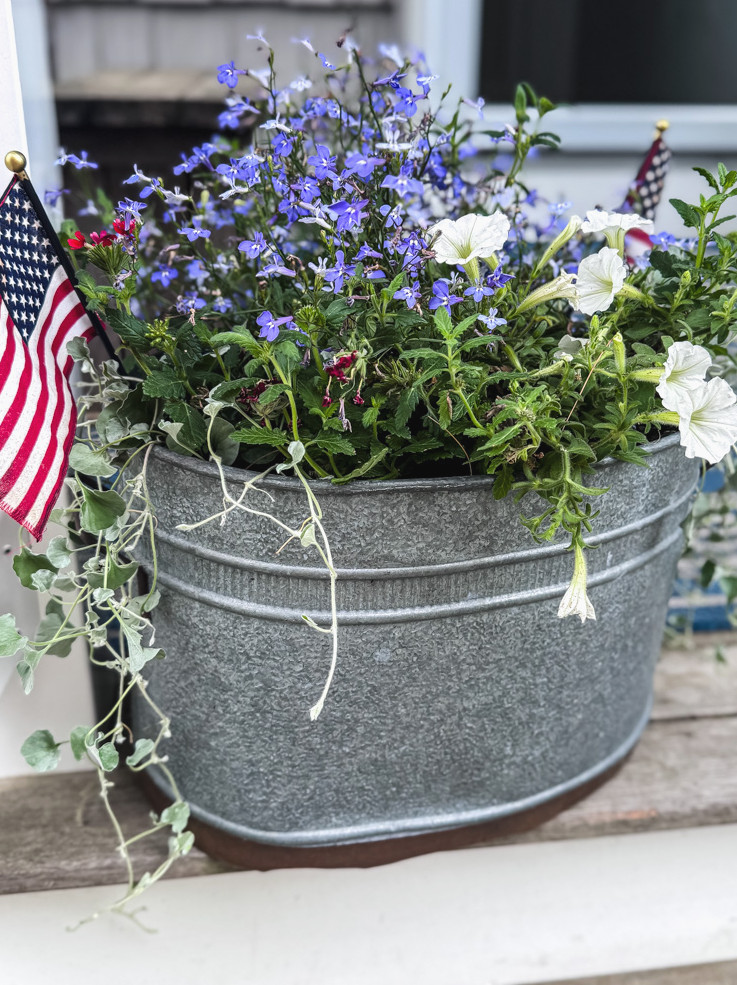
Taking inspiration from Summer’s patriotic color scheme, I planted the large metal tub with red verbena, lovely white petunias, cascading blue lobelia, and a pair of leafy spillers on either side(bonus: hummingbirds love this combination!). A few petite American flags added the finishing touch to this Summer planter.
The 3-Step Makeover:
- Created drainage holes
- Added potting soil
- Filled it with flowers—because cottage gardens are no place for understatement.
Overall price:$5 for the tub+$20 for annual blooms(therealsplurge, though completely worthwhile)
From Gaudy to Serene: A Seaside-Inspired Succulent Planter
How a $5 Thrift Store Blight Turned into a Peaceful Showpiece
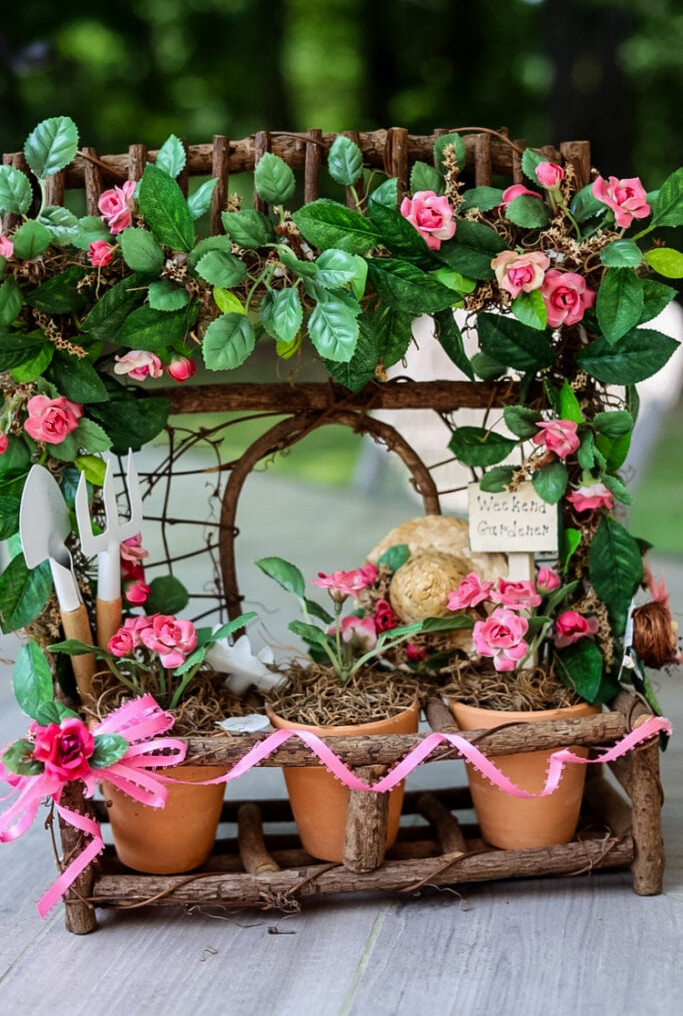
This neglected wall planter was buried beneath pink satin bows and faux ivy—but beneath it all, I discoveredthree little terracotta potsand a grapevine frame brimming with promise. Here’s how I transformed it with anatural, seaside-inspired update.
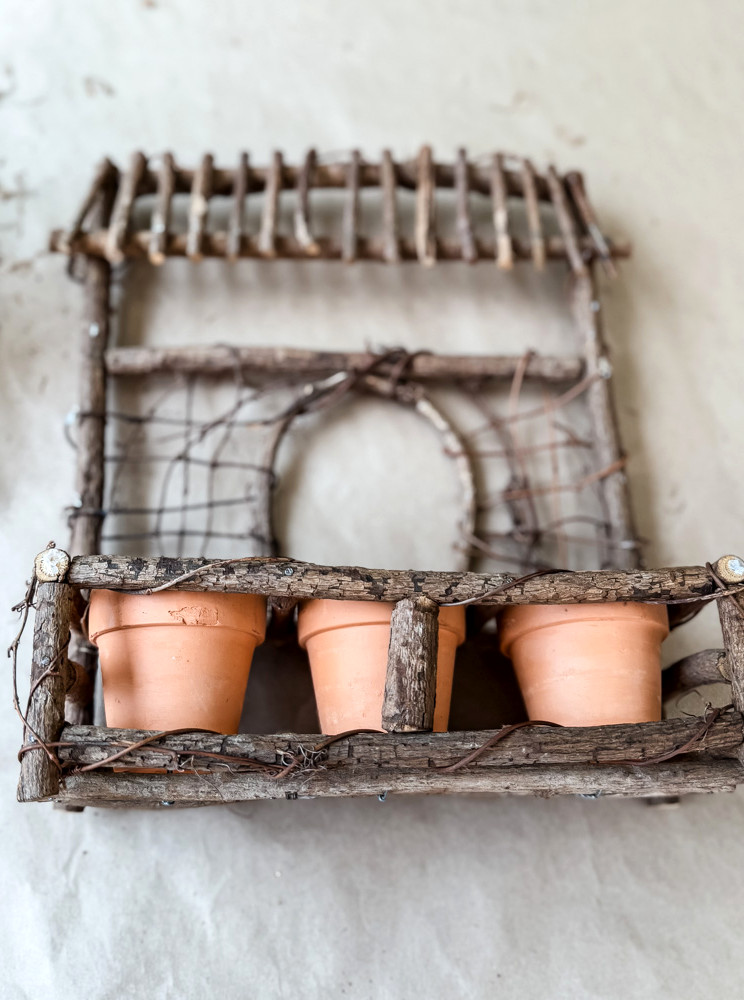
To begin, I needed to remove every decoration that had been glued in place. It had clearly been assembled with care and was nicely crafted, but it didn’t suit my taste whatsoever. After stripping it down, I could finally give it a fresh look!
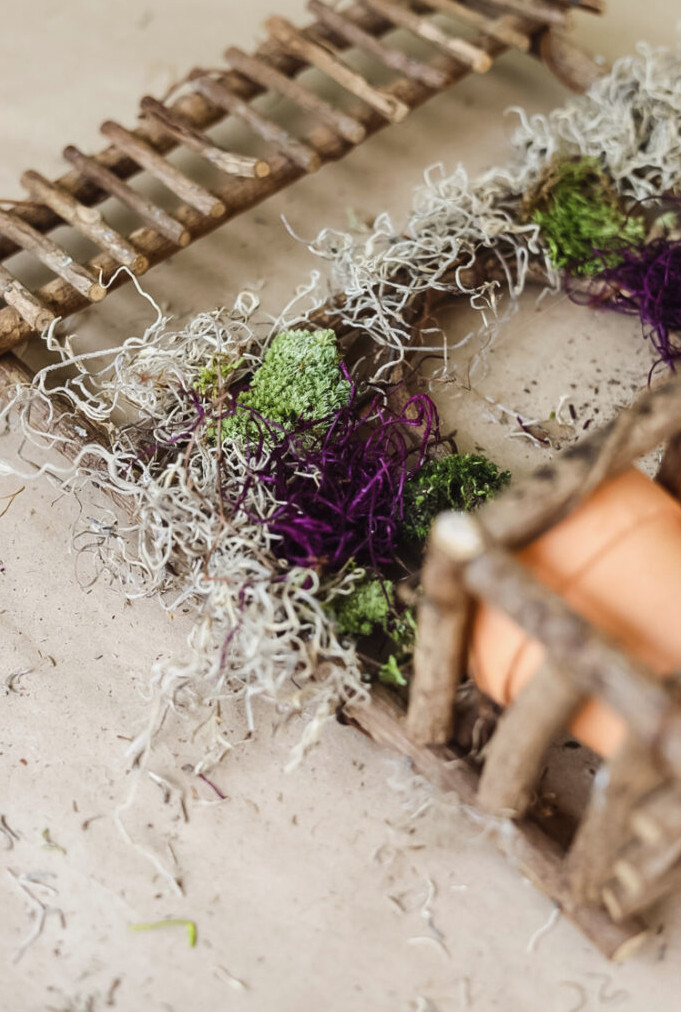
For a beautifully imperfect natural texture, I combined several types of moss with hot glue:
- To start, Spanish moss– loosely arranged to add soft, wispy dimension.
- Next, compact pieces of genuine moss– nestled into the openings for a rustic contrast.
- Finished with several strands of purple Spanish moss for a cheerful splash of color.
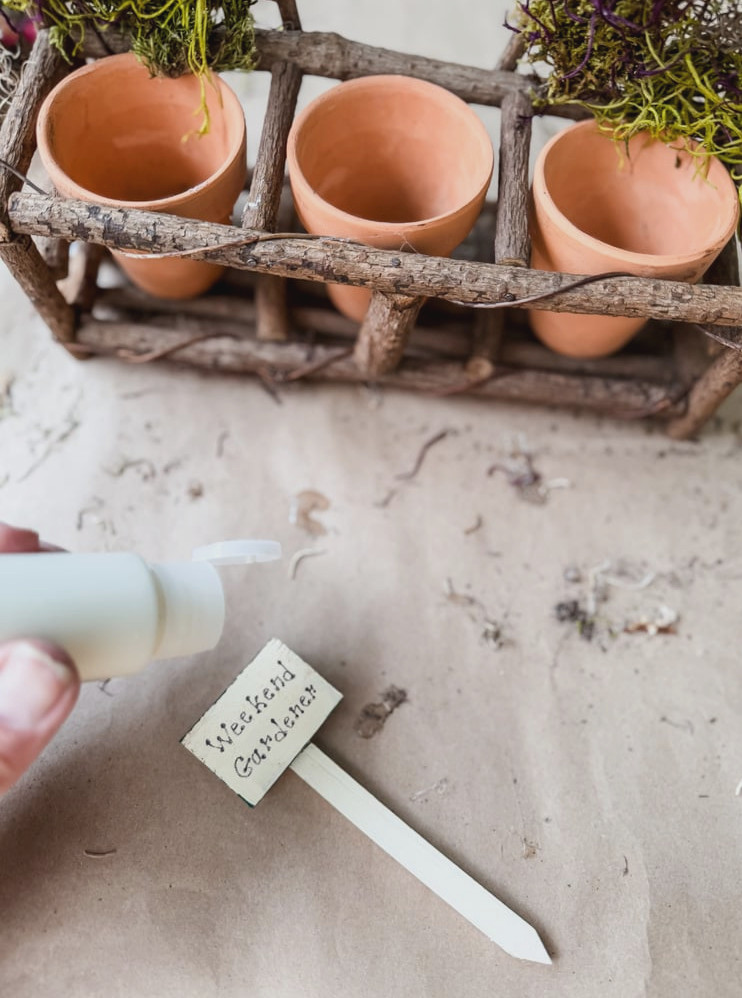
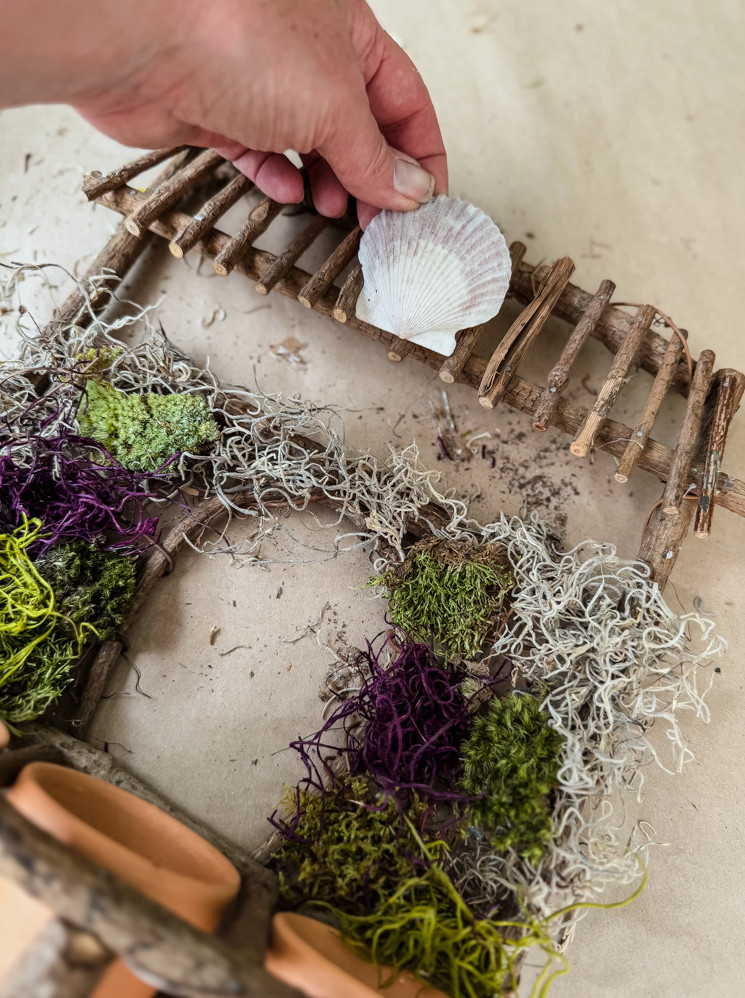
To create its relaxed coastal character, I incorporated two thoughtful details:
- An updated sign– Covered the original “Weekend Gardener” wording with paint and embellished it using a tiny coral fragment.
- A scallop-shell ‘crown’– Attached to the top with hot glue for an immediate seaside feel.
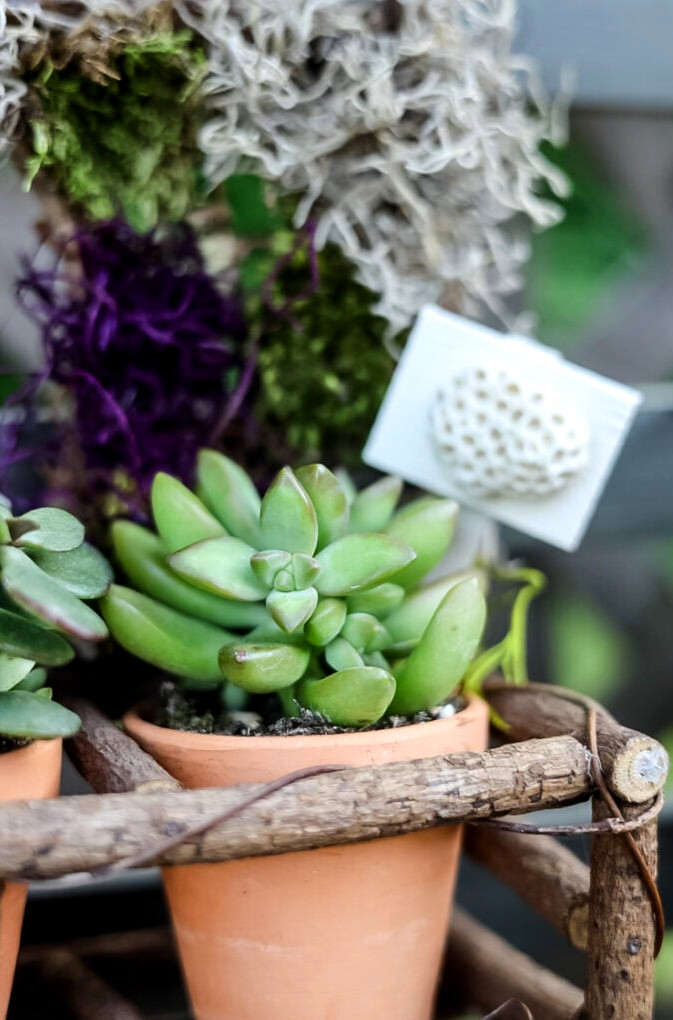
To finish the arrangement, I placed 3 petite succulents inside the terracotta pots, then went into the garden to attach it to the potting bench.
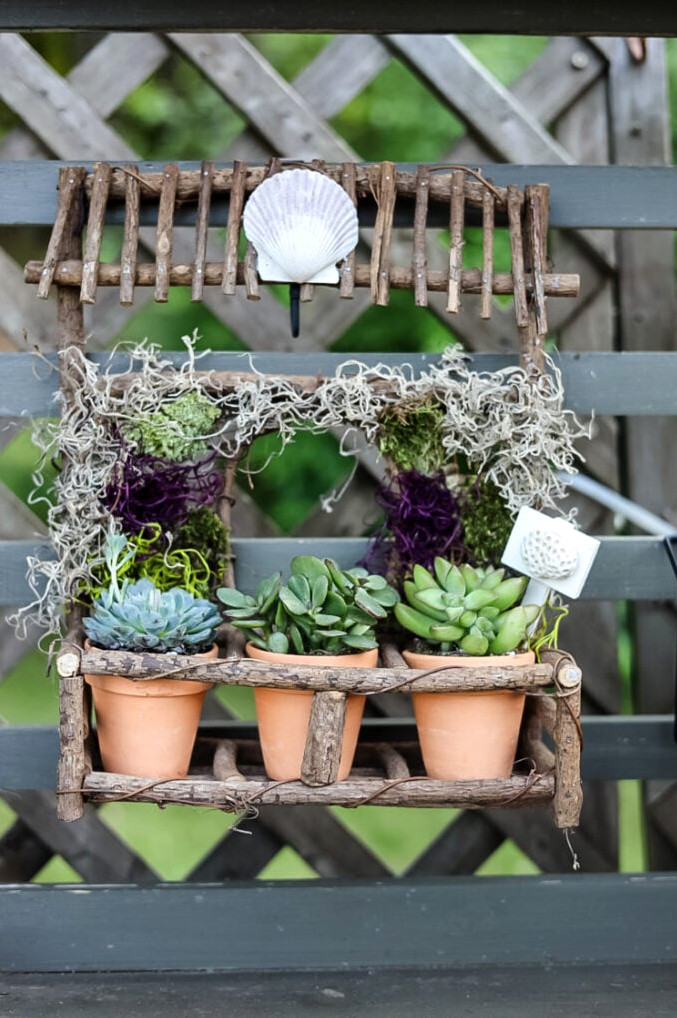
The Transformation Steps:
- Removed everything(farewell, gaudy ribbons!).
- Attached Spanish moss and natural moss with hot gluefor an earthy finish.
- Placed a seashell ‘crown’at the top to add a coastal accent.
- Planted succulentsin the pots (stylish and easy to care for).
- Repainted the original signand attached atiny shellas a distinctive finishing touch.
Final cost:$5 for the planter+$0 for moss/shells(gathered from my collection). It’s now aunderstated, elegantdetail on my garden potting table—proof that even the most awkward thrift-store finds can discover their perfect purpose!
The Cutest Little Clogs: A Dutch-Inspired Garden Accent
These miniature wooden clogs (labeled ‘Holland’) were practically asking for aCottage on Bunker Hilltransformation. Here’s how I converted them into a cheerful garden decoration
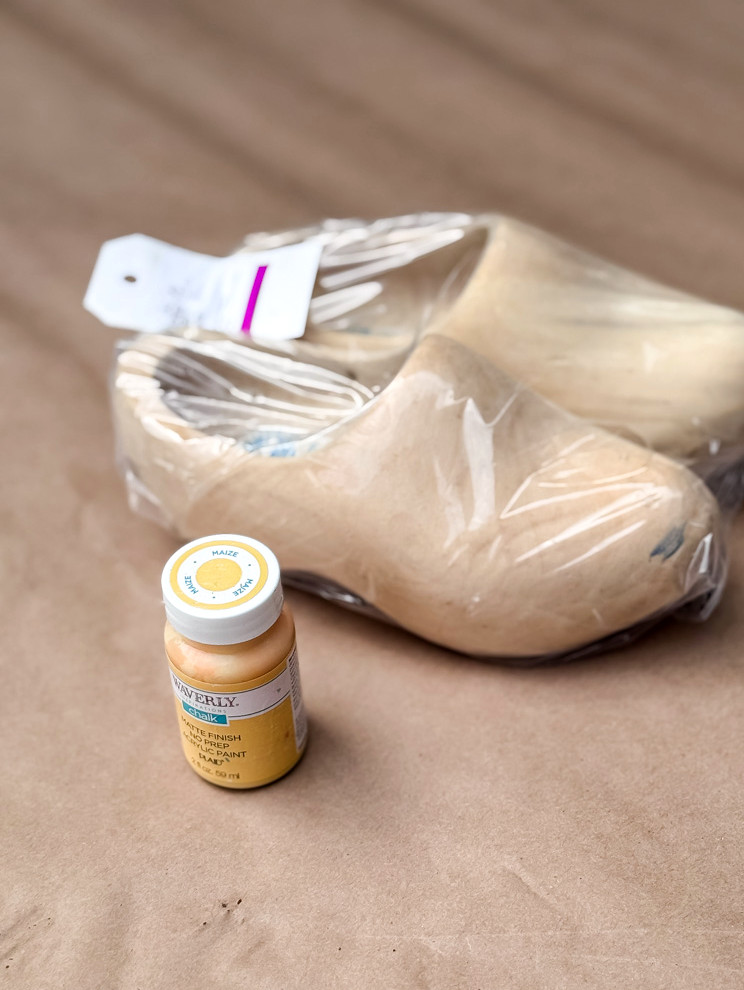
Alright, several months back I came across a pair oflarge, stunning yellow Dutch clogswith hand-painted windmills… but walked away.In my defense, it was February, and spring seemed impossibly distant. Still, like every great forgotten treasure, they stayed on my mind.“Why didn’t you buy them, Jennifer?!“
Jump ahead to this haul:The thrift-shop luck was with me when I discovered thesewooden clogs sized for children and instantly placed them in my cart!
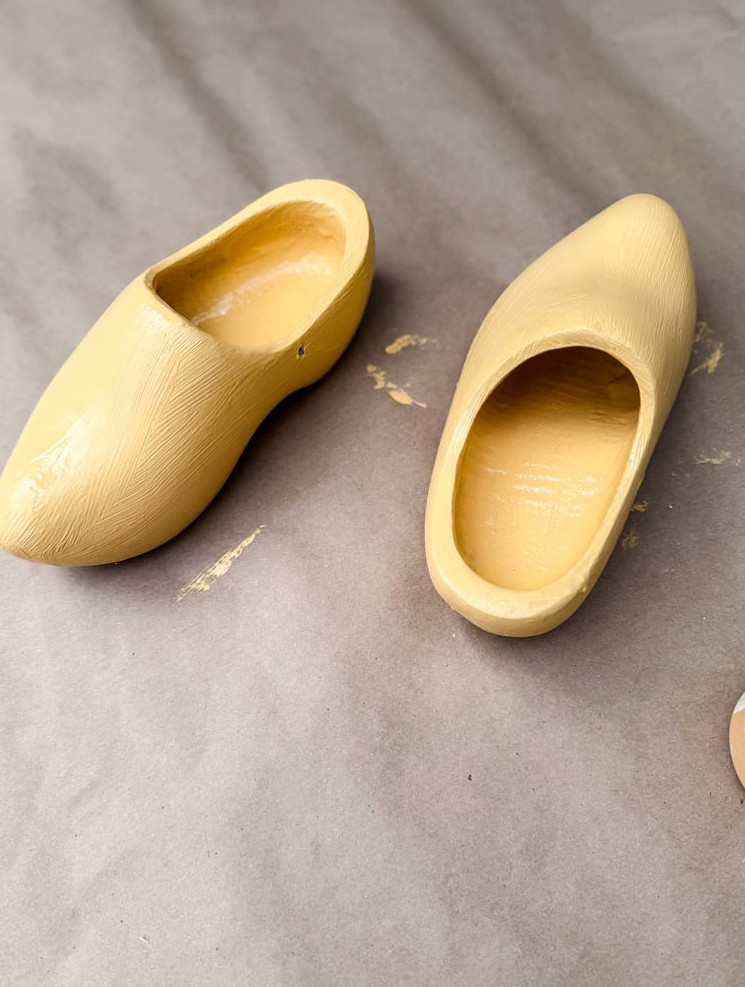
Before beginning the decoupage, I only had to apply one layer of yellow chalk paint to hide the clogs’ original finish.
How I Decorated the Clogs with Floral Napkins
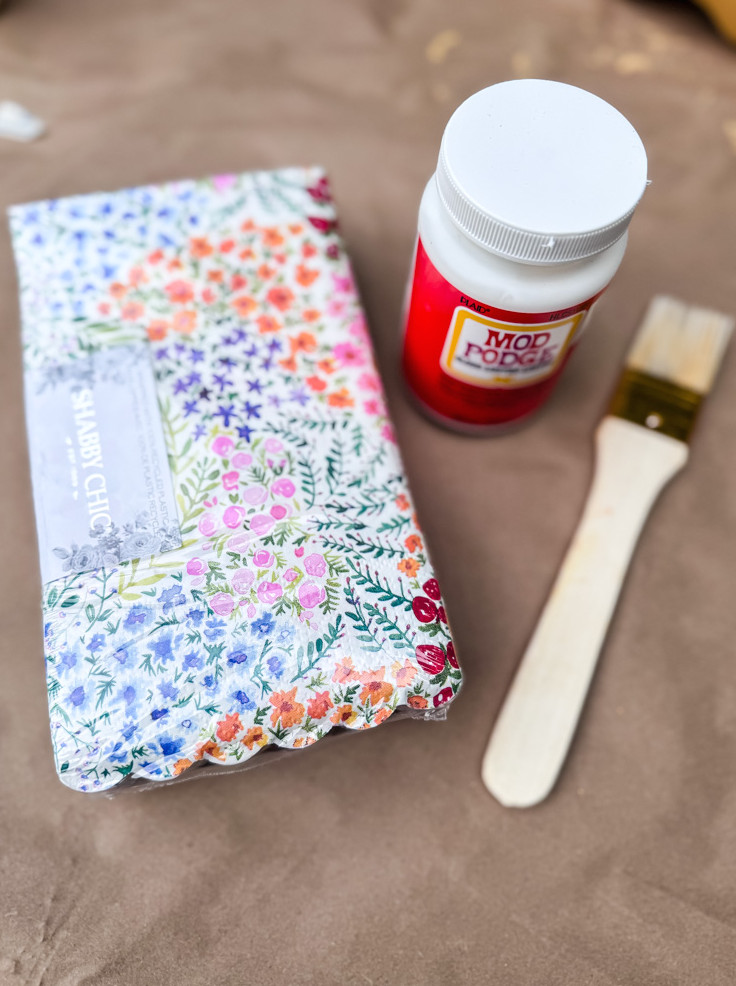
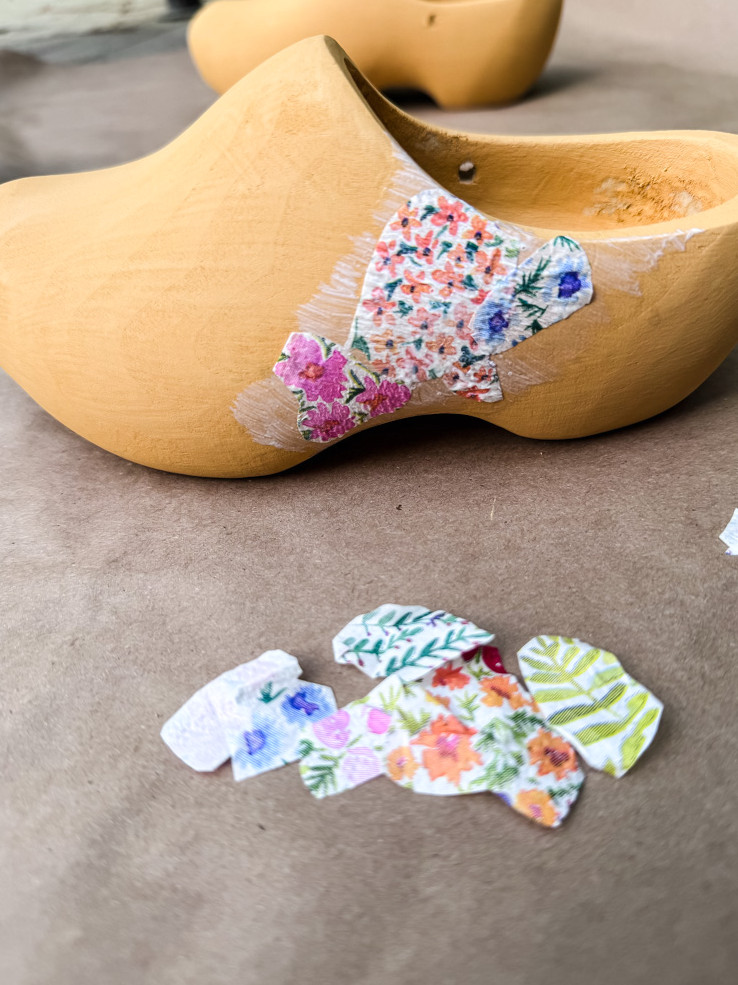
- Trim & Divide: Cut out the napkin’s flower patterns, then separate the layers (only the upper printed ply is needed!).
- Adhere & Flatten: Paint a slim coat of Mod Podge onto the clog, position the napkin piece, and softly brush more glueacrossit to seal it. (Wrinkles?Press them smooth with your fingers as it dries!)
My Suggestion: Choose a small, firm brush for applying glue and use plenty! You don’t want the brush to pull at the paper napkin pieces.
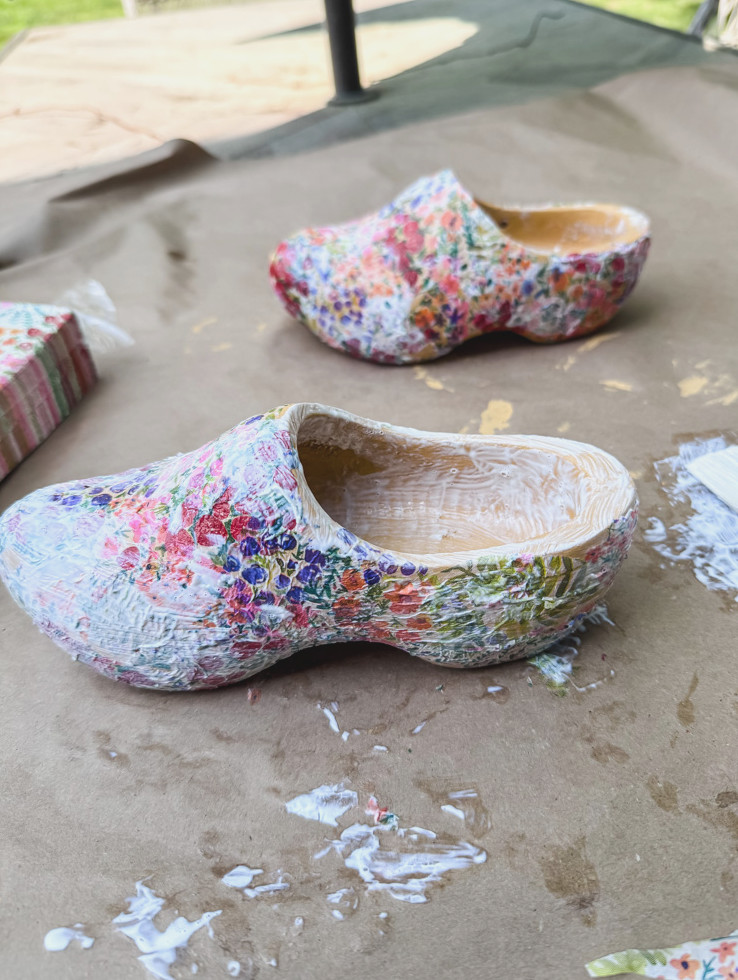
- Repeat & Build: Layer the pieces over one another for a collage-style look—perfection isn’t required!
- Protect It: I applied one more coat of Mod Podge over the clogs and left them to dry. Afterward, I sprayed on a transparent protective topcoat to help them withstand the weather.


After the finish had fully dried, I threaded jute through the opening on both sides of every clog so they would be ready to hang.
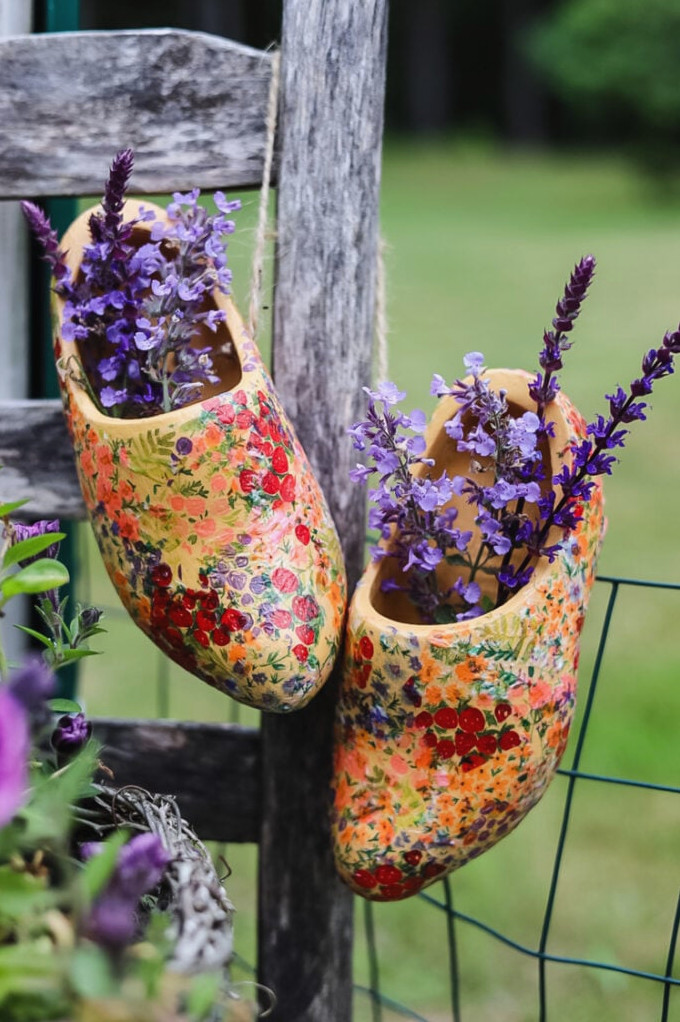
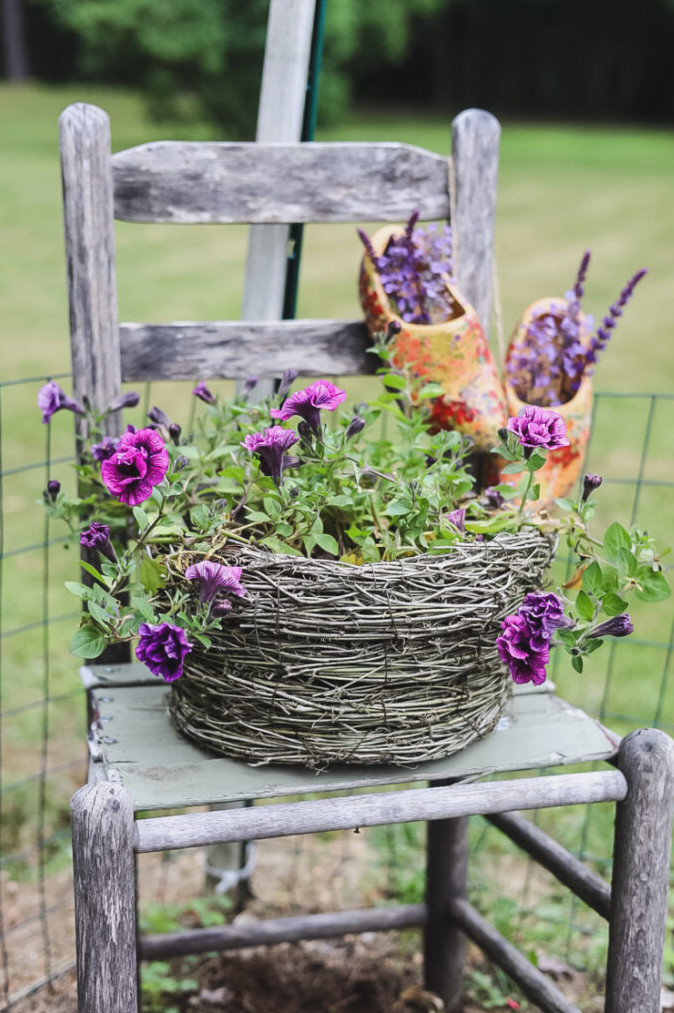
These adorable secondhand clogs add such a delightful touch when suspended over the back of a chair in the cottage garden.
Styling Tip:For the pictures, I placed fresh salvia stems inside the clogs, butartificial bloomswould be lovely for lasting appeal (with no fading or wilting!). Alongside a flower-filled basket resting on the chair seat, they create a little European retreatin my own backyard.
The Makeover:
- Coated them in cheerful yellow– An instant mood booster!
- Added floral napkin pieces with decoupage– A handful of Mod Podge strokes created a whimsical vintage-inspired design.
- Attached jute cord– I suspended them across the back of my$2 secondhand garden chair(a treasured find!).
A Garden (and Its Story) Taking Shape
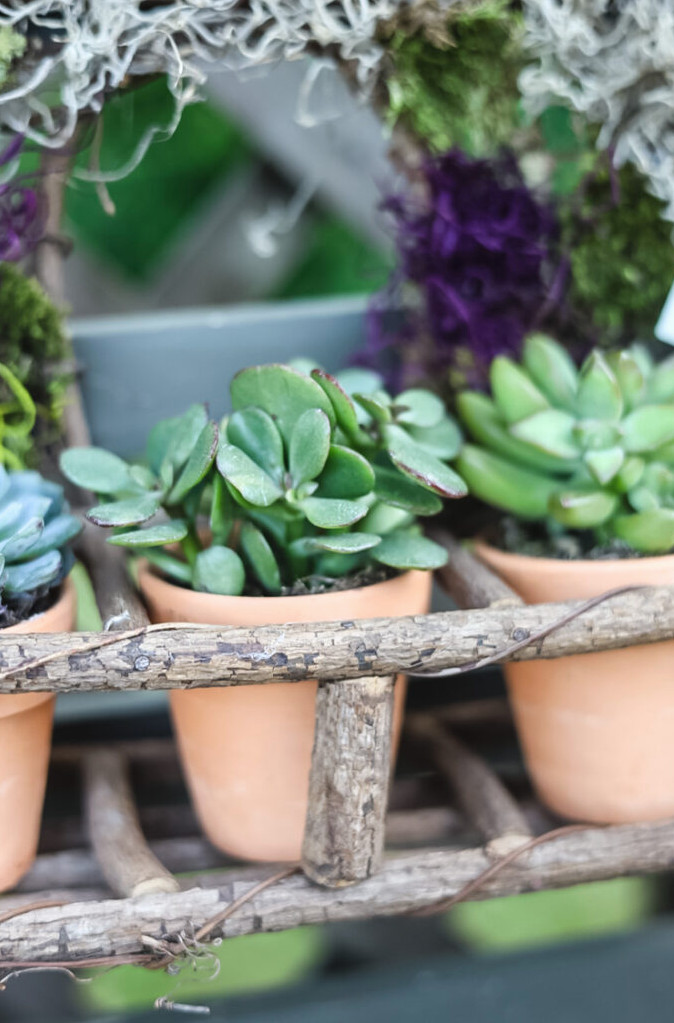
Now that my secondhand treasures are nestled among the flower beds and displayed throughout the garden, all that remains is to wait- for the lobelia to cascade over the tub’s rim, for the succulents in the repurposed planter to reach toward the sunlight, and for the birds to find their new glass bath.
What makes a cottage garden so special? Seeing it flourish. This season, it will be especially enjoyable to watch these thrifted accents mingle with the blooms. It proves that beauty needn’t be flawless or costly; all it requires is some creativity and patience. (And, of course, perhaps a hot glue gun.)
7 Thrifting Ideas for Garden Enchantment
- Welcome the Unattractive: Ignore the grime and rust—pay attention toformandsubstance(metal, glass, terra cotta = treasure).
- Browse the “Unwanted” Section: Vases, strainers, and baking tins can become excellent planters.
- Make Sure It’s Solid: Wind chime quiet? Bowl cracked? That’s fine—provided it can handle a bit of DIY attention.
- Look Past the “Garden” Label: Imagine curtains as table covers, vintage hooks as plant supports, and drawers as elevated beds.
- Buy During the Quiet Season: Pick up inexpensive urns in winter and festive lights in spring (pro tip: white twinkle lights bring a year-round fairy feel).
- Give Old Hardware New Purpose: Drawer handles can guide hoses, while worn ladders can serve as trellises.
- Keep a Measuring Tape Handy: That seemingly oversized trough may fitjust rightbeneath your kitchen window.
Bonus:“When something makes you grin (or chuckle), purchase it—you can decide where it belongs afterward!”
Want to have your projects showcased! If this project or any of my other DIY ideas inspires you, I would be delighted to see your creations and include you in the Reader’s Spotlight gallery. Email a photo to jennifer@cottageonbunkerhill.com
xo, Jennifer
Cottage Garden
Go-To Products
Explore my gardening essentials! Raised beds, plant supports, & tools that help your garden thrive.