Picture entering a garden where colorful blooms blend with thriving vegetables, while aromatic herbs cascade from the borders of delightful raised beds. This is more than a fantasy—it’s the charm of cottage-inspired gardening in raised beds! Combining vegetables, flowers, and herbs lets you design an area that is both attractive and highly productive.
Raised Bed Gardening with Cottage Charm: Blending Vegetables, Flowers, and Herbs
A garden that is both fruitful and scenic has a special kind of appeal. In my vegetable plot, I’ve discovered an ideal balance by combining vegetables, flowers, and herbs in raised beds, along with charming willow teepees and towers that support climbing plants. Raised bed kits simplify the work, giving me more time to enjoy the creative side—planting and planning!
In this article, I’ll explain how to build your own cottage-inspired raised beds, beginning with putting together the kits, selecting suitable plants, and incorporating rustic willow supports. Whether you’re an experienced gardener or a beginner, this approach is a wonderful way to unite beauty and usefulness in your garden.
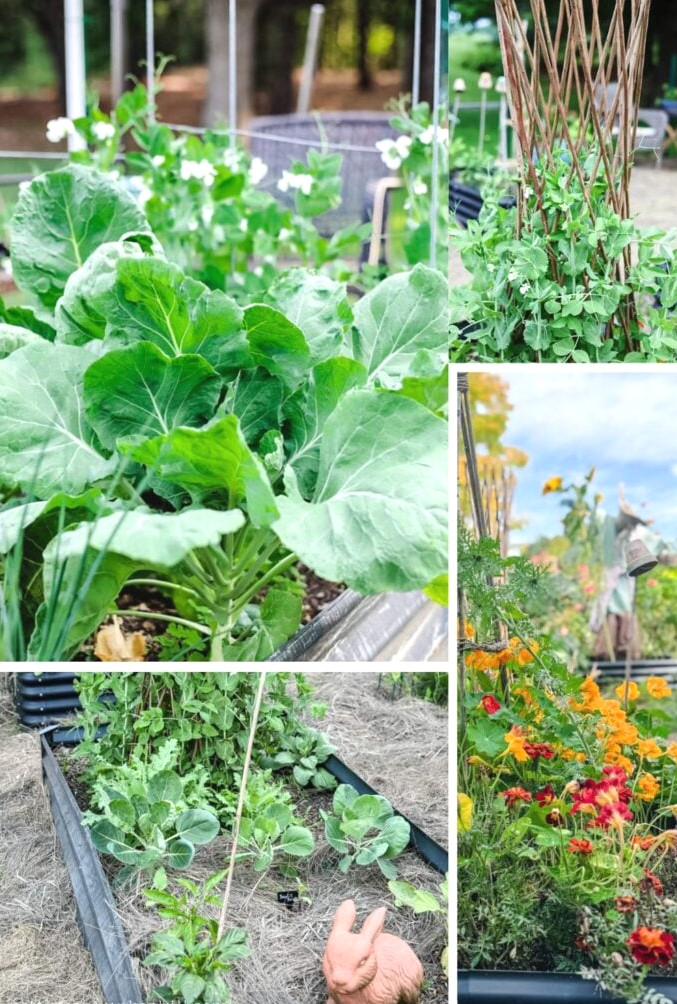
Why Combine Vegetables, Flowers, and Herbs?
Growing vegetables, flowers, and herbs together in raised beds provides numerous advantages:
- Pest Management:Blooms such as marigolds and nasturtiums help deter pests naturally.
- Pollinator Support:Flowers draw bees and butterflies, helping your vegetables become pollinated.
- Efficient Use of Space:Combining plants enables you to cultivate more within a smaller area.
- Visual Interest:A blend of colors, textures, and plant heights produces a garden that is wonderfully eye-catching.
How to Build Cottage-Inspired Raised Beds
1. Select and Put Together Your Raised Bed Kits
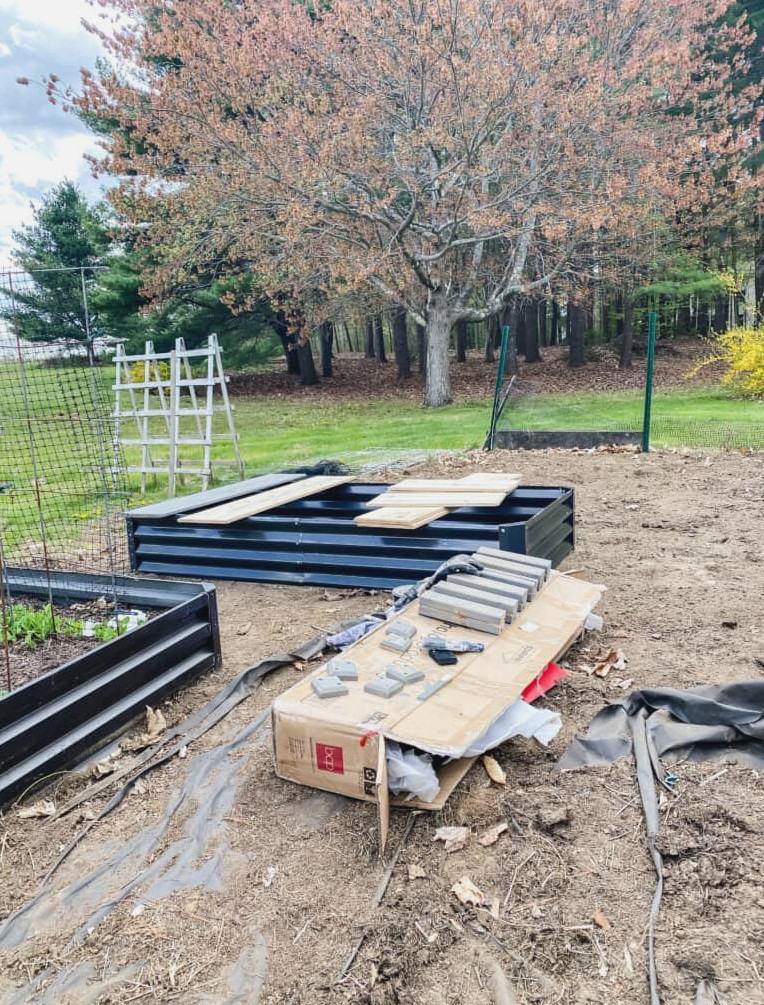
My garden has continued evolving since I first established it, growing slightly—or significantly—each year. It began as a 16 x 16-ft garden and has expanded into a 20 x 55-ft area! The front section is reserved for flowers that I can cut and dry, whereas the rear half is used for everything else. When I enlarged my vegetable garden last season, I chose to include additional raised beds in this part of my extensive garden.
Raised beds provide an effective way to make use of every available inch while giving the garden a warm cottage-style atmosphere as you enter through the gate.
I like purchasing raised bed kits because they offer durability, simple assembly, and a polished appearance. These kits are ideal for building a garden area that feels organized yet inviting, and their variety of sizes makes it easy to find options suited to your space.
- Why Choose Kits?Raised bed kits are an excellent starting point for a garden. They assemble easily, last well, and are available in materials such as metal, wood, and composite to complement your preferences. In my garden, I use a combination of metal, wood, and sturdy plastic because these materials are durable and can withstand the cold, snowy winters here.
- Assembly Advice:Most kits are relatively simple to put together, but carefully follow the instructions. I discovered that having someone assist me made the task smoother, particularly when positioning the beds in the garden.
- Location:I positioned my five raised beds in the middle of my vegetable garden, forming a centerpiece that is both practical and attractive. Select a sunny location with at least 6 hours of daily sunlight, and leave sufficient space between the beds for comfortable walking and convenient access.
2. Adding Soil to Your Raised Beds
Using the proper combination of materials when filling your raised beds is essential for a vigorous, productive garden. This is how I prepare mine, combining shredded leaves, compost, and raised bed soil to form an excellent growing medium.
1. Begin with Shredded Leaves and Leaf Mold
I place shredded leaves and leaf mold from my yard at the base of my new raised beds. Since I live in New Hampshire, maple trees are plentiful, giving us a generous supply of leaves. I compost them during the year, allowing them to transform into dark, rich, crumbly leaf mold.
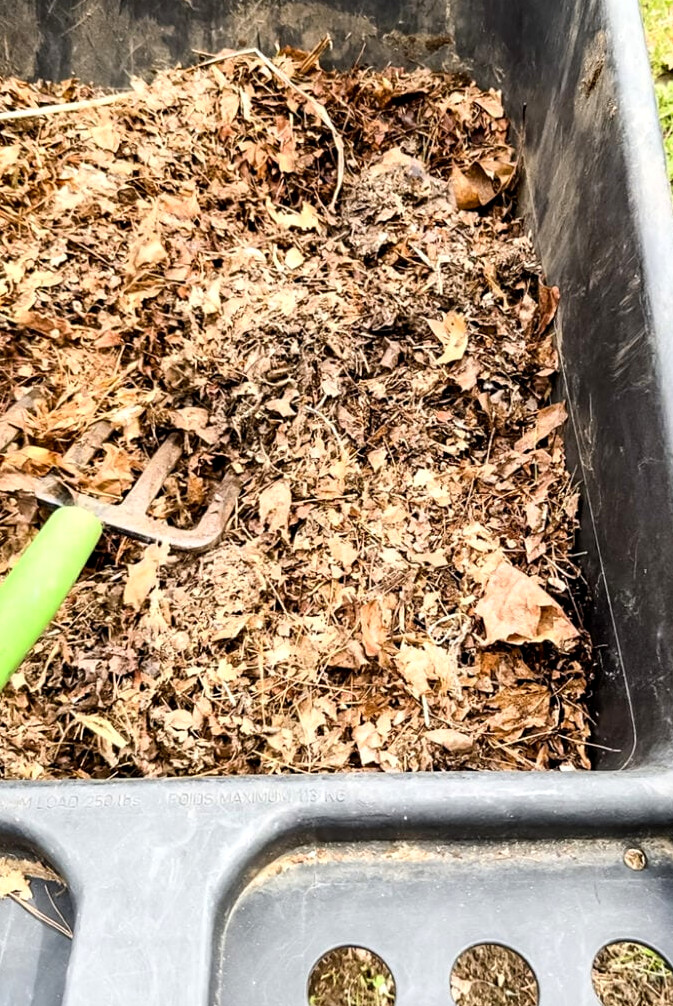
- Why Choose Leaves? Shredded leaves and leaf mold work wonderfully to enhance soil texture, preserve moisture, and introduce organic material. They also provide an affordable option for filling the lower portion of your beds.
- How to Apply Them: Place a 4-6-inch layer of shredded leaves or leaf mold across the base of your raised beds. As time passes, these materials will decompose and add valuable nutrients to the soil.
2. Add Compost
Afterward, I spread a generous layer of compost over the leaves. Compost is garden gold—it supplies nutrients, enhances soil vitality, and supports helpful microorganisms.
- Where to Find Compost: Without homemade compost available, purchase bagged compost at a nearby garden center. Choose a premium organic variety whenever possible.
- How Much Is Needed: Plan on creating a layer approximately 4-6 inches deep. This provides your plants with a nutrient-packed base for healthy growth.
3. Finish with Raised Bed Soil
To finish, I fill the remaining space with soil specially designed for raised beds. Skip ordinary garden soil intended for planting directly in the ground because it may be overly compact and drain poorly inside raised beds.
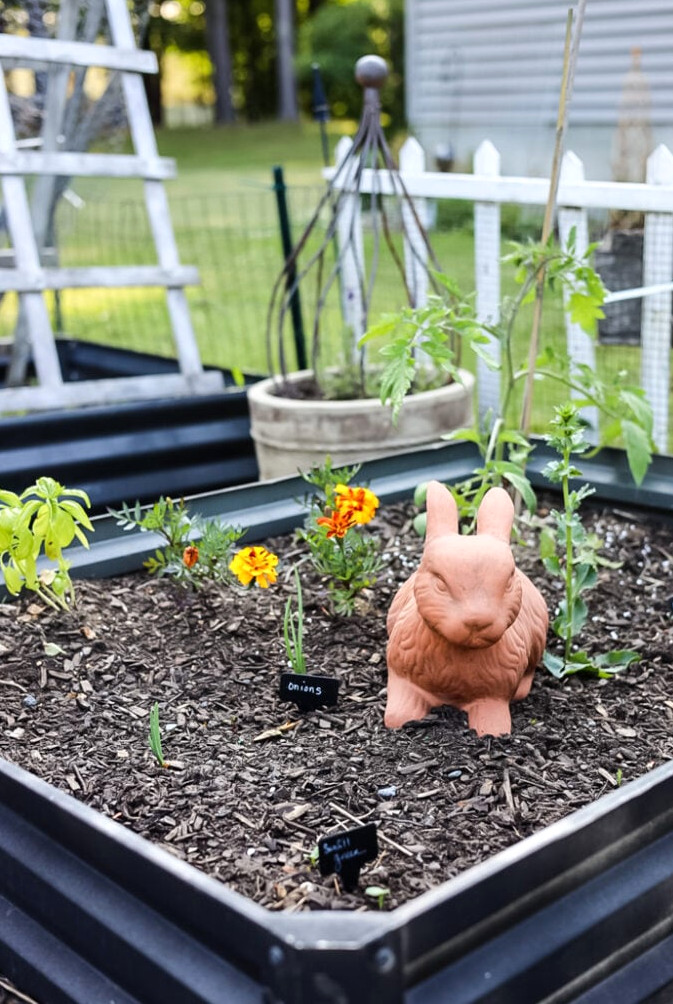
- Why Use Raised Bed Soil? This soil is light, drains efficiently, and is formulated to offer the ideal nutrient balance for container and raised-bed gardening.
- How Much Should You Add? Bring the soil to about 1-2 inches below the rim, leaving space for mulch or extra compost later in the growing season.
For those living in New England, I strongly suggest the Coast of Maine organic garden products. Although they cost more than big-box store brands, their quality is outstanding!
Why This Approach Works
Layering shredded leaves, compost, and raised bed soil creates a fertile, well-drained setting that is ideal for producing healthy plants. In addition, reusing materials such as leaves and homemade compost lowers expenses and helps make your garden more eco-friendly.
Tips for Great Results:
- Replenish Each Year: Every season, add fresh compost and soil to your beds to restore lost nutrients.
- Cover the Surface: Spread a layer of mulch, such as straw, to hold in moisture and limit weed growth.
- Change Crop Locations: Rotate your crops from season to season to help avoid exhausting the soil.
Grow Upward: Vertical Gardening Ideas
When working with raised beds, using every square inch wisely is essential. Growing plants upward is one of the simplest ways to make the most of limited space. Vining crops such as cucumbers flourish with support, and they are easier to find and pick when suspended neatly instead of spreading over the ground.
Install a Trellis
To conserve room and bring height to the garden, I place trellises in several of my raised beds. They work especially well for climbing plants such as snow peas, beans, flowers, climbing spinach, and even small pumpkins.
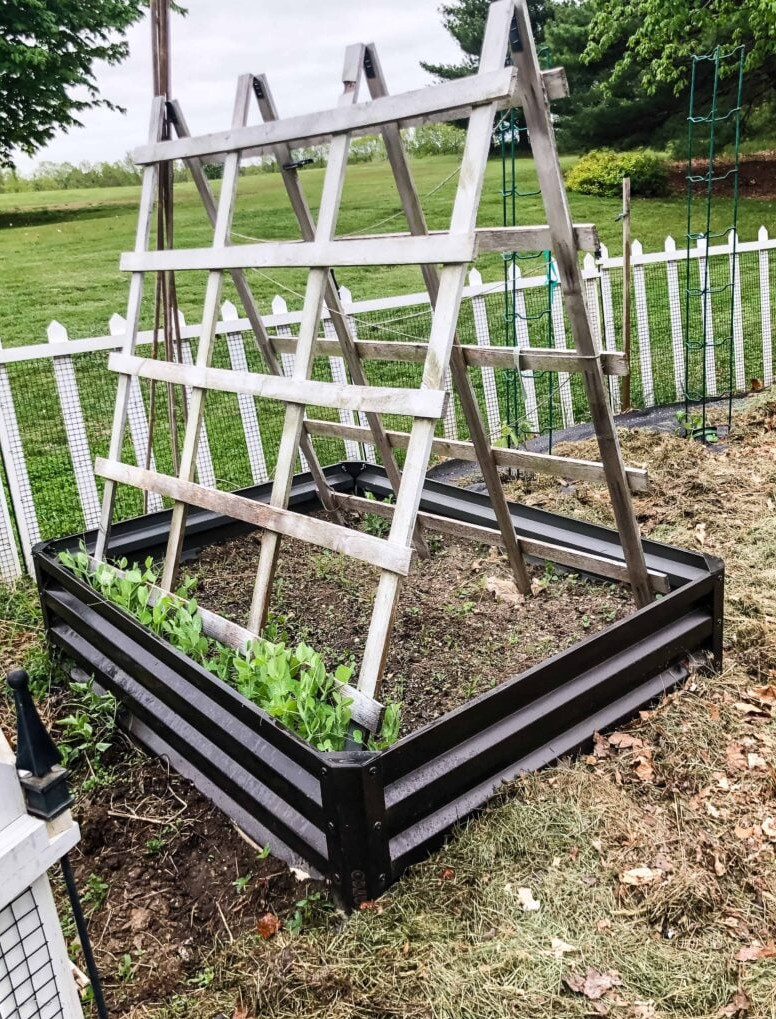
I’ve owned this collapsible trellis for many years—it originally came from Lowe’s—and I also created a DIY guide for building your own folding trellis. This is the only wooden folding trellis I found that I’d recommend, though it is somewhat expensive.
Many folding metal trellises are excellent choices for placing in a raised bed, helping conserve space while allowing vegetables to grow upward.
- Why Use Trellises?Besides conserving space, trellises lift plants away from the soil, helping minimize pests and diseases. They also bring added height and form to your garden.
- Where to Place Them:Set trellises along the north or east sides of your beds so they don’t cast shade on smaller plants. Mine makes a lovely natural boundary around the vegetable garden while providing practicality and charm.
Include Willow Teepees and Towers
Adding willow teepees and towers is one of my favorite ways to bring both beauty and usefulness to raised beds. These charming rustic features support climbing plants while giving the garden a delightful cottage-inspired feel.
Last season, I placed willow funnel towers in the middle of two raised garden beds, creating instant cottage appeal! I encourage every new gardener to give snow peas & sugar snaps a try. Both are cool-weather vegetables that can be planted in early Spring. Because they’re among the first crops to grow, you’ll enjoy a sense of achievement right from the beginning!
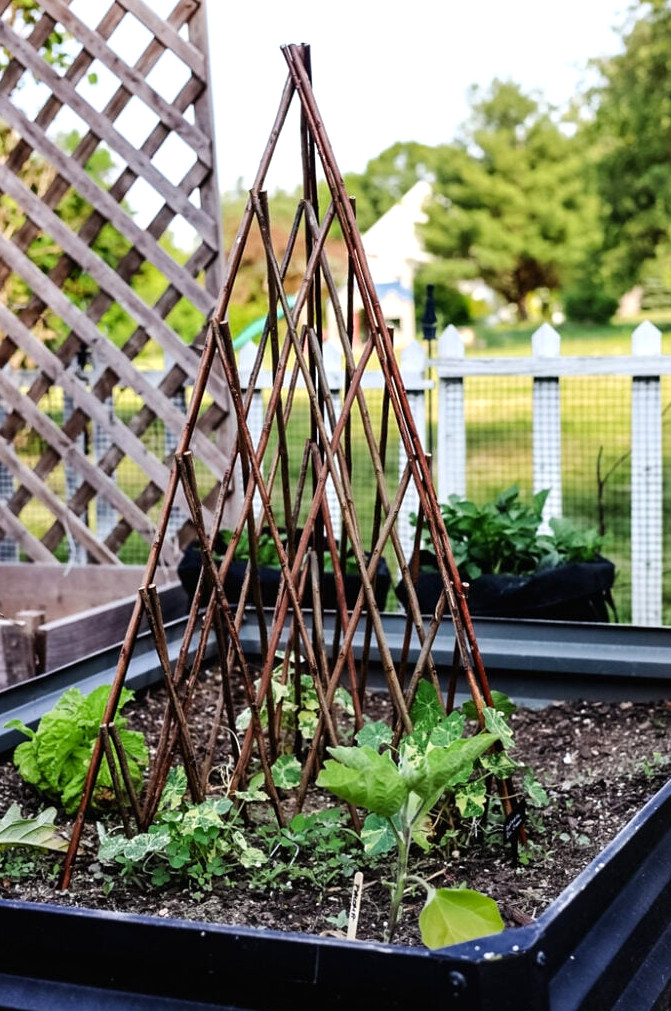
A willow teepee-style trellis is another favorite feature in cottage gardens. It’s affordable and easy to find online. If you’re concerned about keeping it secure, garden staples provide the solution.
Create a Touch of Cottage Charm Yourself!
Do you enjoy crafting your own garden features, or would you like an economical way to bring cottage character to your raised beds? Try these DIY suggestions:
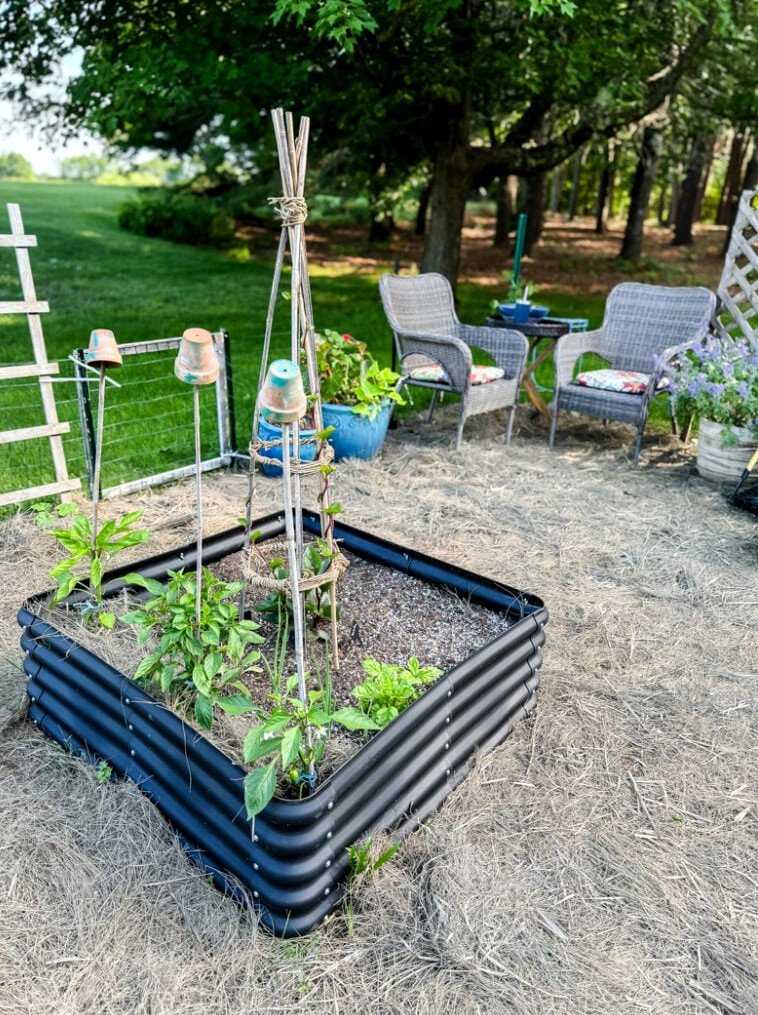
- Build an enchanting DIY cottage garden tower for climbing flowers or vegetables! Use a tomato cage, bamboo, and seagrass rush to make one. It’s ideal for compact areas and works beautifully in a container planter.
Select Your Plants: Best Options for a Cottage-Style Vegetable Garden
Deciding what to grow is one of the most enjoyable steps in creating a raised-bed cottage garden! Combining vegetables, flowers, and herbs produces a beautiful display while improving your garden’s vitality and yield. Here are a few of my preferred plants to add:
Vegetables for Raised Beds
Every fruitful garden depends on vegetables, and these crops can be as attractive as they are tasty. Consider these simple-to-grow selections for raised beds:
- Tomatoes: Select compact ‘patio’ types that fit especially well in raised beds.
- Peppers: Whether sweet bell peppers or fiery chili varieties, they provide flavor and vivid color.
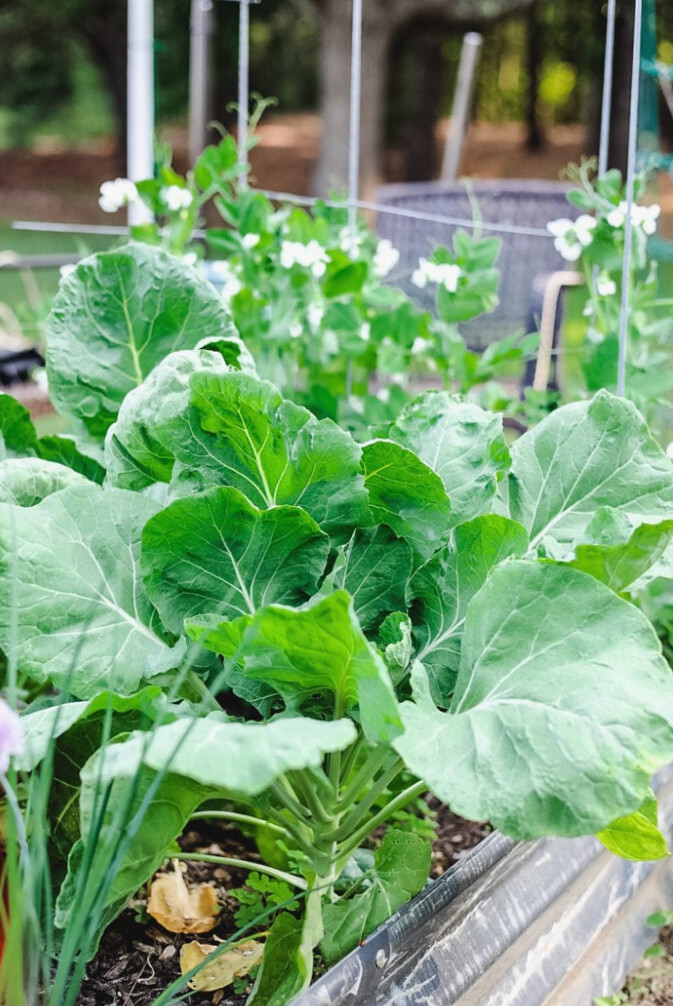
- Beans and Peas: With their climbing habit, these crops are ideal for vertical supports such as willow trellises or garden towers. Bush beans are also excellent for beds.
- Broccoli: This vitamin-rich vegetable contributes height and shape, while its broad leafy greens offer unexpected ornamental appeal.
- Lettuce: Create an attractive edible edge by planting loose-leaf varieties in green and red tones.
- Carrots: Their delicate, feathery foliage brings texture, and harvesting them is always a delightful surprise!
Flowers for a Cottage Garden
At the center of every cottage garden are flowers, which offer color, character, and natural pest management. These blossoms are wonderful companions for your vegetables:
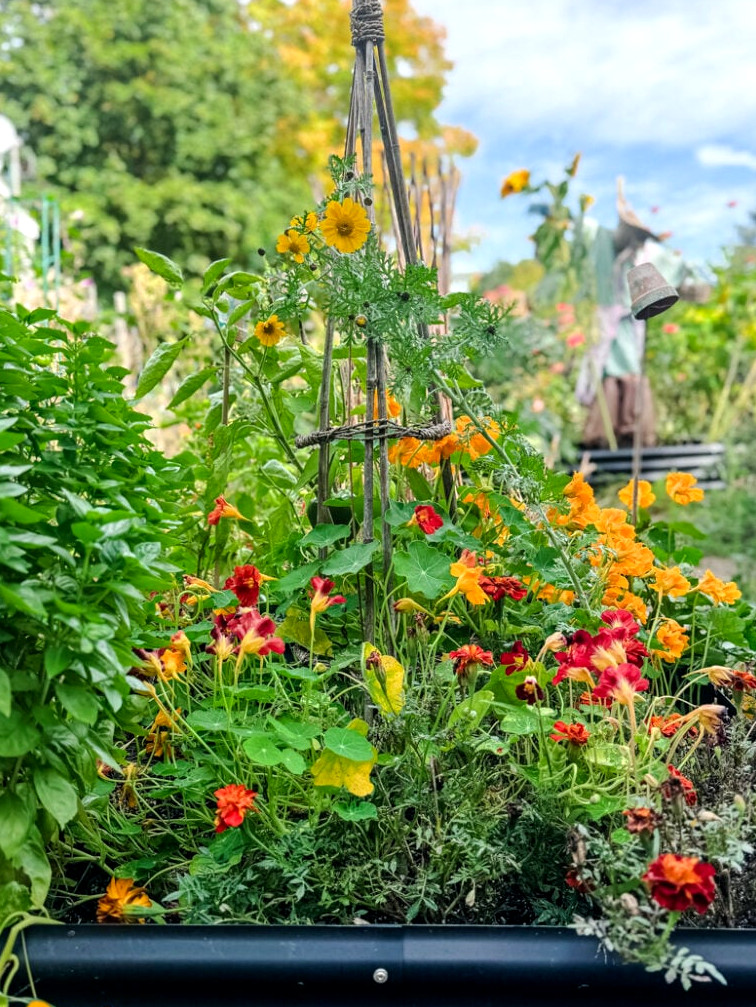
- Marigolds: Their vivid orange and golden blooms help ward off pests such as aphids and nematodes.
- Nasturtiums: Along with bringing a peppery taste to salads, these edible blossoms discourage pests like whiteflies.
- Calendula: This sunny flower benefits pollinators and offers medicinal properties. It’s one of my favorite plants to grow!
- Zinnias: With their striking, colorful flowers, they draw butterflies and work wonderfully as bouquet cut flowers.
Herbs That Flourish In Raised Bed Gardens
For a cottage garden, herbs provide the ideal finishing detail, filling open spaces with aroma and taste. Grow them around the borders or nestle them among your vegetables and blooms:
- Basil: Its abundant green foliage complements tomatoes wonderfully and helps keep mosquitoes away.
- Thyme: This compact, spreading herb works well as an edging plant and draws pollinators.
- Rosemary: The woody stems and aromatic leaves provide form and fragrance.
- Oregano: This resilient herb spreads attractively and brings a Mediterranean feel to your garden (and to your kitchen!)
Design Ideas for Your Raised Bed Cottage Garden
A successful raised-bed cottage garden depends on combining beauty with practicality. Use these suggestions to position your plants for the greatest visual effect:
1. Arrange Different Heights
Grow taller plants, liketomatoesorclimbing beans, toward the middle or rear of your raised beds. This prevents them from casting shade over shorter plants while giving the garden a natural background. Place medium-sized plants, such aspeppersorbroccoli, around them, then add shorter choices likelettuceorcarrotsin front. This tiered layout creates dimension while keeping each plant easy to see and reach.
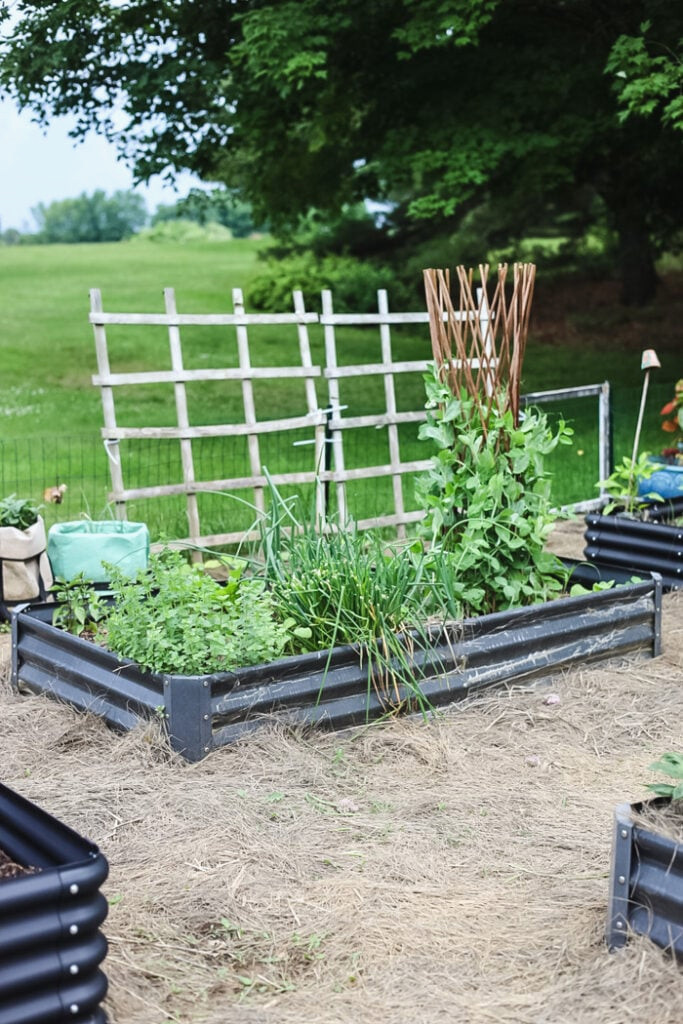
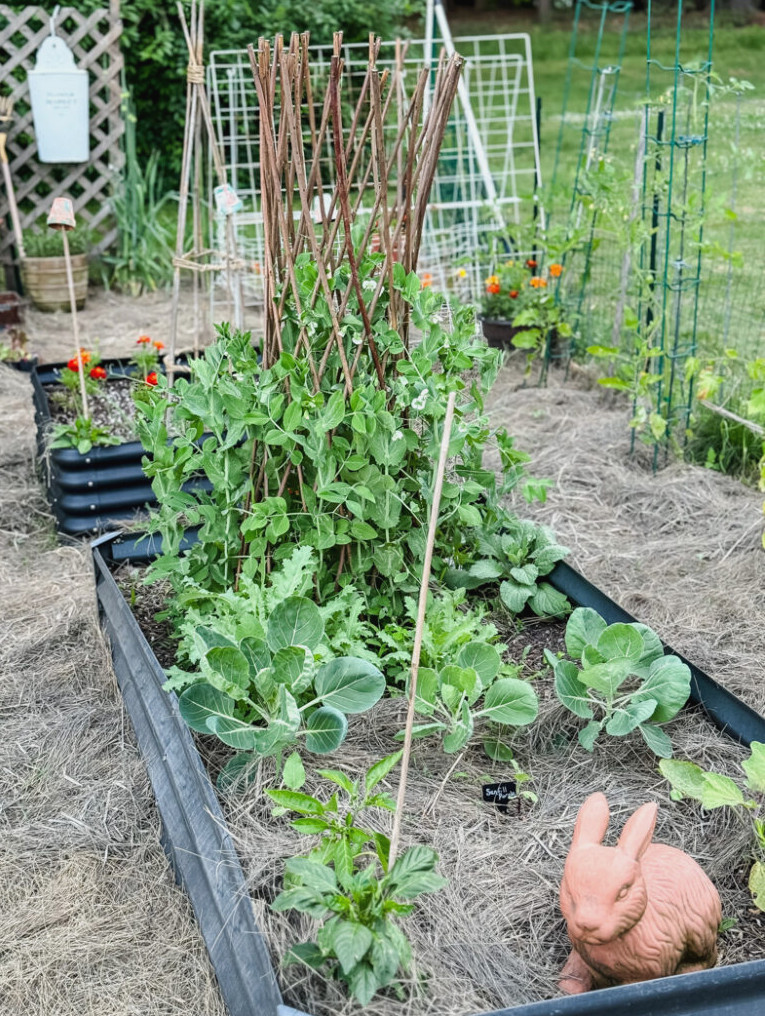
Within this6 x 3-foot raised bed, I’ve combined herbs, flowers, and vegetables to create a charming cottage-garden appearance. Along the front border, I’ve plantedoregano, chives,onions, andcalendula, whilesnow peasclimb a willow funnel trellis at the back. On the opposite side, I’ve includedmarigoldsand severalsmall sunflowers.
For raised beds, my preferred sunflower variety isSunFill PurpleorGreen—these compact, single-stem varieties are ideal for cutting and look beautiful in vases. I also dry the flowers for wreaths, bringing a little garden character indoors!
2. Blend Colors and Textures
The appeal of cottage gardens comes from their abundant, informal style. Pair leafy vegetables likekaleorSwiss chardwith bright flowers such aszinniasandmarigolds. Include aromatic herbs likethymeororeganoto introduce additional texture and fragrance. By combining varied colors, forms, and surfaces, you’ll create a beautiful tapestry that appears both natural and thoughtfully planned.
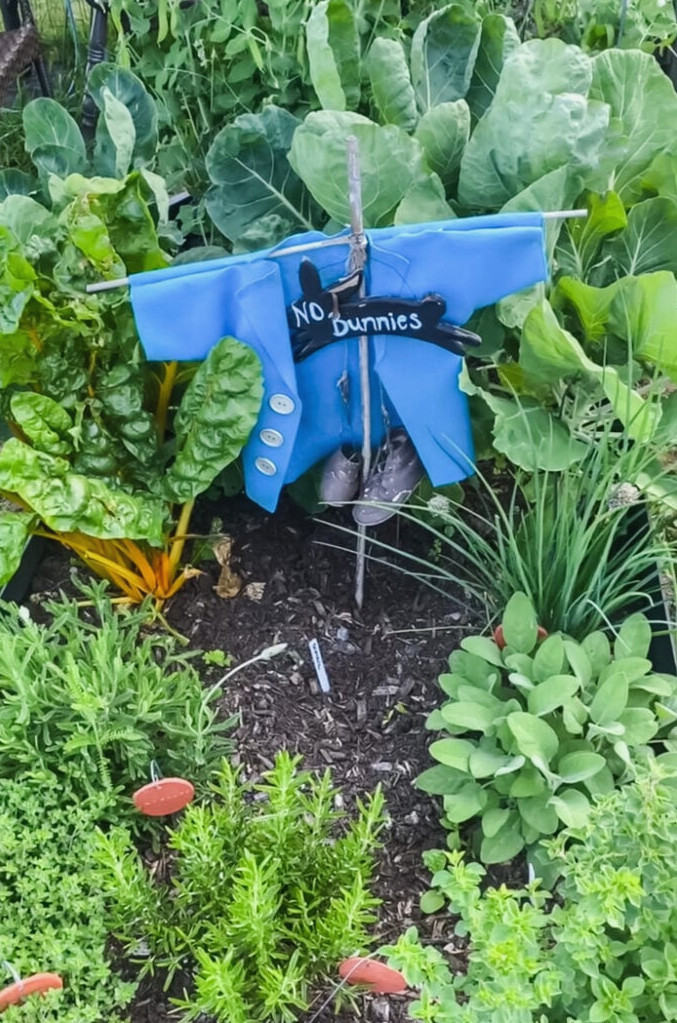
This was one of my favorite garden beds to plant, with a strong emphasis on herbs at the front. I added culinary herbs (sage, oregano, thyme, & rosemary), lavender, chives, Swiss chard, Brussels sprouts, calendula, and marigolds.
3. Border with Herbs or Flowers
Adding softness around the borders of raised beds makes an ideal final touch. Choose spreading herbs likethymeororegano, or place trailing blooms likenasturtiumsorcalendula along the edges. As they cascade over the sides, these plants lend the beds a romantic cottage-garden character.
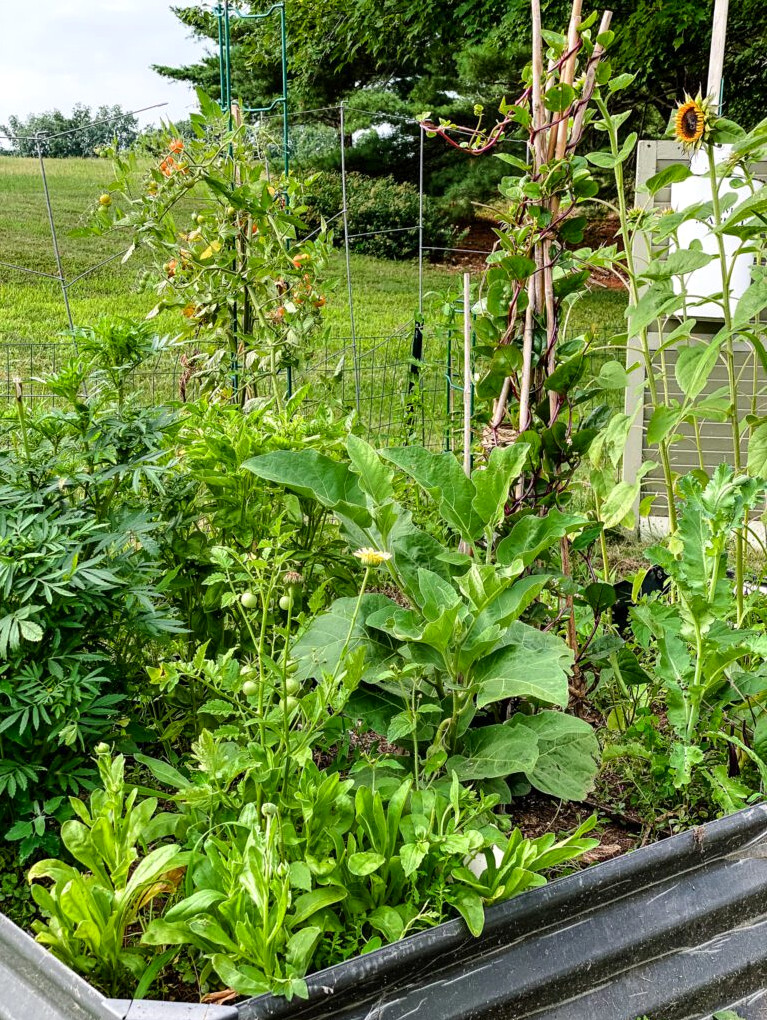
Calendulais among my favorite flowers for vegetable beds. They’re beautiful, excellent at attracting pollinators, and continue flowering until the first frost arrives.
Here, I’ve combined them withtall marigolds, basil,eggplant,sunflowers, and aclimbing spinachat the rear. You may also notice avolunteer cherry tomatoplant that appeared on its own—I couldn’t bring myself to remove it, so I allowed it to develop! (A volunteer plant grows without being deliberately planted; this small tomato probably emerged from a seed a chipmunk dropped the previous year.)
- Layer Heights:Position taller plants (like tomatoes or climbing beans) toward the center or rear, followed by medium- and short-growing plants in front.
- Mix Colors and Textures:Blendleafy greens alongside vibrant blooms and aromatic herbs for an attractive combination.
- Border with Herbs or Flowers:Soften the borders of your raised beds with compact herbs or blossoms.
Advice for Caring for Your Cottage-Style Raised Beds
- Rotate Crops:Move your vegetables to different spots each season to help avoid depleted soil and infestations.
- Mulch:Apply straw or grass clippings to lock in moisture and limit weed growth.
- Water Wisely:Direct water toward the roots with drip irrigation, soaker hoses, or a watering can while preventing excess moisture.
- Deadhead Flowers:Pinch off faded blossoms to promote fresh growth and maintain a neat-looking garden.
Cottage Garden
Top Products
Explore my favorite gardening essentials! Raised beds, plant supports, & tools that help your garden flourish.
Ready to Build Your Cottage Garden?
Raised beds with a cottage-style design offer an ideal way to combine charm and practicality in your garden. Blend vegetables, flowers, and herbs together to create a space that is both fruitful and delightful to enjoy. Add willow teepees and towers, and your garden will take on the quaint, natural character that defines the cottage style.
Put on your gardening gloves, choose the plants you love, and begin planting! I’d be thrilled to see your cottage-style raised beds—send me your updates! I’d love to admire your garden and feature you in the Reader’s Spotlight gallery. Email a photo to jennifer@cottageonbunkerhill.com

additional garden guidance
Grow With Me Gardening Series
This post belongs to the Grow With Me Gardening Series at Cottage On Bunker Hill. My goal is to show you how to begin, care for, and appreciate gardening. I’ll pass along the advice & techniques I’ve picked up over the years while cultivating vegetable and flower gardens in the Northeast.