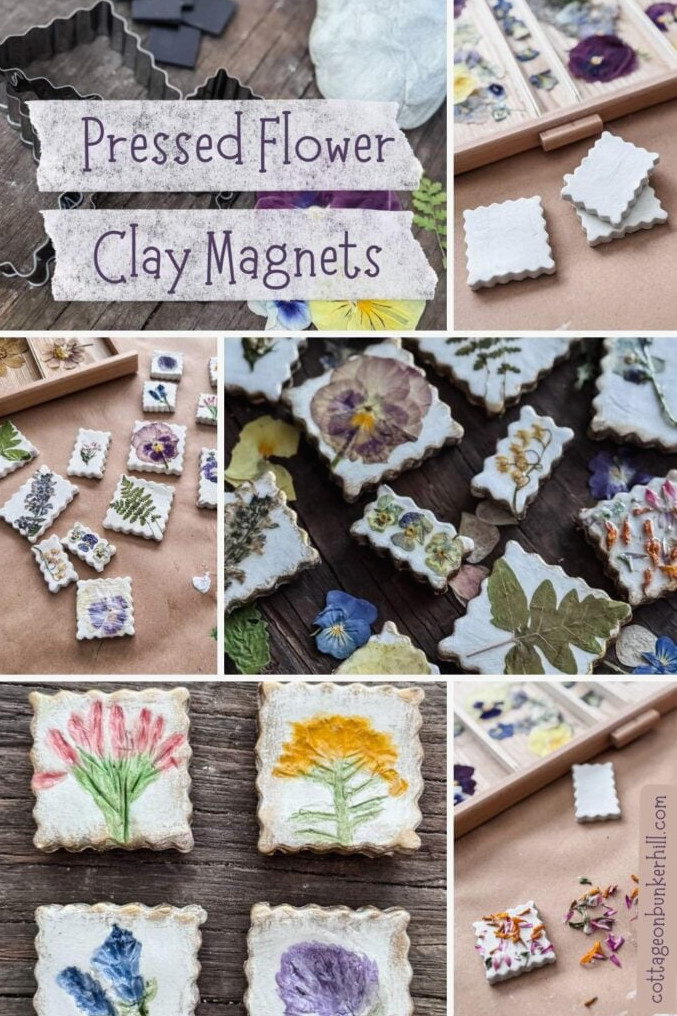
These petite magnets resemble miniature handmade pottery, yet they’re crafted from affordable air-drying clay and genuine pressed flowers. They’re lovely springtime presents, bridal shower tokens, or a charming touch for your kitchen refrigerator. And the best part? There’s no kiln required.
There’s a unique joy in preserving a garden on a tiny scale. These small magnets begin with blossoms I cultivated myself. Lavender from the herb patch, pansies from the spring beds, and delicate ferns from the shaded nook were pressed and stored until I found the perfect project for them.
Today, I’m showing you how to transform those preserved blooms into handcrafted clay magnets featuring watercolor details, shiny coatings, and a hint of gold. They’re simple enough to finish in an afternoon, yet special enough to become gifts recipients will genuinely cherish.
Welcome! I’m Jennifer, and I’ve always felt that nature provides the most gorgeous art materials. For many years, I’ve preserved New England’s flowers and greenery by pressing, drying, and creating with them. Let me show you how to preserve a small piece of the season and bring it inside—easily and beautifully.
How to Create Pressed Flower Magnets with Air-Dry Clay (An Easy Garden-to-Home DIY)
To me, the garden feels like another room of my house. The boundary between the indoors and outdoors has always seemed indistinct, and I love it that way. Whenever I need inspiration for a new craft, I naturally look to whatever is flourishing just beyond my door.
These pressed flower magnets demonstrate that perfectly. I cultivated the lavender, preserved the pansies, shaped the clay, blended the colors, and added the gold accents. Once they’re attached to my refrigerator, they’ve journeyed from garden to clay to kitchen—a complete circle that feels wonderfully rewarding.
Materials You’ll Need
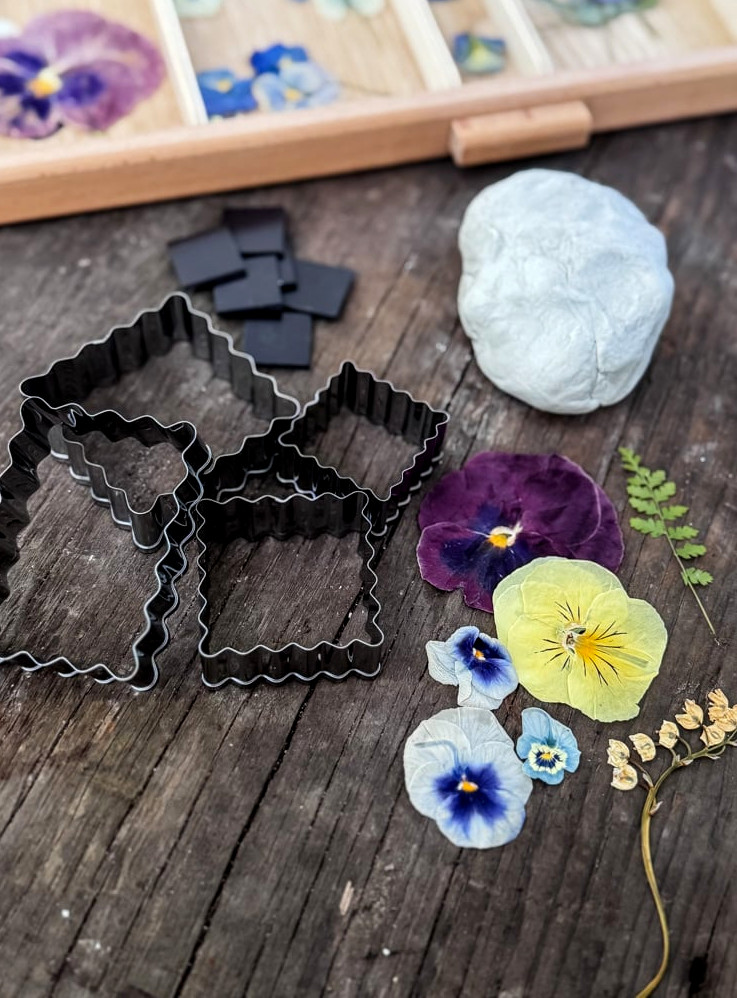
I’m completely delighted by how these small clay pieces came out when I used cookie cutters shaped like postage stamps. Their petite, consistent forms are incredibly endearing—they look like tiny pieces of artwork ready to be displayed. I strongly suggest using them for this craft!
That said, choose any shape you enjoy! Hearts, rounds, stars, and miniature blossoms can all turn out beautifully. My one recommendation is to select smaller designs so they work properly as magnets. A little heart on the refrigerator? Charming. A huge piece? Not quite as useful.
Materials:
Instructions, Step by Step
I’ll guide you through each stage of this project. I’ve tried the method, learned from the errors, and discovered what delivers the best results, allowing you to begin confidently and make something beautiful. The outcome is the same, with much less uncertainty!
Step 1: Roll the Clay Evenly (The Bamboo Method!)
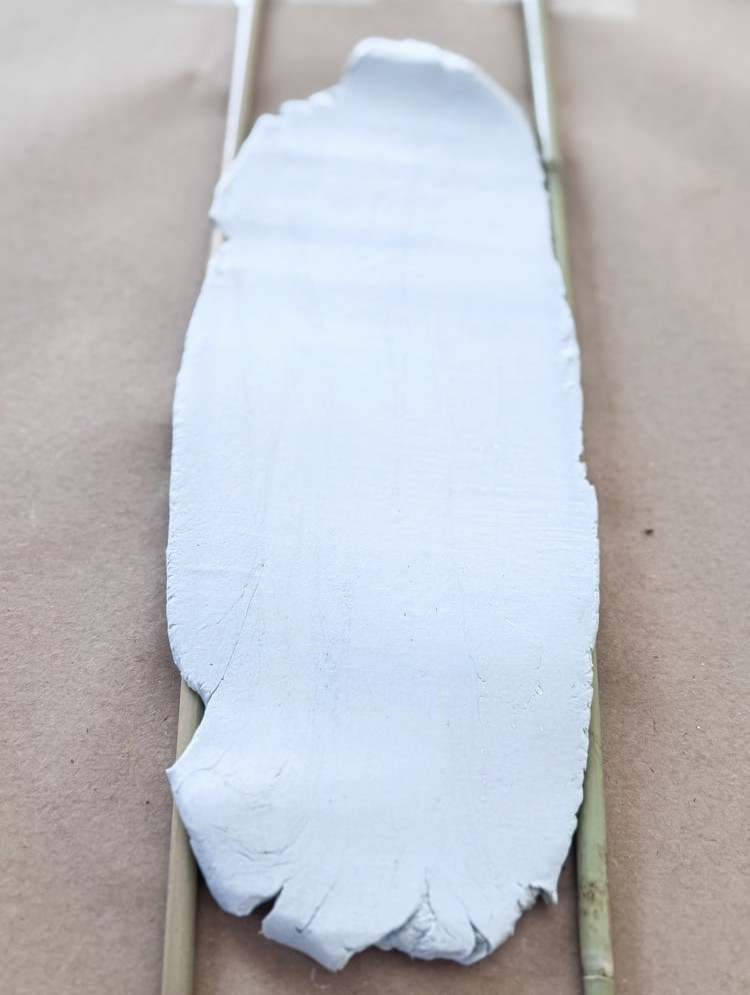
This was my first attempt at a technique I’d come across online, and truly? It changed everything.
Here’s the process:
Secure two bamboo garden stakes—or petite dowels—to your work area, positioning them parallel to one another. Set them approximately the same width as your cookie cutters, or a little farther apart, leaving enough space for rolling. Put a portion of clay between the stakes, then move your rolling pin across them.
The stakes serve as leveling rails, ensuring the clay reaches an even thickness each time. I made mine roughly ¼ inch thick—firm enough to support magnets without becoming overly weighty.
Step 2: Shape Your Pieces
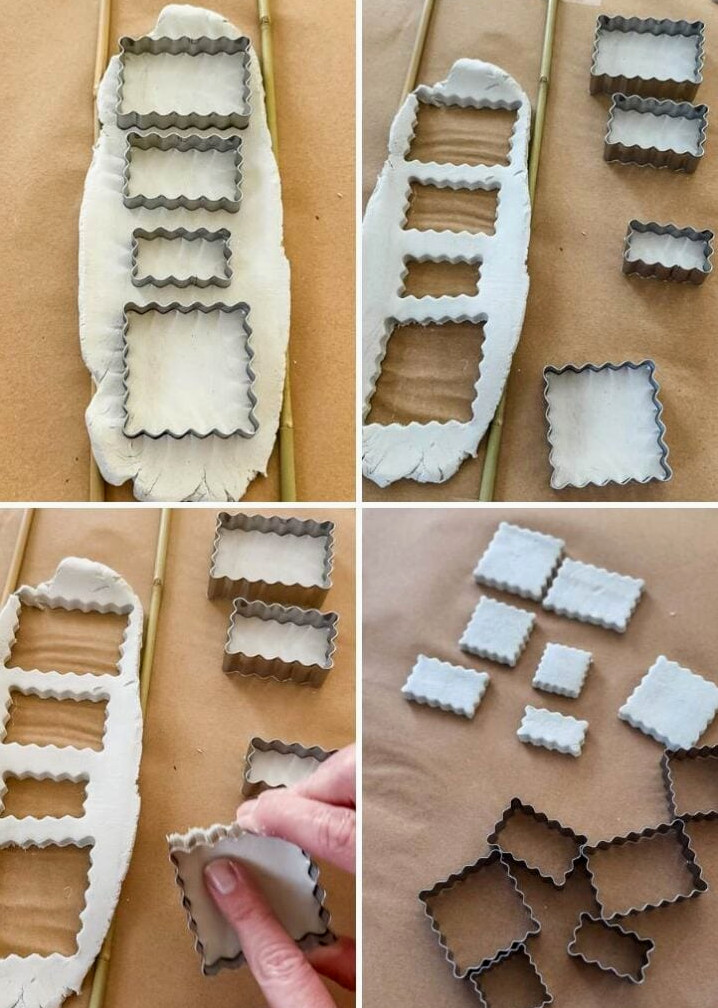
Spread your clay out evenly (don’t forget the bamboo stake trick!) until it reaches roughly ¼ inch in thickness. After that, begin cutting.
Push your cookie cutter securely into the clay, then raise it while the clay remains inside. Gently nudge the shape out with your finger. It should come away without much trouble—if it clings, a slight wiggle will usually loosen it.
A quick note about the clay:
For this project, I’m working with DAS air-dry clay, and honestly, it has been wonderful. It comes away smoothly from metal cutters, keeps its edges from crumbling, and is easy enough for beginners while still producing beautiful results. I definitely recommend it!
Keep cutting and removing shapes until you’ve worked through as much of the rolled clay as you can. Carefully reroll the leftover pieces and continue—but avoid handling the clay too much, since it may begin to dry.
Step 3: Create Impressions (On Some Pieces)
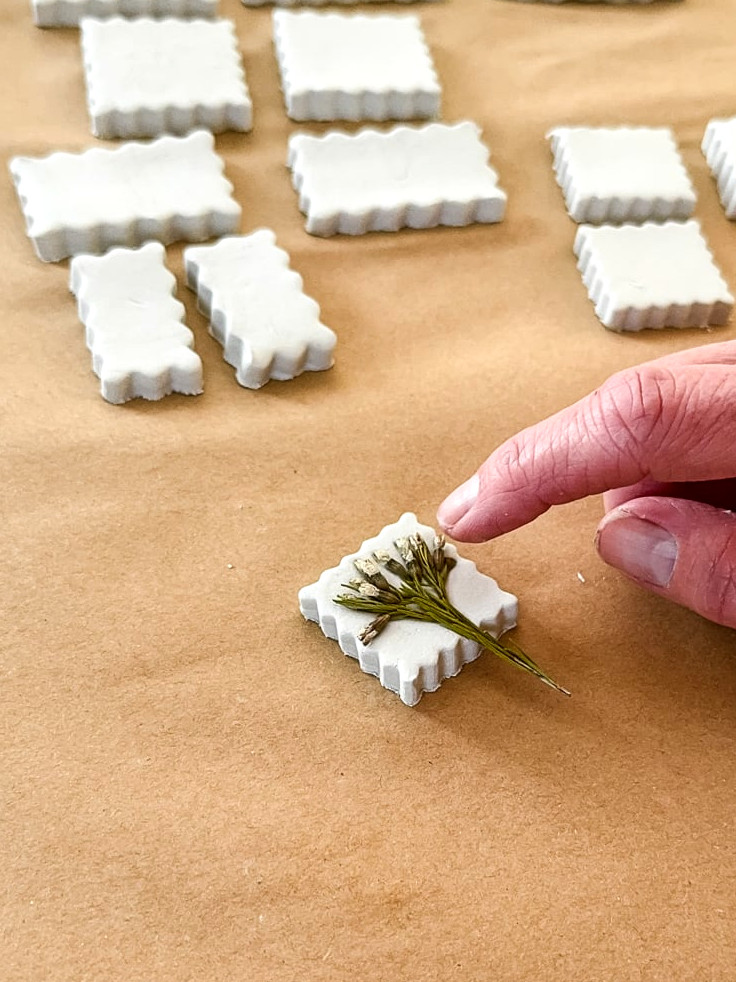
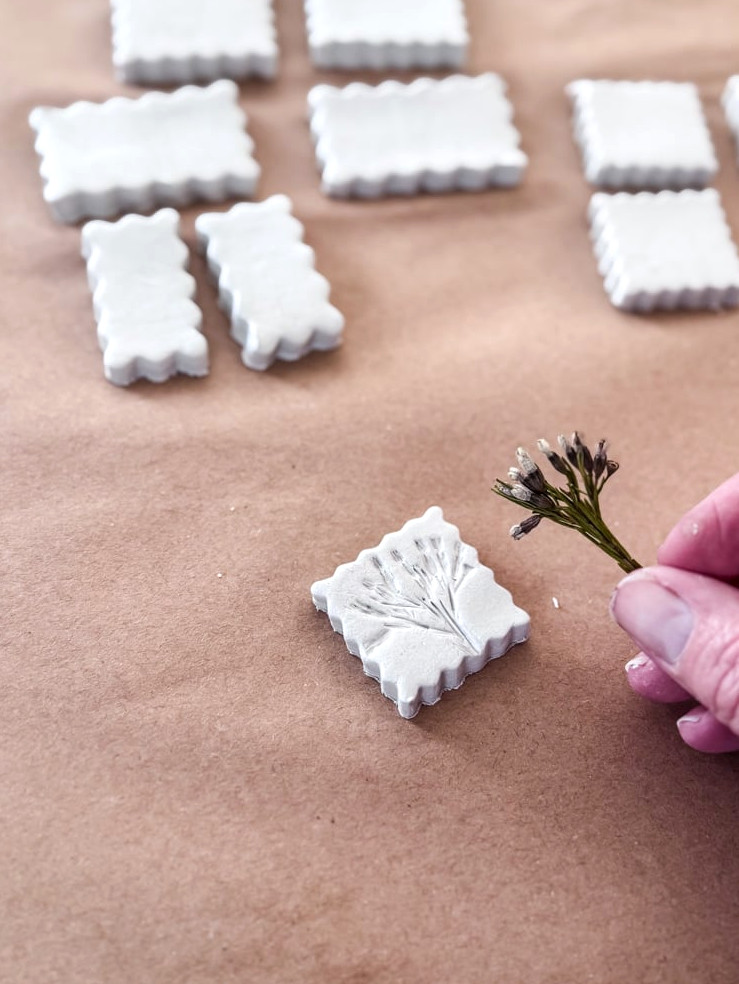
I decided that four of my tiniest squares should have another style: flower impressions rather than flowers pressed onto the surface.
This is what I did:
While the clay remained moist, I softly pushed little lavender sprigs and several other petite flowers into its surface. Then, with extreme care, I rolled my rolling pin over the flowers, applying only enough pressure to capture their outline without crushing the clay. With a few especially fragile flowers, I pressed them down manually using my finger.
Don’t press too far. You only need enough pressure to preserve their outline.
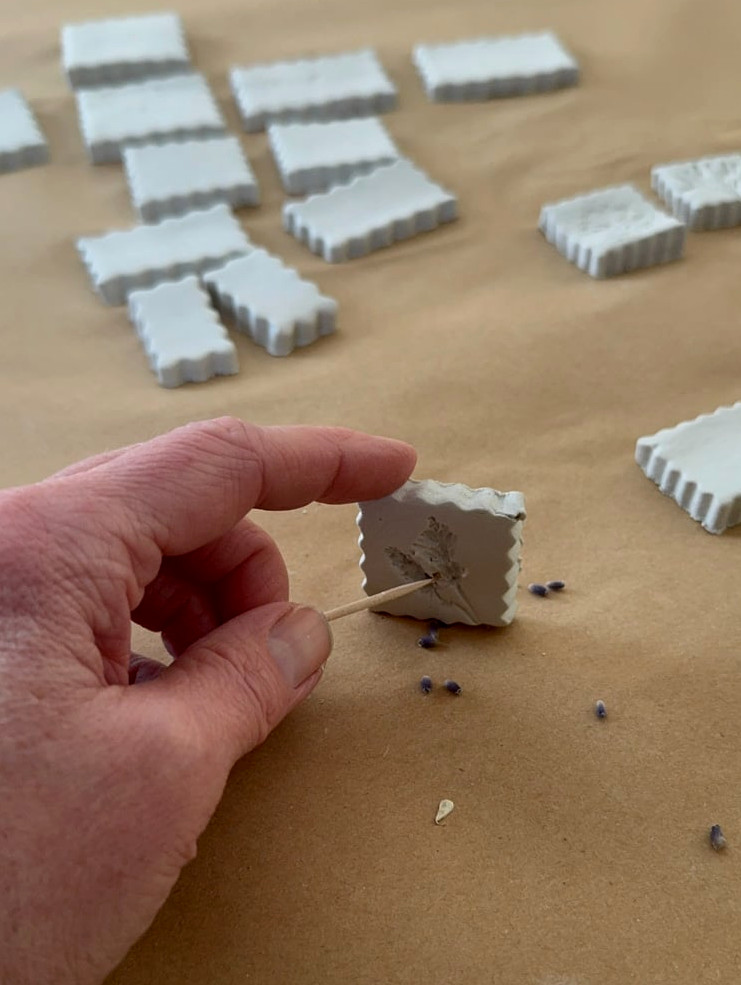
Next came the delicate task of pulling the flowers away so the impressions could show. I used a toothpick to remove any minuscule pieces of floral debris that remained.
Now for a bit of honesty:
A few of these didn’t turn out right. I began with a strawflower, but it simply… failed. The impression looked cloudy and impossible to identify. On another piece, I pressed the rolling pin far too firmly and totally flattened the clay shape. I needed to redo it.
But you know what? That’s perfectly okay. Mistakes are simply part of making things. Clay is quite forgiving—you can roll it together and try once more. Nothing was wasted, and no damage was done. It was just a useful lesson.
Once I reached the lavender, I understood the technique. The impression turned out perfectly. Honestly, it became my favorite!
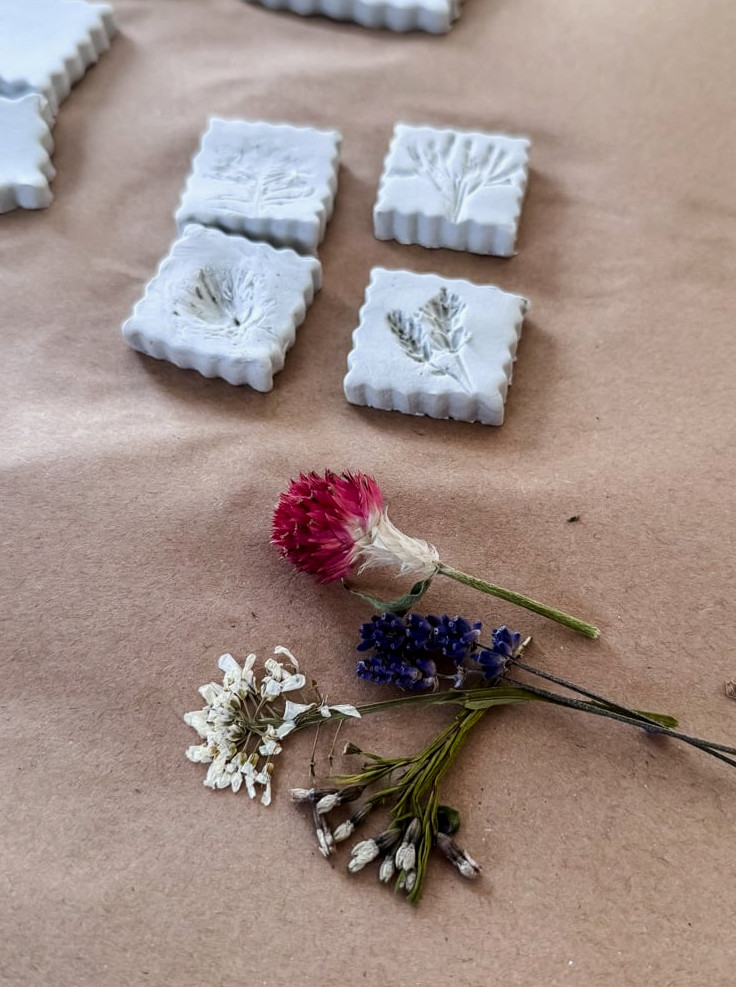
Step 4: Be Patient (Allow Them To Dry!)
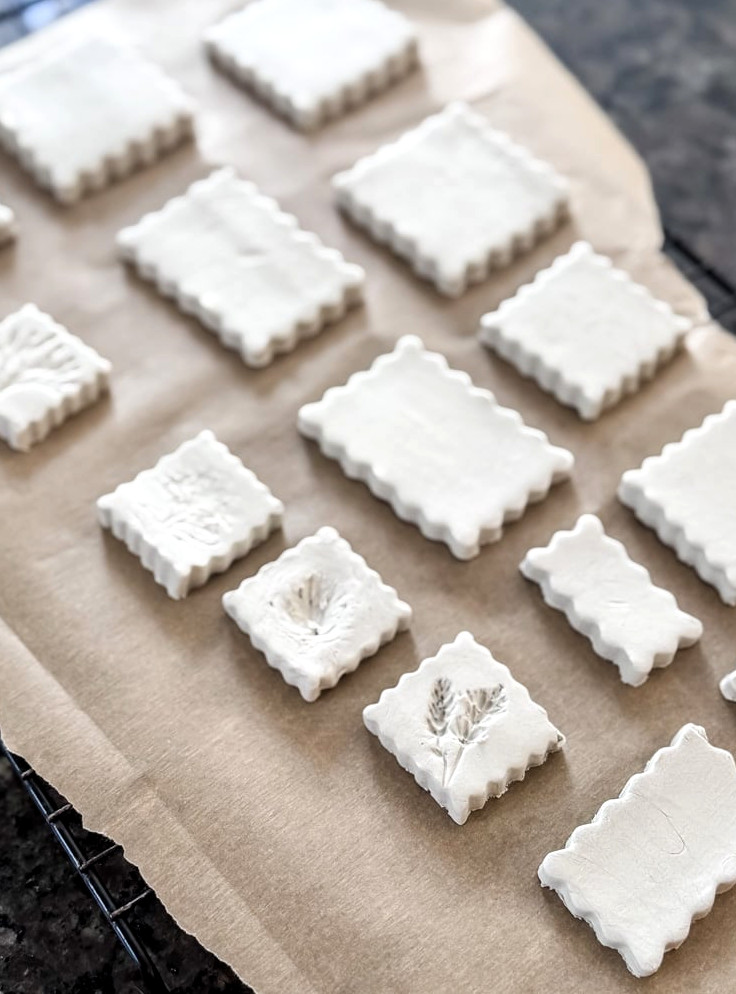
This stage requires some time, and that’s perfectly fine. Set the clay cutouts on parchment paper placed over a baking cooling rack. I allowed my clay pieces to dry for two complete days, turning them over midway so both sides received the same amount of airflow. The cooling rack makes a huge difference here. Never set your damp clay shapes directly on a rack, or they may develop grid-pattern impressions.
Make sure they’re entirely dry before proceeding to the following step. There are no shortcuts here!
Step 5: Color The Impressions
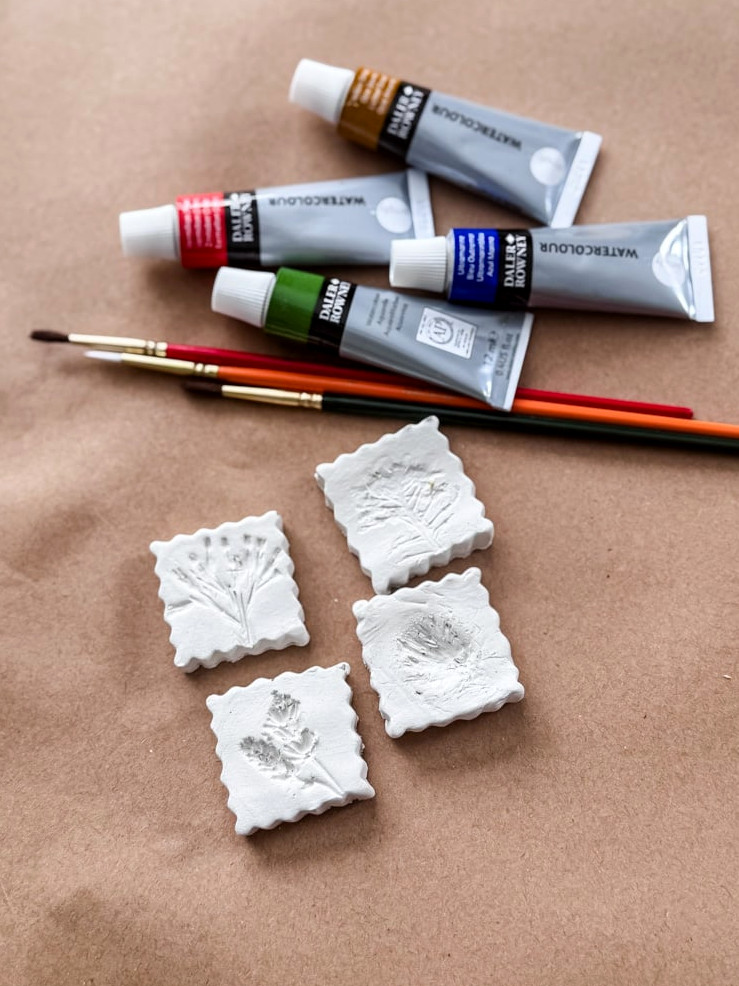
After the imprinted squares had dried completely, I brought out my watercolor paints along with a fine-point brush.
Here’s the best part: you don’t have to be an artist to do this. Not at all.
I aimed to replicate the original flowers as closely as possible: bluish-purple for the lavender, warm golden yellow for one, & muted pink for a pressed waxflower. However, the method is what truly brings it together.
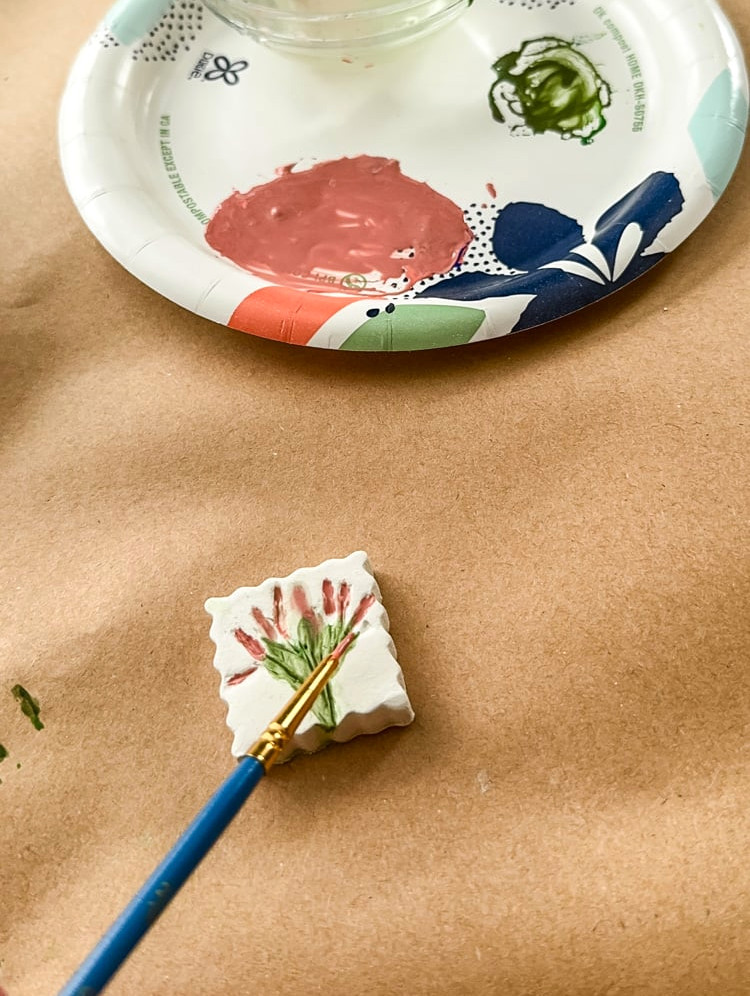
Simply place your very wet paintbrush into the impressions. The watercolor naturally spreads through and fills the sunken sections. Next, gently move your brush across the impression to direct the color where you want it-the paint will follow along. It doesn’t need to be flawless! Actually, slight irregularities give it a more natural, handmade appearance.
The watercolor settles wonderfully into the imprints, collecting in the recessed sections while keeping the raised surface clear. It’s as if the flowers left behind little fossils!!
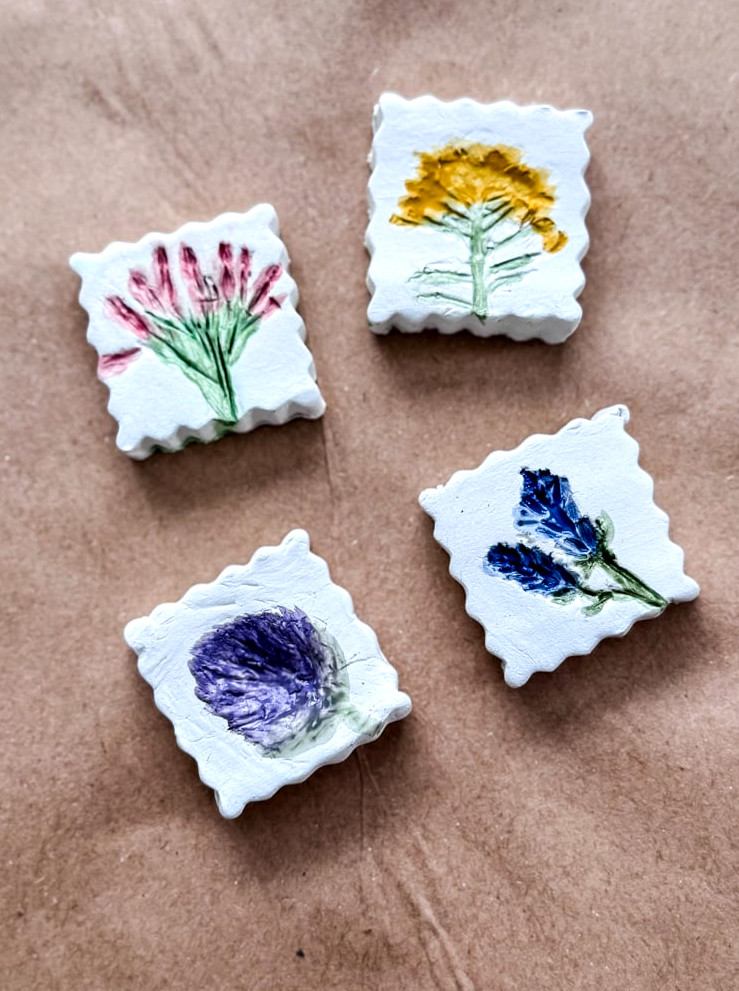
A few helpful tips:
- Choose a fine-point brush for greater precision
- Keep the brush fairly moist so the paint can spread
- Quickly dab away any errors with a paper towel.
- If you paint beyond the lines? Honestly, it will probably still look beautiful
Step 6: Attach Pressed Flowers To The Rest
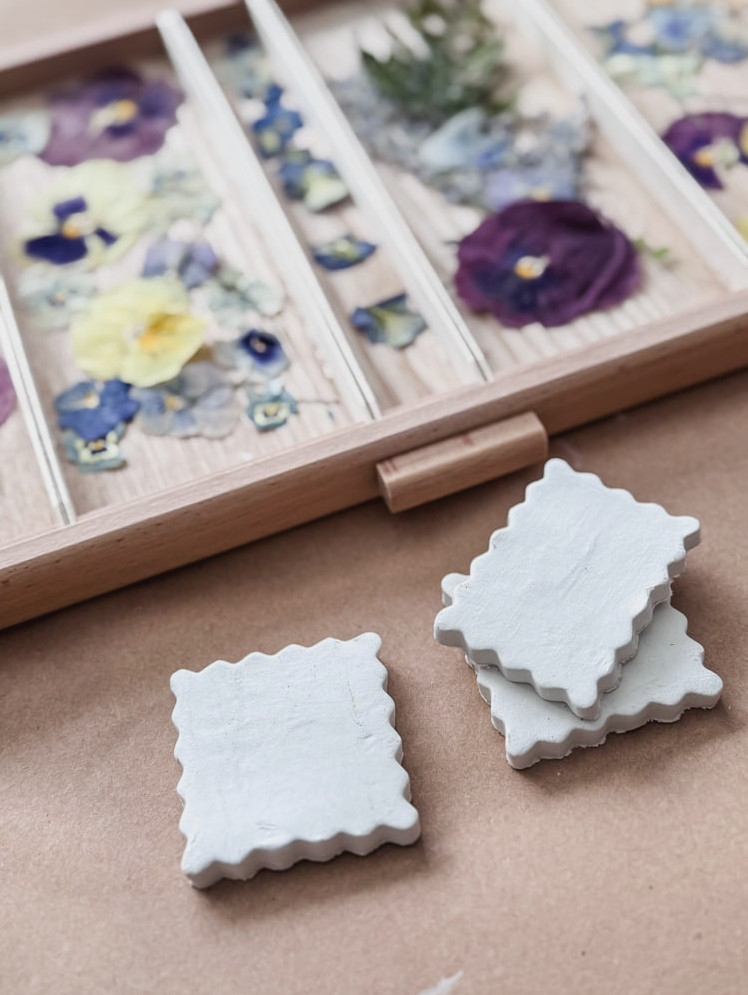
For the remaining clay pieces, I brought out my assortment of pressed garden blooms: pansies, violas, tiny ferns, and more.
Here’s how I did it:
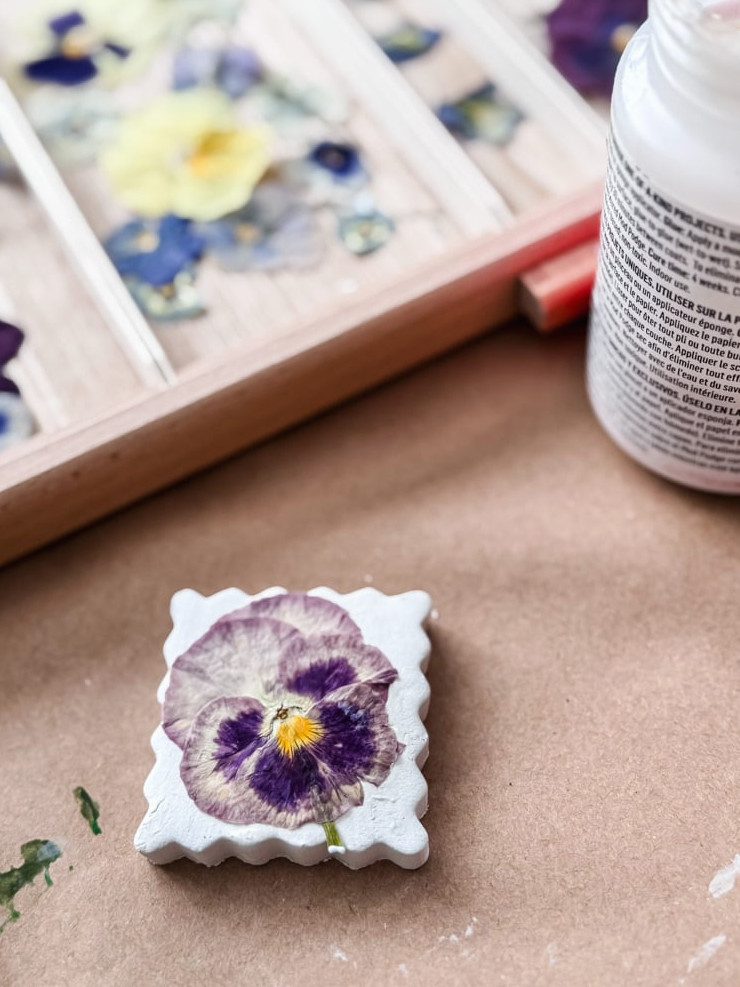
I began by brushing a slim coat of glossy Mod Podge over the area of the clay where I planned to place the flower. Then, with tweezers or an especially careful touch, I arranged each bloom and gently pushed it into position.
A helpful tip for creating a smooth finish:
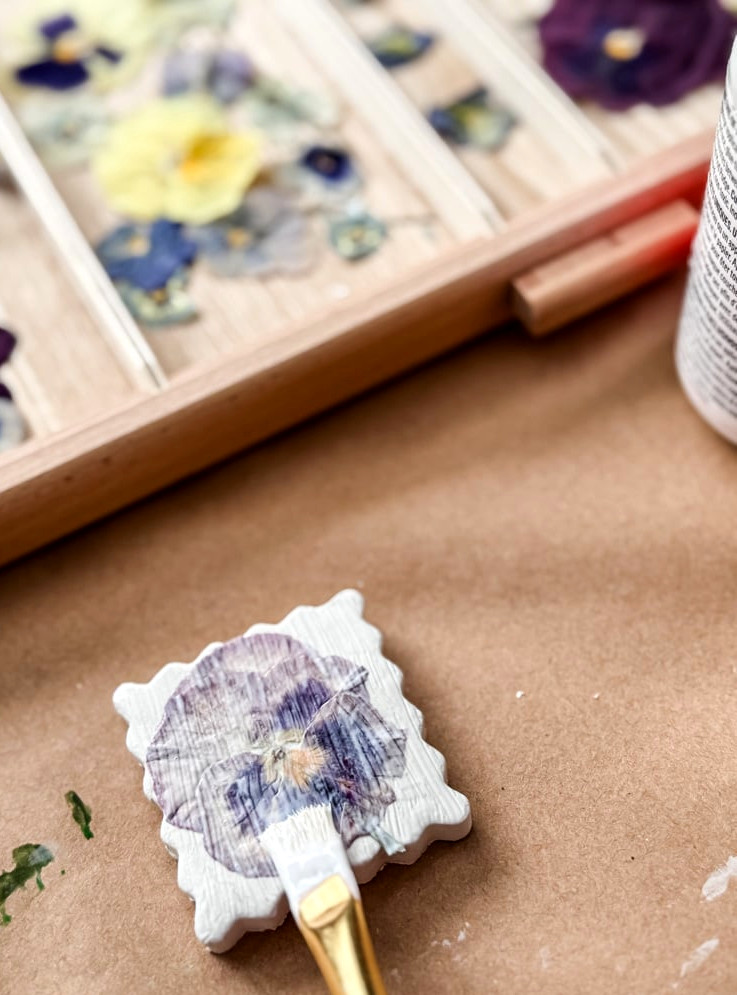
Don’t hurry this part! While working with the larger pansy, I spotted a couple of air pockets beneath the petals. Using my fingertip, I gently pressed them flat, moving from the middle outward toward the edges. Since Mod Podge remains workable briefly before setting, there’s no need to rush.
After arranging the flower just the way I wanted, I applied another delicate layer of Mod Podge across the whole clay piece, including the flower. This locks everything in place and creates that beautiful shiny finish.
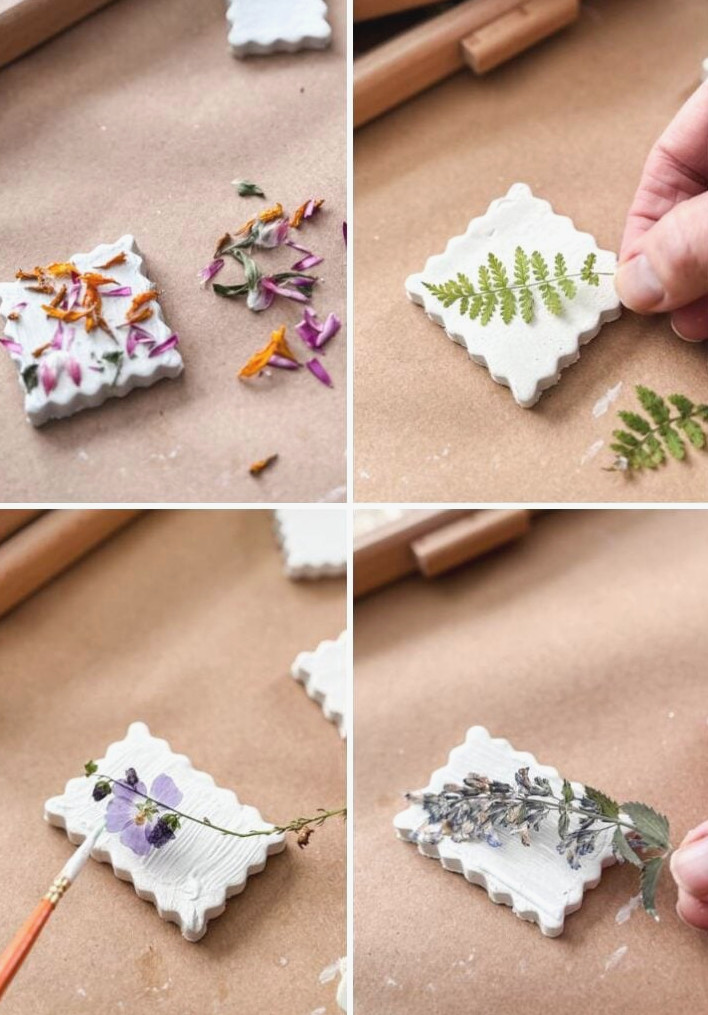
The best part? Experimenting with different layouts.
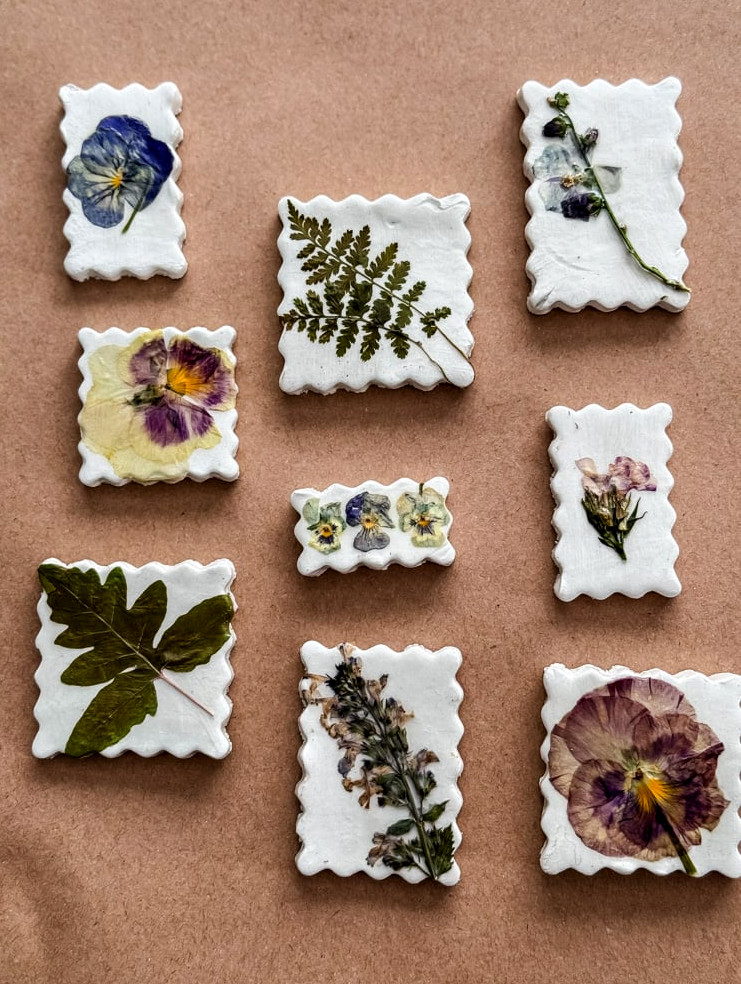
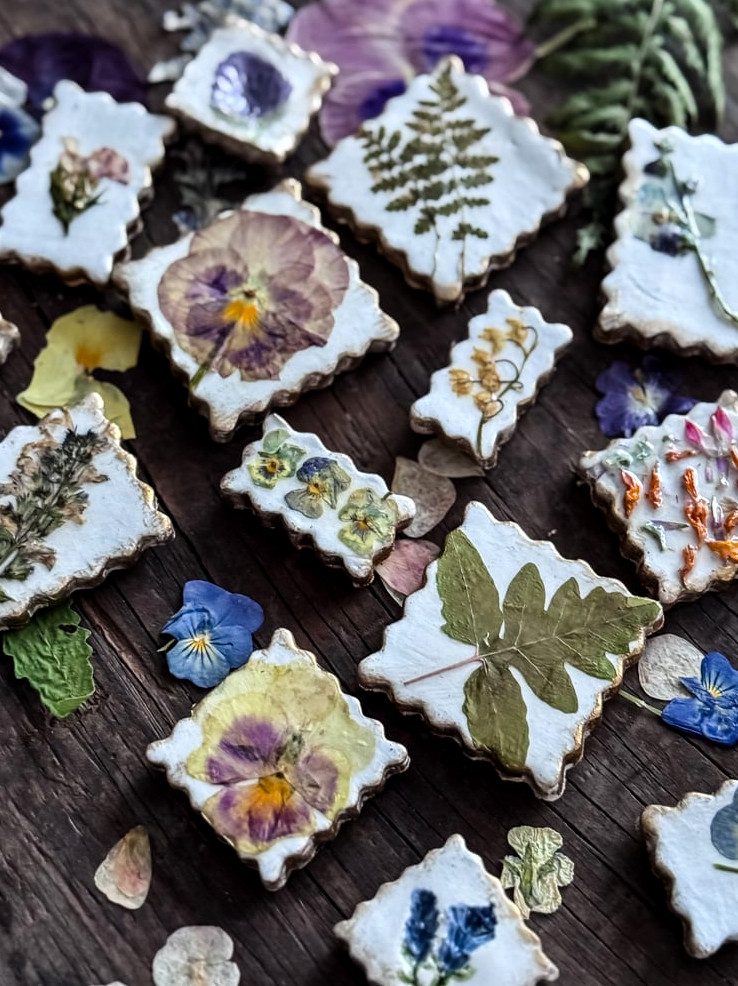
- One square featured a single oversized pansy, striking and lovely by itself
- Another was adorned with small fern fronds, graceful and delicate
- A favorite of mine is a little square decorated with three tiny violas, grouped together like a miniature bouquet
- For one special square, I tried something slightly unusual: I pressed a few little petals directly onto the clay—a sunflower petal here, a touch of strawflower there, and a tiny bit of gomphrena. There was no arrangement planned; I simply used whatever felt right at the time. It became one of my favorites.
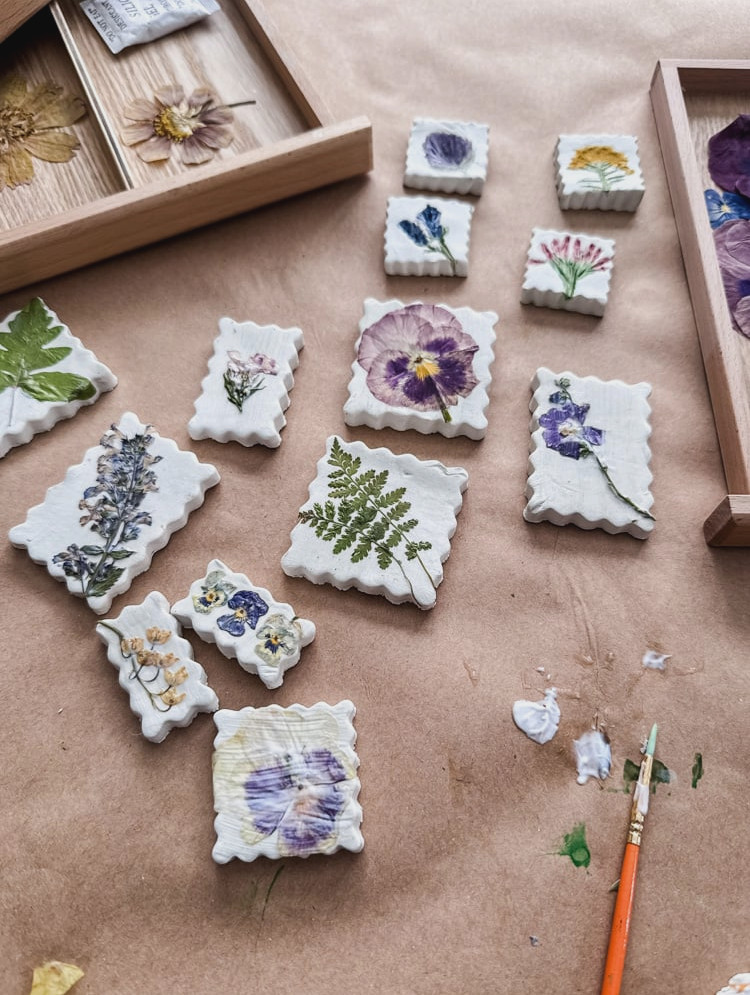
There’s no correct or incorrect approach. Follow the flowers’ lead. Certain shapes look best on their own, while others suit a fuller arrangement. Some only need a handful of scattered petals, like garden confetti.
Follow your instincts—and enjoy the process!
Allow these to dry fully before continuing to the next step. The Mod Podge becomes transparent once they are dry.
Step 7: Seal & Gloss
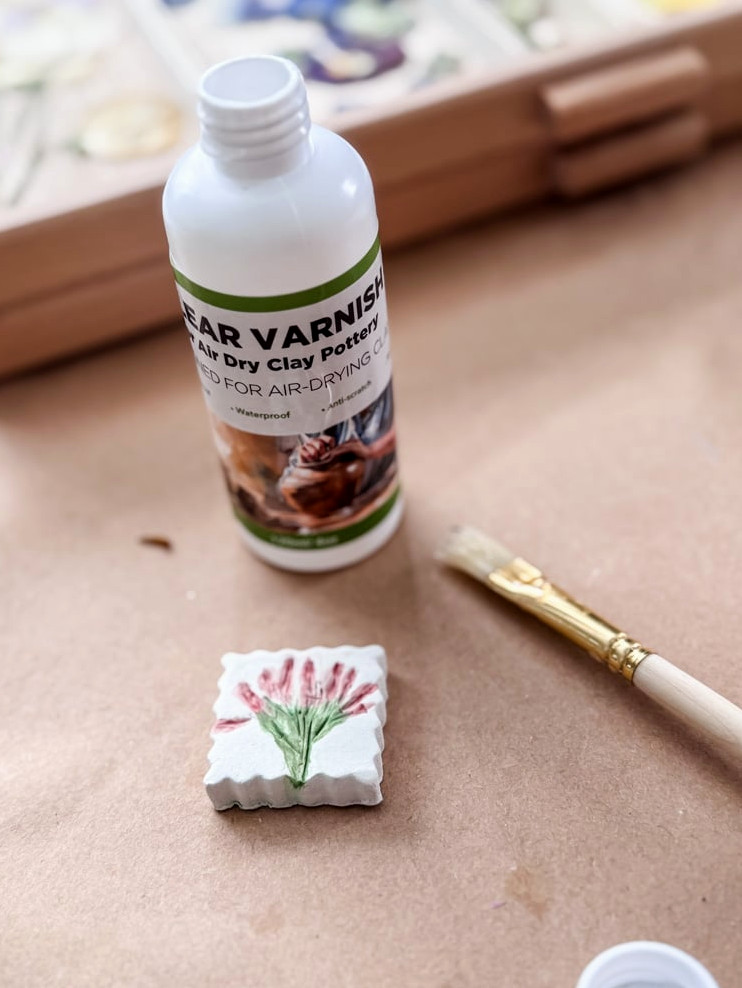
At this point, you can choose between these options:
- Stop here if you prefer the shiny appearance of glossy Mod Podge (it looks lovely and offers protection!). I recommend applying a second layer.
- Take it further by using an air-dry clay varnish to achieve an authentic pottery-like sheen.
I tested both options, and honestly? The varnish brings an extra special quality. It adds depth and shine to the magnets, creating a glazed-ceramic appearance without needing a kiln. I also noticed that Mod Podge makes an extra-thick gloss formula, although I have not tried it myself.
Step 8: Decorate The Edges (Optional, Yet Stunning!)
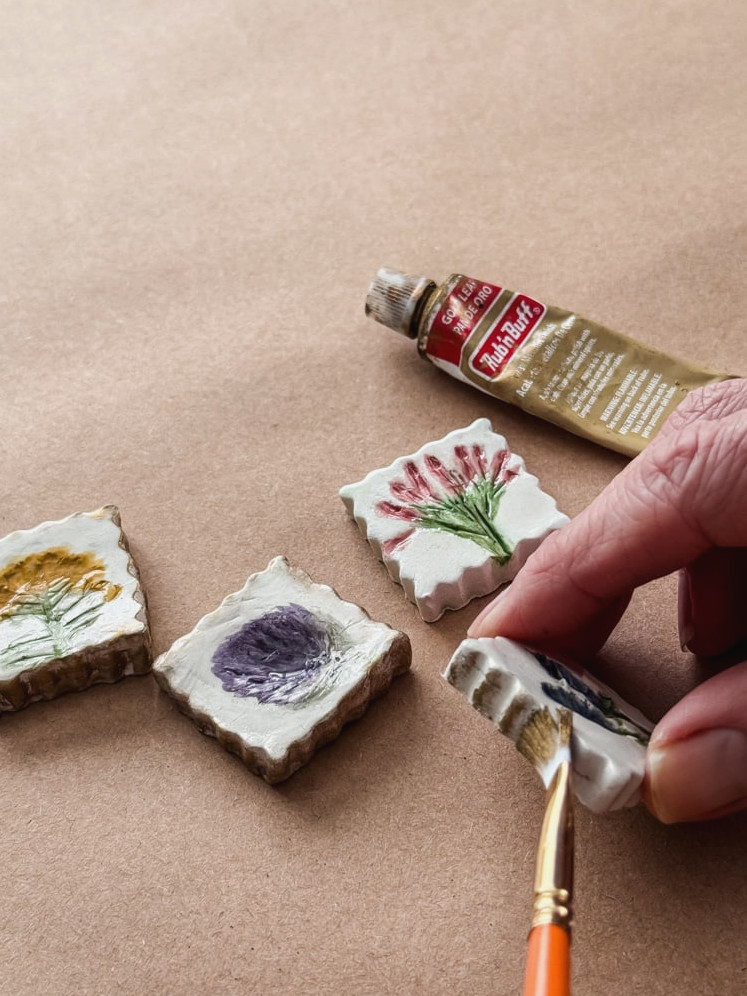
Now you can decide between two lovely choices:
- Option A: Finish here. Your magnets are already charming with only the varnish, leaving them glossy and safeguarded. Truly, they look beautiful just as they are.
- Option B: Bring in a hint of gold. This is the step I enjoy most.
I have a slight obsession with Rub ‘n Buff. It is one of those products that seems almost like a shortcut because it is effortless to use and creates such a beautiful result. If you have never tried it, though, keep this in mind: it’s a wax, not a paint. Even the smallest amount covers a surprisingly large area.
This is how I applied it:
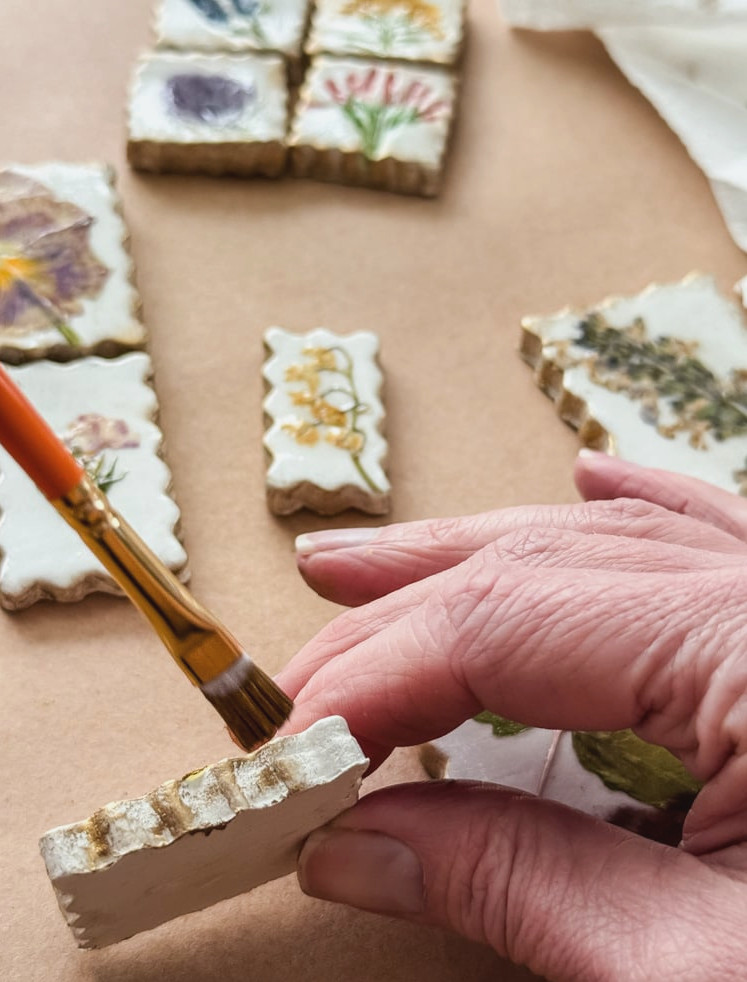
I placed a tiny amount onto a paper towel—and I mean truly tiny, roughly the size of a pea—and guided a small paintbrush through it. Working with one magnet at a time, I swept the gold across the raised ridges along the sides, allowing it to settle into the texture.
The enchanting part came next: I lightly brushed from the magnet’s bottom toward the top, barely making contact with the surface. The result is a gorgeous weathered, polished effect—similar to antique gold leaf, but without the hassle or expense.
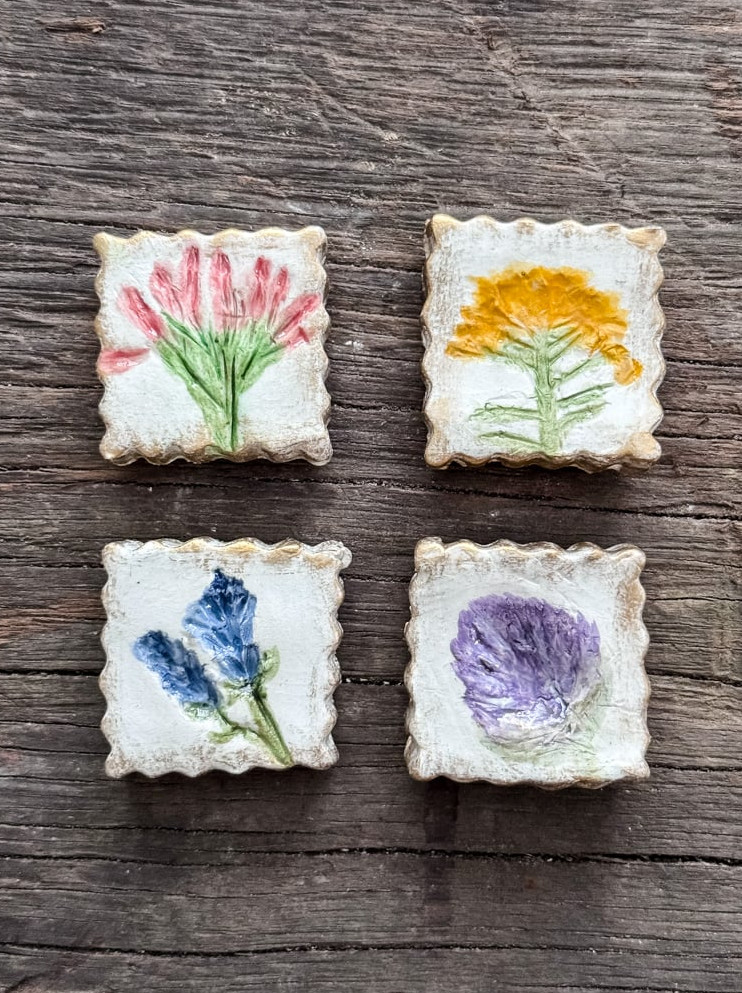
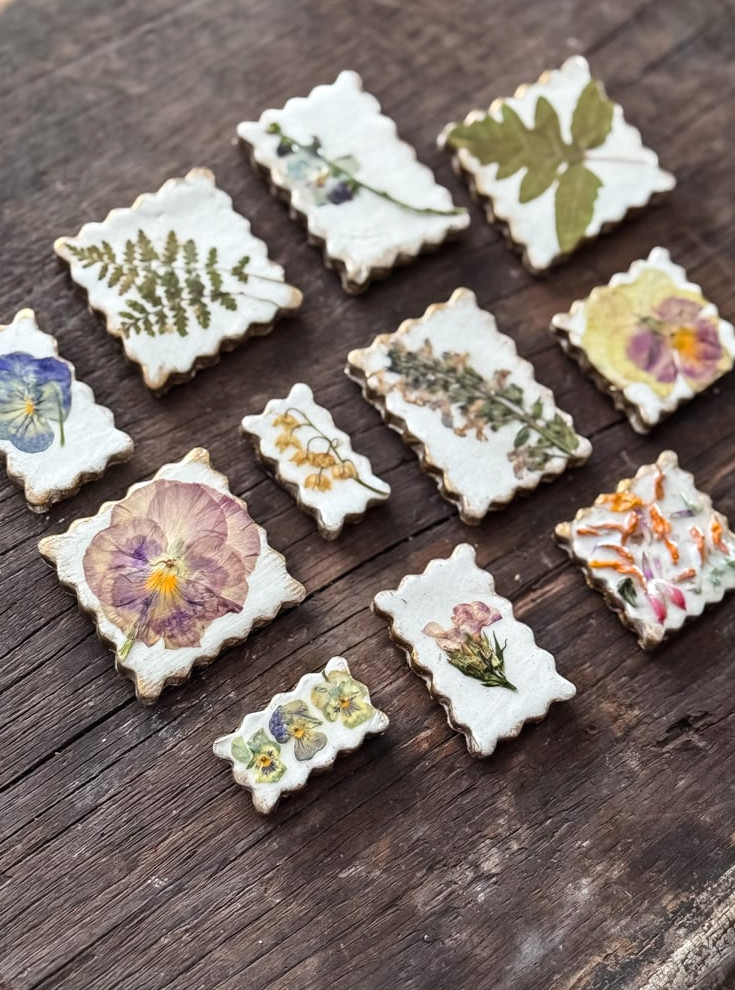
That delicate golden stripe reflects the light and gives the entire piece a polished, elevated appearance. It creates added dimension and makes the handmade project feel like a treasured heirloom.
Step 9: Attach The Magnets
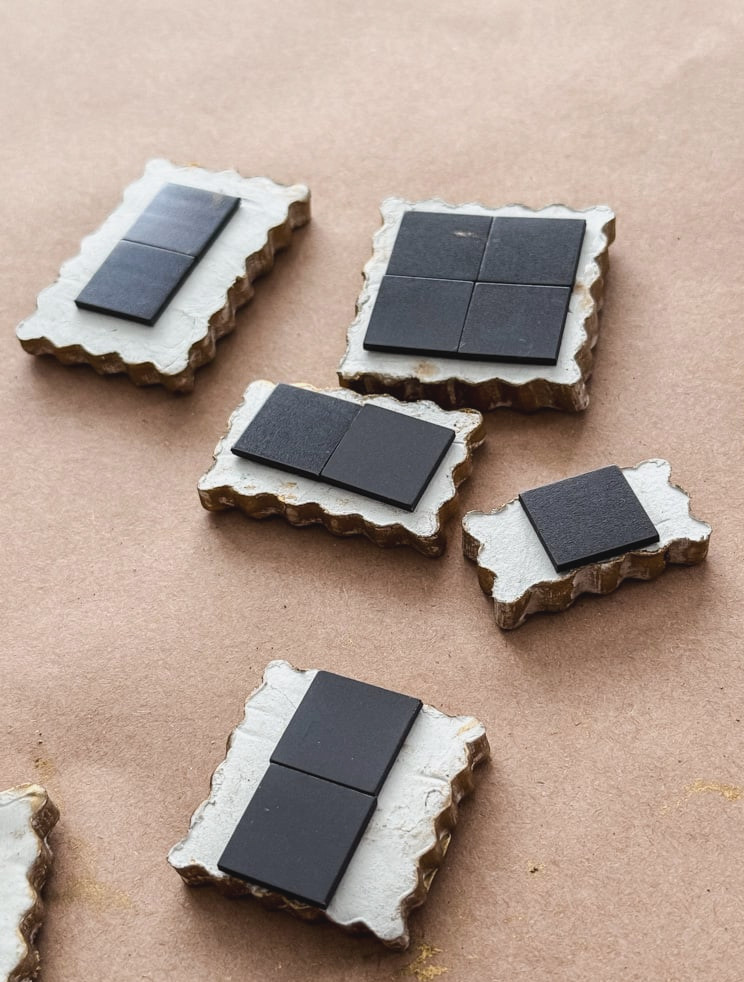
We’ve reached the final step! It’s now time to turn these lovely clay pieces into actual magnets.
I turned each clay piece over with the underside facing upward. Then came the simplest step: self-adhesive magnets. No adhesive, no waiting for anything to dry-just remove the backing and press.
Here’s the key: based on the size of each clay piece, I used 1, 2, 3, or even 4 magnets. One magnet was enough for the little squares. For the bigger pieces, I added a few more to keep them secure and prevent them from sliding down the fridge.
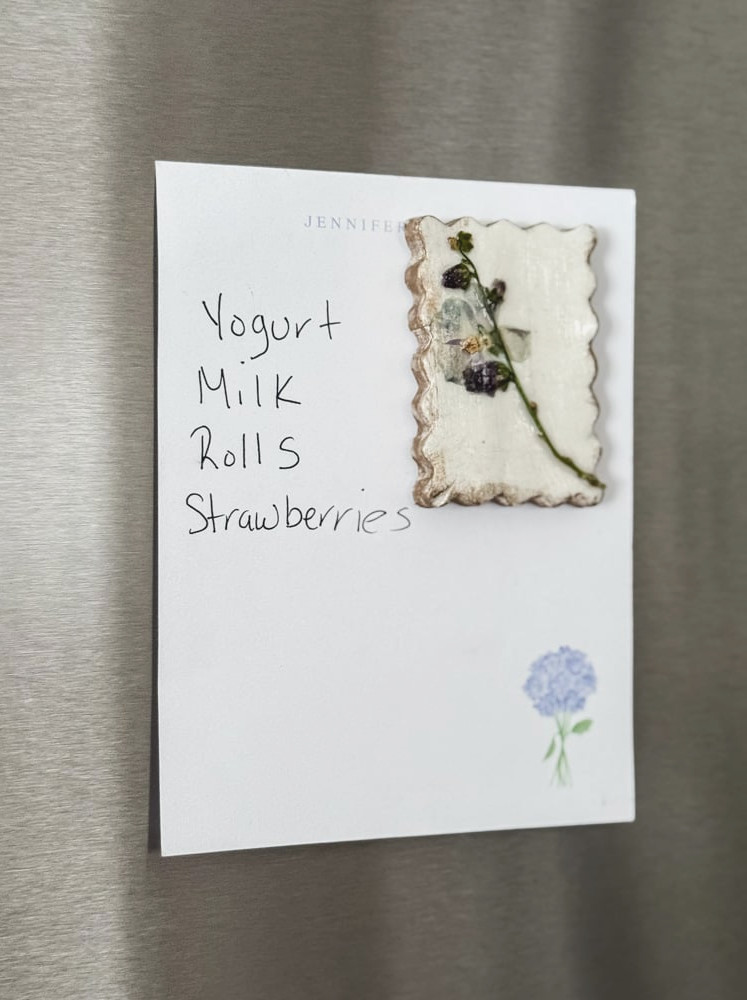
These little square magnets are my favorite because they’re so slim. They don’t leave space between the clay and the surface, allowing the magnets to rest flat against the fridge or memo board-no shaking, no strange angle.
Remove the backing, push the magnet firmly onto the piece, and give it a few minutes to bond before putting it up. And you’re done!
Ways to Use Them
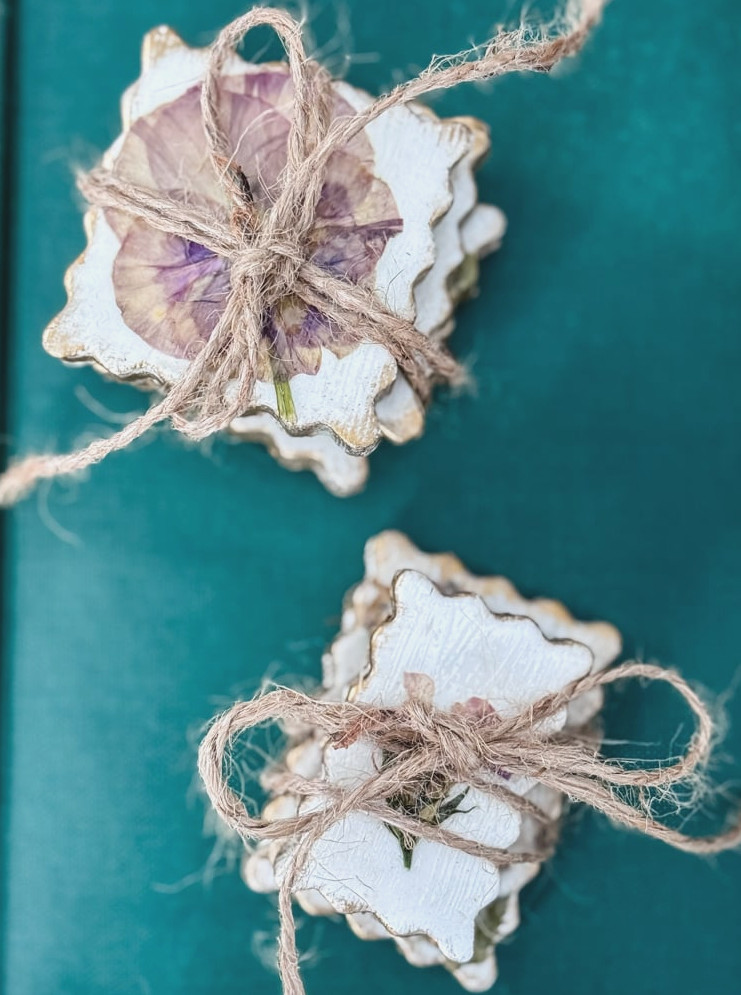
These tiny magnets may be small, but they can be used in countless ways:
On your fridge, of course. Whenever you grab the milk, you’ll see a little glimpse of your garden looking back at you.
On a magnetic board in the kitchen, office, or entryway. They bring such a charming, personal accent.
As gift decorations. Fasten one to a wrapped package, and it becomes part of the gift-a small extra that continues to give.
In lockers or cubicles. A small touch of garden charm for desks and dorm rooms.
Give them in sets. Bundle a few with twine, place them in a small box, and you have the loveliest hostess gift or stocking stuffer.
And my favorite idea: bridal shower favors! Picture tiny magnets created with assorted pressed flowers, or made in shades that coordinate with her wedding colors. Place one in a lovely box for every guest, and you’ve offered something thoughtful, handmade, and enduring. How wonderful to let a piece of the celebration remain on someone’s fridge for years. Plus, you can create plenty of magnets without spending much $$.
Shop For Supplies
I’ve collected them all in my Amazon store
Last Tips From My Workbench
- Press your own flowers.It’s simple, free, and makes the project feel truly personal. I’ll show you how to do it!
- Coordinate your paints with the real thing-or don’t! No rule says lavender must be purple.
- Rub ‘n Buff is a great investment.A small tube lasts ages, and that golden edge makes everything appear deliberate.
- The bamboo stake method really works.I’m never shaping clay by hand again.
- Let the clay dry slowly.Waiting two days seemed endless, but hurried clay tends to crack. Give it time!
A Garden, Kept Forever
There’s a gentle kind of magic in opening the refrigerator and seeing a little piece of your garden gazing back at you. A pansy saved from last spring. Lavender gathered in July. A tiny fern from that shady stroll you took to clear your mind.
All of that lives inside these little magnets.
They’re easy enough to decorate in one afternoon, yet special enough to turn into miniature keepsakes. Give them to friends. Slip them into packages. Set them aside for bridal showers. Or keep the entire collection for yourself—I won’t tell.
Whenever I see mine, I’m reminded that the most wonderful projects aren’t necessarily the largest. Sometimes, they’re small enough to rest in your palm, crafted from flowers you grew, pressed and preserved, then transformed into something lasting.
Now it’s your turn. I can’t wait to see what you make! Send in your photos to me cottageonbunkerhill@gmail.com to be featured in the Reader’s Spotlight page
xo, Jennifer
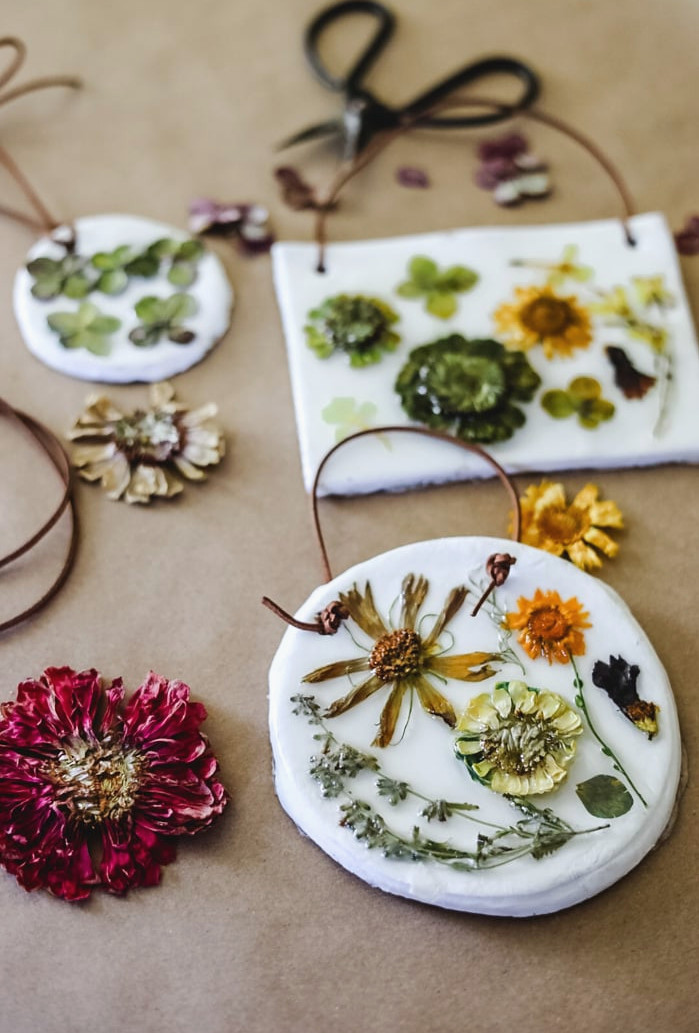
Can’t Get Enough of Flowers? Same Here
Dried & Pressed Blooms
explore a few of my favorite tutorials:
Enjoy projects like this?Stay in the loop! Join my newsletter familyfor more warm, affordable DIY ideas sent straight to your inbox. You’ll receive special tips, advance tutorial access, and plenty of inspiration to make your home feel personal, cozy, and handmade.