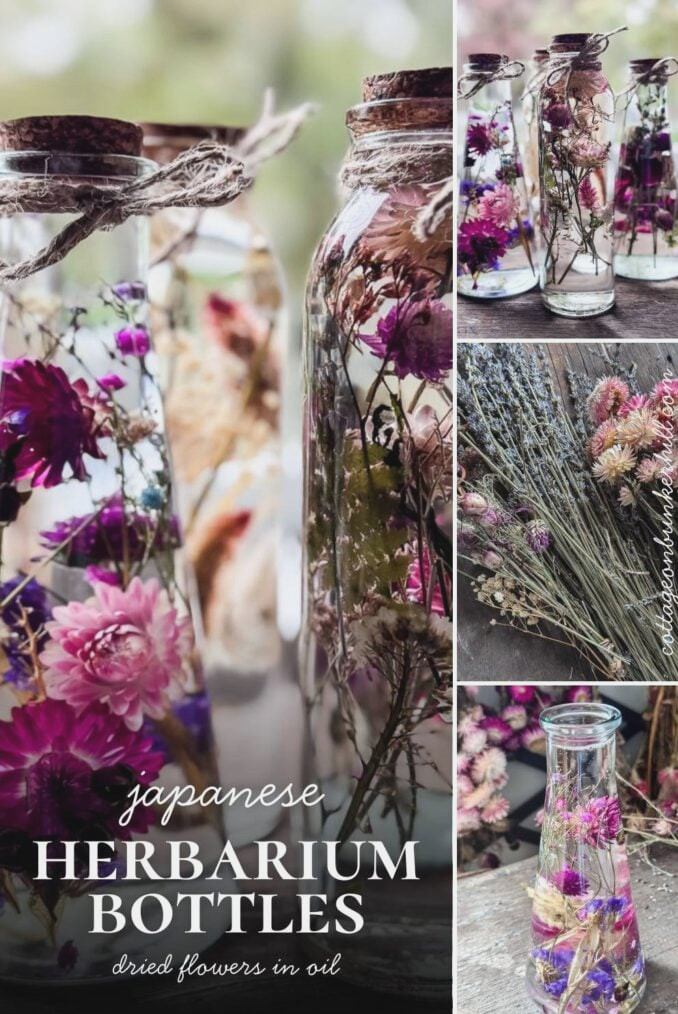
Have you ever discovered something online and immediately thought, I have to create that right now? That was exactly how I felt when I first came across Japanese herbarium bottles. Dried blossoms floating in clear glass, surrounded by oil, and styled like miniature botanical apothecary displays—I was instantly captivated.
And the best thing? Nearly everything I needed was already growing just beyond my doorstep.
A Japanese herbarium involves placing dried flowers inside a sealed glass bottle filled with oil. It may sound elaborate. It may appear costly. Yet it’s one of the most rewarding and economical projects I’ve created in quite a while. It also feels incredibly true to me: grow it, preserve it, place it in a bottle, and turn it into decor.
If you have dried flowers left over from last season (or a cutting garden overflowing with blossoms ready to be saved), you’re only a short step away from displaying one on your windowsill, too!
Garden to Home
I’ve always felt that the boundary separating the garden from the home should remain indistinct. This series focuses on stepping across that boundary—bringing outdoor growth inside through lovely, enduring projects. New ideas shared every month.
Let’s grow together!
So, What Is a Japanese Herbarium, Exactly?
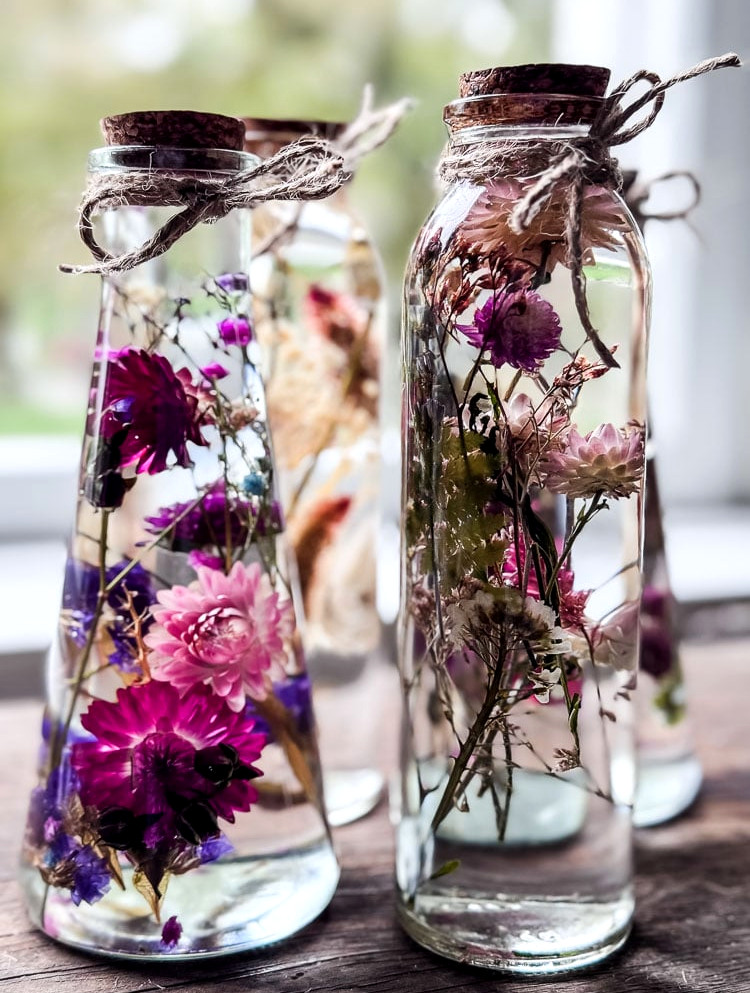
The term herbarium may bring to mind faded, pressed plant samples tucked into a science book, which is technically the classic meaning. In Japan, however, the idea developed into something far more artistic. A Japanese herbarium is simply a clear glass bottle containing dried flowers preserved in oil. That’s all there is to it.
The oil creates an almost enchanting effect! It makes the petals clearer, intensifies their shades, and gives the arrangement a radiant glow whenever sunlight travels through the glass. Place one on a bright windowsill, and you’ll understand exactly what I mean.
These creations have grown into a beloved craft and decorating trend in Japan, and they’re gradually becoming popular elsewhere for very good reason. They’re absolutely beautiful!! Store-bought designs can cost $30, $40, or even more. A handmade version using flowers from your own garden? It may cost only a few dollars and, truthfully, feels much more meaningful.
Here’s What You’ll Need
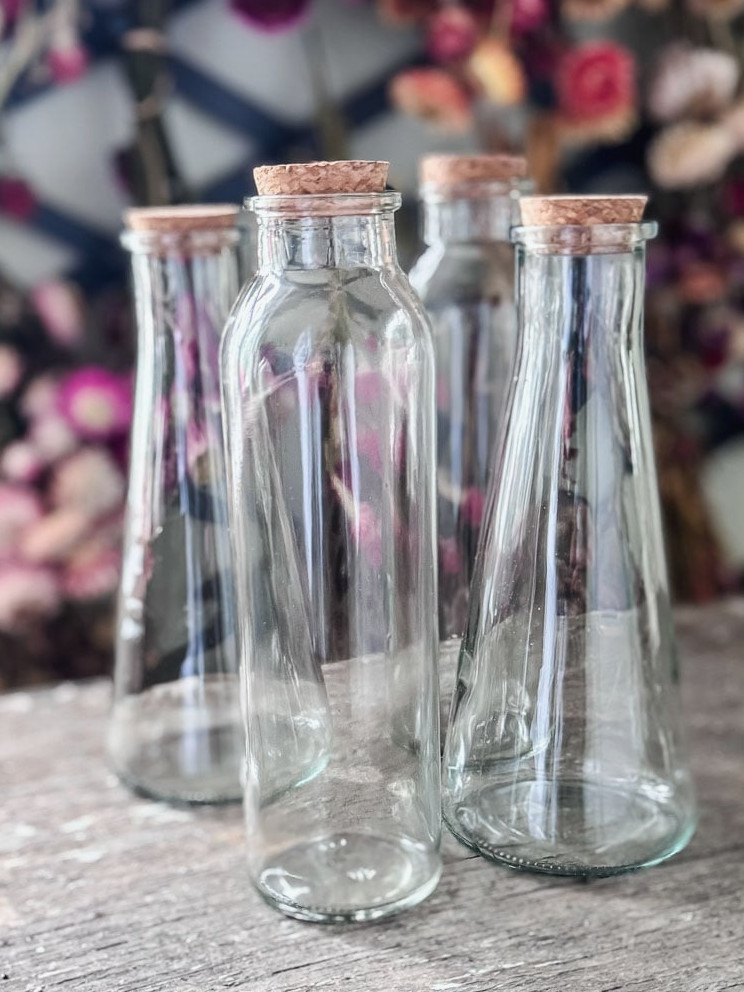
Supplies for this Project
For the flowers I used:
- Dried strawflowers, globe amaranth (a burst of color)
- Dehydrated hydrangea heads
- Love-in-a-Mist seed pods
- Bunny tails, baby’s breath, and sea lavender
- Dried celosia blooms
- Small lavender stems
- Poppy seed pod
- Rose buds/ petals
- Fern fronds
For the bottles:
- Transparent glass bottles with cork tops or bottle lids (I used this collection of tapered bottles & this collection of round bottles)
- Mineral oil: this offers the clearest finish
- A bamboo skewer or chopstick for positioning the flowers
- Tiny scissors or floral cutters for shortening stems
- Optional: hot glue gun for securing the cork
A Quick Note About Bottles
There’s no need to purchase anything elaborate. Truly, begin by looking through your own kitchen. Generous honey containers, jam jars, or even a mason jar would look wonderfully filled with dried blossoms and oil. In fact, the wider opening makes arranging simpler.
For a more vintage apothecary style (such as the tall cork-covered bottles I used), browse your nearby thrift shop first. I regularly find unusual glass containers there for practically nothing. IKEA, HomeGoods, and craft retailers such as Michaels also stock reasonably priced clear glass bottles with cork tops. Or look for “herbarium bottles” on Amazon if you’d prefer a matching collection or several different sizes.
The main requirement is simply a clear glass container with a lid or cork that fits tightly. Other than that, every shape and size is suitable. Combining several bottle styles together can actually create a particularly charming display.
Welcome! I’m Jennifer, and I’ve always thought nature provides the loveliest art materials. For many years, I’ve preserved New England’s flowers and foliage by pressing, drying, and crafting. Let me teach you how to preserve a small piece of the season and bring it inside—easily and beautifully.
Drying Your Flowers
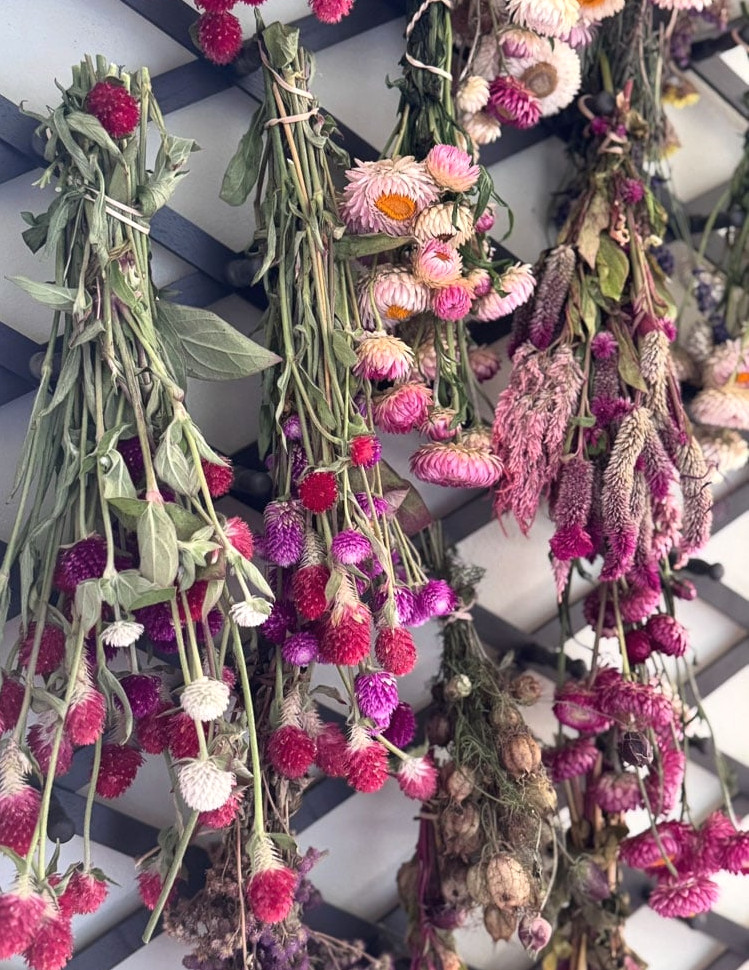
If you have a cutting garden, you’re already well on your way. Many flowers that dry beautifully are also wonderfully easy to cultivate: strawflowers, globe amaranth, statice, and lavender are nearly foolproof. They retain their color, preserve their form, and look gorgeous floating in oil.
To air-dry them, gather the stems into small bunches, fasten them with a rubber band, and suspend them upside down in a cool, dry location away from direct sunlight. Usually, a few weeks will do the trick. They’re ready when the stems feel firm and the petals have a papery texture.
If you don’t grow your own flowers, don’t worry!! Visit your local grocery store, farmer’s market, or Trader Joe’s and pick up a few bouquets to dry. You can also find a broad selection of dried flowers online (Amazon & Etsy).
A few observations from my experience
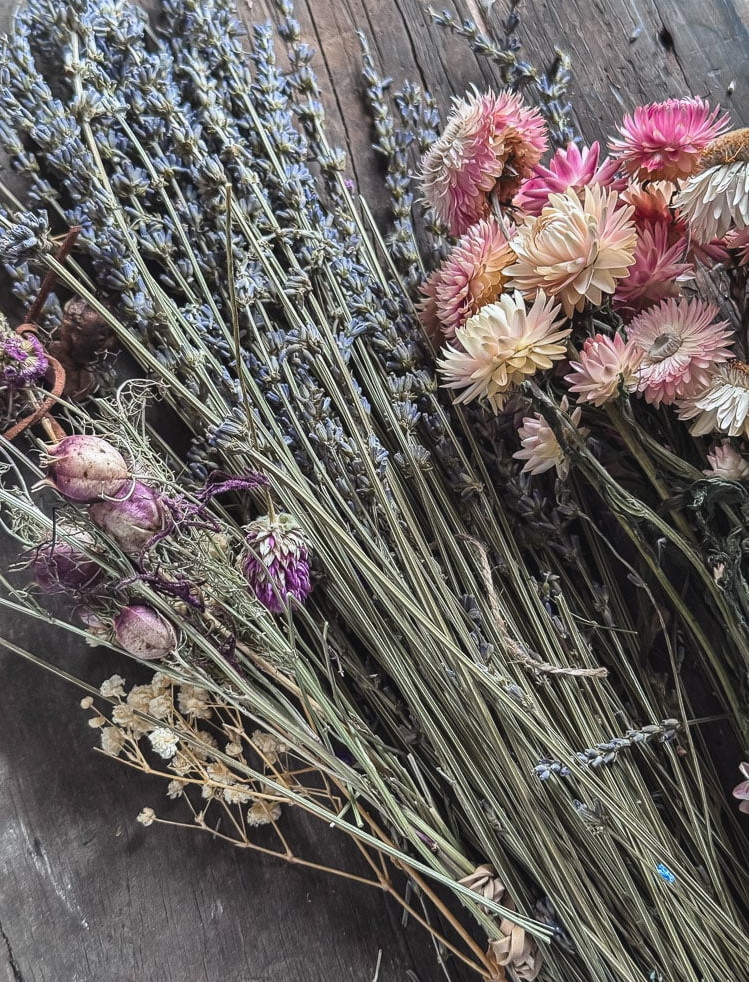
- Strawflowers and globe amaranth are the stars of this project. They dry rapidly, retain their color wonderfully, and look amazing in oil.
- Hydrangea flowers proved challenging to use for this project! I wouldn’t choose them again.
- Bunny tails, sea lavender (sometimes called German statice), and baby’s breath bring lovely movement and an airy quality to the arrangement
- Small Rose buds resembled bright pink pearls & I adored them!
- Lavender contributes a lovely, delicate, purple-toned accent and looks particularly beautiful toward the top of the bottle
One essential rule: ensure that everything is totally dry before placing it in the bottle. Any leftover moisture is the primary cause of cloudy oil, and it may lead your flowers to mold. You’ve put far too much effort into these to let that happen
Creating Herbarium Bottles
This is genuinely one of those crafts that appears more difficult than it really is. Once you settle in with your flowers and bottles, the process becomes almost meditative. It’s somewhat like arranging a miniature bouquet, only this one can remain beautiful for years.
Step 1: Prepare Your Flowers
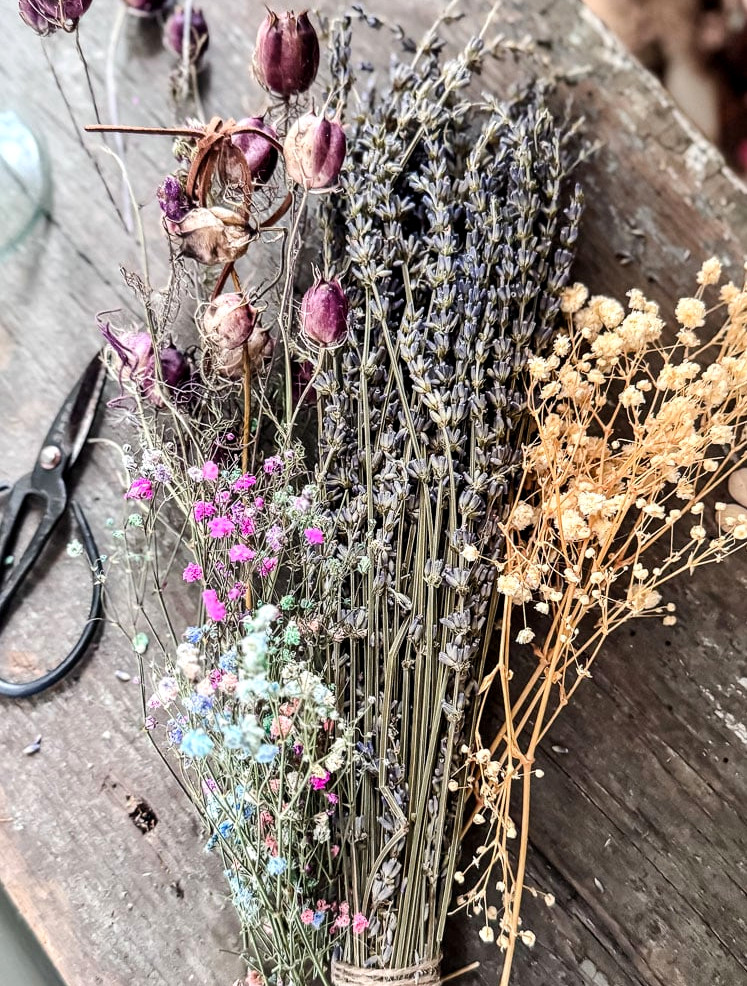
Before placing anything inside the bottle, do some minor trimming. Take away extra leaves, cut the stems to different lengths, and separate larger hydrangea heads into smaller bunches when necessary. Different stem heights create the finished bottle’s layered, abundant appearance. You don’t want every piece to be identical in length.
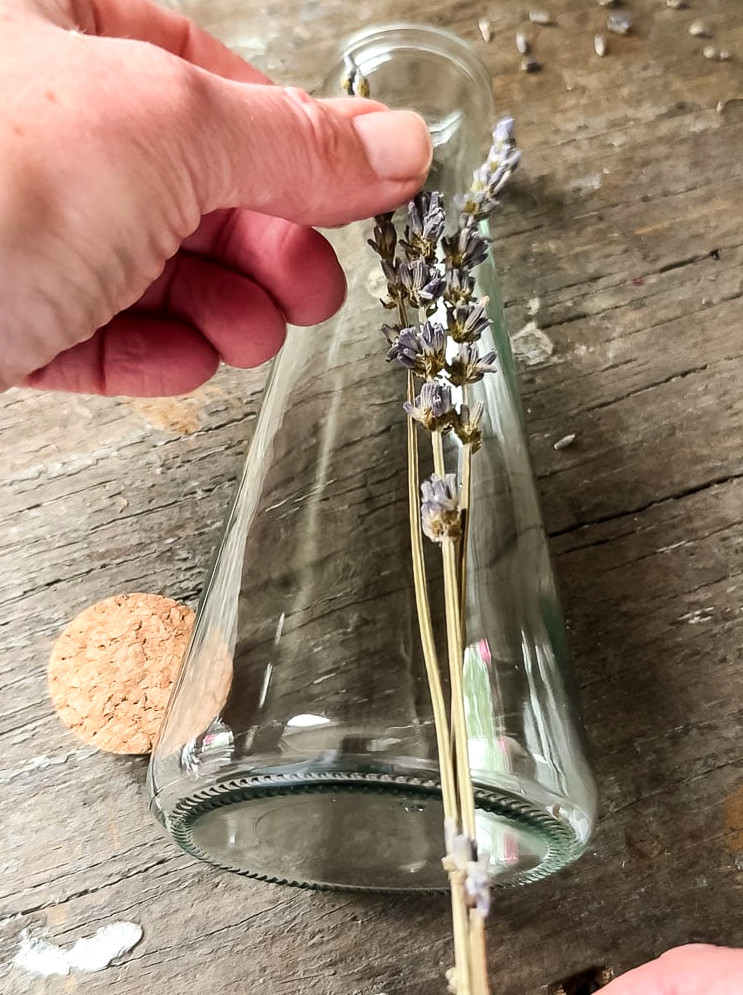
One helpful trick is to place a longer flower beside the bottle to determine the ideal length, then trim away the extra stem.
Step 2: Begin Arranging Your Flowers
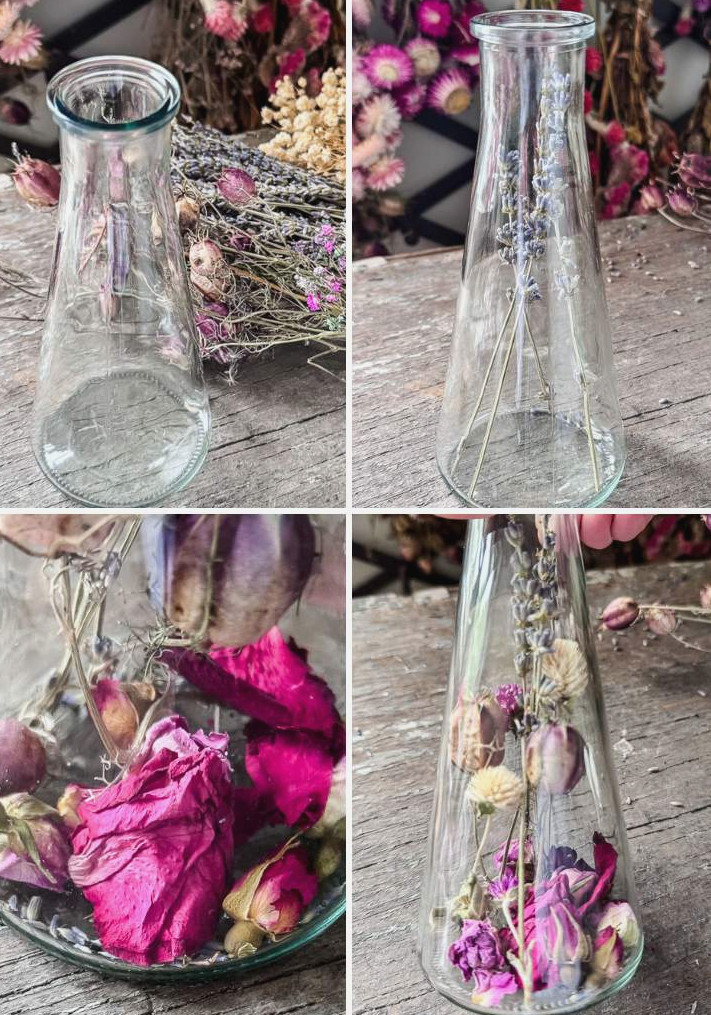
Start with your filler stems like baby’sbaby’s breath, bunny tails, sea lavender, and lavender. These were the easiest ones for me to place first, especially the fuller stems, such as baby’s breath, which help fill space.
After that, I added the more defined blooms first: strawflowers, globe amaranth, love-in-a-mist, or rose buds
Use a bamboo skewer or chopstick to position the stems and gently shift everything around. Don’t rush this step. It’s the enjoyable part!
Step 3: Pour In The Oil
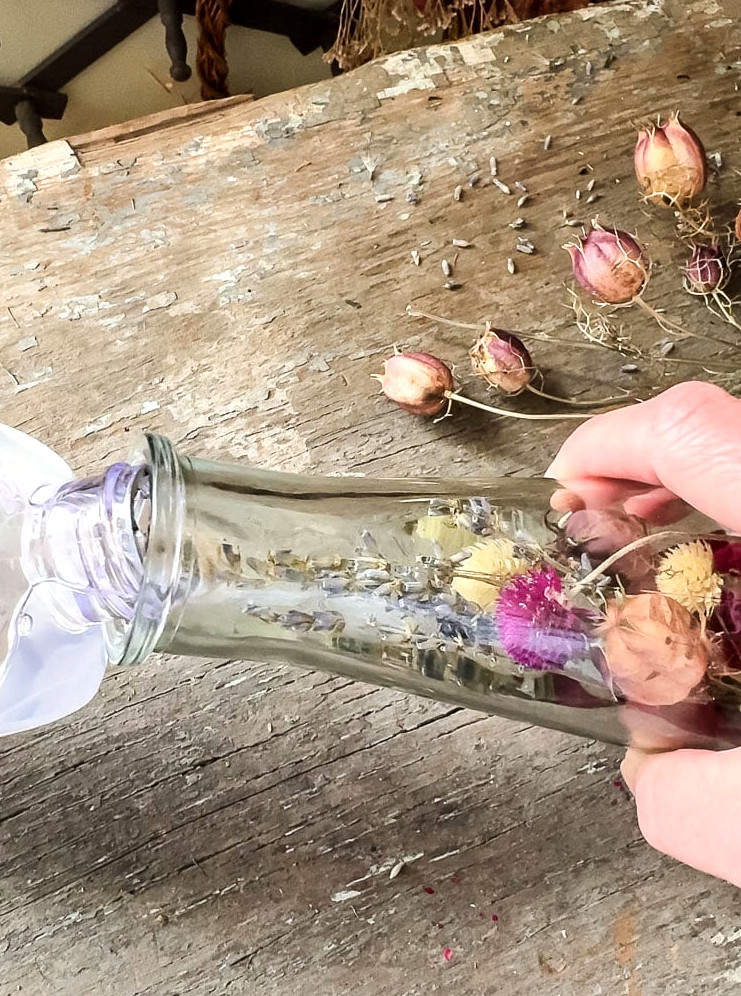
When you’re satisfied with the arrangement, you can add the oil. Pour gradually… and I truly mean gradually. Angle the bottle a little while pouring to avoid disturbing the flowers.
For the clearest and prettiest finish, I suggest using mineral oil. Bring it nearly to the rim, keeping only a little room at the neck.
While researching this project, I repeatedly came across warnings that baby oil may create a cloudy appearance. Let me assure you, the mineral oil is completely clear once they’re done (I honestly can’t stop admiring them on my windowsill!)
Step 4: Allow The Air To Escape
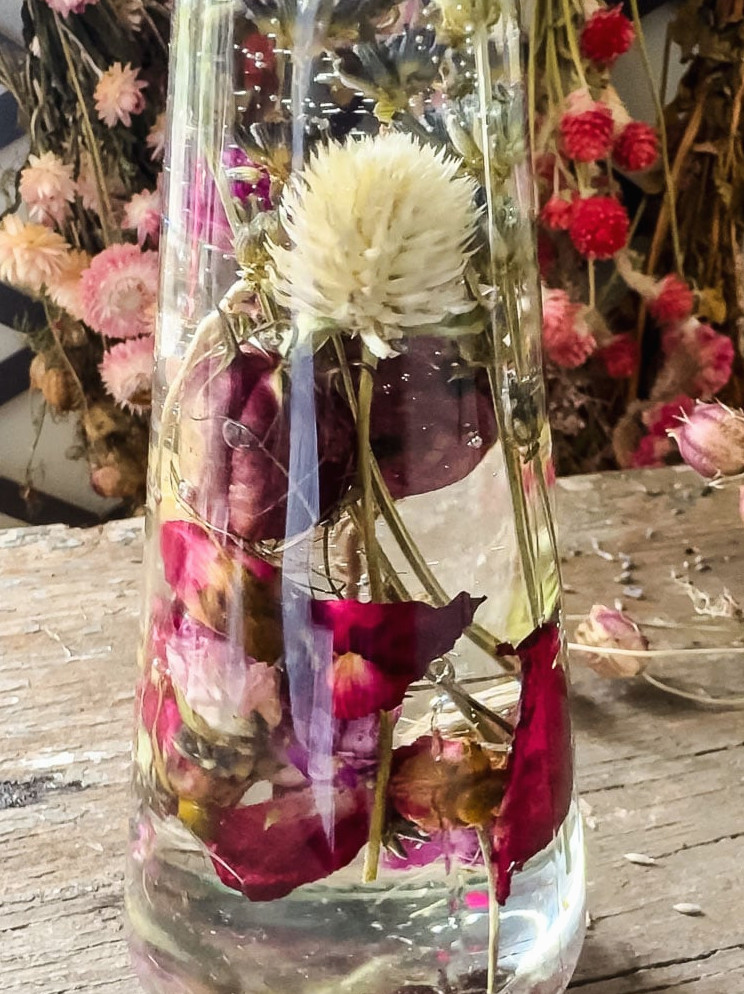
Keep the bottles uncovered while the air bubbles rise out of the oil. I GENTLY knocked on my bottles to help the bubbles drift upward. I suggest waiting about 30 minutes.
Step 5: Close The Bottle
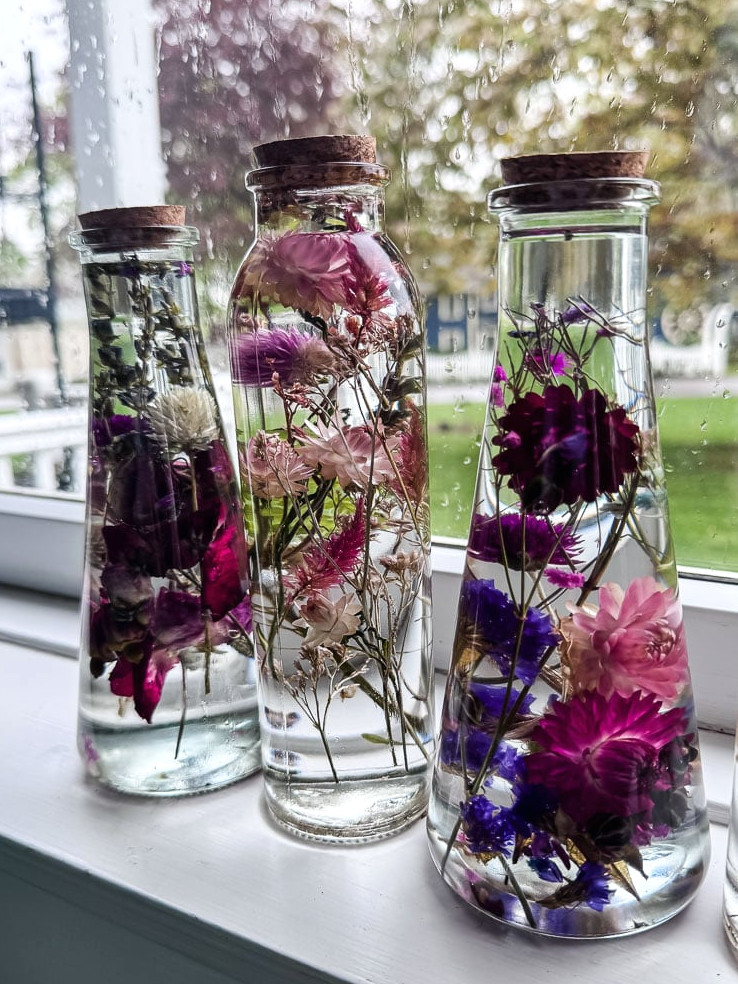
Push the cork in firmly or screw the lid into place. For added security, apply a narrow line of hot glue around the cork before inserting it ( I didn’t do this)
Step 6: Tidy It Up and Show It Off
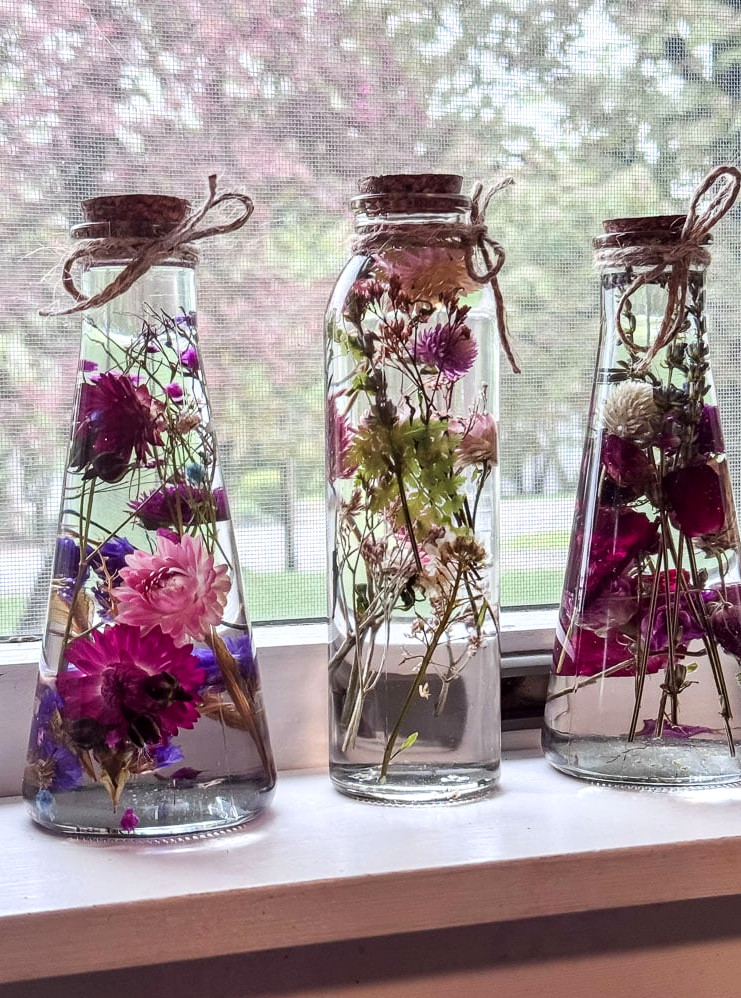
Clean the bottle’s exterior, wrap some twine around the neck for a touch of added character, if you wish, and choose a lovely spot on a windowsill. That’s truly all there is to it.
The Other 3 Herbariums & How I Arranged Each One
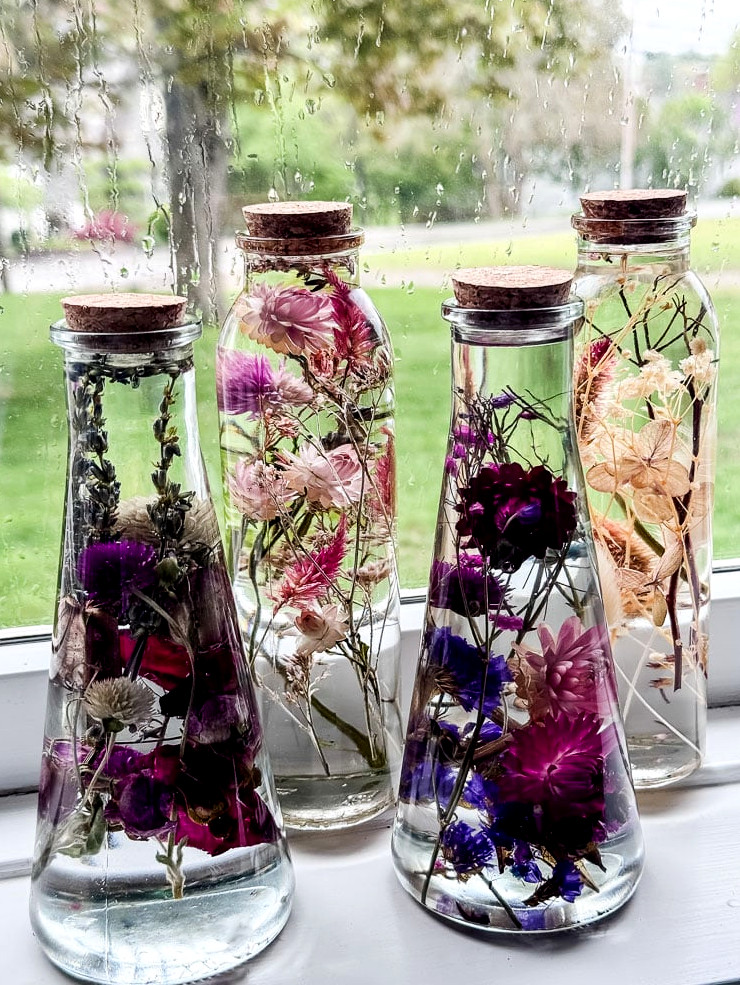
What I especially adore about this project is that there’sno single “correct” way exists. To give you an idea of how varied the results can be, I created four bottles and gave each its own character. The method is the same, but the outcomes are entirely different.
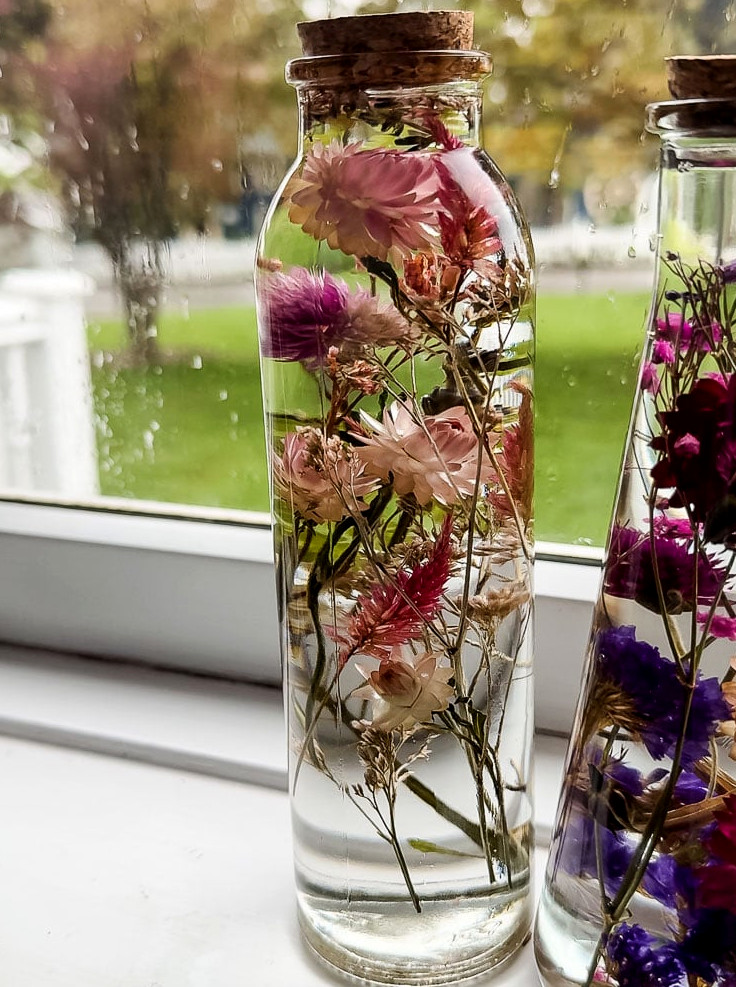
Bottle 2: Gemstone Hues
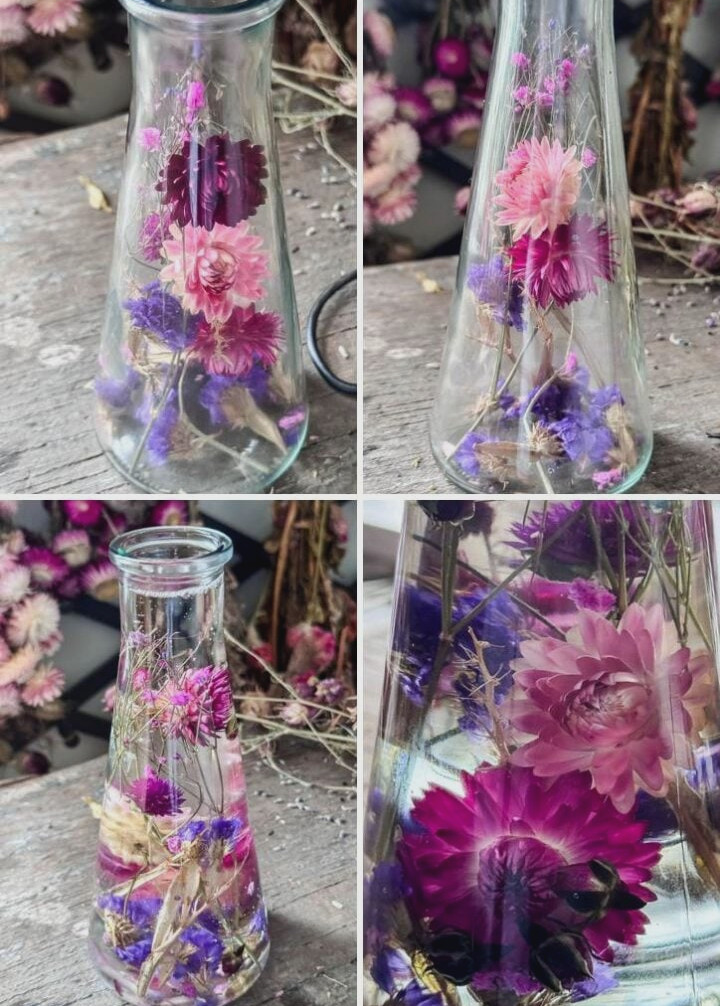
Purple statice, vivid baby’s breath, rosy globe amaranth, and strawflowers. Deep, vibrant, and lovely on a windowsill. The statice brings in a delicate, feathery texture that prevents the arrangement from feeling too dense.
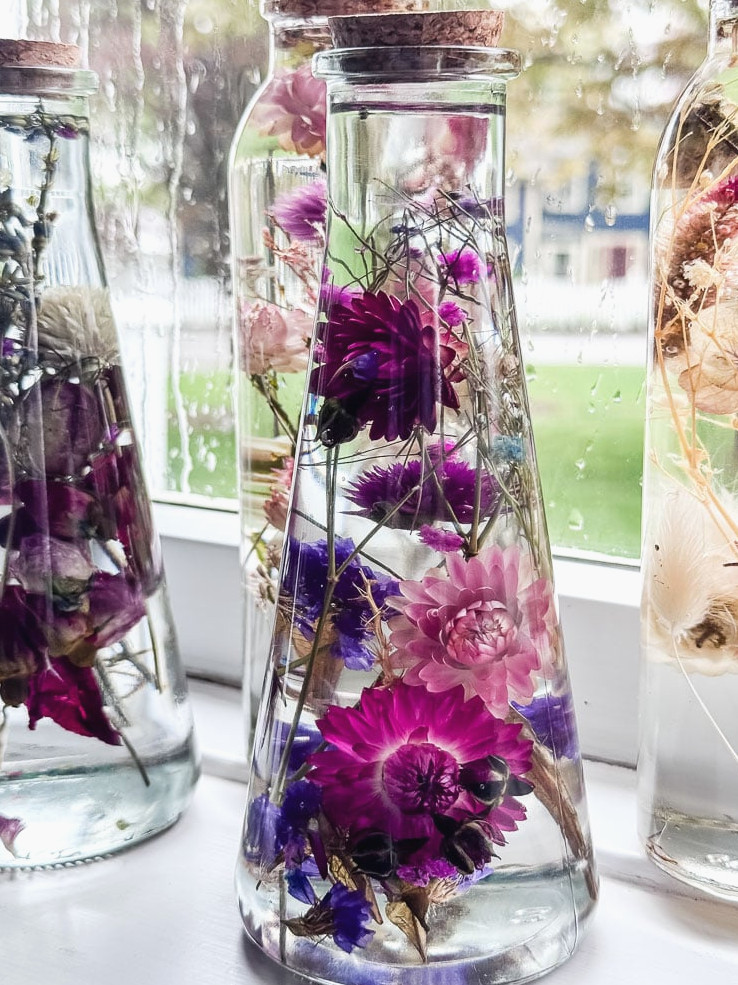
This is my favorite of the four bottles I created. The strawflowers’ details appear almost unbelievable!
Bottle 3: Gentle Neutrals
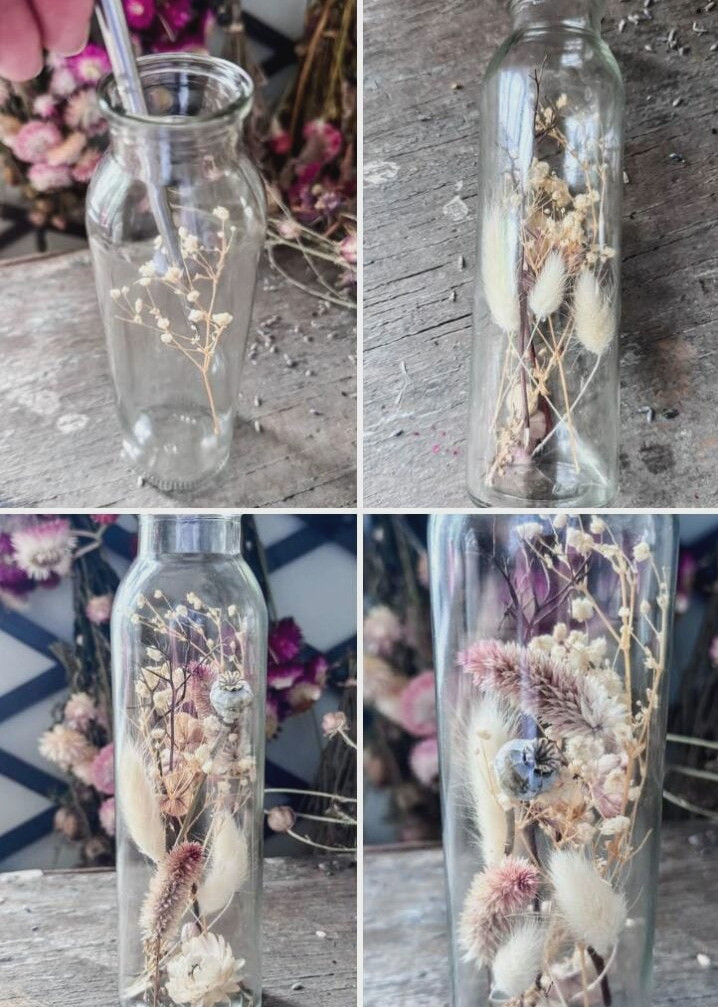
This one is the most understated of the collection. Cream-colored baby’s breath, hydrangea, bunny tails, a poppy pod, delicate pink celosia, and a little twig from a spirea bush come together here. Light, refined, and graceful, it suits anyone drawn to a softer, nature-inspired look.
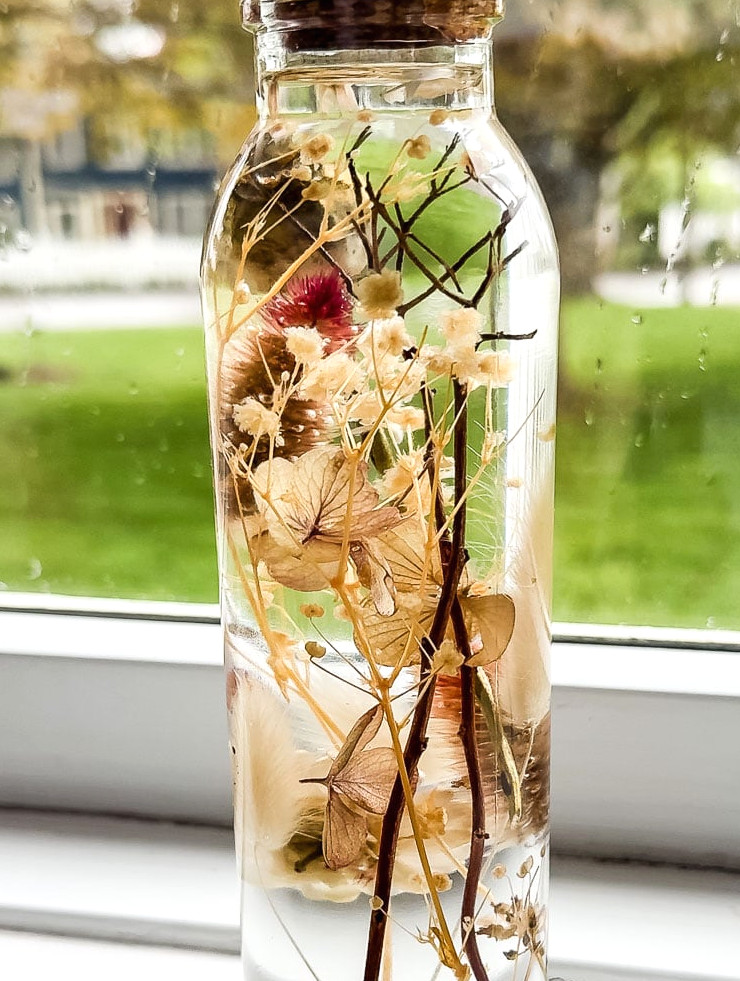
Bottle 4: Every Shade of Pink
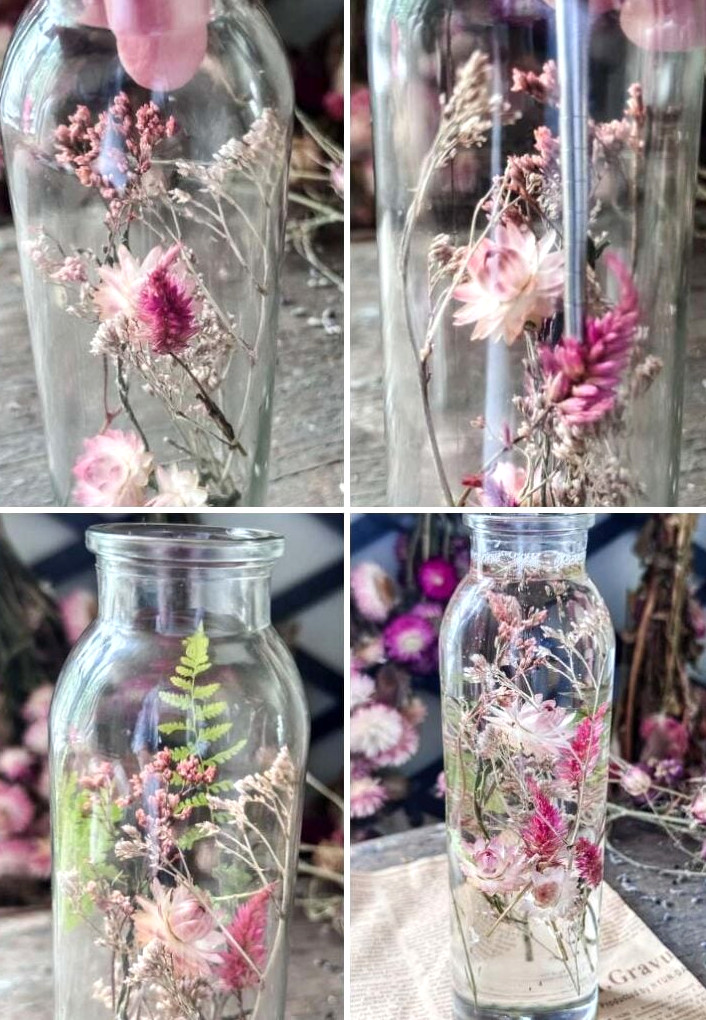
Pale pink strawflowers, white strawflowers, raspberry-colored celosia, and ferns. Delicate and romantic without looking overly elaborate. The ferns provide just enough greenery to make it feel fresh instead of overly sweet.
Helpful Tips, Tricks & Lessons I Picked Up
Here are a few points to keep in mind before beginning:
Choose mineral oil instead of baby oil Baby oil can work when necessary, but mineral oil is more transparent and creates that lovely, nearly invisible appearance where the flowersappear to seem suspended. You can locate it at nearly any drugstore, typically tucked away in the laxative section. Don’t be put off by that—it’s entirely pure and scent-free.
Make sure your flowers are fully dry I touched on this before, but it deserves emphasis. Any moisture can ruin a clear herbarium. If the flowers aren’t thoroughly dried, the oil may become hazy. When you’re unsure, let them dry for another week.
Change up your stem lengths Try not to trim every stem to an identical height. The prettiest bottles feature layers: a few stems reaching high, others nestled down low, with some blooms looking ahead and others angled gently to the side.
Handle the oil carefully Add it in a slow, narrow stream while gradually tipping the bottle. Pour too quickly, and you may have to reposition everything with your skewer; that works, but it’s easy to prevent.
Secure the cork Applying a small bead of hot glue around the cork’s bottom before pushing it into place makes a big difference. Oil can seep through even the tiniest opening, and discovering a leaking bottle on the windowsill is hardly enjoyable.
They change with age & that’s part of their appeal When properly sealed and protected from strong direct sunlight, a herbarium will remain vivid and close to its original colors during the first year. From there, the shades slowly begin to mellow. Reds shift toward burgundy, pinks fade into dusty mauve, and whites develop a soft, creamy vintage hue. After three years or more, the result resembles a sepia botanical keepsake, filled with texture and delicate forms when touched by the light. Honestly? Every stage has its own beauty. These pieces aren’t designed to endure forever, yet they grow older in the best possible way—with grace.
A Tiny Garden Keepsake to Treasure Forever
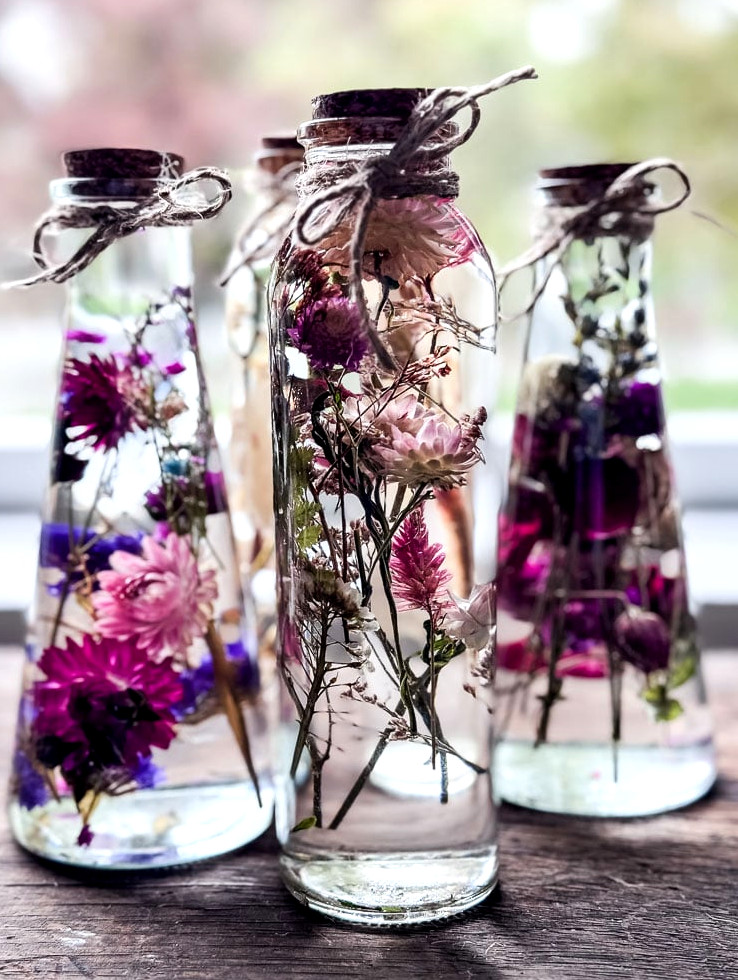
There’s something especially meaningful about this project, and I find myself returning to it again and again. Nearly every flower inside my four bottles was gathered from my own garden! Seeds I sowed, stems I snipped, blossoms I preserved. Now they rest on my windowsill in their small glass containers, shining in the afternoon glow, and they’ll remain there next winter when the garden lies beneath a foot of New Hampshire snow.
That’s the complete garden-to-home idea captured in a bottle. Truly.
If you create one—or four—I’d be thrilled to see them. Tag me on Instagram or email me a picture. And if you’re beginning a cutting garden and trying to decide which flowers are best for projects like this, I can help. Strawflowers, globe amaranth, statice, lavender, bunny tails. They’re among my favorite blooms from my cut flower garden, and they seem practically perfect for a project like this.
Now head to your pantry, find a honey jar, and begin!
Show off your creations! If this project—or any of my other DIY ideas—inspired you, I’d be delighted to see them and feature you in the Reader’s Spotlight gallery. Email a photo to jennifer@cottageonbunkerhill.com
xo, Jennifer
Enjoy projects like this?Make sure you don’t miss any! Join my newsletter familyfor more warm, affordable DIY inspiration sent straight to your inbox. You’ll receive special tips, advance access to tutorials, and plenty of ideas to help your home feel personal, welcoming, and handmade.
save for later