Here’s a unique DIY Gift Box project – create an adorable Paper Box Strawberry!! Who can resist a charming Strawberry Craft? You only need red and green paper, plus a little thread! We’ve made some useful Strawberry Gift Box Templates for you to use if preferred – although you can just work with ordinary red and green paper by following the straightforward directions below.
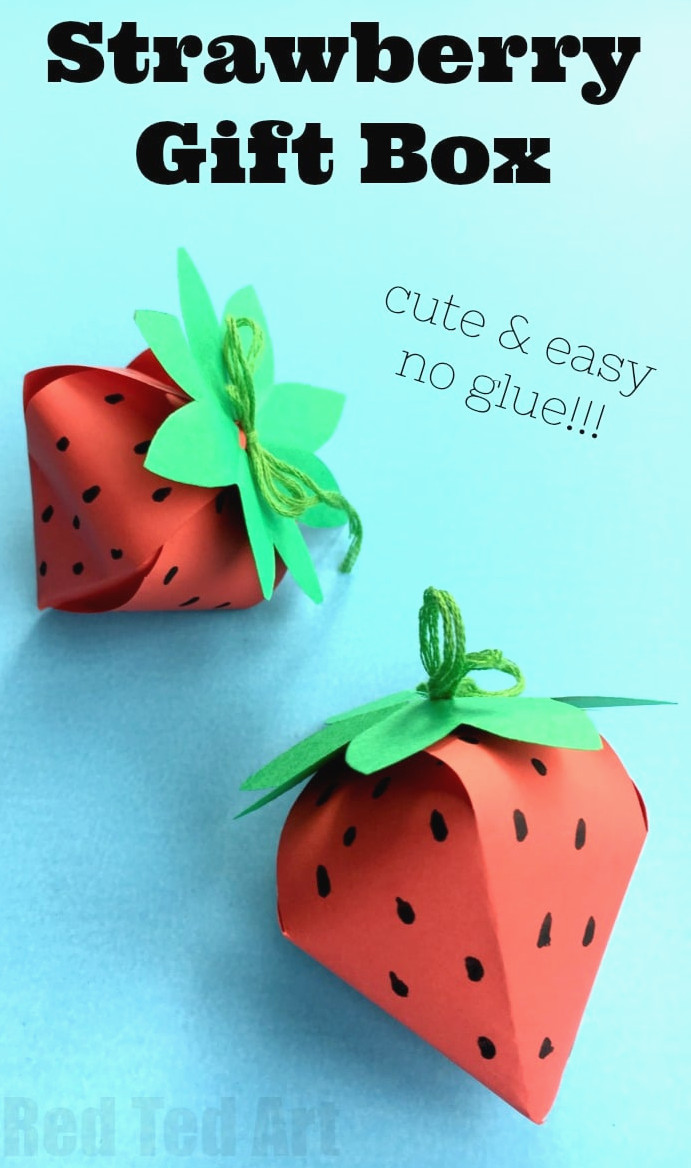
These gift containers are perfect for holding a small sweet treat – perhaps a ferror rocher or a few chocolate mini eggs. You could also fill this DIY Paper Box Strawberry with little presents, like a BFF Ring, BFF neglace, or bracelet.
Alternatively, turn these paper strawberries into beautiful summer decorations! Wouldn’t they make a delightful paper strawberry garland for a “Strawberries & Cream Party” theme?
Paper Crafts for Kids Book
If simple paper projects are your kind of craft, you might also enjoy my Easy Paper Project book! This paper puppet appears in the book because it is such a “classic” beginner-friendly paper craft to create with children and lots of fun to play with:
Be sure to take a look at the book here! I’m sure you’ll enjoy it!! 🙂
DIY Paper Box Strawberry
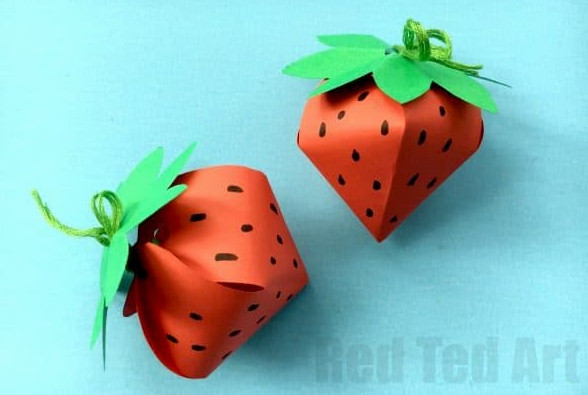
Materials required for your 3d Strawberry Box
- Red paper (With careful cutting, you can make two paper strawberry boxes from one sheet of A4 paper)
- Medium green paper offcuts
- Ribbon or thread to fasten it closed (any colour is fine – wool works as well)
- Small treat or present (optional)
Basic tools
- Scissors
- Hole punch
- Black pen
- Small side plate for sizing (15cm diameter works well)
- Tin can for sizing (7.5cm diameter works well)
Although some crafters prefer to glue these, adhesive is not actually required!
You can also download our FREE Strawberry Box Printable (and $0 at check out).

Making a DIY Paper Box Strawberry
Watch the video, or use the illustrated step-by-step directions underneath. The video demonstrates how to create these simple Paper Box Strawberries WITHOUT using the template. Either approach works beautifully, so it mainly depends on which you prefer! The assembley process for the printable matches the method shown in the video! So be sure to set aside time to watch it!
Step-by-Step Guide to Creating a Paper Box
Step 1 – Use your side plate and can as guides to trace and cut two circles – make the larger circle from red paper and the smaller one from green.
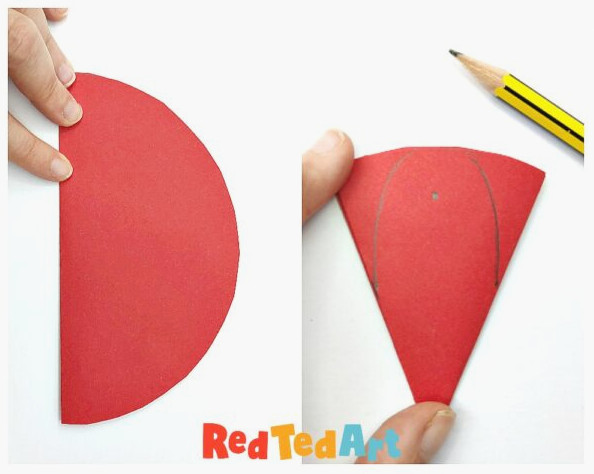
Step 2 – Start with the red circle and fold it in half.
Step 3 – Fold it in half twice more.
Step 4 – With a pencil, sketch a petal on the folded circle. It should begin at the centre of the first edge, rise to the top of the curve, and return to the centre of the opposite edge.
Step 5 – Cut along the outline, then punch a hole at the petal’s top.
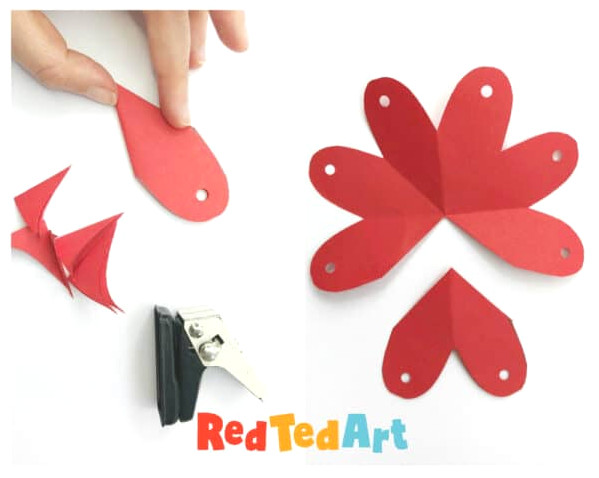
Step 6 – Unfold the paper to reveal a flower shape. Remove one quarter, as it will not be required.
Step 7 – Draw a few black marks to represent the strawberry seeds.
Step 8 – Pass a thread through the holes in your strawberry.
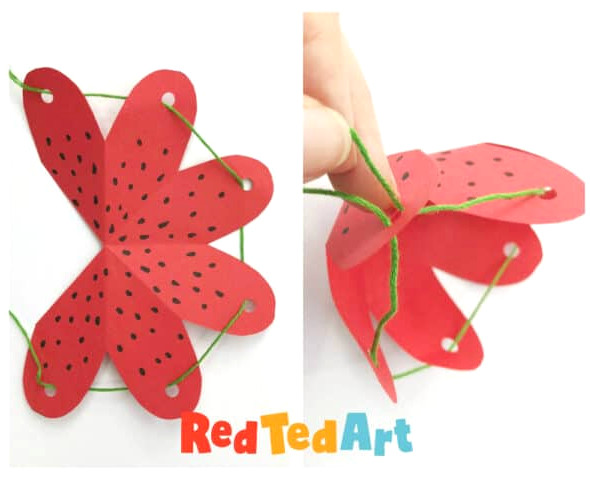
Step 9 -Thread the remaining thread through the first hole, then pull so the strawberry shape gathers and forms. Finish by tying a knot.
Step 10 – Make the strawberry leaf. Repeat steps 1 – 4, shaping the petal with a pointed top for the leaf and trimming a small section from the bottom to create a threading hole.
Step 11 – Unfold it. Push the thread through the centre or your strawberry leaf and your project is complete. If desired, place a small amount of glue beneath the leaf to hold it in position, though this is optional.
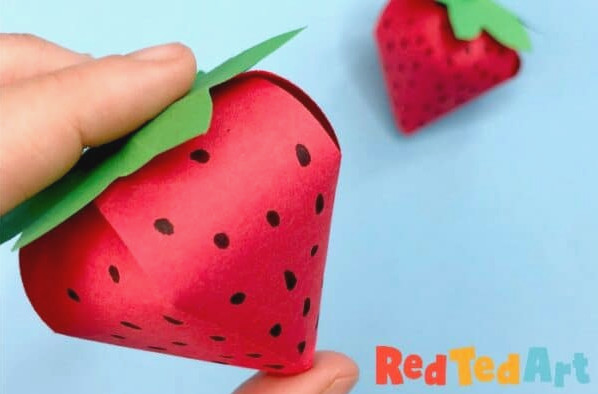
Have fun!! We hope you enjoy these adorable little creations as much as we do!
Don’t forget that this much-loved craft appears in my Kids Paper Crafts book here:
The book focuses almost entirely on paper, card, and stationery – making the crafts easy for everyone to access and relatively mess-free (that means no paint and only a small amount of glue!).
Explore our selection of enjoyable and simple Strawberry Crafts here:
Discover more DIY Gift Box Ideas!
You can also watch this video on YouTube, where it is slightly longer: