If you’ve spent any amount of time here, you already know I’m devoted to real plants. I grow a cutting garden, preserve flowers and botanicals, and press blooms… I’m usually not the one choosing an artificial alternative.
And still. Here we are!
This summer, I initially set out to create a living succulent wreath. I researched the method, understood what it involved, and then ran the numbers: by the time the cuttings developed roots (a realistic two to four weeks), I would only have from perhaps July until the beginning of September before the chilly New Hampshire evenings made it too cold for succulents outdoors. That isn’t much time to enjoy a project that requires so much effort!
So I changed course. And I’m genuinely happy that I did.
The living wreath is already scheduled for early next spring. Then, everyone can enjoy it throughout the entire summer, especially those of us living in the colder parts of the country where warm weather seems to disappear almost as soon as it arrives. But this summer? We’re choosing the practical option.
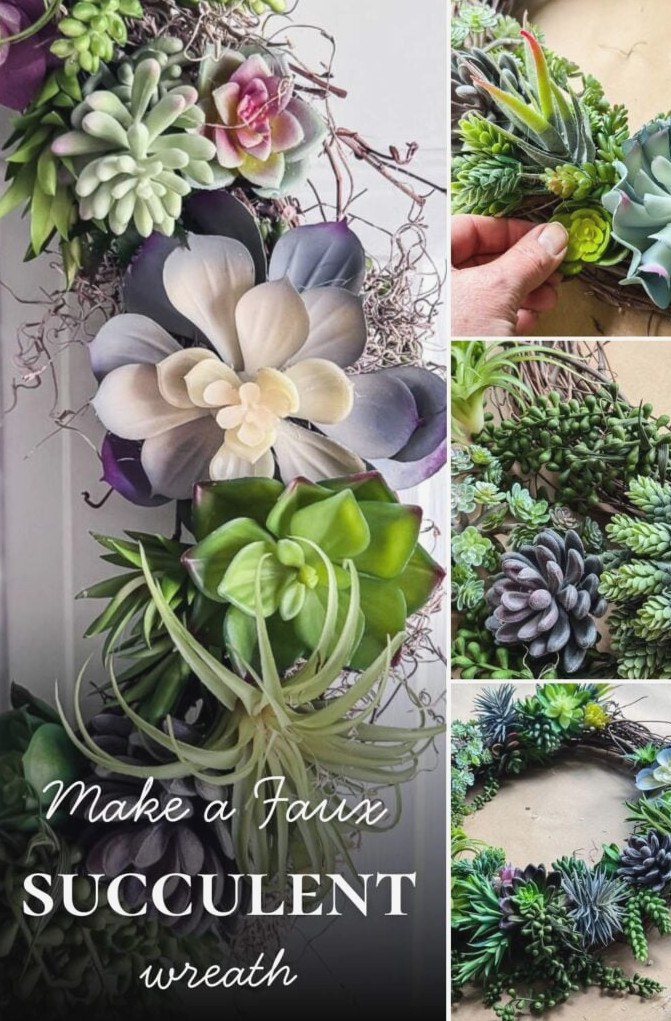
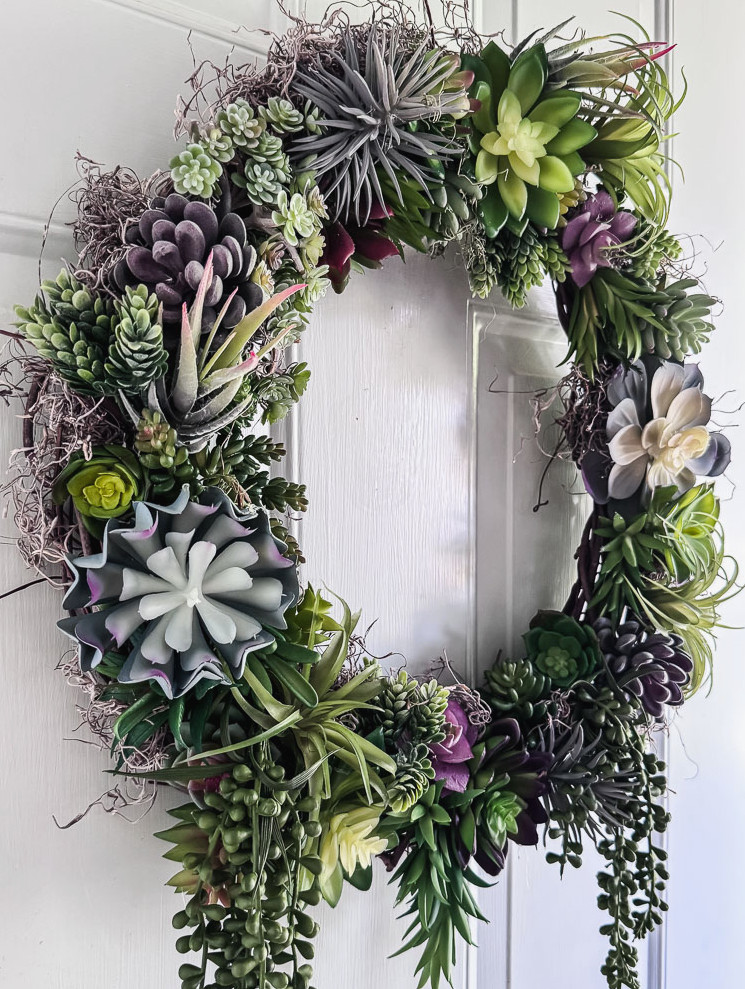
Here’s what I love about this wreath: if you saw it hanging on my door, I wouldn’t begin by saying “it’s fake” . With its mix of textures, rich layers of color, and trailing strand of pearls at the base… it feels full, thoughtfully arranged, and honestly a little atmospheric in the best way.
And there’s more: almost all of the succulents came from supplies I already had in my craft room from an earlier project. That means this wreath cost me nearly nothing. If you’re purchasing everything from the beginning, I’ll share the complete cost breakdown. It costs slightly more than the usual wreath projects I share, but it remains quite affordable for the result, and unlike a fresh wreath, this one can be packed away after the season and brought out again next year.
Let’s get started.
Welcome! I’m Jennifer, and since 2019 I’ve been documenting my home’s transformation, with an emphasis on affordable, attainable decorating. If you appreciate New England’s character but need your home to function for everyday life, you’ve come to the right place. I explain each project so you can build a home that reflects your story, without feeling overwhelmed.
Why Faux Is the Practical Choice Here
I want to pause on this for a moment because I realize some of you may be giving me a skeptical look right now.
For a wreath, artificial succulents aren’t a lesser substitute; in certain circumstances, they’re actually the more sensible option. When your front entry receives very little direct sunlight (mine sits beneath a covered porch), living succulents would have a difficult time regardless. If you’re in an area with a brief warm-weather period, like my Zone 6a location in New Hampshire, the window for a living version is quite limited. And when you want something you can hang up, leave alone, and bring out next May looking just as good, faux plants are the way to go.
Next spring, I’ll make the living succulent wreath when the season is better suited to it. For now, this useful, attractive, low-maintenance version is exactly right, and I’m not going to apologize for that.
Supplies You’ll Need
This wreath uses only a handful of materials, which is wonderful! All you really need is a grapevine wreath form, two packages of faux succulents, and a bag of Spanish moss. You’ll also need a dependable glue gun, and I highly suggest choosing Gorilla glue sticks instead of generic ones.
At this point, I’ve completed more projects than I can remember, and after changing to Gorilla glue, I haven’t returned to anything else. Its grip is more secure, which is important when you’re attaching a substantial echeveria to a wreath form and trusting it to remain in place. (Gorilla, if you happen to be reading, my DMs are open.)
One detail to keep in mind: my method, which uses tightly arranged succulents with Spanish moss filling the spaces along the inner and outer edges at the end, is only one possibility. For a gentler, simpler design where the moss has a stronger presence, you could add fewer succulents and allow the moss to contribute more. Another option would be covering only the lower half of the wreath with succulents for a dramatic asymmetrical arrangement (I think this would look fantastic!).
For either of those designs, one package of succulents would likely be enough rather than two.
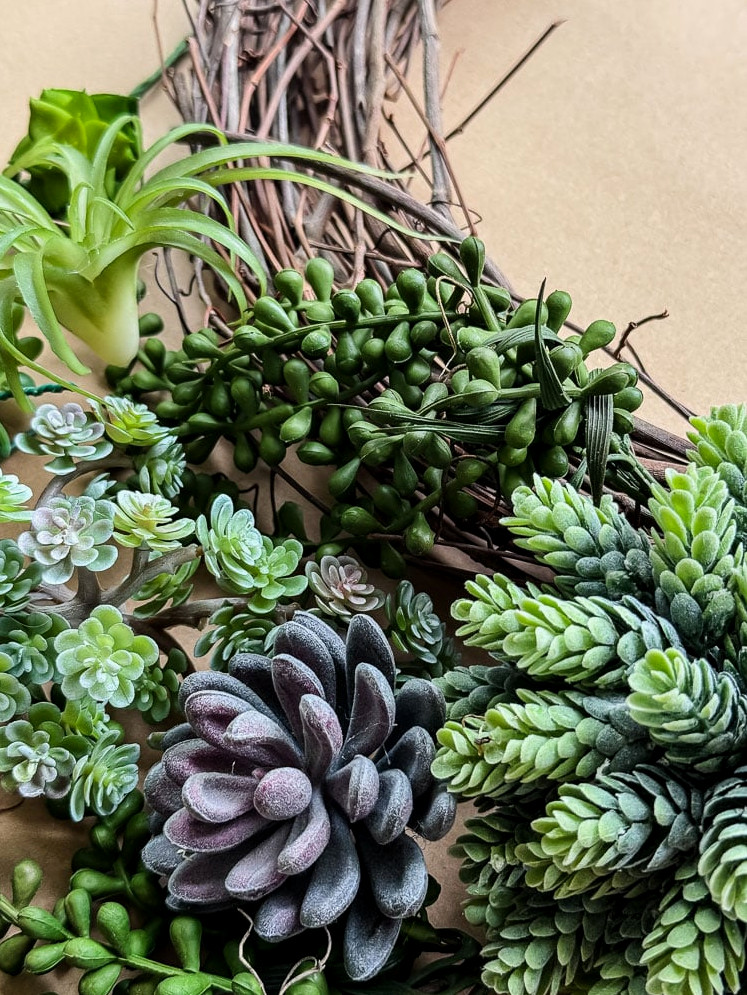
Materials for this Project
Estimated cost if purchasing every item new: around $50–55. For a wreath of this size and fullness, that’s truly an excellent price. I was browsing Etsy to compare prices and came across a similar wreath listed for $194!!! Plus, this design can be used year after year.
Which Wreath Form Size Is Right for You?
An 18-inch wreath isn’t the perfect choice for everyone. Your door may be more compact, or perhaps you’d prefer to begin with a more affordable option.
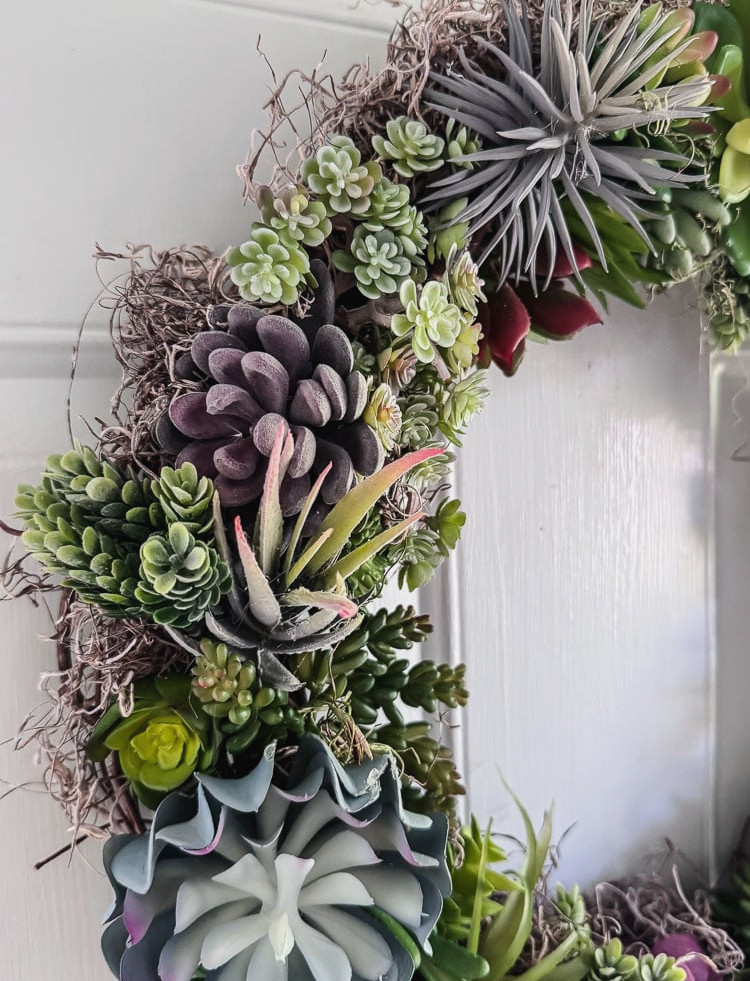
Below is a general estimate of how many succulents you’ll require according to the wreath’s dimensions, using thesame rich, completely filled-in appearance shown here:
•12-inch form: roughly 22–26 succulents; one pack is enough, making this the most economical choice at about $22 for the succulents alone.
•14-inch form: plan on approximately 28–34 succulents. You’ll need to open a second pack, though you’ll have a few remaining for a smaller craft or to cover any bare spots.
•18-inch form (what I used): around 44 succulents, or two complete packs.
Remember that these numbers reflect the thick, abundant coverage shown on my wreath. For a more relaxed, airy arrangement, you might be able to use slightly fewer pieces. The sets come with a pleasing variety of sizes, meaning the larger focal pieces will cover more space than the tiny fillers.
Before You Begin: Organize Your Succulents
Before plugging in your glue gun, empty both packs and spend a few moments examining the contents. The set I suggested includes a helpful assortment of echeveria rosettes, string of pearls, burro’s tail, aloe picks, air plant forms, yucca, and sedum, with sizes ranging from petite filler pieces to larger statement rosettes.
Arrange them loosely according to style and notice the range of colors available. You’ll be working with greens, purples, silvery-blues, and soft cream shades.
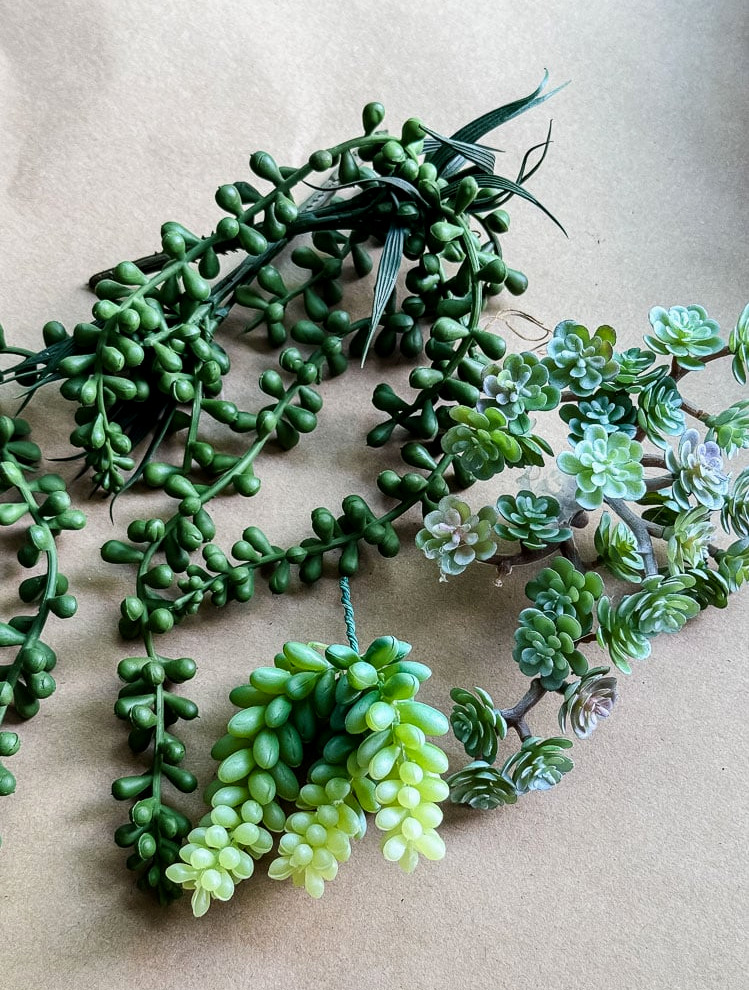
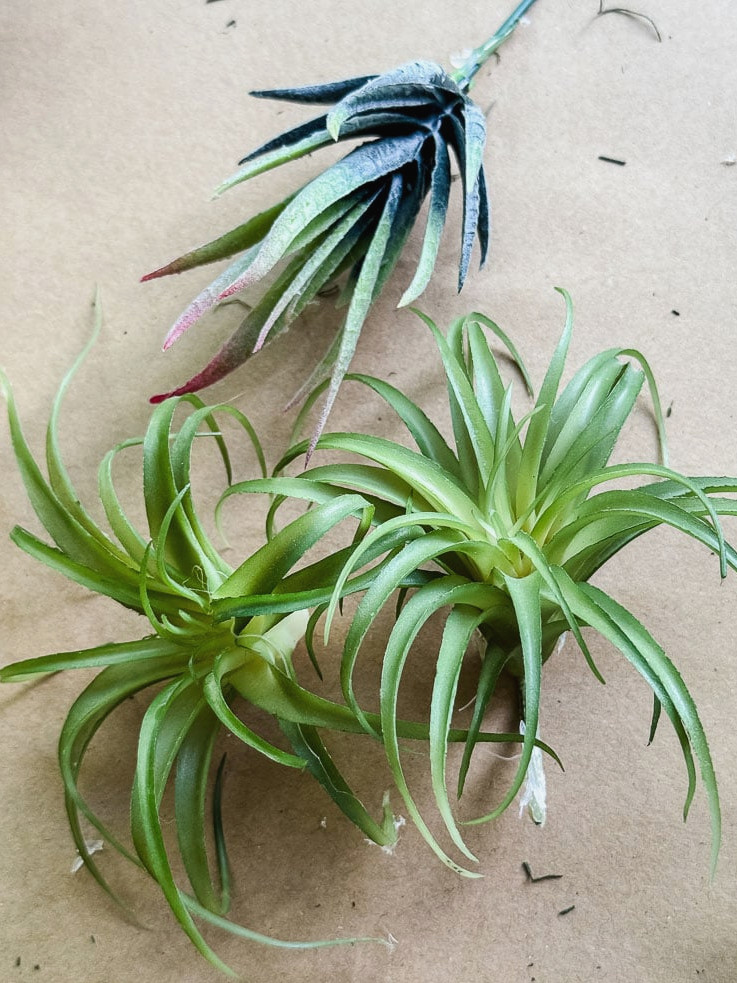
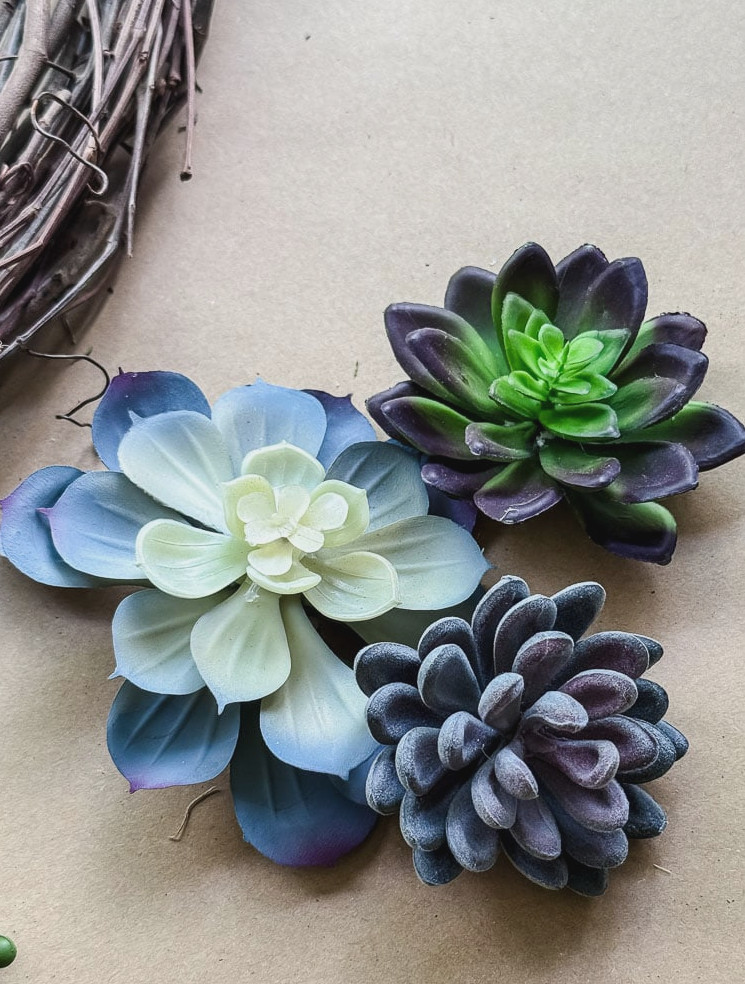
I divided mine into 3 groups: trailing succulents, spiky varieties, and rosette or flower-shaped pieces. You don’t need a strict system- but keeping everything in view lets you quickly pick up what you need instead of searching through a mound while holding a glue gun.
How to Make It: A Step-by-Step Guide
Although this wreath may look complicated, it’s surprisingly easy and uncomplicated to create! If you’re just getting started with crafts, I always suggest beginning with a wreath.
Step 1: Begin With Your Focal Piece
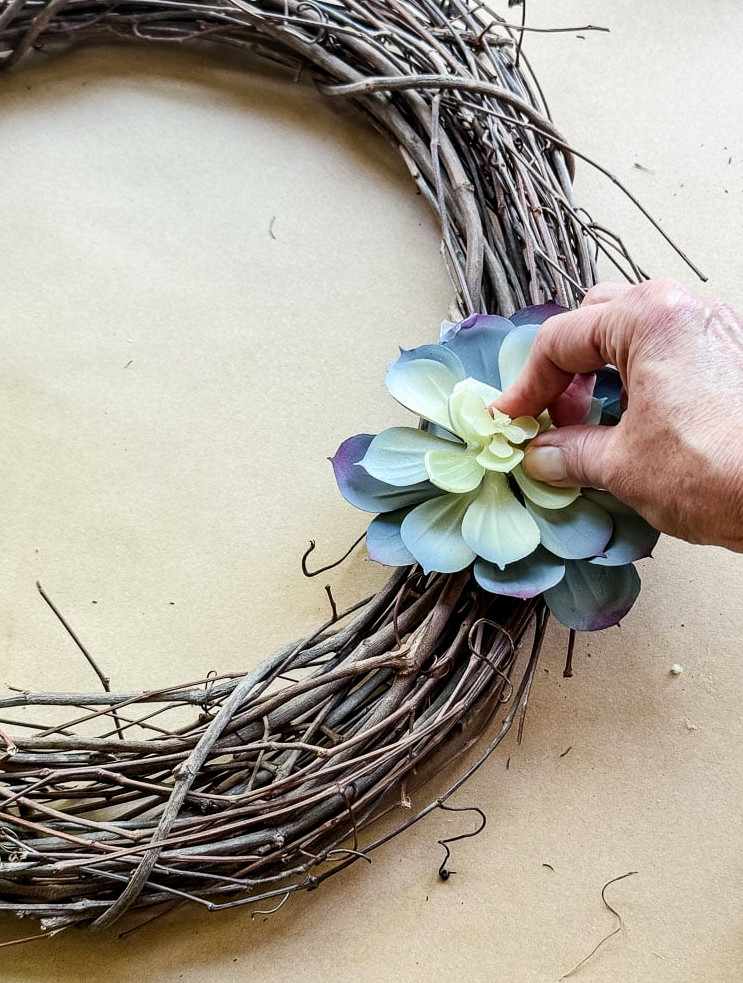
Choose your biggest and most attention-grabbing echeveria. I used one of the pink or purple-hued rosettes and positioned it around the 3 o’clock mark on the wreath’s right side. This piece serves as your anchor, your first step, and your visual guide. Build the rest of the arrangement outward from it.
Apply a generous layer of hot glue to its base, then press it securely against the grapevine. Keep holding it in place for several seconds before releasing it. A piece this large needs plenty of surface contact.
Step 2: Continue Around the Wreath in One Direction
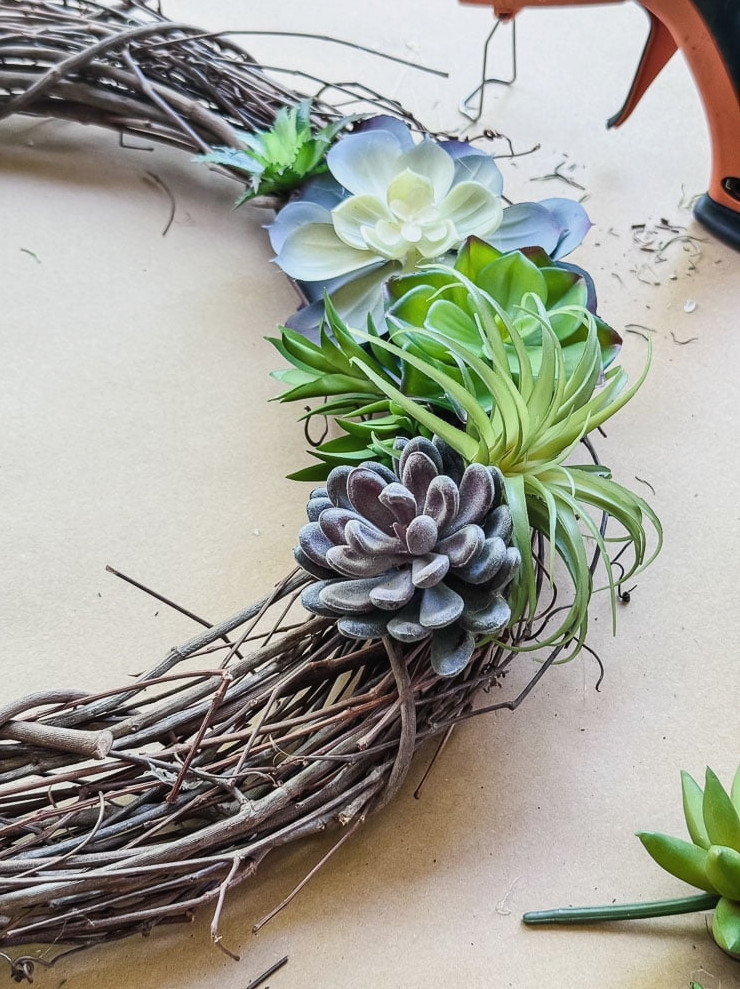
Beginning at the anchor, move down the wreath’s right side, then continue upward and around the left side. As you work, vary three elements: color, texture, and scale. Place a large rosette beside a spiky succulent, followed by a cluster of small sedum. Pair purple with green, then with silvery-blue. There’s no strict pattern to follow; simply avoid placing two similar pieces directly beside one another.
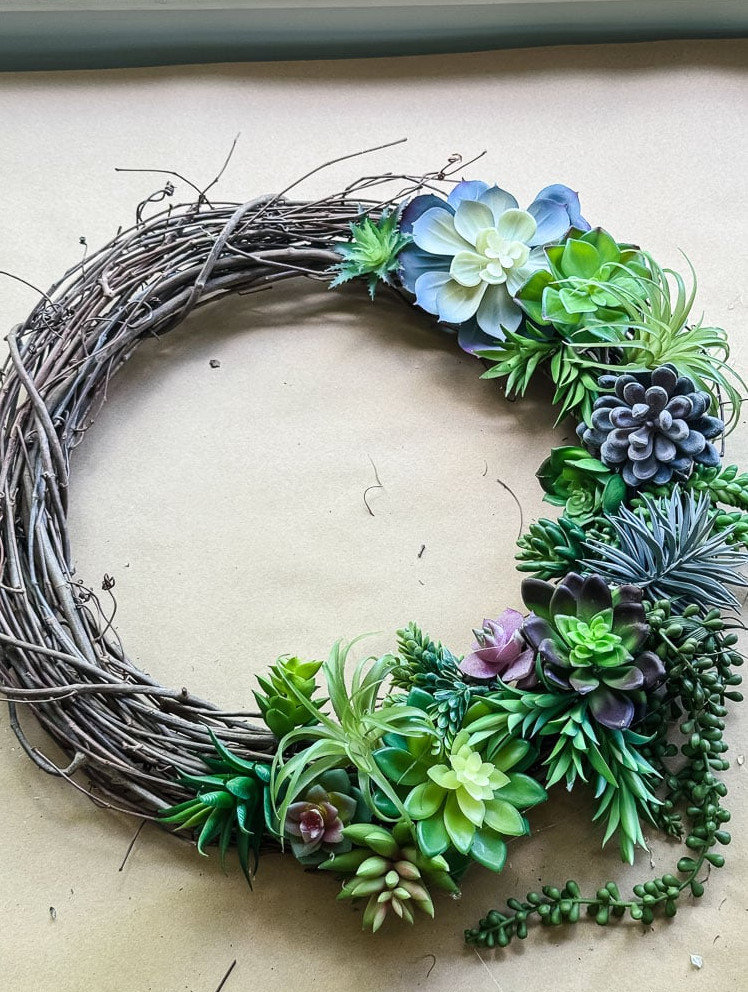
Hold two options over the area and choose the one that seems most fitting.right. Once you get started, this feels completely natural, and I promise you can’t choose a wrong answer here.
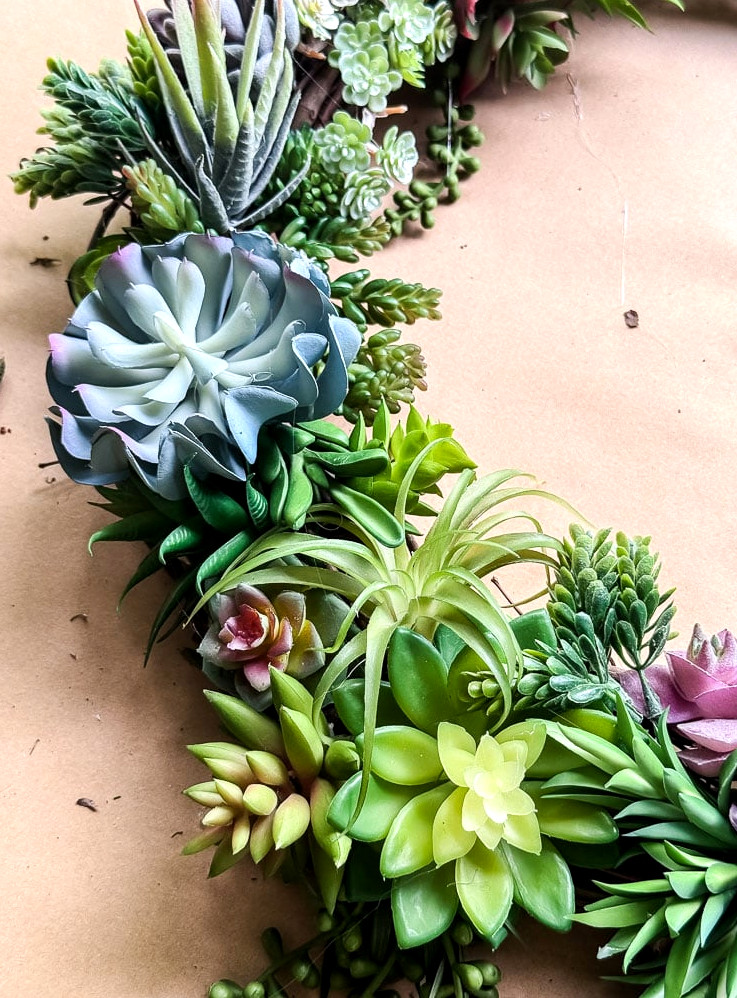
One other detail is important! Rather than viewing your wreath as a flat surface, imagine it with depth. While arranging my succulents, I positioned some toward the viewer, angled others inward, and slipped a few beneath neighboring pieces. This layering helps create the abundant, nearly sculptural appearance of the finished wreath instead of making it seem as though everything has simply been glued flat in a circle.
Step 3: Learn Your Two Attachment Techniques
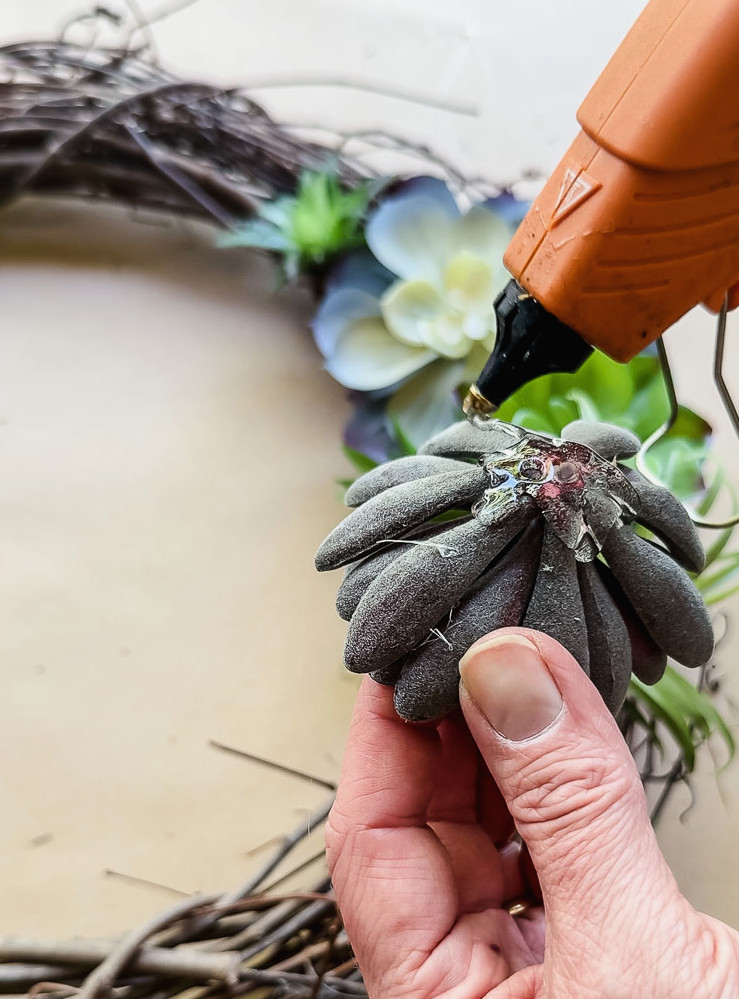
Faux succulents do not all fasten in the same manner, so understanding this beforehand can prevent some unnecessary aggravation.
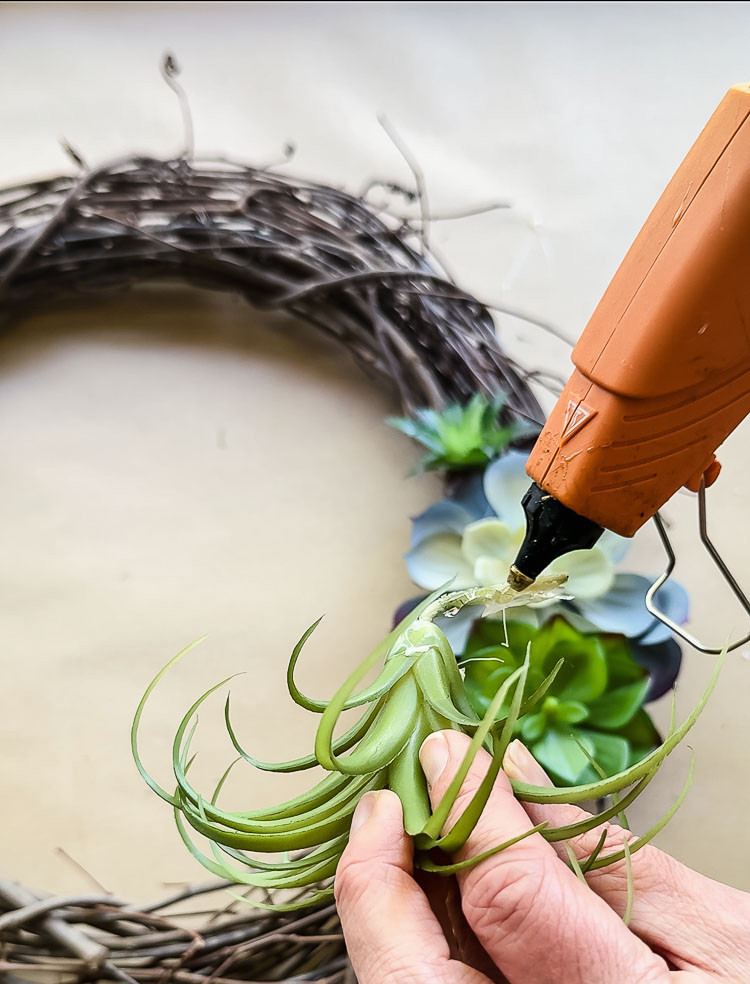
Wire-stemmed pieces: Add a dab of hot glue to the wire stem, then push it between the grapevine branches. The vines grip the stem firmly, making these the simplest pieces to position.
Flat-base pieces: Put hot glue straight onto the succulent’s flat bottom and press it securely against the grapevine surface. Keep holding it for about 5–10 seconds before letting go. These require a firm, level contact area in order to remain attached.
Large or heavy pieces: Apply plenty of glue, AND think about winding a short length of floral wire around the stem and through the grapevine for added stability. This is especially helpful with any larger echeveria that carries noticeable weight.
Step 4: Leave The Trailing Pieces Until The End
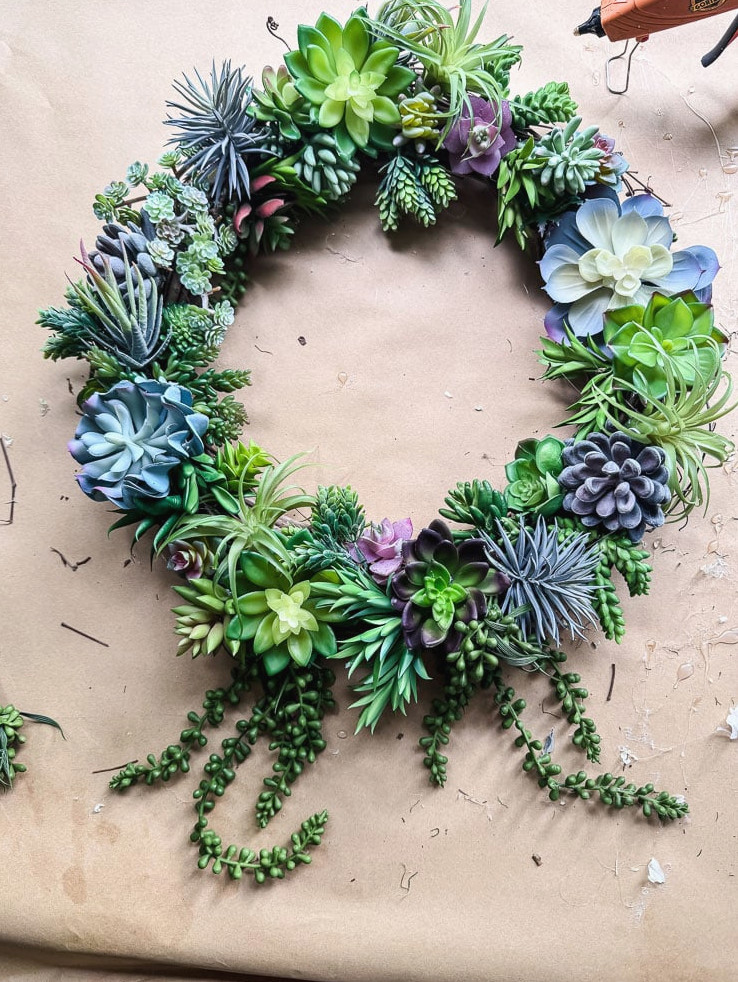
As you arrive at the bottom of the wreath, place your string of pearls there. Allow it to hang downward naturally instead of attempting to push it into the form.
That flowing motion at the base is what creates the wreath’s natural, polished appearance. It interrupts what might otherwise look like an even ring and guides the eye downward in a lovely way.
At first, I added them while moving around the wreath, but ultimately I had to remove and reposition them-it would have been simpler to save them for the very end.
Note: The longest strands from both strings I placed in the wreath needed trimming…they were noticeably distracting. Still, I saved those cut pieces and hot glued them into other bare areas of the wreath (nothing goes to waste around here!)
Step 5: Complete It With Spanish Moss
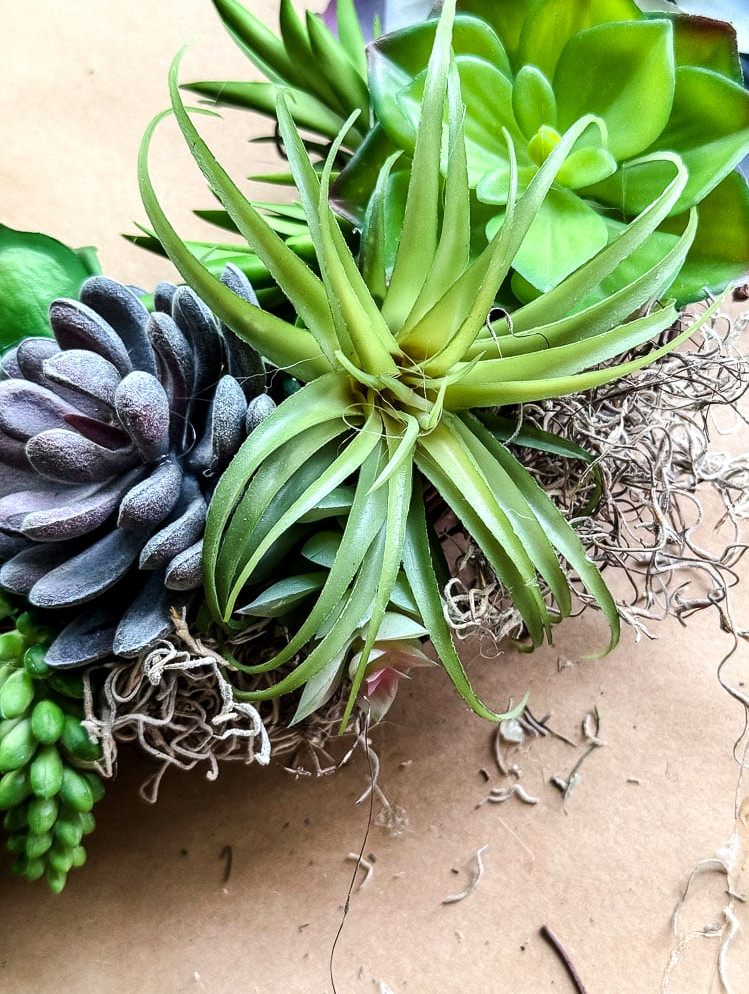
After securing all the succulents, gather small, loose pieces of Spanish moss and tuck them into the grapevine around both the inside and outside edges of the wreath. Work between the succulents. You are not trying to cover the entire wreath; simply fill the areas where the grapevine shows through and smooth out any transitions between succulents that seem a bit sudden.
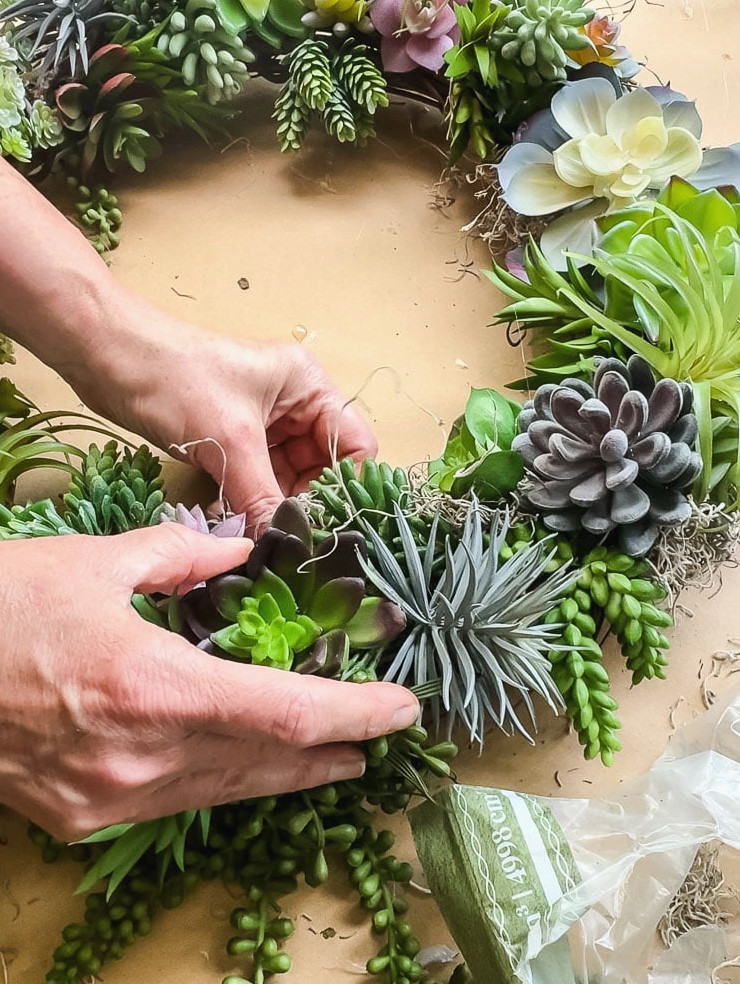
This is the part that gives the entire wreath a natural, completed appearance instead of making it seem overly crafty. The moss blends into the design, though you would definitely notice its absence. Continue working around both sides until you like the result. There’s no need for glue since the grapevine keeps it securely in place.
A Few Things I’d Like You to Know
•You really can’t arrange these incorrectly. I truly mean it. Whenever I felt uncertain about which succulent to place next, I tested a few alternatives. I’m a visual person, so I need to see the options first! Every now and then I would think “ugh, I’m not fond of that” after gluing it down, but hot glue is quite forgiving when you move quickly.
•Let asymmetry work for you. This wreath doesn’t have to form a flawless circle of uniformly spaced rosettes. Its natural, mildly irregular layout is what helps it appear lifelike instead of mass-produced.
•Put on the silicone finger protectors. I included this reminder in the supply list, and I’m repeating it here. Hot glue at wreath-making temperatures can be seriously dangerous.
•Before hanging it, keep one practical detail in mind: this wreath weighs more than a typical faux floral wreath. The succulents really add up! I suggest using a durable wreath hanger or a heavy-duty magnetic hanger for this project. A Command hook is not strong enough for this wreath!
•Hang this wreath on a covered, sheltered door. Mine is displayed on my covered front porch, where it works beautifully: it’s shielded from harsh sunlight and rain, so it should remain attractive for years. Faux succulents will fade and break down when exposed to full sun and changing weather. Provide some protection, and it will serve you well.
•Keep it flat in a box during the off-season. I also keep the plastic zipper bags that bedding comes in for wreath storage (I love a free solution!) Your future self will appreciate it—it helps keep the dust away!.
The Final Takeaway
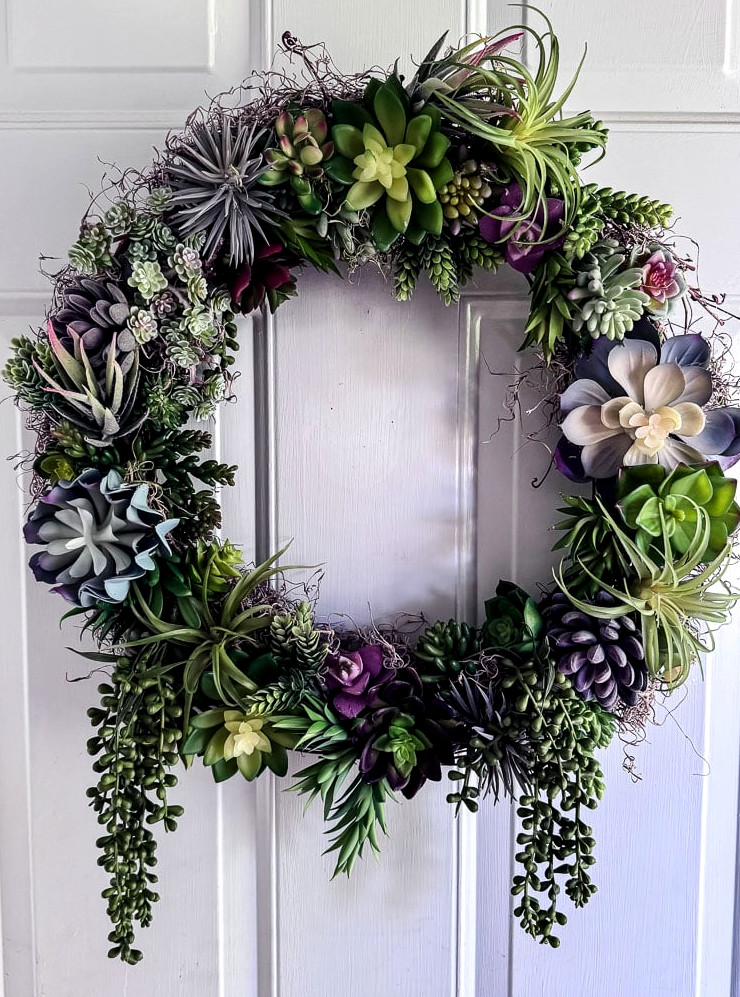
At times, the sensible option is the best one. Making this wreath took me just over an hour, and I already had every supply I needed. It will decorate my front door with a full, beautiful look throughout summer, and I can use it again next year
A living succulent wreath remains on my project list, and this time I’m serious; it’s actually written on my calendar. I’m planning for early spring, giving us the entire summer to enjoy it together. I’ll add the link here once it’s ready.
For now, I’m completely pleased with the faux version on my door—I’m sitting on my front porch (what I call my outdoor office), admiring it while I write this tutorial for you.
Also, if you’re searching for additional wreath inspiration (I have plenty!!) take a look at this collection featuring 40+ ideas for every season & style. You can also read my guide about the essential items to keep in your supply stash when you begin making wreaths (I strongly encourage you to create every one yourself!)
Show off your projects! If this project or any of my other DIY ideas inspires you, I’d be delighted to see your work and feature you in the Reader’s Spotlight gallery. Email a photo to jennifer@cottageonbunkerhill.com
xo, Jennifer
Enjoy projects like this?Don’t miss out! Join my newsletter familyfor more warm, affordable DIY ideas sent directly to your inbox. You’ll receive special tips, advance access to tutorials, and plenty of inspiration to help your home feel personal and full of heart.