Have you ever spotted something gorgeous in a shop, checked the price, and burst out laughing? That was exactly my reaction to Anthropologie’s dried flower frames. Beautiful? Absolutely. Worth the hefty cost? Not to me, especially once I realized I could create my own.
So that’s what I did. It also inspired me to think about the many ways I bring my garden inside—not only through vases, but through lasting projects too. Pressed blooms. Dried displays. Frames like these. Welcome to what I’m calling my Garden-to-Home series, a collection of creations that begin in the garden and finish on your walls, shelves, and tables. First up: DIY dried flower frames modeled after that Anthropologie favorite,
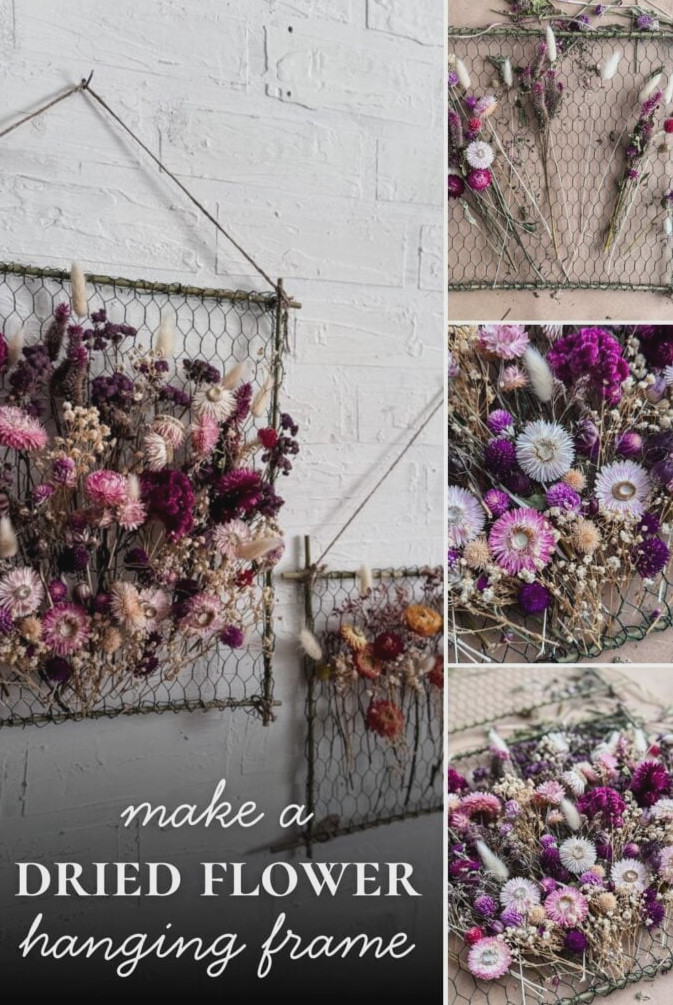
Garden to Home: Transform Your Dried Blooms Into Beautiful Wall Art
This craft began with a major case of Anthropologie envy. Their dried flower frames are absolutely gorgeous, but their prices are another story. I gathered bamboo stakes, a roll of chicken wire, and plenty of dried flowers from my garden, then built my own version.
Welcome to the first official project of my Garden to Home series: easy, lovely ways to bring the things you grow into your living spaces. Today, we’re creating dried flower frames with bamboo stakes, chicken wire, and flowers from my garden (along with a handful of store-bought favorites).
Here Are the Inspiration Pieces From Anthropologie:
Welcome! I’m Jennifer, and I’ve always felt that nature provides the most beautiful art materials. For many years, I’ve preserved New England’s blossoms and greenery through pressing, drying, and crafting. Let me show you how to preserve a small piece of the season and bring it inside—easily and beautifully.
What You’ll Need
The best part of this project, in my opinion, is how affordable it is. Truly, it costs very little, and you may already have all the supplies on hand.
I chose green chicken wire intended for crafts; it’s much lighter and easier to bend than the heavier variety sold at garden centers. Believe me, your hands will appreciate the difference.
For the frame, I selected slender 18-inch bamboo plant stakes. If you prefer a sturdier, more substantial look, simply purchase wider bamboo and trim it to size. There’s no single right way to do it!
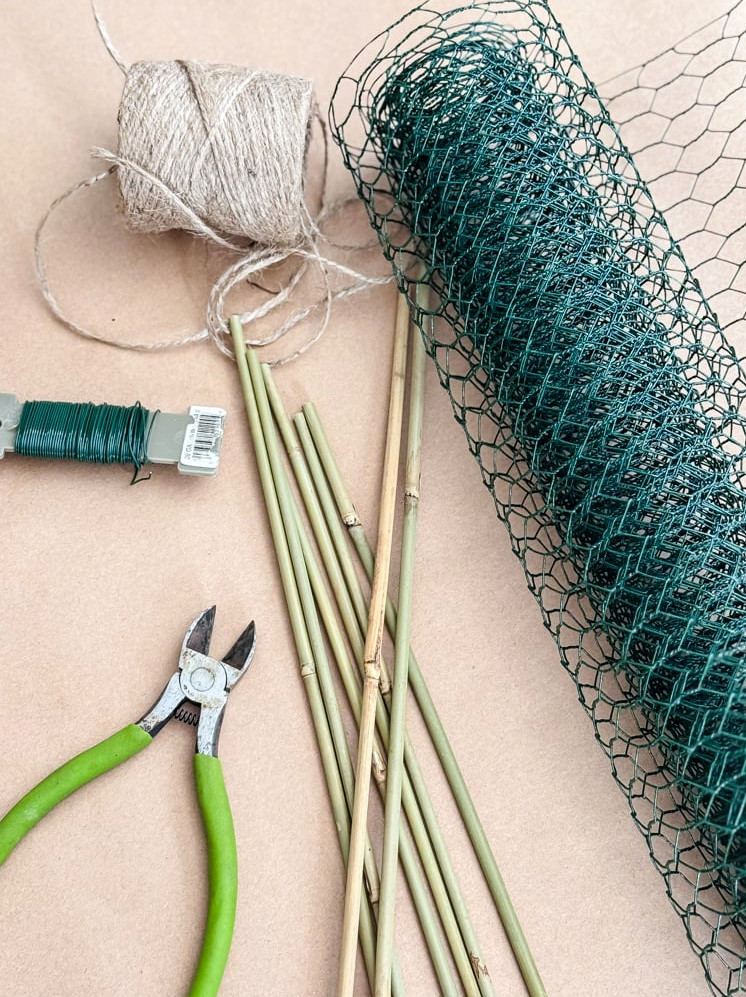
Supplies for This Project
Garden to Home
I’ve always thought the boundary between the garden and the home should be indistinct. This series focuses on stepping across that boundary—bringing outdoor growth indoors in beautiful, enduring ways. New projects shared each month.
Let’s grow together!
Step-By-Step Directions
Let’s begin the tutorial! We’ll start by building the chicken wire frames, then move on to the enjoyable part: embellishing them with dried flowers.
Step 1: Create Your Bamboo Frames
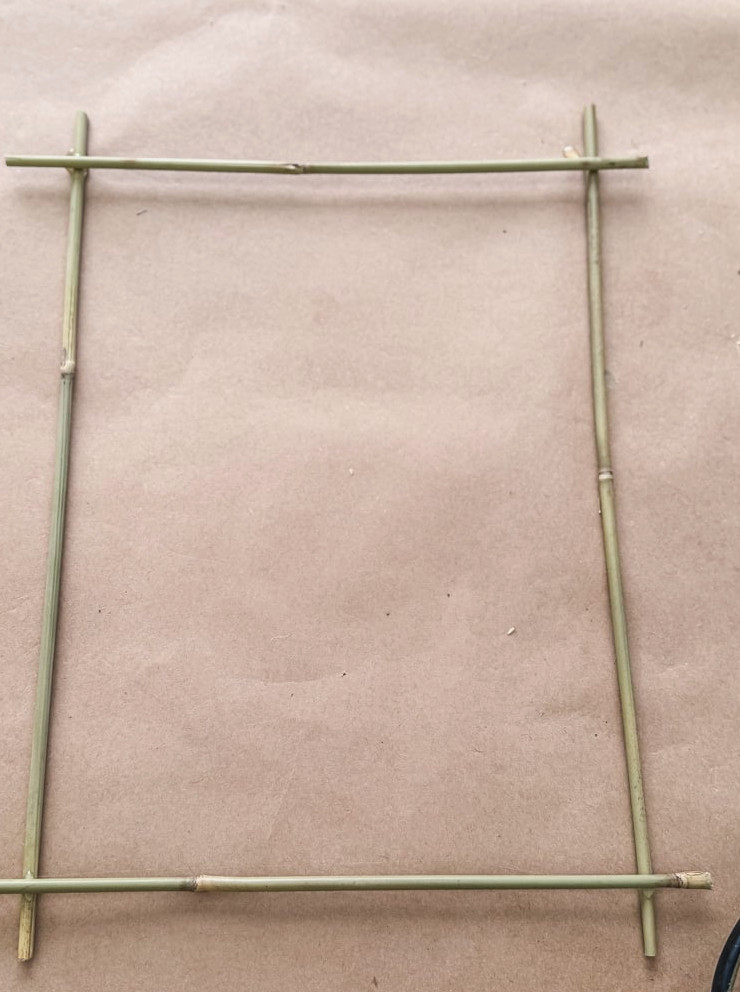
I began by building two bamboo frames: a 16″ x 16″ square and a 16″ x 14″ rectangle. To create each frame, I positioned four bamboo stakes in the desired shape.
I placed a tiny bead of hot glue at every corner to temporarily keep the bamboo steady. After that, I reinforced each joint by wrapping jute twine around it in an X-pattern, tightening it firmly, and tying it off.
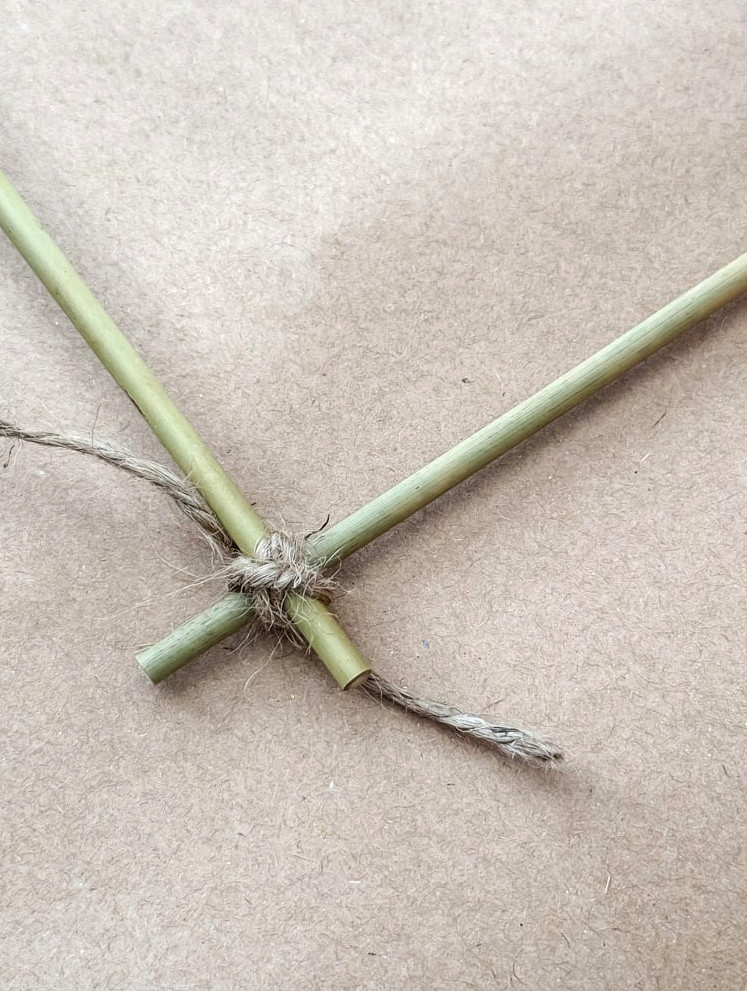
The hot glue only stabilizes everything while you work—the twine provides the actual support. (I discovered this after attempting it without glue first, and the bamboo repeatedly rolled away!)
- Position stakes to form square or rectangular shapes
- Use a small amount of hot glue at the corners to temporarily secure them
- Wrap the joints firmly with twine for added strength
Step 2: Fasten the Chicken Wire
This step may seem more complicated than it really is! Here’s how I did it:
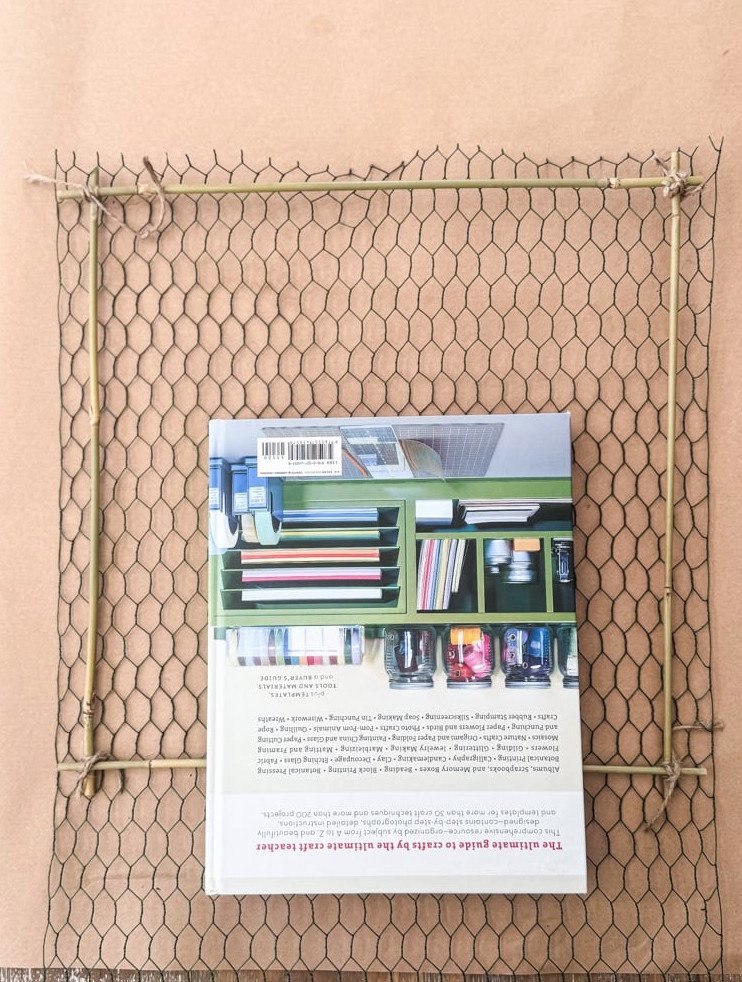
I began by unrolling the chicken wire and placing a weighty book on top to hold it flat. (Chicken wire tends to curl back up on its own!) Once it was flattened, I set my bamboo frame over it, leaving roughly 1 inch of wire extending past the frame on every side.
Put safety first: Wear your gloves! The edges of chicken wire are sharp.
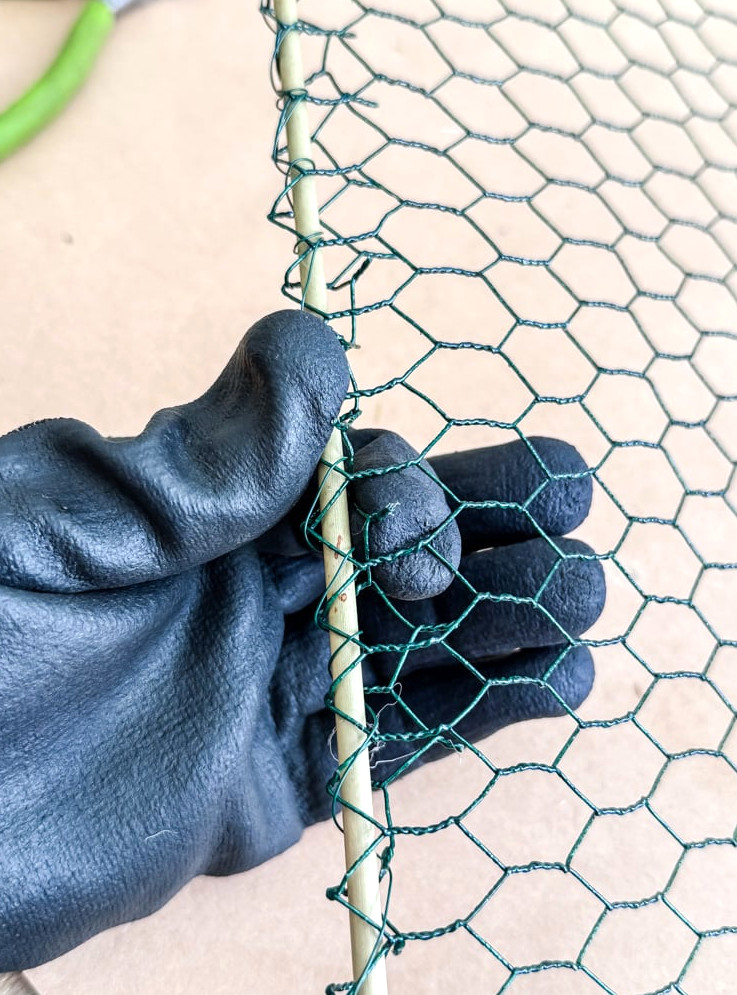
I folded the wire edges over the bamboo frame one side at a time, pressing them snugly around the wood. It’s similar to wrapping a gift—you want the result neat and firmly secured.
- Hold the wire flat beneath a heavy book
- Set the frame on top and fold the edges over (remember to wear gloves!)
Step 3: Fasten the Frame with Floral Wire
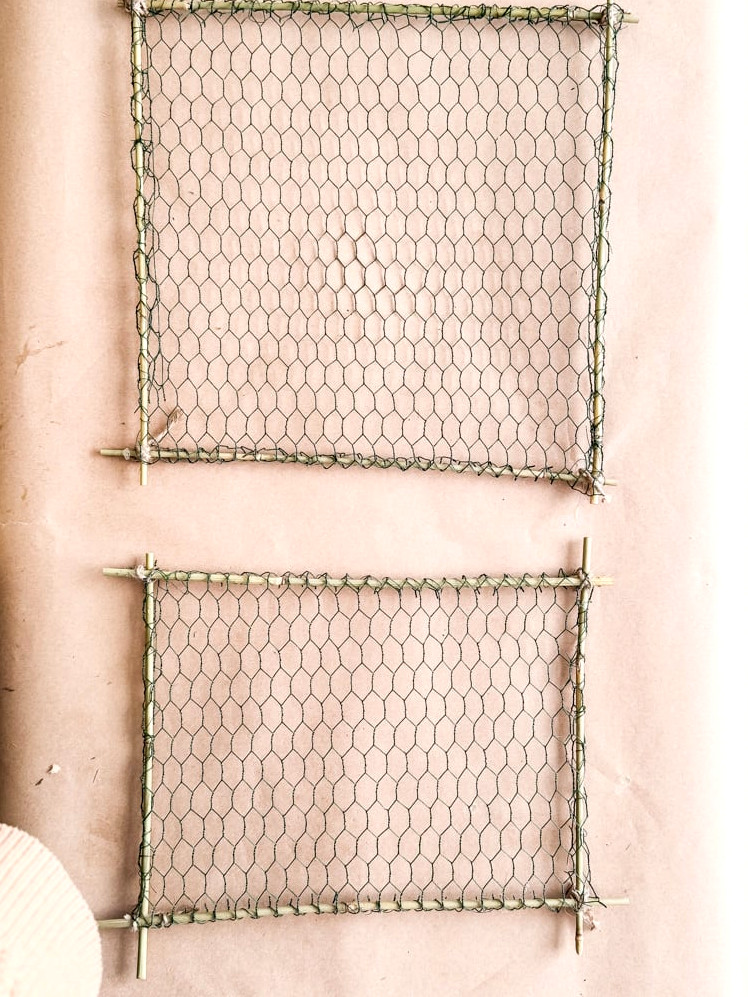
After folding the chicken wire over the frame, I needed to secure it firmly in position.
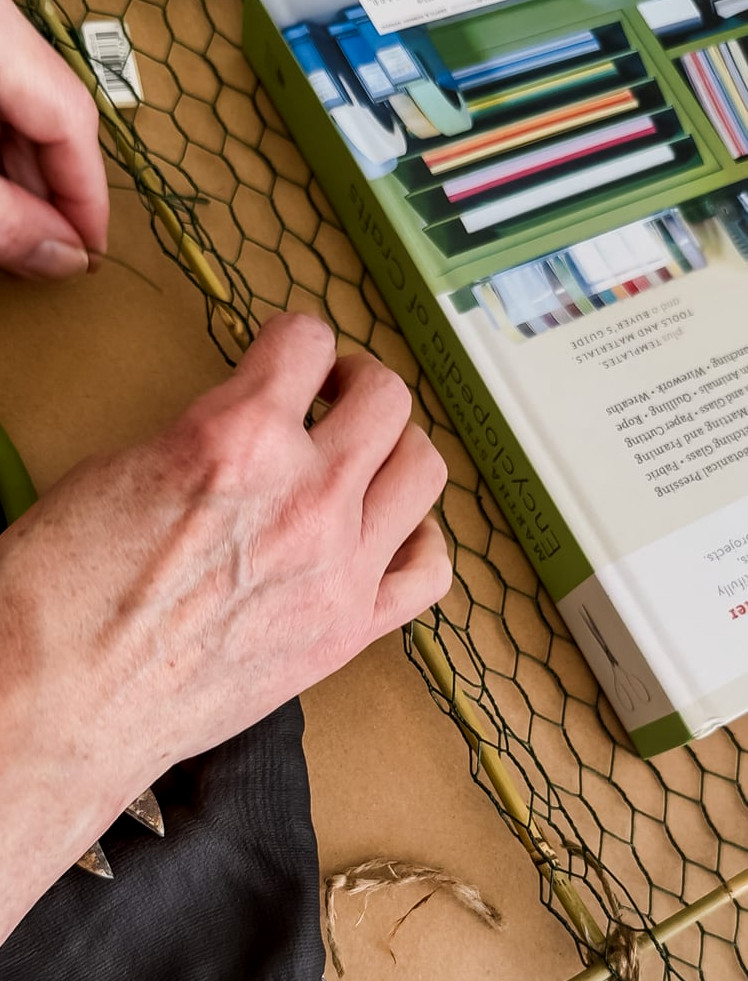
That’s where the floral wire is useful. I pulled out a long length of floral wire from the paddle. Beginning at one corner, I threaded it through the chicken wire openings and around the bamboo frame—similar to using a blanket stitch when hemming a pair of pants.
I continued around each of the four sides, maintaining tension in the wire. At the finish, I twisted it securely and tucked the pointed end underneath to prevent anyone from getting poked.
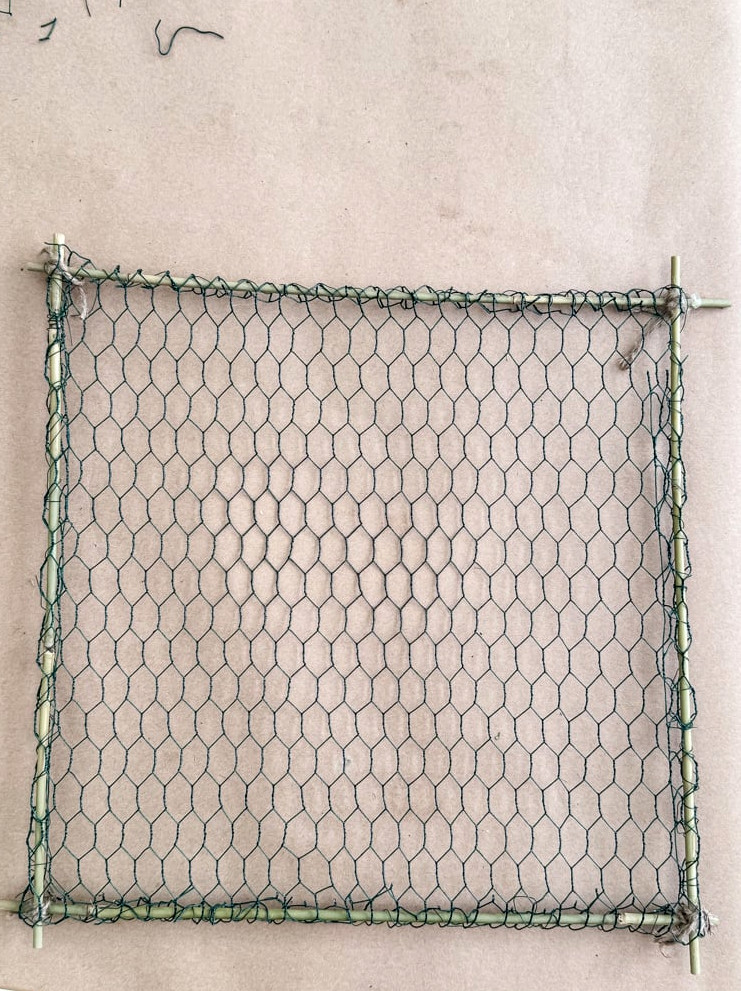
I slipped my gloves on again and carefully flexed the frame—bending it a little before returning it to its original position. This encourages the chicken wire to settle and sit more evenly against the bamboo. Since the wire naturally curves and creases, some adjustment is necessary. Don’t worry if it isn’t completely flat—as long as it remains tight and secure, it’s ready!
.
Step 4: Attach a Twine Hanger
The frame is nearly finished! It only needs a way to be hung.
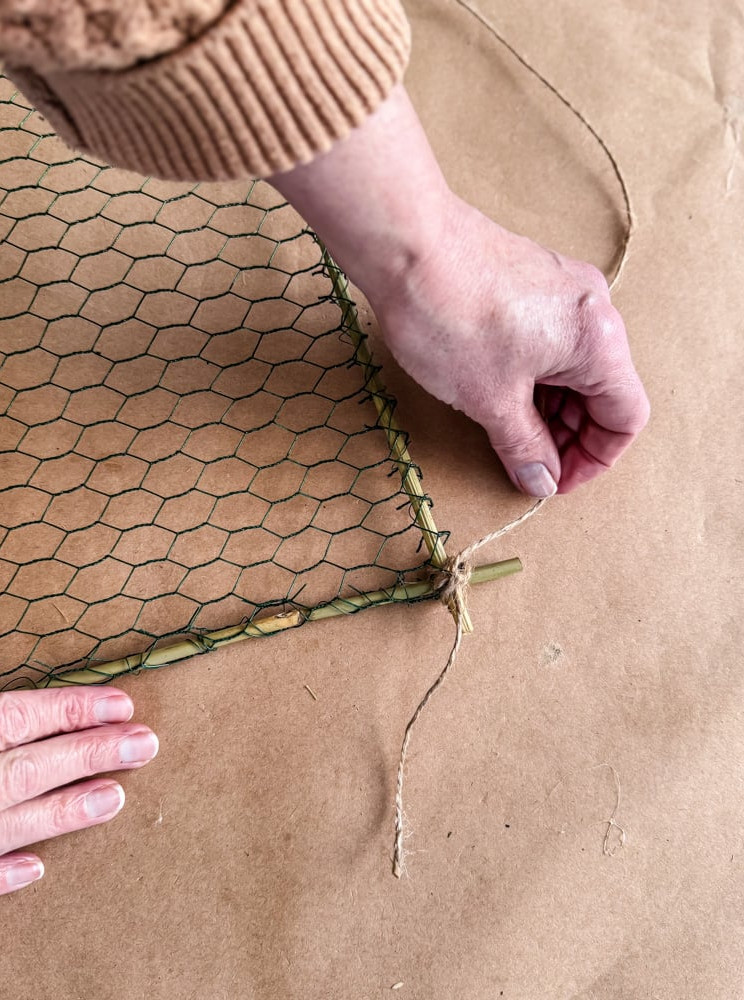
To make the hanger, I trimmed a length of jute twine wider than my frame, using roughly 24 inches for the 18-inch frame. I fastened both ends firmly to the upper corners, forming a loop to hang it from.
Tip: The amount of twine required depends on the ‘drop’ you prefer. Using a longer piece allows the frame to hang farther below the nail. The ideal length will vary based on where you plan to display it in your home.
Adding Flowers To The Frames
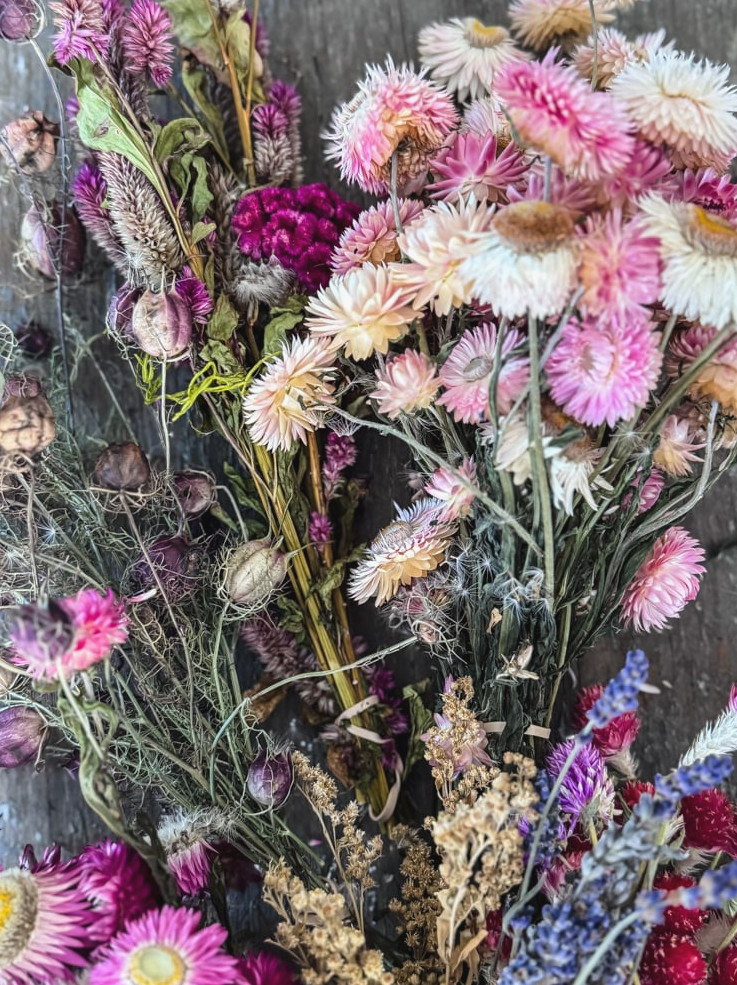
Once the frames are finished, the most enjoyable part begins: decorating them with flowers! I mainly used blooms that I had grown and dried in my summer garden, including strawflowers and gomphrena, plus some purchased baby’s breath and bunny tails for extra fullness.
This is your chance to experiment creatively! There isn’t one perfect method for arranging them.
If you don’t grow your own flowers for drying, that’s perfectly fine. You can find dried florals at craft stores, online retailers, farm markets, and even certain grocery stores. Choose colors and textures you enjoy, then personalize the design.
Flower Materials List
For the Large Square Frame (18″ x 18″):
- Pink, red, and white strawflowers (grown in my garden)
- Pink, purple, and white gomphrena (from the garden)
- Celosia (from the garden)
- Nigella pods (from the garden)
- Cream-colored baby’s breath
- White bunny tails
For the Smaller Rectangle Frame (18″ x 15″):
- Orange and yellow strawflowers (grown in my garden)
- Yellow drumstick flowers (from the garden)
- Cream-colored baby’s breath
- White bunny tails
For The Large Square Frame
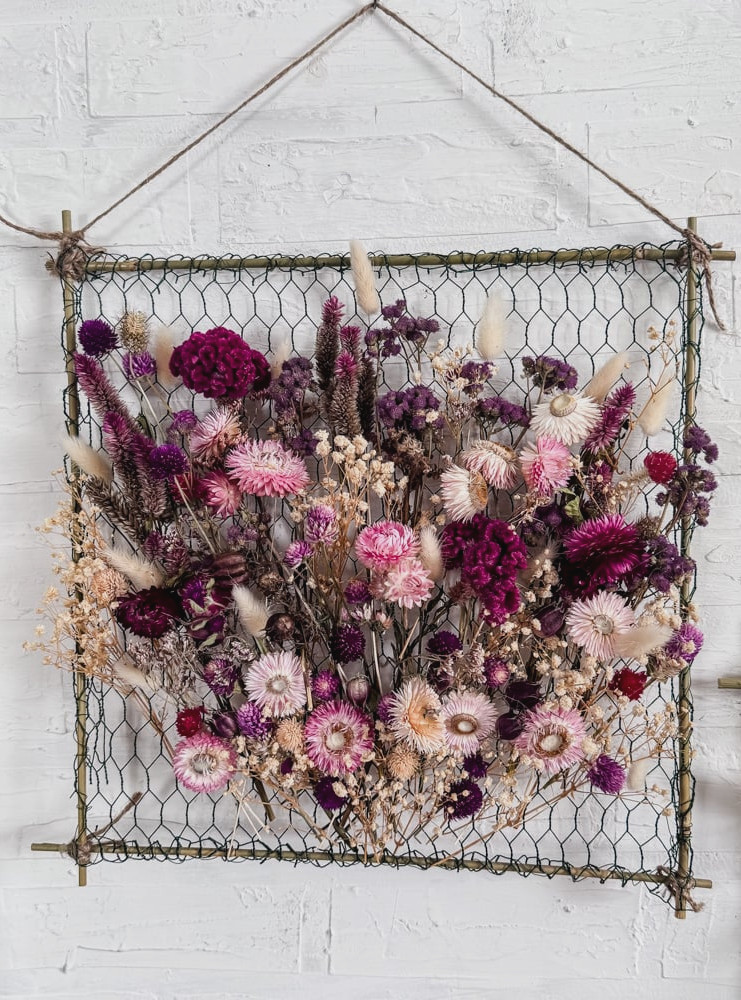
I chose a full, romantic “bouquet” style.
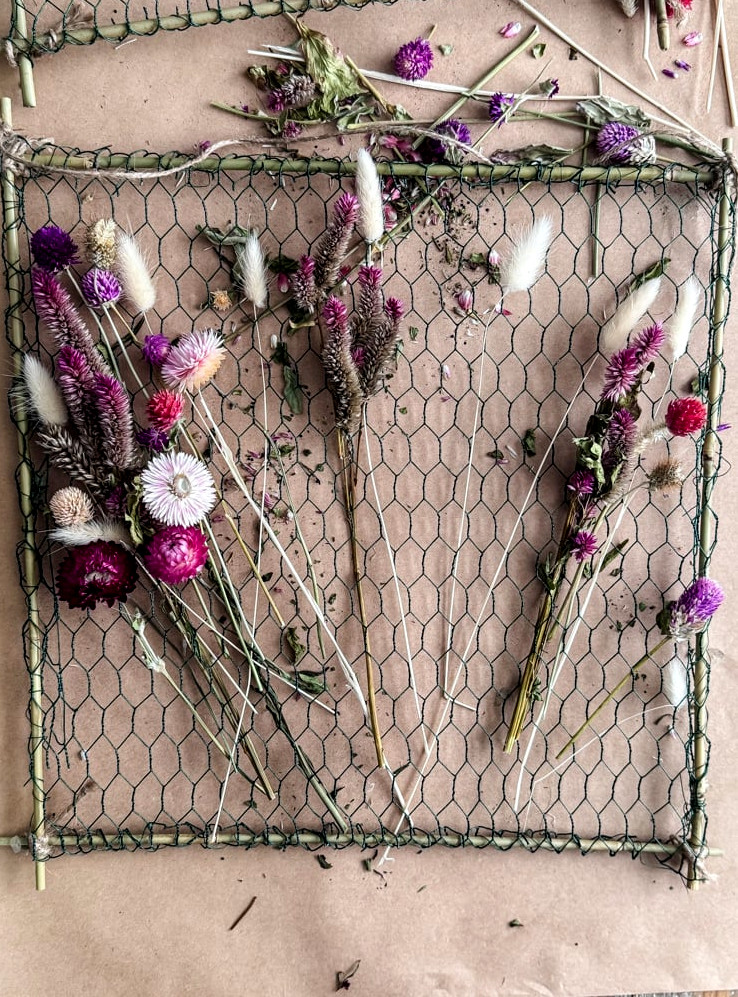
For this frame, I was aiming for a dramatic, romantic appearance with vivid jewel-toned blooms: rich purples and bright pinks, softened by gentle whites and creams so the overall look wouldn’t feel overwhelming.
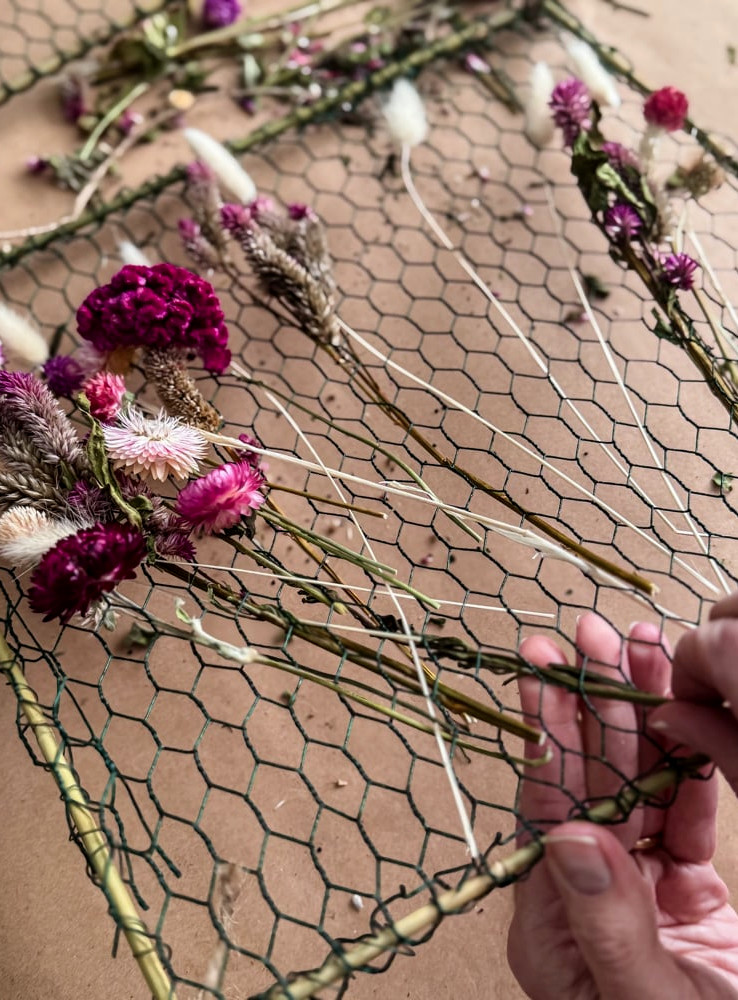
This is how I placed them:
Starting from thefront of the frame, I positioned every flower where I wanted it. Next, I guided the stem through a chicken wire opening toward the back, gently drawing it through until the flower head rested on the wire. This holds the arrangement securely without noticeable glue or ties—just flowers appearing to float beautifully across the wire.
A humorous warning:I became a bit too forceful with a few flowers while threading them through and… well, they ended up headless. It happens! Keep a few extra flowers nearby in case you get as enthusiastic as I did. Believe me, you’ll be glad you did!
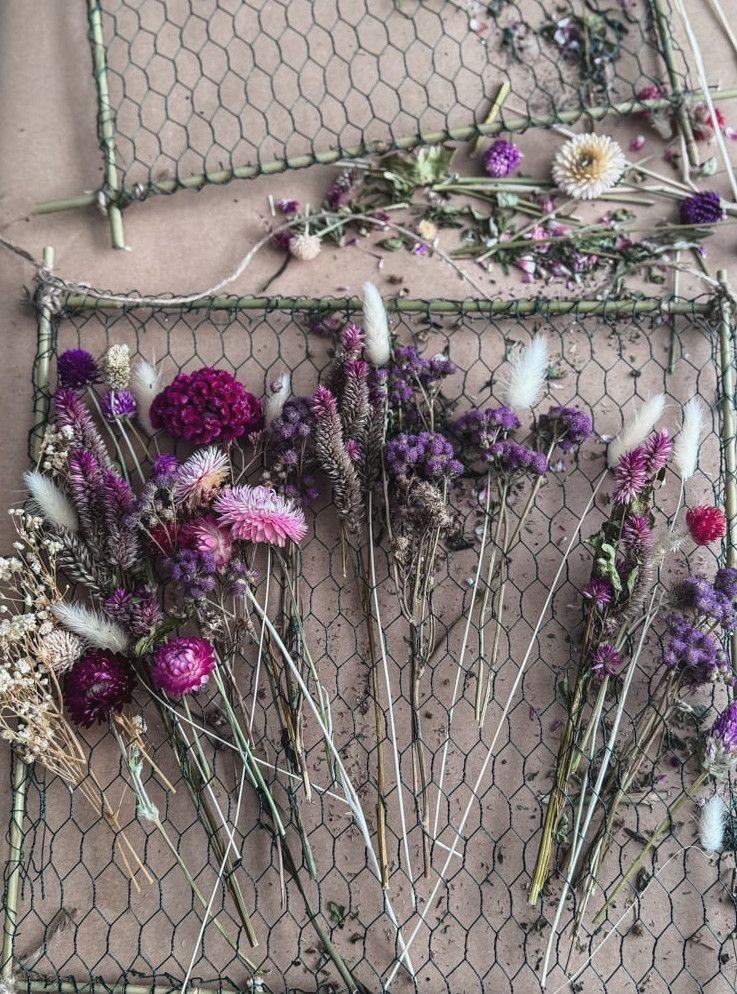
I began along the frame’s left side with my first grouping of flowers, continued toward the middle, and then finished on the right, covering the upper half first. After establishing that top layer, I gradually worked downward, placing blooms a little lower to bring in depth and dimension.
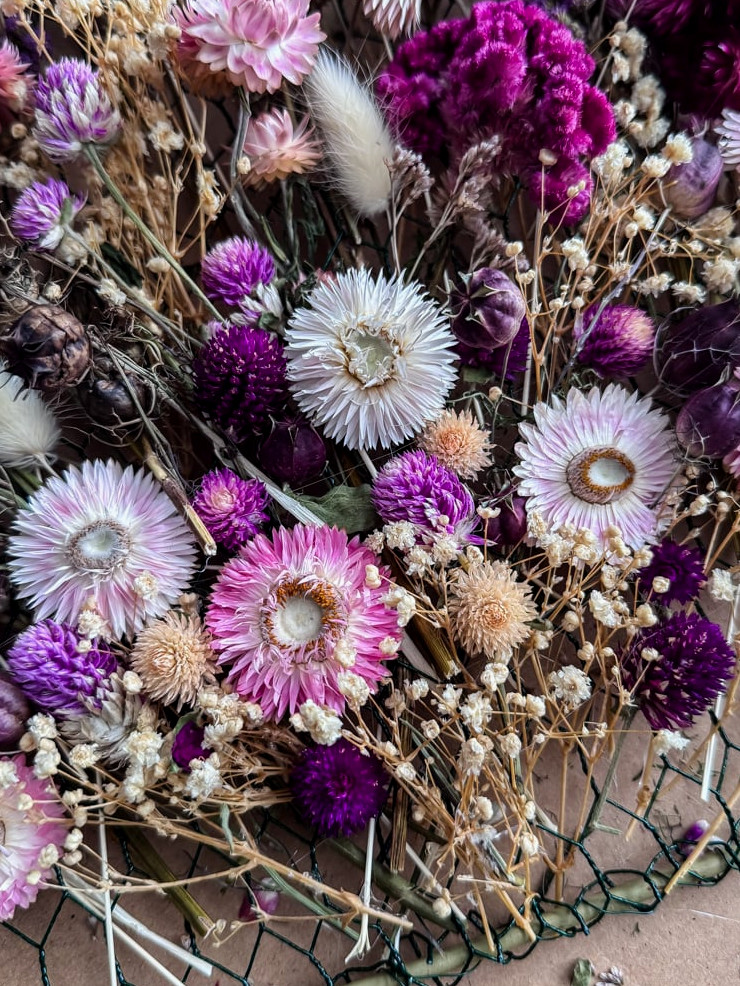
Those flower heads I had accidentally beheaded were perfect for this! In the lower middle area, I used hot glue to attach several strawflower and gomphrena heads that had snapped off earlier. Since they didn’t require lengthy stems, they covered the empty spaces wonderfully.
To finish, I scattered delicate cream baby’s breath across the entire frame, filling thin areas and giving the arrangement a light, romantic atmosphere.
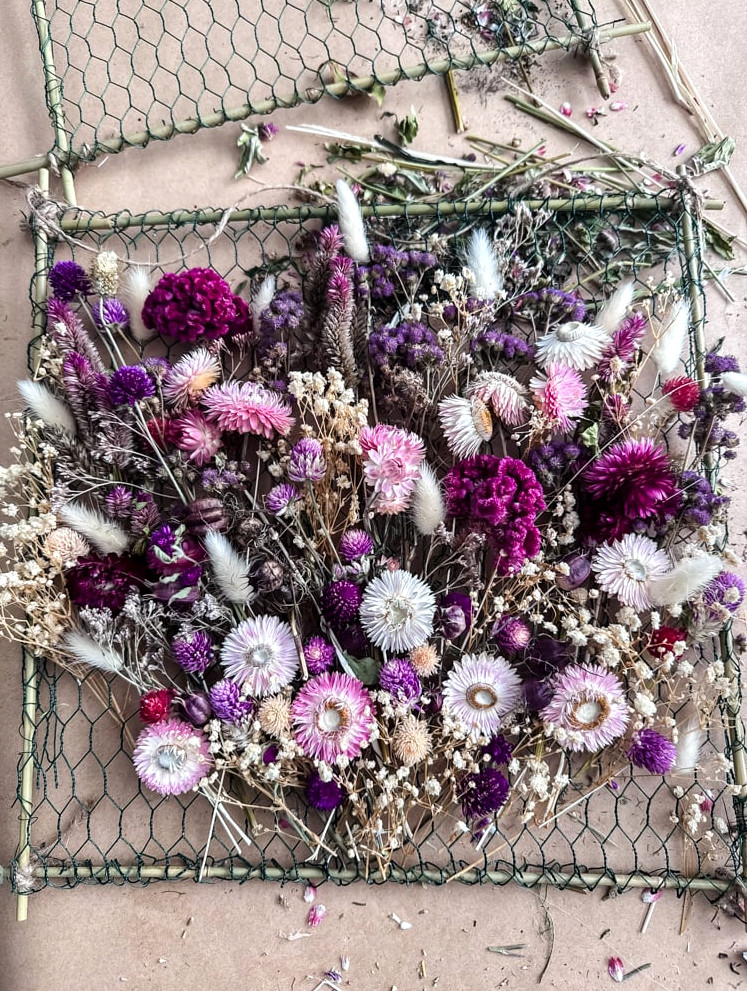
Viewed from a distance, it looks like a lush, layered, three-dimensional bouquet floating in the air.
For the Smaller Rectangle Frame
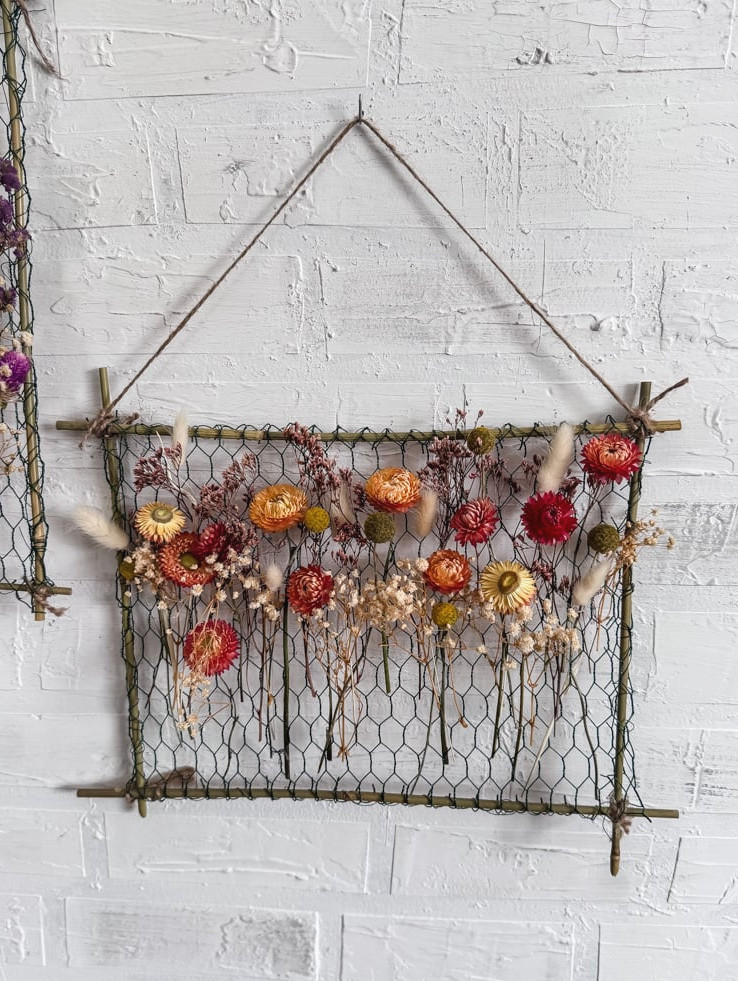
I chose a simpler arrangement, similar to flowers sprouting in a garden bed
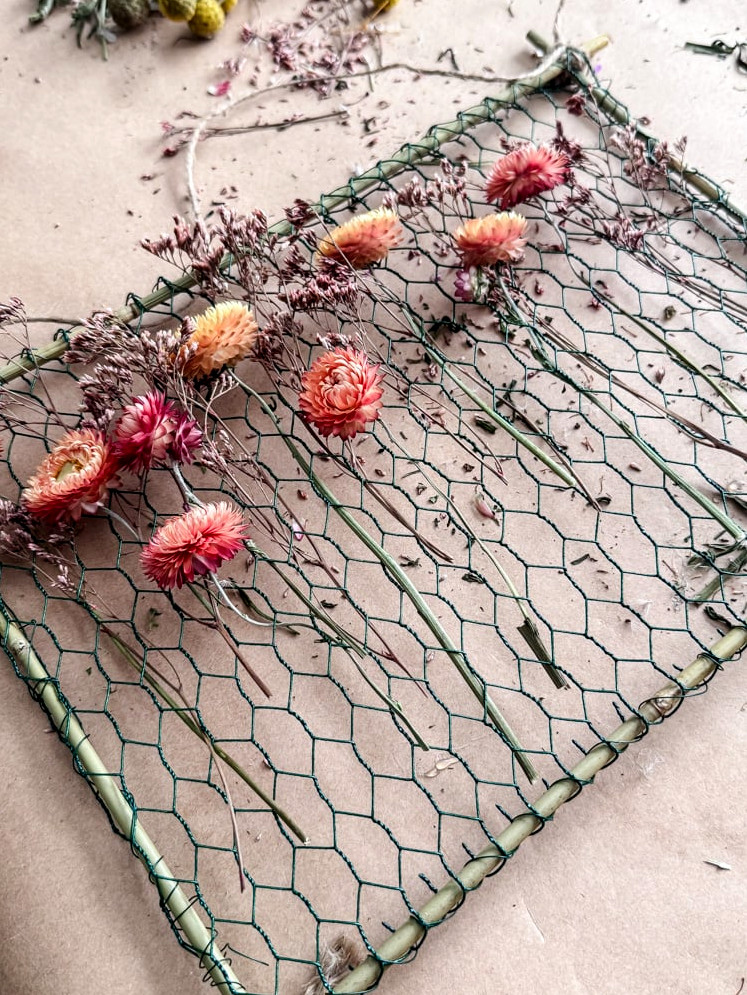
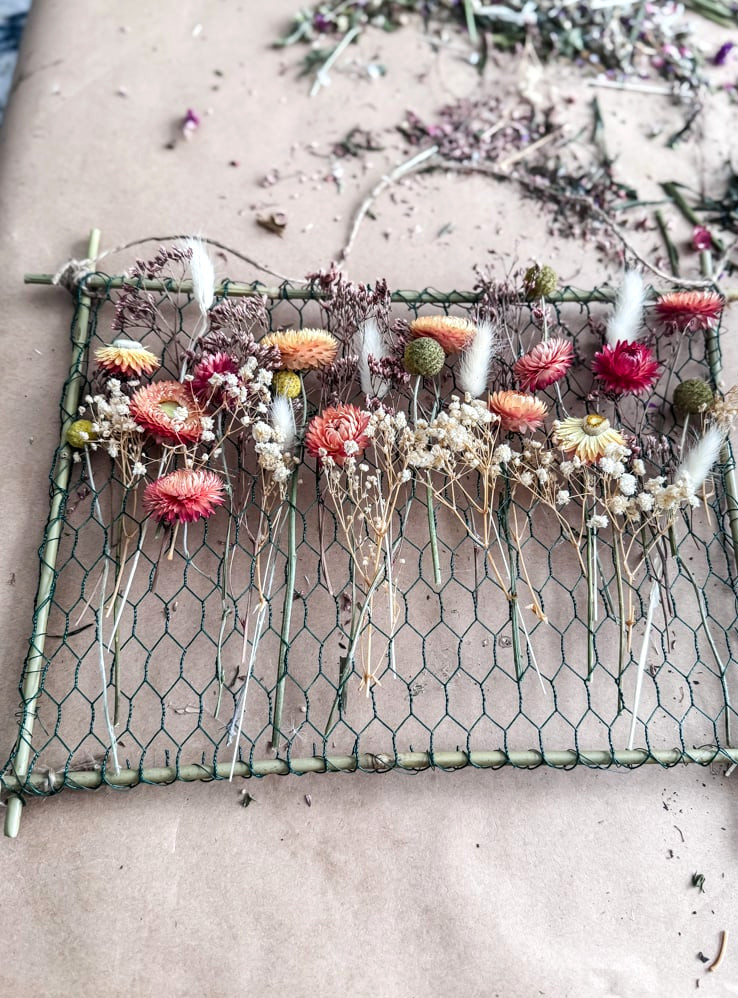
With the 18″ x 15″ rectangle, I took an entirely different approach. Rather than making a dense bouquet, I arranged a straightforward line of flowers across the frame, much like a garden bed.
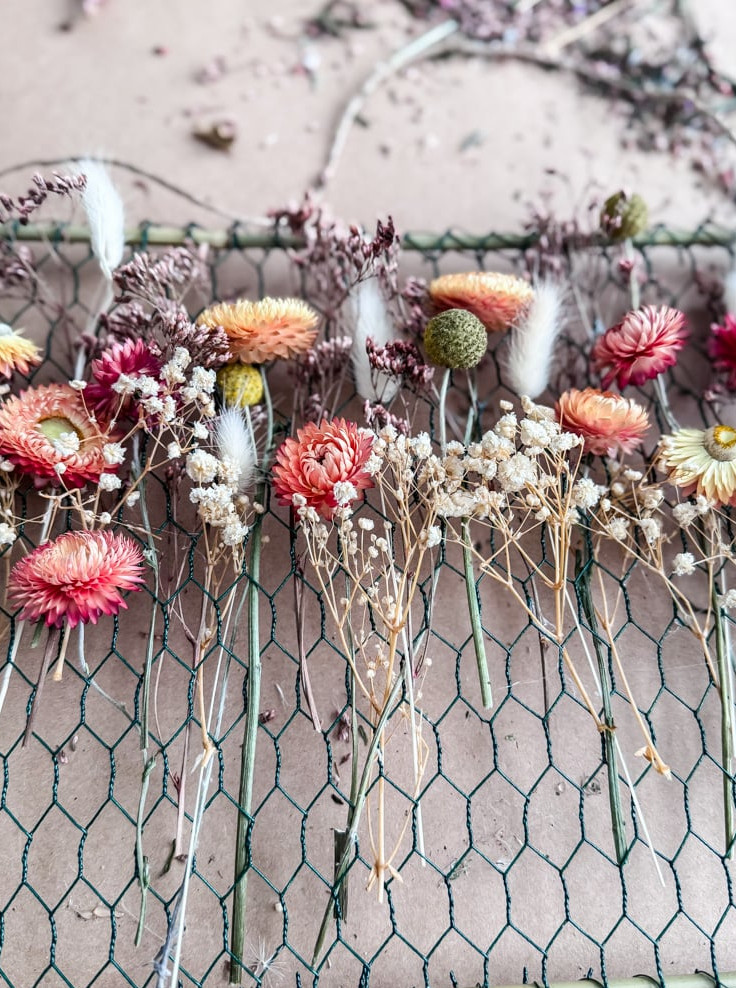
Beginning at one end, I continued across the frame while keeping the stems approximately level and forming a horizontal row of blooms. Compared with the overflowing square frame, this arrangement felt more streamlined and contemporary.
Because this design requires fewer flowers, it’s an excellent option when your garden has only a small amount of available blooms!
Styling & Display Ideas
I placed the large square frame and the smaller rectangle on the corner that leads into the living room. They bring a lovely natural accent to the wall, particularly in late winter when I’m longing for hints of spring!
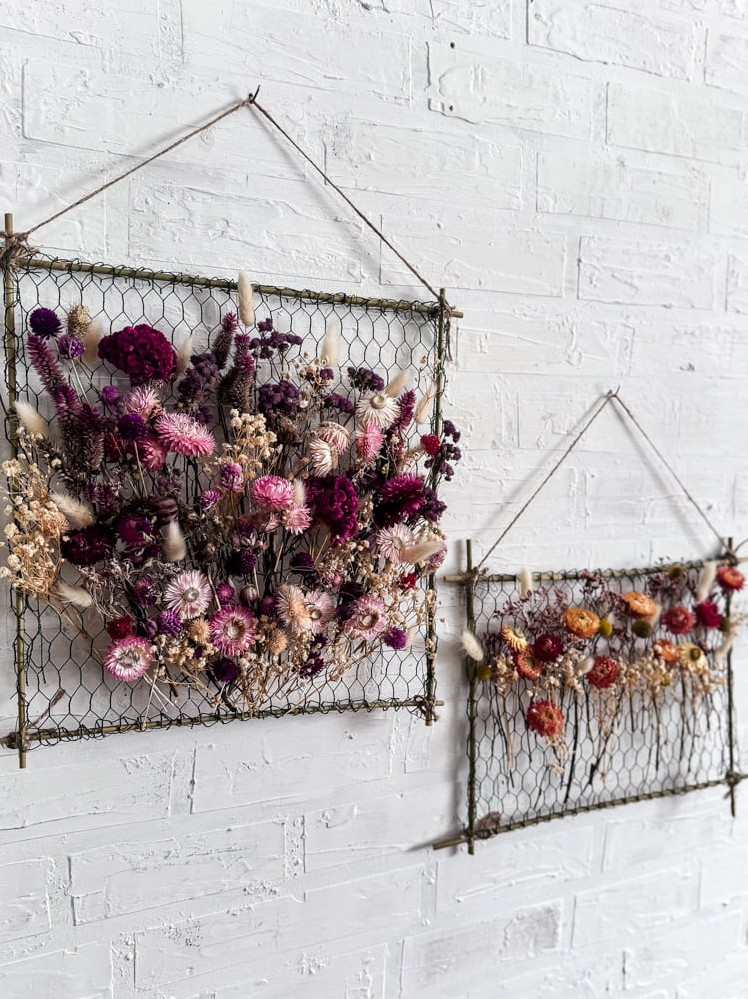
Additional styling options:
- Arrange two or three on a gallery wall
- Prop a larger one against a mantel or shelf
- Decorate with smaller ones seasonally (replace the flowers with fall accents, winter greenery, and more)
- Give them as gifts! They’re wonderfully meaningful handmade presents
Helpful Tips &Ideas
- Select durable dried flowers. Fragile blossoms may lose their petals. Strawflowers, statice, and grasses stay lovely for a long time.
- Put on gloves while working with chicken wire. The edges can be quite sharp!
- Avoid packing it too full. The charm comes from displaying each stem and the open space between them.
- Adapt the frame dimensions. Prefer a 12″ x 12″ design or a wide horizontal one? Simply change the length of your bamboo pieces!
- Faux flowers are another option! Have extra artificial stems on hand? Use them in place of dried blossoms.
PRICE BREAKDOWN
Here’s the comparison:
- Premium store-bought version: $80-100+ for a single frame
- My homemade version (for TWO frames!):
- Bamboo stakes: $7
- Chicken wire: $8
- Floral wire: $3
- Twine: $3
- Dried flowers from my garden/stash: FREE
- Total: Roughly $21 for both frames
It’s Your Turn Now!
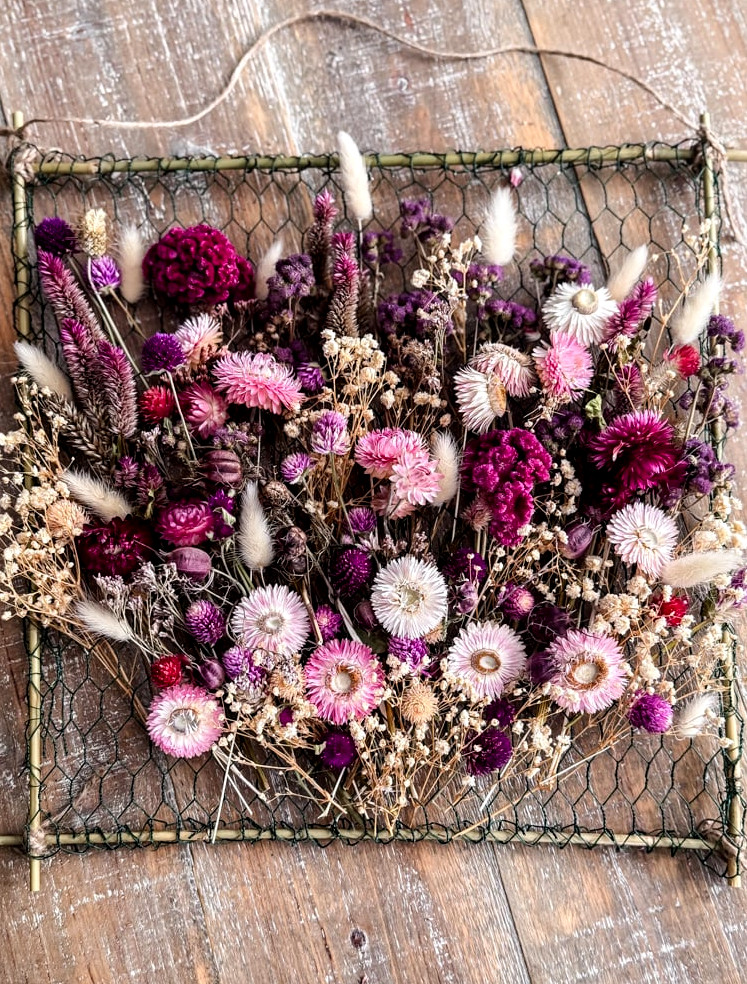
One of the best parts of maintaining a cottage garden has been growing flowers specifically to dry them for crafts and décor. Most of the blooms shown here went into the ground last spring. They began as tiny seeds, almost impossible to see in my hand. By July, they had opened into the brightest pink and orange shades I had ever witnessed. I gathered them all summer, suspended them to dry, and they have remained there since last fall.
This captures the heart of Garden to Home.Turning what grows into something enduring.
If you haven’t grown dried flowers in your own garden yet, don’t let that hold you back. Pick up a few from a craft shop and begin making! And if you’re planning your garden for this year, think about adding several varieties meant for drying. Gardening takes on an entirely fresh meaning when you realize your flowers can remain beautiful well beyond the first frost.
Created your own dried flower frame? I’d be delighted to see it! Send photos to cottageonbunkerhill@gmail.com for a chance to appear in the Reader’s Spotlight.
xo, Jennifer
Enjoy projects like this?Stay connected! Join my newsletter familyfor more warm, affordable DIY ideas sent straight to your inbox. You’ll receive special tips, advance access to tutorials, and plenty of inspiration to help your home feel personal, handmade, and full of heart.