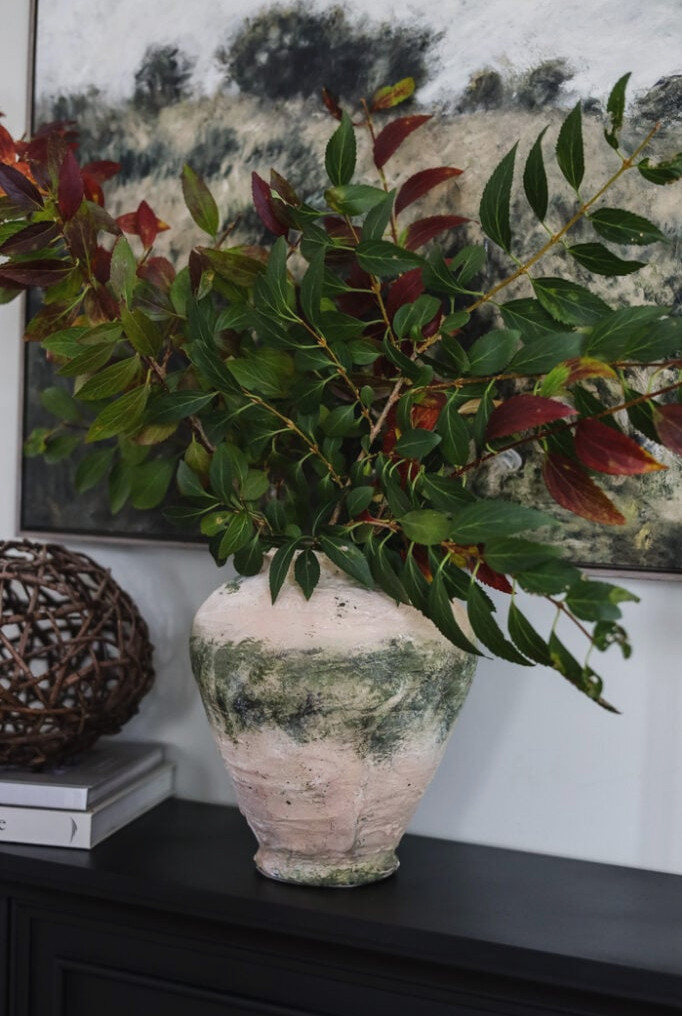
Have you ever loved a Pottery Barn vase but winced when you saw the price? No worries! Today, I’ll show you how to make a beautiful vase inspired by Pottery Barn, all from the comfort of your home. You’ll only need a bit of imagination, a few simple materials, and a thrifted vase.
In this project, I’ll walk you through turning a thrift-store treasure into an elegant vase. After just a handful of easy steps, you’ll be surprised by how much of a difference a little DIY effort can make. So, let’s begin and show that you can recreate the Pottery Barn look yourself!
From Thrifted Find to Affordable Style: Give Your Vase a Pottery Barn Makeover (Without Spending Much!)
Have you ever become completely smitten with a Pottery Barn item, only to come back down to earth after seeing the price? I certainly have! Recently, I came across their new Tuscany Terra Cotta Vase and immediately adored it. Unfortunately, its $299 cost quickly spoiled the excitement. With that amount, I could almost refresh my entire living room!
Still, I wasn’t about to let the expensive price stop me. After examining the pictures, I realized I could reproduce the look at home for much less. My next stop was my secret source: the thrift store. Thrift shopping is an excellent place to discover distinctive, inexpensive pieces that can be transformed into something genuinely remarkable.
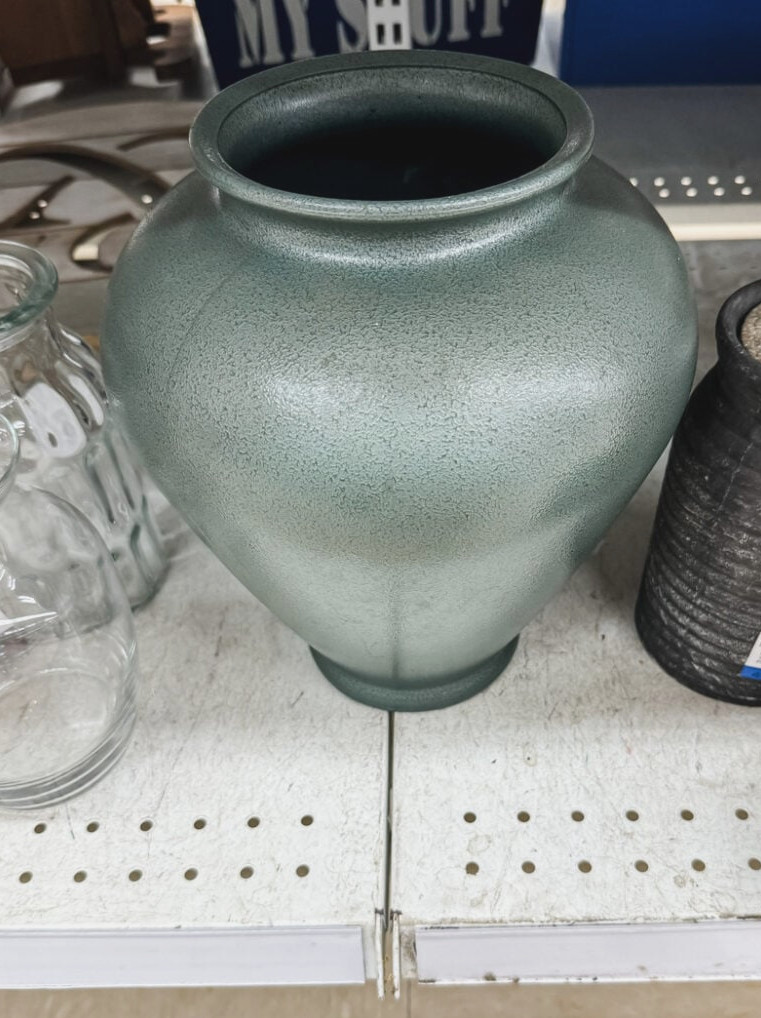
While browsing the bottom shelf in the vase section at my nearby Savers, I found one with the ideal shape and dimensions for my Pottery Barn-inspired version. It’s a glass vase that had already been spray-painted green by someone else.
With the vase in hand, it’s time to begin giving it a new look. Below are the supplies I used, along with the paint shades.
Supplies
- Thrifted vase (choose a larger, rounded bulb-shaped vase)
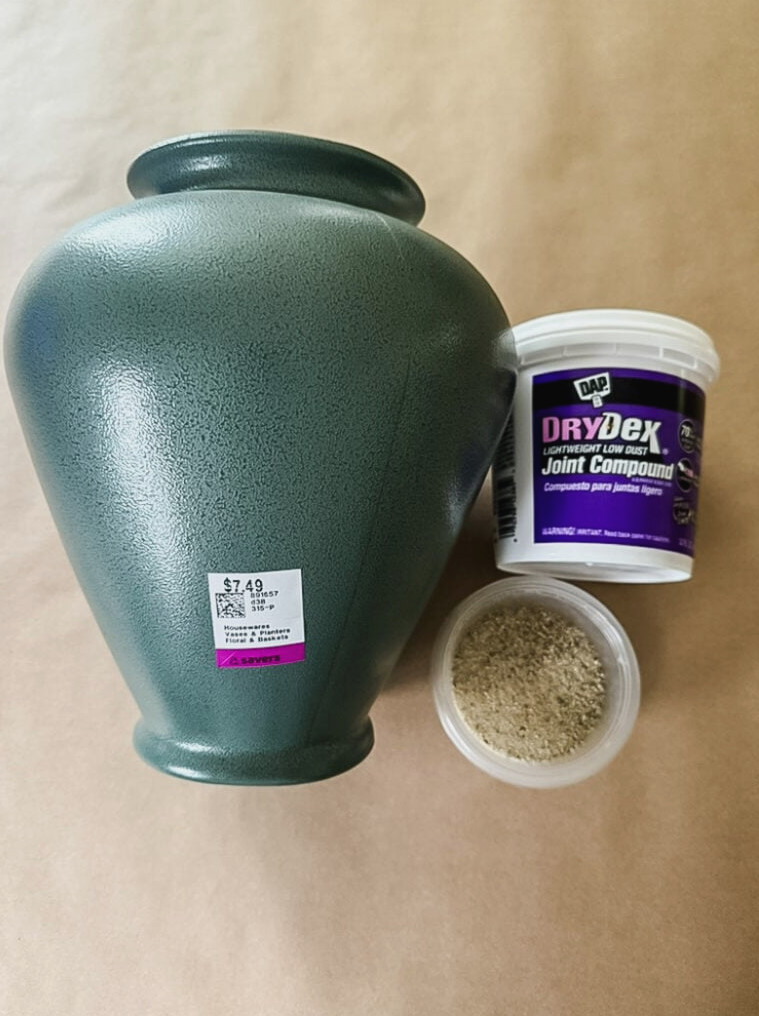
- Joint compound (do not substitute spackle!)
- Sand
- Paint – Base layer: Folk Art Matte Linen Toile
- Paint – Neutral shades: Folk Art Vintage White, Apple Barrel Lite Mocha, Apple Barrel Territorial Beige (all matte finishes)
- Paint – Dark green accents: Apple Barrel English Ivy Green, Folk Art Pure Black
- Paintbrushes
- Drop cloths or newspaper (to protect the work area)
- Sealant (optional)
Instructions
Now comes the enjoyable part!! Let’s transform this vase with a fashionable new finish. For this project, I’ll begin by applying a textured foundation with one of my favorite methods. Then, I’ll use several neutral paint shades and techniques to achieve an aged pottery effect.
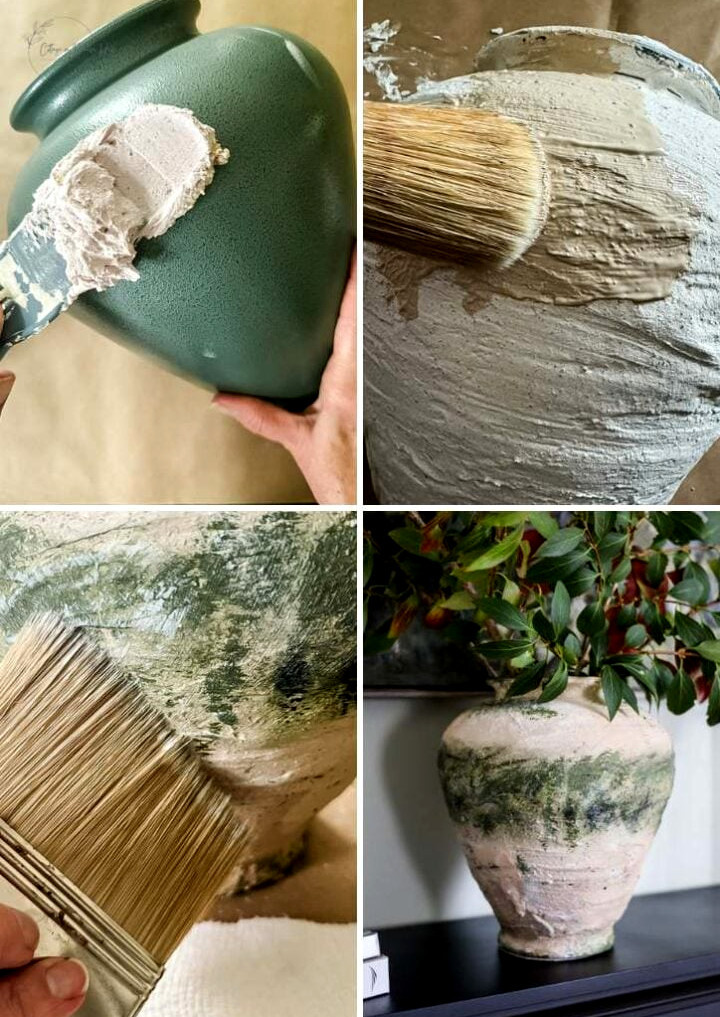
We’ll begin by applying texture to the vase to create that weathered pottery appearance. This gives the piece a more genuine and natural-looking finish.
After the textured layer has completely dried, you can move on to adding color and developing the aged pottery effect.
Building a Textured Foundation: The Starting Point for a Pottery Finish
Looking for a quick way to achieve an aged pottery effect? The key is one straightforward material: joint compound.
This useful construction product, commonly located in the paint section of home improvement shops, works wonderfully for bringing texture and dimension to your creations. Remember to choose joint compound rather than spackle.
To make the finish feel more like genuine pottery, I mixed a small amount of play sand into the joint compound. It adds a coarse surface that resembles the Pottery Barn-inspired vase.
If you don’t have sand available, there’s no need to be concerned. You can still achieve a lovely textured coating using only joint compound.
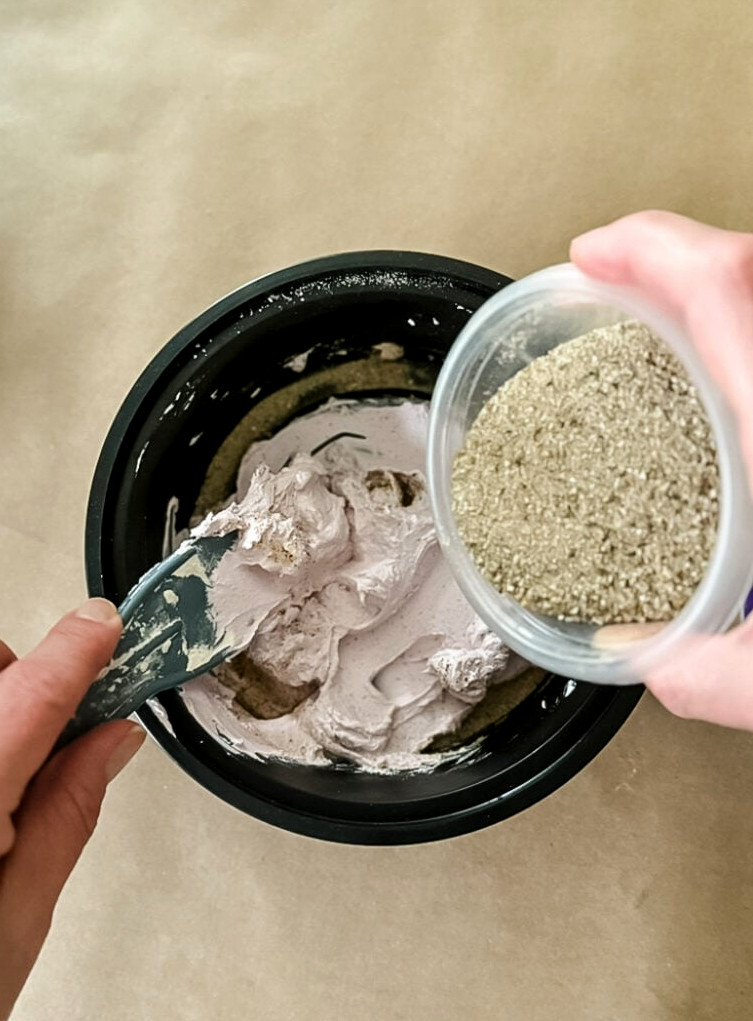
Combine both ingredients in a disposable bowl until the texture reaches your preferred level of coarseness. Begin with a generous spoonful of joint compound, then gradually add sand until the mixture appears gritty.
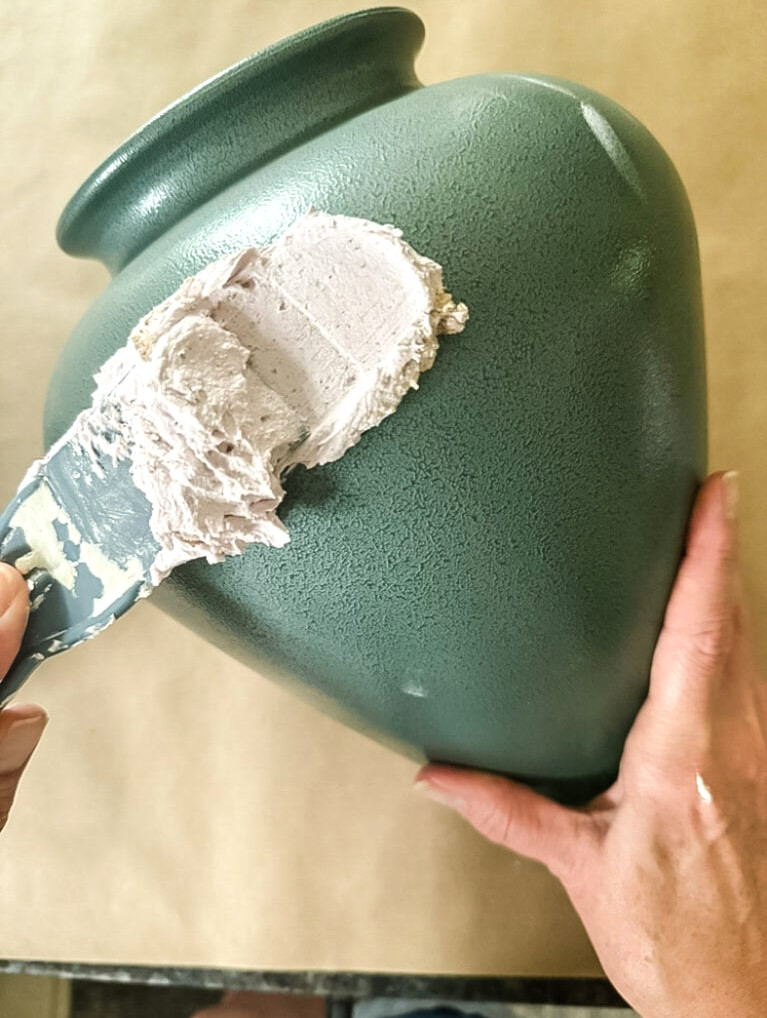
Apply the joint compound across the whole vase. After covering it, smooth the coating with a putty knife or even your fingertip. If you notice raised spots or irregular sections, lightly soften them with a wet finger or moist paper towel.
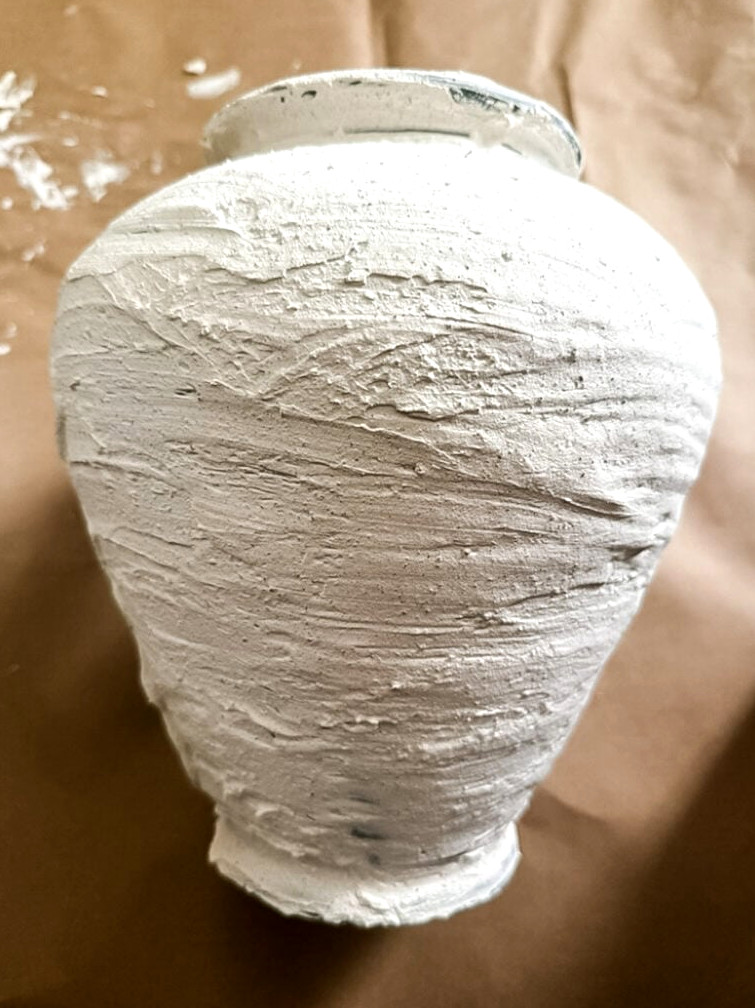
Wait until the joint compound has dried thoroughly before proceeding. This can require several hours or even a full night.
Applying the Base Coat
After the joint compound has fully dried and become firm, you can coat the vase in a single neutral shade. For the vase’s primary color, I chose Folk Art Matte Line Toile paint. Any matte paint in a medium tone will do.
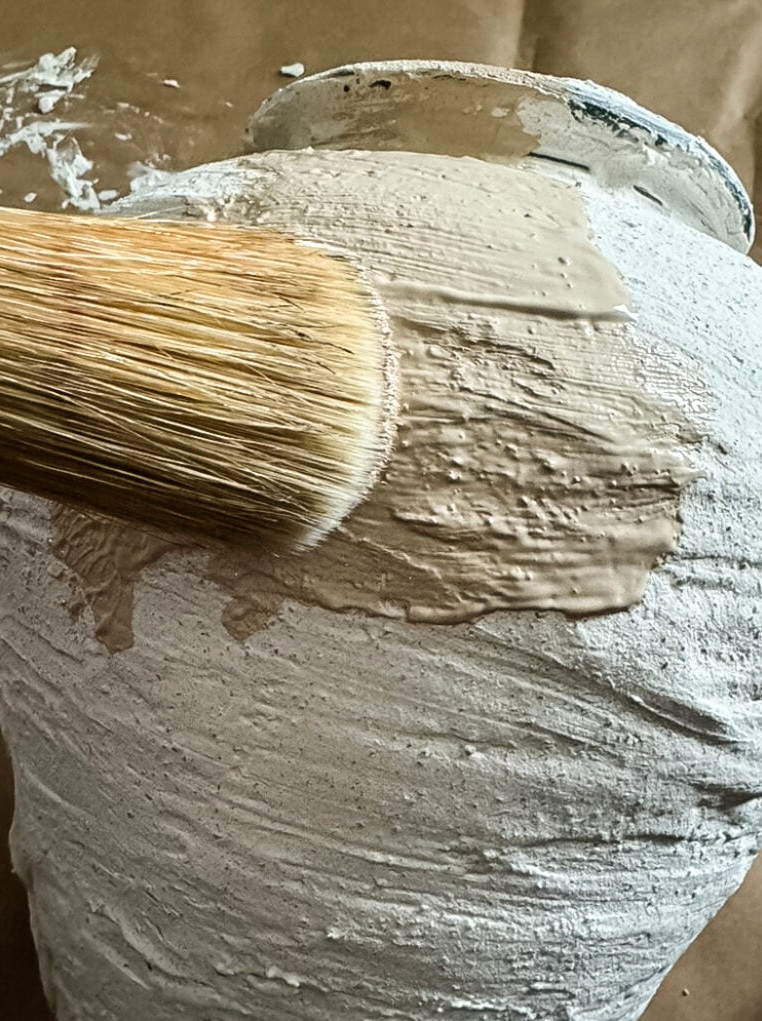
For projects like this, I enjoy working with large, thick paintbrushes because they make painting much faster and simpler. Although they’re commonly used with chalk paint, they’re also excellent for this kind of craft.
Building Dimension with Neutral Paints:
Once the beige base layer is dry, you can create more dimension in the DIY vase transformation by adding additional neutral beige and brown shades.
Pour a little of each neutral color onto a paper or plastic plate. The shades I’m using here are Folk Art vintage white, Folk Art linen toile, Apple Barrel lite mocha, and Apple Barrel territorial beige.
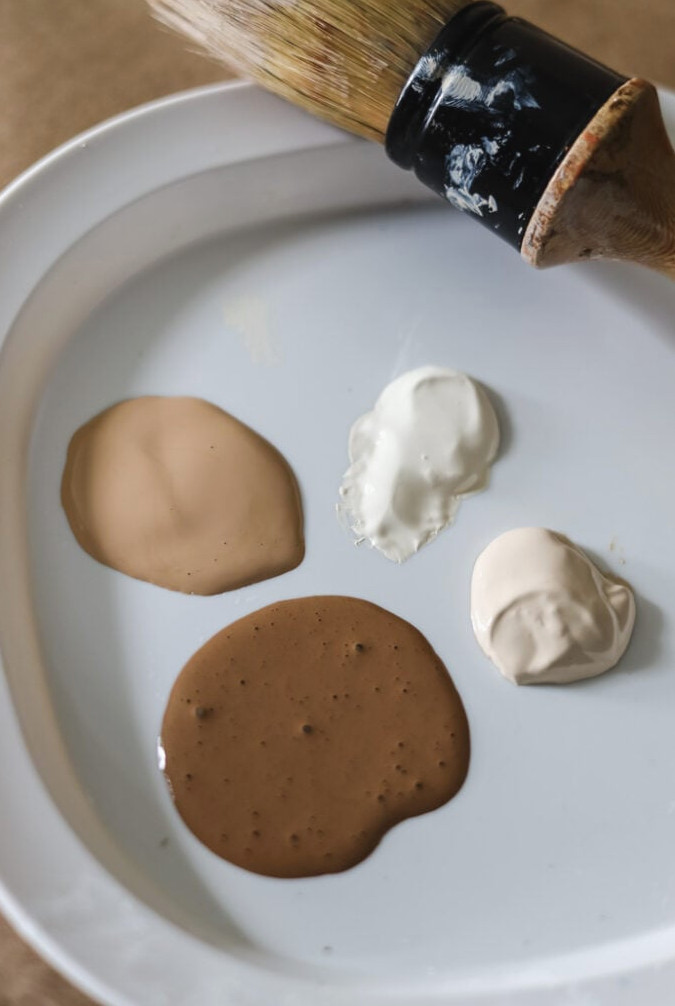
Work with the same paintbrush as you layer the colors. Keep a paper towel nearby as well, since you’ll need it to blot away excess paint.
Dip only the tip of your brush into one shade, then dab it against a paper towel to remove the extra paint. The goal at this stage is a soft, understated finish.
Lightly dab the brush onto the vase. Focus mainly on the lower third, along with the rim and tip of the vase; the center will receive a bolder treatment.
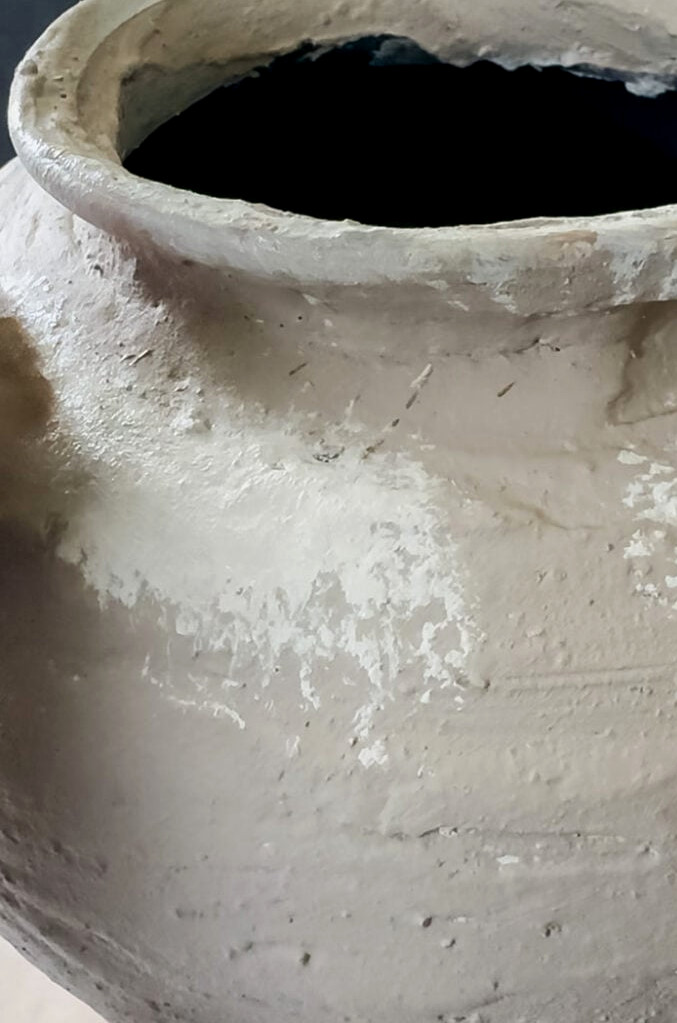
There’s no need to analyze it too much! Alternate between the paint colors, blot off the excess, and dab the brush over the vase. Blend the shades into one another so the transition points disappear and the result looks smooth.
Forming the “Ancient Pottery” Finish
Next, create an aged pottery-style finish on the vase with a dark green paint, Apple Barrel English Ivy Green, along with a small amount of black. The Pottery Barn inspiration piece is completely black, but green suits my taste and decorating style more.
Be sure to apply the paint with a gentle hand, which helps produce a more realistic, weathered finish.
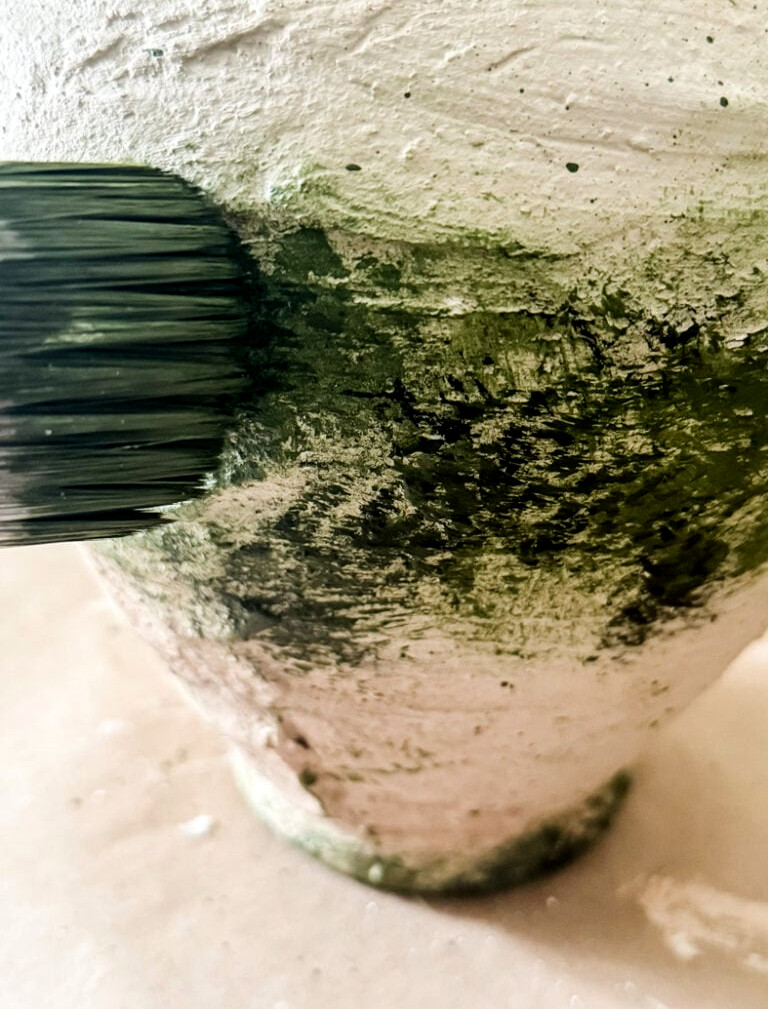
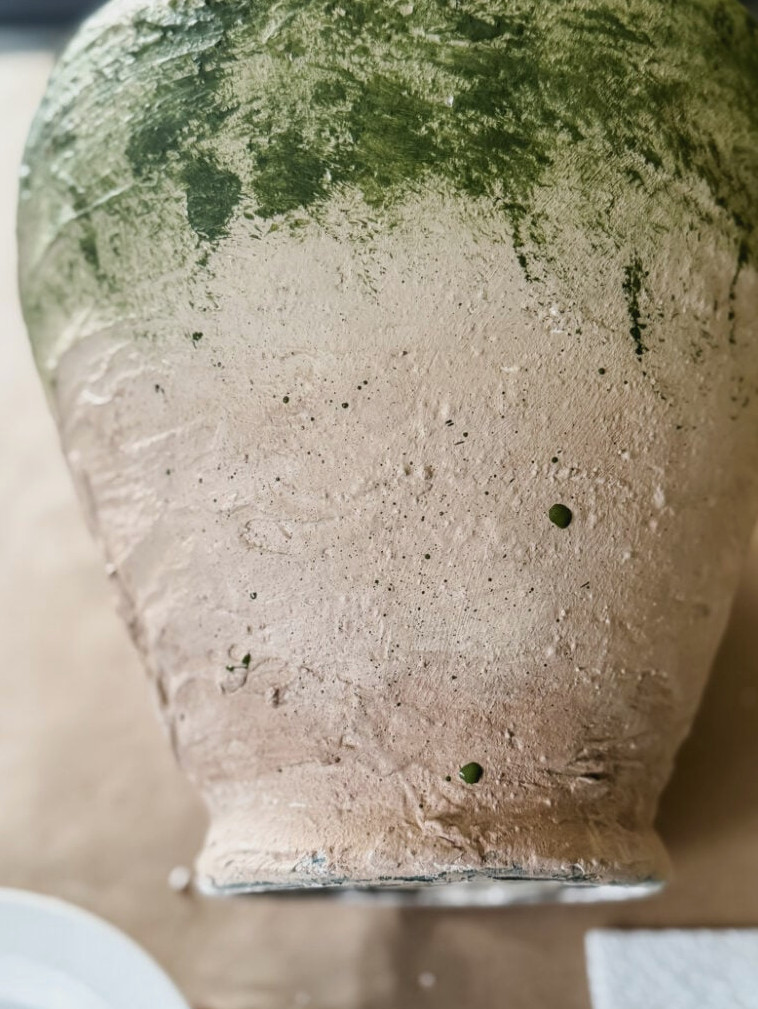
Begin dabbing the dark green paint around the vase’s center section. Every so often, place a tiny dab of black over the green to add an aged quality.
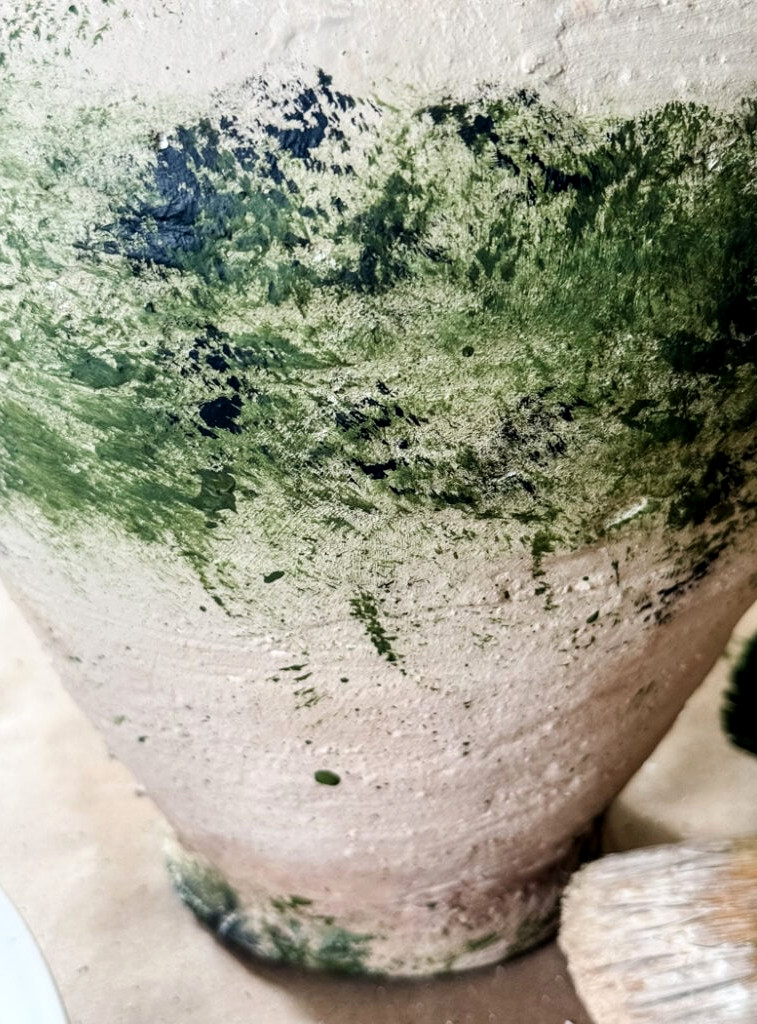
Apply some green along the lower rim as well as around the upper rim and edge.
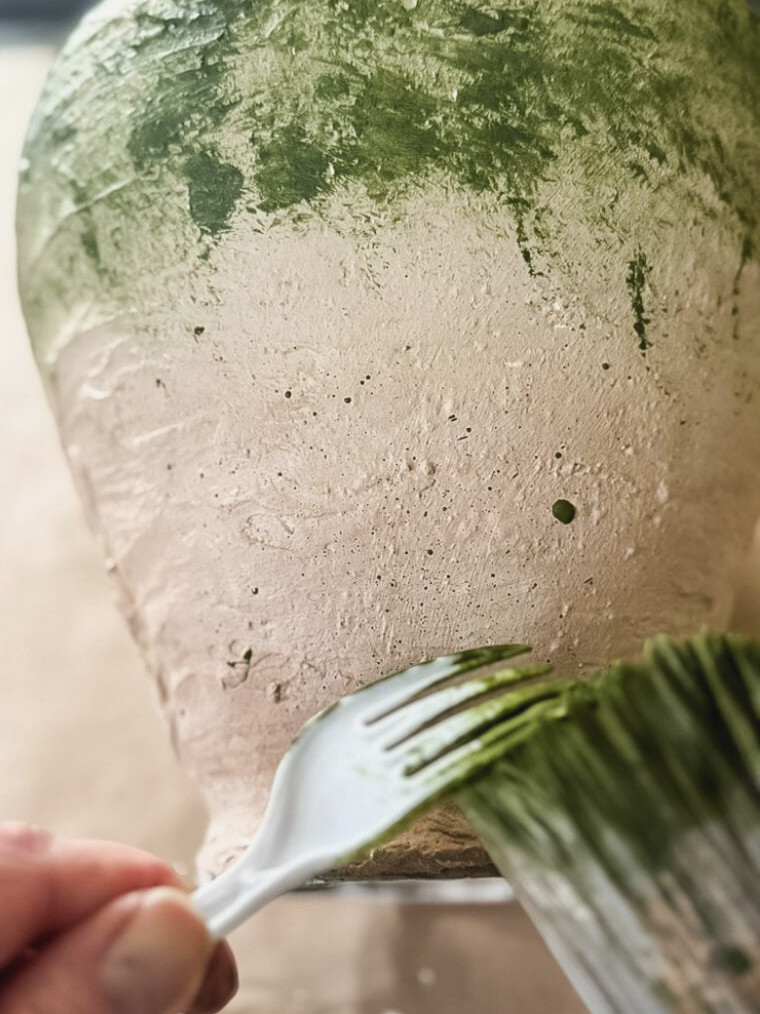
For a pottery finish that looks even more genuine, bring in a little creative detail. Carefully flick a small quantity of green paint across the vase’s surface.
For a loose, speckled pattern, drag a plastic fork or spoon along the underside of your paintbrush. This creates small paint drops that scatter across the vase.
If you’re up for trying something different, you can also splatter the paint with your finger. Be ready for some minor cleanup afterward!
Quick Summary:
- Begin with a rich green shade, like Apple Barrel English Ivy Green.
- Work mainly on the vase’s center and softly dab on the color with the stippling brush.
- From time to time, add tiny dabs of black paint.
- For an even more genuine finish, brush a light coat of green paint along the vase’s lower rim, upper rim, and edges.
of black paint to give it a worn, timeworn appearance.
Final Details
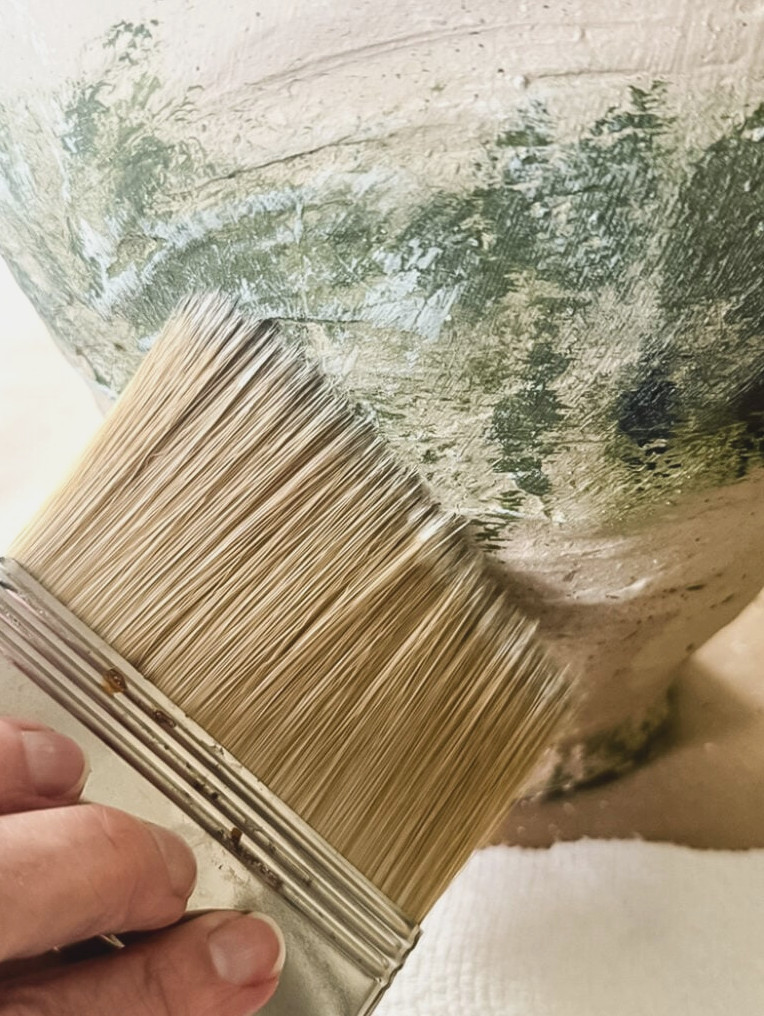
To add one last hint of vintage character, take a large chip brush and dab several X shapes across the vase.
- Coat the brush tip with vintage white paint.
- Blot away extra paint onto a paper towel.
- Lightly place X shapes in assorted areas of the vase.
This creates a delicate, weathered finish that enhances the pottery’s aged appearance.
Optional: Protect your vase by covering it with a matte clear topcoat. This step is worthwhile if you expect the exterior to become very wet. I’ve finished other vases with joint compound and paint without using one, and they have stayed the same, but I never immerse the vase in water and take care while filling and emptying it.
DIY Victory!
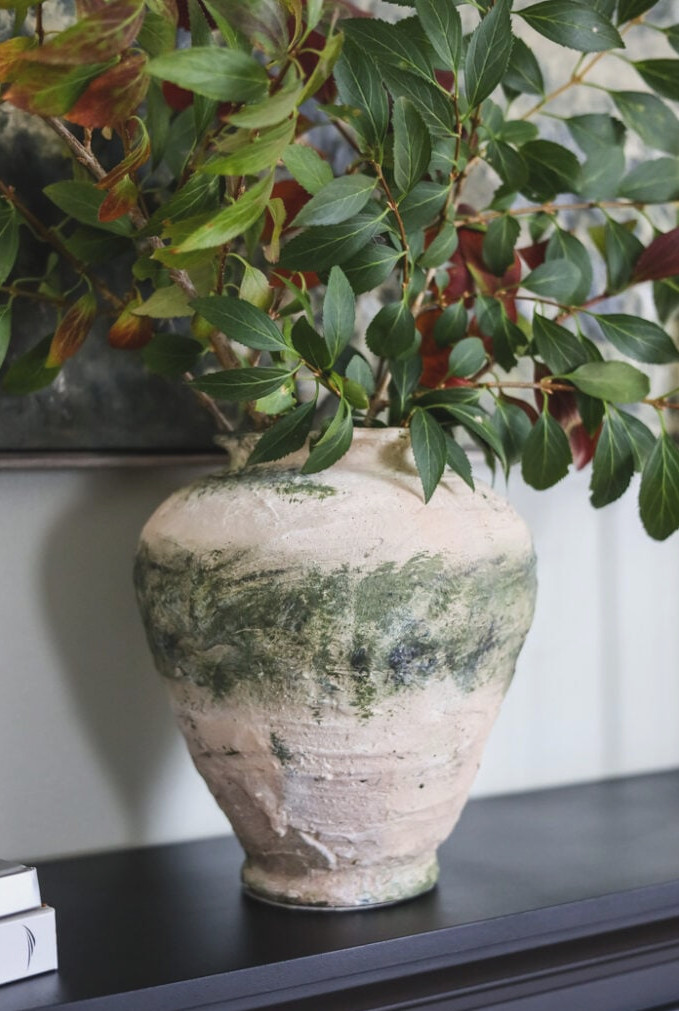
And just like that! I’m absolutely delighted with the result of this DIY project. By giving a thrifted vase a new purpose, I created a beautiful Pottery Barn-inspired accent without spending a fortune.
This makeover shows that creating lovely, one-of-a-kind pieces for your home doesn’t require a designer budget. So, feel free to embrace your creativity and try out different methods. The results may pleasantly surprise you.
Now it’s your opportunity! Visit a nearby thrift shop, pick up a vase, and allow your creativity to take over. With a touch of DIY ingenuity, you can make your own Pottery Barn-inspired showpiece.
Want to see your creations showcased? If this project or any of my other DIY ideas has motivated you, I’d be delighted to view them and include you in the Reader’s Spotlight gallery. Email a photo to jennifer@cottageonbunkerhill.com
xo, Jennifer
Want more vase transformations? Here are a few other projects I’ve completed.

top rug alternatives
designer rug face-off
my favorite discoveries
pretend until you succeed
17 Pottery Barn alternatives
Creative DIY Ideas