Each January, I spread out my seed catalogs alongside the notes I scribbled in my garden journal and reflect on the past season. What succeeded. What failed. What I’ll change. And last year? I have plenty to share.
Following 2024’s truly disastrous summer—the record-setting rain, the vegetables that surrendered, and the cut flowers that barely appeared—I entered 2025 with modest hopes and a very specific strategy. (If you missed my garden recap from last year, you can read it here.) My plan was to grow additional flowers. Better varieties. Blooms I could preserve and use in projects throughout the following year. I also wanted to stop battling the sweet peas and finally understand why they continued to disappoint me. Most importantly, I intended to enjoy the garden rather than constantly feel frustrated by it.
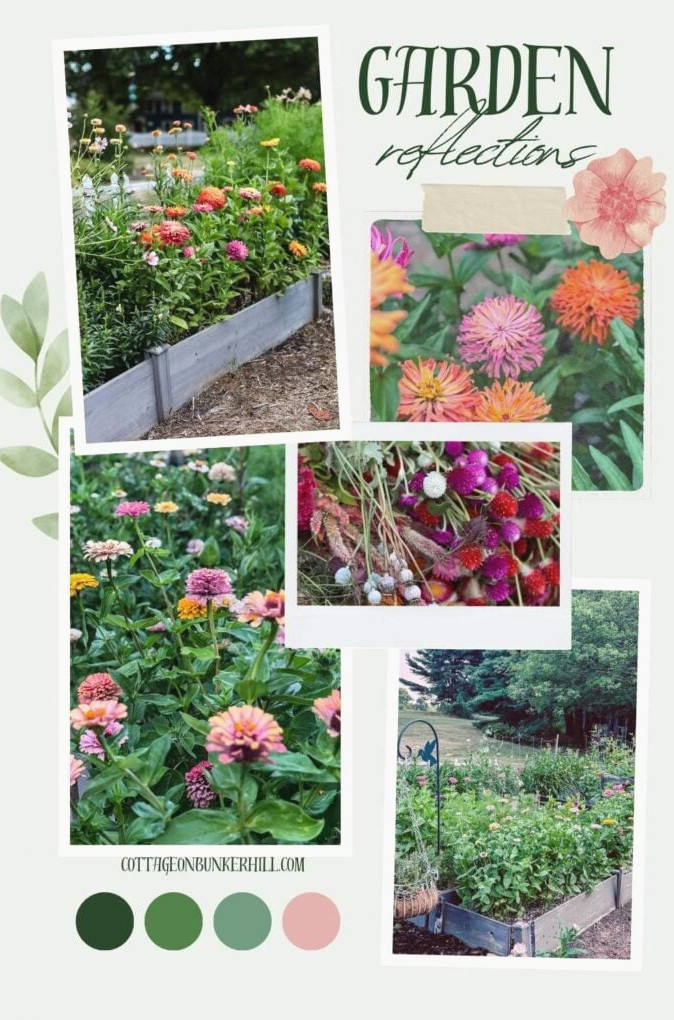
Hello! I’m Jennifer from Cottage on Bunker Hill. I’ve been gardening at home for more than 20 years, and for the past 5 I’ve concentrated on our cut flower garden. Through experimentation, mistakes, and plenty of muddy knees, I’ve learned what truly works. My goal is to grow flowers with a purpose, whether they’re destined for a vase on the kitchen table or for long-lasting projects, using straightforward, dependable techniques suited to a busy everyday life.
The Season’s Standout: Strawflowers Finally Got Their Chance to Shine
If you’ve been reading along for some time, you may recall what inspired me to create a dried flower garden and that the whole idea began with strawflowers. Their papery, jewel-like blossoms were the first blooms to show me that my garden could serve as a source of craft materials as well as a cutting garden.
That’s why it’s a bit painful to confess that the year before last, they almost entirely failed. Whether the cause was the weather, a poor batch of seeds, or simply one of those gardening puzzles that never gets fully answered, I’m not sure—but I harvested nearly nothing.
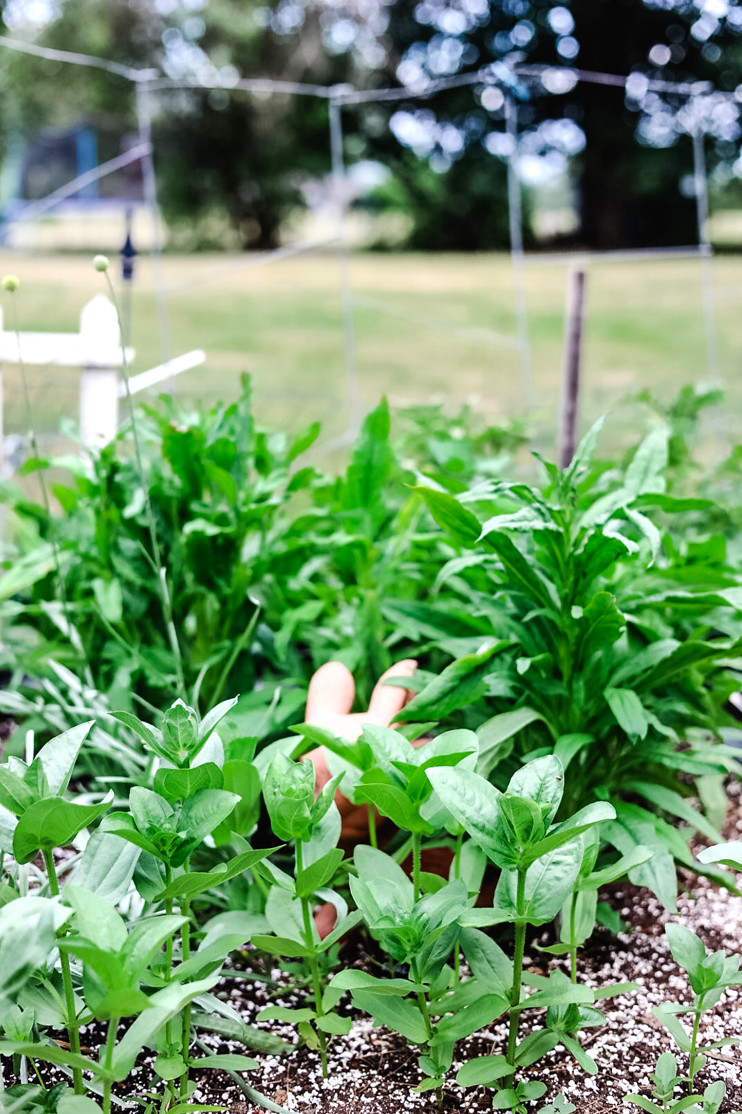
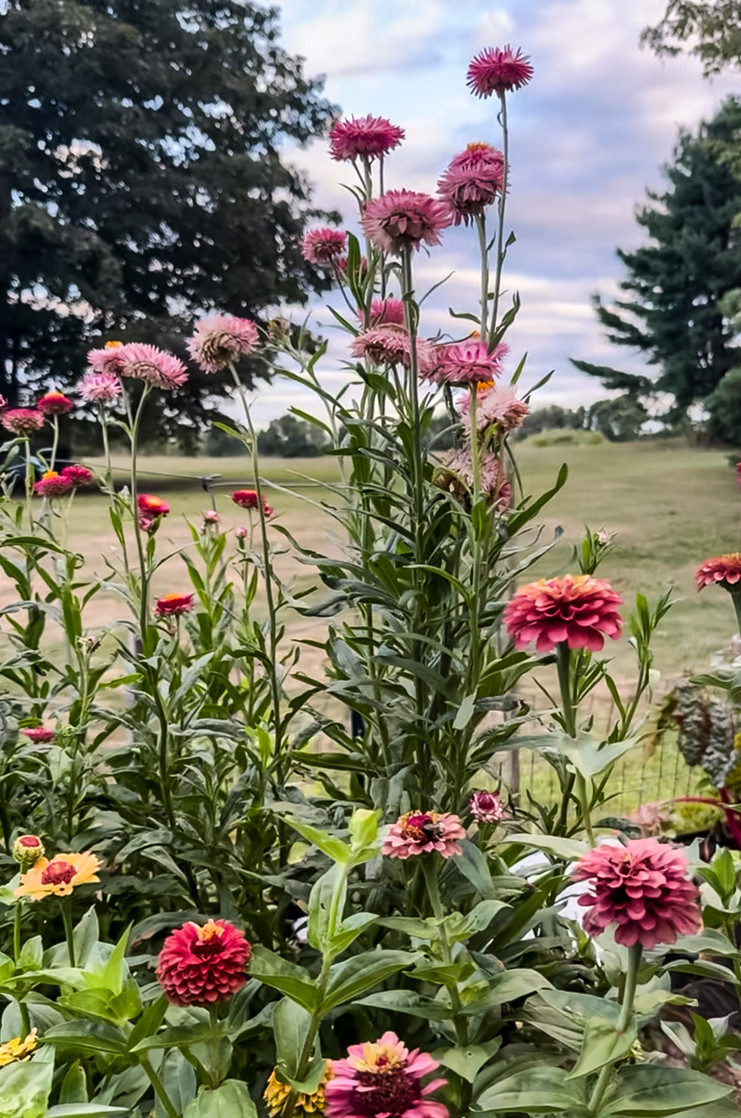
Last summer? Every seed sprouted. Every. Single. One.
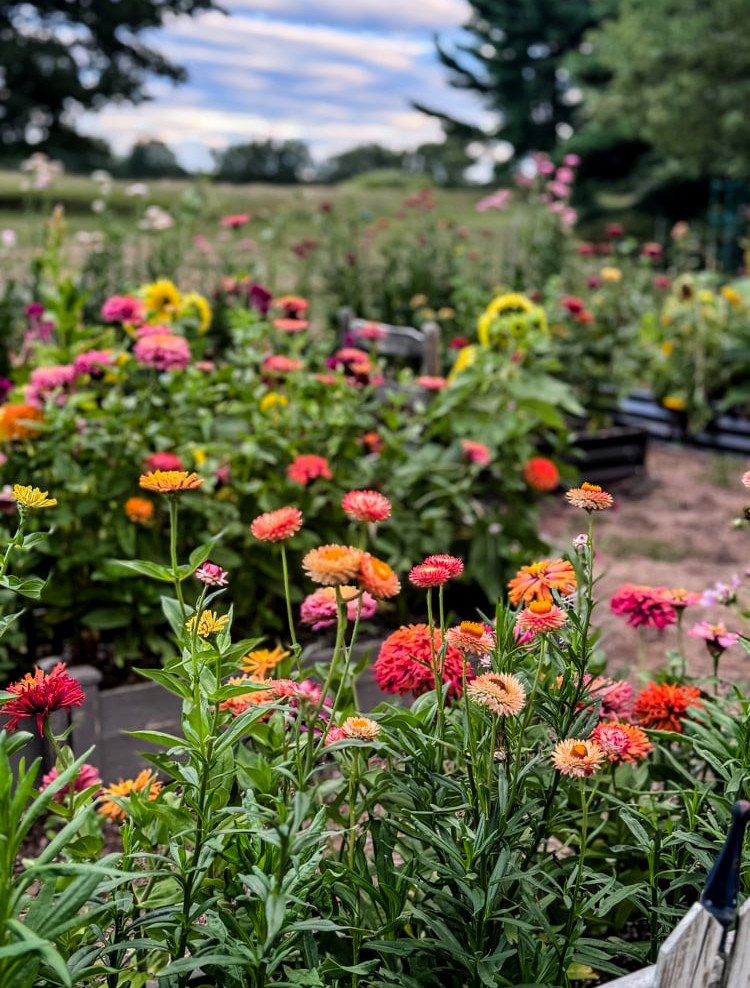
I grew strawflowers in every shade: rich burgundy, delicate blush, vivid orange, creamy white, and vibrant pink. The beds were packed with blooms. Every few days, I gathered armfuls, suspended them from my accordion peg rack in the hallway to dry, and still watched more flowers appear. By autumn, I had built up the loveliest collection of dried strawflowers I’d ever had, and they found their way into everything—wreaths, the dried flower hanging frame, seasonal arrangements, and more.
Every now and then, the garden delivers precisely what you’ve been hoping for. For strawflowers, 2025 was that season.
Guidelines for Growing Strawflowers
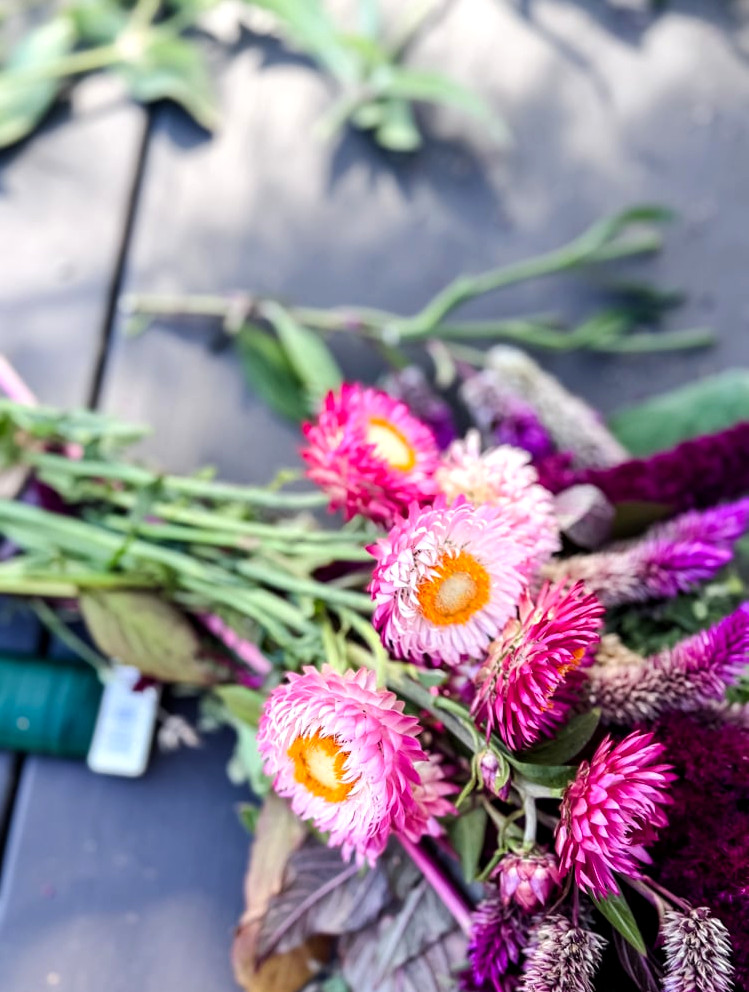
- Begin indoors 4-6 weeks before your last frost: Strawflowers require a lengthy growing period. Direct sowing has never worked well for me here in New Hampshire because they simply don’t have enough time to flower.
- Leave the seeds uncovered: Light is necessary for germination, so gently press them onto the surface of your seed-starting mix, then mist to add moisture.
- Pinch early to encourage more flowers: Once the plants reach approximately 8–10 inches, remove the tips to promote branching. A single stem can turn into five or six.
- Cut them before they completely open: At harvest, the center should remain fairly tight. Waiting too long can cause the petals to fall apart as they dry.
- Dry them upside down somewhere dark and well-ventilated: The hallway connecting my kitchen and living room is ideal-away from direct sun, with plenty of airflow, and attractive enough while the flowers dry.
The Sweet Peas Breakthrough I’d Pursued for Years
All right, I have to tell you about the sweet peas.
I attempted to grow sweet peas year after year. Each spring, I direct sowed them as every beginner tutorial recommends, only to finish with a few thin vines that bloomed for a short time before fading away ahead of summer’s true arrival. Eventually, I accepted that perhaps sweet peas simply weren’t for me. Maybe my corner of New Hampshire wasn’t suited to them. Perhaps the universe was trying to tell me something.
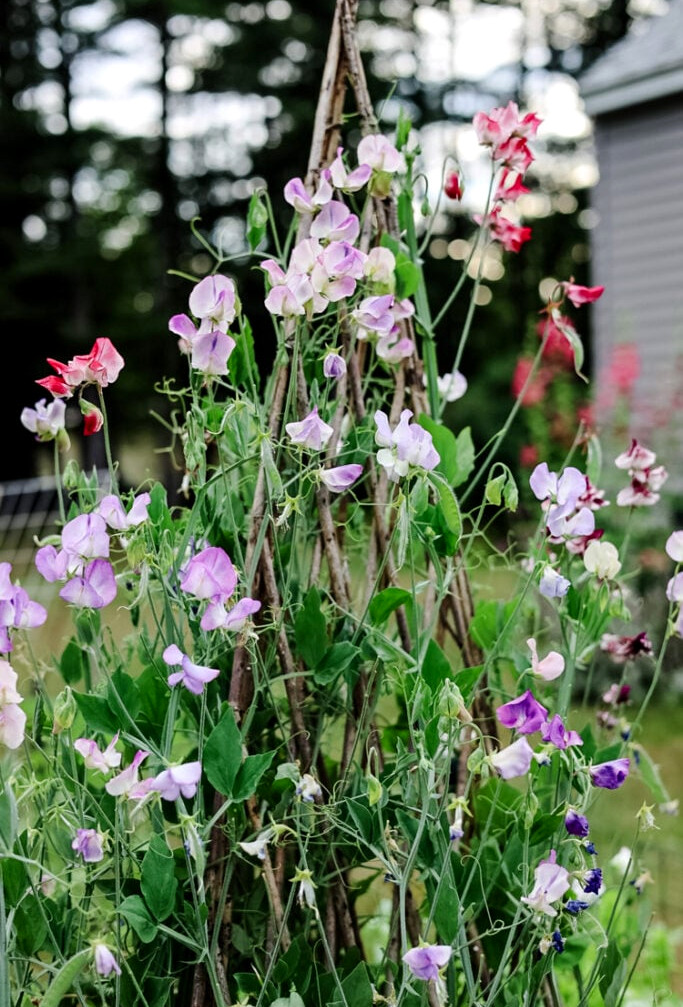
Last winter, I decided to test another method: winter sowing.
I placed my Spencer Ripple Formula Mix from Johnny’s and April in Paris from Select Seeds inside large salad containers, left them outdoors to experience the cold, and hoped for the best. Then, for the first time, I grew vigorous sweet pea plants that climbed my willow trellises and bloomed throughout the entire summer. Their frilled, two-toned flowers were exactly what I had imagined. The beds near my front door smelled wonderful.
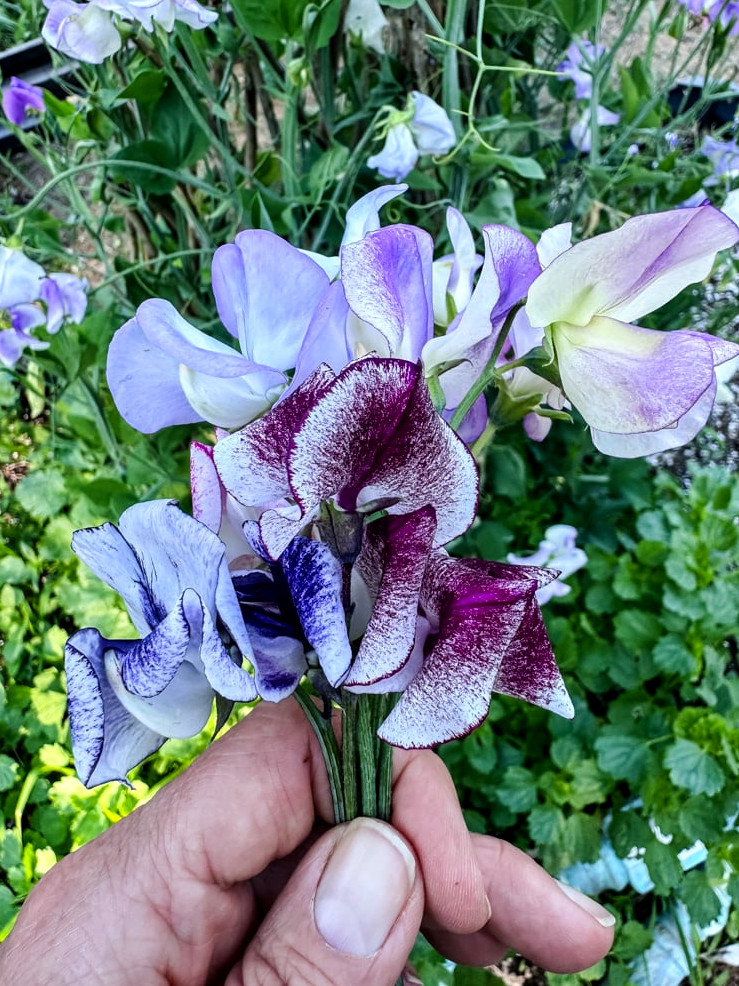
I was honestly amazed. After years of failed attempts, the answer turned out to be wonderfully easy: allow the seeds to follow their natural process, including a cold spell before germination.
If sweet peas have been difficult for you, give winter sowing a try. I recommend it wholeheartedly.
Winter-Sowing Advice for Sweet Peas
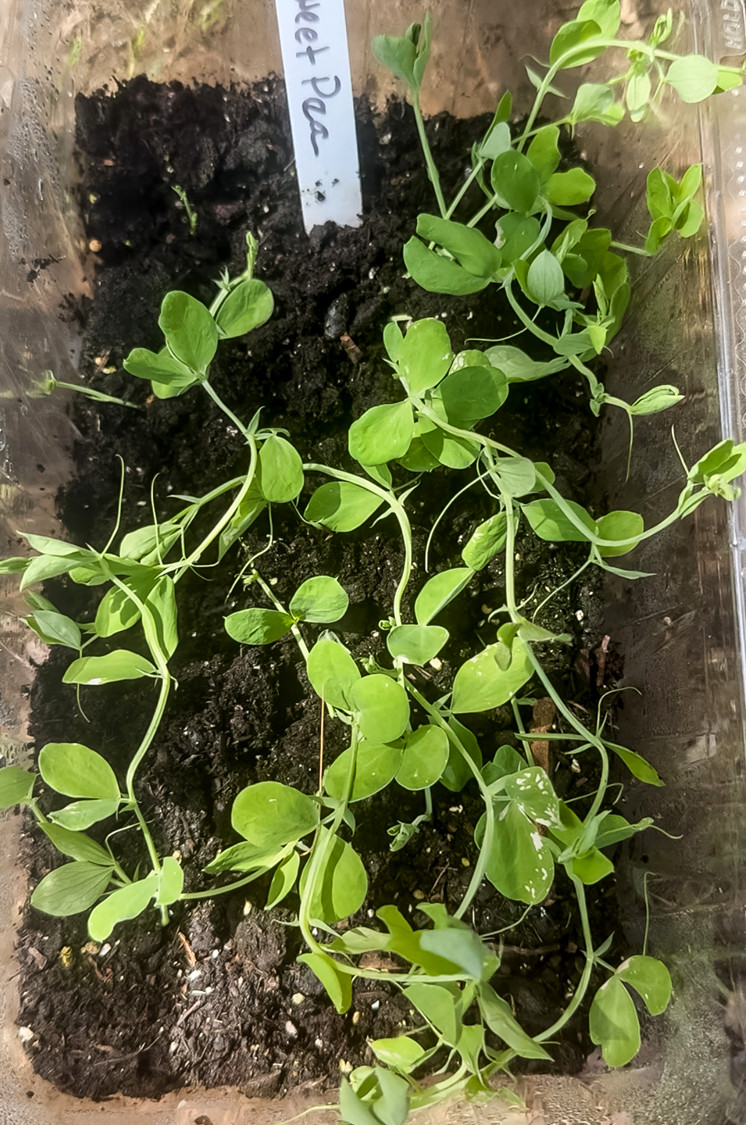
- Sow toward the end of winter. In zone 6a, I usually do this in January or February. Sweet peas appreciate cold conditions, so the exact schedule isn’t something to worry over.
- Choose a tall container. Because sweet peas establish lengthy roots early, a deep container or milk jug gives them adequate growing space.
- Presoak the seeds overnight. Doing so softens the outer coating and helps germination happen sooner.
- Avoid overprotecting them. When daytime temperatures remain above freezing, keep the lids vented or remove them completely. These seedlings need plenty of fresh air.
- Provide climbing support right away. Have a trellis, netting, or willow branches prepared when transplanting so the plants can latch on immediately.
- Harvest regularly. Sweet peas produce more flowers when cut frequently. Don’t allow faded blooms to form seeds, or production will slow down. (They also smell wonderful. I place them in little bud vases and spread them throughout the house.)
The Three Zinnia Varieties That Stole the Spotlight
My zinnia beds were better in 2025 than in any previous year, and I believe much of that success came from the hot, dry summer we experienced. Zinnias flourish in our heat.
I plant zinnias in my garden every year without exception. Their range of colors alone makes them worthwhile! With a new variety each season, you could keep growing them indefinitely and still have choices left. If you’re new to cutting gardens and unsure where to begin, begin with these. They require little effort, offer abundant rewards, and will have you completely devoted by August. And the more blooms you harvest, the more flowers the plants keep producing.
-
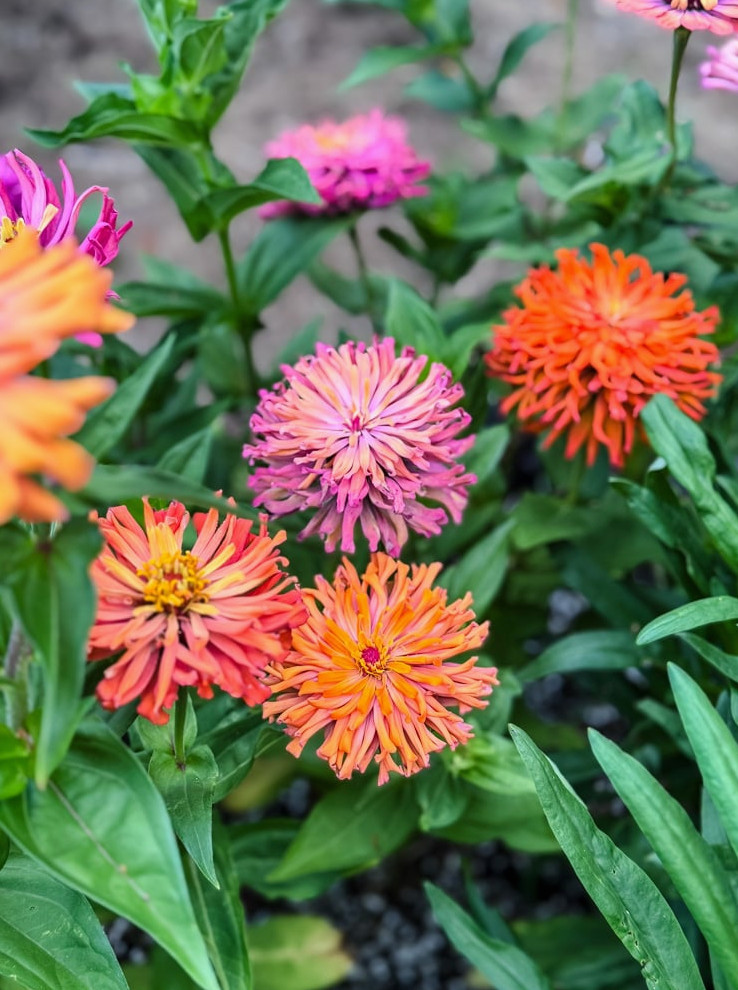
‘Agave’ Zinnias -
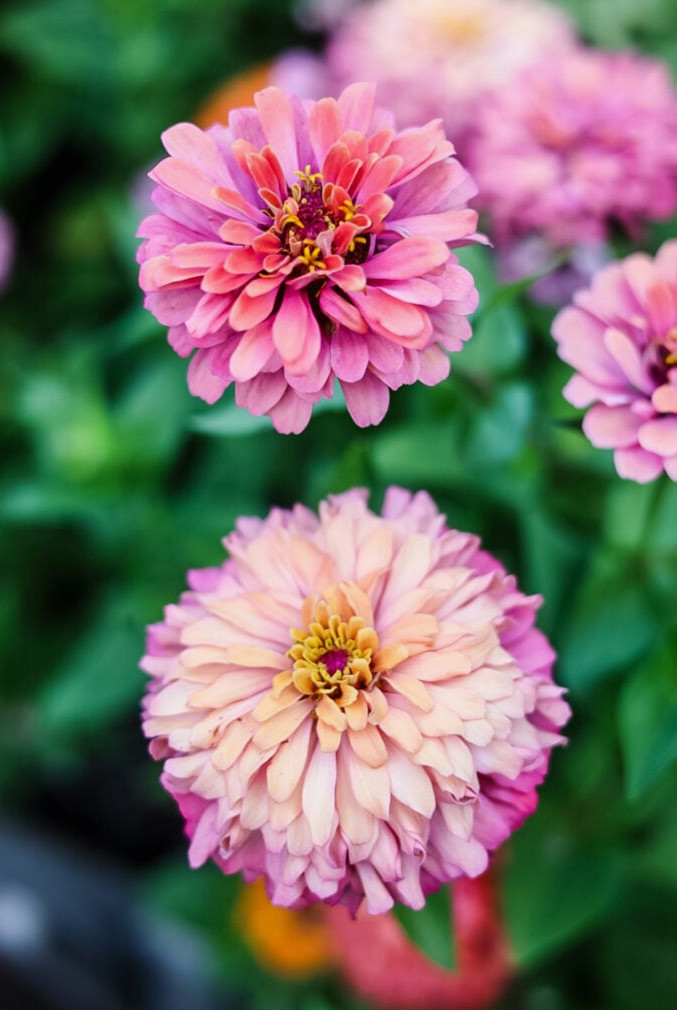
‘Ballerina’ Zinnias
This season, I tested 3 fresh varieties: Aurora, Agave, and Ballerina from Johnny’s. Each had its own shape and color scheme, yet all were remarkably prolific and looked gorgeous together in a vase. Aurora produced those large, traditional zinnia blossoms in cozy peach hues. Agave added more distinctive blooms and tones that photograph wonderfully (they brought to mind something from a Dr. Seuss-inspired garden bed). Ballerina — with its soft, nearly dahlia-like shape — was my favorite to use in arrangements.
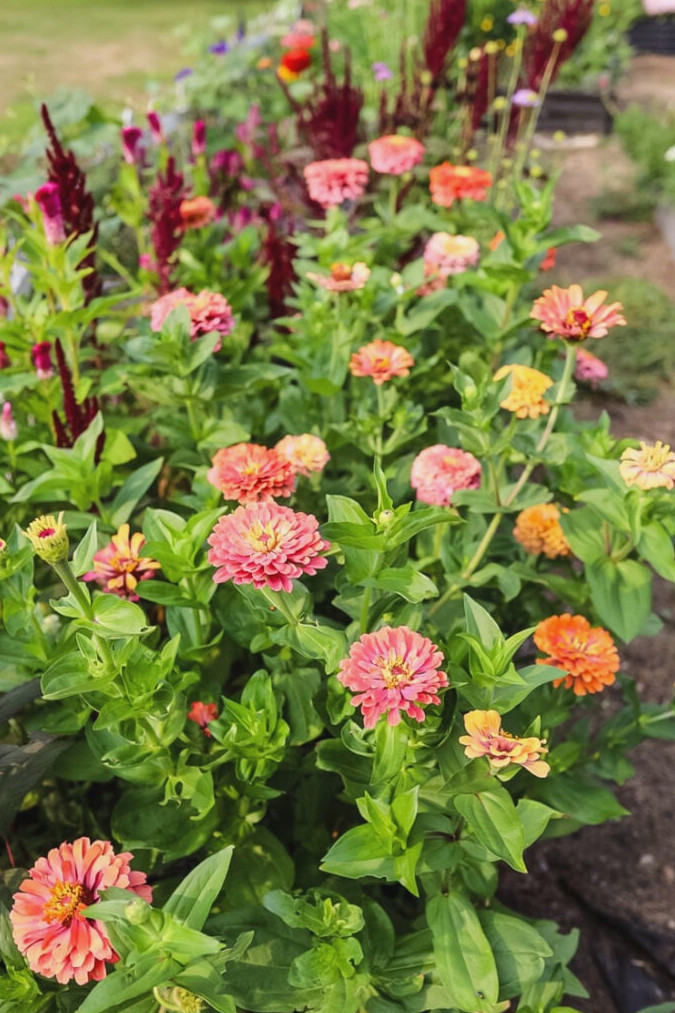
Zinnias may not be ideal for drying (they become brittle and shed their form), but they’re unmatched in warm-weather bouquets. Throughout the season, I kept fresh arrangements on my kitchen table, while the plants continued flowering regardless of how often I harvested them.
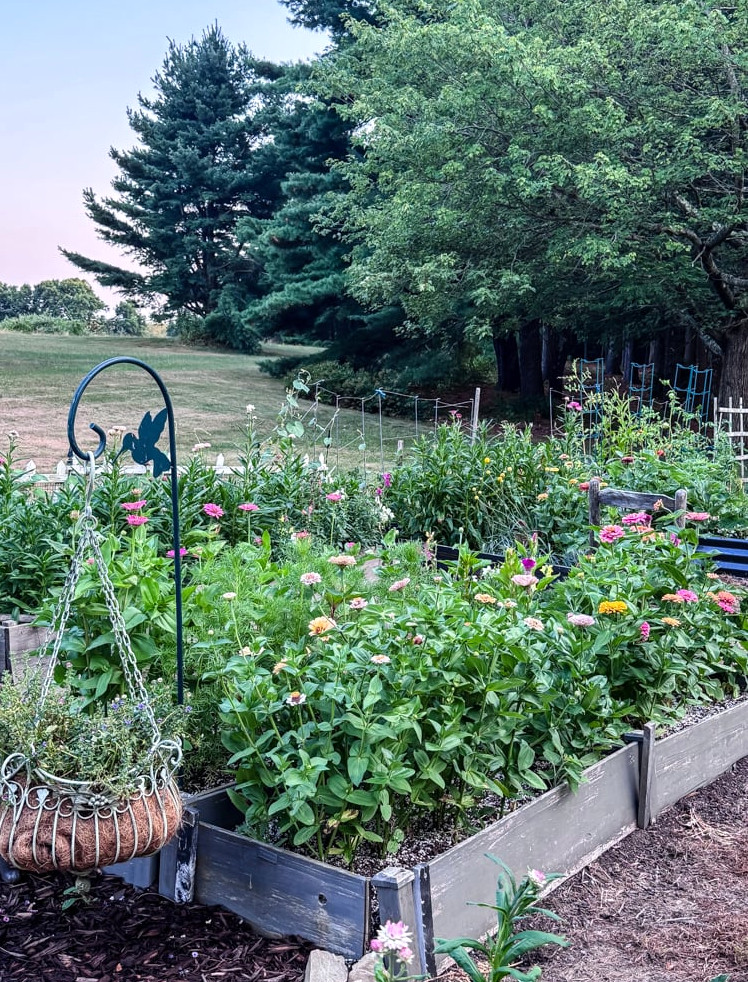
Although Aurora, Agave, and Ballerina were the three varieties that stood out most last year, they were certainly not the only zinnias growing in my garden. I planted Benary’s Giants (a complete mixed packet filled with those amazing colors), Queeny Mix, Illumination, and several Floret originals as well. With zinnias, having more is always better! They cover the beds in vivid, rich color from the beginning of summer through the first frost and are endlessly valuable as cut flowers. Whatever else I grow each year, I’ll always reserve plenty of space for a large, overflowing patch of zinnias.
Zinnia Growing Tips
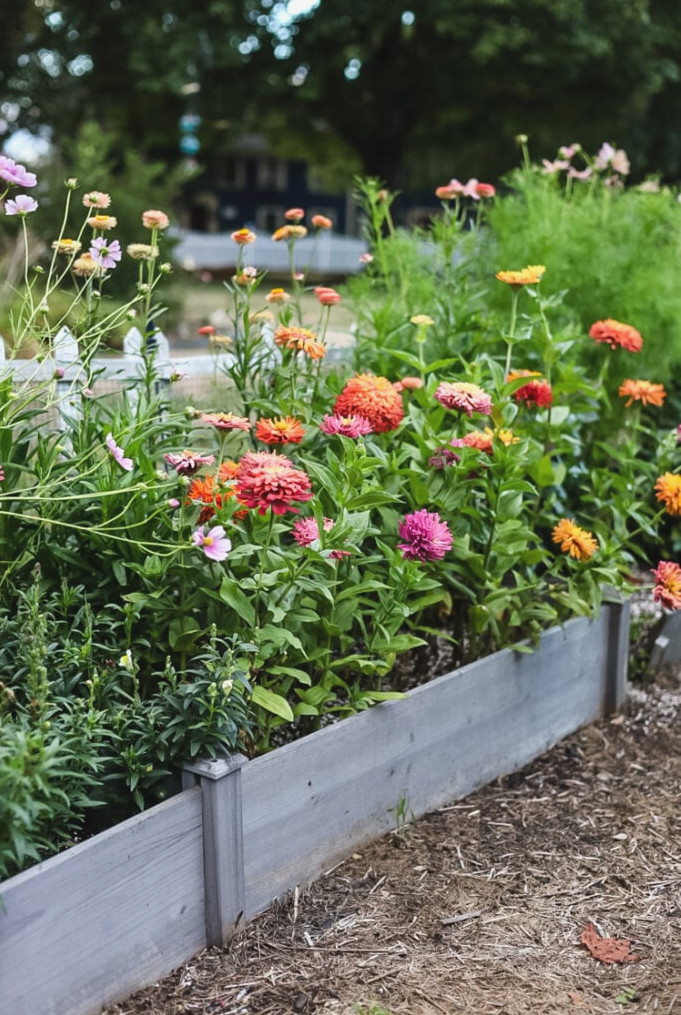
- Sow seeds directly after the final frost once the soil has warmed. Zinnias dislike chilly soil and will simply sit there pouting if planted prematurely. Here in New Hampshire, I hold off until Memorial Day weekend.
- Remove the first bud. I realize it can be difficult. However, taking off that initial center bud while the plants are young promotes a considerably fuller and more productive plant.
- Harvest above a node. As you cut, trim the stem back to a leaf set or lateral shoot; this signals the plant to branch out and create additional blooms.
- Harvest before pollen becomes visible in the center. To enjoy the longest vase life, gather zinnias once the petals have opened but while the center remains compact.
My Top Zinnia Varieties:
- Benary’s Giants
- Queeny Mix
- Illumination
- Aurora
- Agave
- Ballerina
- Floret Originals
- Isabellina
The Overlooked MVPs: Gomphrena, Sunflowers, and My Latest Experiments
Not every exceptional flower takes center stage, but a handful deserve a well-earned mention before we discuss the disappointments.
Gomphrena
Gomphrena enjoyed an outstanding season. If you haven’t planted gomphrena, I’d love to persuade you to give it a try. Its cheerful, clover-shaped spheres in rich magenta, delicate pink, and vivid red are among the most dependable, heat-loving flowers for a cutting garden, and they continue blooming throughout the season, regardless of how hot or dry conditions become.
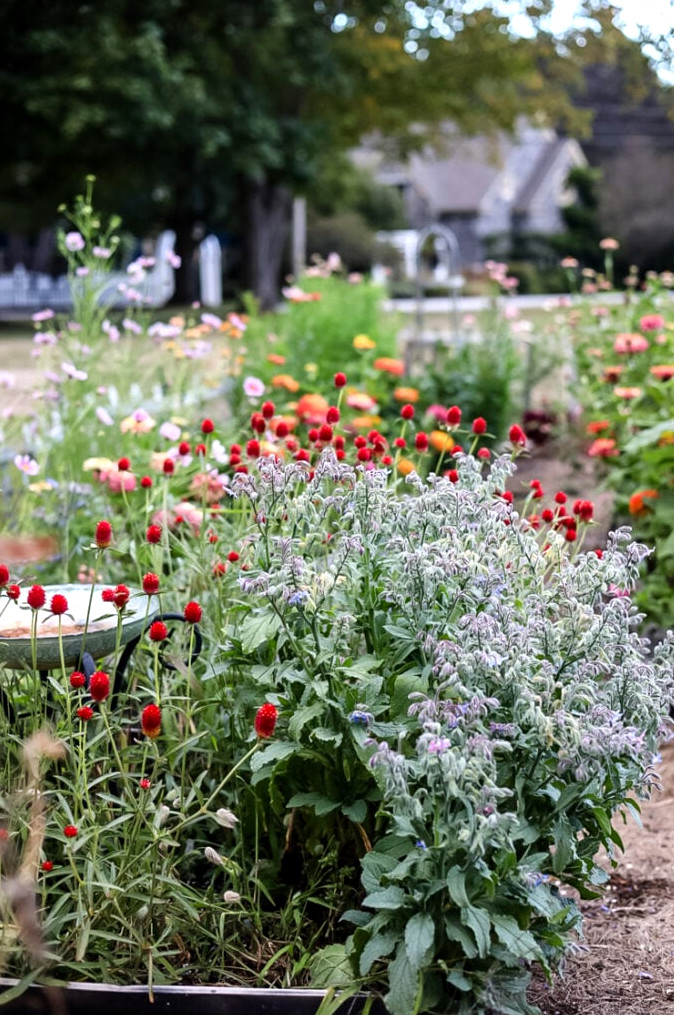
Last summer, I gathered generous handfuls for fresh bouquets alongside the zinnias and celosia, and the combination was gorgeous. However, their true charm appears after drying: gomphrena preserves its color and form remarkably well, which has made it one of my most frequently used dried flowers for wreaths and arrangements. If you’ve overlooked it because it lacks showiness, take another look. It proves its value every time.
Gomphrena Growing Tips
- Begin indoors 6–8 weeks before the final frost. Gomphrena gets off to a slow start, so it gains a lot from being started inside ahead of time.
- It thrives in heat- don’t move it outdoors too soon. Wait until the ground is truly warm and any danger of frost is gone. Gomphrena becomes unhappy in chilly weather and won’t really grow until temperatures rise.
- Skip pinching. Unlike strawflowers and zinnias, gomphrena doesn’t require pinching; simply let it grow naturally.
- Harvest regularly for additional flowers. Frequent cutting encourages more blooms. Trim the stems back to a pair of leaves to promote branching.
- For drying: pick the flowers once the globe-shaped heads are completely colored and firm. Their lovely color will remain for many months.
Compact Sunflowers
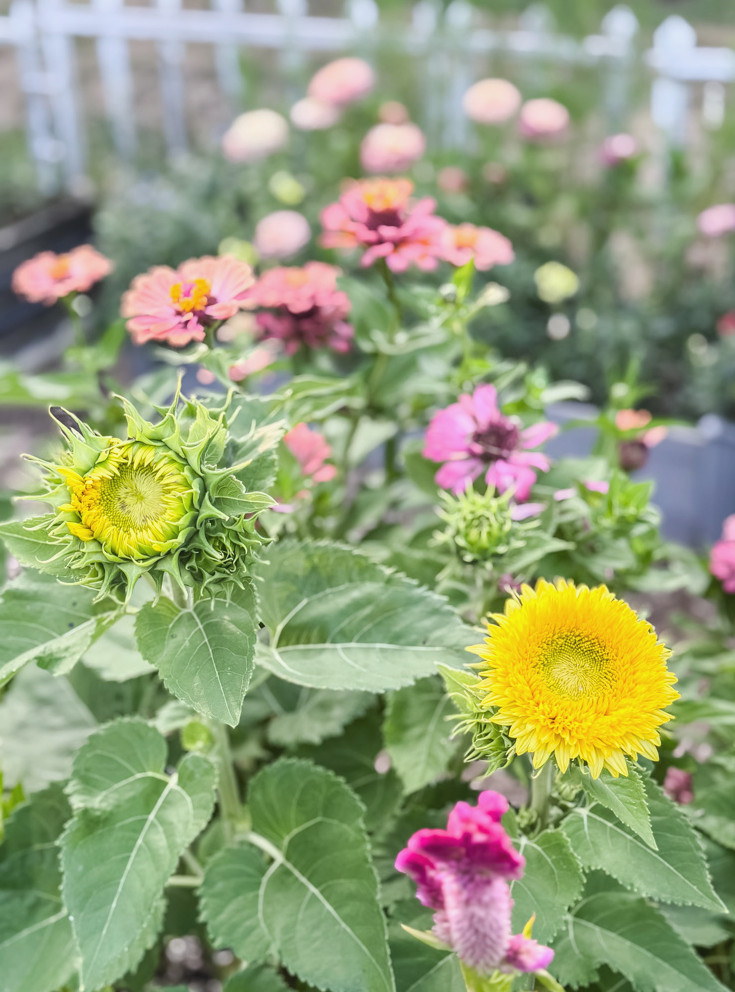
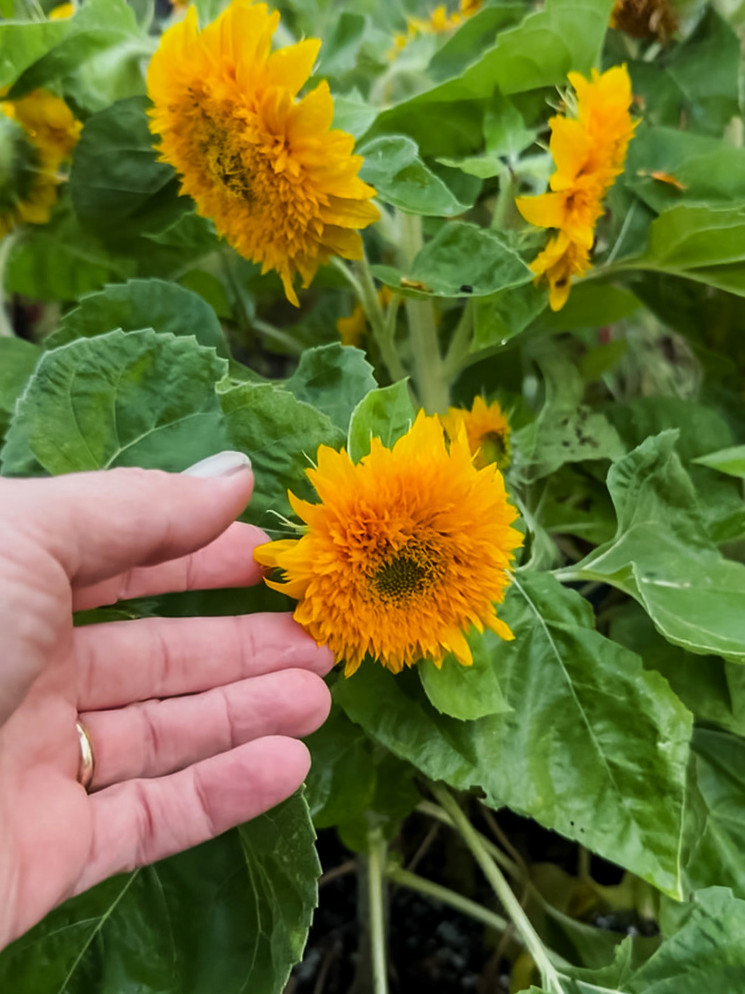
Compact Sunflowers were a fresh addition, and I quickly became completely enamored with them. Last year, I grew two petite varieties, Gummy Bear and Teddy Bear, and their soft, golden pom-pom blossoms were a delightful surprise among the pink and purple flowers filling the rest of the cutting beds. They have an especially playful, cheerful quality.
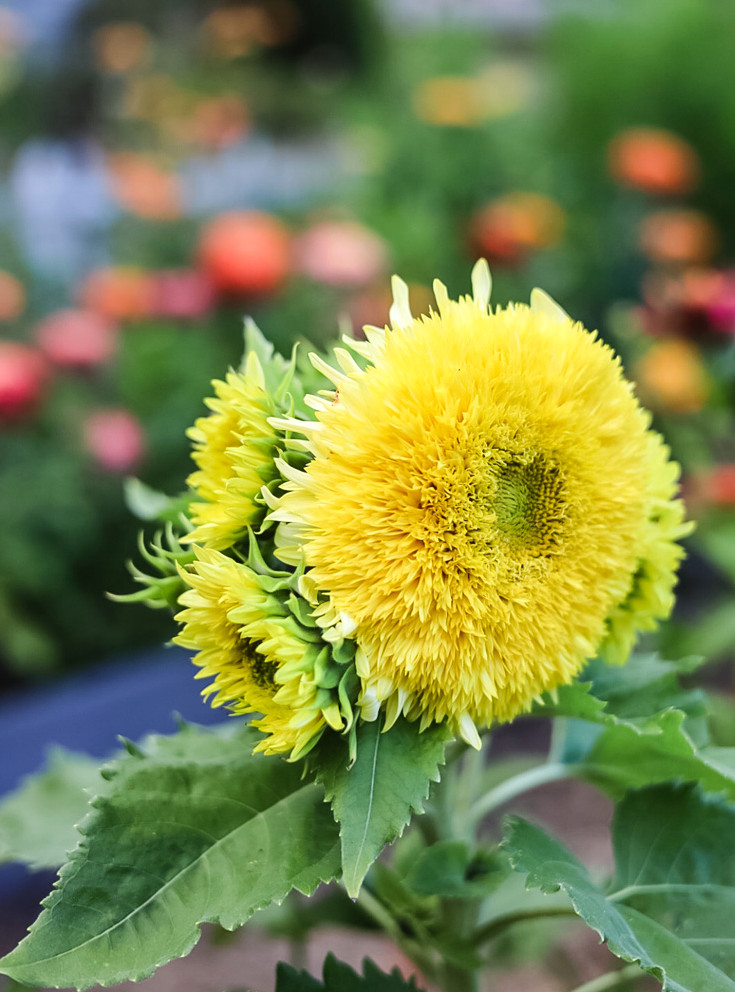
These aren’t the usual towering, dignified sunflowers. Instead, they’re short and plush, bringing a smile whenever I passed by. Sunflowers are excellent cut flowers overall, while the smaller types are particularly useful because they complement arrangements without overwhelming them.
Sunflower Growing Tips
- Direct sow once the final frost has passed and the soil is warm. Sunflowers develop rapidly, so starting them indoors isn’t necessary;they’ll soon catch up.
- Place them in full sun. They truly need it. Provide at least six hours of sunlight daily for the strongest, most robust plants.
- Plant new seeds every few weeks into early summer to extend the picking season rather than receiving one large burst of blooms.
- Harvest as the petals begin to unfold to achieve the longest vase life. Blossoms that are fully open generally fade sooner after cutting.
- Teddy Bear types stay compact, making them suitable for smaller plots and less likely to cast shade on nearby flowers than tall, single-stem varieties.
New Additions I Tested
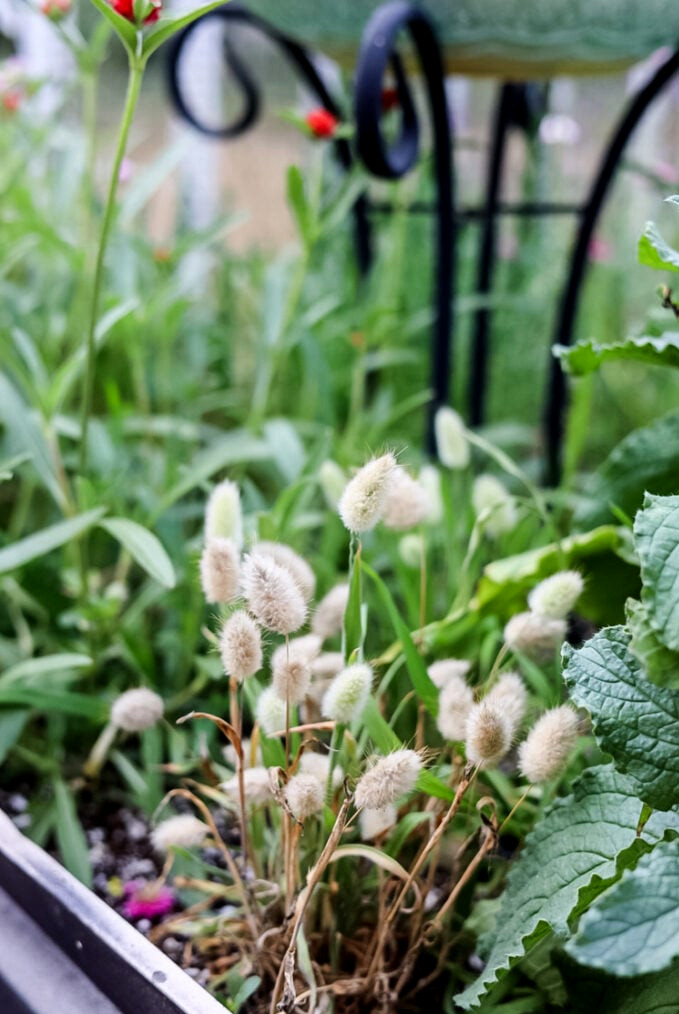
First-time additions this year: bunny tail grass and craspedia (drumsticks): Each season, I test out a few flowers I’ve never cultivated before, and in 2025, bunny tail grass and craspedia were my experiments. Both make wonderful dried flowers and offer wonderfully distinct forms: bunny tail grass produces soft, fluffy seed heads that bring remarkable texture to arrangements, while craspedia creates neat yellow globes on upright stems that have an almost architectural appearance.
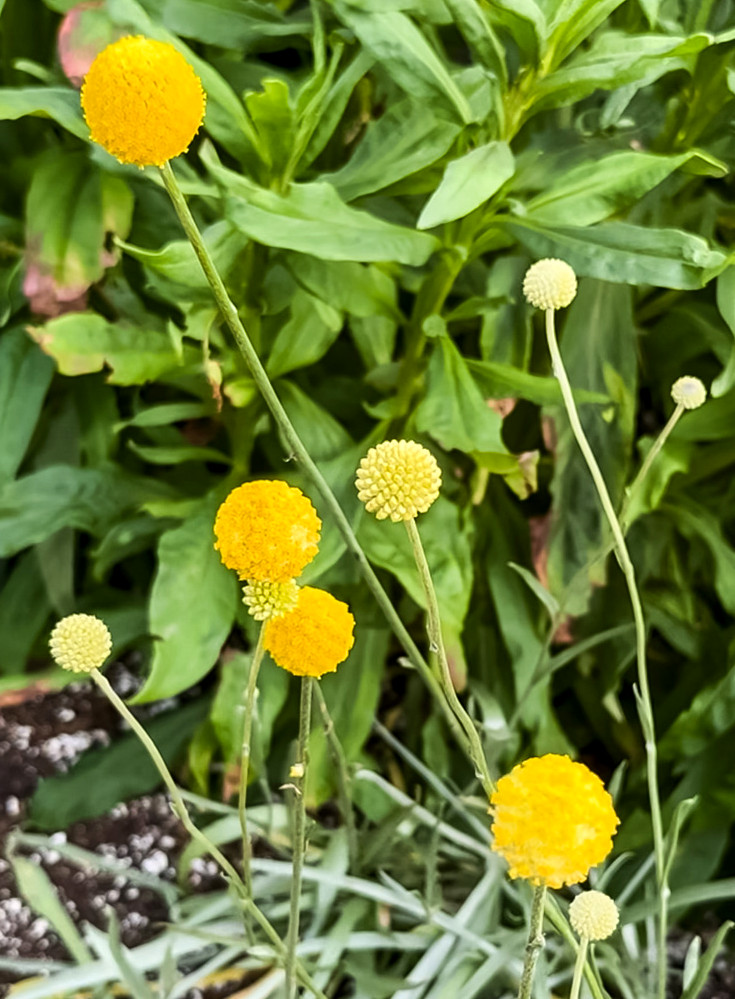
Because I began with only a small number of plants, my harvests were modest, but both varieties will return to the 2026 lineup in far greater quantities. If you’re creating a dried flower garden and would like to include something unusual, either one would make an excellent choice.
For both flowers, I started the seeds indoors 6-8 weeks ahead of my last frost date.
The Rest of the Garden Was Wonderful Too!
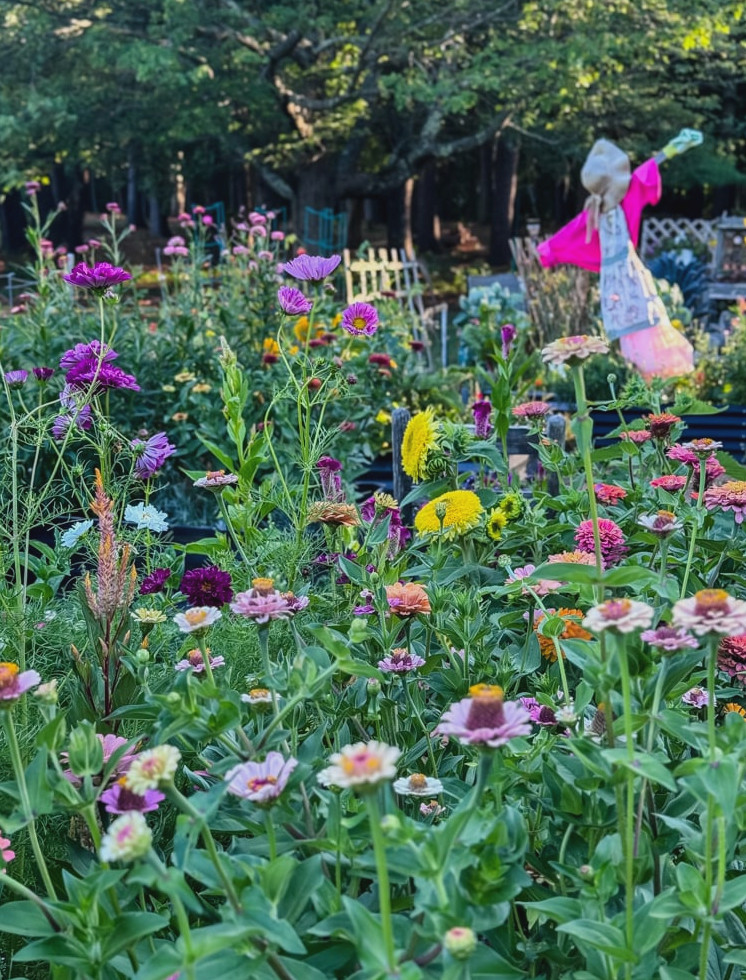
I’d be telling only part of the story if I failed to mention that 2025 was an excellent year overall. My celosia was breathtaking, and the velvety plumes in rich burgundy and coral remain some of my favorite flowers to dry. The scabiosa performed beautifully, the snapdragons produced abundantly, the bells of Ireland brought the lovely structural green I adore in arrangements, and the cosmos? They created a sweeping haze of color throughout the summer. Truly, it seemed as though every seed I planted turned out magically! After the difficulties of 2024, I think I really needed that.
Read more about the cut flowers I most enjoy growing in your garden here.
The Disappointments (Because They Always Happen)
Honestly, I wouldn’t be truthful if I shared only the successes with you!
Growing Stock (A Major Disappointment!)
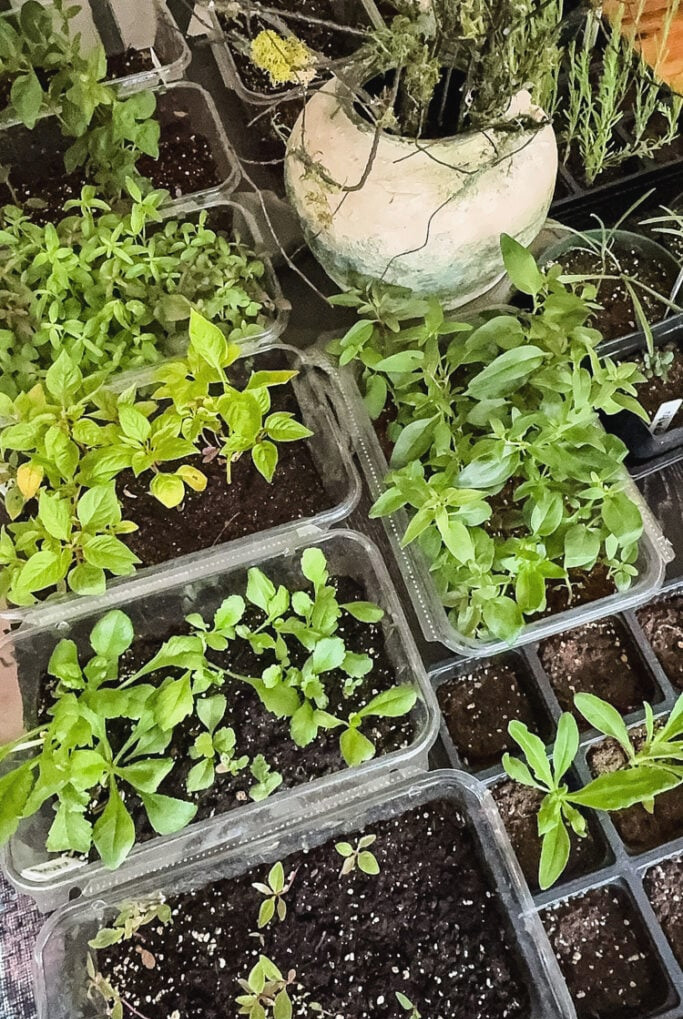
Stock: Last year, I gave stock a try because I adore its scent and classic cottage-garden appearance. Although the indoor-started seedlings looked healthy, every single plant died after being transplanted! I’ve learned since then that stock benefits from a period of cold before germinating, so this winter I’m testing winter sowing it with my other cool-season flowers. We’ll see how it goes. I’m hopeful, but cautiously so.
Poppies
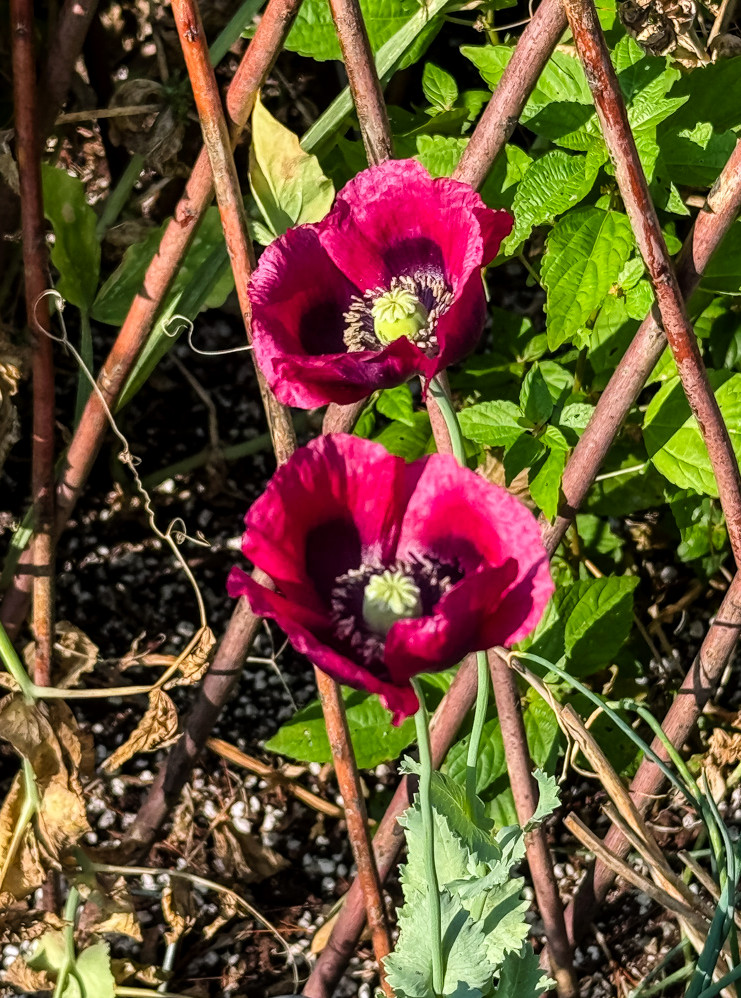
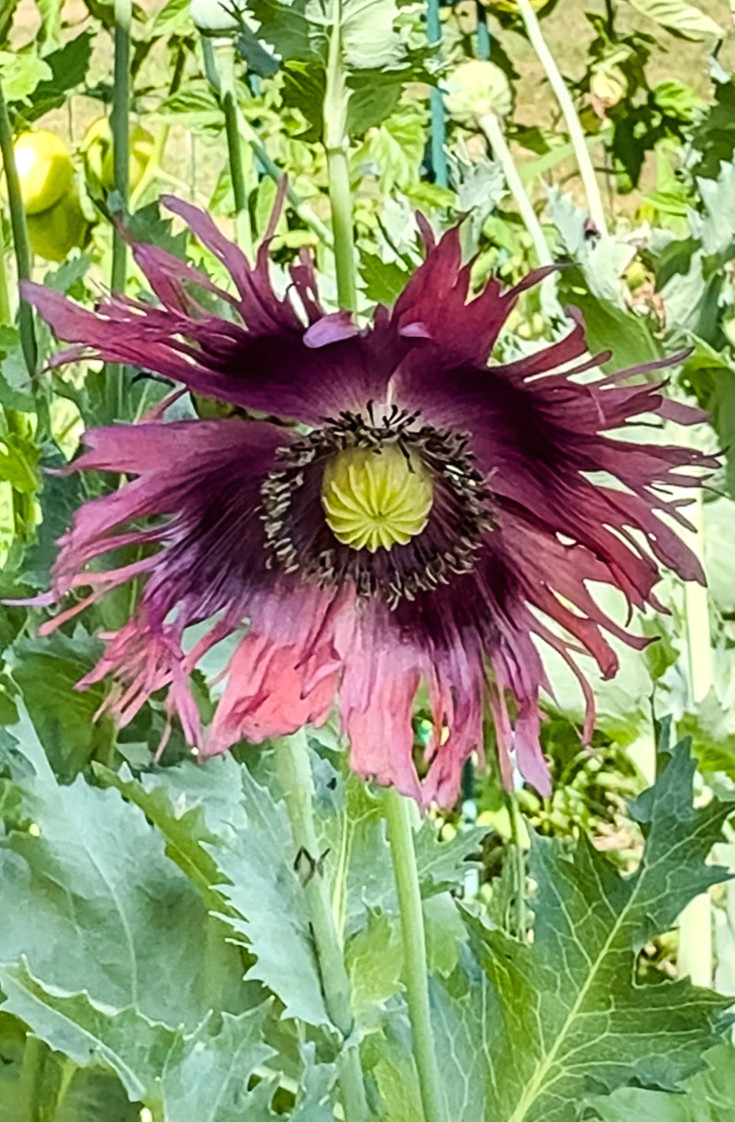
Poppies: With this one, I believe I’ve finally solved the problem, which makes it a success hidden inside a failure. For the last few years, I’ve scattered poppy seeds directly into my garden beds in early spring with very little success, and I assumed they simply weren’t sprouting. Some seasons produced a handful of gorgeous blooms, while others gave me none at all! Last summer, once I had nearly given up, several appeared in midsummer, which is exceptionally late for poppies.
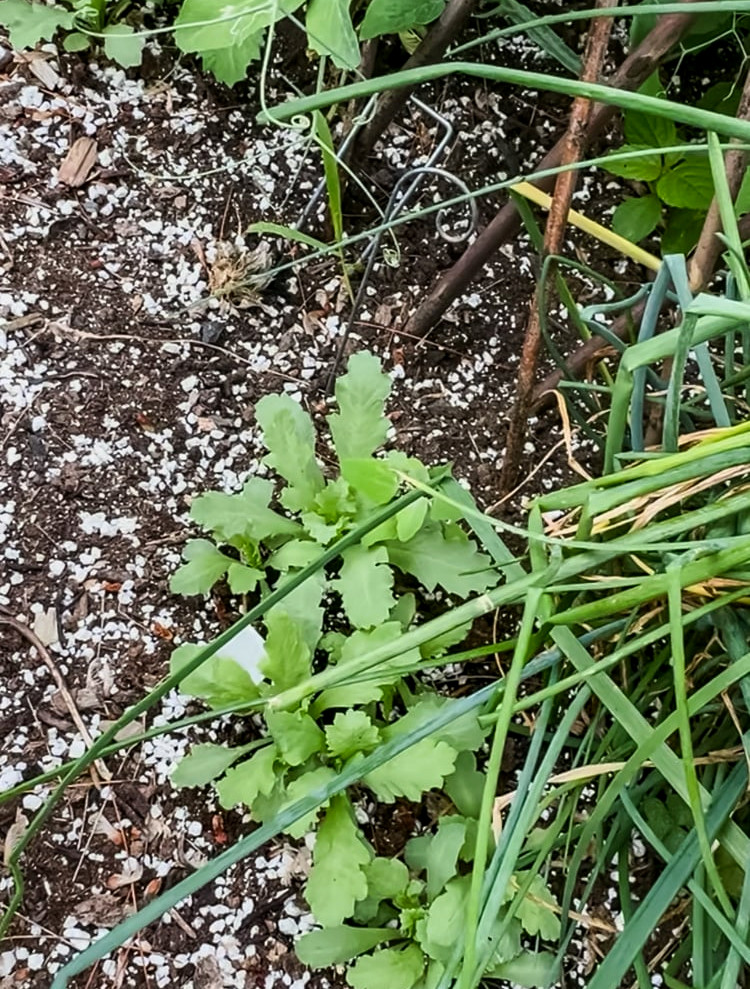
My suspicion? Birds and other small animals were consuming the seeds. Since poppy seeds must remain on the soil’s surface to receive the light required for germination, they’re also especially vulnerable to anything with a beak or a keen nose searching for an easy meal.
My Solution for Raising Poppies (and Why It Should Help)
This year, I’m winter sowing my poppies in peat pots placed inside zip-loc bags. Poppies strongly dislike being transplanted — their roots are delicate, and they don’t recover well after being disturbed — so the peat pot should solve that issue nicely. When the seedlings are ready to be planted outdoors, you simply open the bottom of the pot and place the entire container into the soil. No damaged roots, no transplant shock. And because theseeds are safely tucked inside the bag on my porch instead of resting on the garden soil, so no birds are enjoying a complimentary meal.
I’ll let you know this summer whether it succeeds. Keep your fingers crossed.
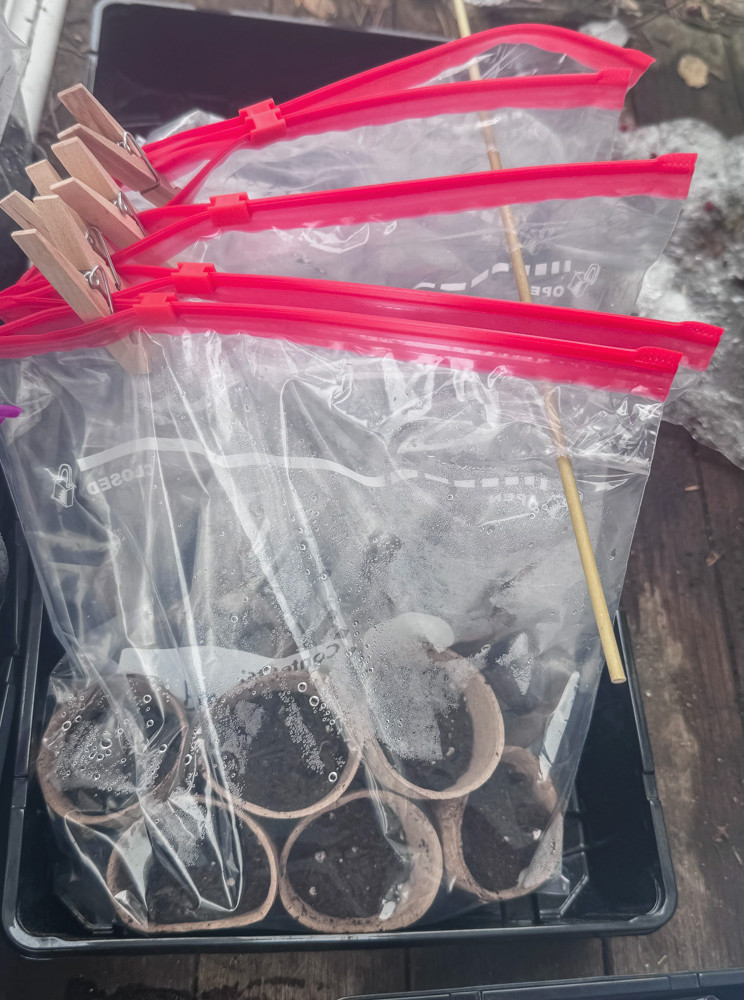
A few basic tips for growing poppies:
- Only sow on the surface: Poppies require light for germination, so they should not be covered with soil.
- Sow directly as early as you can: Poppies need cool conditions to become established. In New England, this usually means late winter or the very beginning of spring. They tolerate frost well.
- Thin without mercy: Poppies don’t thrive when crowded. Space them at least 6 inches apart for the finest blooms.
- Keep the pods: Although the flowers are stunning, I’m especially eager to use the dried pods for projects!
Cottage Garden
Favorite Products
Browse my favorite gardening supplies! Raised beds, plant supports, & tools to help your garden flourish.
What’s Happening Already (Winter Sowing)
It’s February, so seed-starting season is officially underway here at the Cottage—even though the garden itself is covered by 3 feet of snow.
Today I placed my winter-sowing containers outside: poppies (in the peat pots I mentioned), sweet peas, larkspur, violas, snapdragons, Queen Anne’s lace, stock, & several other flowers. I’m using 2.5-gallon Ziploc bags on the front porch because it’s the only location I can reach right now. The snow in the yard is too deep to cross, so I can’t access the garden at all; for the moment, the porch will have to do. They’ll remain there until the snow melts, when I’d like to transfer them to the garden. They’re being rained and snowed on right there on the porch, just as intended.
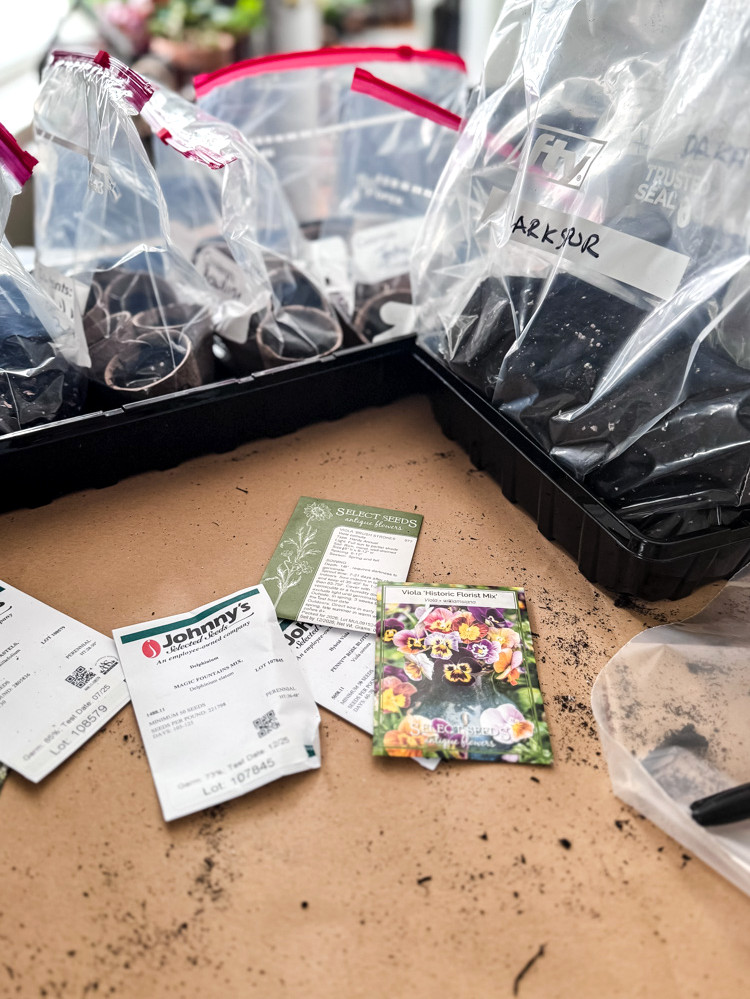
There’s something especially rewarding about this season. At the moment, the garden appears to be nothing but white, frozen, and dormant. Yet those containers on the porch suggest another beginning. Things are already getting started.
A Brief Note About Winter Sowing
If winter sowing is new to you, it’s among the most forgiving and effortless methods for starting seeds. There are no grow lights, heat mats, or constant monitoring required. You simply make a miniature greenhouse from a milk jug, ziploc bag, or transparent container, plant your seeds, and allow nature to take over.
- Milk jugs: Slice around the jug near its center to form a hinged lid, keep the top slightly open for ventilation, and add drainage holes to the bottom.
- Zip-loc bags: Keep the top open by a couple of inches to allow airflow, then make several small drainage cuts in the bottom. Before adding potting soil, I place a coffee filter over the slits so the soil won’t rinse right out—a wonderfully simple trick that works perfectly.
- Large salad mix containers: These are honestly my favorite. Make holes in both the lid and the base, and you’ve got a convenient little greenhouse ready to use. The transparent sides make it easy to watch everything happening inside.
If winter sowing is unfamiliar to you, it’s one of the easiest and most forgiving ways to start seeds: there are no grow lights, heat mats, or constant supervision needed. You basically turn ordinary containers into tiny greenhouses, sow your seeds, and let nature handle the rest.
Excellent choices for winter sowing:
- Cool-weather flowers: larkspur, poppies, violas, snapdragons, sweet peas, Queen Anne’s lace, bells of Ireland, stock
- Hardy annuals that respond well to cold stratification
- Any seeds whose packet recommends “direct sow in early spring” or identifies them as “cold hardy”
Poor choices for winter sowing:
- Warm-weather flowers requiring heat for germination (zinnias, celosia, strawflowers)
Anything that grows especially slowly and requires an extended indoor head start beneath lights
Plans for 2026: More of What Works
I’m not making the garden bigger this year. After enjoying such a successful season in 2025, I’d rather not interfere with what’s already working. I’m sticking with my mixed beds: vegetables, herbs, flowers, and climbers growing side by side, while concentrating on producing more of what I know I’ll use.
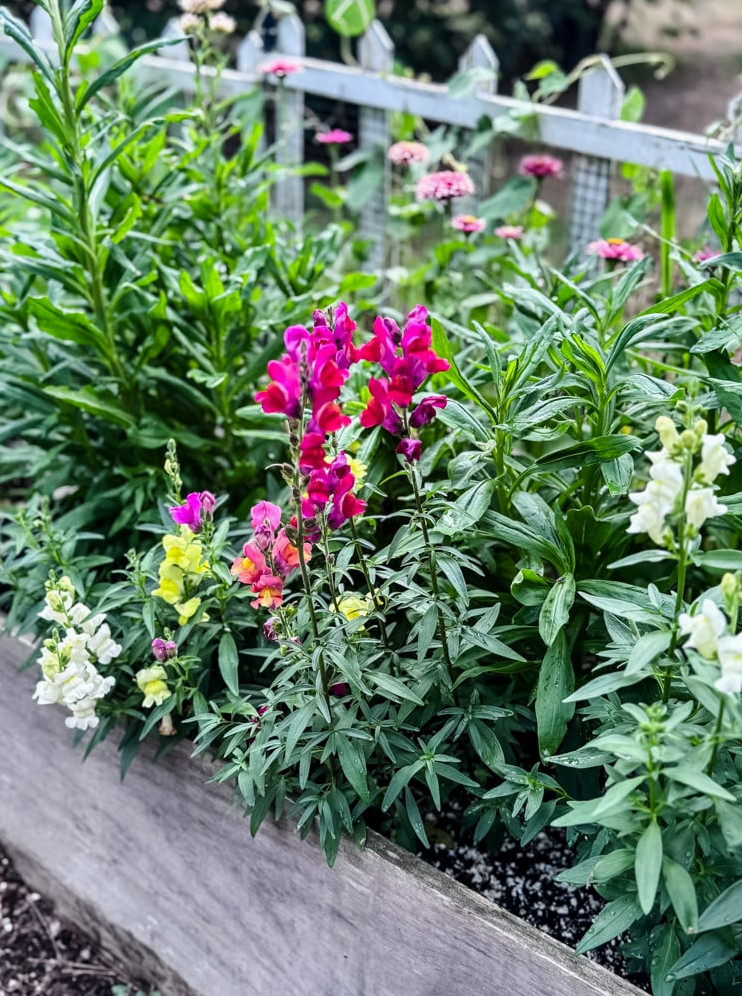
One accomplishment from last year that makes me especially proud was the way I arranged each raised bed. Rather than planting one or two varieties throughout a bed and leaving it at that, I created three separate rows in every bed, organizing them by height: low-growing flowers at the front, medium-sized varieties in the center, and the tallest plants at the back. That meant a bed could feature compact snapdragons in front, zinnias in the middle, and lofty celosia rising behind them.
This gave every bed a purposeful, appealing appearance, almost resembling a small living display, while keeping the garden looking abundant and layered throughout the season instead of like a mix of plants all reaching the same height. I’ll continue this method in 2026, planning it with even greater intention from the beginning.
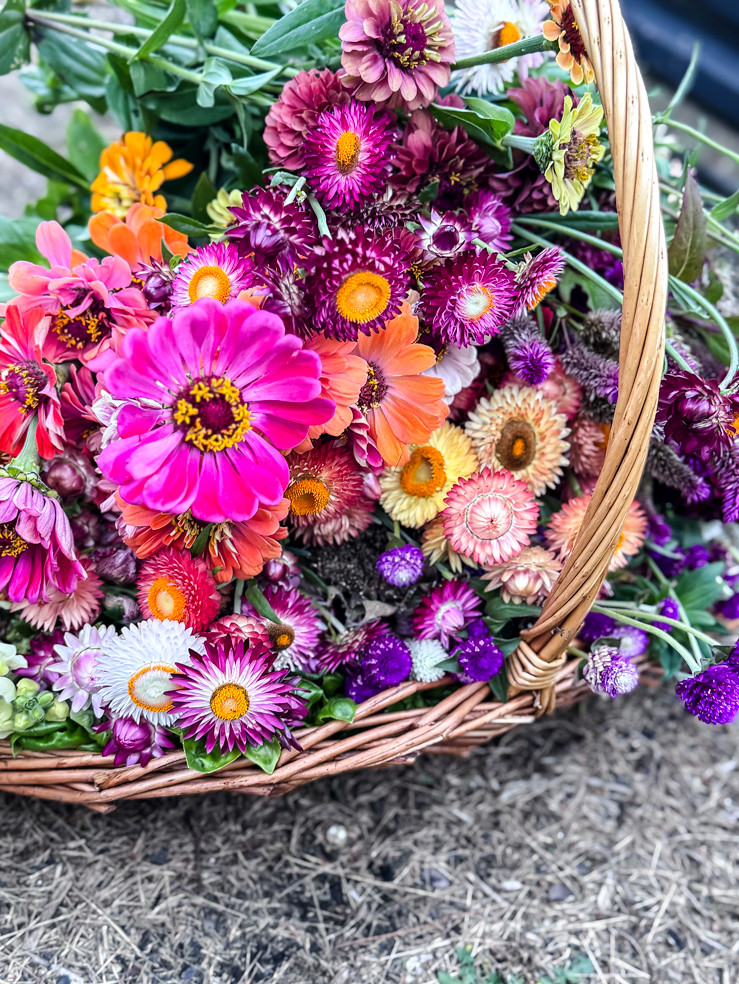
I’m planting more strawflowers and gomphrena, along with additional selections of those zinnias. I’ll also expand the bunny tail grass and craspedia plantings. The sweet peas are definitely returning. Stock will receive one final serious attempt through winter sowing, and I’m truly looking forward to seeing how the poppy trial turns out.
As always, I’m aiming for a garden that supplies both the vase and the wreath basket, with flowers that are lovely throughout summer and continue offering something during winter. That complete seed-to-project cycle is my favorite part of the entire process, and 2025 brought me right back to the reason I love doing it.
I’ll share updates as the season progresses. If you’re winter sowing as well, I’d love to know what you’re placing in your containers this year!
xo, Jennifer
Curious about what I create with all those dried flowers? Explore my complete collection of Floral & Botanical Projects for inspiration throughout the year. And if you haven’t seen my detailed guide to growing flowers for drying, you can find it right here.
Enjoy projects like this?Don’t miss out! Become part of my newsletter familyfor more warm, affordable DIY ideas sent straight to your inbox. You’ll receive special tips, advance access to tutorials, and plenty of inspiration to help your home feel personal, handmade, and full of heart.