
These salt dough handprint ornaments make a delightful Halloween keepsake. Create a pumpkin, Frankenstein, ghost, or vampire. Children can lend a hand by preparing the salt dough and decorating the ornaments! They will have fun pushing their hands into the dough and painting the designs as well. Make one character or craft all four Halloween figures!
RELATED: Salt Dough Recipe
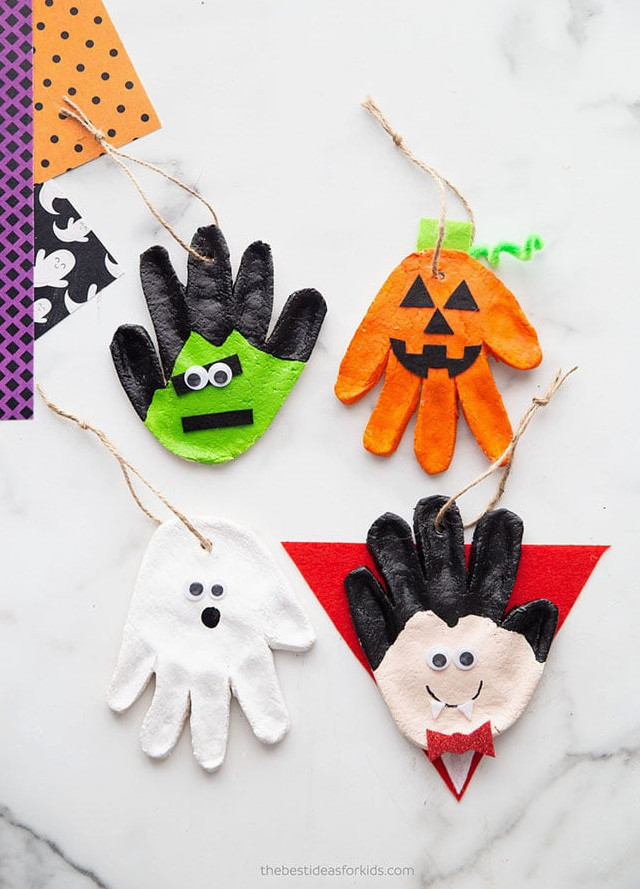
We designed these ornaments to resemble our Halloween handprint cards. You can create the same Halloween characters and make them into an opening handprint card. We enjoyed them so much that we decided they would also be charming ornaments!
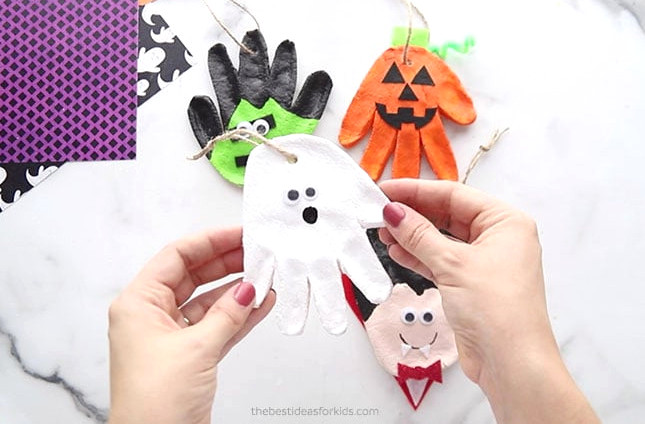
Required Supplies
For Preparing the Salt Dough:
- Flour
- Salt
- Warm Water
- Straw (for creating the hole)
- Twine (for hanging)
- Sealer – finish with either mod podge or a clear glaze spray. We prefer this spray for a long-lasting finish. Adults should handle the spraying and always follow the instructions for the selected product. Sealing the finished ornaments can help prevent them from cracking after a few years.
For the salt dough recipe – refer to the recipe below.
REMINDER and SAFETY NOTE: As a friendly reminder, keep these away from pets (they may be toxic to dogs if swallowed).
These are the supplies needed for decorating:
How should I seal the ornaments?
After finishing, remember to seal the ornaments with either mod podge or a clear glaze spray. Sealing is simpler before attaching the embellishments (felt, googly eyes, and so on). This spray provides a durable finish. Adults should do the spraying and always follow the directions for the chosen product. Sealing the completed ornaments may prevent them from cracking over the years and help protect them from mold.
Which Glue Should I Choose?
Hot glue is the most effective option for attaching items to salt dough. This helps the ornaments last longer and keeps the craft pieces securely in place. Younger children should have an adult assist with this step.
Salt Dough-Making Tips
- I prefer to leave my salt dough to air-dry for 24 hours before baking, which also reduces the baking time!
- After removing the salt dough from the oven, check the bottoms. If they remain slightly soft, place the pieces on a cookie-cooling rack or turn them over and let them air-dry for another day so air can reach the undersides as well.
- Keep the oven temperature low. Although baking will take considerably longer, this helps prevent the salt dough from puffing.
- The salt dough needs plenty of kneading to become smooth. I usually knead it for a minimum of 10 minutes. Divide the batch into smaller portions before kneading and rolling.
- If the dough initially seems dry, thorough kneading will often give it the needed consistency, though you may add a small amount of water if necessary. Add it gradually, or the dough could become overly wet.
-
Start by combining 4 cups of all-purpose flour and 1 cup of salt.
-
Pour in 1.5 cups of warm water, then stir until a dough begins to develop.
-
Should the mixture seem slightly dry, add extra water one tablespoon at a time. If the dough is overly sticky, mix in a small amount of additional flour.
-
Work the dough until it becomes a smooth, soft ball. Knead it for at least 10 minutes so it reaches the proper texture. Roll it until it is just under 1/2 inch thick. The surface should look smooth after rolling; if it does not, knead it for several more minutes.
-
Push your hand into the dough to create a handprint.
-
Using a knife, carefully trim out the handprints (adults only). Keep a small amount of space around every finger so they do not become too thin during baking. If making the complete set of ornaments, repeat this process 3 additional times.
-
Use a straw to create a hole at the top of the middle finger for Frankenstein and the Vampire. For the ghost and pumpkin, make the hole on the opposite side, where the fingers hang downward.
-
When possible, allow the ornaments to dry naturally for one day before baking. Doing so reduces the required oven time. Bake at 250 degrees Fahrenheit (or 120 degrees Celsius) for 2 hours. Afterward, place the ornament bottoms on a cookie cooling rack and let them air dry for one day before painting.
-
Apply paint to the ornaments. Once dry, protect them with a clear spray sealer or Mod Podge before attaching the decorations.
-
Finish decorating the ornaments using the directions below.
-
Attach a length of twine or ribbon so the ornaments can be hung.
Ways to Decorate the Halloween Salt Dough Crafts
Begin by painting each handprint:
- Use orange paint for the pumpkin handprint
- Cover the ghost with white paint
- Paint Frankenstein green. Once the green paint has dried, color the fingers black to create the hair.
- Give the vampire’s face a beige shade (or this shade). Let the paint dry, then make the fingers black for the hair.
Frankenstein
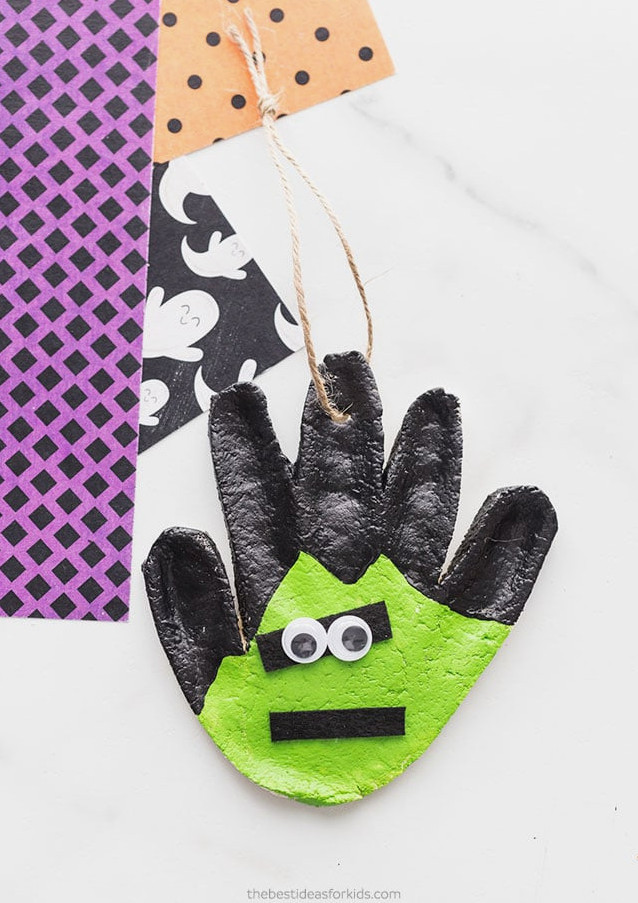
1. Trim two rectangular felt pieces and adhere them to the face as eyebrows and a mouth.
2. Place 2 googly eyes above the felt eyebrow piece and glue them in position.
Pumpkin
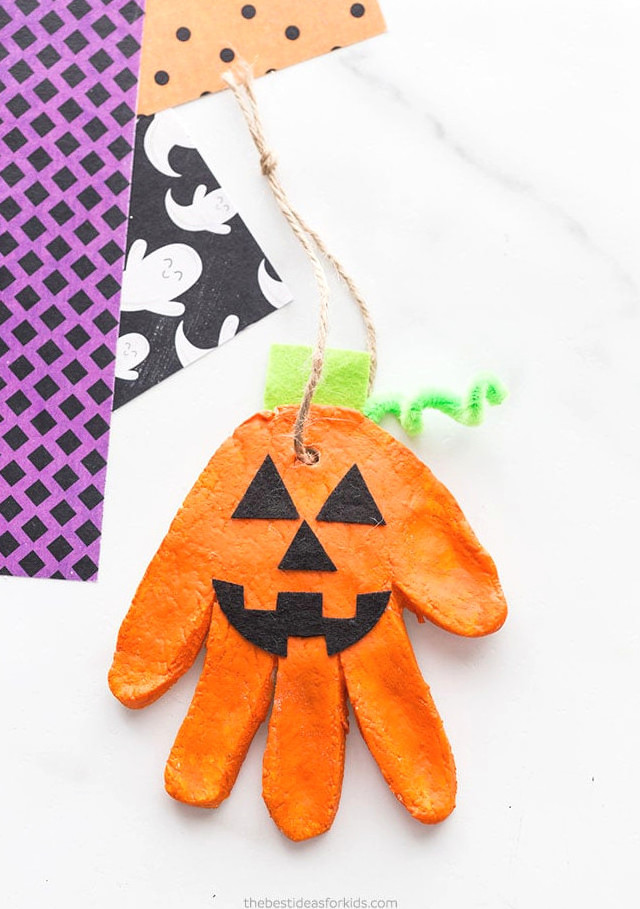
1. Shape the eyes, nose, and mouth from black felt, then glue them into place.
2. Fashion a stem from green or brown felt and attach it to the rear of the handprint’s top.
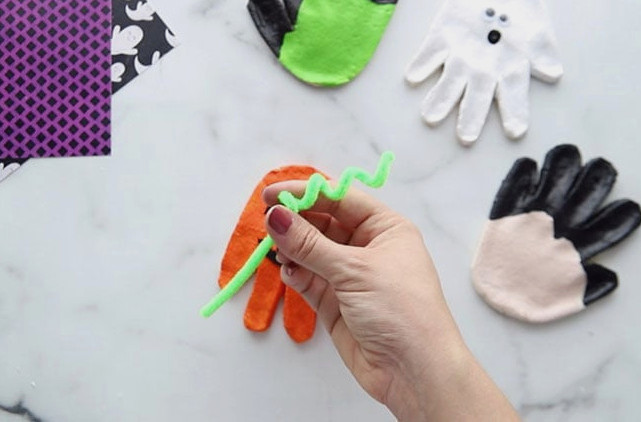
3. Wind a green pipe cleaner around a pencil, then fasten it to the back of the handprint’s top.
Ghost
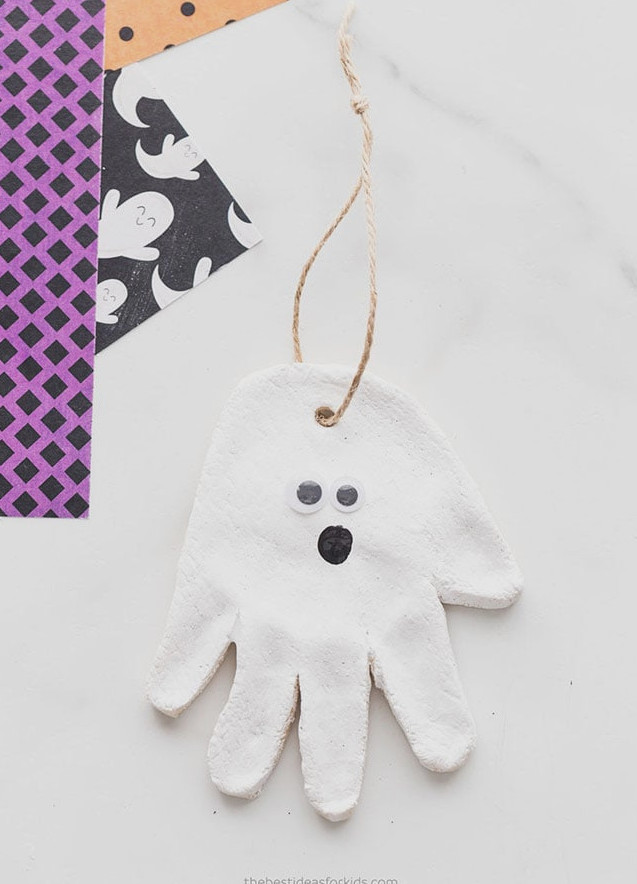
1. Attach 2 googly eyes. We chose one that was a bit larger than the other.
2. Use black paint or a black Sharpie to add the mouth.
Vampire
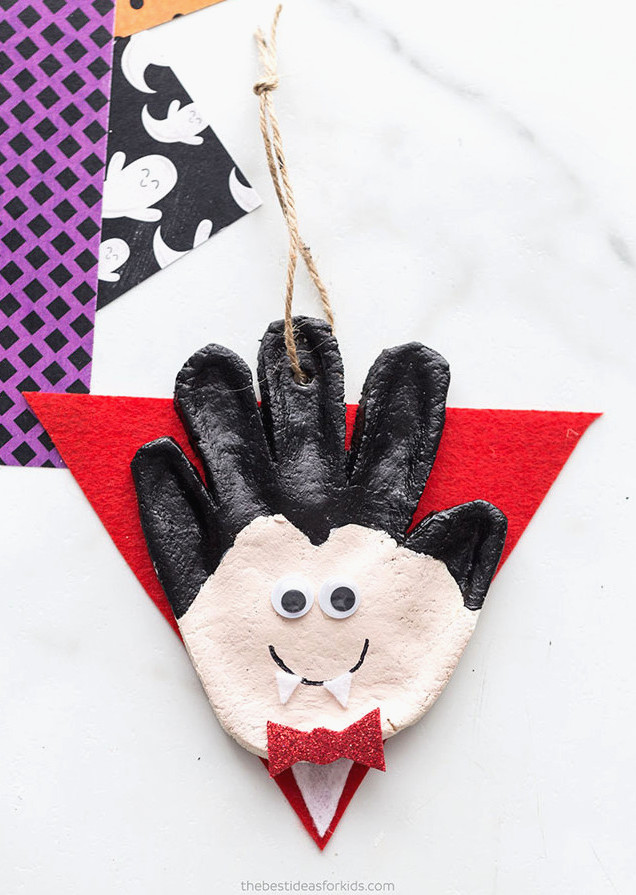
1. From red felt, cut a triangular piece and glue it onto the back of the handprint.
2. Make a slim triangle from white felt and attach it to the triangle’s lower edge.
3. Secure 2 googly eyes with glue.
4. Sketch the mouth using a black Sharpie.
5. Cut 2 tiny triangles from white felt and attach them to the mouth.
6. Cut a bow shape from glitter foam paper and adhere it to the bottom of the handprint.
We hope you enjoy creating these charming Halloween handprint ornaments!