
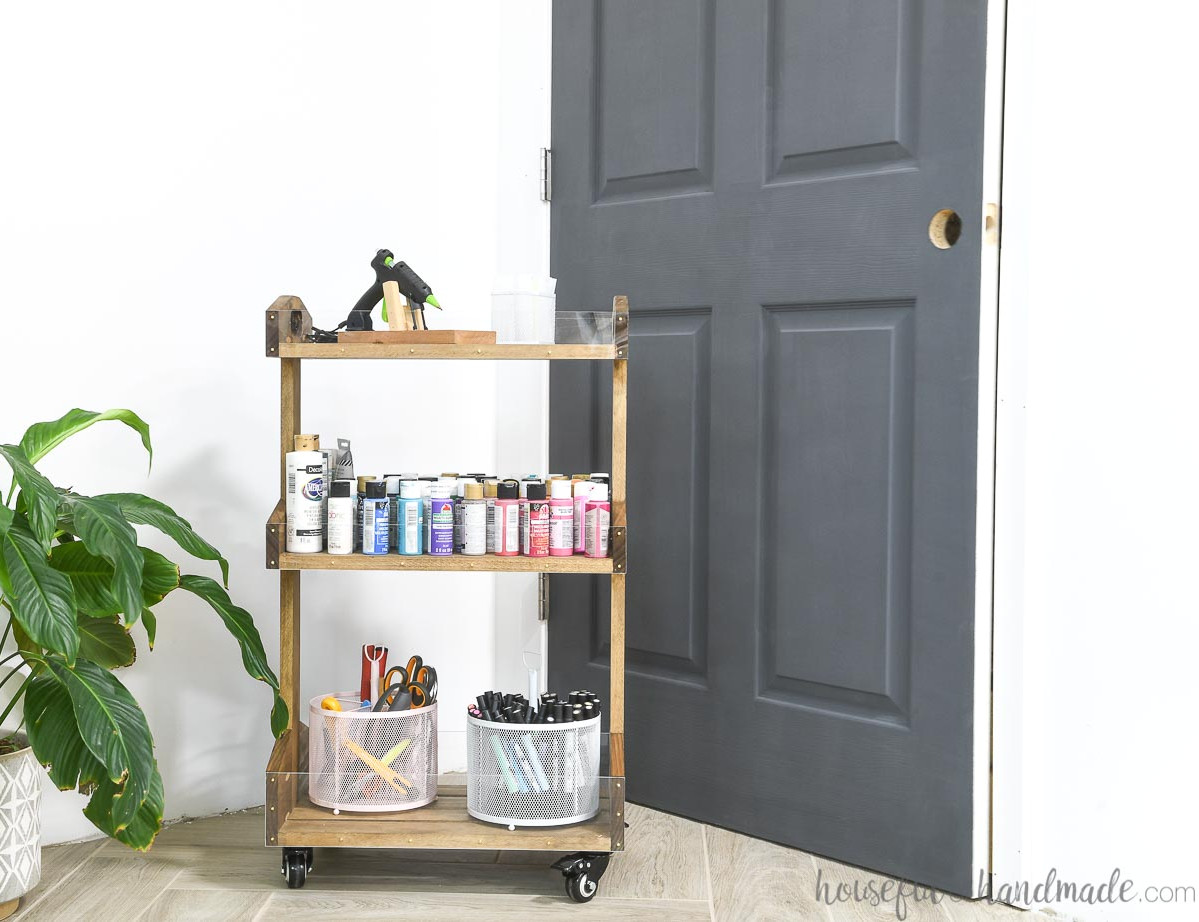
Bring extra storage to any room with this attractive wooden rolling cart.
You can never enjoy too much storage. That is exactly why rolling carts have become so well-liked.
Need additional storage in your bathroom: rolling cart! Need extra room in your kitchen: rolling cart! Need a place for your hobby supplies: rolling cart! The options are limitless.
That is why I teamed up with Kreg tools and used their newly updated Kreg Jig 720Pro to create this simple wooden rolling cart. It would be an ideal DIY present for someone on your Christmas shopping list!
And at the moment, you can purchase the 720Pro pocket hole jig bundled with my favorite AutoMaxx face clamp and screws (through Jan 31, 2022 or while supplies remain).
Rolling Storage Cart Design
While planning this wooden cart, I wanted it to be both attractive and practical. I think the result accomplished both goals!
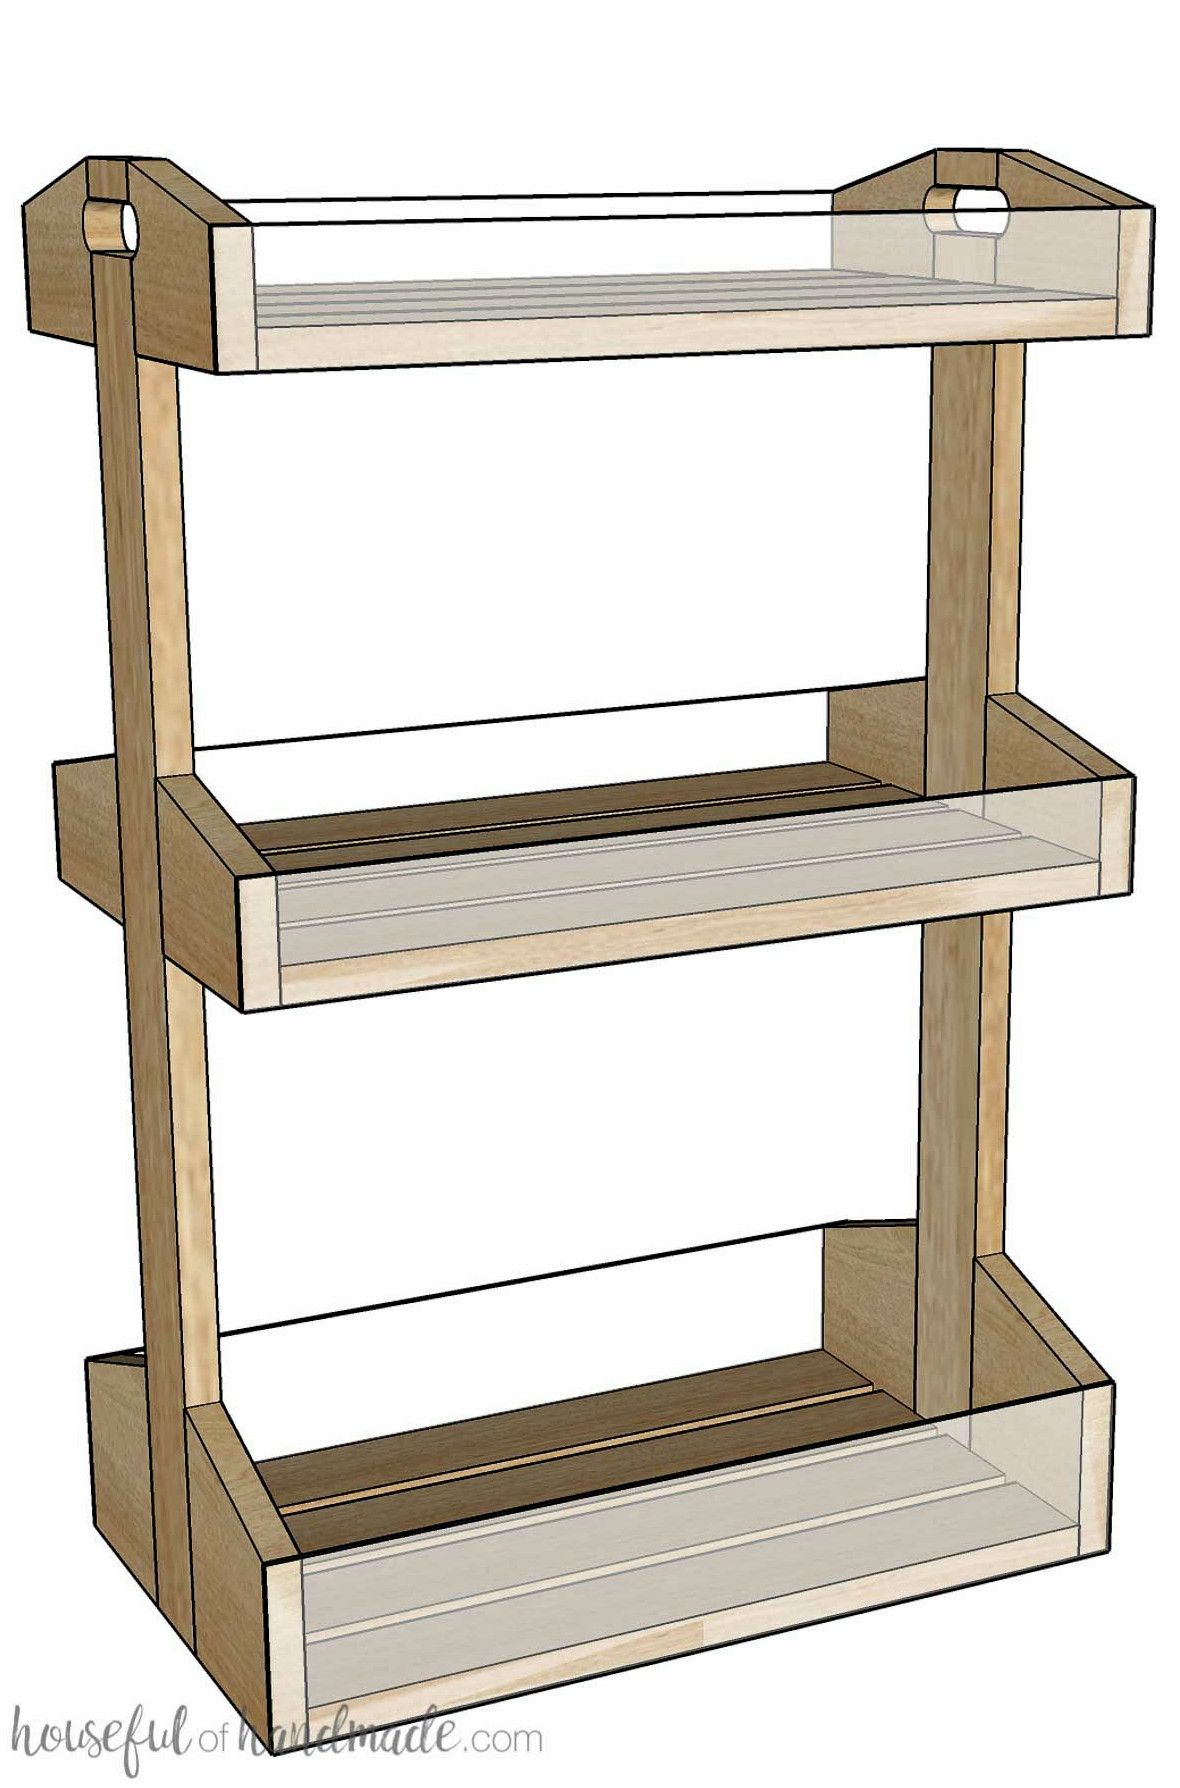
Rather than using four corner posts to secure the trays, the trays join together at the center of each side. This keeps the full storage section open and simple to reach.
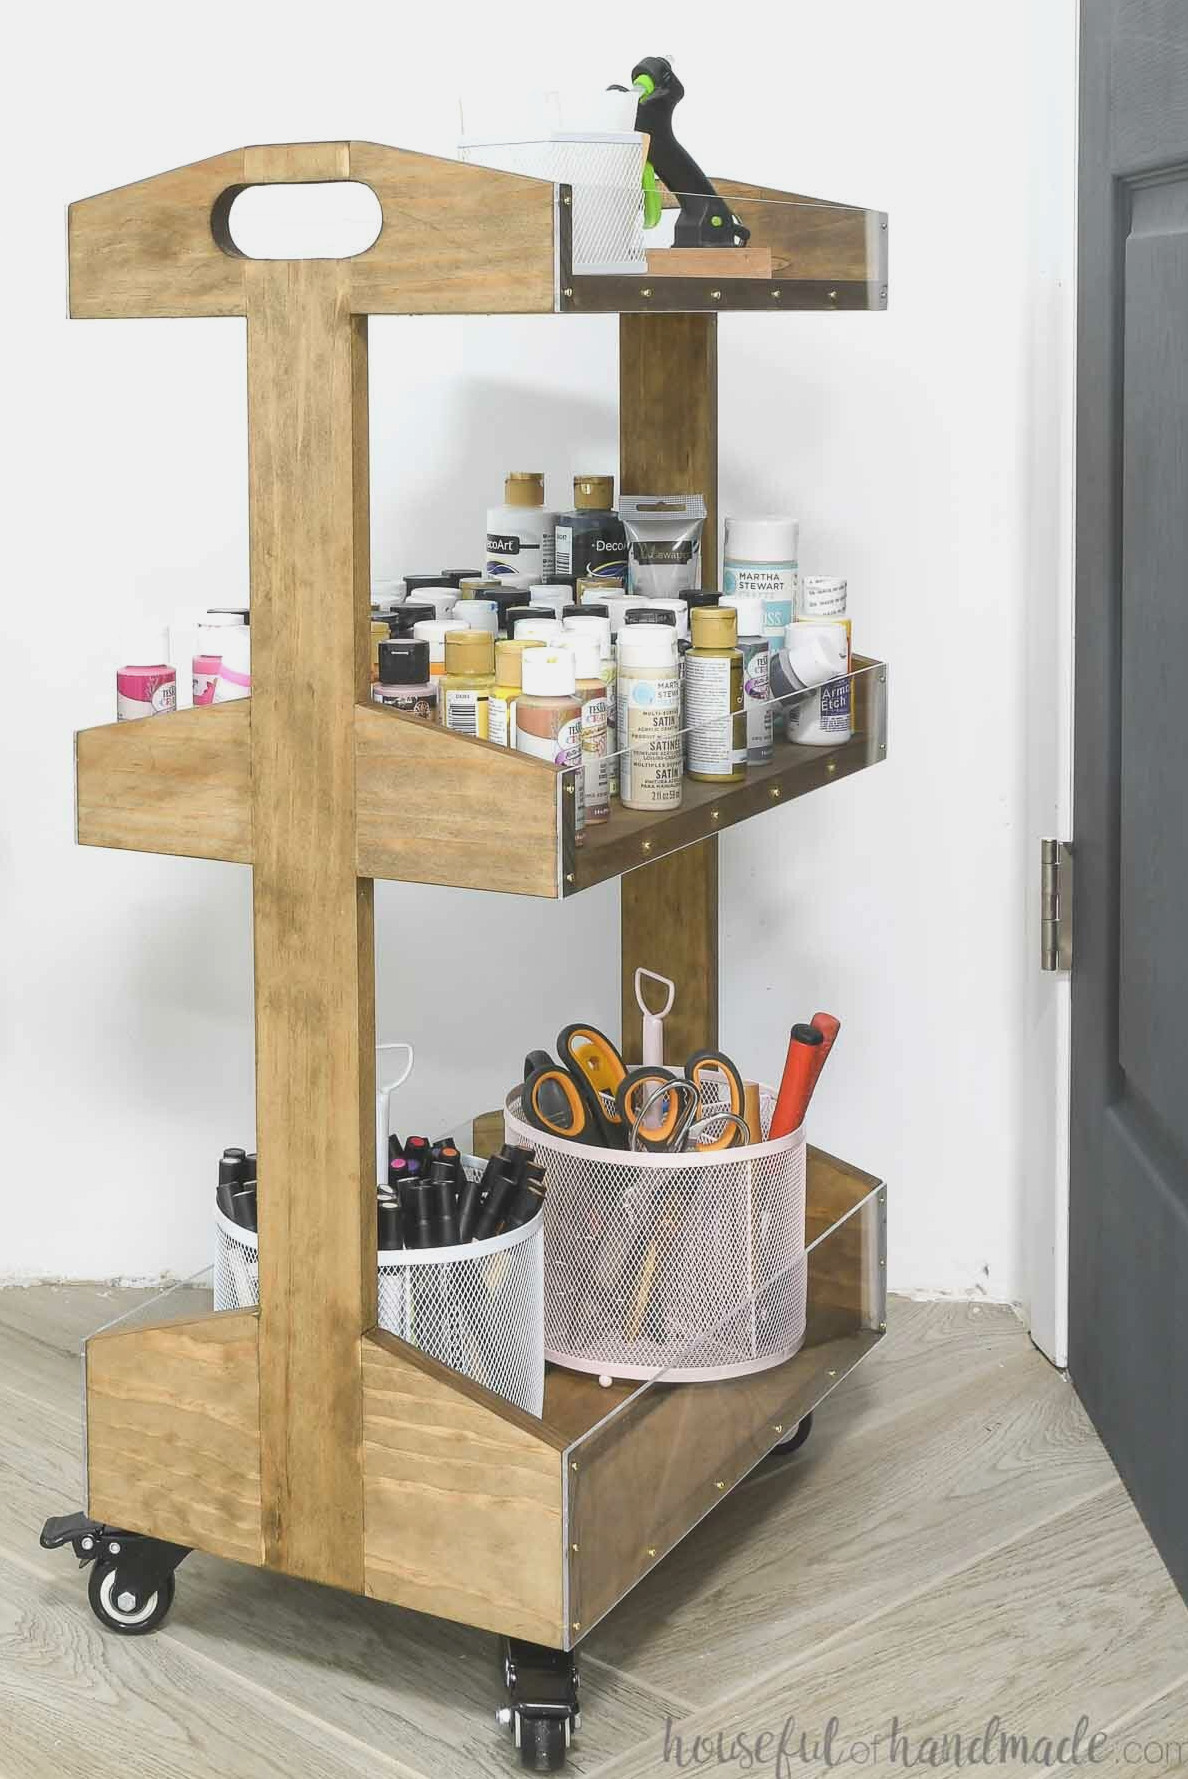
To create an even more open storage section (it is always helpful to see what is inside your cart), I added plexiglass to the edges of the storage trays. Besides making the contents easy to view, it also gives the cart a sleek, lighter appearance.
If you prefer a more functional utility cart, you can use wood along the edges instead of plexiglass. However, the plexiglass looks fantastic on a decorative cart!

Both sides of the cart feature a cutout handle, making it simple to pick up and move wherever necessary. Plus, the 4 sturdy caster wheels let you roll it around with ease.
This three-level cart provides plenty of storage space. The bottom level includes a deeper tray, while the top two trays are shallower.
However, these dimensions are easy to modify while building your own rolling cart. Add extra levels or create deeper or shallower trays according to your requirements.
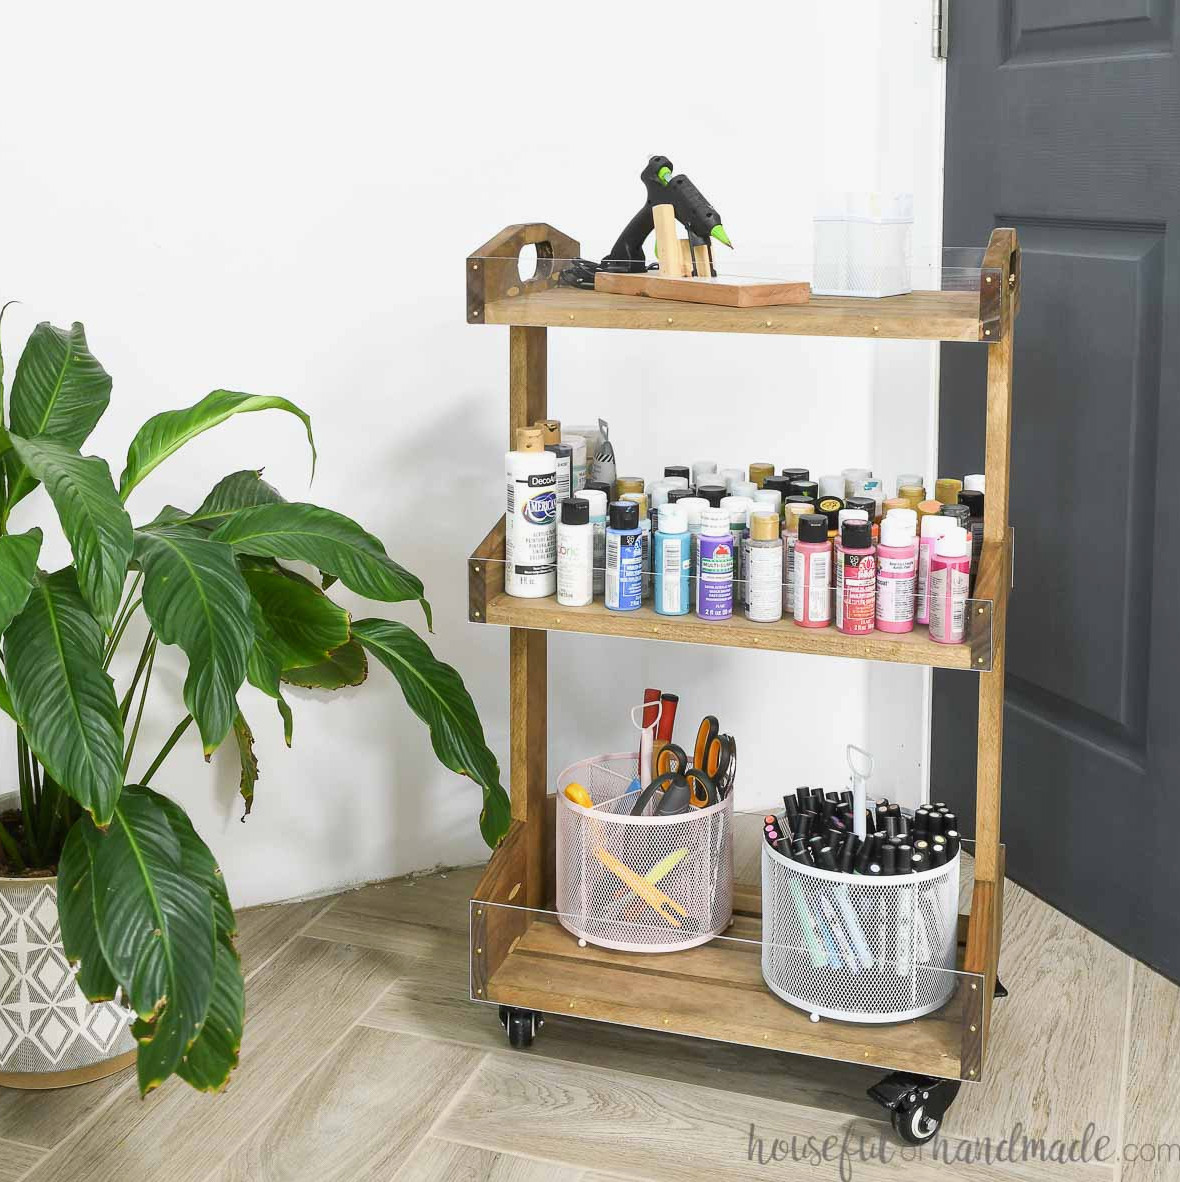
Ways to Use a Rolling Cart
Rolling storage carts are incredibly handy! They bring organization and additional storage into any room while looking attractive at the same time.
What I especially like about this wooden rolling cart is that it is stylish enough to function as furniture in any room. With 3 easy-to-view trays, you can keep plenty of whatever you need inside.
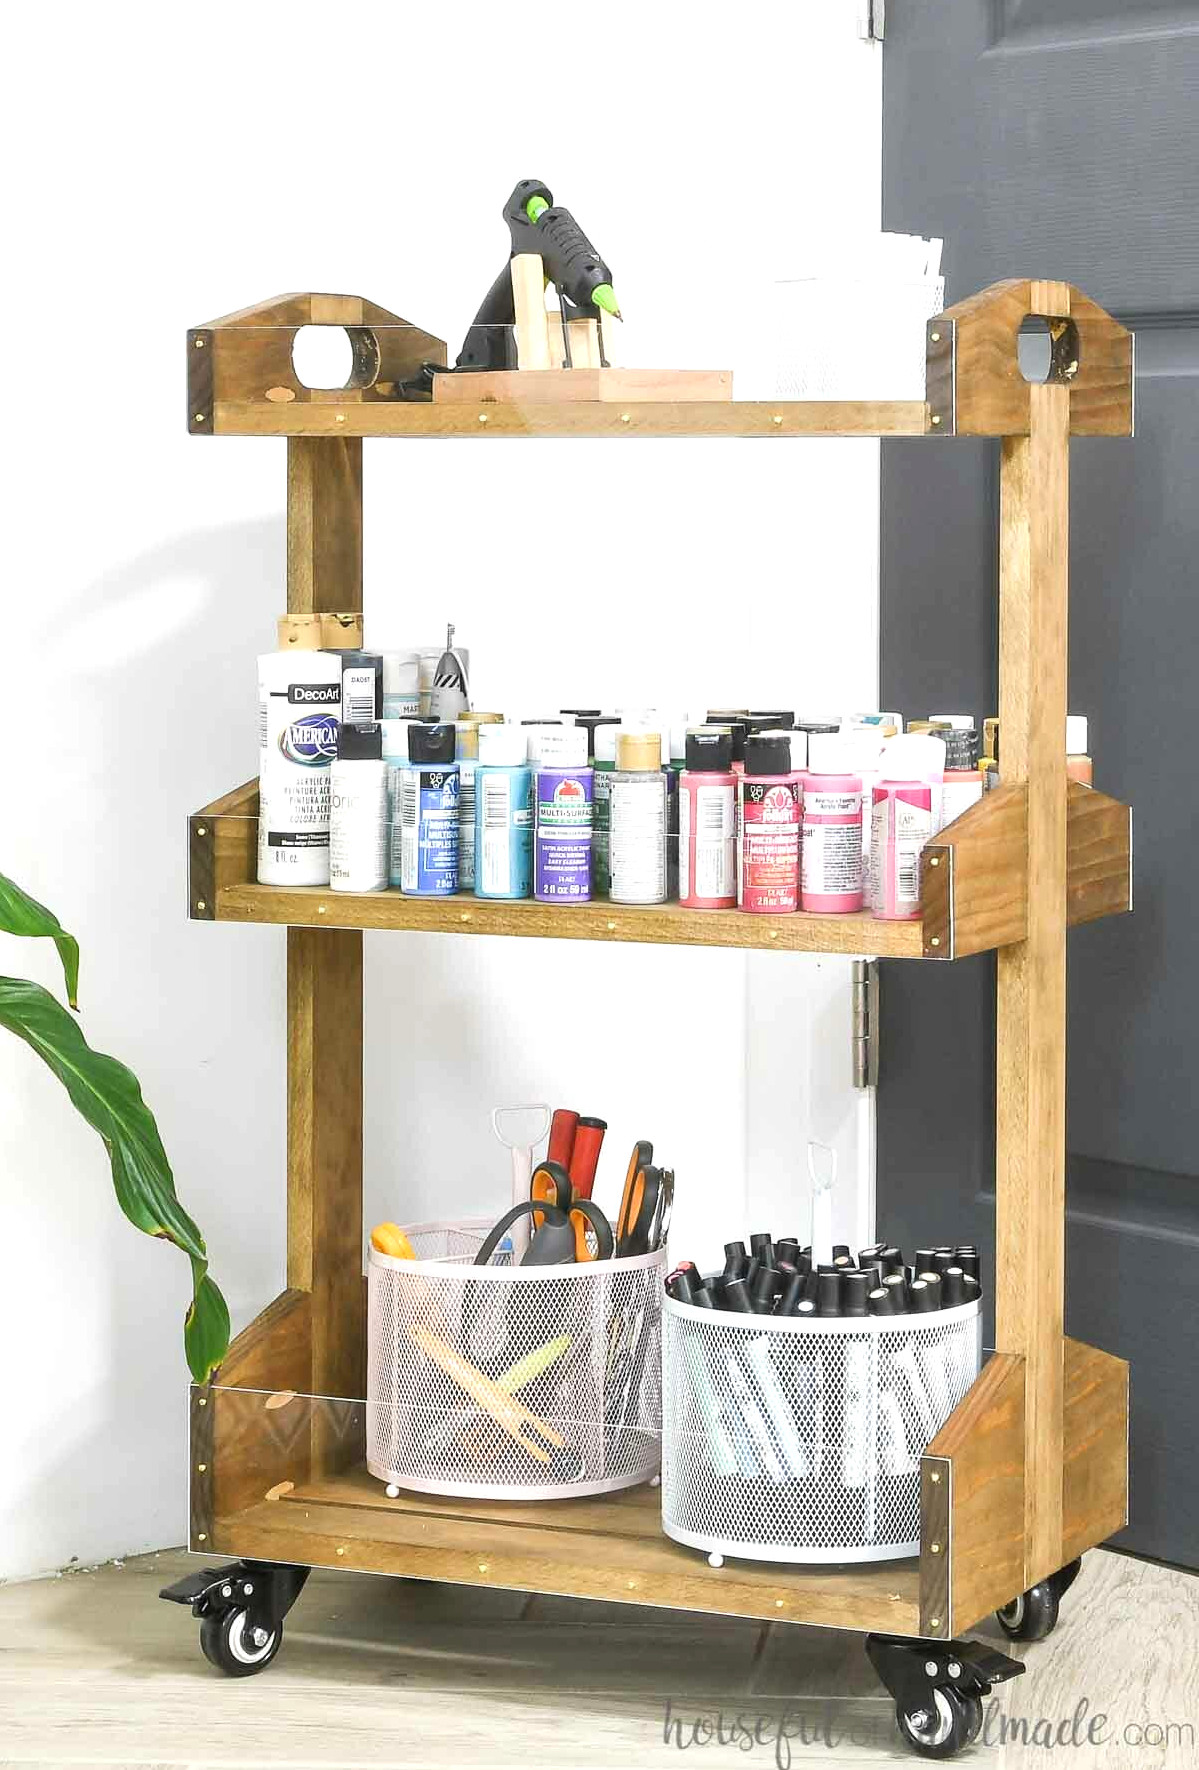
Here are several ways you can use your wooden storage cart:
- Set it beside your sofa for magazines, books, and remote controls.
- Turn it into a craft cart that can be stored in a closet when it is not needed.
- Bring extra storage to a kitchen wall or corner.
- Place it in a bathroom so each person has a personal storage area for their belongings.
- Put serving dishes on it for display in the dining room.
- Use it as a bedside table in a bedroom.
- Keep it in a workshop to have frequently used tools and materials nearby.
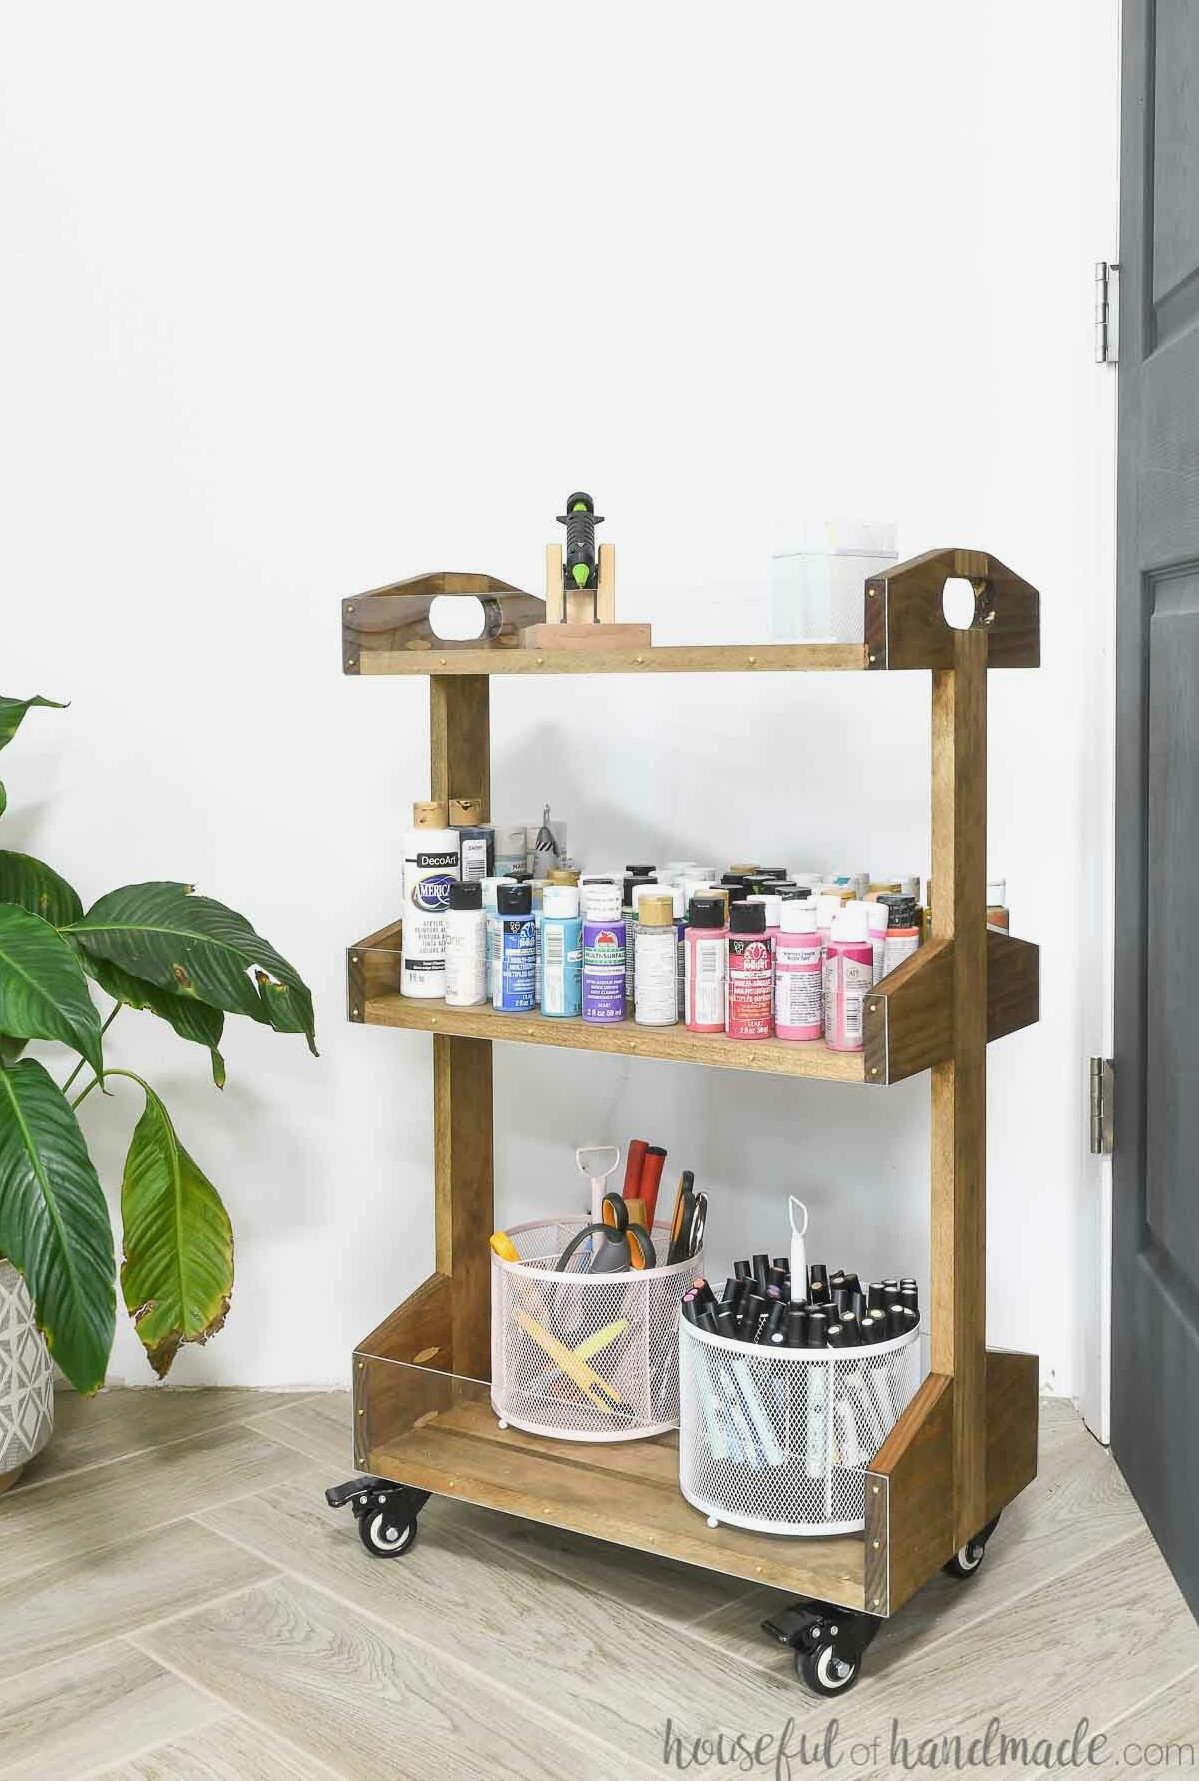
Those are only a handful of ideas for using a new wooden rolling cart. I am using mine as a craft table, keeping craft supplies underneath and my glue gun conveniently on top.
How to Make a Rolling Cart
Tools required:
- Pocket hole jig
- Purchase the Kreg 720Pro with a complimentary clamp and screws now through January 31, 2022.
- Miter saw
- Carpenter’s square
- Drill
- Impact driver (optional, though I appreciate not needing to change bits on the drill)
- Jigsaw
- Sander
- Saw or utility knife for trimming plexiglass
Materials:
- Wood materials
- (3) 8′ long 1×3 boards
- (1) 3′ long 1×4 board
- (1) 20″ long 1×6 board
- (4) 2 1/2″ x 19 1/2″ plexiglass pieces
- (2) 4″ x 19 1/2″ plexiglass pieces
- 1 1/4″ pocket hole screws
- Small pan-head wood screws
- 2″ caster wheels
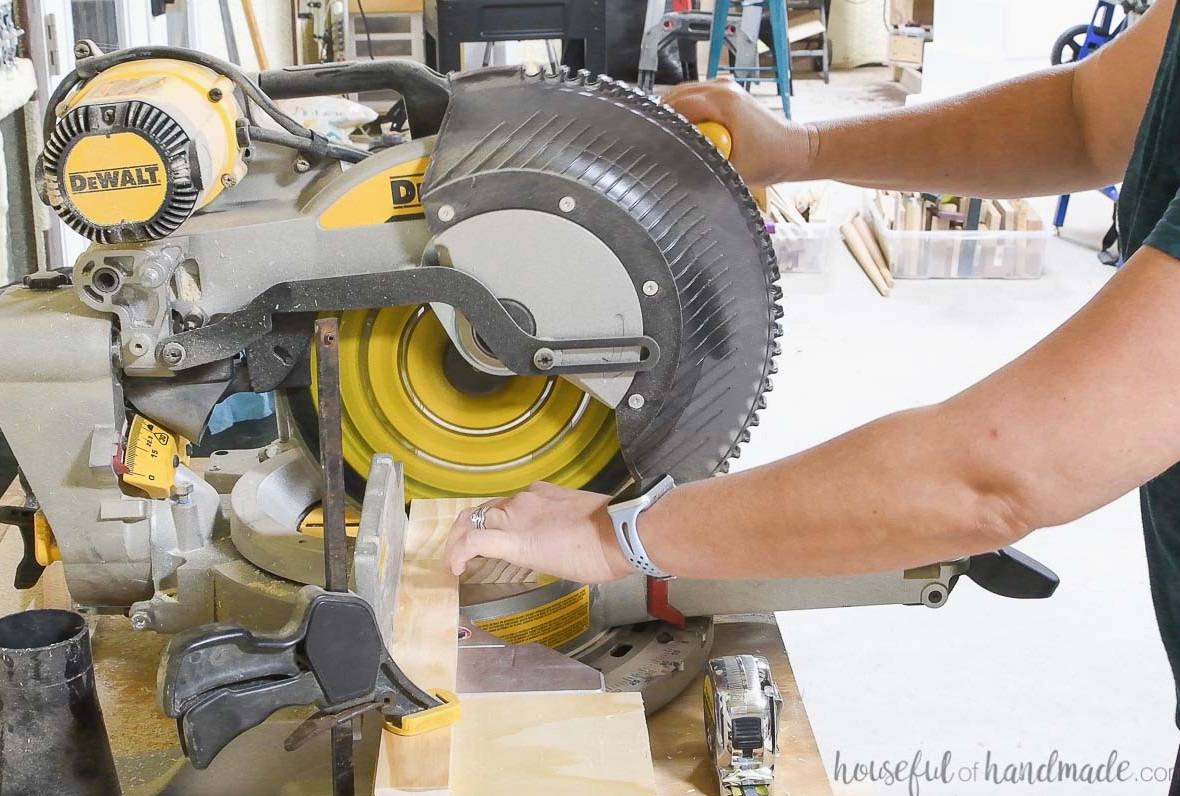
Cut the components
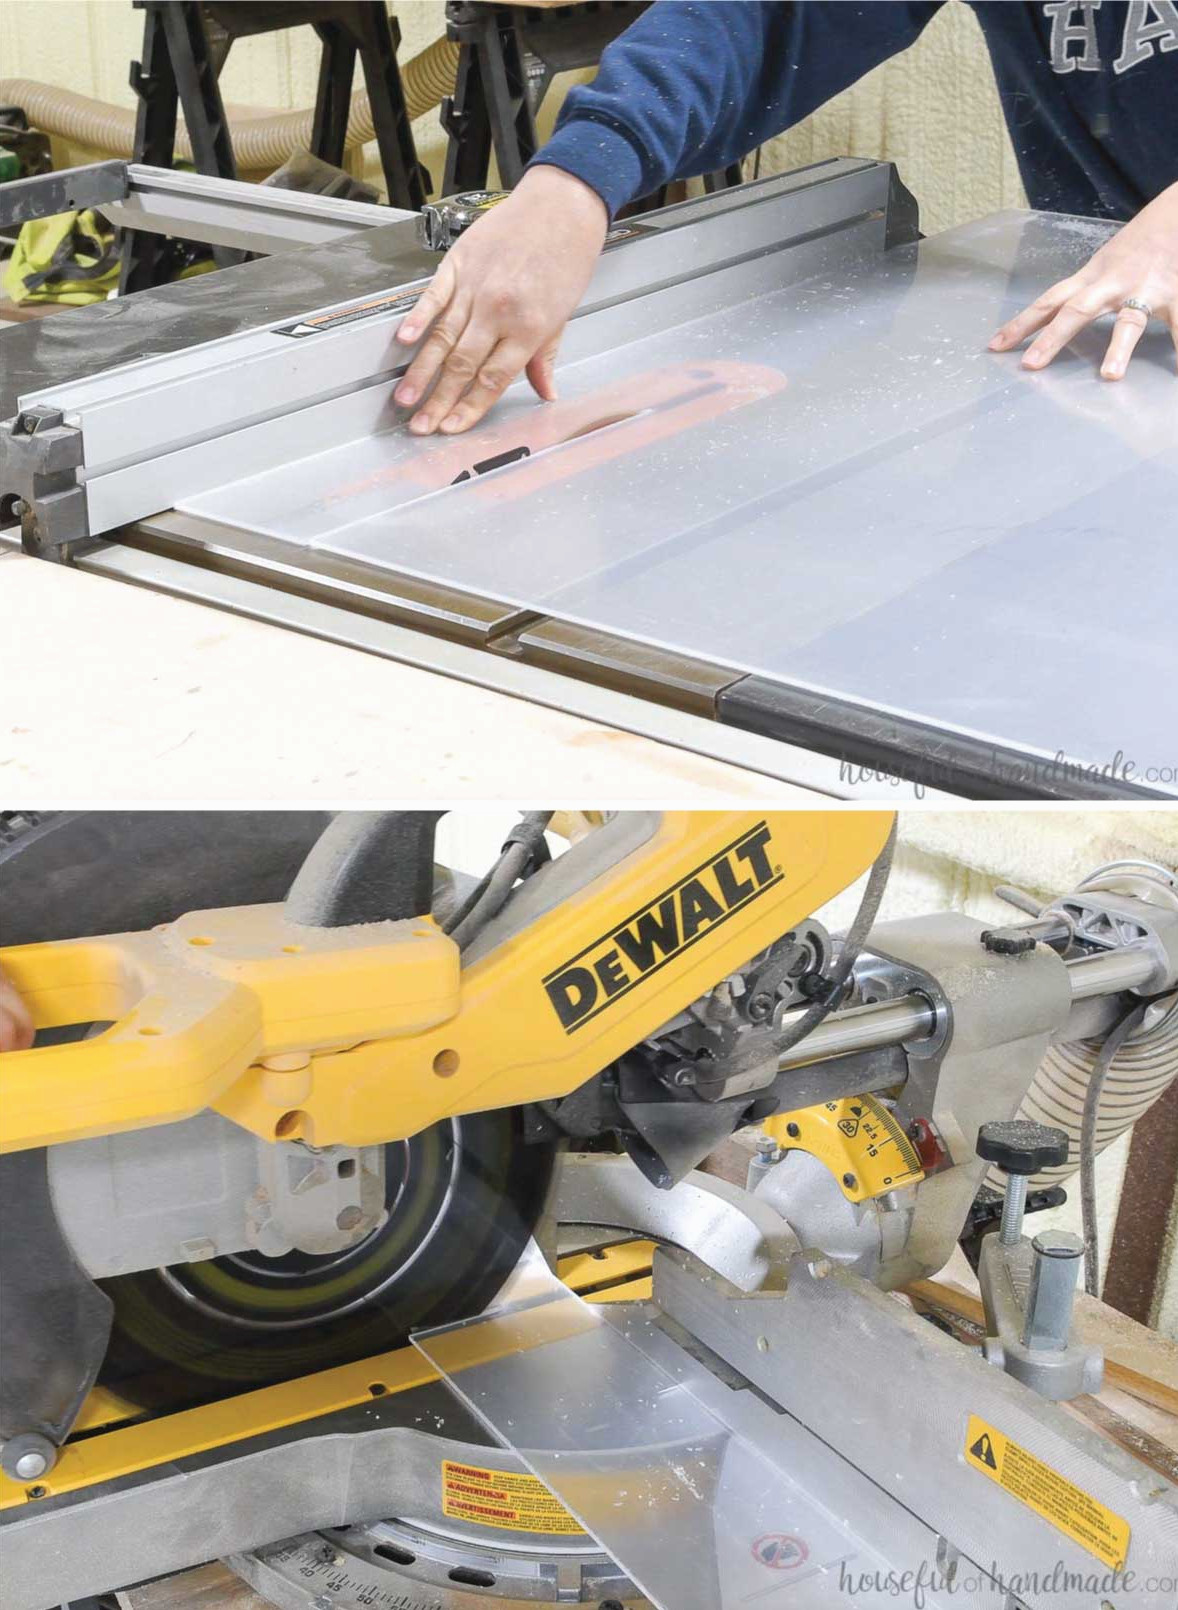
Use your miter saw to trim every piece.
- (2) 30″ 1×3 boards
- (12) 18″ 1×3 boards
- (8) 4″ 1×4 boards
- (4) 4″ 1×6 boards
Usually, I do not advise cutting every piece before putting things together, but this is one project where you can cut all the pieces before assembly.pieces at the front.
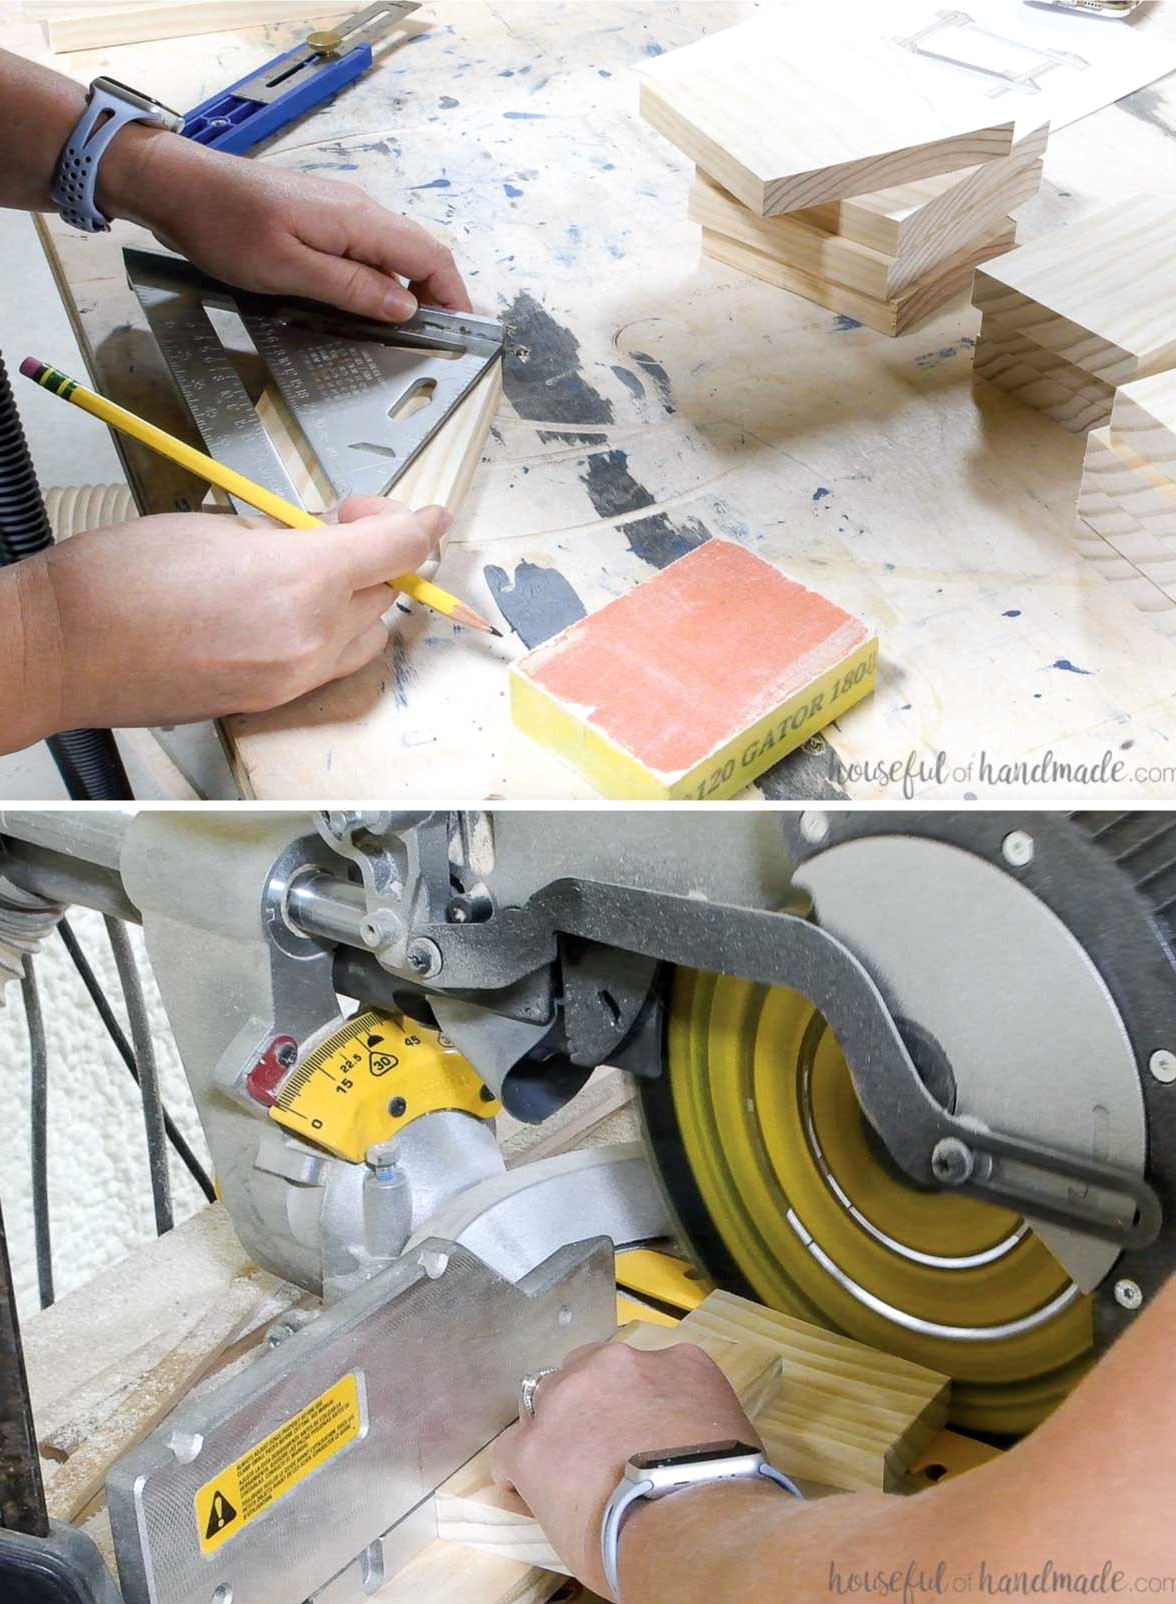
On the 4″ 1×4 boards, measure 2 1/2″ upward from the front bottom and mark the spot. Draw a line connecting this mark to the upper back corner.
Adjust your miter saw to remove the angle from the board. Use this setting to cut the top of each 4″ 1×4 board.
Repeat the same steps for the 4″ 1×6 boards, though this time measure 4″ upward from the front bottom corner before marking. The angle will vary slightly from the one used on the narrower boards.
Regular woodworking tools can be used to cut the plexiglass. Alternatively, score it along the line with a utility knife, then snap it apart.
Keep the protective backing on the plexi during and after cutting. Leave it in place until the final step to prevent scratches.
Use 220-grit sandpaper to gently smooth the cut edges and eliminate sharp spots.
Put together the cart sides
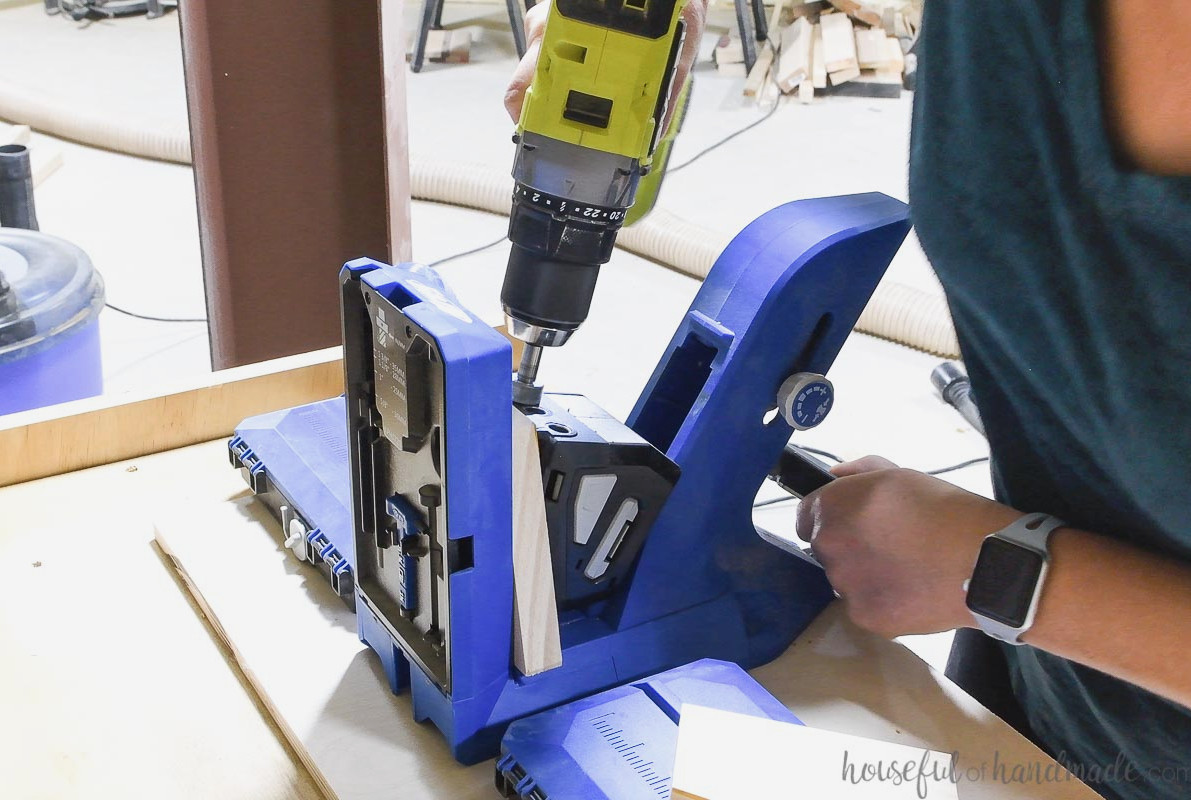
Adjust the drill bit on the Kreg 720Pro pocket hole jig for 3/4″-thick material. The jig does not need to be manually adjusted; simply clamp the material in place, and it will adapt automatically to the thickness.
Make two pocket holes in the longer edges of every angled board. When drilling, mirror the boards so the holes will all face inward and remain concealed inside the cart.
For the top-tier boards, position the pocket holes within the lower 1 1/4″ of the angled pieces. This keeps them clear of the handle area that will be cut out later.
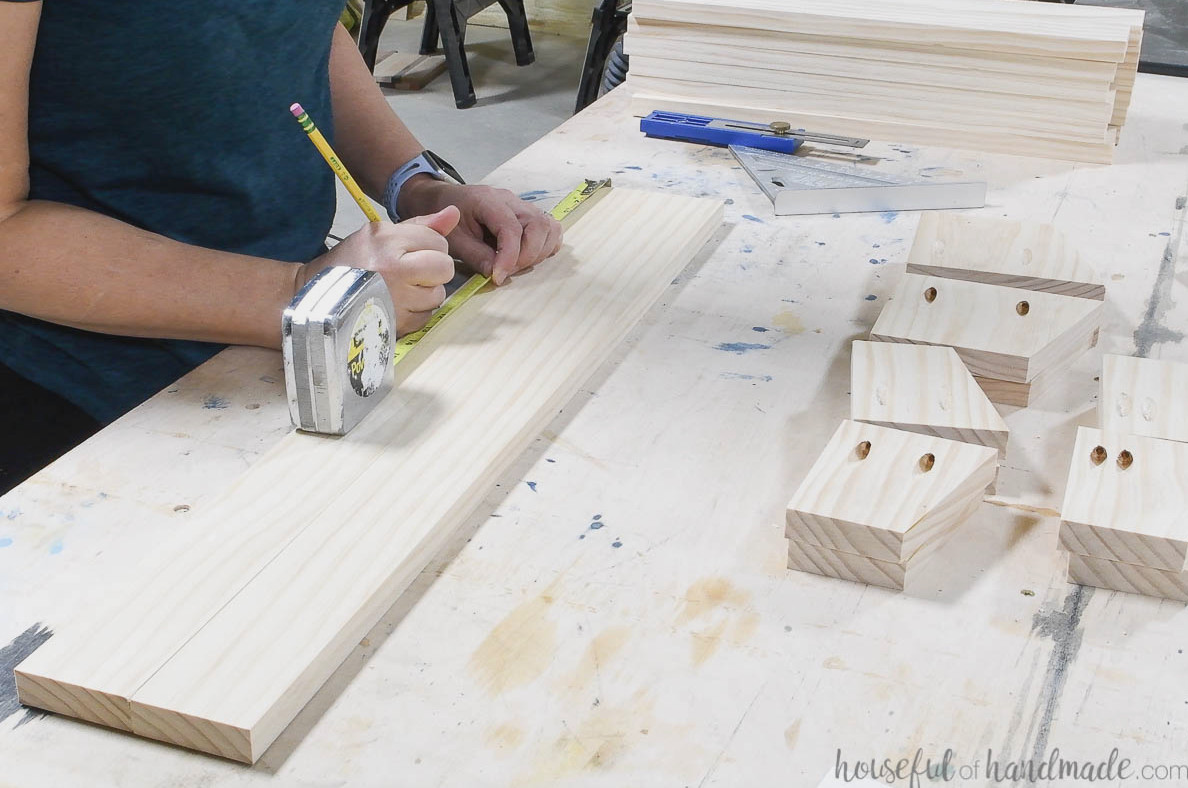
From the top of the 30″ 1×3 boards, measure down 11 1/2″. Mark this measurement on both sides of each board.
The middle tray’s top will be fastened at this location. Adjust the position as desired.
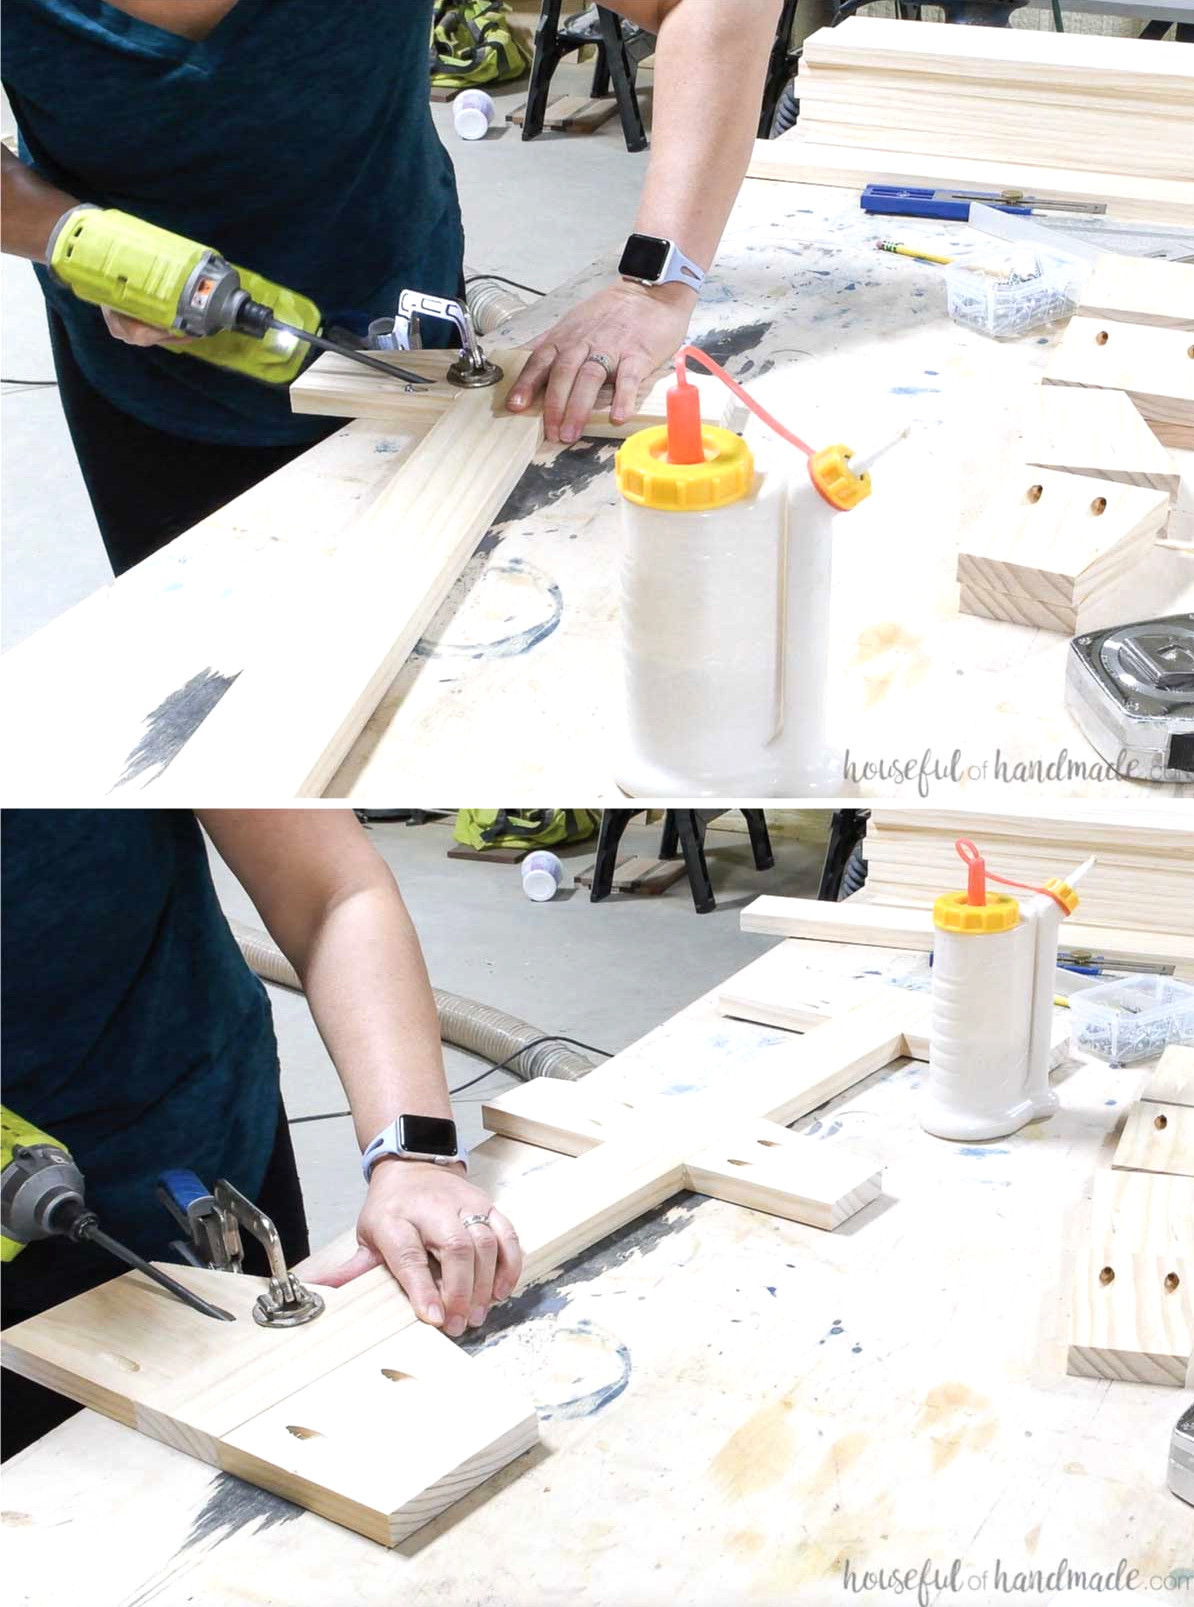
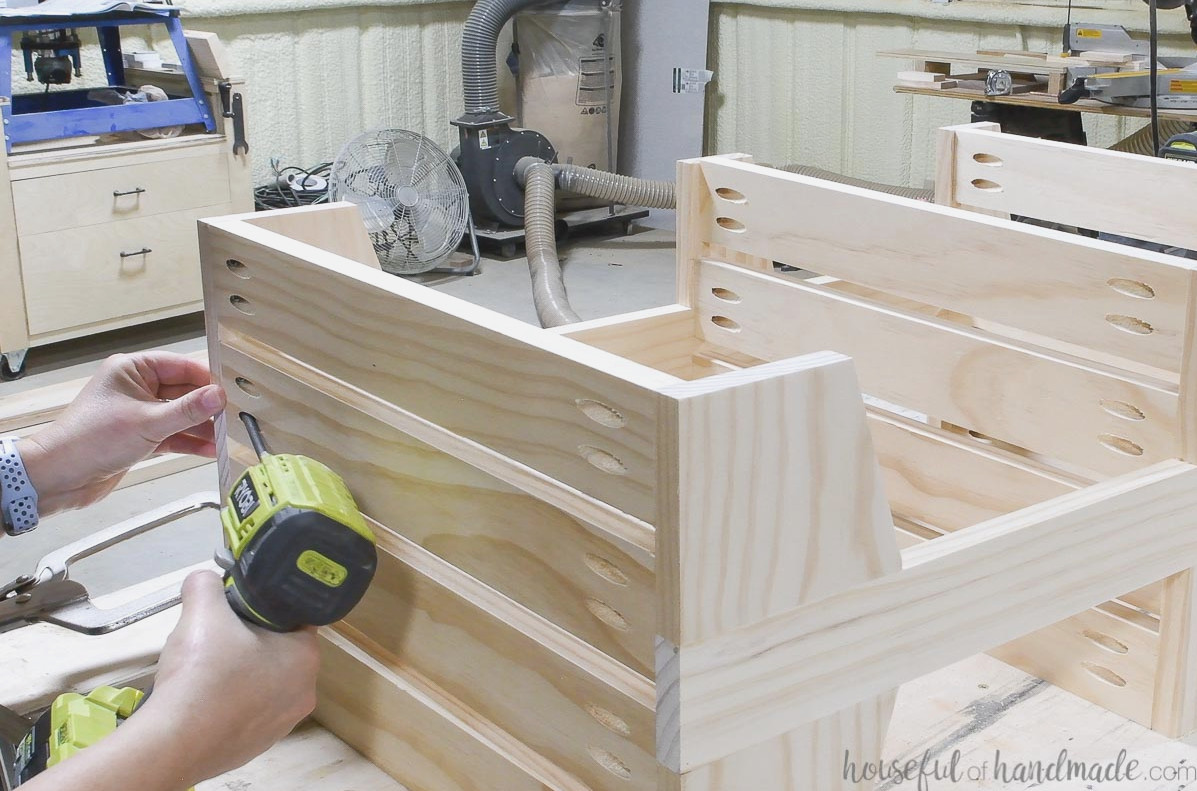
Fasten the angled pieces to the center 1×3 using wood glue and 1 1/4″ pocket hole screws.
Align the top edges of the top-tier boards with the top of the 1×3. Match the bottom edges of the bottom-tier boards with the bottom of the 1×3. Finally, align the upper edges of the middle-tier boards with the mark.
Hold everything flush at the front and back with a face clamp.
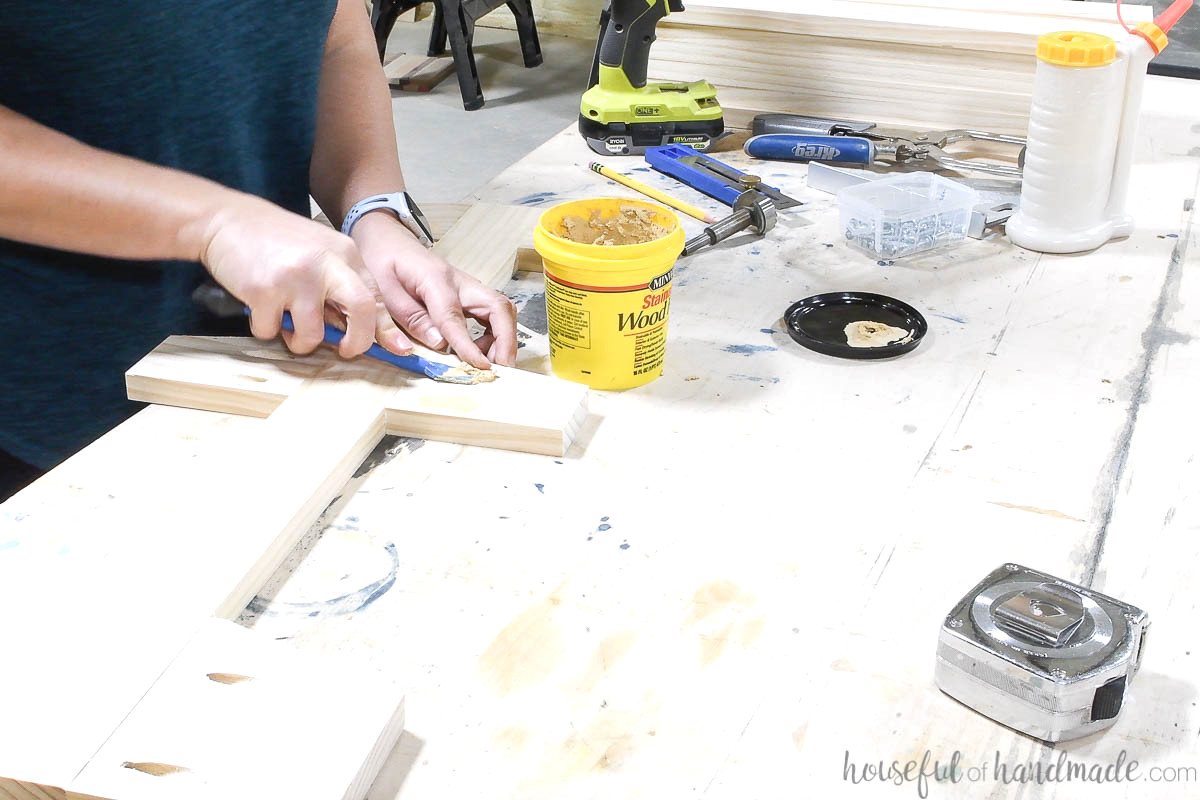
Cover the pocket holes with wood putty or plugs to conceal them inside the rolling cart. Sand the sides smooth before continuing.
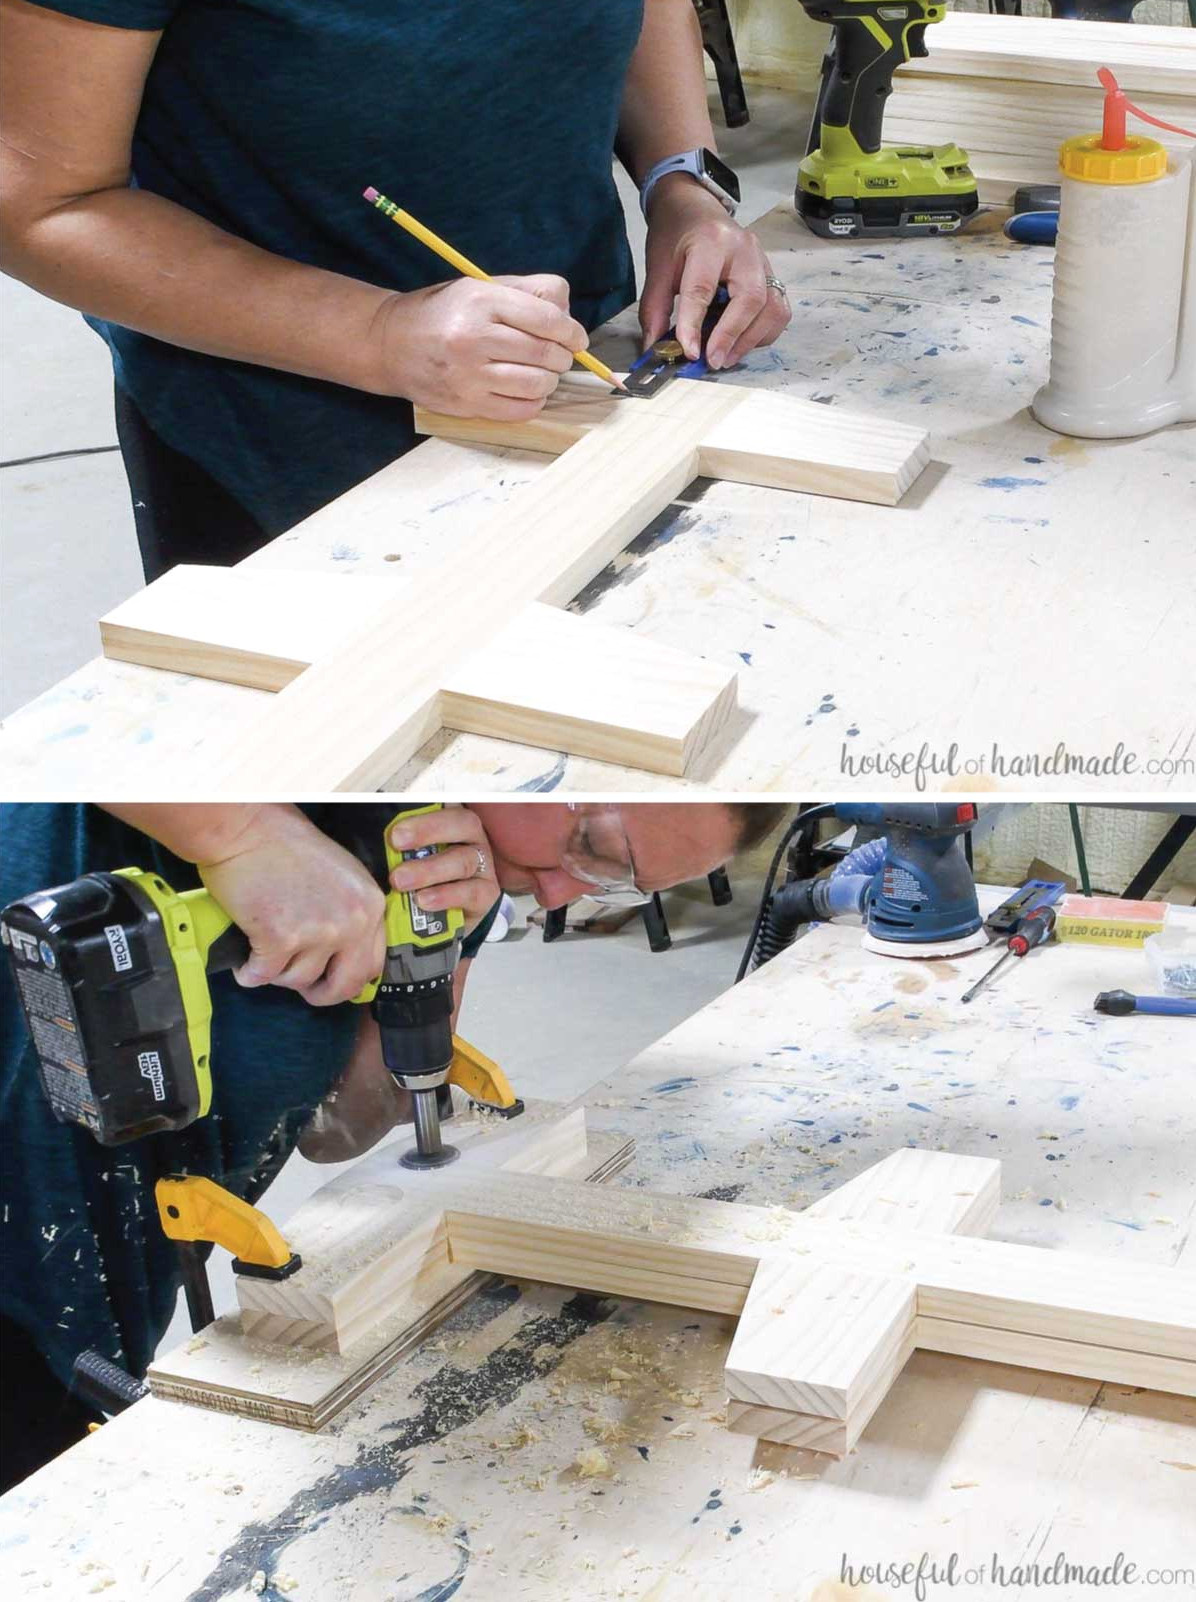
Measure 3/4″ downward from the top of the side pieces and the top tier, then draw a line. From that line, measure another 1 1/2″ downward and draw a second line. These lines indicate the handle’s upper and lower edges.
Mark the midpoint of this section where the 1×3 center board meets the side boards.
Clamp the two upper pieces together. With a 1 1/2″ Forstner bit, drill holes centered on the mark at the seam.
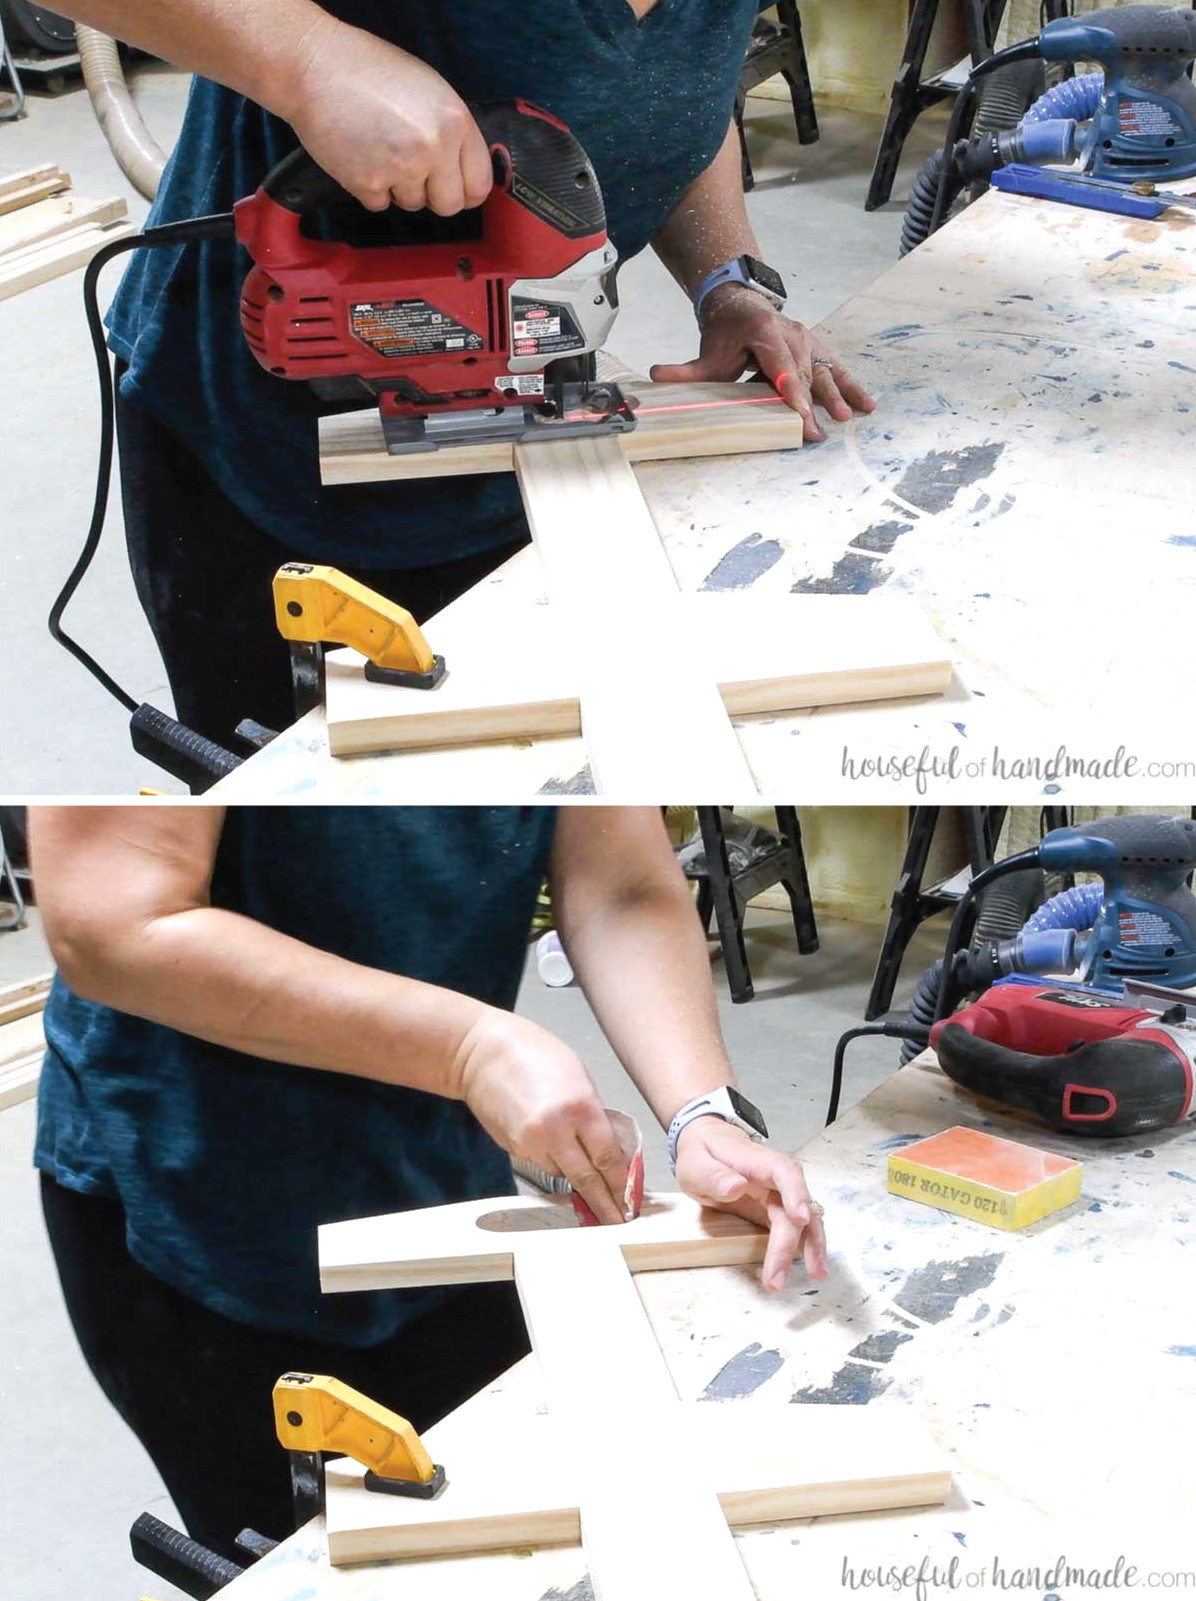
Next, use a jigsaw to cut along the lines connecting the holes and form the handle opening.
Smooth the handle opening with sandpaper.
Create two pocket holes at both ends of each 18″ 1×3 board.
Fasten the 1×3 boards to one side piece, using four boards per tier.
Keep the outer boards even with the side-board edges. Space the two inner boards 1/2″ apart.
Apply wood glue and secure everything with 1 1/4″ pocket hole screws.
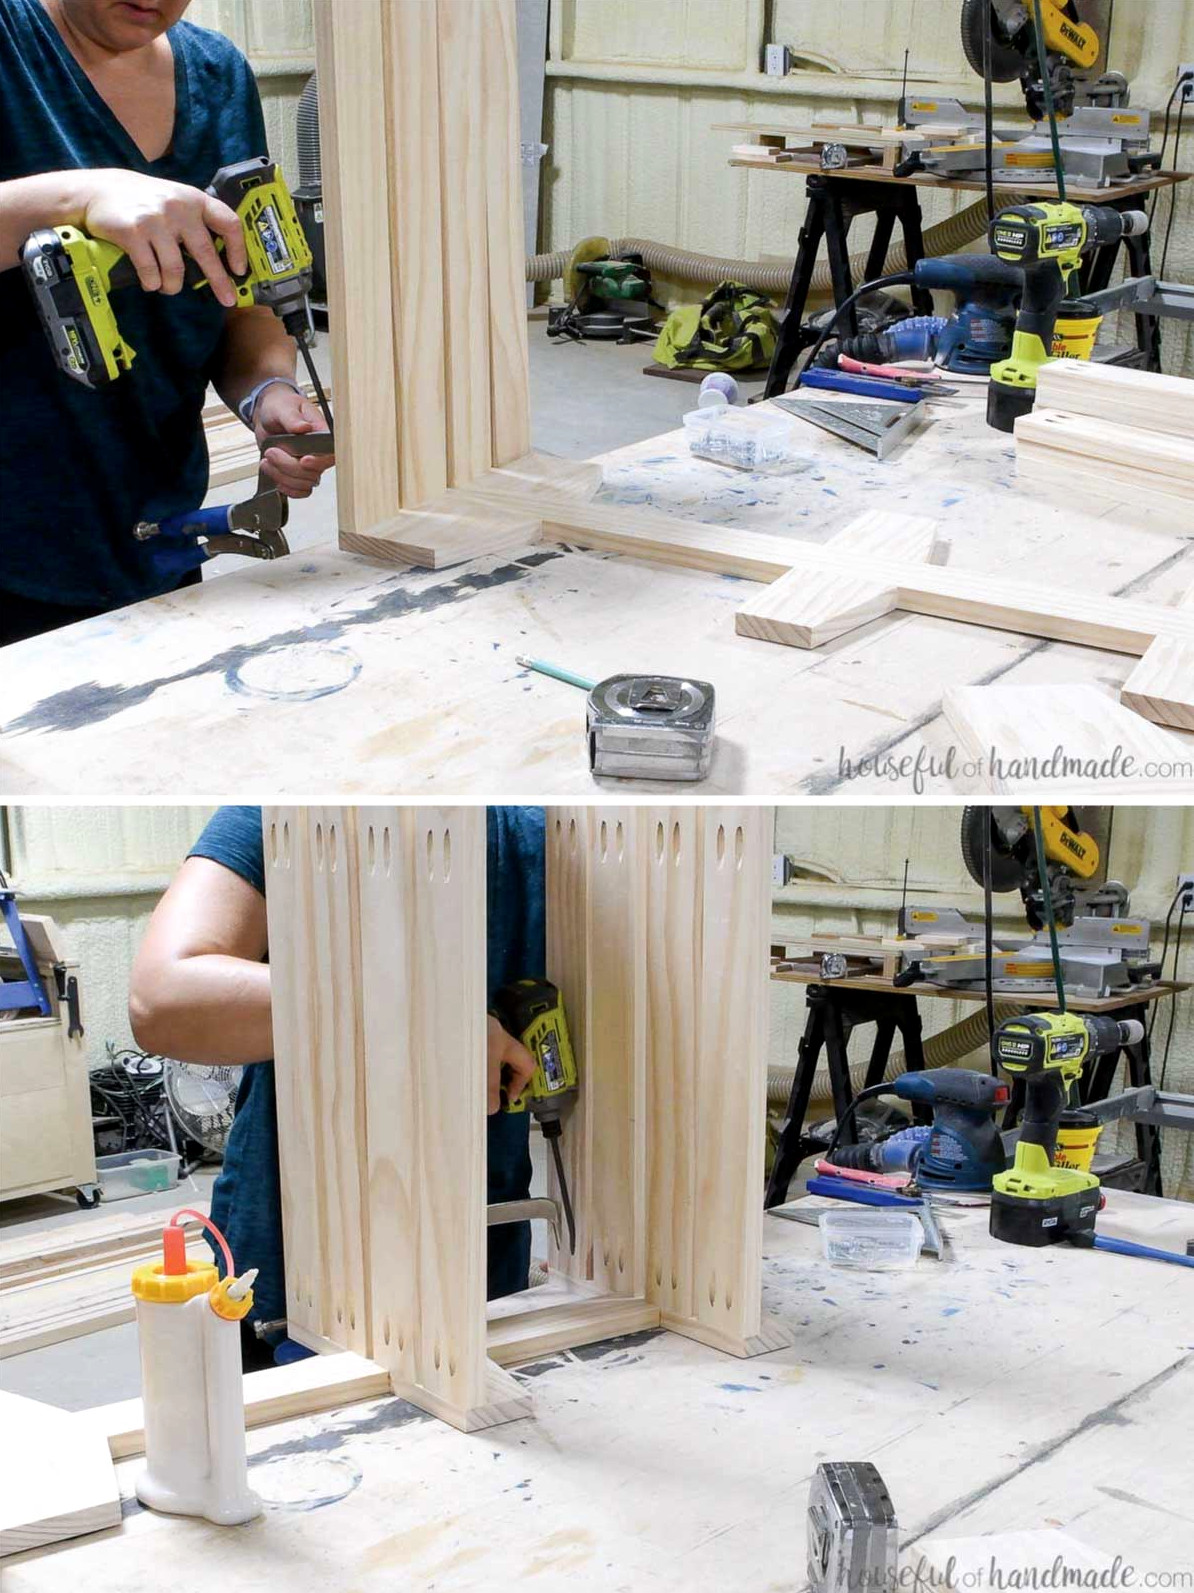
After fastening every board to one side, attach them to the opposite side using the same method.
Complete the wooden cart
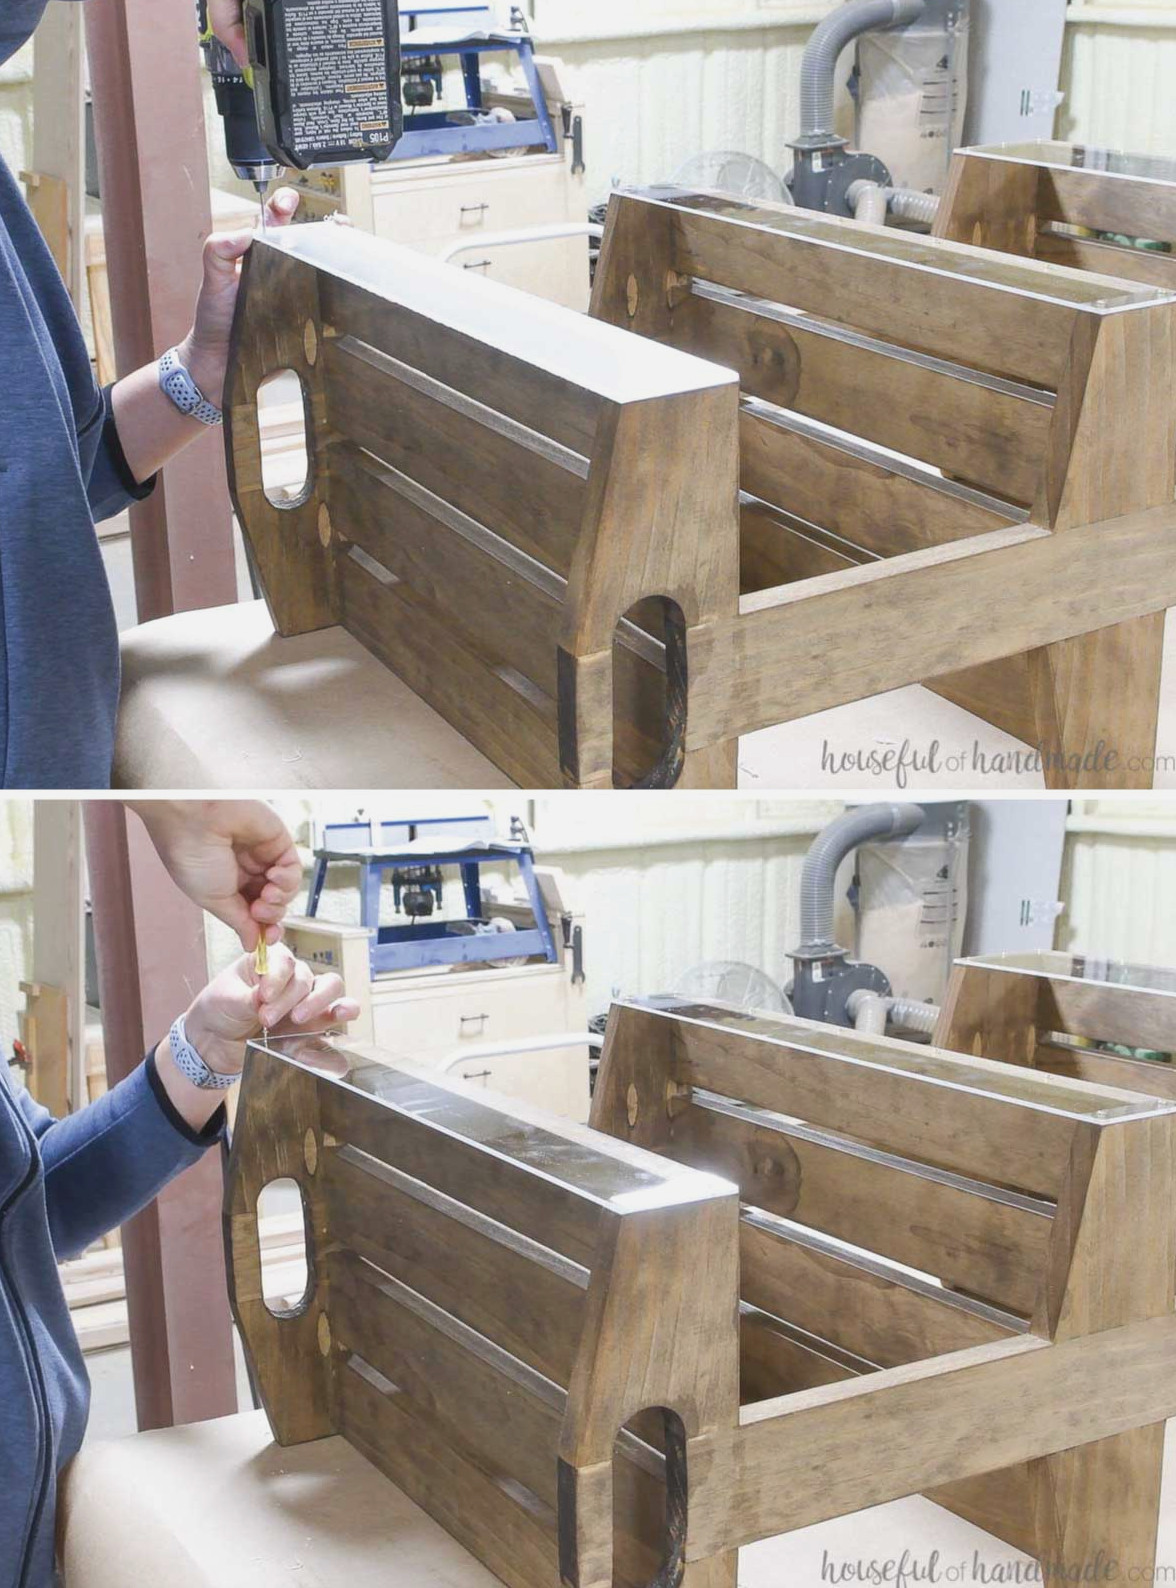
Sand the completed rolling cart, then apply stain or paint.
Set the plexiglass pieces against the tray fronts. Identify the center of the boards where they will be fastened and drill pilot holes.
Take off the plexi backing, then secure the pieces with the small wood screws. Do this on both sides of every tray.
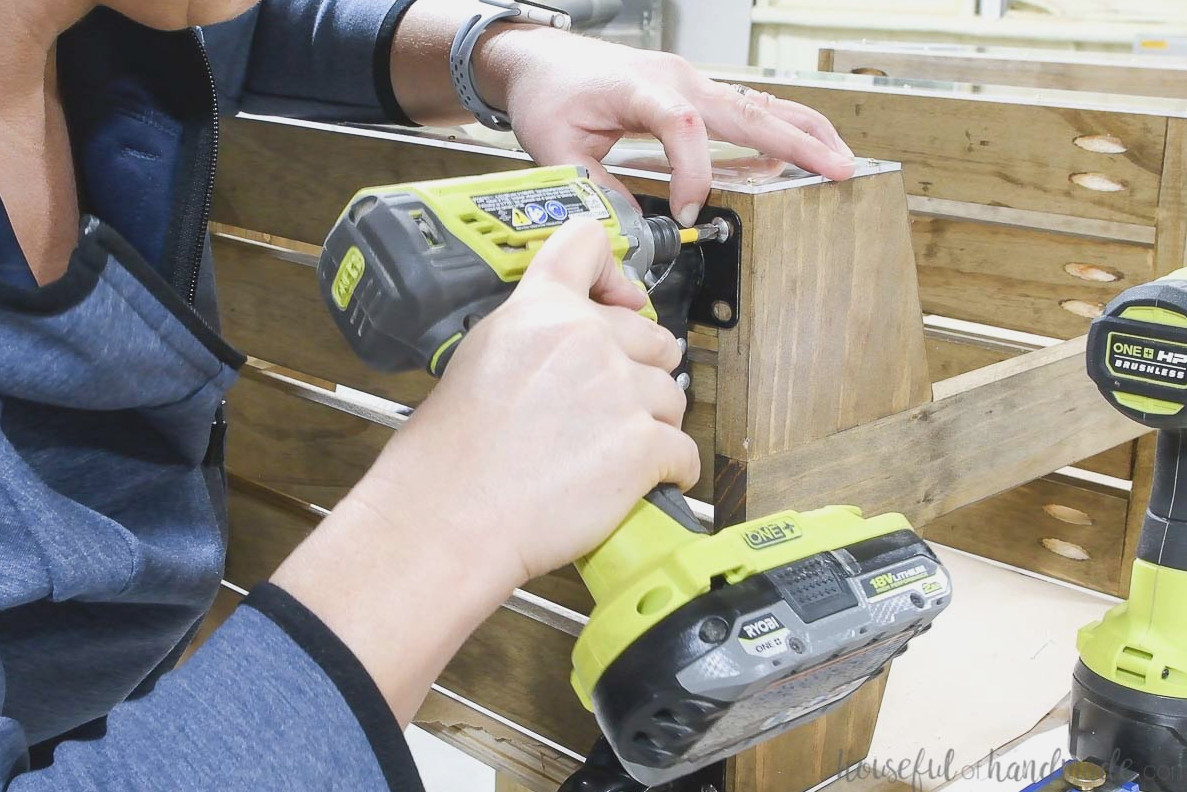
Fasten the wheels at the four corners of the bottom tray.
Your wooden rolling cart is finished! Don’t you already feel more organized?
I was eager to load mine with the craft supplies that had been stored in boxes for the past year and a half. Now everything I need is easy to see!
This rolling cart would make a delightful DIY present for anyone on your list. I’m sure they will remember you throughout the year as they use it.
Now is the ideal time to purchase your new Kreg 720Pro while it is discounted. It is a gift that keeps providing as you use it to complete your to-do list throughout the year!
Happy Building!