
A bathroom remodel can absolutely fit within a budget! I know because this is the second one we’ve completed in our current home (you can see the master bathroom remodel here).
The vanity is often one of the most expensive elements in a bathroom. However, building one yourself can save you a substantial amount of money!
I teamed up with Kreg Jig to provide the building instructions for this 42″ DIY bathroom vanity featuring lower drawers. You can now create your own bathroom vanity while keeping costs down!
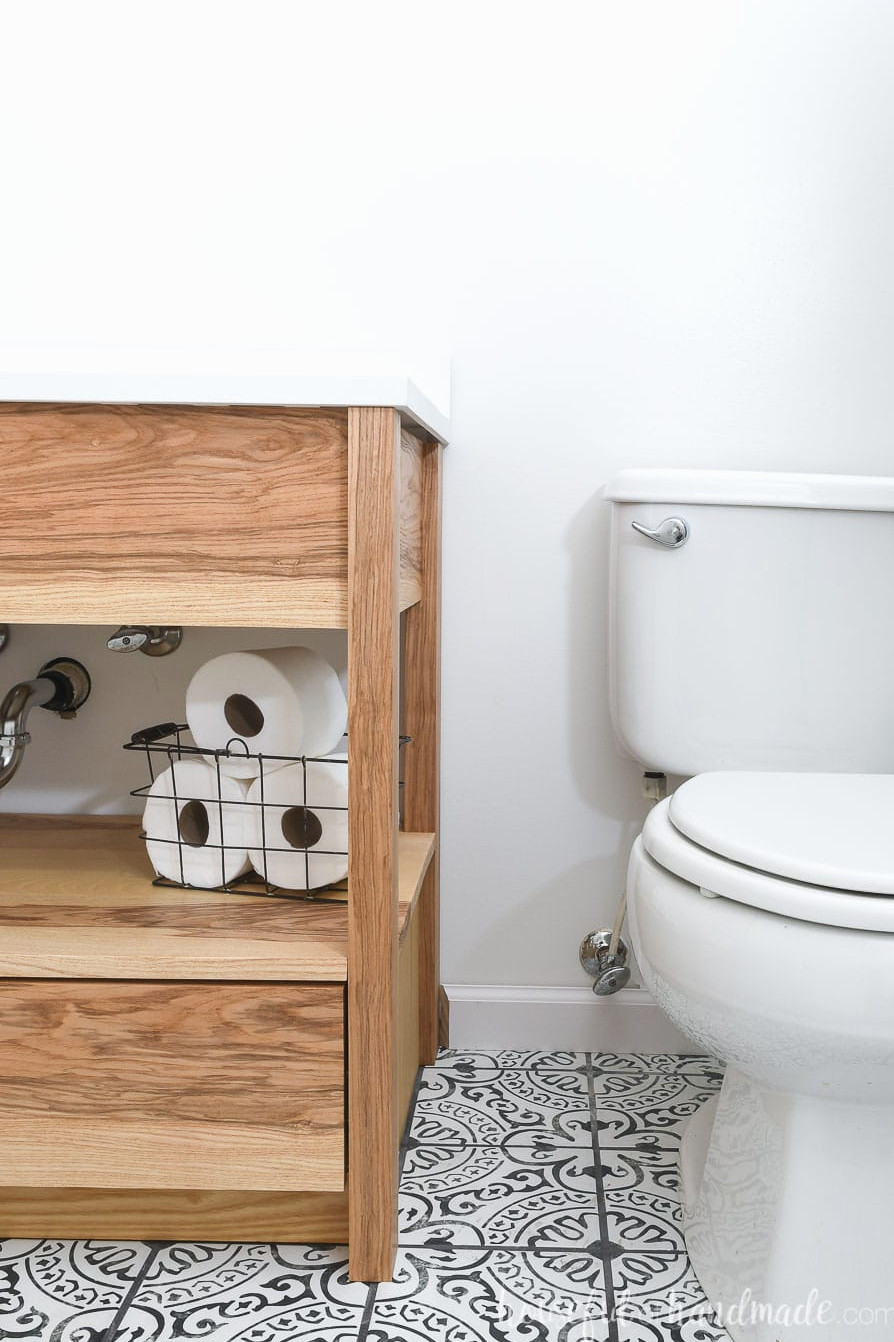
Most people never consider making their own bathroom vanity, but after constructing the kitchen cabinets during our recent kitchen renovation, I discovered that cabinets are easier to build than many people assume.
The key to creating a bathroom vanity is taking your time and working accurately.
Make sure every board is cut straight and that each piece meets at a 90 degree angle. Once that is done, you’ll have a beautiful bathroom vanity you’ll be proud to show everyone!
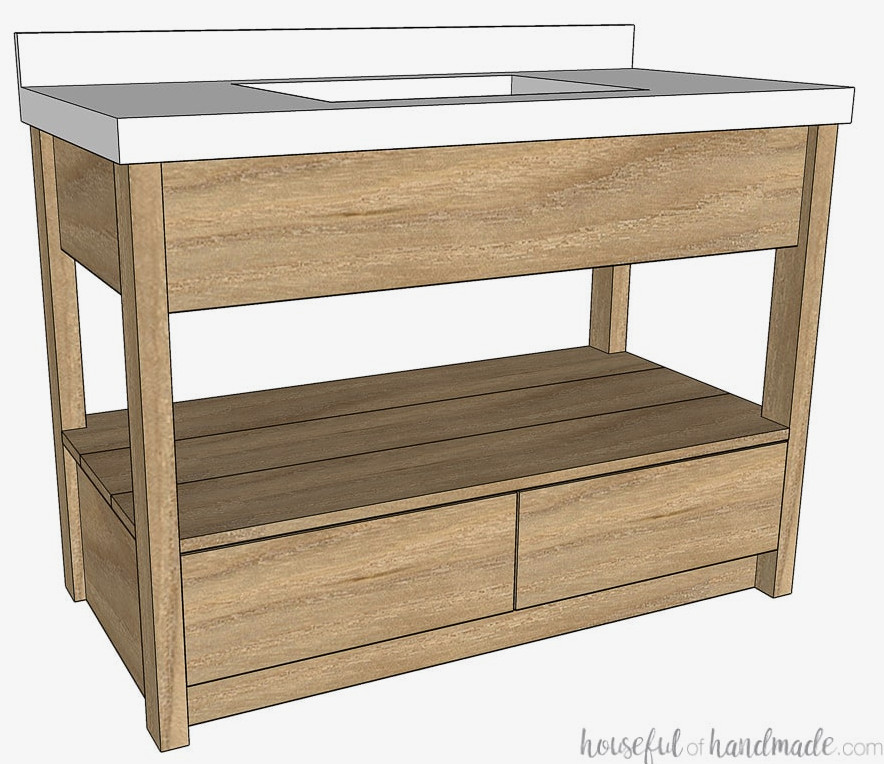
DIY Contemporary Bathroom Vanity
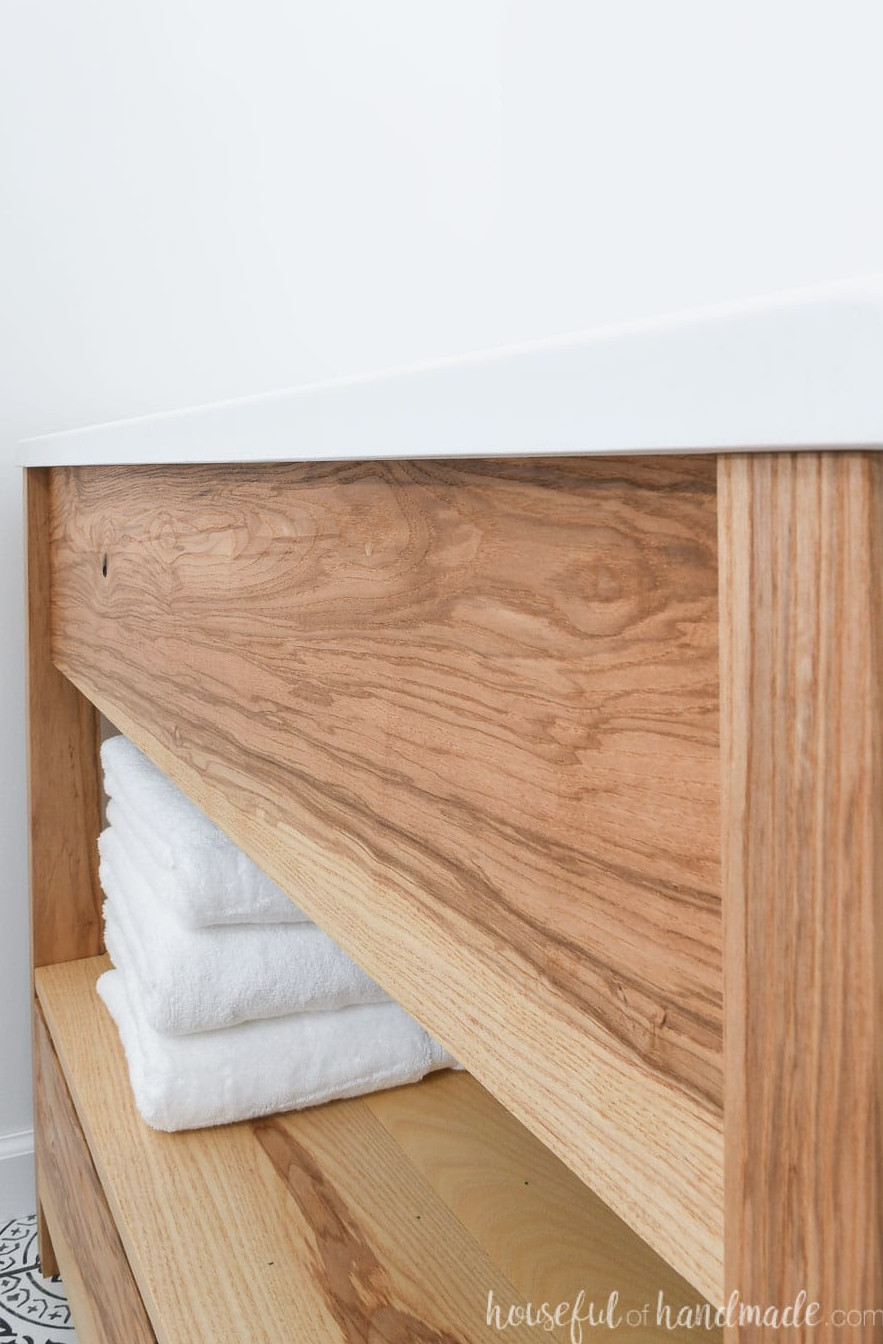
Our goal was to create a space that felt sleek and current while adding a touch of rustic charm. And what could be more modern than open shelving?
Since this is our guest bathroom, open shelves are useful for more than decoration. Towels and other essentials can remain visible, so visitors won’t feel uncomfortable searching through your drawers.
I also appreciate open shelving in a compact bathroom because it makes the room appear more spacious. Rather than using one large enclosed cabinet, the shelves create a more open visual effect.
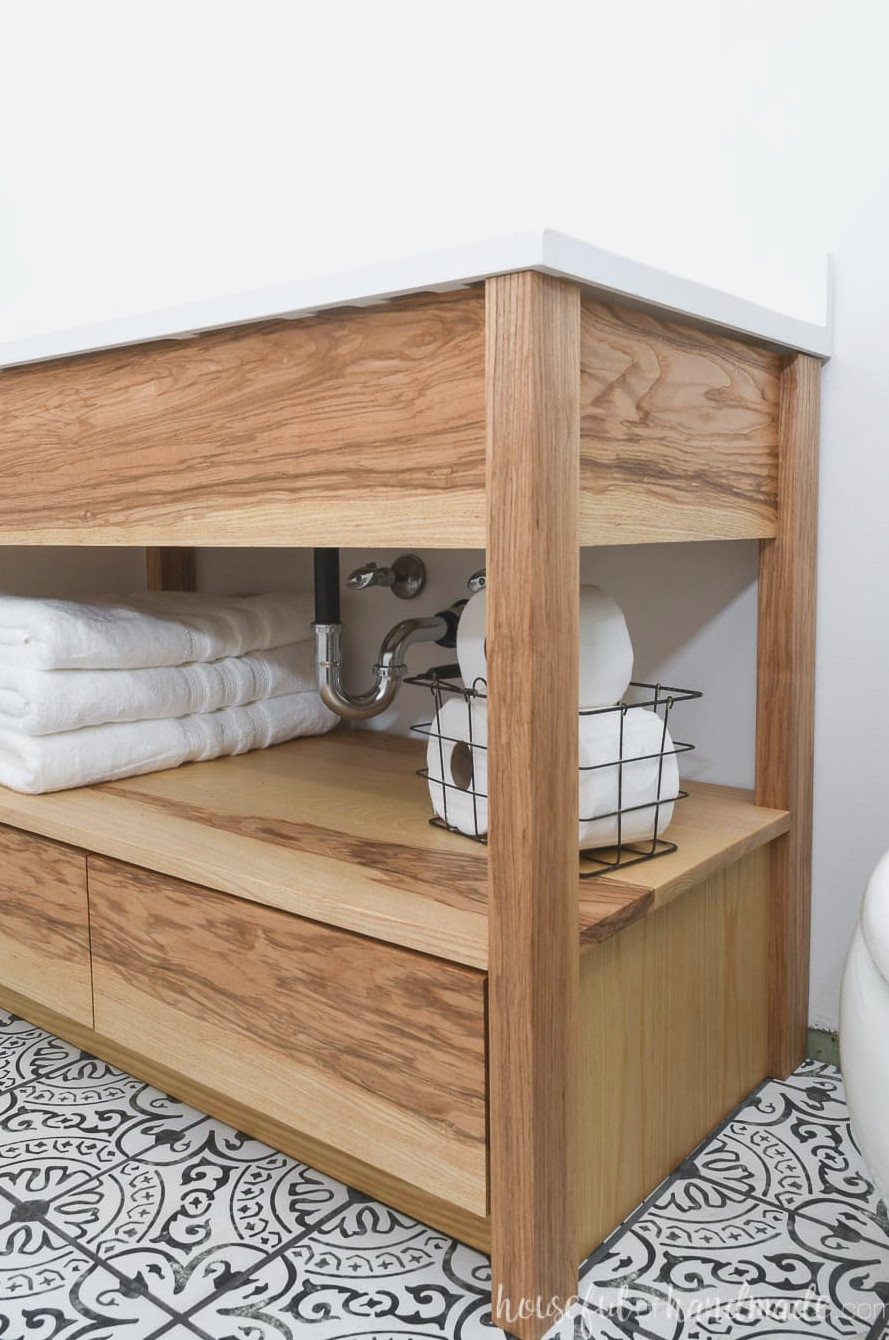
Still, storage was necessary!
Although this is a guest bathroom, I wanted plenty of room to put things away!
At times, I use the guest bathroom storage for items that aren’t needed regularly. It is an extra place for those unusual things I only need a few times each year!
To preserve the contemporary vanity design, we positioned the drawers at the bottom of the cabinet rather than at the top, and I like the result much better!
Lower vanity drawers can be bigger because there’s no need to reserve space for the sink or plumbing.
Take a look at how much storage it provides!
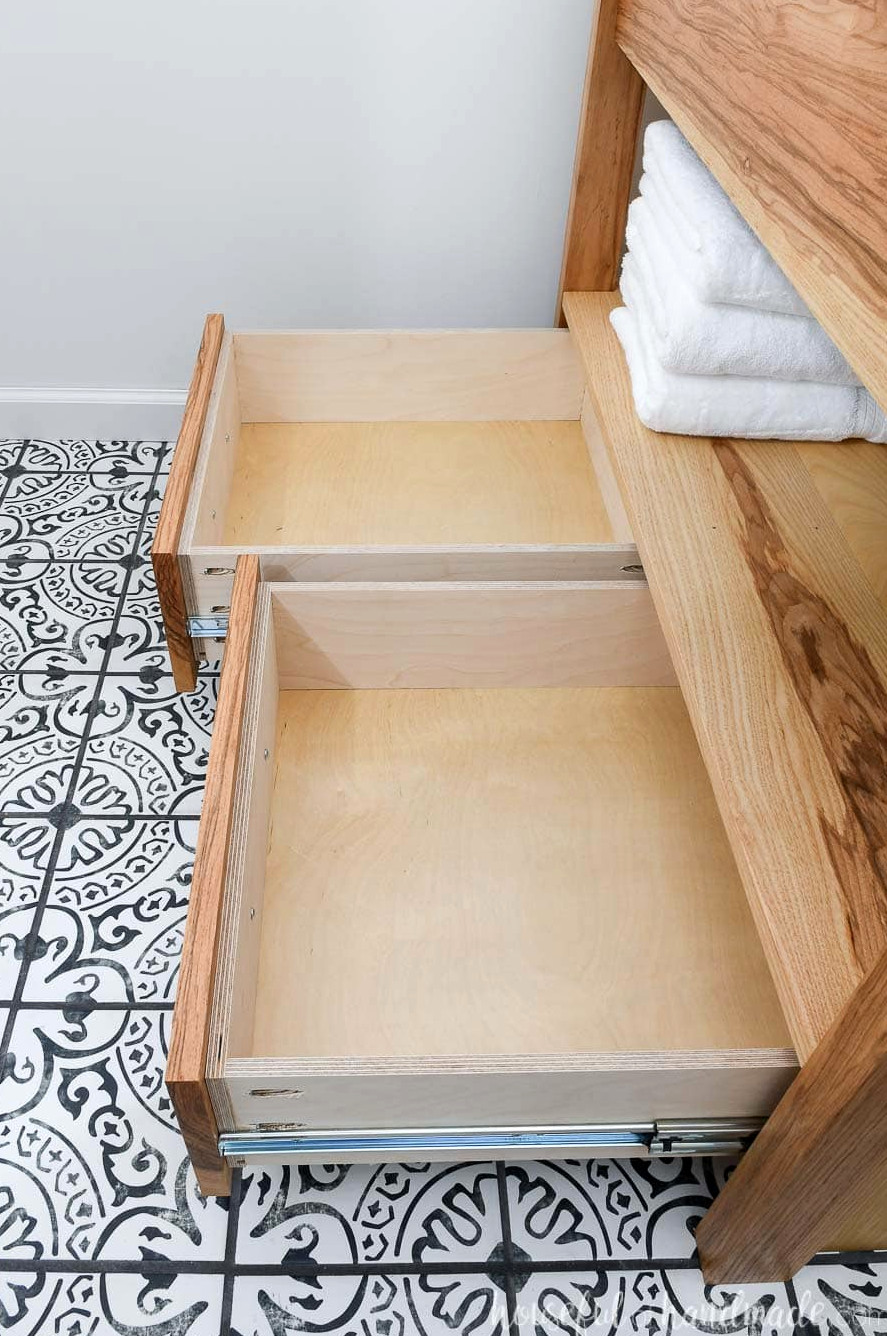
42″ Bathroom Vanity
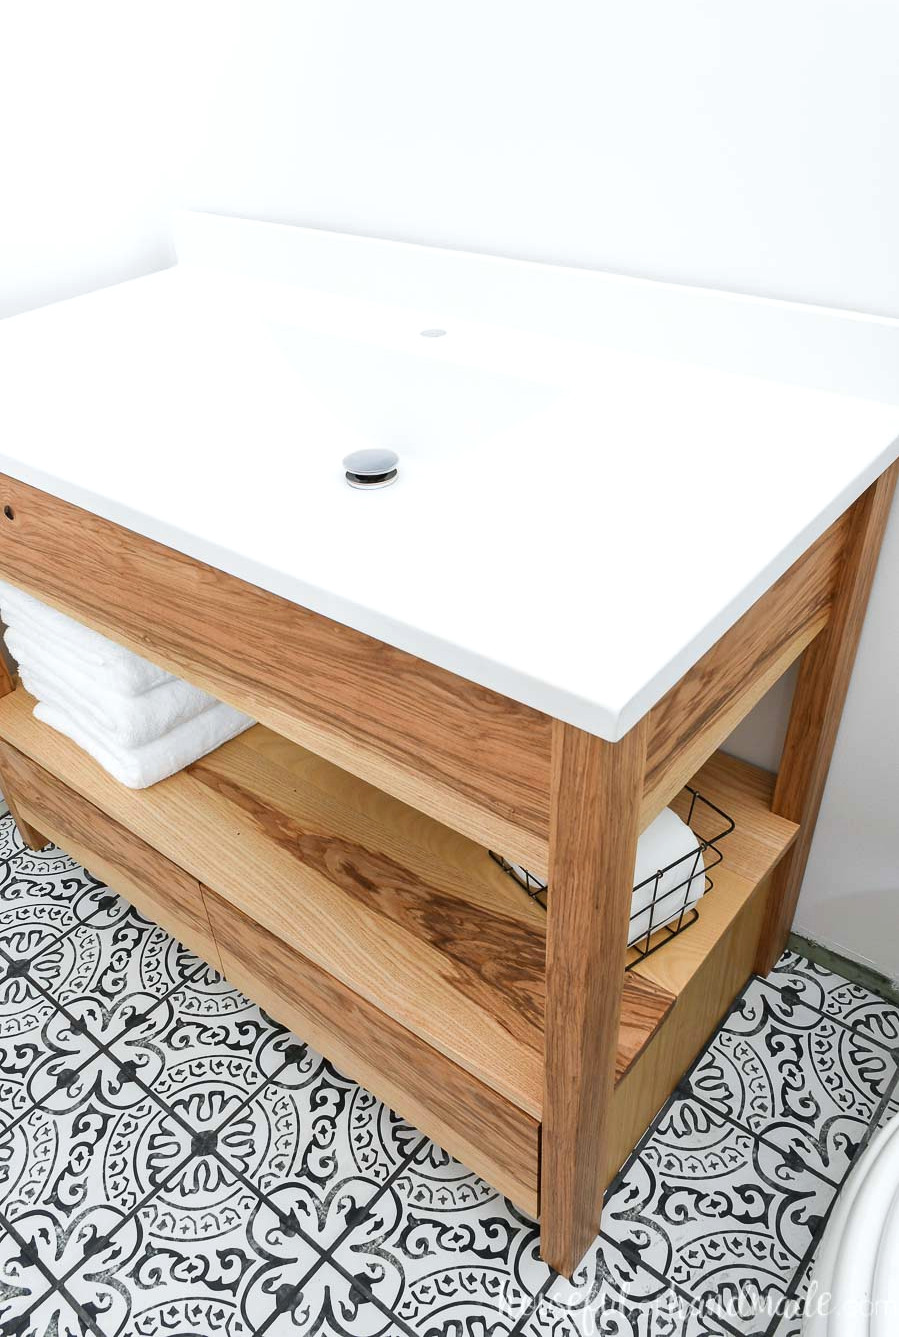
To stay within budget, I created this DIY bathroom vanity using the standard 42″ bathroom vanity size. This allows it to accommodate a ready-made vanity top.
Purchasing a pre-built vanity top helped reduce expenses. I also like that once the bathroom vanity is installed, the sink can be fitted right away, allowing us to use it quickly.
That makes this bathroom vanity an authentic weekend project!
We selected this straightforward white vanity top with an integrated sink. Its clean design complements the white walls and nearly blends into them. As a result, the vanity’s lovely wood becomes the main attraction.
Need another size? Find the PDF construction plans for this vanity in 30″, 36″, 48″ and 60″ here.
Additional Bathroom Remodel DIYs
Below are more DIY vanity ideas, including vanity tops that you can make yourself.
How to Construct a Bathroom Vanity with Drawers
Equipment & Supplies
Overall Measurements
The completed vanity stands 30″ high and measures 21 1/2″ deep. The vanity shown here is 42″ wide.
Plans are also available for 30″, 36″, 48″ and 60″ vanities.
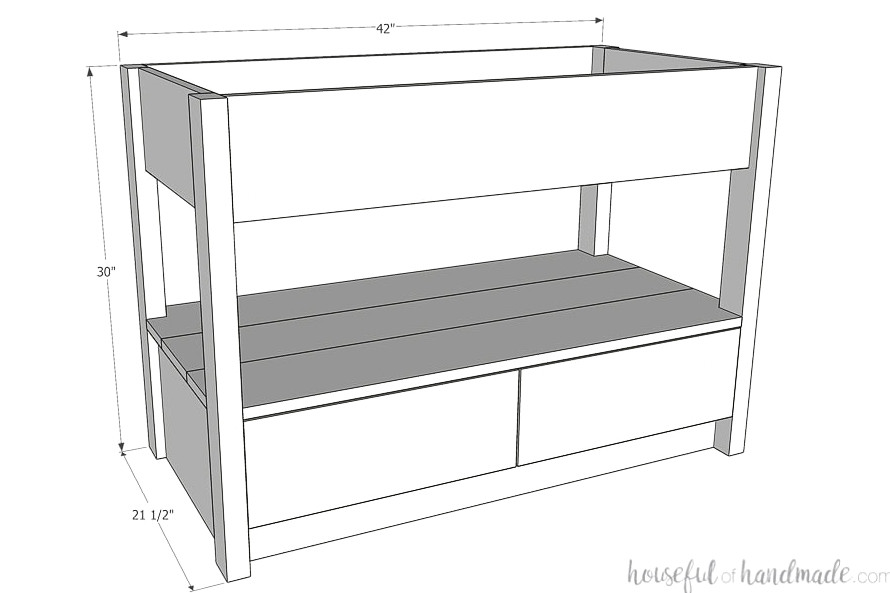
Cutting Guide
Cut the components based on the construction plans. Find the 42″ bathroom vanity plans at Kregtool.com.
Download the PDF construction plans for this vanity in 30″, 36″, 48″ and 60″ here.
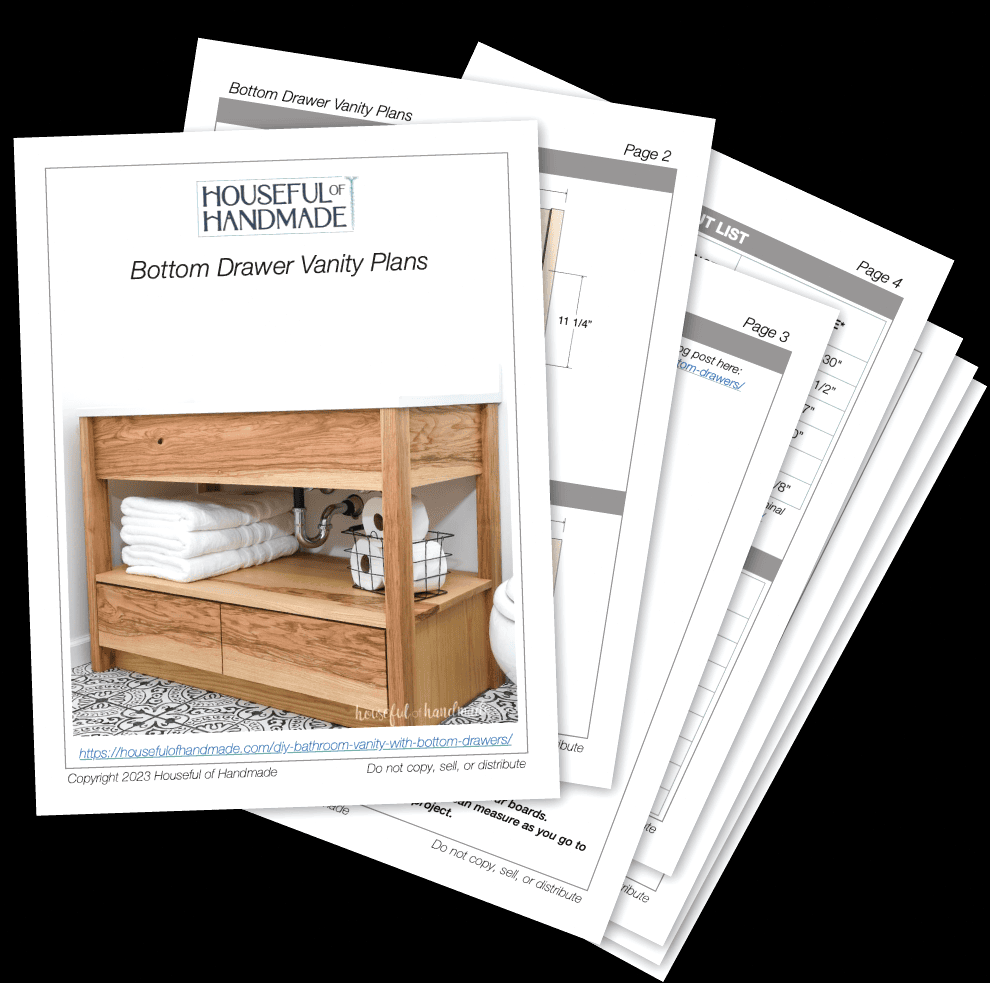
Download the Premium PDF Woodworking Plans
PDF plans contain- Simple-to-Follow Cut List, Materials List, Suggested Tools, Detailed Instructions with 3D illustrations, & Useful Resources
BONUS- 3D SketchUp Model
Since bathrooms are frequently exposed to water, I like building vanities from hardwood. Hardwood stands up better with age, and bathrooms typically receive plenty of daily use.
At a nearby lumberyard, I discovered this attractive ash lumber with abundant color variation, so I paired it with ash plywood.
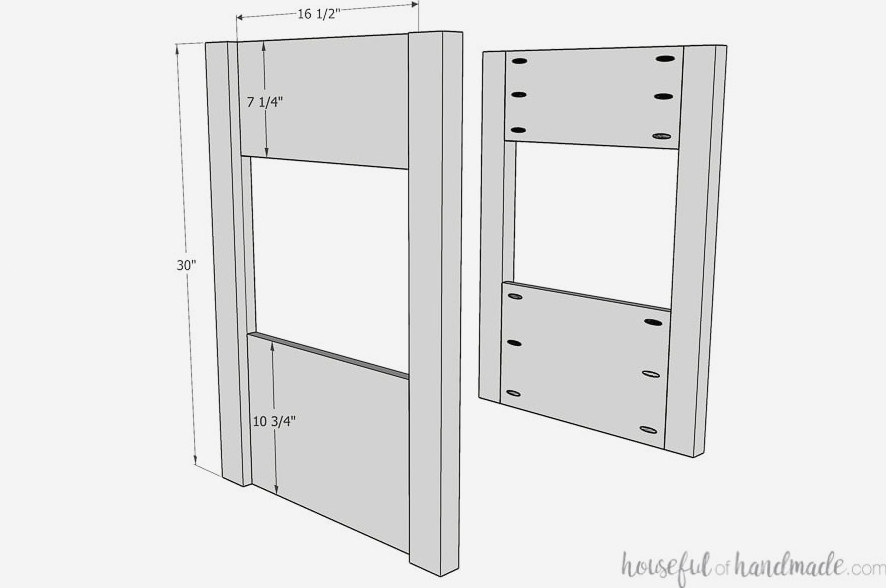
STEP 1- Assemble the sides & bottom
Create pocket holes sized for 3/4″ material at both ends of the skirt and panel boards.
Use 1 1/4″ pocket hole screws to fasten them to the legs, keeping the skirt even with the upper and inner edges of the legs and the panel level with the lower and inner edges.
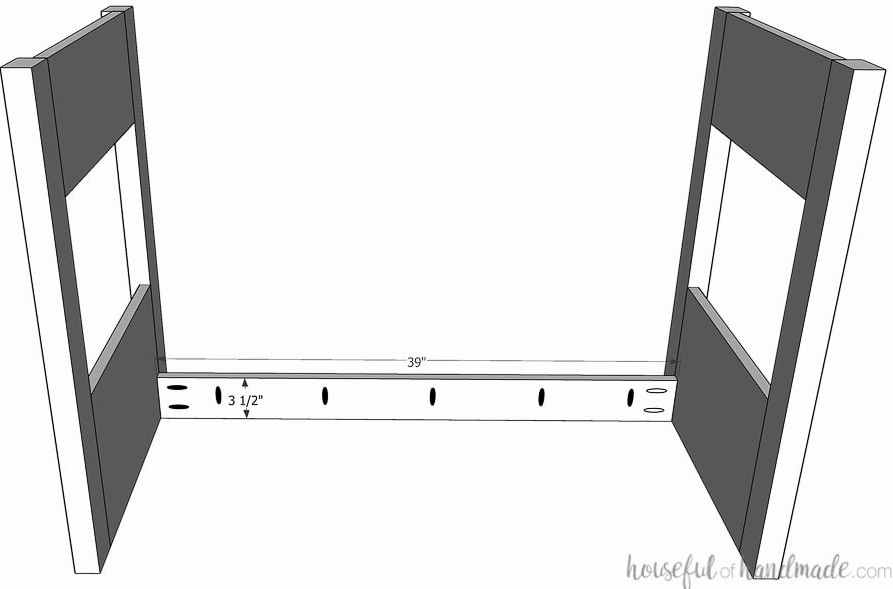
Make pocket holes along the sides and upper edge of the toe kick.
With 1 1/4″ pocket hole screws, fasten the toe kick between the completed sides, positioning it 2 1/2″ back from the front (even with the side panel edge).
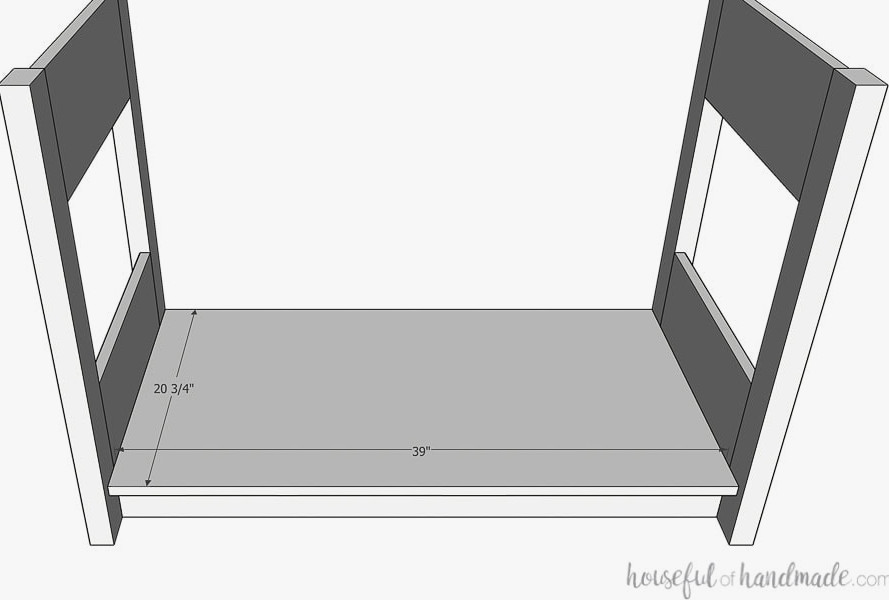
Make pocket holes for 3/4″ material along the sides of the base board. Pay attention to the toe kick location so the pocket holes do not overlap in the same position.
Fasten the base board to the sides with 1 1/4″ pocket hole screws, aligning the back edges (the front will sit 3/4″ back).
In addition, use 1 1/4″ pocket hole screws to connect the base to the pocket holes in the toe kick.
STEP 2- Construct & install open shelf
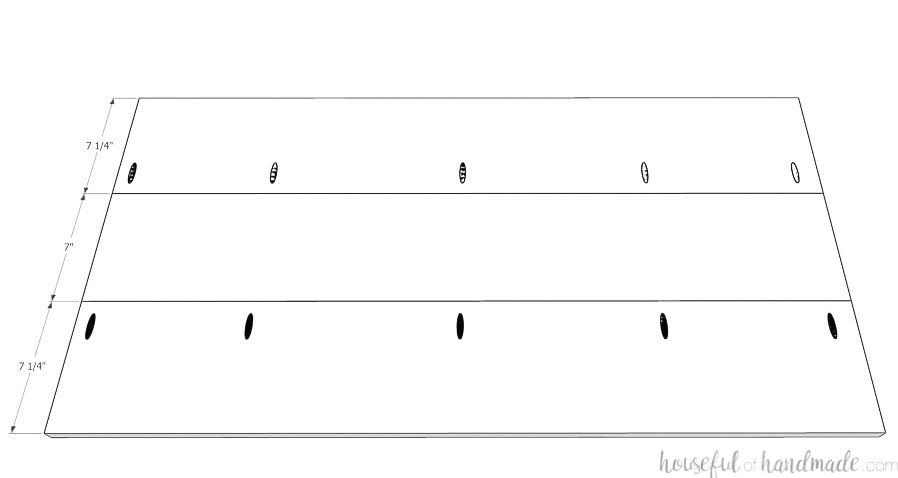
Trim one shelf slat to 7″ so it fits inside the vanity. A table saw or circular saw equipped with a guide track can be used for this cut.
Make pocket holes for 3/4″ material along the edges of the outside shelf slats.
Apply wood glue, then use 1 1/4″ pocket hole screws to join the 3 shelf slats into a single wide shelf.
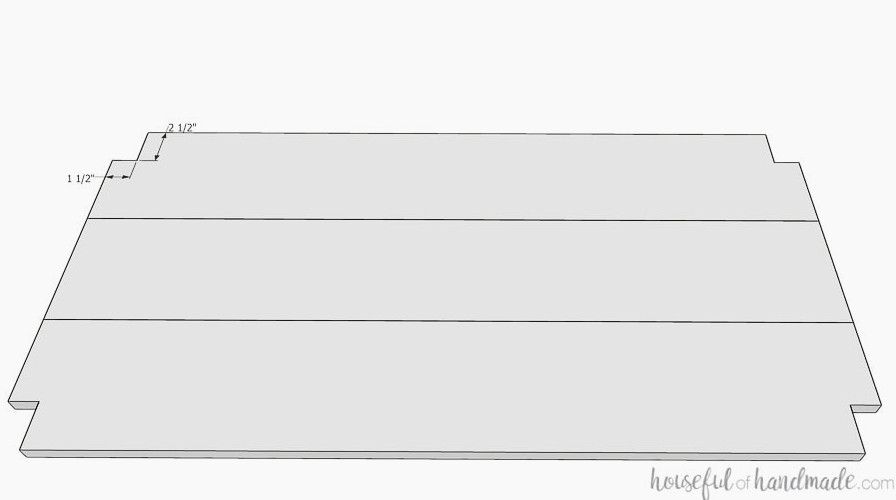
Before placing the shelf in the vanity, use a jigsaw to cut notches at the corners for the 2×3 legs.
Create pocket holes for 3/4″ material across the top of the drawer divider. I placed 3 pocket holes on one side and 2 between them on the opposite side to help the divider remain upright.
Fasten the divider to the middle of the assembled shelf bottom with 1 1/4″ pocket hole screws.
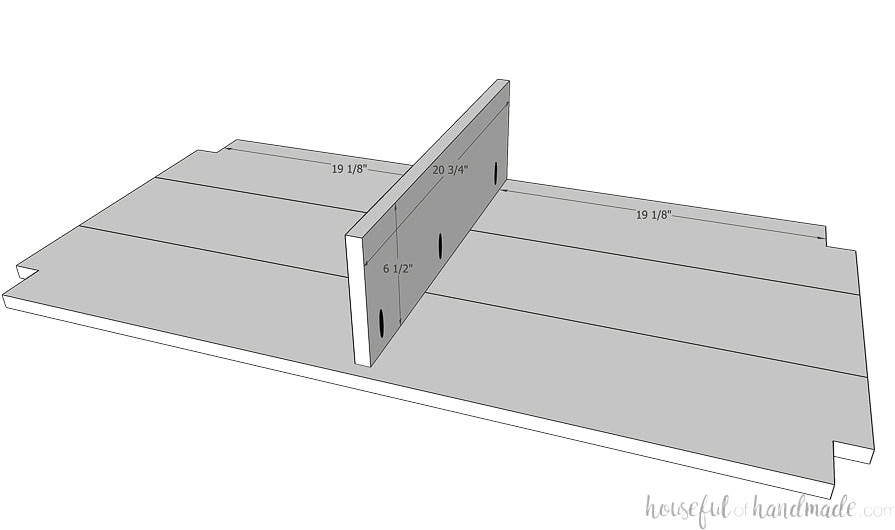
Drill pocket holes for 3/4″ material in the shelf’s notched sides so the screws can enter the leg components.
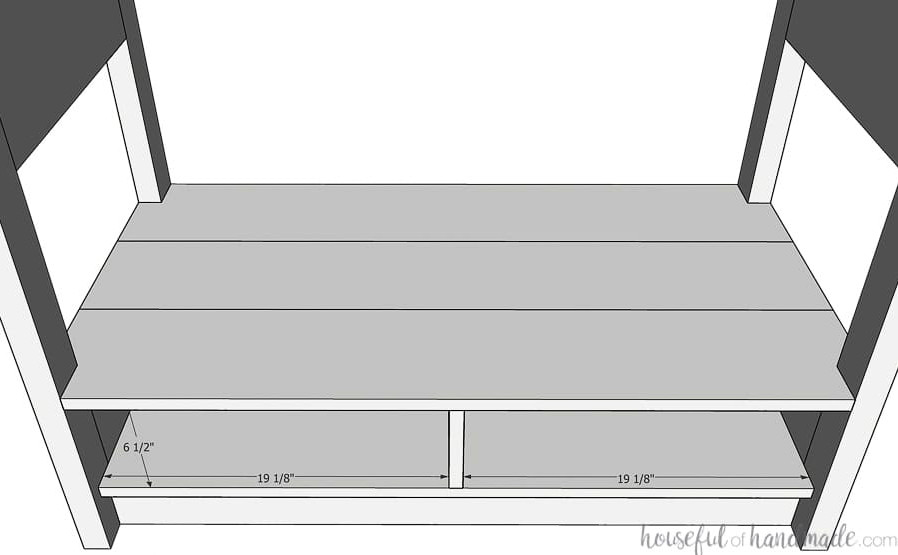
Gently position the shelf inside the vanity between the side panels. Check that the notches sit securely around the legs.
Clamp it firmly against the side panels, making sure the drawer divider rests tightly against the base. Fasten it into the legs with 1 1/4″ pocket hole screws.
Next, attach the drawer divider to the base using screws driven from below. If you prefer not to purchase additional screws, 1 1/4″ pocket hole screws will work here too.
Confirm that the drawer divider is positioned at the center of the base.
STEP 3- Install the upper skirt
Drill pocket holes for 3/4″ material into the sides of the front and back upper skirt pieces.
Position the back piece flush with the rear of the legs. You may also orient the pocket holes toward the back because this area will sit against the wall.
Set the front piece 3/4″ behind the front edge of the leg, then fasten it with 1 1/4″ pocket hole screws.
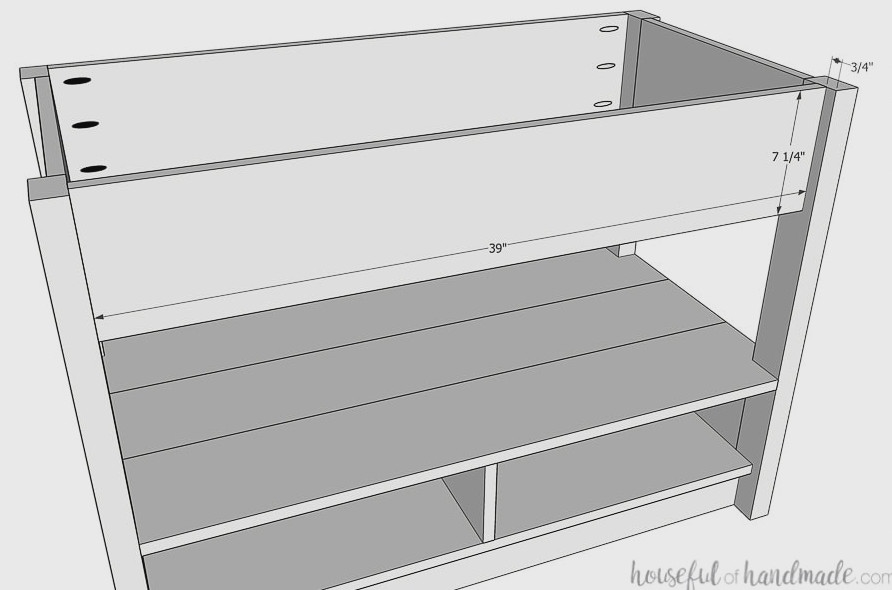
STEP 4- Assemble the drawers
Cut a groove 1/4″ wide and 1/4″ deep on the inner faces of the front and side drawer box pieces, positioned 1/4″ above the bottom.
If you cannot cut a groove, take a look at these additional simple drawer-building methods.
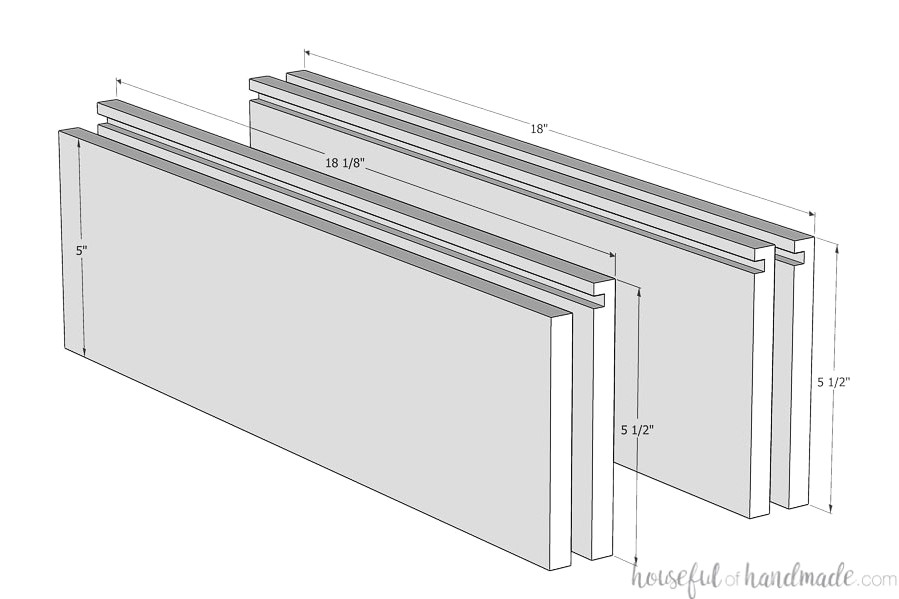
Drill pocket holes sized for 1/2″ material in the exterior sides of the drawerdrawer box side components (the sides opposite the groove).
Assemble the drawer box by attaching the side components to the front and rear pieces using wood glue and 1″ pocket hole screws.
Confirm that the upper edges of every drawer box component are even. The lower edge of the drawer box back should align with the groove’s upper edge.
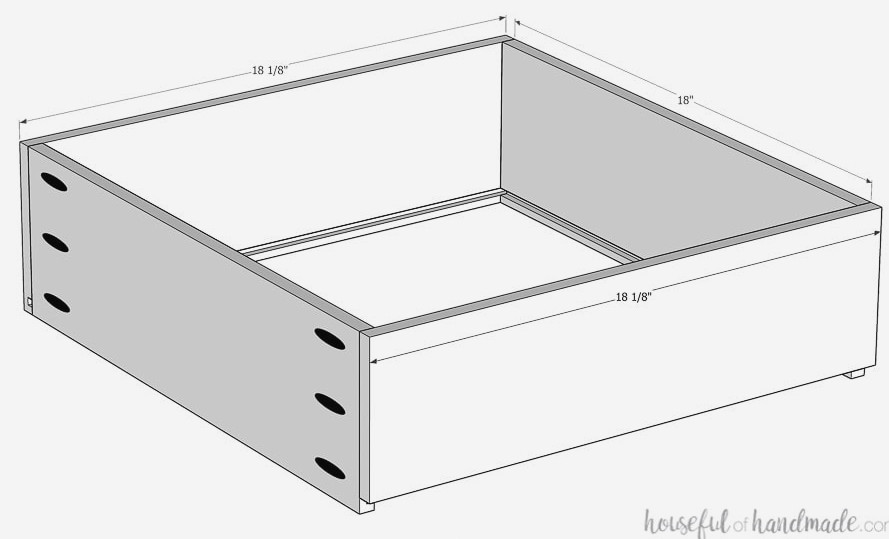
Position the drawer box bottom beneath the back piece, sliding it into the grooves in the side and front pieces.
Check that the box is perfectly square, then fasten the drawer box bottom to the back piece using 5/8″ brad nails.
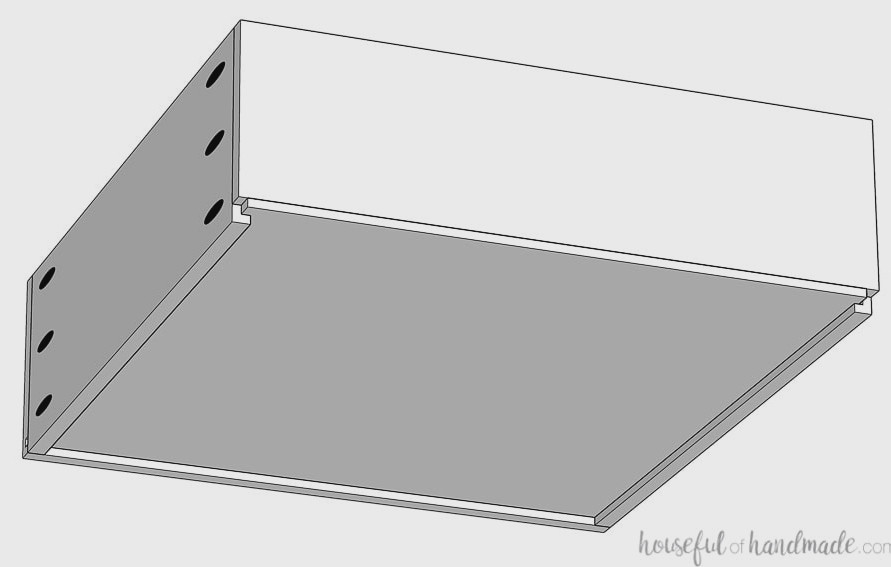
STEP 5- Finish
Attach the drawer slides, positioning them so the drawer box front sits even with the drawer divider front. Learn how to mount drawer slides here.
Use clamps to hold the drawer fronts against the drawer box, leaving a 1/8″ space along the sides and top edges. Find helpful tips for aligning drawer fronts here.
Fasten the fronts with 1 1/4″ screws driven from inside the drawer.
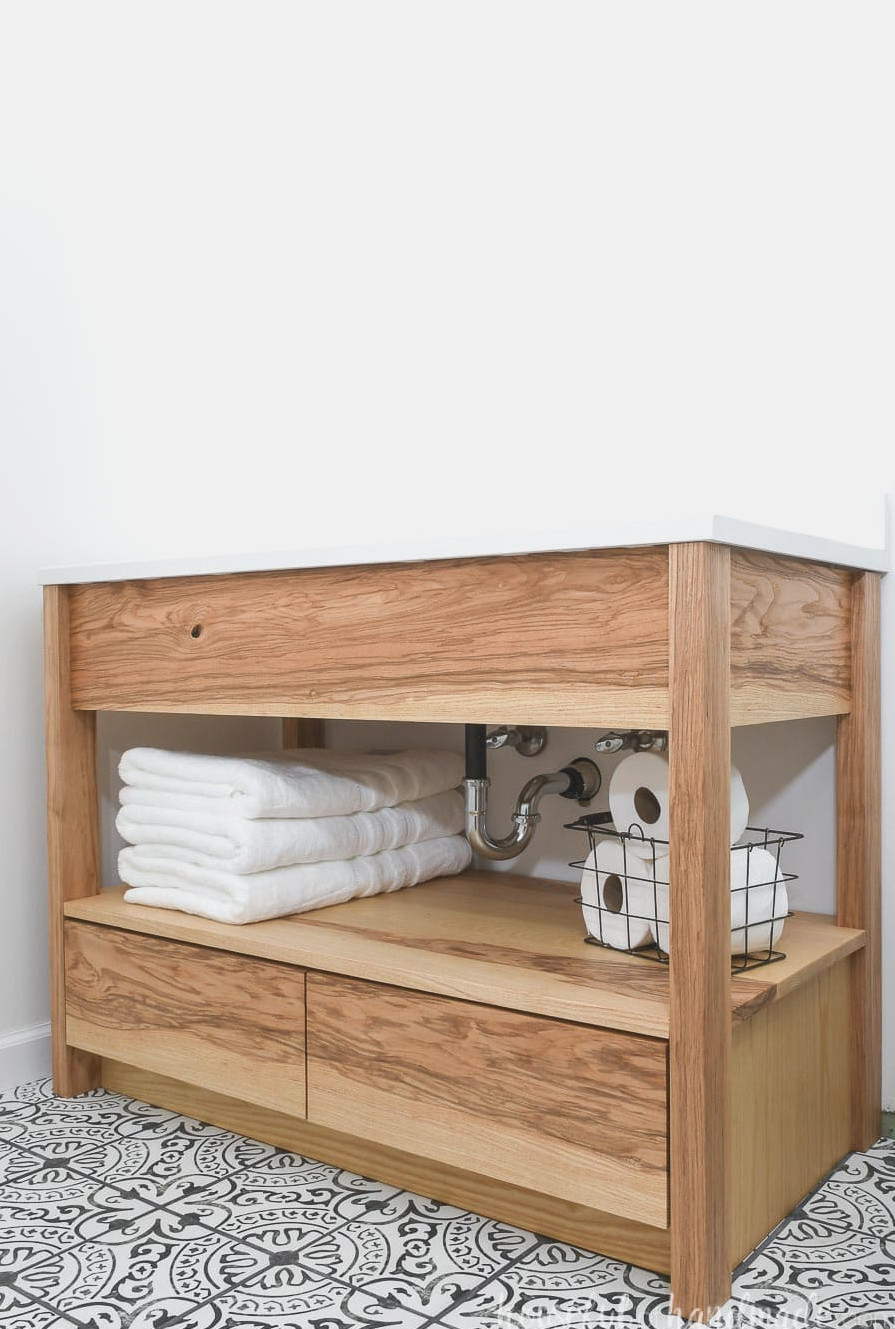
Smooth and apply a finish to the fully assembled vanity. Next, position the bathroom vanity and install the vanity top and sink.
You made it!
Remember to Get the Printable PDF Plans Here!
Premium plans feature:
- Suggested Tools
- Materials list
- Clear cut list table
- Cutting diagrams
- Detailed instructions with 3D renderings
- Useful resources
- BONUS: 3D SketchUp file
You can now enjoy your updated bathroom vanity and its generous storage.
Would You Rather Watch? View the Video Below
Enjoy building!