
Create a fresh DIY bathroom vanity with this step-by-step guide.
Move beyond your ordinary bathroom vanity! A stylish new vanity that resembles furniture is an excellent way to refresh your bathroom.
Building a vanity is an enjoyable DIY project. These simple-to-use plans make an ideal weekend project.
I teamed up with Kreg Tools to provide the building plans for our 8′ vanity at no cost. Or you can find plans for this open shelf vanity in additional sizes here.
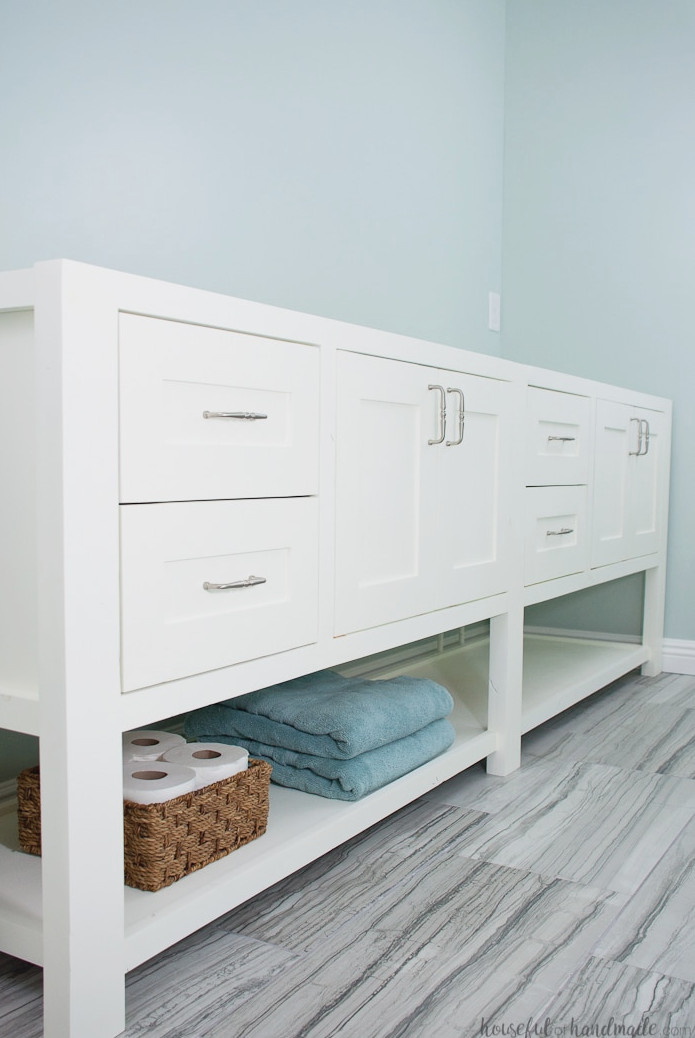
Bathroom Vanity with Open Shelving
You might assume that a closed cabinet is best for concealing all your bathroom supplies. However, an open lower shelf can make a compact bathroom seem more spacious.
This DIY vanity offers lots of storage as well!
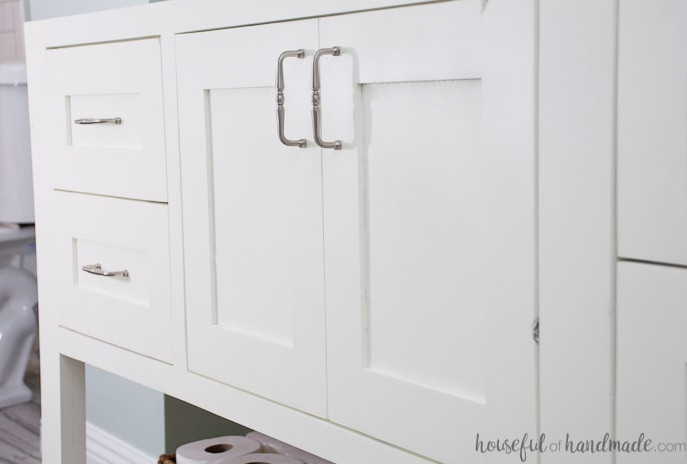
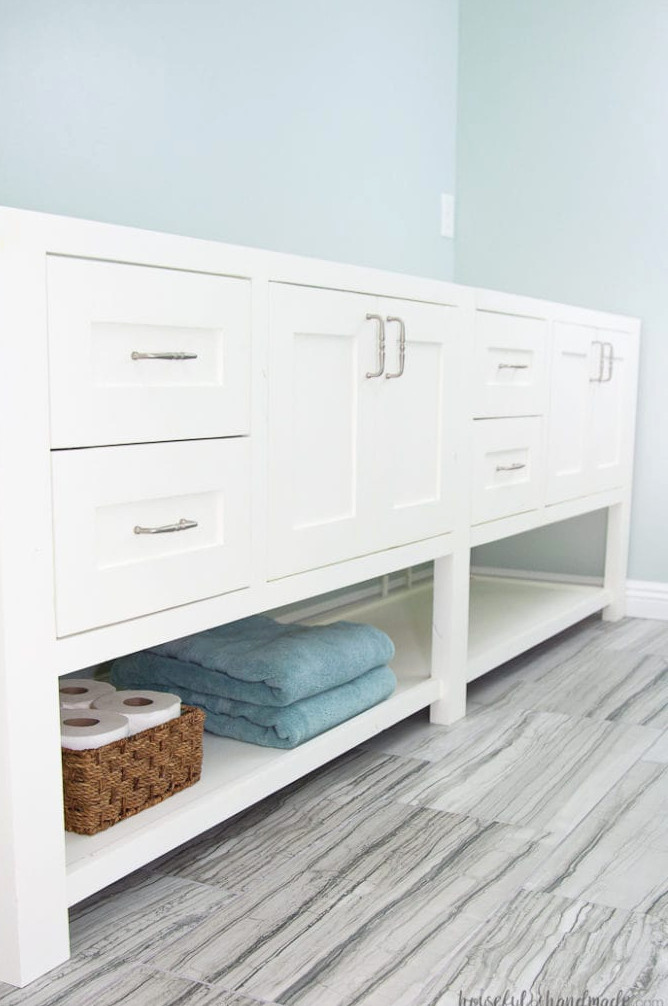
Each sink area has a spacious cabinet with space for both plumbing and storage.
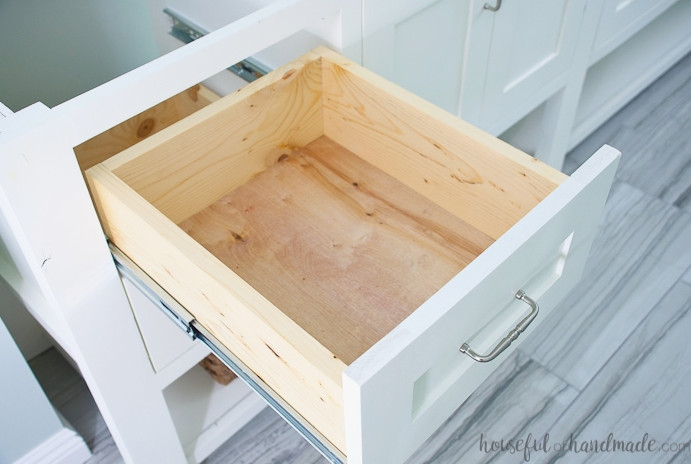
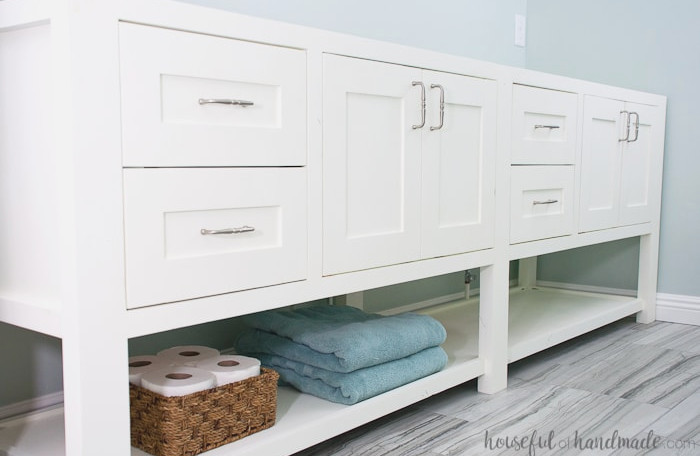
The cabinet is also paired with 2 deep drawers. I favor deep bathroom drawers because bottles and containers can remain upright, creating extra storage capacity.
The spacious open shelf sits beneath the enclosed storage. It extends across the entire length and width of the bathroom vanity.
This open shelf can provide plenty of additional storage as well!
Open shelving transforms storage into decoration. I enjoy using it to showcase:
- Hand towels
- Spare toilet paper
- Hair-styling tools stored in baskets
- Containers for bath supplies
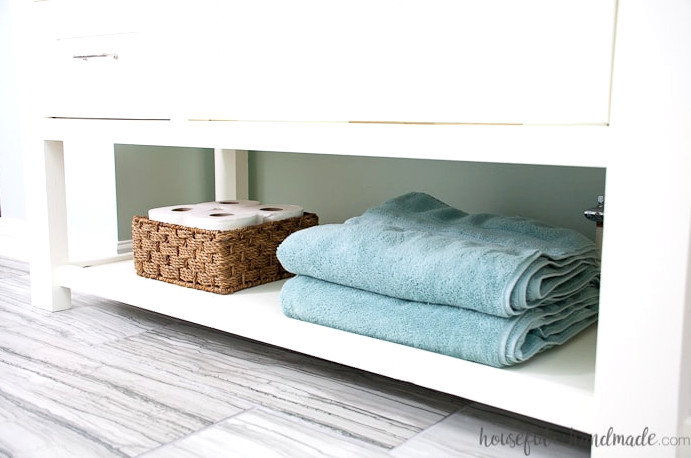
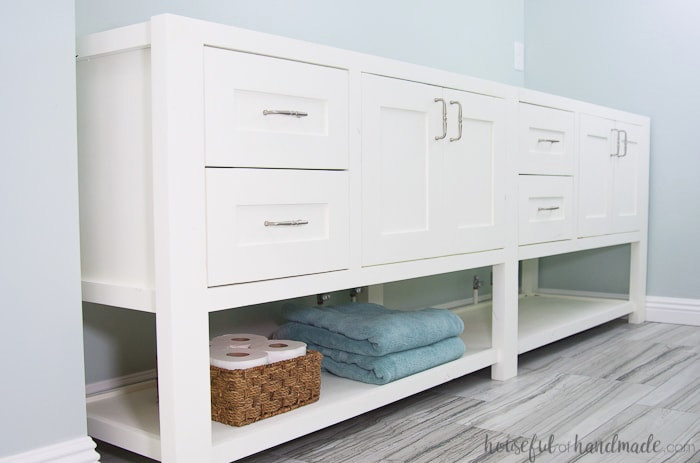
Our vanity measures 8′ long, making it two combined 48″ cabinets. The 48″ cabinet includes generously sized drawers with more capacity than I can use!
Even without space for an 8′ vanity, you can create your own attractive open-shelf version. I have prepared plans for every common size from 36″ through 60″.
Each plan includes space for one sink, two drawers, and the open shelf underneath.
Most importantly, every design is made to accommodate a standard bathroom vanity top. Purchase a solid-surface vanity top from a home improvement center to quickly and affordably transform your bathroom!
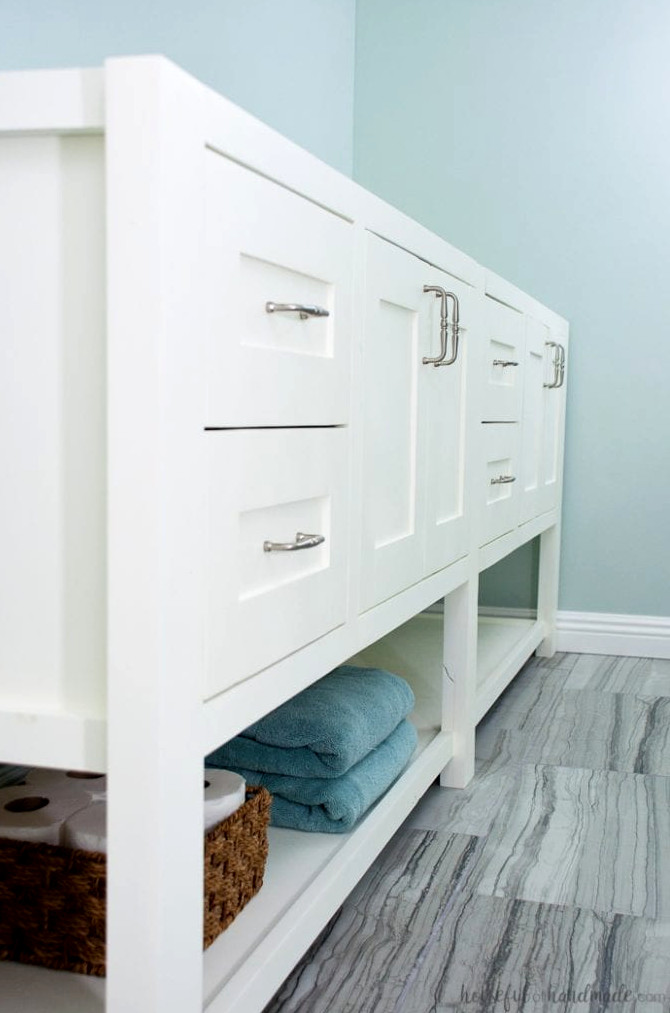
Timeless Vanity Style with Shaker Doors
This DIY vanity features a straightforward, timeless design that works beautifully for refreshing any home.
Rather than using ordinary cabinets, the vanity is constructed like a furniture piece for the bathroom. This creates an upscale appearance without the expensive price.
The shaker-style doors can be made without a router, making this project approachable for beginner woodworkers.
A traditional face frame and inset doors complete the cabinet. Together, they create a crisp, uncluttered bathroom design.
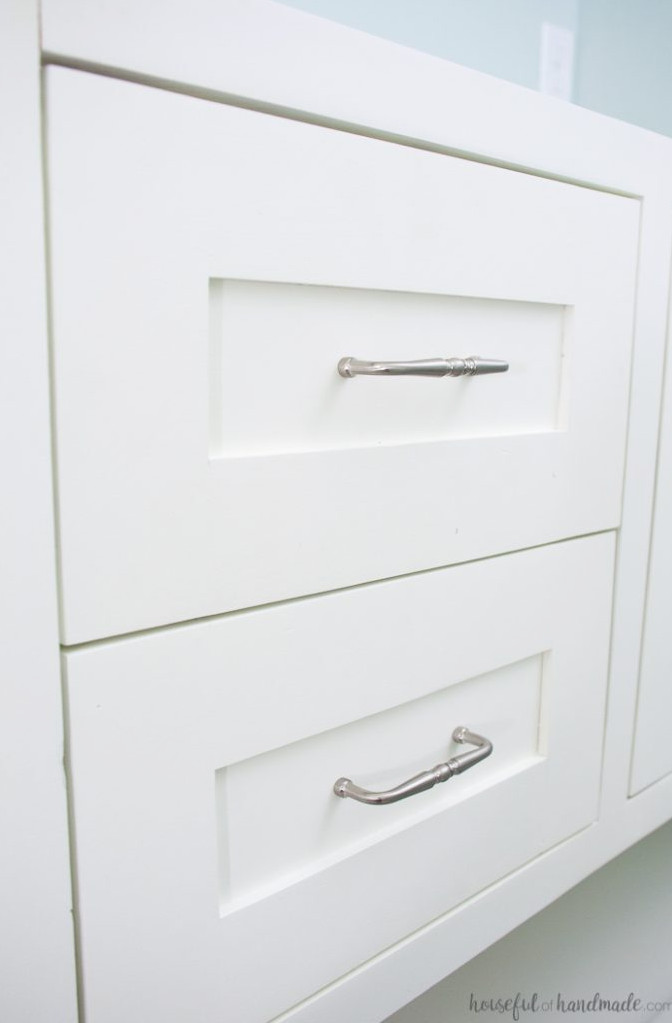
Affordable Bathroom Vanity
The greatest advantage of our new DIY bathroom vanity may be how much less it cost to build than to purchase!
The complete vanity came in under $300 to construct! And I did not choose the least expensive lumber available.
I selected my favorite economical hardwood: knotty alder. It is beginner-friendly, easy to work with, and attractive. When stained, it resembles cherry. You can view its natural tone in this DIY dining room hutch.
Choose lumber that matches your budget when building your vanity. Then discover how to achieve a professional-quality painted finish here.
DIY Bathroom Vanity Construction Plans
Tools & Supplies
Cutting List
Cut the components for the 8′ vanity by following the construction plans at Kregtool.com.
Or download the printable PDF plans for this vanity in other standard dimensions here.
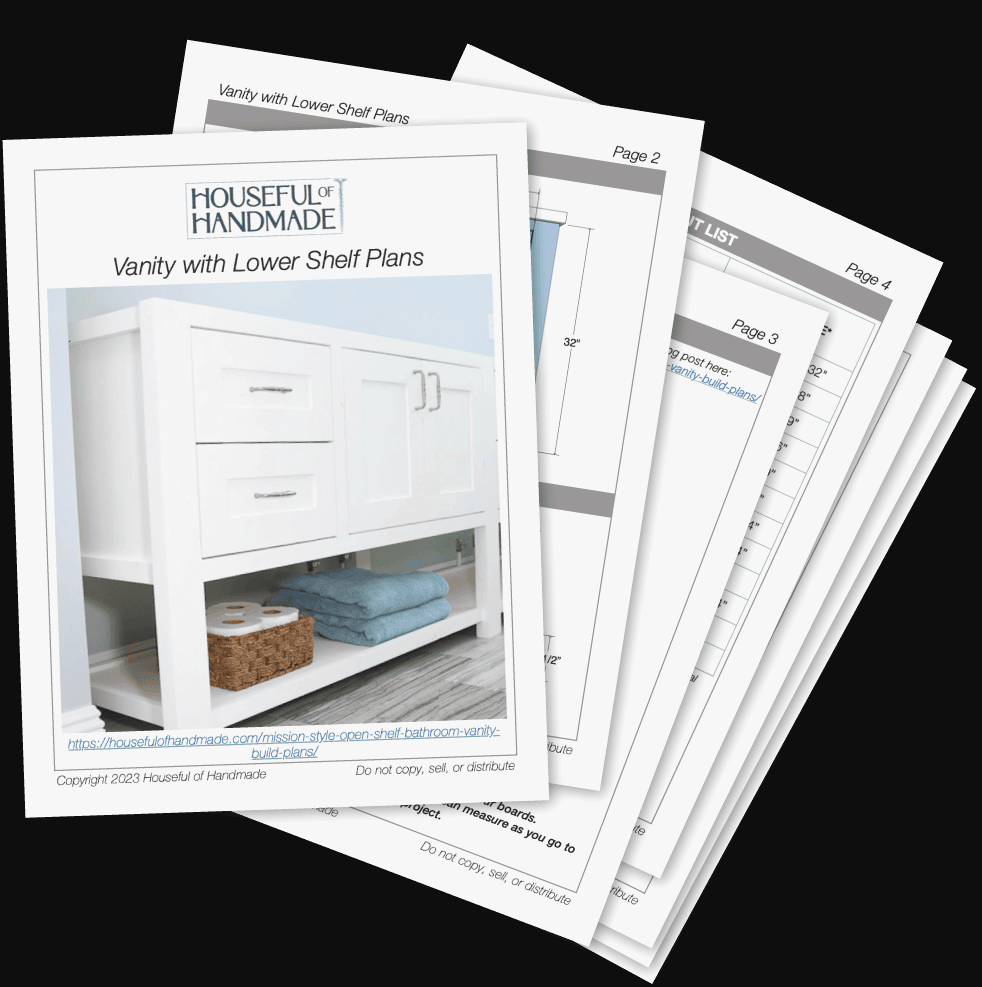
Download the Premium PDF Woodworking Plans
PDF plans feature- Simple Cut List, Shopping List, Suggested Tools, Step-by-Step Directions with 3D illustrations, & Useful Resources
BONUS- 3D SketchUp Model
STEP 1- Construct the sides
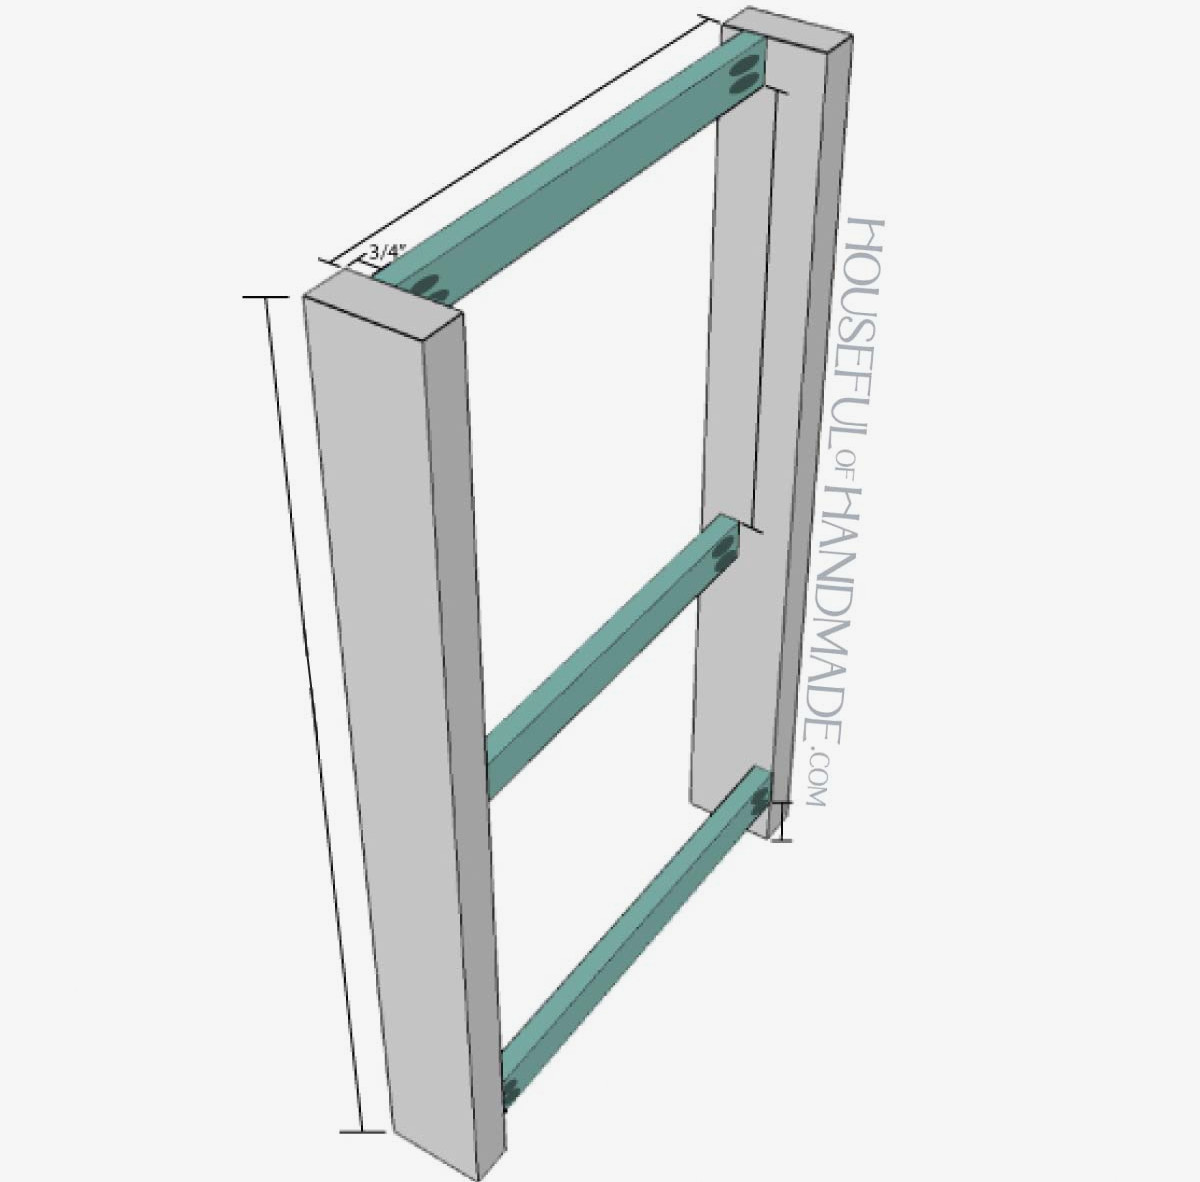
Create pocket holes for 3/4” thick material at both ends of the side trim boards.
Build the sides by fastening the side trim boards between the legs. Position one board at the top, recessed 3/4″ from the outer edge.
Next, install another board 16″ beneath the top board, also 3/4″ inward from the outside edge. Position the final board 2″ above the bottom, aligned flush with the legs’ inside edge.
Fasten everything with 1 1/4” pocket hole screws and wood glue.
Build the opposite side in the same manner, ensuring that it is mirrored.
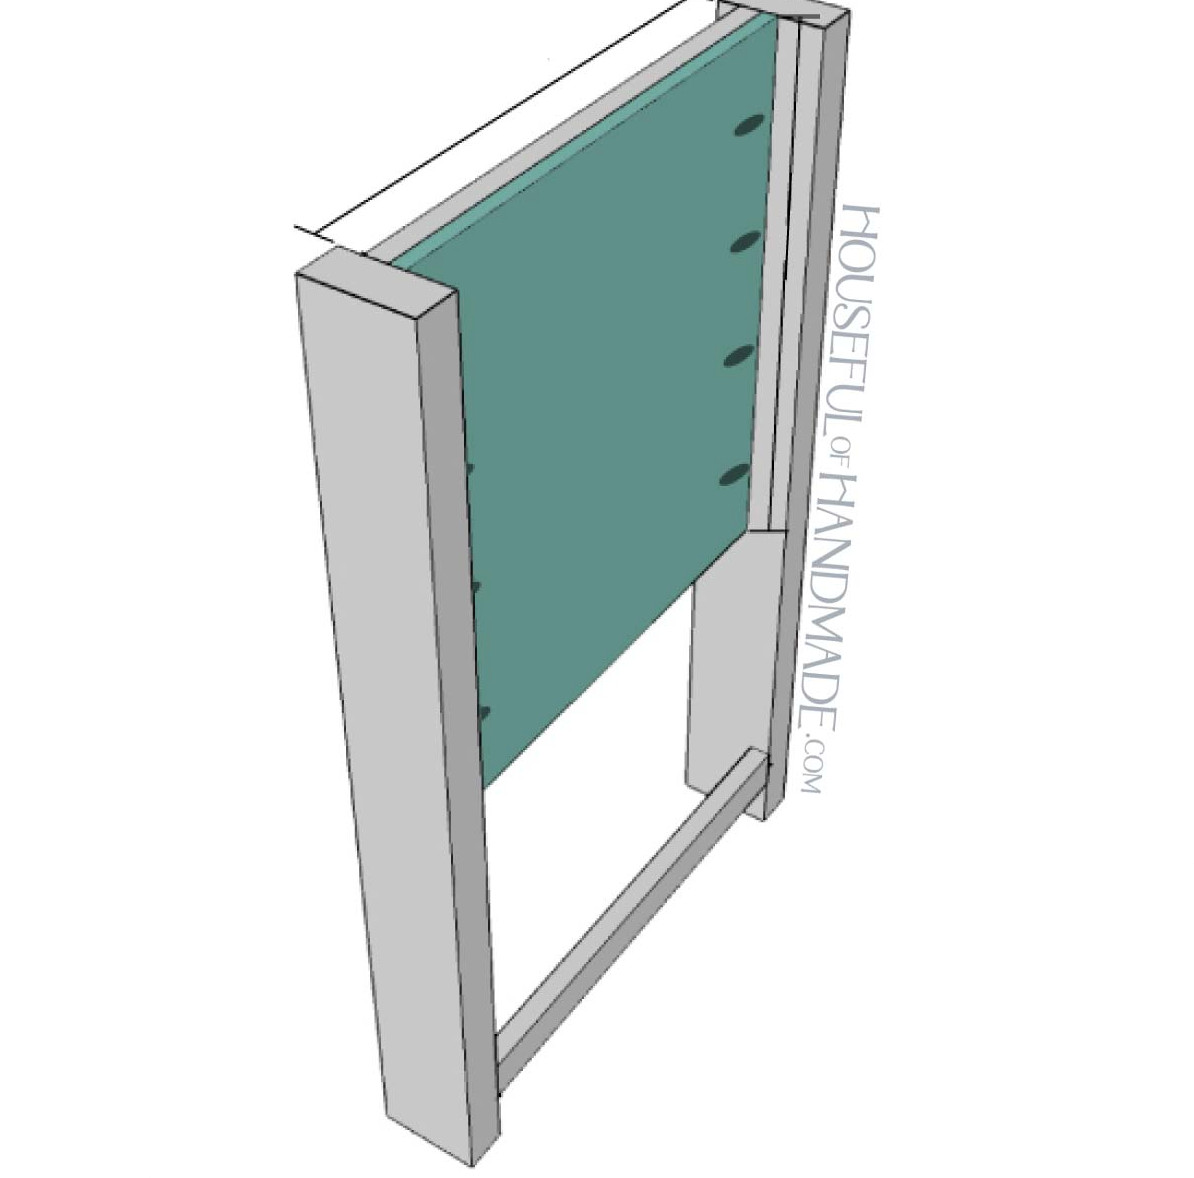
Make pocket holes for 1/2” thick material along the sides of the plywood side panels.
Fasten the panels inside the side trim boards, keeping them flush with the upper board and 1/2″ above the lower board.
Use 1 1/4” pocket hole screws to attach them to the legs, then drive 1” brad nails through the plywood and into the side trim boards.
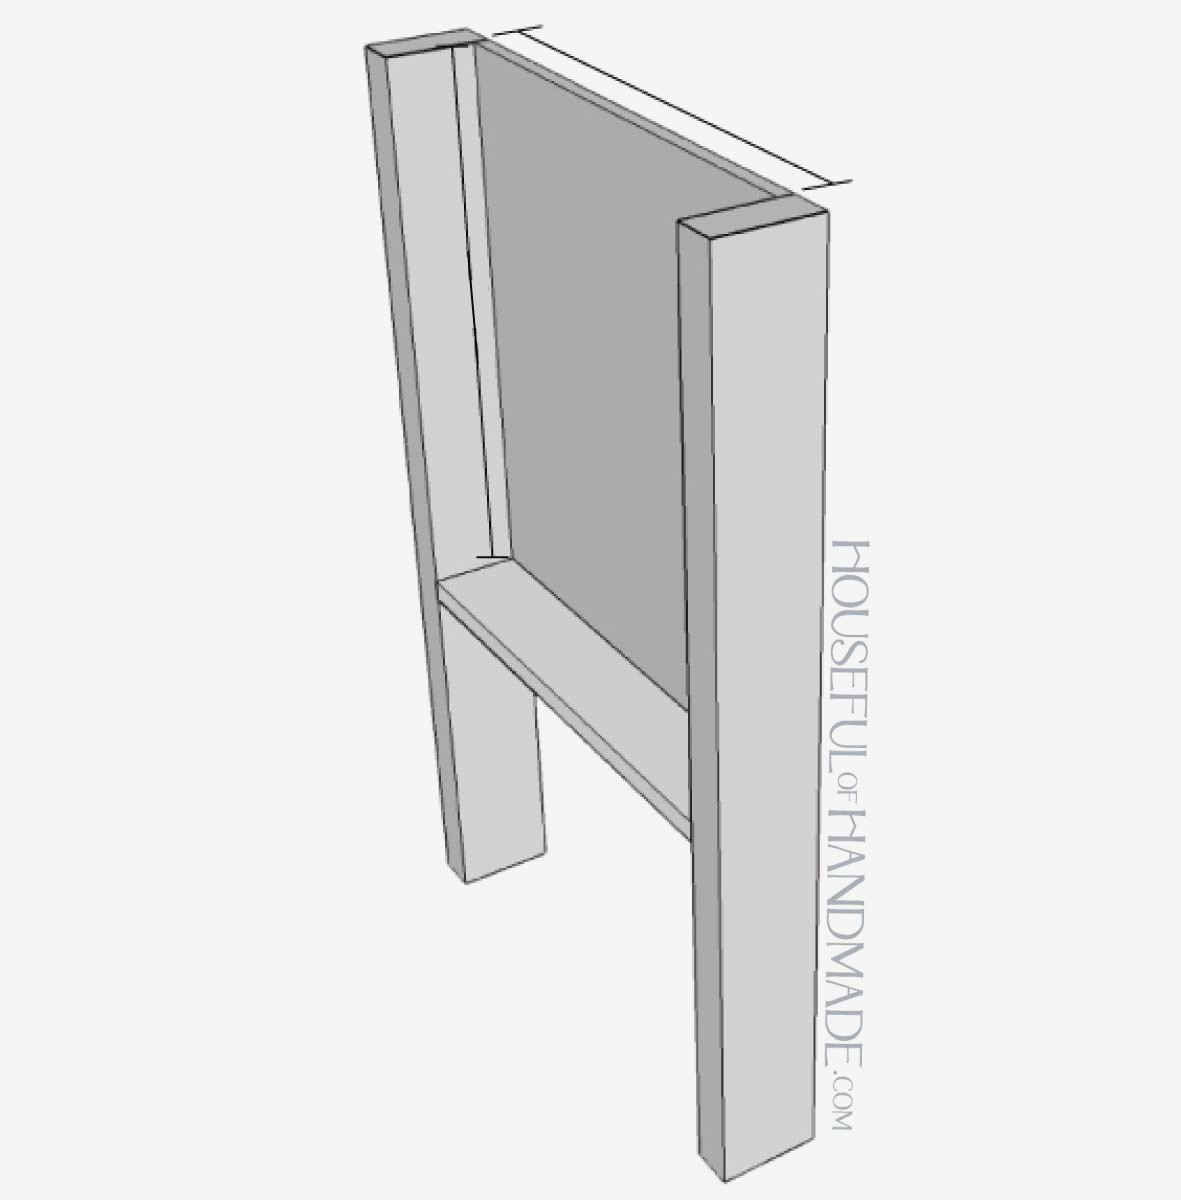
For a double vanity, construct the center legs.
Using pocket holes, secure the 1×4 between the 2x4s, 18 1/2″ below the top.
Next, fasten the center plywood panel to the legs with pocket holes, keeping it flush with the top and the right side of the legs.
Position the pocket holes on the panel’s right side so they face the drawer side.
STEP 2- Join the sides
Make pocket holes for 3/4” thick material at both ends of the face frame rails and stiles.
As shown in the plans, assemble the face frames between the stiles. Apply wood glue, secure them with 1 1/4” pocket hole screws, and keep them flat with face frame clamps.
Afterward, fit the frames between the two side sections, aligning the upper portion flush with the top and front of the legs.
Install the lower frame 2” above the bottom, aligned flush with the inside.
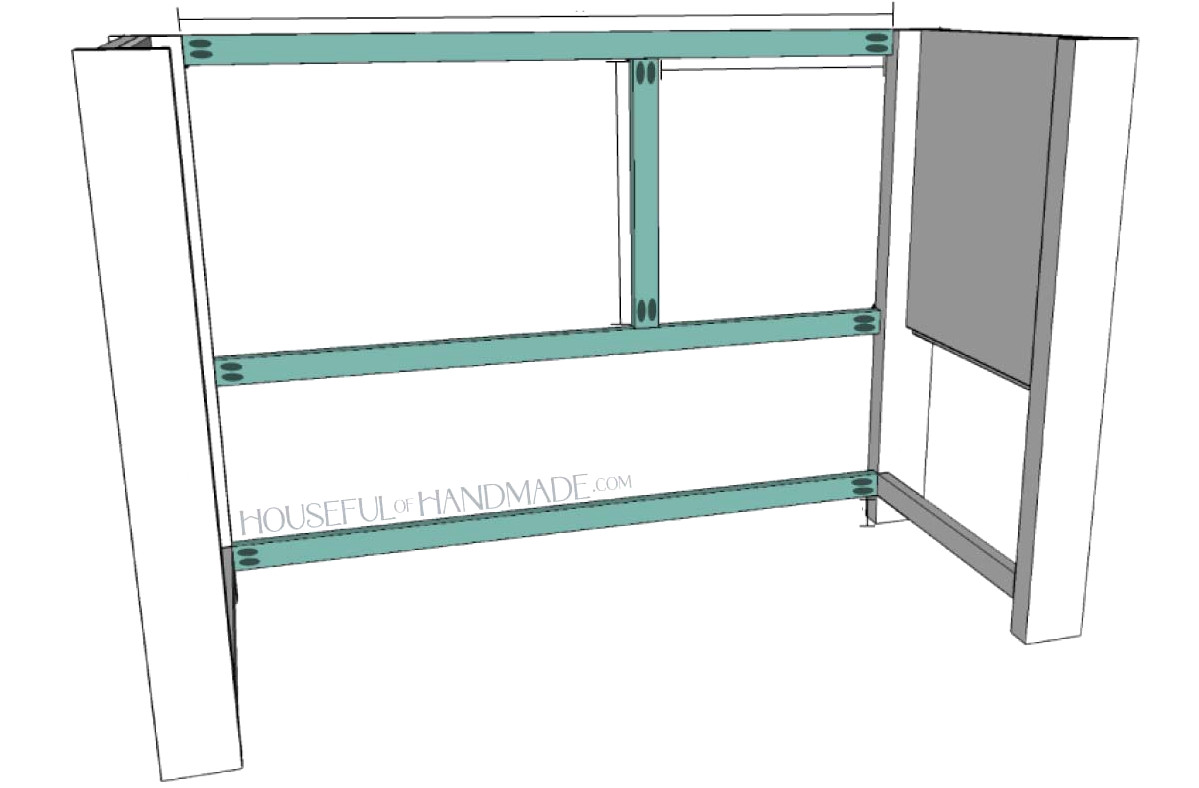
Drill pocket holes for 3/4” thick material into both ends of the back support boards.
Place one back support between the legs, flush with the vanity’s top and rear. Install the second support 12″ beneath the first, also aligned with the back of the vanity.
Fasten them using 1 1/4” pocket hole screws and wood glue.
Position the final face frame rail 2″ above the vanity bottom, between the legs and flush with their front edges. Secure it with 1 1/4” pocket hole screws.
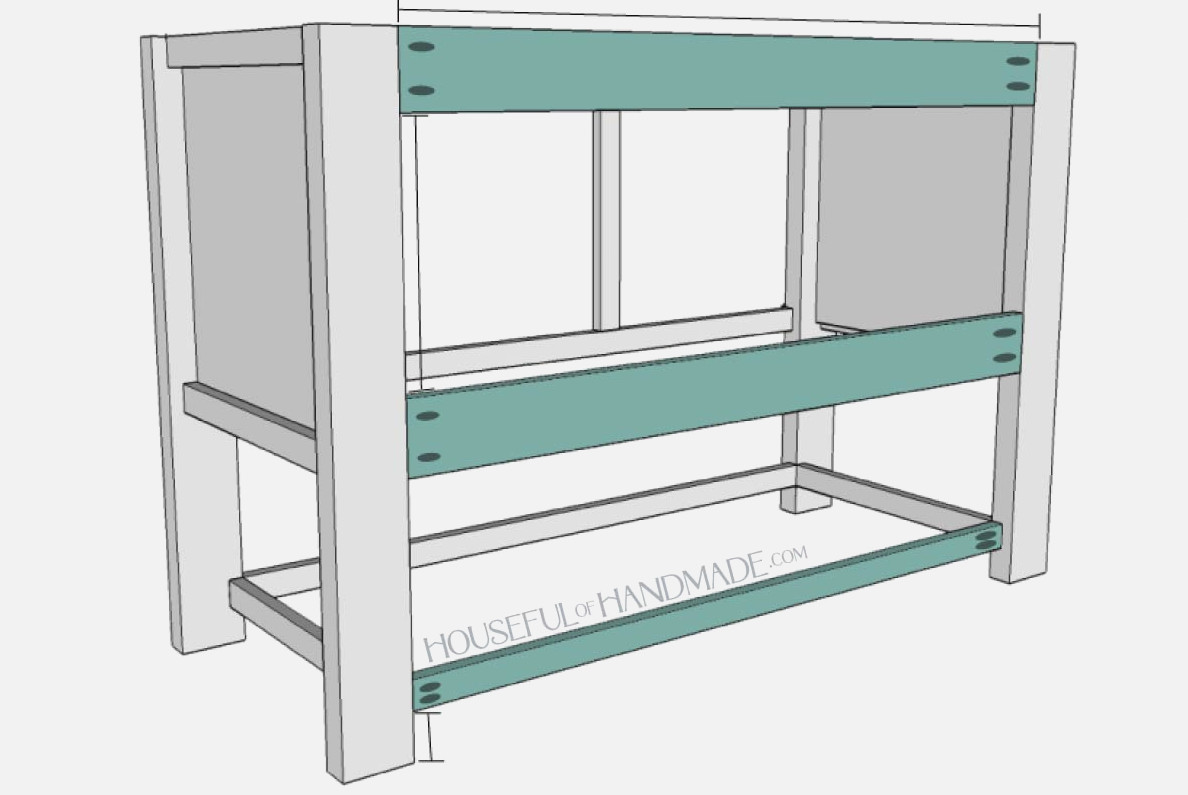
STEP 3- Complete the vanity cabinet
Drill pocket holes for 1/2” material around the cabinet bottom perimeter and in the bottom shelf pieces.
Set the bottom shelf at your preferred depth within the 1×2 frame. Fasten it with 1” pocket hole screws.
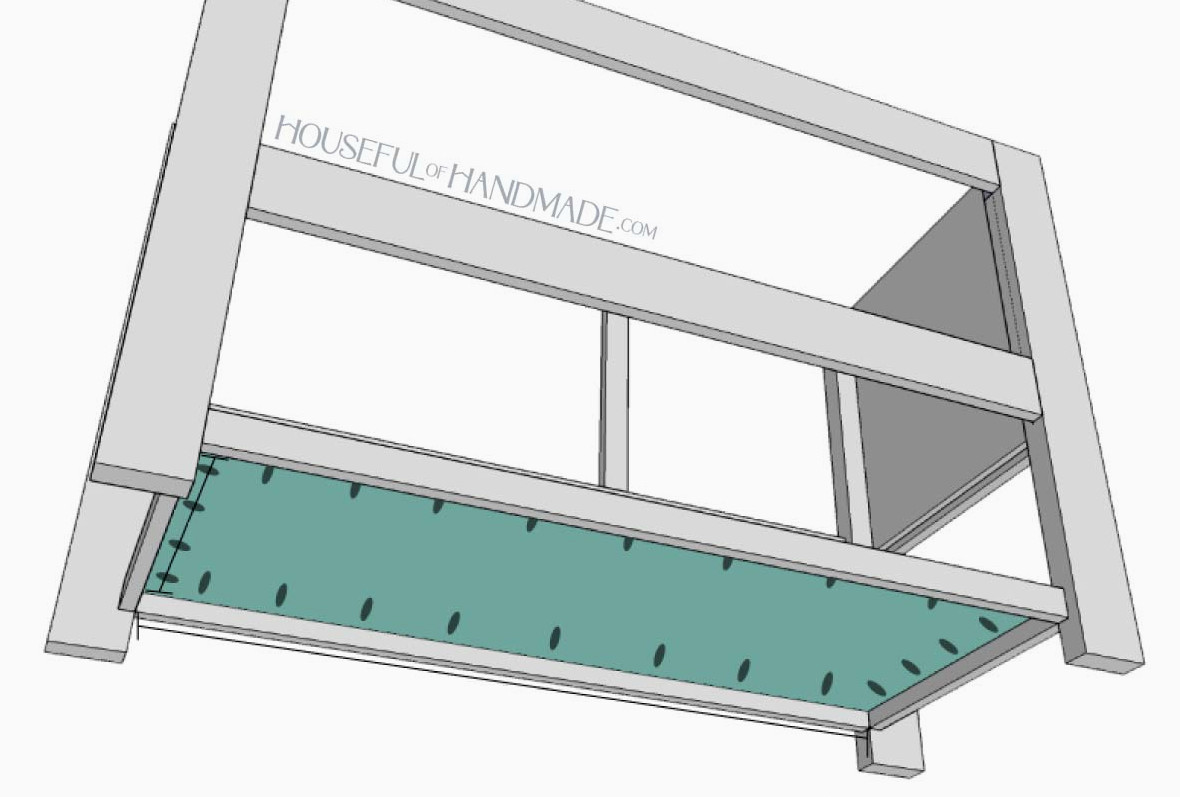
Position the cabinet bottom beneath the vanity cabinet area, flush with the bottom of the face frame. No bottom panel is installed beneath the drawers.
The cabinet base should stop approximately 1″ before reaching the side panel, ending flush with the legs.
To prevent items from dropping through this narrow gap, fill it with a scrap piece of 1/2″ plywood, as I did, or cut the bottom panel to 27″ long and notch a 3/4″ x 1″ section around the legs.
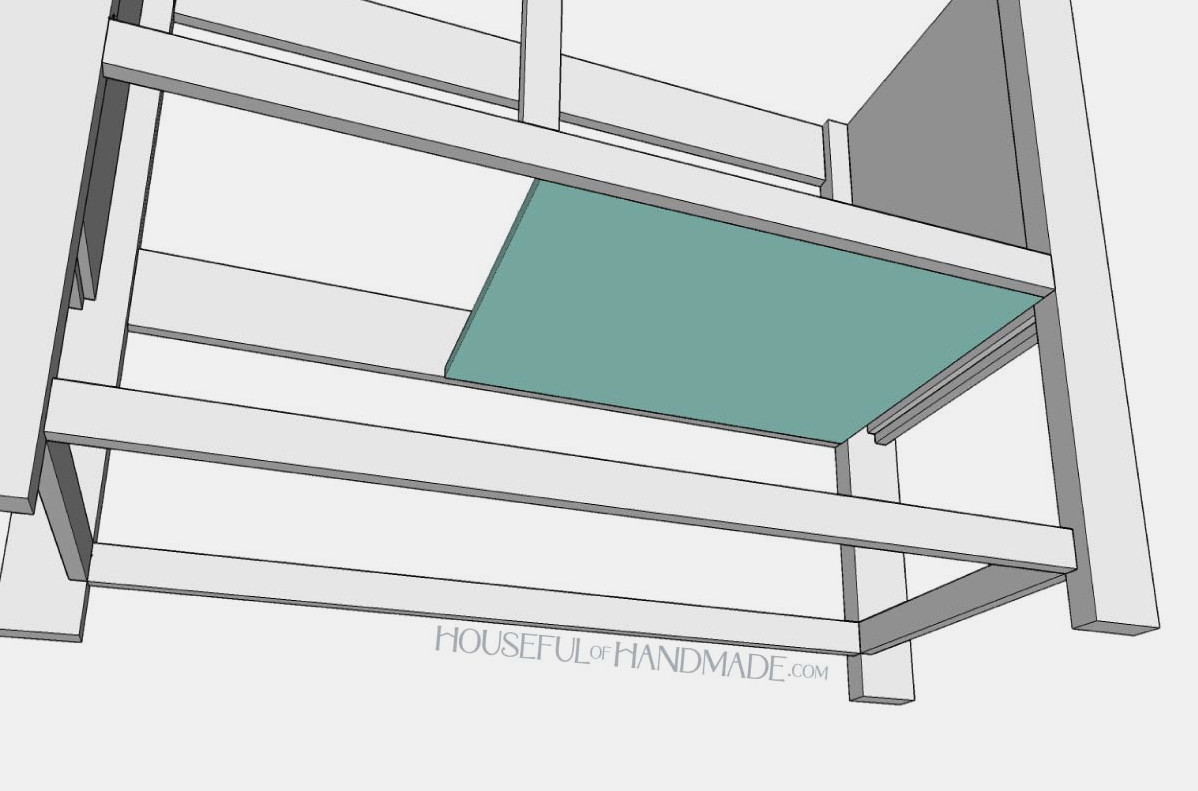
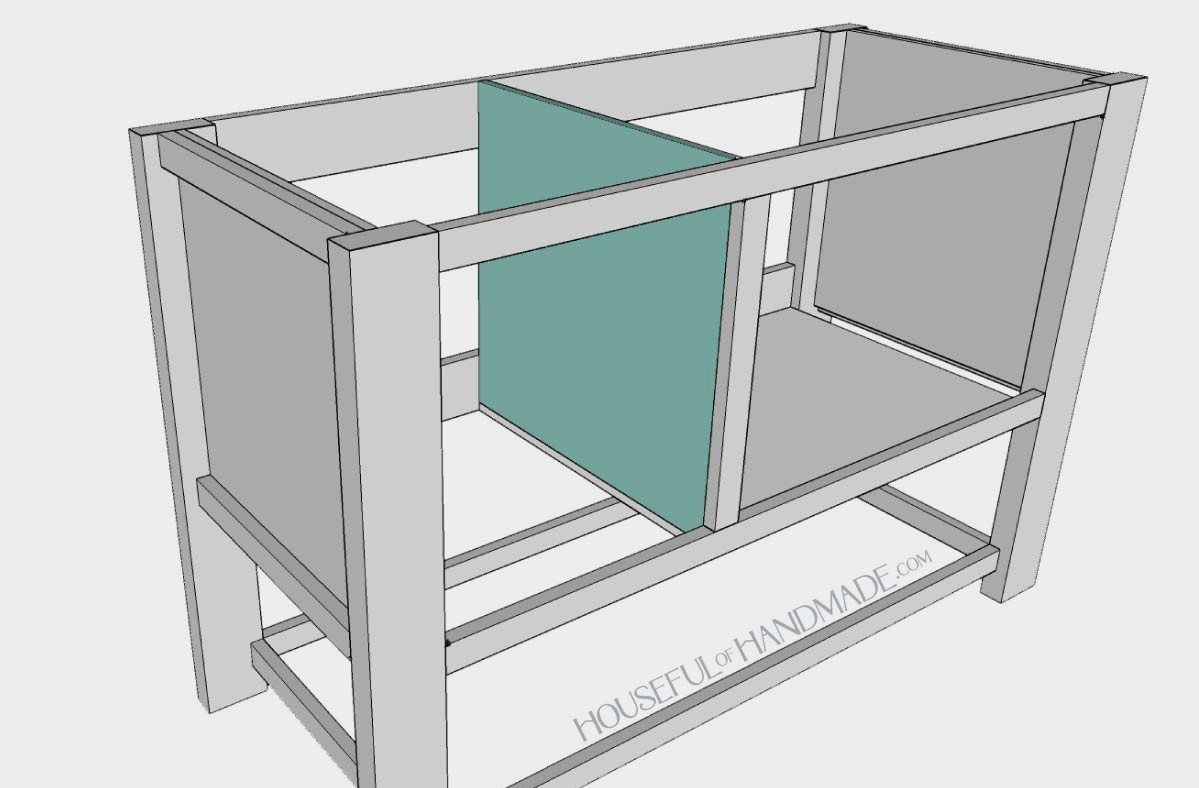
Create pocket holes for 1/2” material in the front, rear, and bottom edges of the cabinet center panel. Align the back pocket holes with the rear support pieces.
Install the panels on top of the cabinet bottom, keeping them flush with the side of the face frame stile in the drawer areas.
Secure them with 1” pocket hole screws and glue.
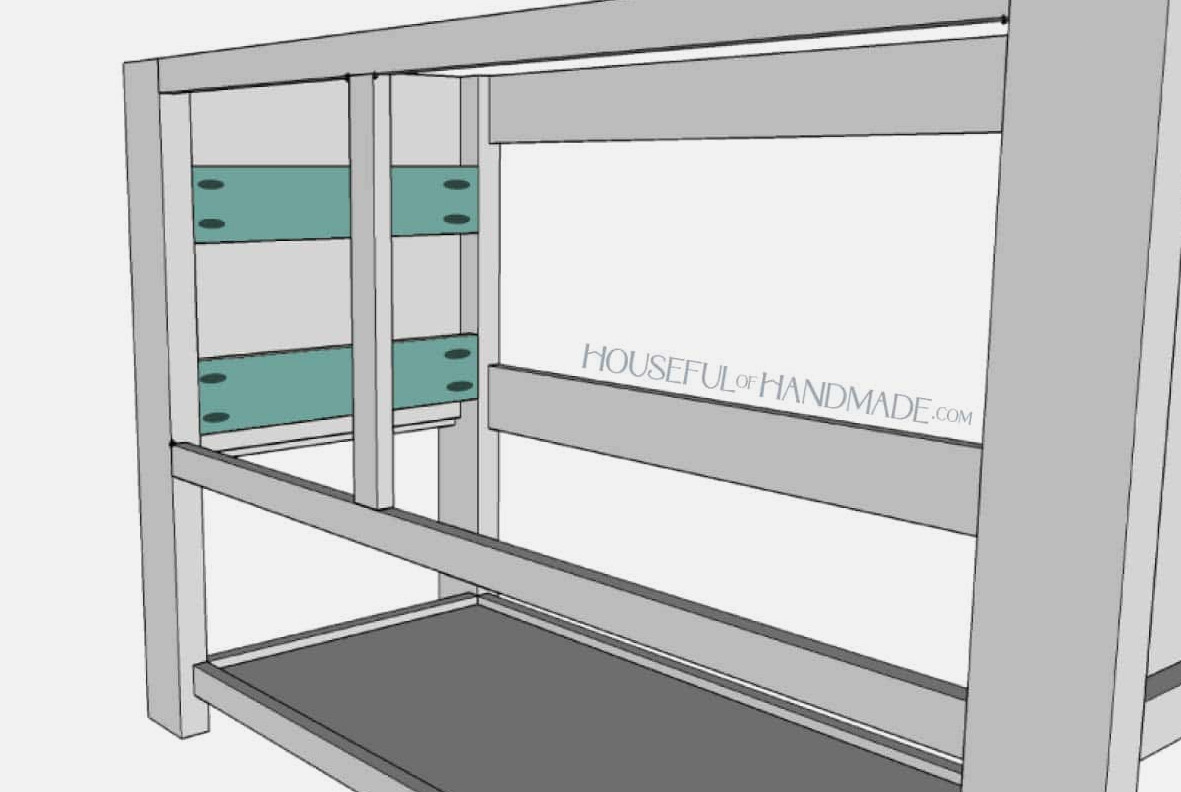
Drill pocket holes for 3/4” material at both ends of the drawer support pieces.
Fit the supports between the legs, aligning them flush with the leg sides where the drawer slides will be installed.
Fasten them with 1 1/4” pocket hole screws.
STEP 4- Construct the drawers
Cut a groove 1/4″ wide and 1/4″ deep along the inside of the drawer front and side pieces, positioned 1/4″ above the bottom. Rip the back piece to 4 3/4” so its lower edge aligns with the groove’s top.
Drill pocket holes for 3/4” material in the front and back pieces, on the side opposite the groove.
Apply wood glue, then attach the front between the side pieces with 1 1/4” pocket hole screws.
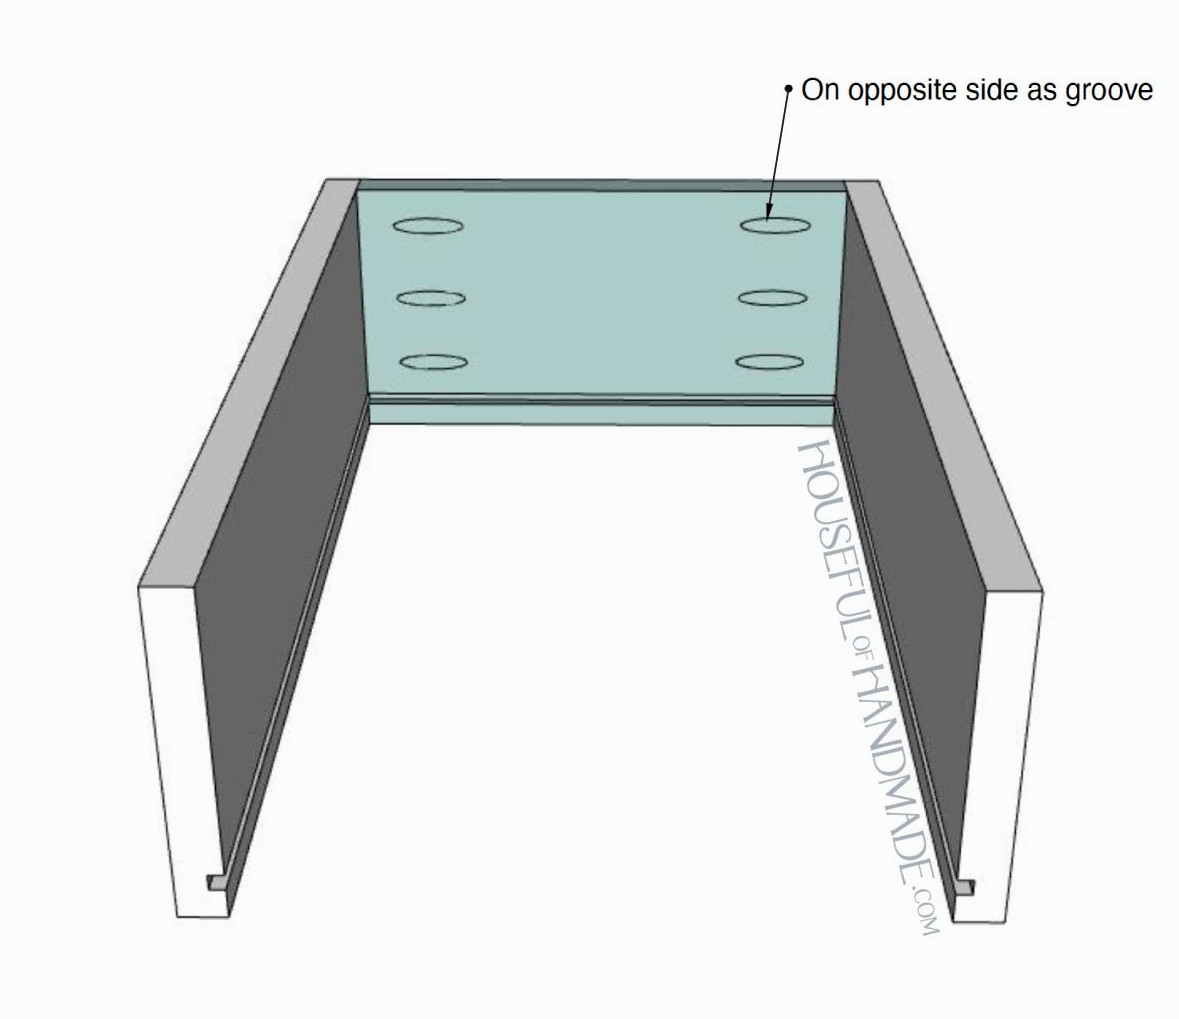
Install the back pieces between the sides, aligning the bottom with the top of the groove.
Check that the drawer box is square, then repeat the process for the second drawer.
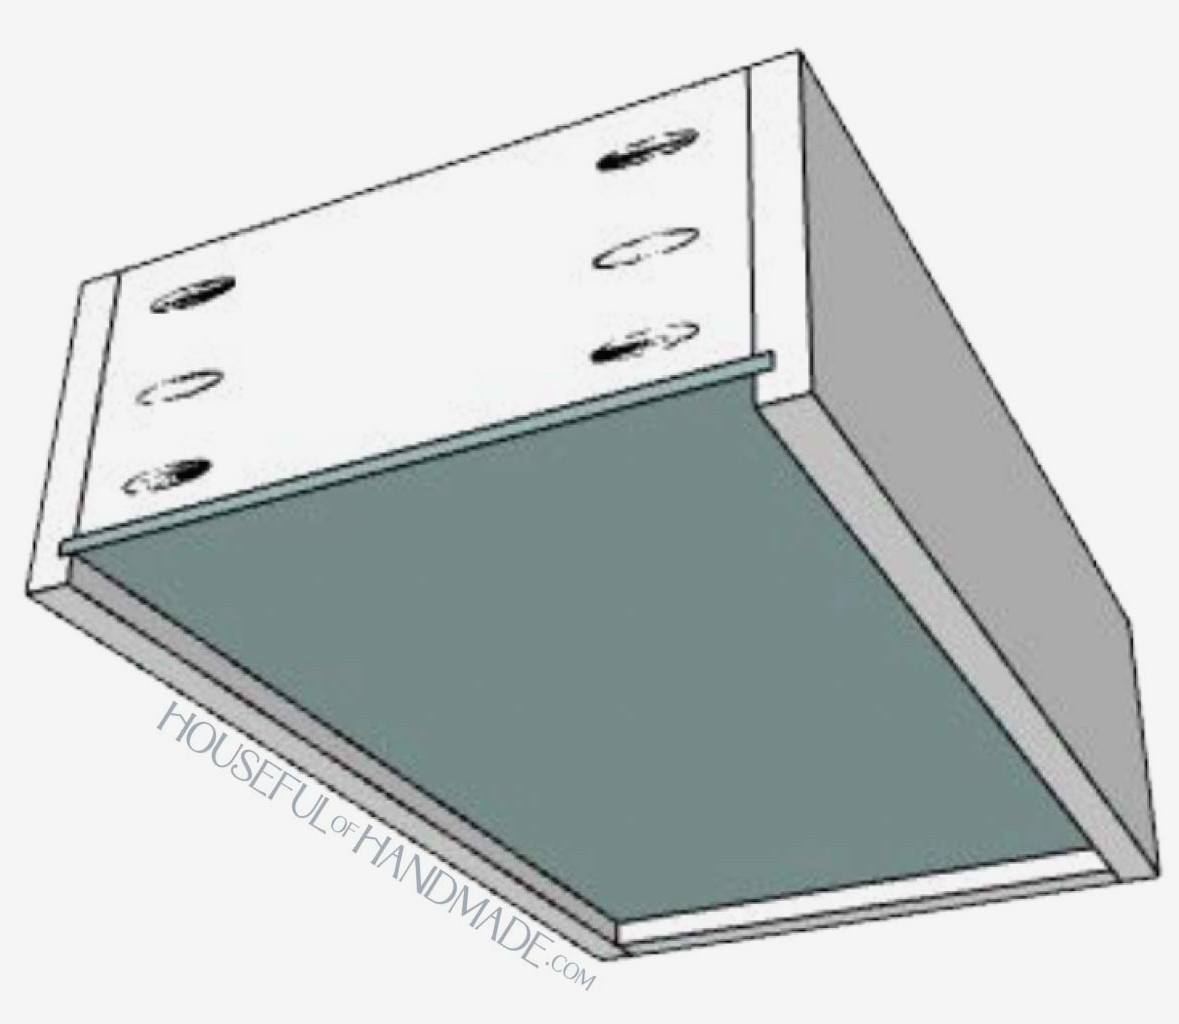
Slide the drawer bottom beneath the back piece and into the grooves in the sides and front.
Confirm that the box remains square, then fasten the drawer bottom to the back piece with 5/8″ brad nails. Discover additional drawer-building advice and alternative construction methods here.
STEP 5- Construct the doors
The doors & drawer fronts are designed for a full inset, allowing them to sit flush with the vanity face frame while leaving an 1/8″ reveal around each drawer front.
The drawer openings should measure 9” wide by 16″ tall. Verify the dimensions of your openings and modify them if needed.
Set the pocket holes for 1/2” thick material, then drill them into the top & bottom of the plywood panels.
Position the rails against both sides of the center panel, ensuring that their backs are flush. Fasten them using 1” pocket hole screws.
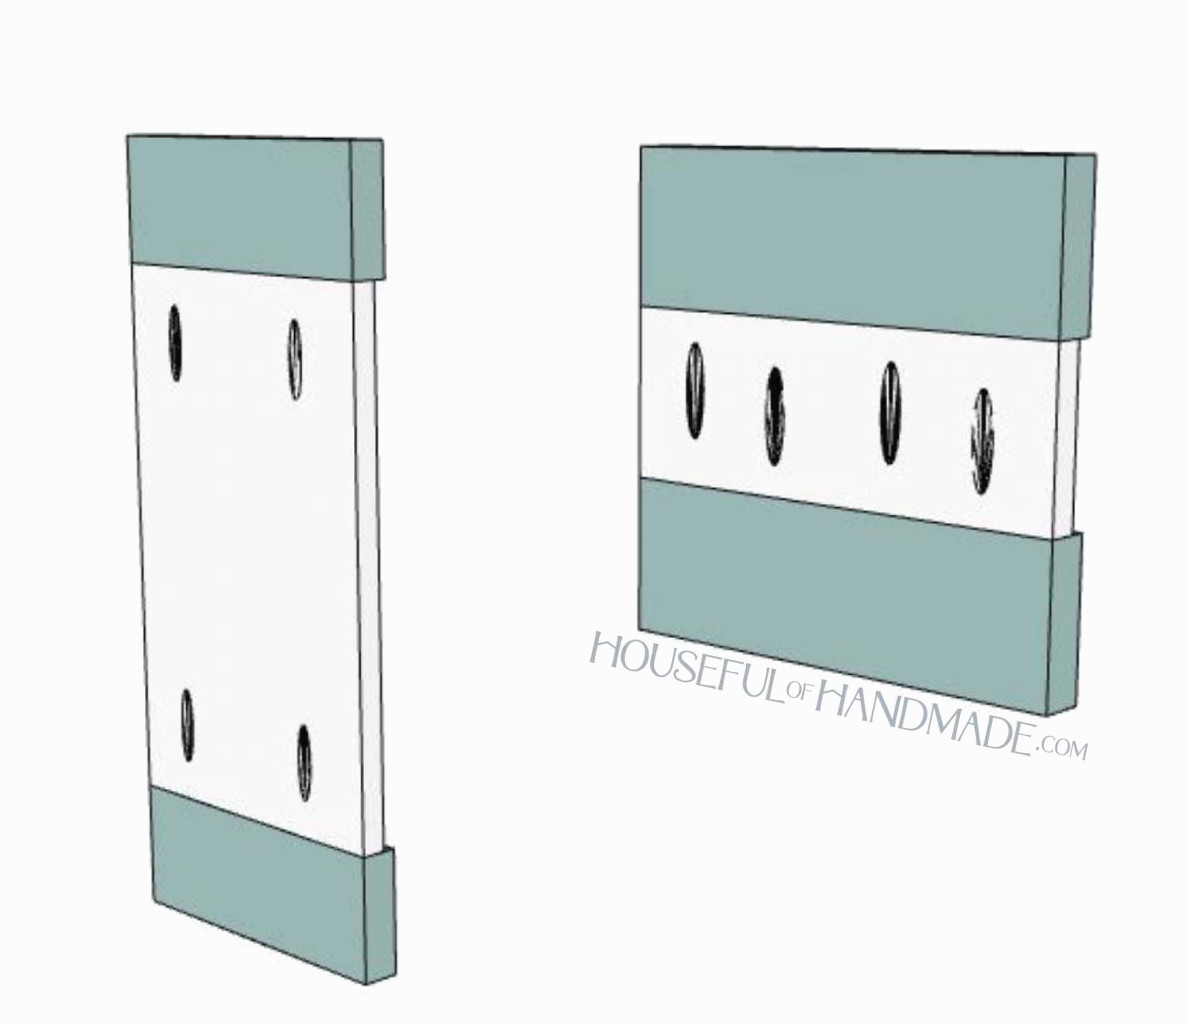
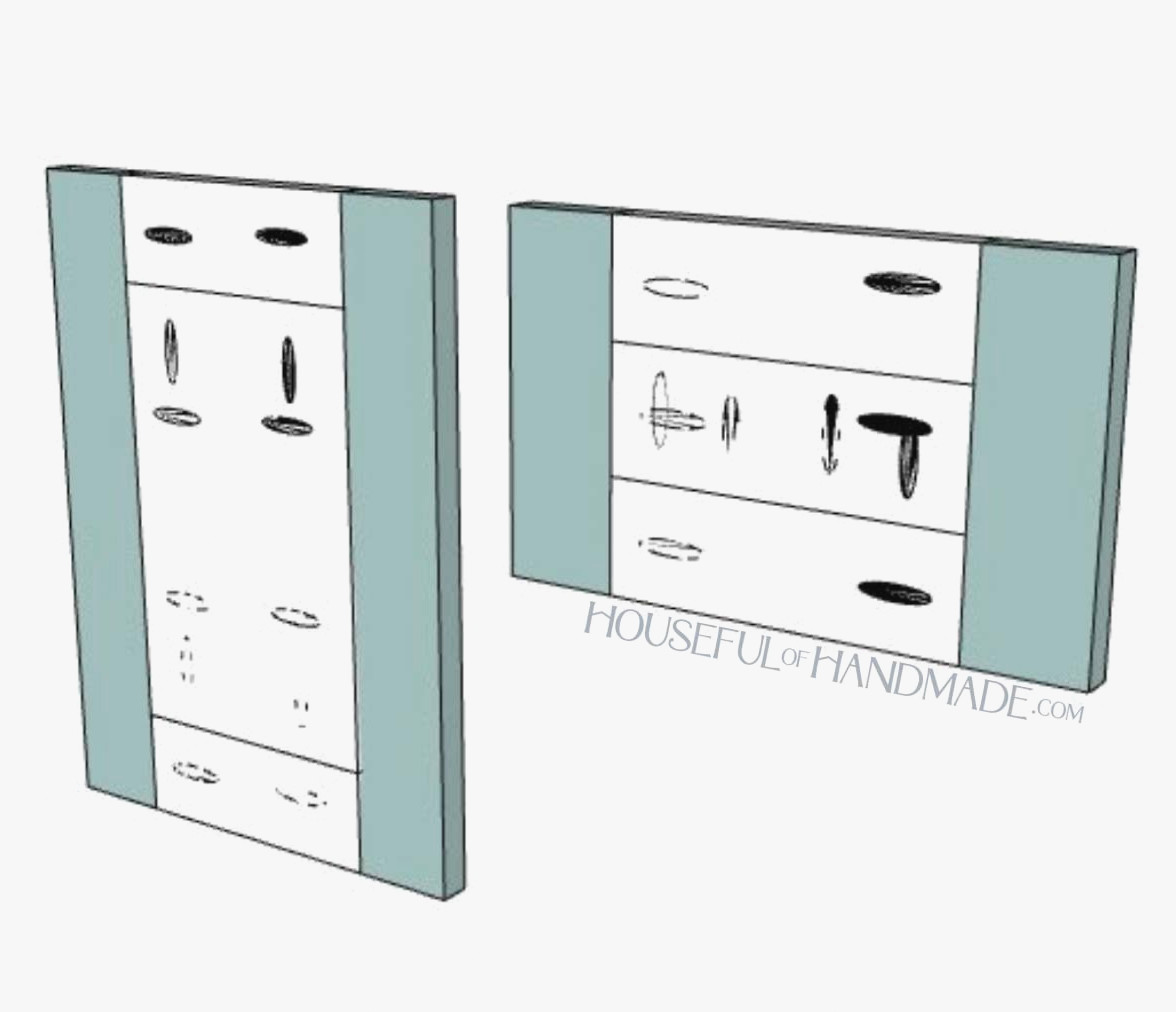
Create pocket holes for 1/2” material along the plywood panel sides. Next, reset the pocket hole jig for 3/4” material and drill holes into the sides of the rail pieces.
Fasten the stiles using pocket hole screws. Use 1” screws for attaching the plywood panel and 1 1/4” screws for joining the rails to the stiles.
Keep the backs aligned, forming a 1/4” recessed center panel on the front.
STEP 6- Apply the finish
Once the vanity has been sanded, apply stain or paint. Be sure to seal it well so it can handle the additional moisture found in a bathroom.
Mount the drawer slides with the front of the drawer box positioned 3/4” behind the face frame fronts. Learn how to install drawers here.
Hold the drawer fronts against the drawer box with clamps, leaving an 1/8″ space along the sides and tops.
From inside the drawer, fasten the fronts with 1″ screws, then attach the drawer pulls. Learn how to attach drawer fronts easily here.
Install hinges so the cabinet doors sit inset within the face frame. Position the doors with an 1/8” gap on every side. Add knobs if desired.
That’s it!
Don’t Forget to Download the Printable PDF Plans Here!
Premium plans feature:
- Suggested Tools
- Materials shopping list
- Simple-to-read cut list chart
- Cutting diagrams
- Detailed instructions with 3D renderings
- Useful resources
- BONUS: 3D SketchUp model
Place your vanity in the bathroom. Learn how to install a vanity here.
Finish it with your vanity top and enjoy.
I’m heading off to complete another project now.