I’ll admit something. Whenever I step inside a thrift shop, I’m rarely searching for one specific item. I’m searching for possibility.
A jar that might shelter a miniature woodland. A creamer destined to become a plant pot. A colander practically pleading for succulents to tumble through its openings. I can’t always say why I pick something up—I simply sense that it still has plenty of life in it.
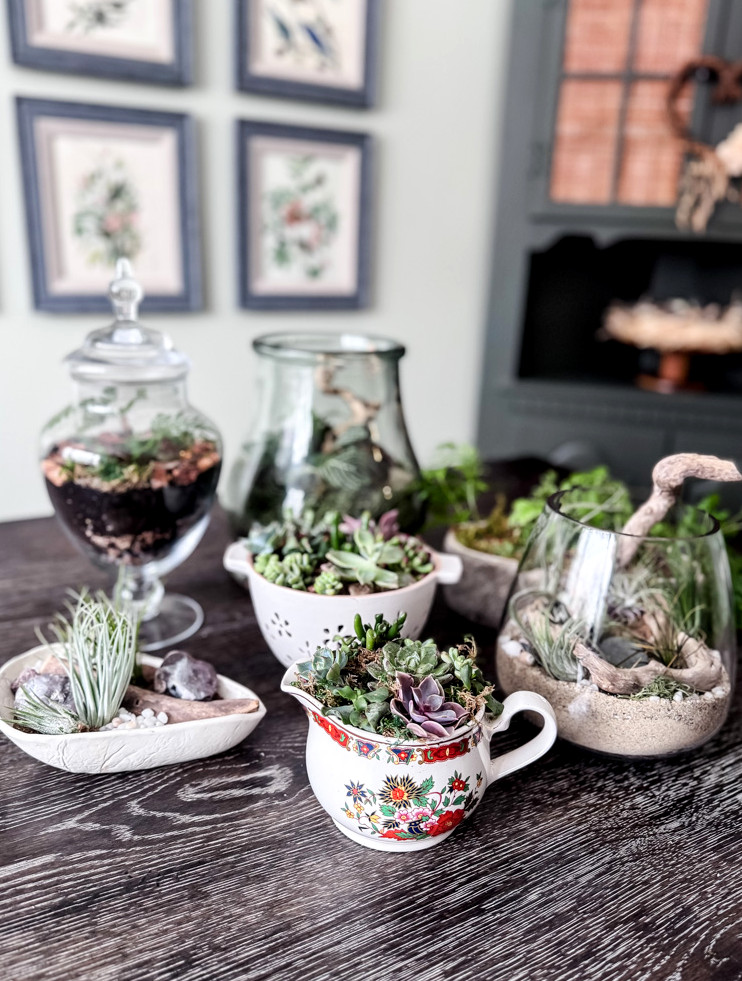
That’s where two of my favorite passions, thrifting and gardening, come together. Today, I’m showcasing five secondhand vessels and the new purposes they found. A few became terrariums, while others turned into planters. Each one sat on a shelf, waiting for someone to recognize its possibilities. Spoiler: I took them home. Now, they’re flourishing.
Before We Start: What to Consider When Thrifting Planters
As I search for containers to repurpose, I remember a few important points:
- Form is more important than the original function. A candleholder can turn into a terrarium, and a sugar bowl can serve as a succulent planter.
- Forget the label and focus on the shape. Missing a drainage hole? That’s fine. I’ll explain how to manage it.
- Small openings call for the right equipment. Chopsticks, extended tweezers, and patience make excellent companions.
- Follow your instincts. If that unusual little dish keeps crossing your mind, return and buy it. I know this from experience.
Let’s move on to the fun part!
Hello, I’m Jennifer. I feel that the most inviting homes are filled with stories—and mine is told through discovered treasures. To me, thrifting means more than spending less; it means creating a home filled with warmth, personality, and a touch of New England heritage, one pre-loved treasure at a time.
Before and After: 5 Thrift Shop Finds Turned Into Plant Displays
Why They’re Favorites
There’s a subtle kind of wonder in saving an object from a thrift store shelf and giving it another purpose. A jar that sat empty for years can become a miniature ecosystem. A creamer once used for milk can overflow with succulents. A colander originally designed for berries can transform into a lush, green basket.
That’s the spirit behind this collection of projects. Five containers. Five makeovers. No strict definition of what a “planter” should be.
Whether you’ve cared for plants for years or are just beginning, I hope these suggestions encourage you to view thrift store shelves in a new way. The next time you’re browsing, that quirky little dish may not seem strange at all. It may simply look full of possibility.
Project 1: A Closed Terrarium in an Apothecary Jar
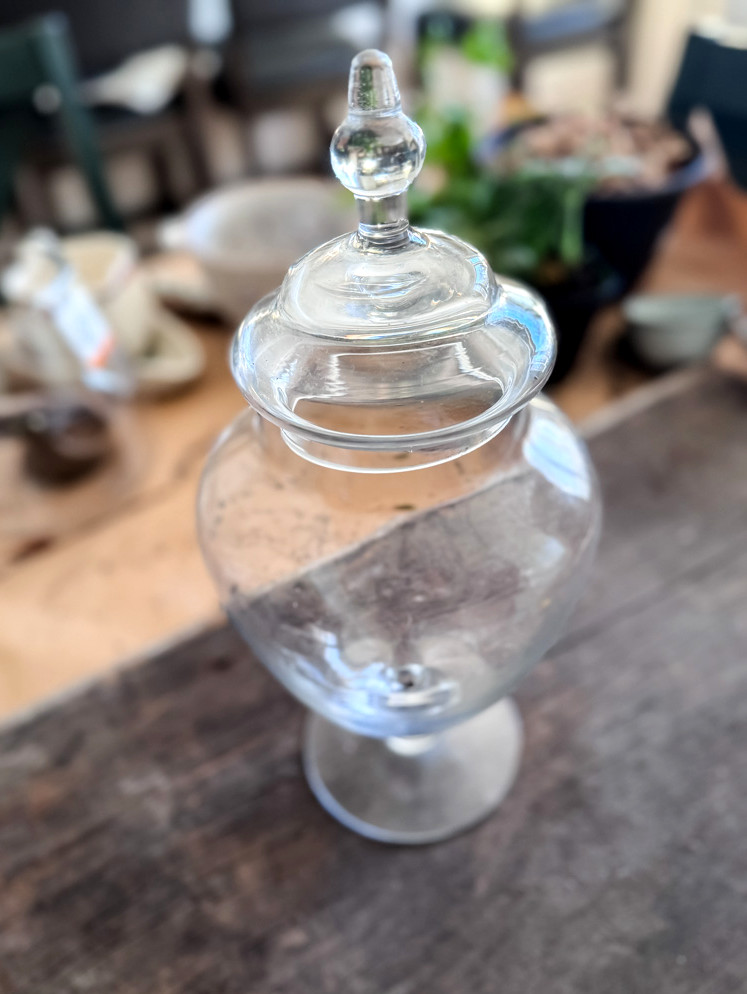
The Discovery:
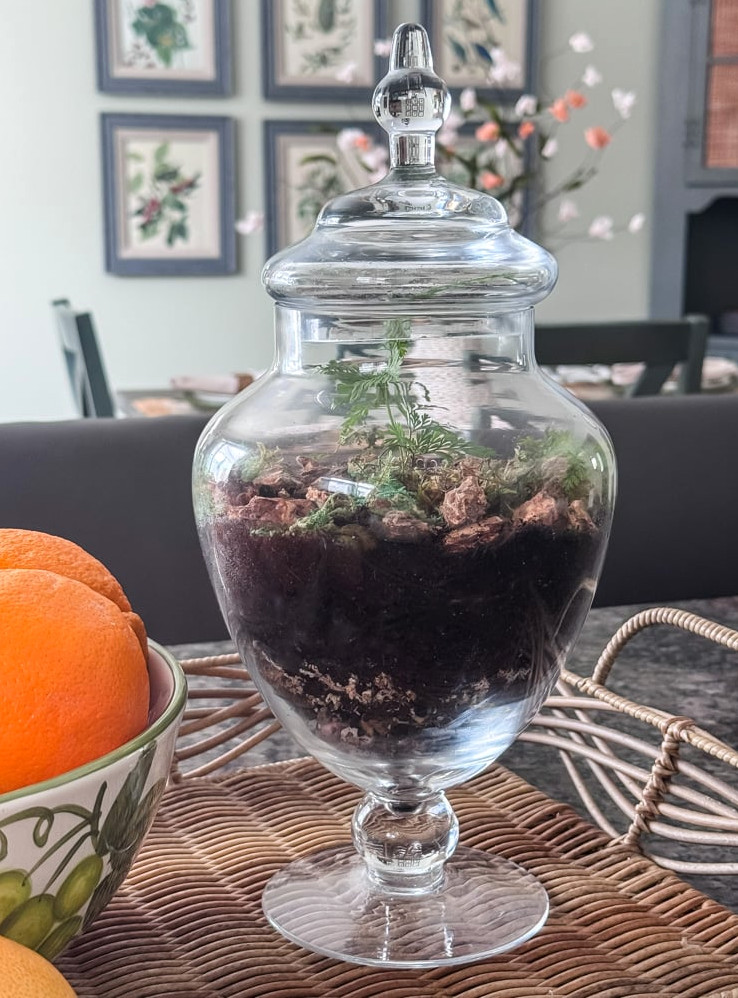
A glass apothecary jar topped with a rounded lid, discovered on a dusty lower shelf. The price was $5. I examined it from every angle, searched for cracks, and found it to be spotless. Previously, I had used it for my sea glass collection, but it was ready for a fresh purpose: a tiny, self-sustaining woodland.
The Container:
Clear, tall glass, a spacious opening, and best of all—a lid that formed a proper seal. That combination is ideal for a closed terrarium. The cover supports the enchanting water cycle: evaporation, condensation, rainfall, and repetition.
How To Create The Terrarium
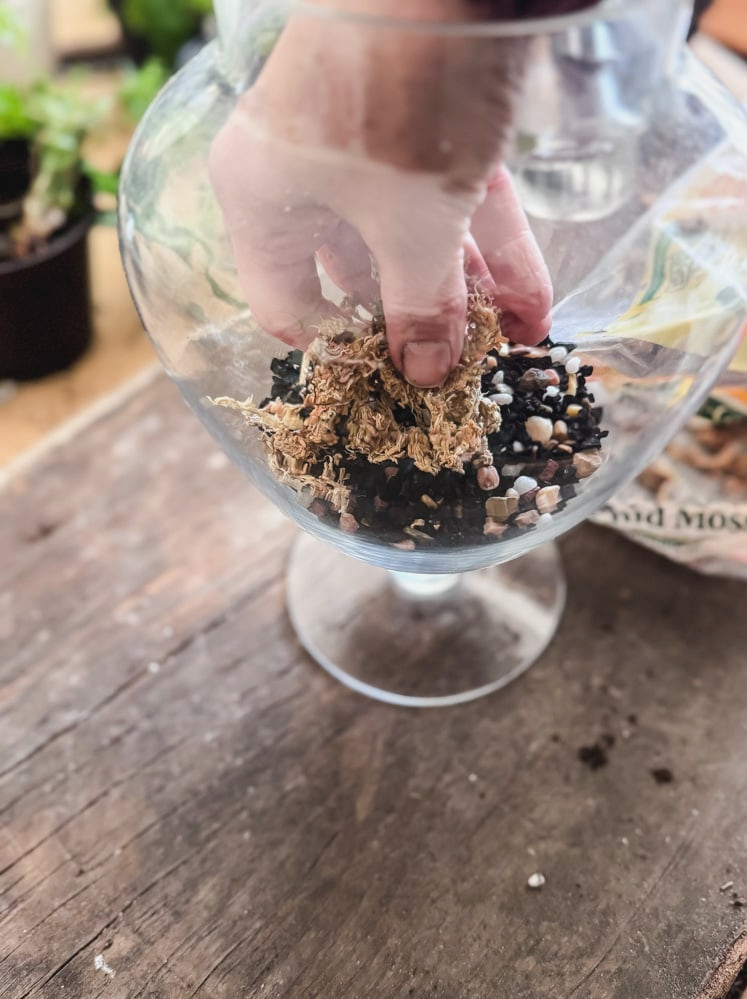
Whether you’re making a spacious terrarium or a more compact version, a closed terrarium requires the same layering method. Begin with pebbles or gravel to provide drainage, add a small quantity of activated charcoal to maintain freshness and promote a healthy environment, then place a layer of sphagnum moss to separate the drainage material from the potting soil. Finish with a few inches of potting mix before planting your miniature greenery.
The Layers:
- Drainage pebbles
- Activated charcoal for freshness
- Sphagnum moss to form a dividing layer
- Potting soil blended with a small amount of orchid bark for airflow
- Terrarium plants (refer to the chart below)
- Moss as the final living cover
- A quick glass cleaning, followed by placing the lid
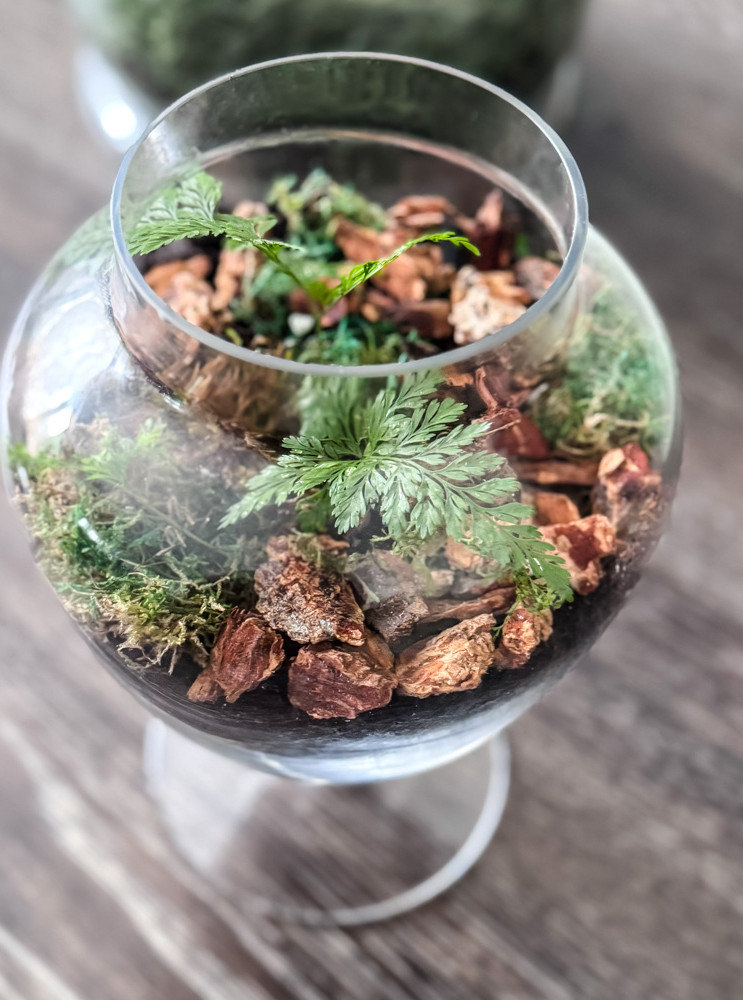
For this terrarium, I used only a few small pieces of rabbit’s foot fern. To complete the arrangement and create a natural woodland atmosphere, I topped the soil with orchid bark and fresh green moss.
Best Choices For Closed Terrariums
For Colorful Accents & Pattern:
- Nerve Plant (Fittonia): A timeless favorite. Its vivid pink, red, or white veins create a lively and attractive contrast among the surrounding greenery.
- Polka Dot Plant (Hypoestes phyllostachya): A wonderful color-filled option, featuring spotted leaves in shades of pink, red, or white.
Textured Foliage (Ideal for the Middle Layer)
- Peperomia: Their ridged, patterned, or succulent-like leaves provide impressive texture while remaining nicely compact.
- Aluminum Plant (Pilea cadierei): Its shimmering, quilt-patterned leaves glisten in a terrarium’s soft, filtered light.
- Friendship Plant (Pilea involucrata): Its richly textured bronze-green foliage looks as though it belongs in an enchanted woodland.
The Full, Trailing Carpet
- Baby Tears: Creates a thick, vibrant green carpet that spreads attractively across soil and stones.
- Creeping Fig: Choose the miniature type! Its tiny foliage gradually attaches to glass or driftwood, producing a charming, weathered appearance.
- Living Moss (Sheet Moss, Cushion Moss, Fern Moss): This is the finishing touch. Pressing it into the soil instantly creates a ‘forest floor’.I used a combination of varied colors and textures.
The Fine, Featherlike Ferns
- Button Fern: Displays orderly lines of small, rounded leaflets along dark stems-very clean and architectural.
- Maidenhair Fern: Features charming, compact, fan-shaped leaflets,
- Rabbit’s Foot Fern: Recognized for its fuzzy, spreading rhizomes that resemble rabbit’s feet. It brings a lovely, gentle texture.
Completed Apothecary Jar Terrarium
The Outcome:
A self-sustaining garden enclosed in glass. I misted it once when I first assembled it, closed the lid, and left it to manage itself. Moisture gathers on the glass each morning before disappearing by afternoon. The plants remain healthy and green. The jar that had sat empty for years now contains a complete miniature ecosystem.
What I Discovered:
A drainage opening is not necessary for every thrifted container. Nor does every lid need to be discarded. At times, the item’s original function, whether it is an apothecary jar, cookie jar, or vase, is already perfectly suited to what your plant requires.
Project 2: The Retro Creamer Succulent Pot
The Discovery:
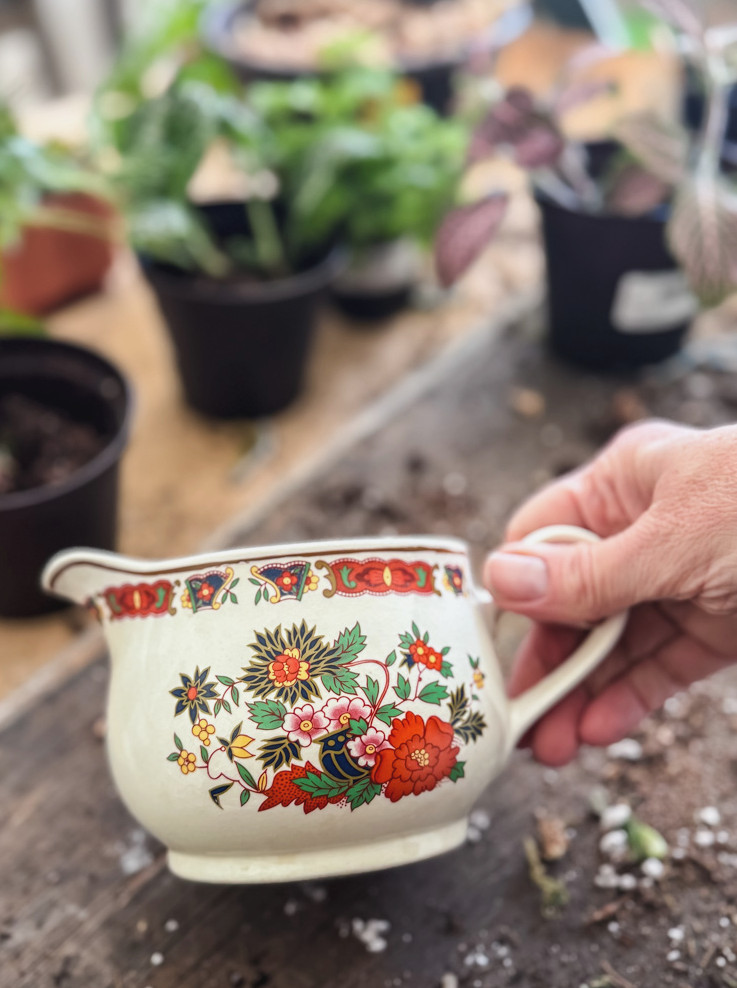
A white Irish china creamer decorated with a vivid floral design. The price was $2. Perhaps an Irish nanny once used it to pour milk into teacups. These days, it dispenses echeverias.
The Container:
It is charming and petite, though it has no drainage hole at all. Still, those flowers were irresistible, so I had to keep it.
Step 1: Getting the Creamer Ready
The Modification:
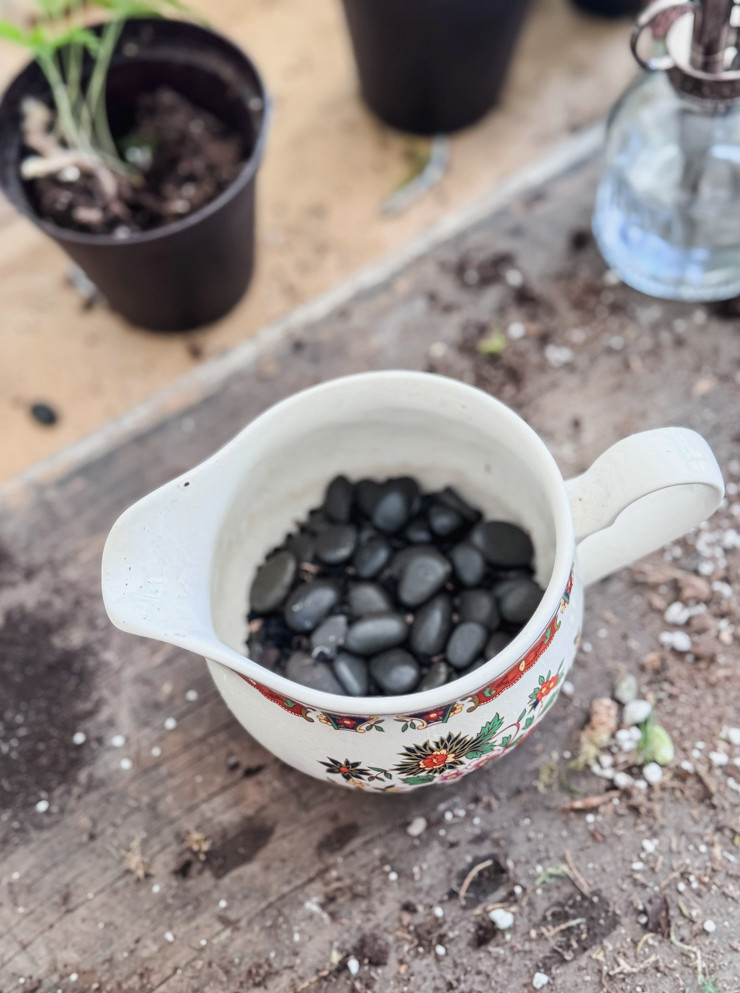
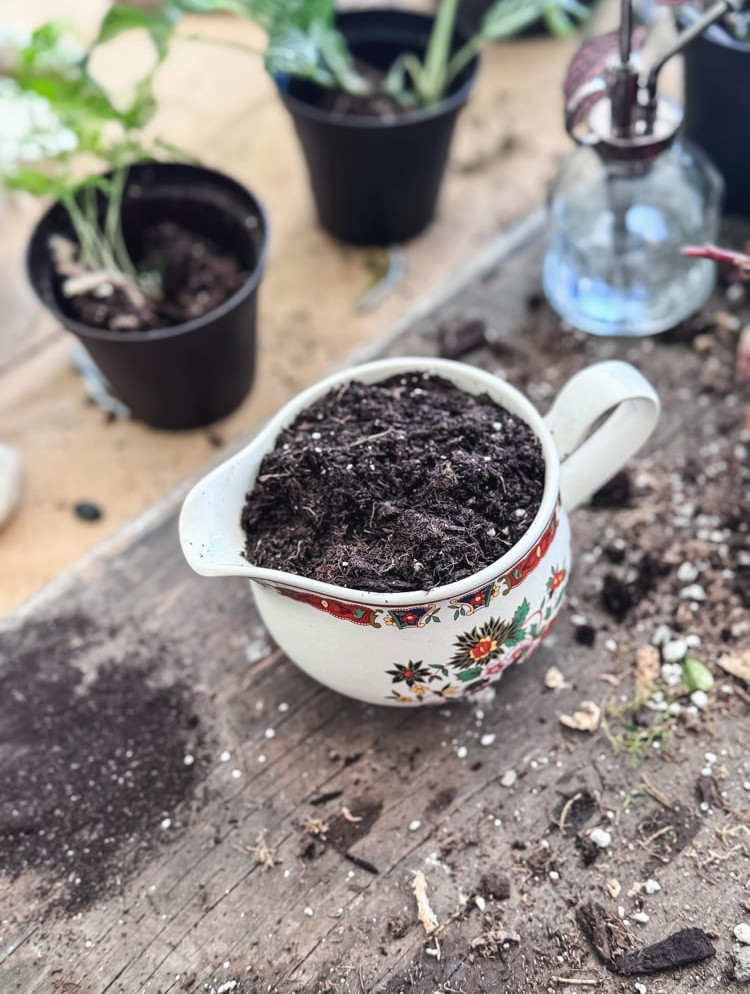
Since there is no drainage opening, I have to plan carefully. I placed a particularly thick layer of pebbles underneath to form a holding area for extra water. After that, I filled the creamer with succulent potting mix.
The Components:
- Pebbles (a generous base layer—this is essential!)
- Charcoal (a small sprinkling)
- Cactus & succulent soil (quick-draining)
Step 2: Planting Your Succulent Pot
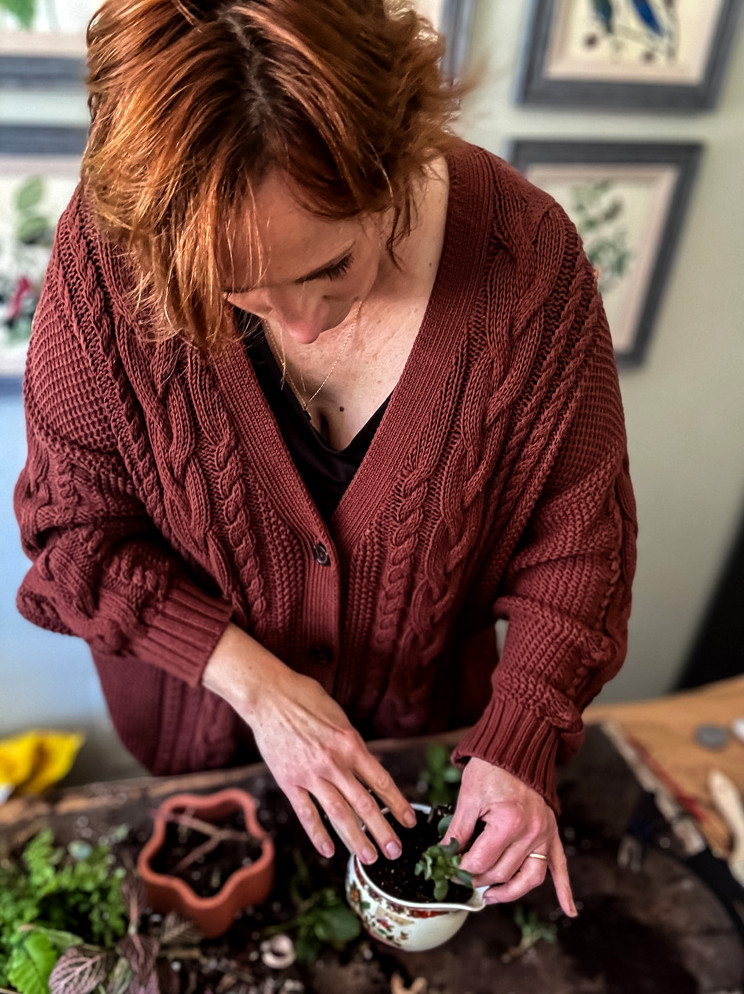
For this more compact pot, I am choosing small succulents as well, taken from a collection of succulents I purchased.
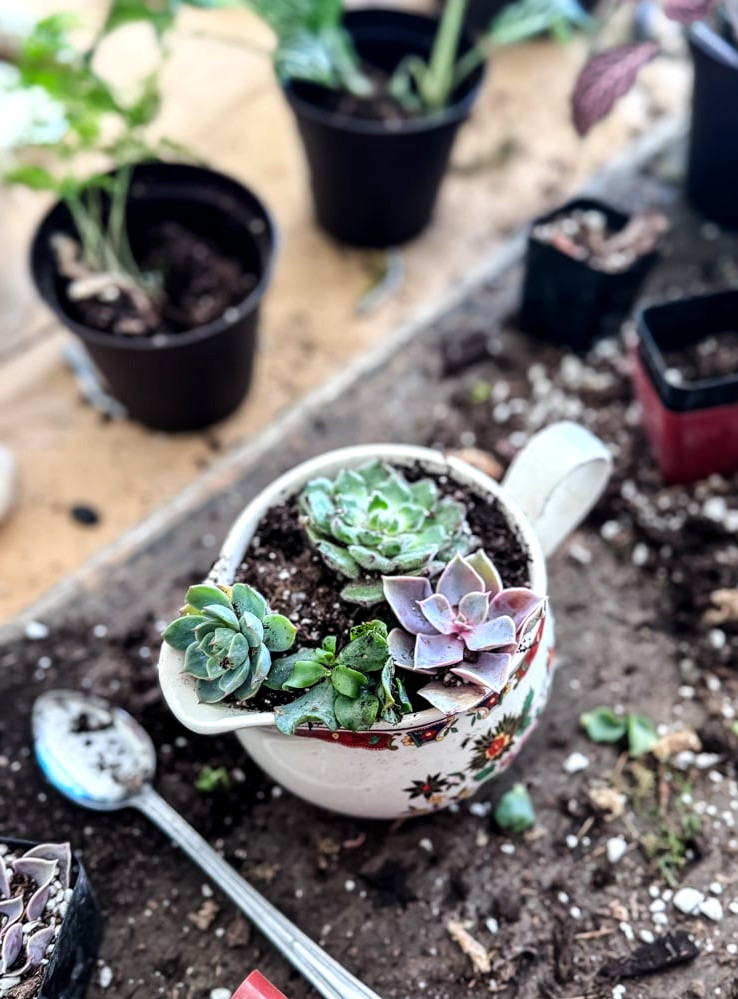
The long handle of an iced tea spoon made it easier to form openings in the soil and insert the succulents.
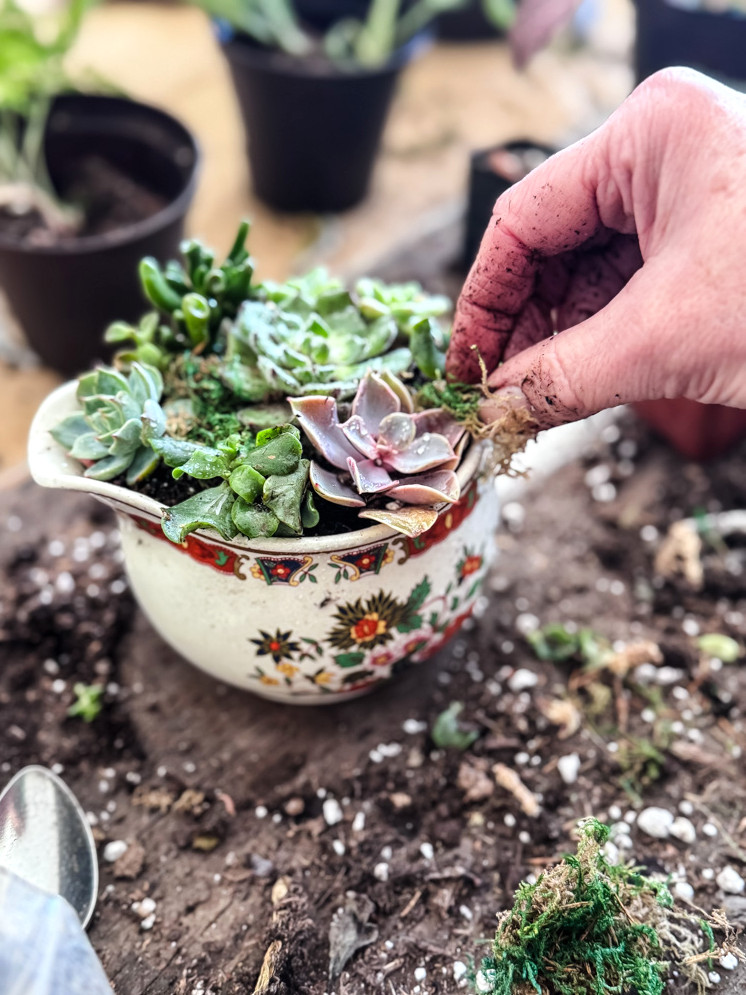
After arranging the creamer with succulents in various colors and forms for visual appeal, I tucked pieces of moss over the visible patches of soil.
Completed Succulent Planter
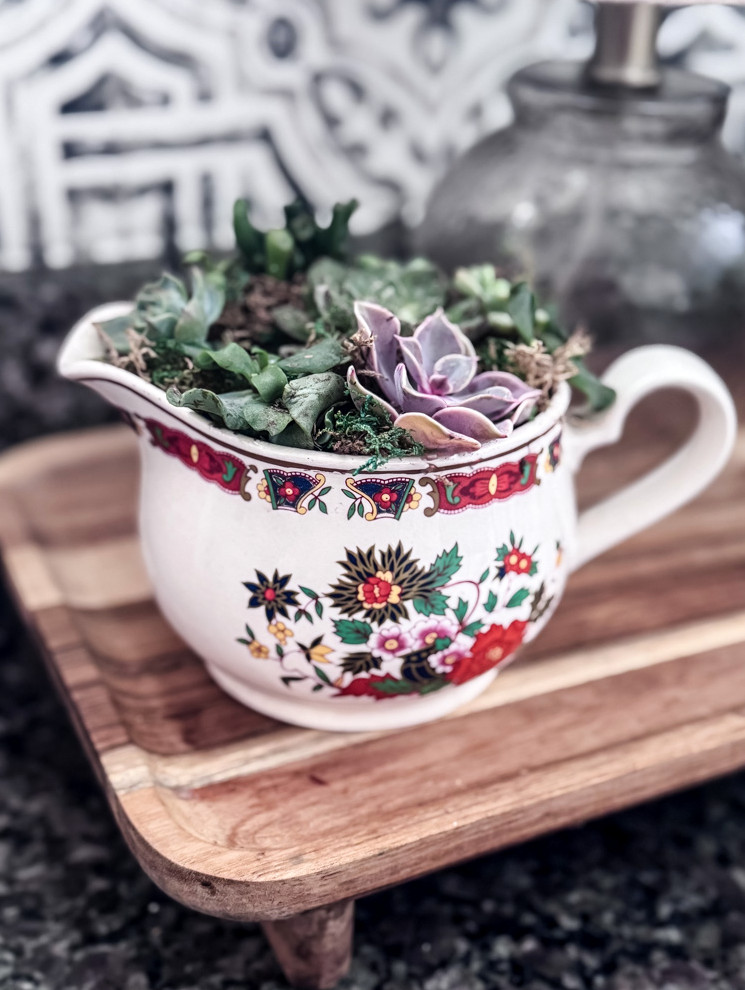
The Outcome:
It resembles a miniature still-life artwork. The bright flowers on the creamer echo the cool shades of the echeveria. It rests on my kitchen tray and brings a smile to my face every time I do the dishes.
My Takeaway:
A container without drainage isn’t necessarily a problem. The key is selecting plants suited to this setting, such as succulents. I water this one lightly—one tablespoon at a time, and only after the soil has dried out completely.
Project 3: The Cement Fern Container
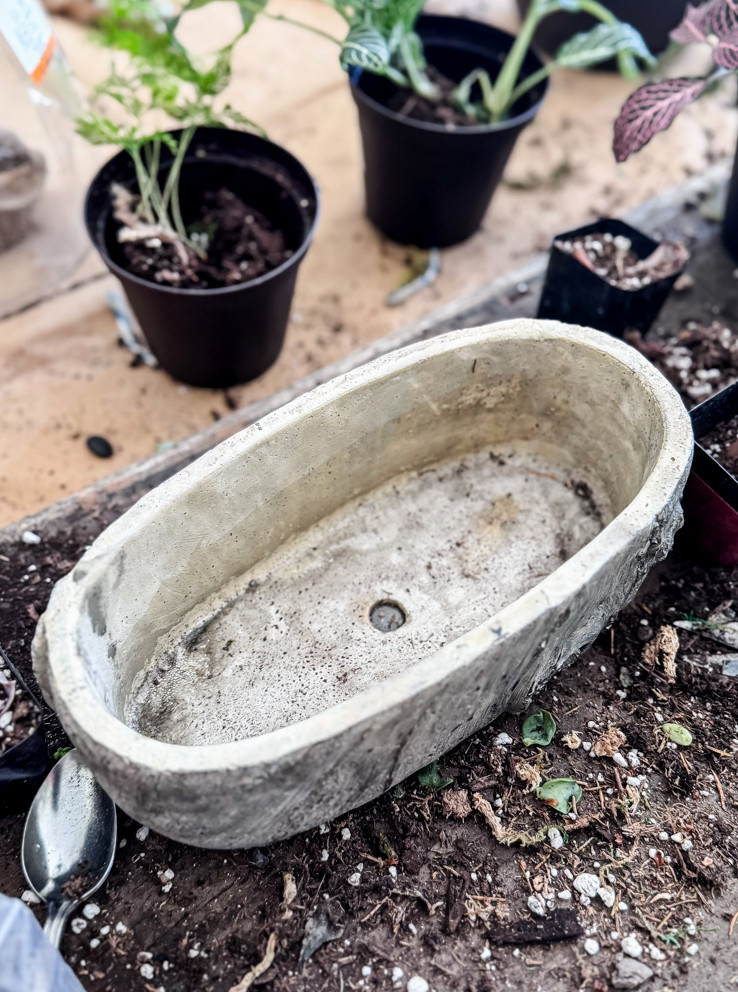
The Discovery:
A petite, elongated cement planter with no markings, weighing nearly as much as a brick. It cost $3 and was in ‘like new’ condition. I was instantly drawn to it.
The Container:
Because cement is porous, it’s especially well suited to plants that enjoy moisture. It allows air to pass through. It develops a lovely patina over time. Plus, its form adds personality.
Creating a Tiny Fern Planter
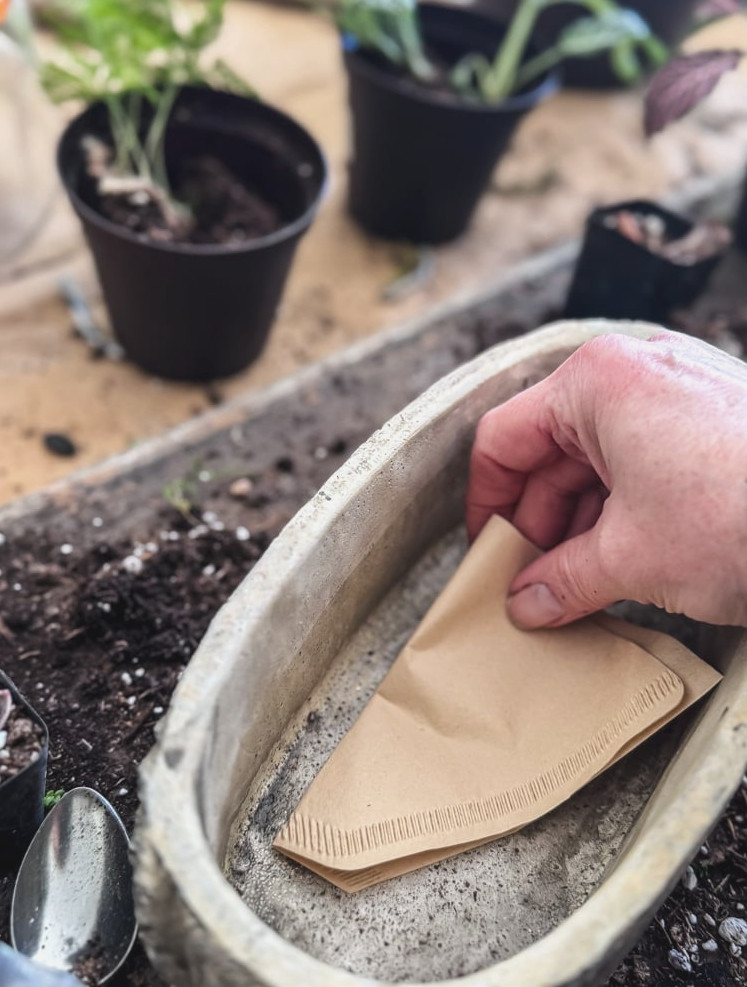
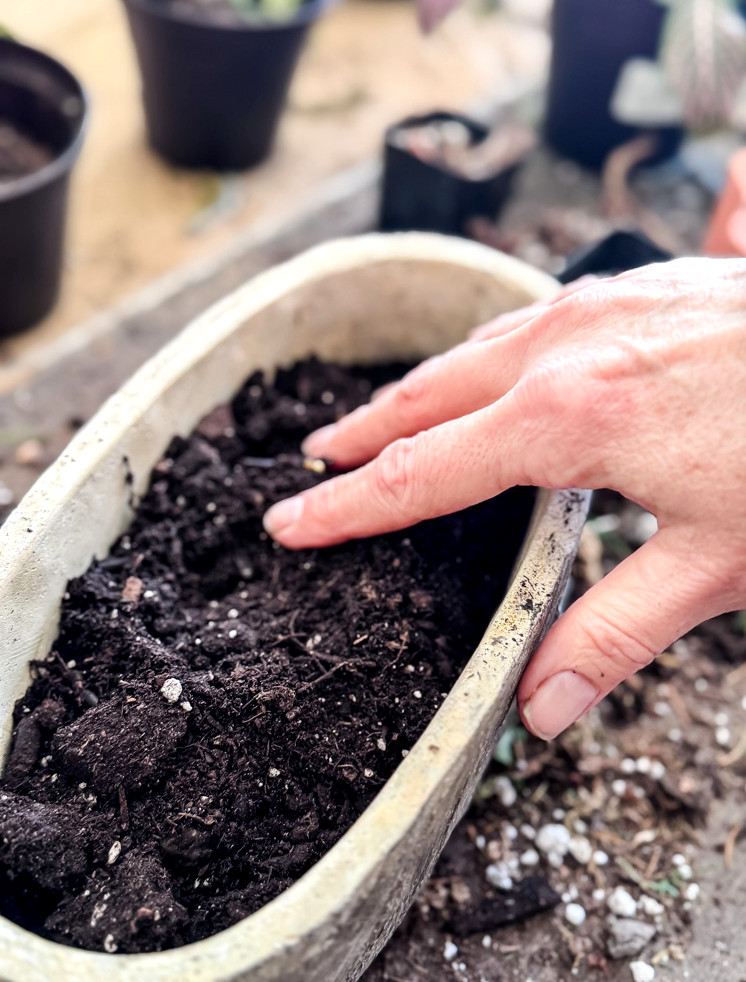
Here’s one of my favorite little tricks! Place a coffee filter inside the bottom of your planter to keep the soil from escaping whenever you water it.
For this container, I’m using a potting soil blend because I’ll be planting moisture-loving ferns for this thrifted project.
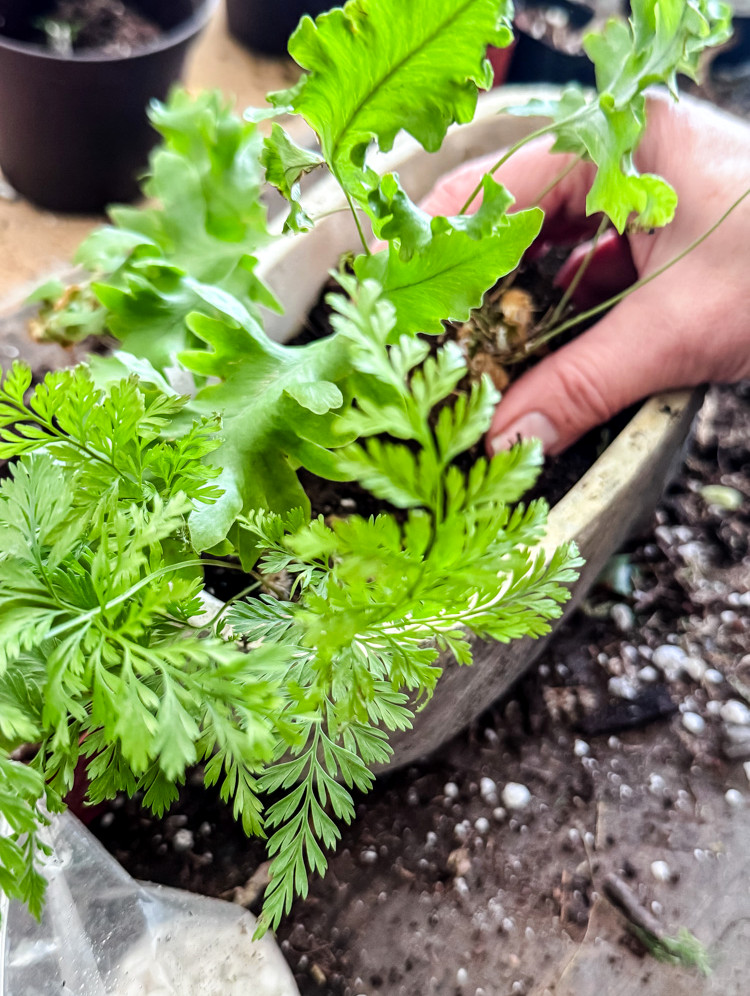
With room for three tiny ferns, this planter is an ideal fit. Two of them came from sections I divided from pots for my closed terrarium project.
Some intriguing ferns to keep an eye out for include:
- Rabbit’s Foot Fern
- Maidenhair Fern
- Blue Star Fern
Completed Fern Planter
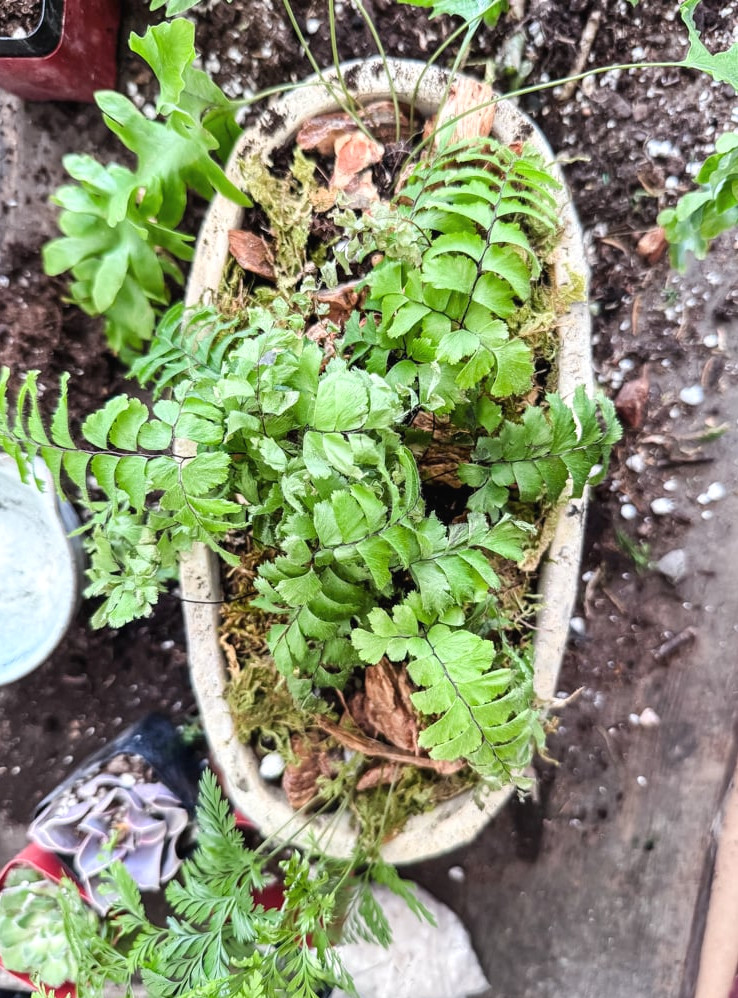
To give it a completed appearance, I topped the soil with orchid bark and moss.
The Outcome:
Uncomplicated. Serene. Just right. The chilly gray cement highlights the ferns’ striking green color. I haven’t decided where this planter will go yet: perhaps on the bathroom counter, where ferns enjoy the humidity, or nestled on a shelf of the tall living room bookcase.
Project 4: The Berry Colander Succulent Dish
The Discovery:
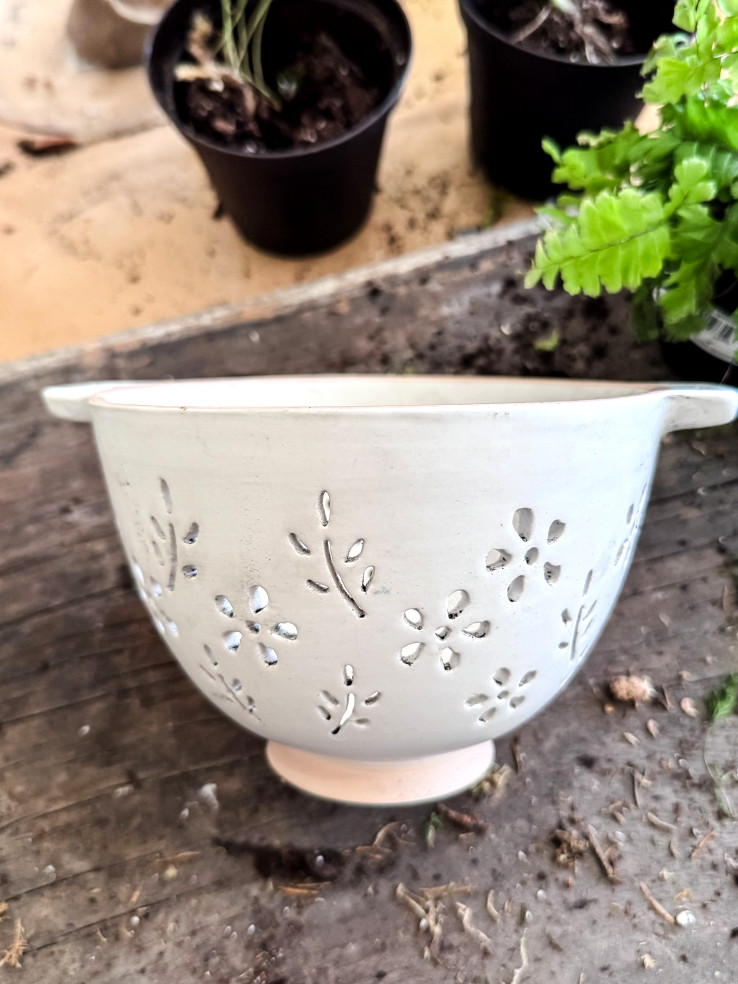
A cream-colored ceramic berry colander decorated with tiny perforated flower shapes throughout. I believe it came from Target, and I paid just $1 for it.
The Container:
Its compact size and shape make it ideal for another petite succulent arrangement. Since it’s a colander, it will fit perfectly in the kitchen.
Step 1: Getting the Colander Planter Ready
The Modification:
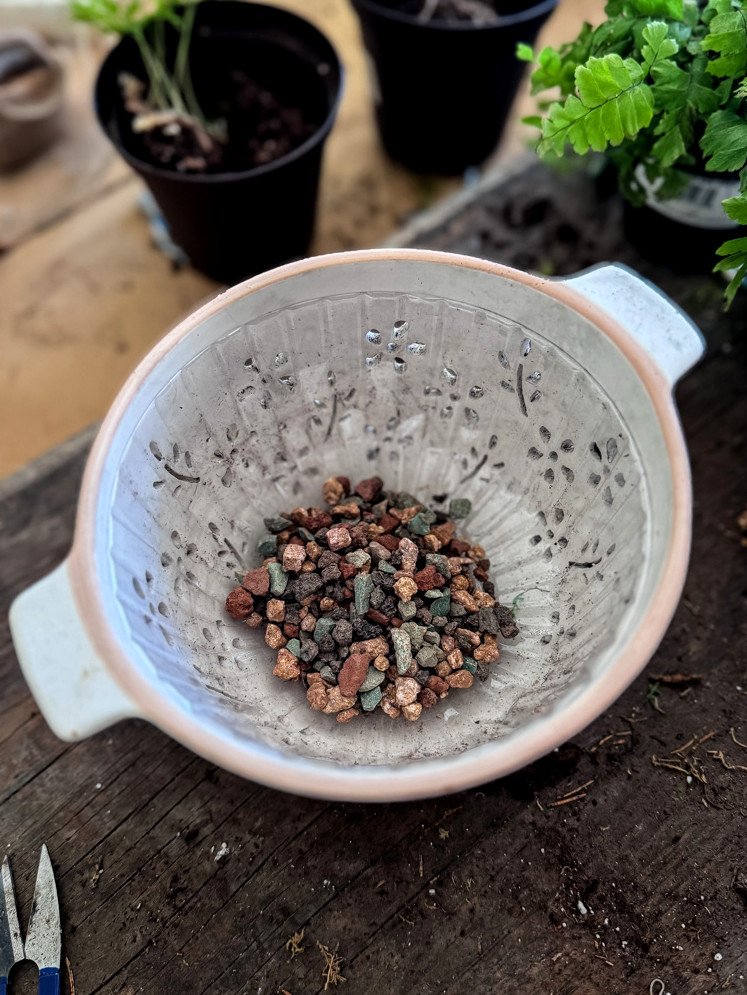
To prevent soil from spilling through all those openings, I covered the inside with a plastic plant saucer—the type placed beneath a nursery pot. I had saved one from a Trader Joe’s planter, and it fit exactly! Next, I put in a layer of small stones to improve drainage before adding the soil.
Succulents require fast-draining soil that doesn’t retain excess moisture. For this colander, I chose a cactus & succulent potting blend.
Step 2: Planting The Succulents
The Plants:
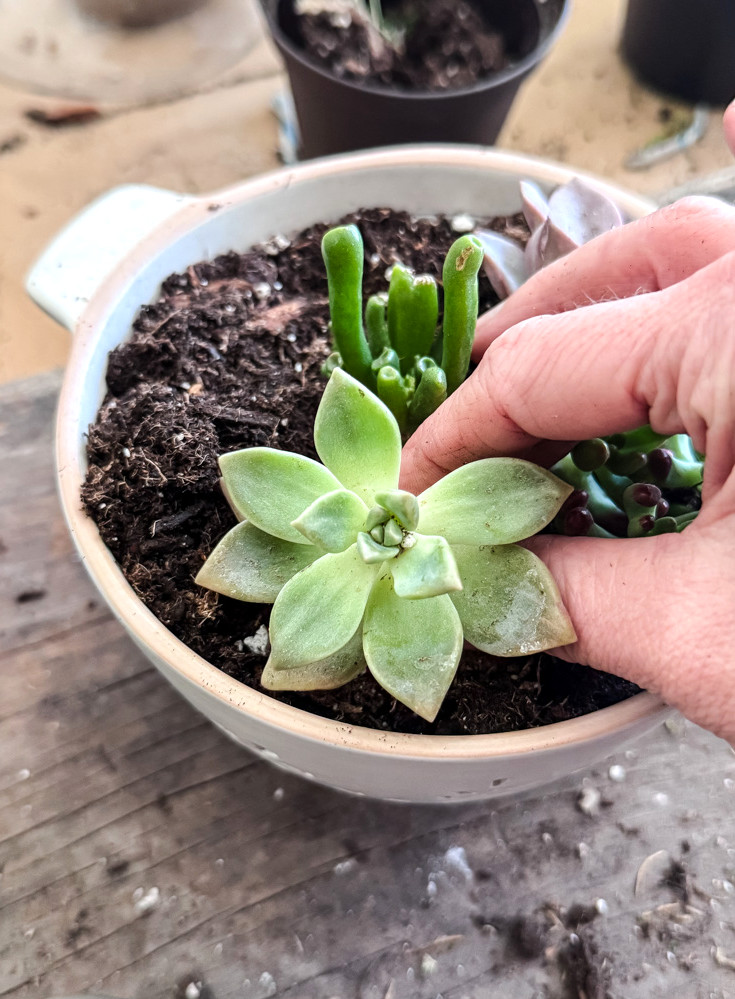
Once again, I’m using small succulents from the set I purchased and used for the creamer planter.
- A trailing burro’s tail that will eventually cascade across the edge
- A handful of small echeverias for rosette form
- Sedum with red-tipped leaves
- A crassula with rippled edges
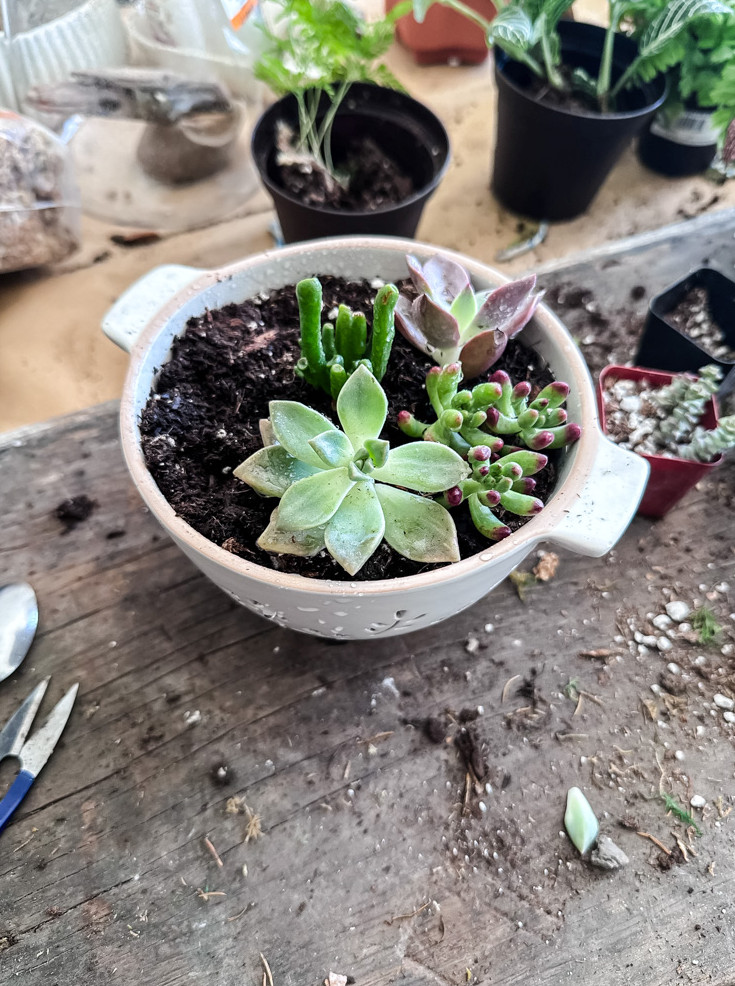
Final Details:
For the finishing touch, I topped the soil with decorative sand and several colorful lava rock pebbles.
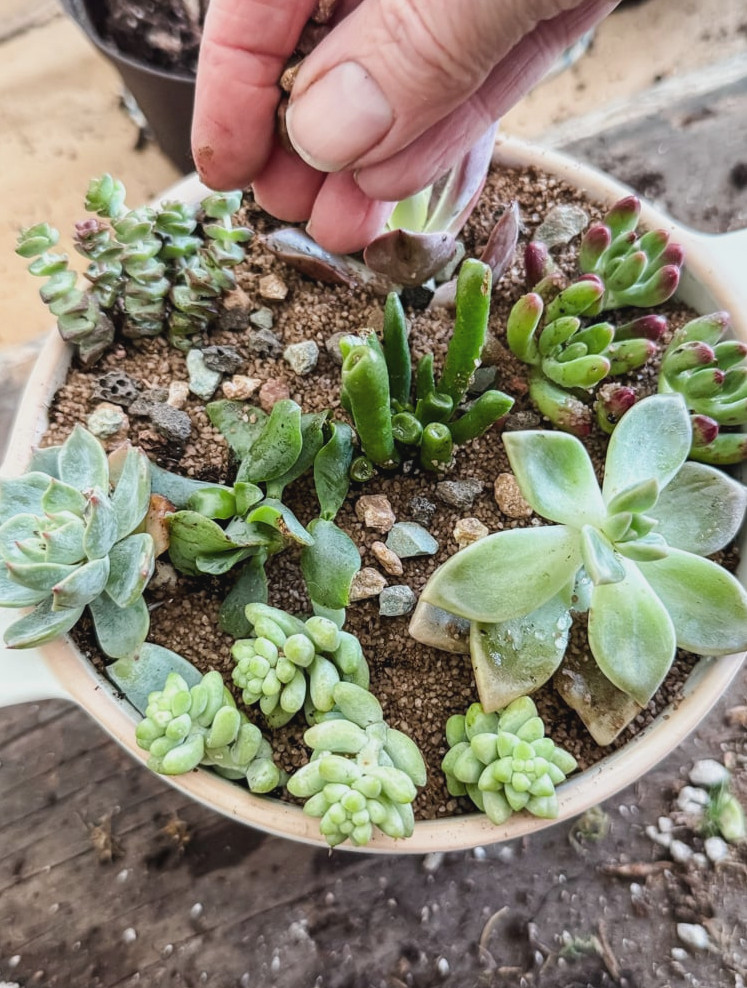
Completed Colander Succulent Planter
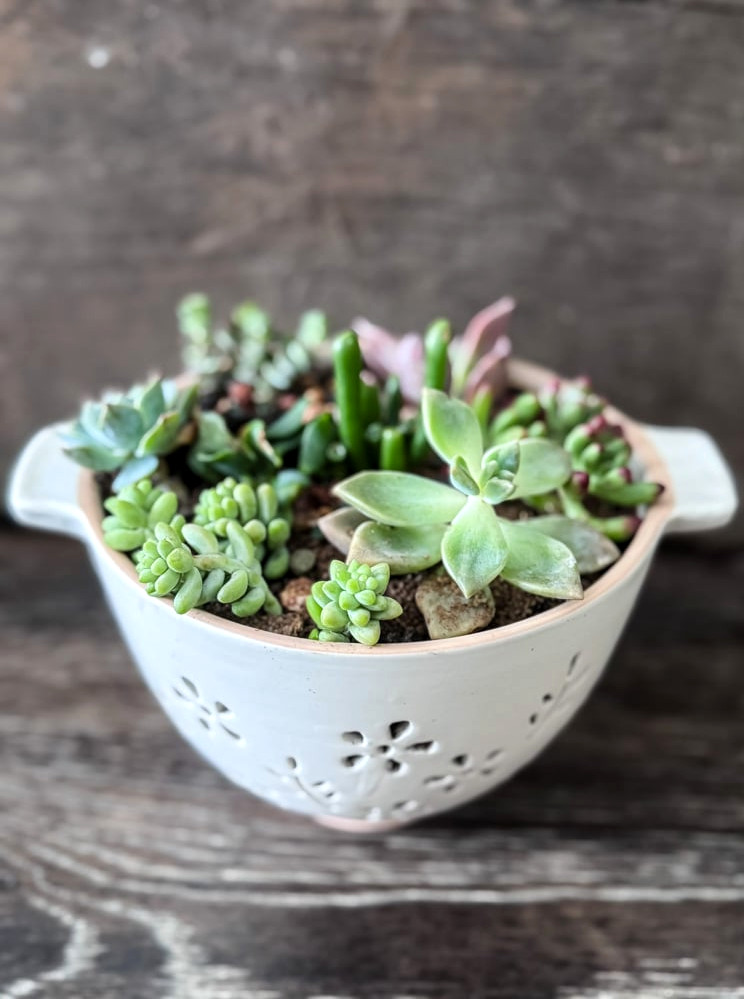
The Outcome:
This arrangement is the plant version of a basket overflowing with flowers. In time, the succulents will trail over the sides in every direction and begin filling the colander. Once they outgrow this petite planter, moving them into a larger pot will be simple (thrifted, naturally!)
My Takeaway:
At times, the perfect planter isn’t actually a planter. A colander, sieve, wire basket—anything featuring holes can be transformed into something lovely. You simply need to view it from a new perspective.
Project 5: The Moody Open Terrarium
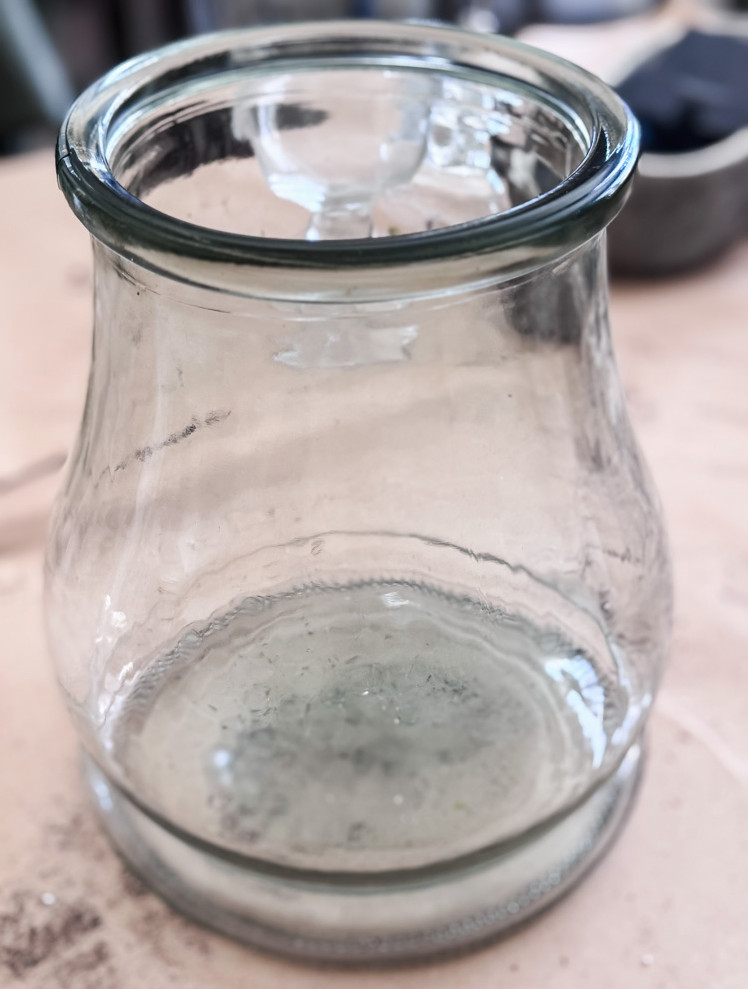
The Discovery:
A huge recycled-glass vase, sturdy and uneven, with bubbles sealed inside the walls and a subtle green tint. Weighty. Flawed. Atmospheric. It cost $6, and I grabbed it the moment I noticed it tucked away at the back of the shelf…never skip the vase section of your thrift store, because I always uncover the most interesting pieces.
The Container:
High, broad, and uncovered. Without a lid or drainage, it offers pure sculptural appeal.
Step 1: Getting The Vase Ready
The Modification:
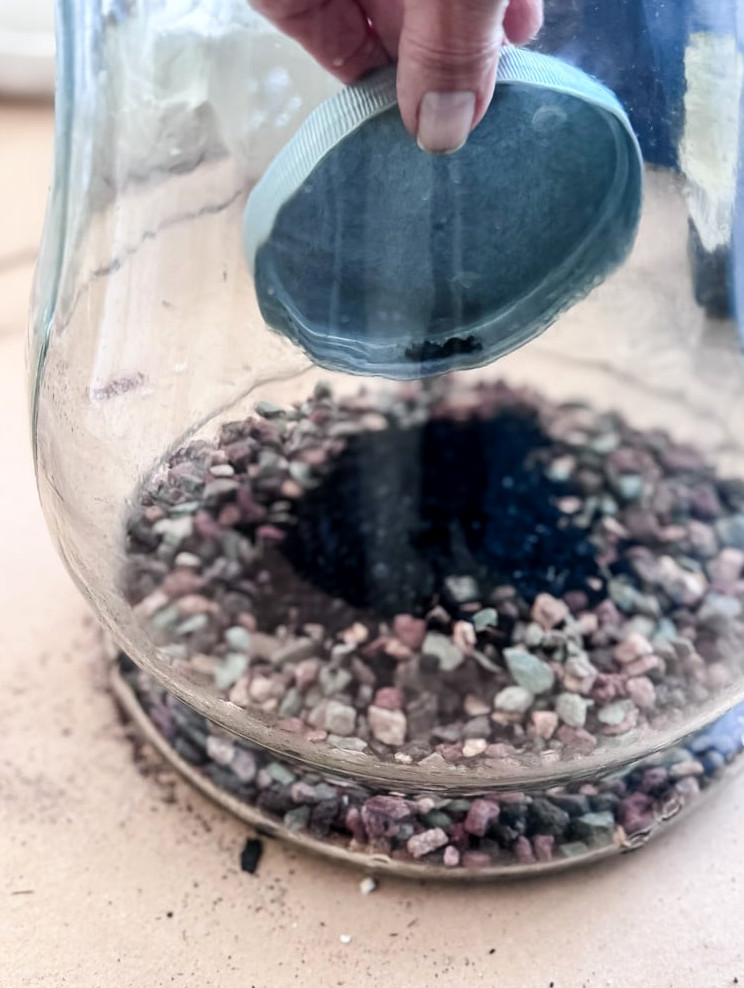
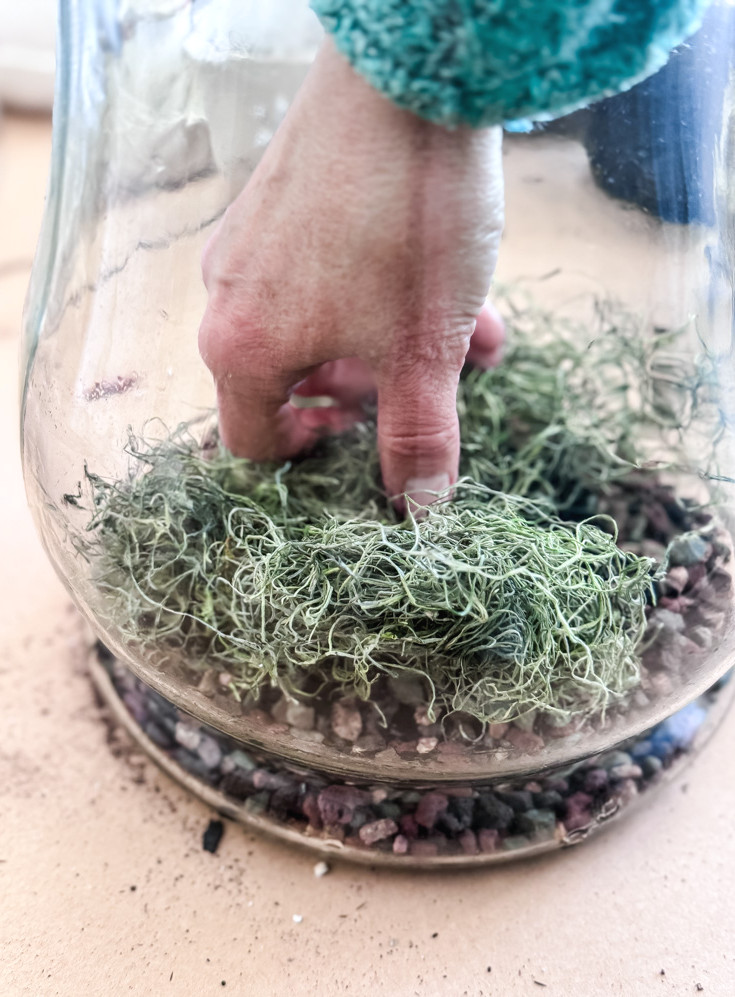
This vase required a false bottom. I began with a few inches of lava rock and a small amount of activated charcoal, followed by a substantial layer of green Spanish moss and then soil. By forming a false bottom, excess water has somewhere to collect while the roots remain safely above the damp area.
Step 2: Adding Plants To The Terrarium
The Selection:
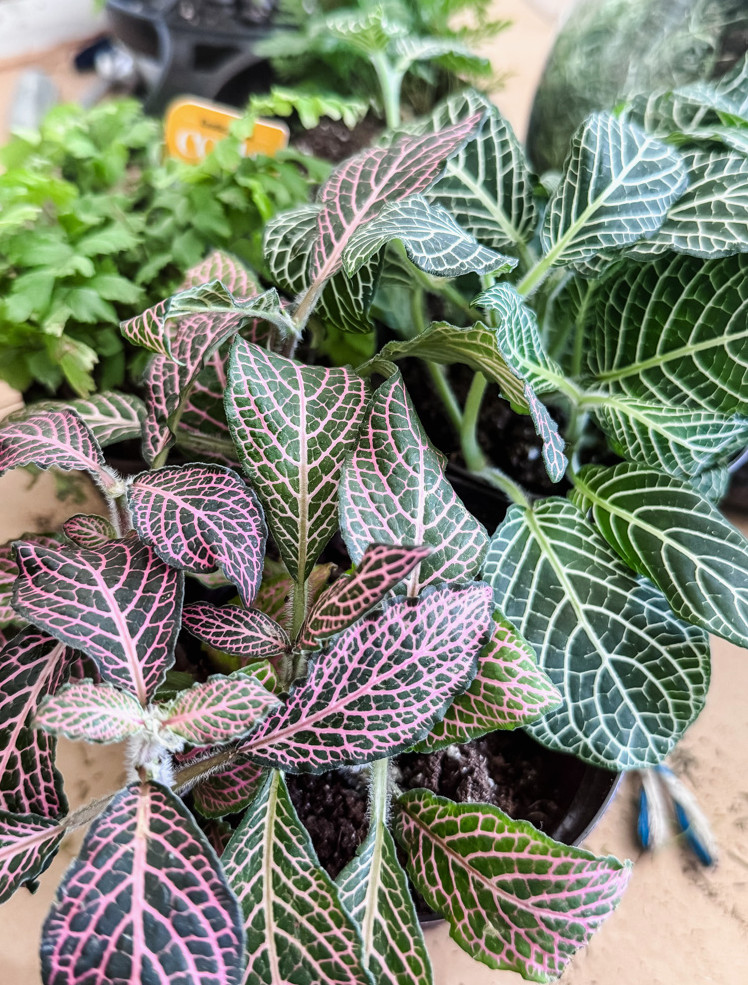
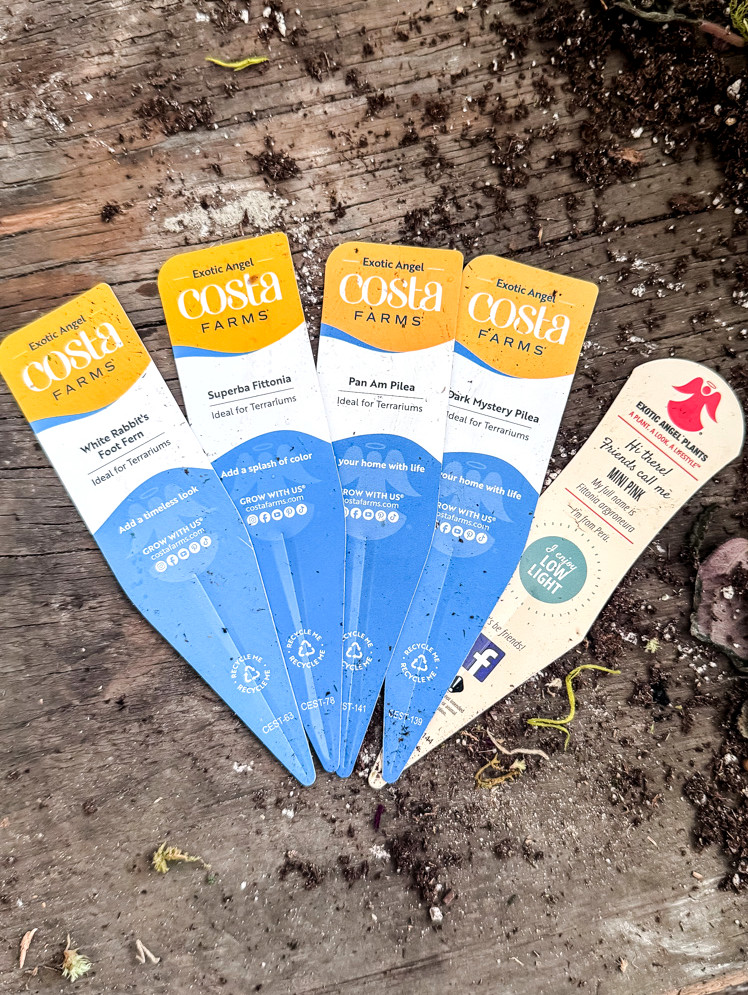
I still had a few plants remaining from the closed terrarium project I completed recently, and they were an ideal match for this vase.
- Fittonia
- Pilea
- Rabbit Foot Fern
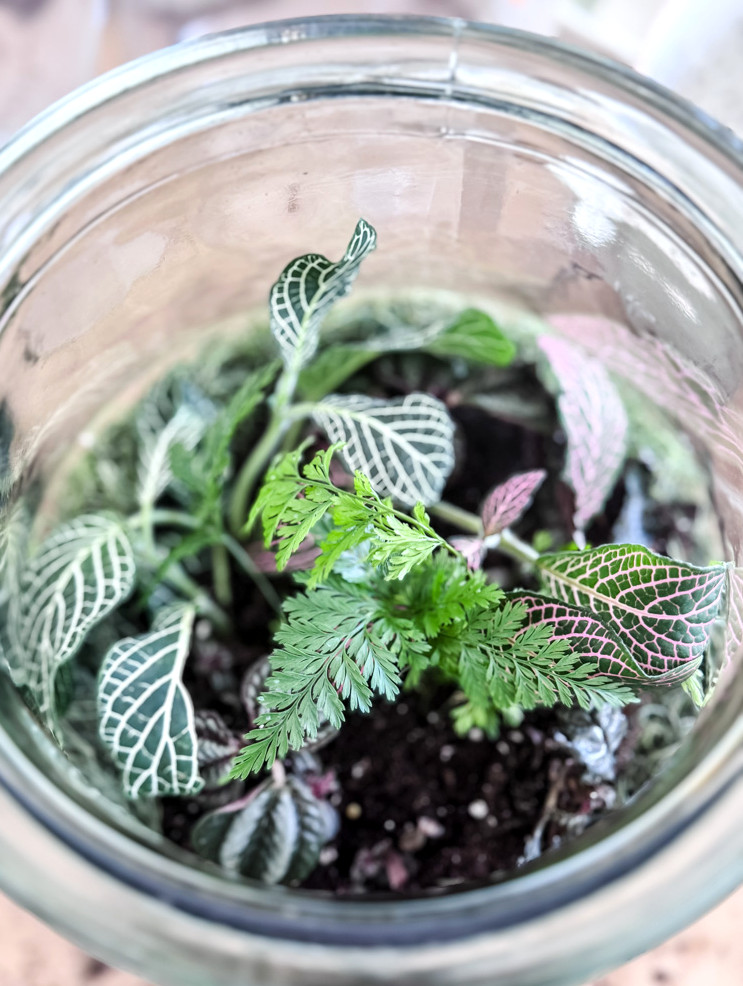
The Additions:
To emphasize the atmospheric mood of this tall glass vase, I placed inside it a crooked, knotted piece of driftwood. Its winding form interrupts the empty vertical space and adds an earthy, almost eerie quality, as though a tree branch were stretching through the mist.
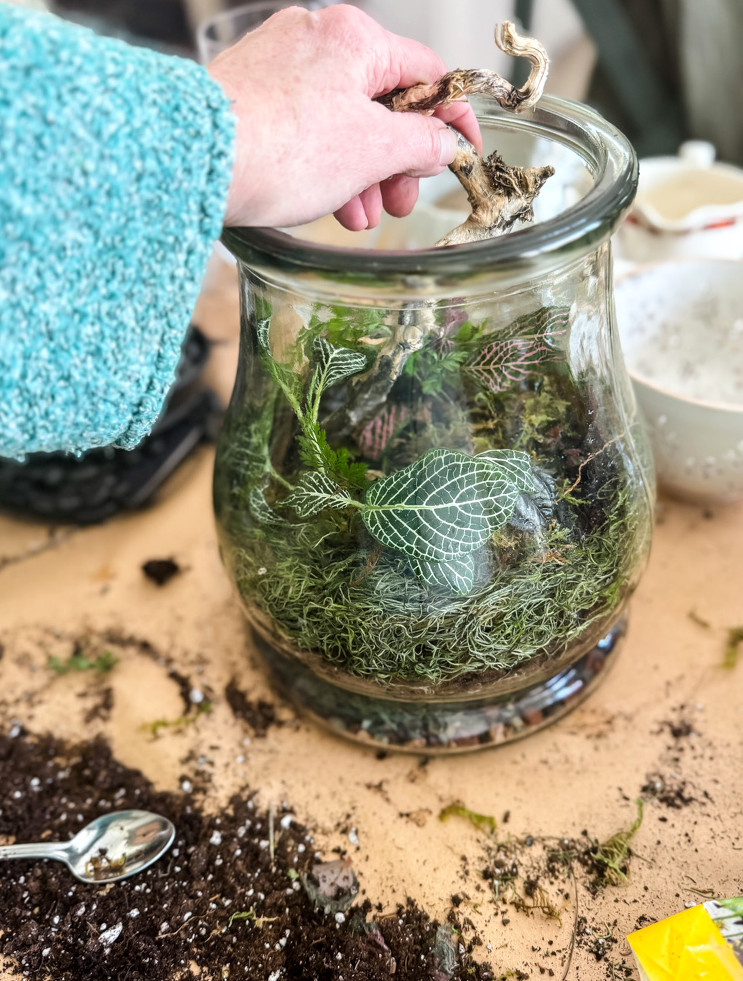
Final Touches:
For the final details in this open terrarium vase, I tucked in pieces of preserved moss along with a few white beach stones.
Completed Vase Terrarium
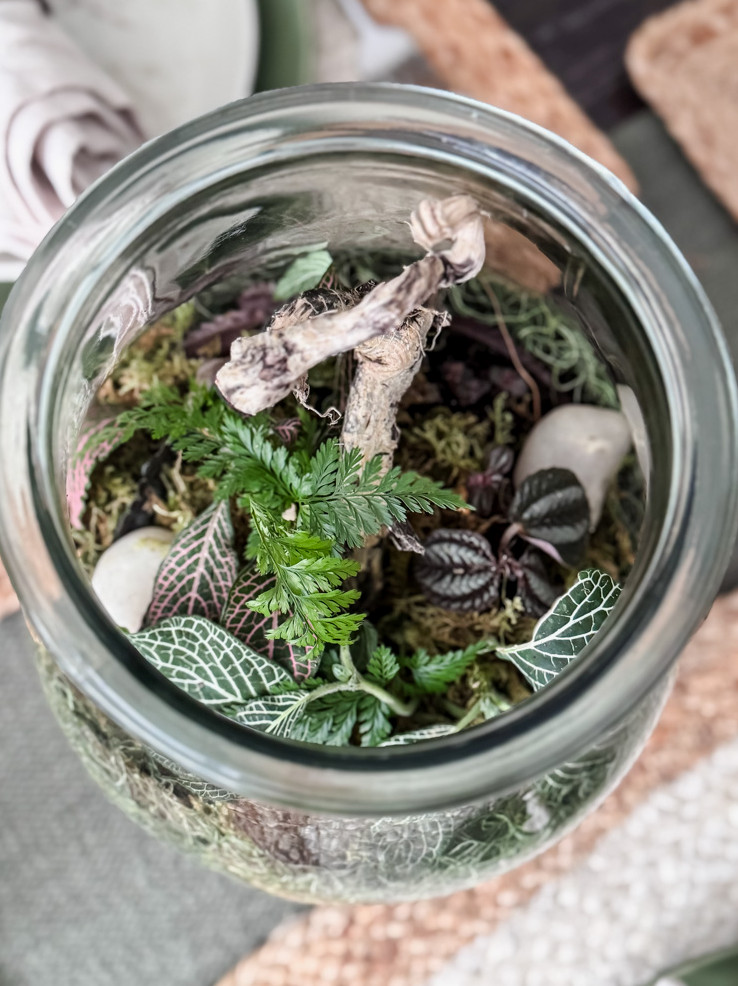
The Outcome:
It has the perfect moody atmosphere. The rich green glass softens the light, surrounding everything with a gentle, underwater radiance. It resembles a forest floor, unearthed and brought onto the plant shelf in my office!
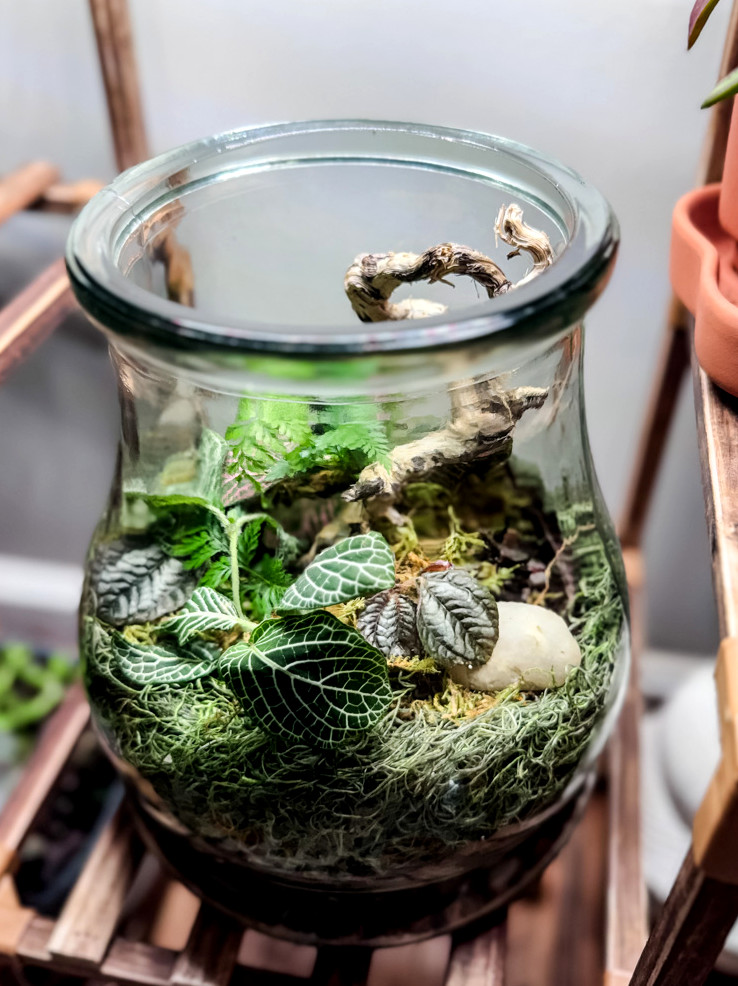
My Takeaway:
Large containers aren’t more difficult; they simply require a different approach. They call for extra supplies, greater patience, and more imagination. The reward? A striking centerpiece that continues to catch my eye whenever I’m writing at my desk!
Thrifting Advice for Plant Lovers
Before setting off to search for your own containers, here are the lessons I’ve picked up:
Things to Search For
- Glass containers with lids→ Ready-made closed terrariums
- Teacups, creamers, sugar bowls→ Ideal compact succulent planters
- Colanders, sieves, wire baskets→ Drainage already included!
- Distinctive glass vases→ Open terrariums just waiting to be created
- Anything handcrafted→ Someone cared enough to create this. Give it love once more.
Enjoy Thrifted Air Plant Projects Too?
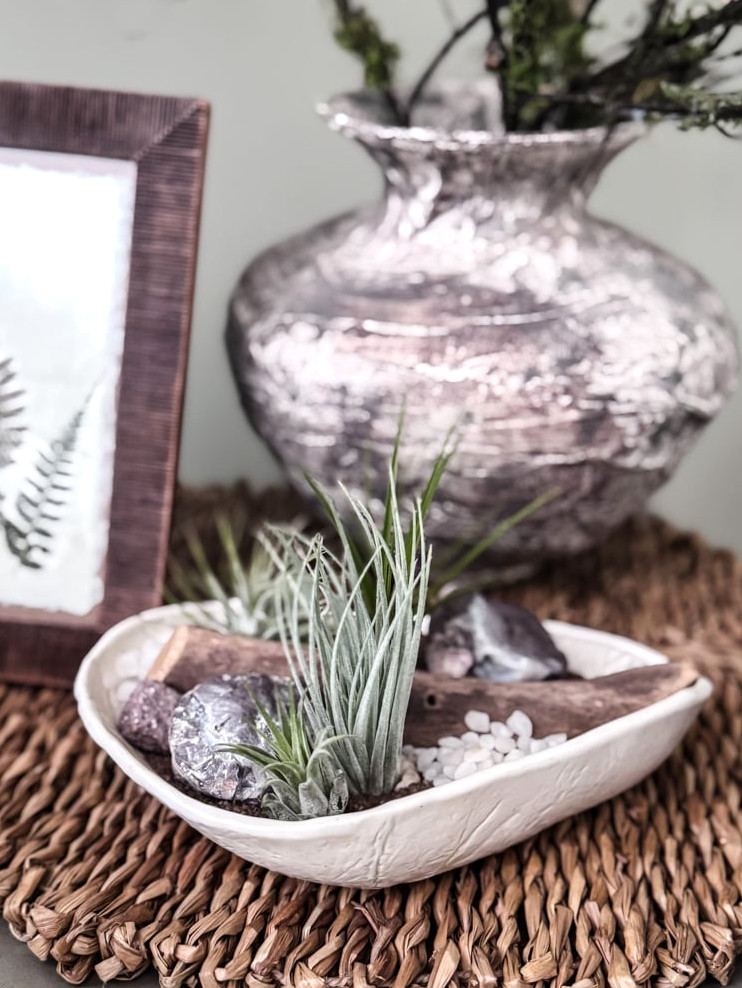
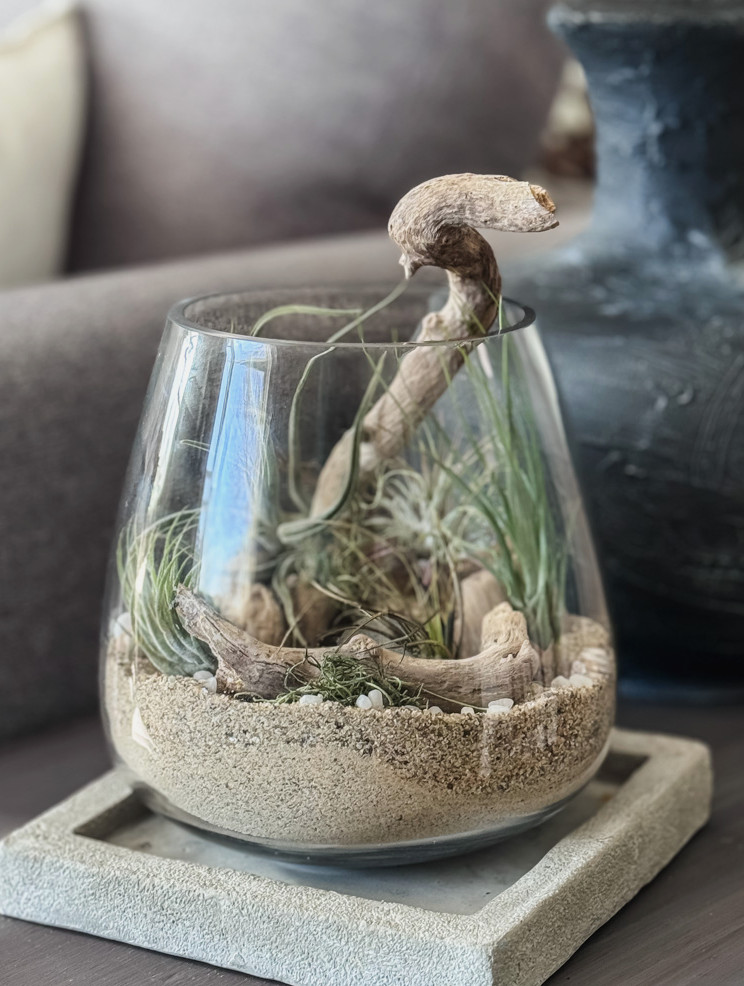
I’ve got two additional thrifted makeovers that merit their own feature: a seaside keepsake preserved in glass and a one-dollar thrift-store find.
Your Turn: What Treasure Will You Save?
The next time you walk past a thrift shop, step inside. Browse the aisles. Glide your fingers across the shelves. Keep an eye out for the jar lacking a purpose, the chipped dish, or the colander that has been waiting around since 1974.
Take it home. Clean it thoroughly. Turn it around in your hands. Then tuck a plant inside!
I’d love to see what you discover and create. Email your photos to cottageonbunkerhill@gmail.com for a chance to be featured in the Reader’s Spotlight
xo, Jennifer
Enjoy projects like this?Stay in the loop! Join my newsletter familyfor additional cozy, affordable DIY ideas sent straight to your inbox. You’ll receive special tips, advance access to tutorials, and plenty of inspiration to give your home a handmade, heartfelt atmosphere.