
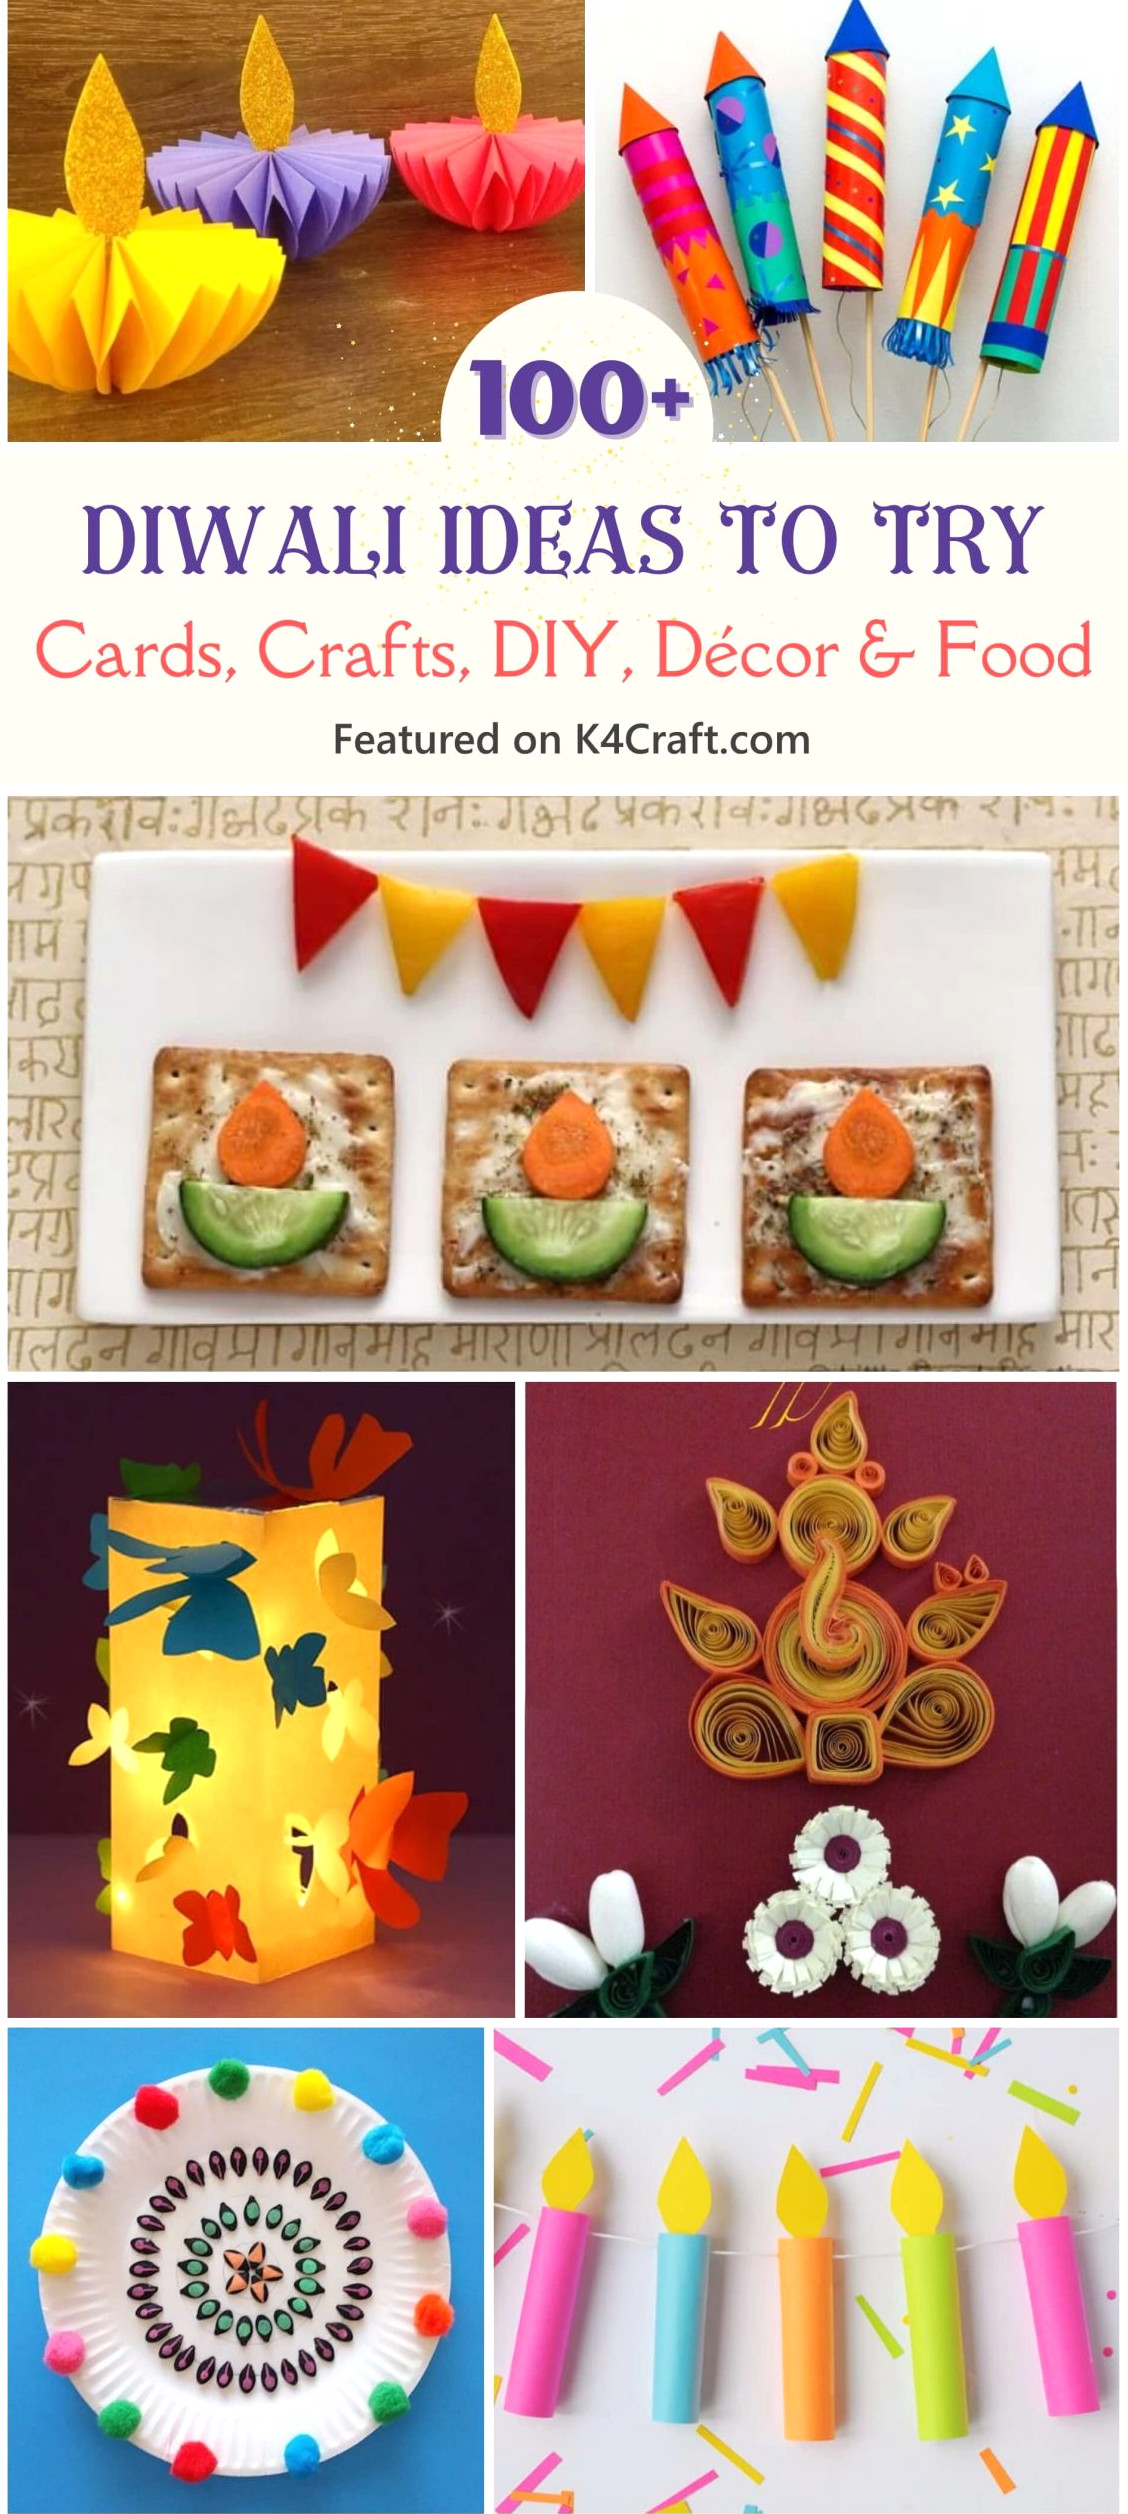
The long-awaited celebration of lights, sweets, and happiness has finally arrived, bringing with it the perfect opportunity to create wonderful Diwali Crafts And Greetings. We have gathered some of the finest Diwali craft ideas from around the web to help you make this festival more radiant with your creativity. Now is the ideal time to engage your children in extraordinary arts and crafts that keep them occupied while encouraging their imagination. This can also assist you in preserving the elegance of your home.
Diwali offers no room for carelessness as we prepare for one of India’s most magnificently celebrated festivals. For fifteen continuous days, the sparkle and brilliance reach another height. Besides the pooja and handmade decorations, nobody can overlook the captivating rangolis at the entrances or the delightful aroma of mouthwatering dishes. Explore the quirky, impressive, and heartwarming ideas below to make your Diwali even more memorable.
Plastic decorative items can often be harmful to the environment. Therefore, we are sharing some outstanding concepts to help you create your own home décor while keeping our planet clean and secure. So, what are we waiting for?? Put on your creative hats and get set for an exciting Diwali preparation.
100+ Diwali Celebration Activities For A Blast Of Fun!
Origami Diya Paper Craft
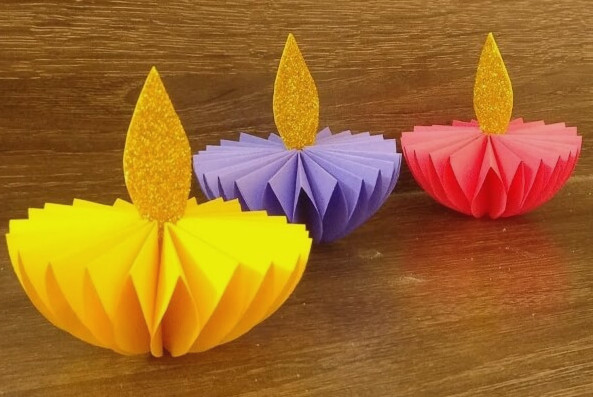
Create these charming Diyas using the well-known “fanfold” origami method. While traditional clay lamps illuminate the outside of your home, this handmade creation will add radiance to your interiors.
Encourage your children to craft attractive and imaginative Diyas that can decorate the house while helping you reduce expenses.
Suitable age group: 9-14 years
Supplies you need:
- A4 size sheet packet
- Fevicol
- Scissors
- Glitter sheet
Procedure:
- Grab a sheet of paper and trace circles across it with the help of a round object.
- Next, use the drawn outlines to cut every circle from the sheet.
- Fold each circle in half, angle it sideways, and fold it in half once more.
- Fold all the remaining cut-outs in the same way.
- Unfold the cut-outs from the center, apply glue to one side, and attach them together.
- Begin connecting all the cut-outs using glue.
- Secure its ends together with adhesive as well.
- Cut a flame from another colored sheet and attach it to the middle of the Diya.
That’s all—your Diya is now finished!!!
#LightBox – Lanterns
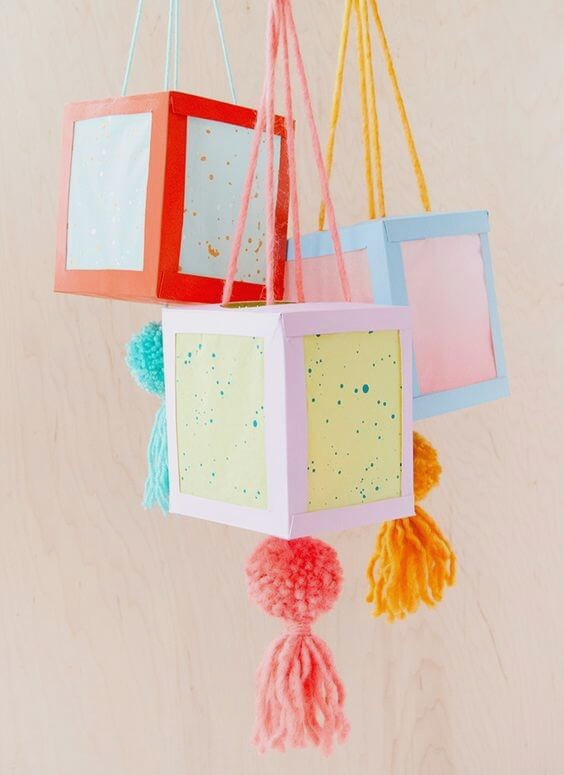
Why spend money on plain yet costly charlottes from the market when you can create one yourself at home!
Your Diwali décor will not feel complete without these captivating Light Boxes. Decorate them with adorable pompoms and pendants, and personalize them according to your style.
These are certainly among our favorite crafts of all time. This handmade charlotte looks fantastic when displayed on the wall during the festive season.
Suitable age group: 9-14 years
Supplies you need:
- Empty facial/ tissue boxes
- Colored paper
- Scissors
- Ruler
- Pencil
- Paint
- Paintbrush
- Hot glue gun
Procedure:
- Use scissors to remove the upper portion of the box and set it aside.
- Unfold every edge of the boxes and detach the sections.
- Coat each box piece with any shade you prefer.
- After the paint has completely dried, use a ruler and pencil to mark uniform lines on every side of the boxes.
- Snip along these marked lines with scissors.
- Take a fresh piece of colored paper and cut strips of matching size
- Keep threading the paper through the cardboard pieces until the weaving is complete.
- Carry out the same steps across the entire surface.
- Make a tiny opening at the top of the lantern using the point of the scissors.
- Put a small battery-powered light inside the lantern.
Our gorgeous lantern is now ready to be hung!!
#DIY Diwali Greeting Card
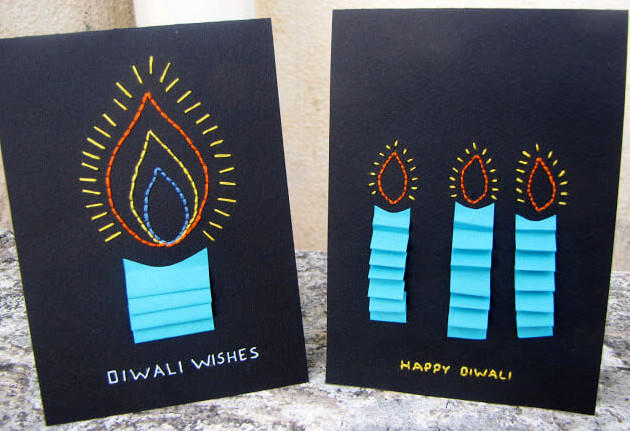
Handcrafted greetings will always remain a wonderful present for every occasion. Handmade cards express affection and thoughtfulness toward someone in an especially beautiful way. Still, producing a large number of greetings can become exhausting when using traditional crafting methods. Select the link beneath the image to discover how to create stylish greetings swiftly and with ease.
The weekend is almost here, and I am delighted because Diwali has always been one of my most beloved festivals. So, why not begin by preparing a few Diwali cards that are also incredibly simple to make?
Suitable age group: 9-14 years
Supplies you need:
- Black sheets
- blue chart paper
- different colored threads of your choice
Procedure:
- Fold the large black sheet in half so that it takes the form of a book.
- Next, measure and cut a small 1cm x 6cm strip from the blue sheet.
- Shape the top section of the blue sheet into a semi-circle by cutting it.
- Begin folding 1cm from the bottom, first toward the front and then toward the back.
- Attach it to the paper, then stitch the thread into the sheet in the shape of a Diya and its essence.
- After completing that, stitch “HAPPY DIWALI” across the sheet in capital letters.
Your simple and delightful Diwali card is ready!!!
#DIY Butterfly Lamp
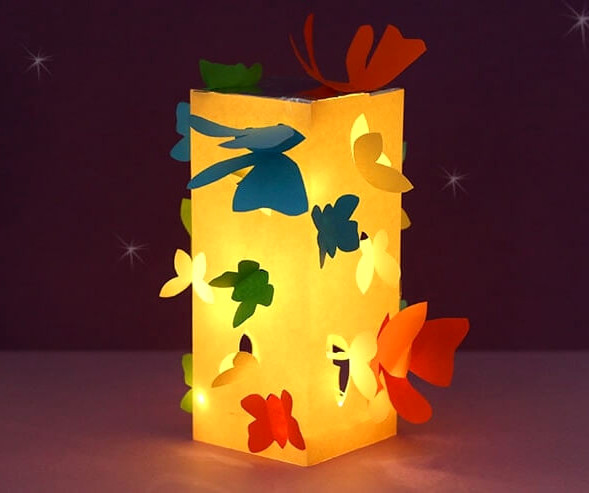
This easy project is certain to earn you plenty of compliments! Vibrant and lively, this Butterfly Lamp perfectly captures the spirit of Diwali. Let this DIY paper lamp fill your space with pure positive energy.
Have you ever explored a butterfly house or caught fireflies inside a container? It is an enchanting experience, especiallywhen it’s the festive period and Diwali is nearing.
Suitable age group: 9-14 years
Supplies you need:
- 4 A4-sized sheets.
- Foil scraps
- Pencil
- Paper-cutting scissors
- Adhesive tape
- Glue
- Craft knife
- Craft cutting board
- Ruler
- Small torch, LED lights.
Procedure:
- Begin by printing a butterfly template on the colorful sheets, then cut out the shapes.
- Choose one sheet for the lantern base and fold it inward by 7.5cm.
- Repeat this on both sides.
- Unfold the sheet, then bend the top and bottom edges 1.5cm inward.
- Keep the sheet on a firm surface and use a paper knife to randomly cut half-butterfly shapes along the outlines.
- Fold the A4 sheet again in the same way described in step 2.
- Trim a piece of foil into a shape that covers the upper part of the lantern base.
- Bend the butterfly wings cut in step 1 and stick them in random places.
- Your lantern is now fully prepared.
- Set it over a small torch or an LED light.
And taddaa!!! Your butterfly lantern is ready to display.
#Glitter Gift Box
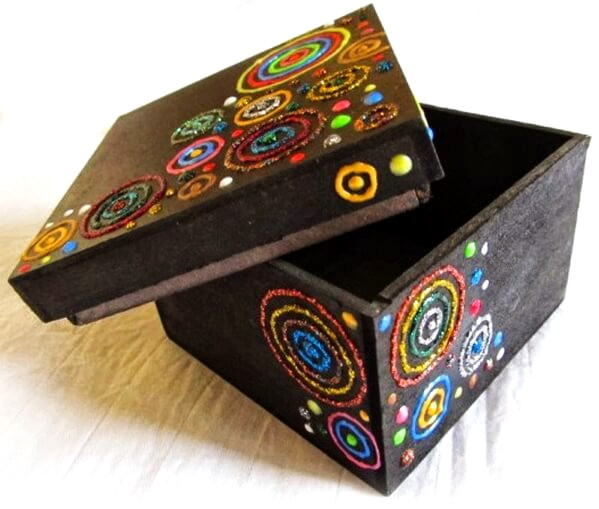
Avoid harmful plastic gift wrapping and choose genuine creativity instead. Create this Glitter Giftbox and delight your loved ones with presents that are carefully wrapped and beautifully decorated.
Exchanging gifts, sweets, and chocolates is an important part of our Diwali customs. With the celebrations approaching, we all need a container for presenting sweets or chocolates, so why not make one yourself? It will keep your children engaged while lending you a helping hand.
Suitable age group: 9-14 years
Supplies you need:
- A wooden box
- Liquid glitter
Procedure:
- Get a simple wooden box, open it, and set it on a firm surface.
- Hand your child some liquid glitter and demonstrate how it should be used.
- After that, allow them to use their imagination and creativity to design their own joyful box.
#Traditional Twist
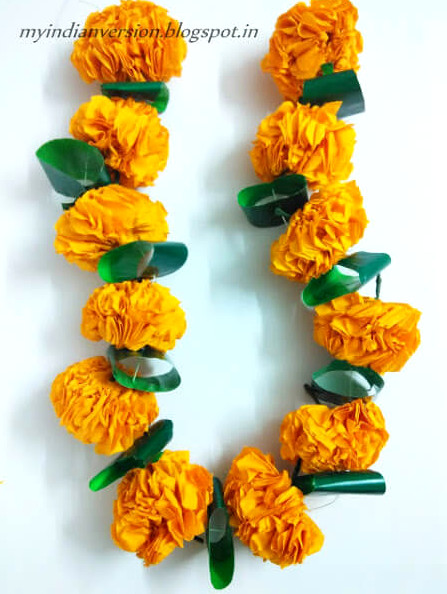
Add a classic touch to your home decor with marigold garlands created without using marigolds!
This Maala of marigold flowers, also known as ‘Genda ka phool’, is regarded as highly auspicious during Diwali pooja and is among the most meaningful and essential decorations to make.
Suitable age group: 9-14 years
Supplies you need:
- A long piece of thread
- Marigold blossoms
- Betel leaves
- Needle
Procedure:
- Thread the needle with the long strand to begin creating the mala.
- Next, push the needle through the middle of the lower section of a marigold flower.
- Follow the same process with a betel leaf.
- Continue alternating the steps until the mala is finished.
- Once the mala is complete, knot its ends together to join both sides.
And your mala is complete!!
#Down The Memory Lane
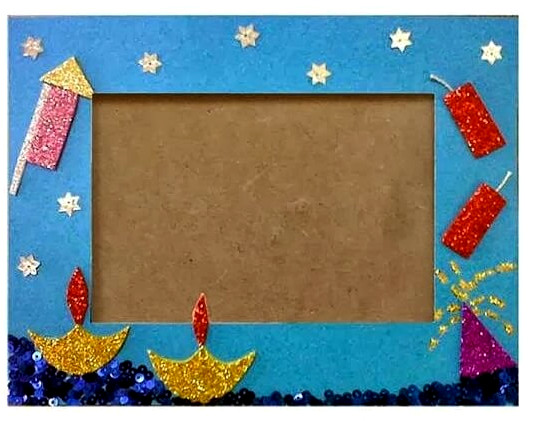
Preserve cheerful Diwali memories for your loved ones in this handcrafted photo frame. Follow our guide to discover how to make it.
Suitable age group: 9-14 years
Supplies you need:
- 1 wooden photo frame measuring 9 7cm.
- 1 bottle of acrylic paint
- Paintbrush
- Packet of stars
- Packet of sequins
- Glitter sheet cut-outs.
- Fevicol
Procedure:
- Take the blue wooden photo frame and decorate it according to your preference.
- Begin at the base by arranging the sequins in the form of ocean waves.
- Finish the design with stars, glitter cut-outs, Diyas, and assorted firecracker stickers.
Your fabulous Diwali photo frame is ready to be admired!!
#Cracker Gift Tubes
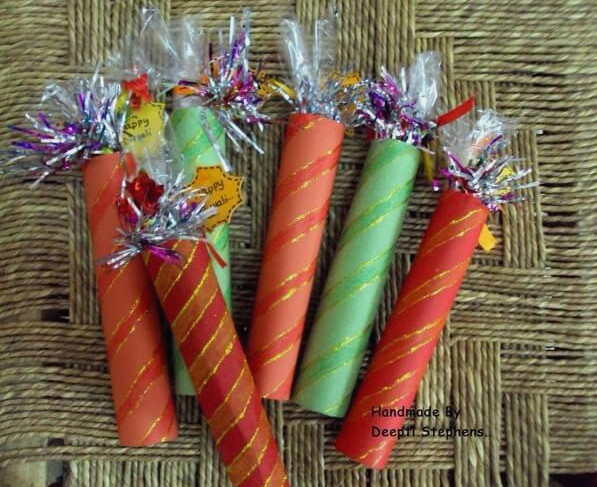
Although lighting crackers may be restricted, creating cracker gift tubes certainly is not. Repurpose empty toilet paper rolls to package sweets and dry fruits in a creative way.
Diwali fills our homes with excitement and a festive mood. Since firecrackers contribute to environmental pollution, we can make our own eco-friendly versions and use them to decorate our homes.
Suitable age group: 9-14 years
Supplies you need:
- Packet of A4-sized sheets
- Handcrafted ribbons
Procedure:
- Gather 5 A4-sized sheets and roll them together from one end to the other.
- Apply glue to both ends after rolling so the tube stays secure.
- Next, slice the ribbons from the top into narrow strips.
- Attach these ribbons to the top of the prepared firecrackers and glue them in place.
Your firecracker is ready to decorate with, and it will look incredibly stylish on the wall.
#Pop Up Diwali Greeting
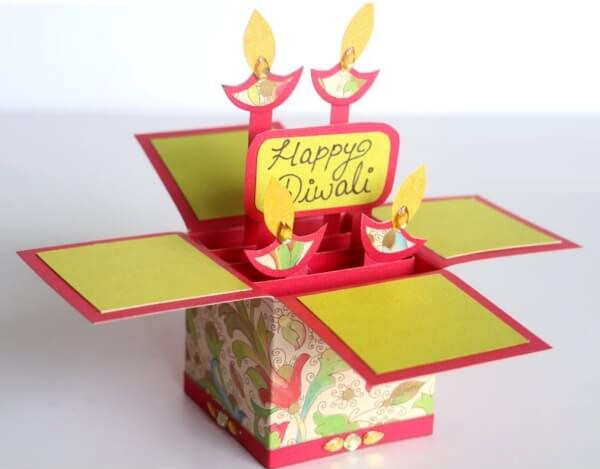
Nothing makes a better greeting than a customized pop-up card. Use the link below the image to access the easy tutorial and amaze everyone with your creative talent.
#DIY Kids Greeting Card
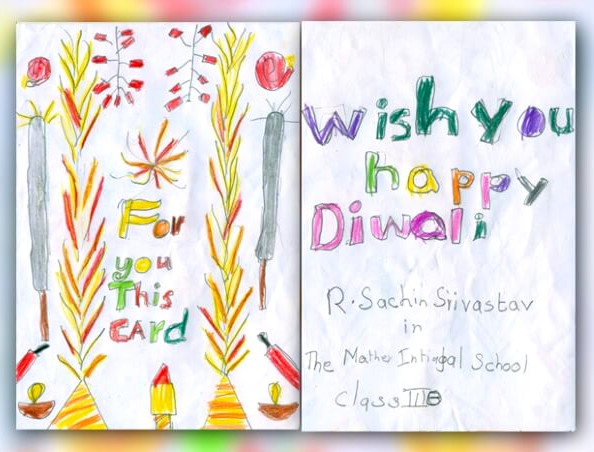
For our youngest readers, here is a charming Diwali greeting idea. Experiment with your preferred colors and show your joy.
Cards are regarded as some of the most touching crafts in the world. If you involveyour kids in these activities, as they will help them feel closer to the people they care about.
Recommended age group: 9-14 years
Materials required:
- A4-size sheet
- Pencil
- Crayons
- Eraser
- Scissors
Instructions:
- Fold the A4-size sheet in half to form a card.
- Use a pencil to write “Happy Diwali” and allow your kids to decorate the message with colors.
- Give your children some crayons and pencils for the back of the card so they can express their creativity.
- Ask your child to write their name, school, and class on the front.
And there you have it!!! Your Diwali card is ready to be sent.
#Quilling Card Craft
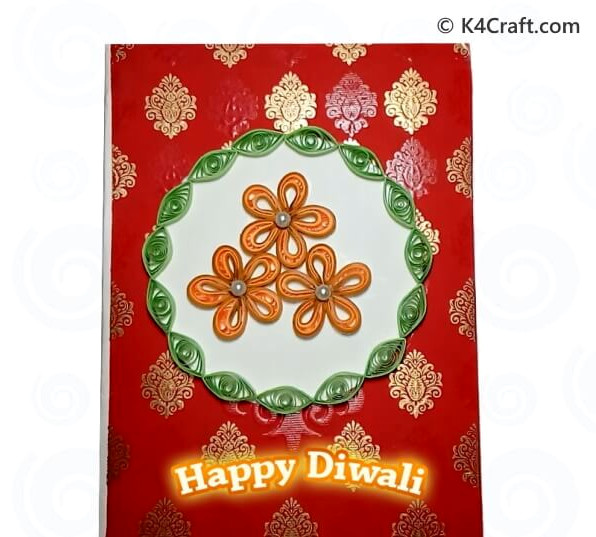
Slice colorful paper strips and quill them into flowers and leaves to decorate your Diwali greetings. This creative method saves time while helping you create beautiful cards.
#Cracker Card
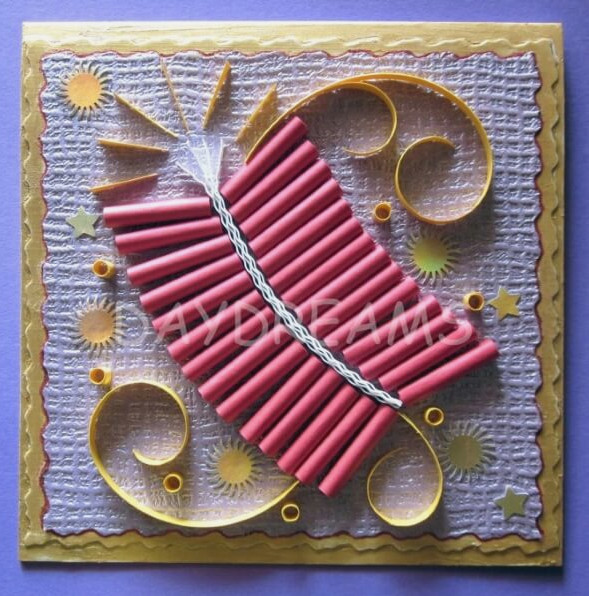
This greeting idea is truly explosive—quite literally! Select the link below the image to send a cracker card to the people you love.
#Spread The Shine
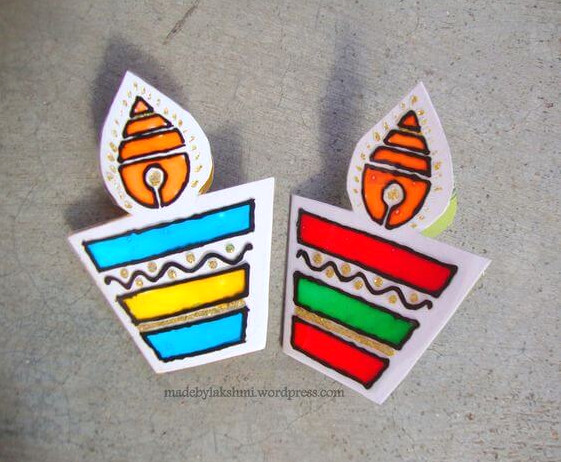
During these challenging times, ensure that nobody is left surrounded by gloom. Share the radiance of Diwali and brighten someone’s day with these dreamy greetings. Creating them is an activity you will truly enjoy.
#Quilling Diwali Card Craft
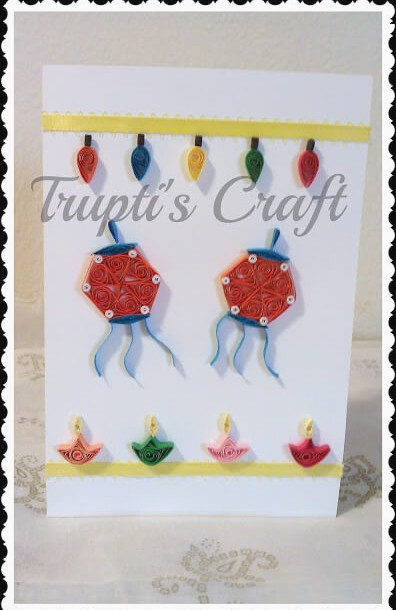
When you are short on time but have plenty of crafts to complete, quilling can be very helpful. Create Diyas and lamps using the quilling technique, then personalize your Diwali greetings with affection.
#DIY Diwali Lantern
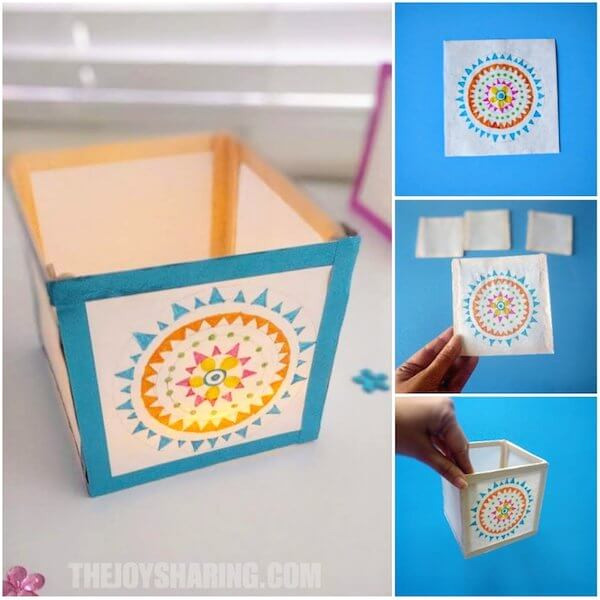
This DIY lantern is a timeless artwork created especially for the Diwali atmosphere. Follow our easy guide to make your own paper lantern and add an artistic glow to your home.
#Diwali Greeting Card Ideas
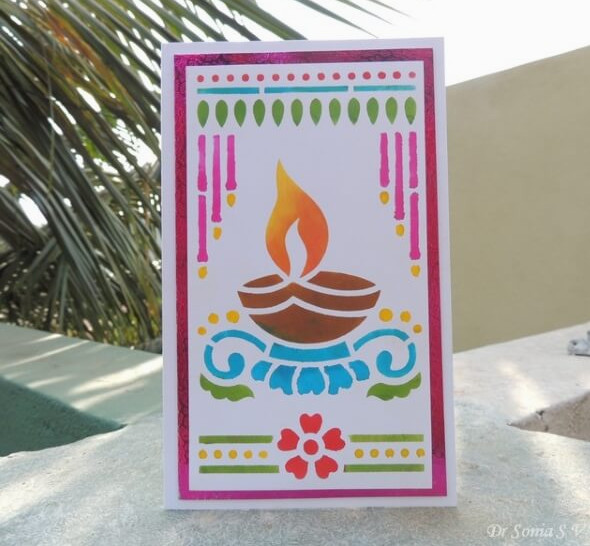
Share warm wishes with your family and relatives through this beautifully designed card. It combines cultural tradition with creativity. Click the link below the image for further details.
#Diwali cards: Let the fun begin
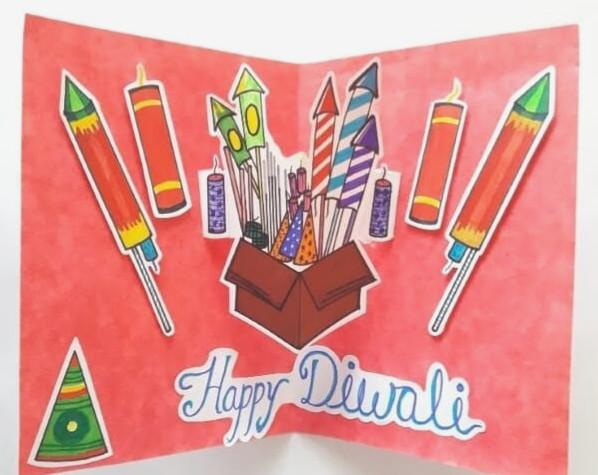
This entertaining pop-up card is ideal for sending cheerful Diwali greetings to cousins, brothers, sisters, and friends. Its stylish design expresses your wishes perfectly.
If you are planning to give a Diwali card to a friend or relative, you can create a lovely one using the steps below:
Materials required:
- Colored paper
- Sketch pens and crayons
- Fevicol
- Pencil
Instructions:
- Choose a rectangular colored sheet and fold it in the center to create a card.
- On white paper, draw cracker shapes such as rockets with a pencil and color them. Add “Happy Diwali” to convey your wishes to your loved one.
- Cut out all the designs and attach them to the card.
Your card is complete!! Present it to your loved ones and make the celebration unforgettable.
#Floral Greeting
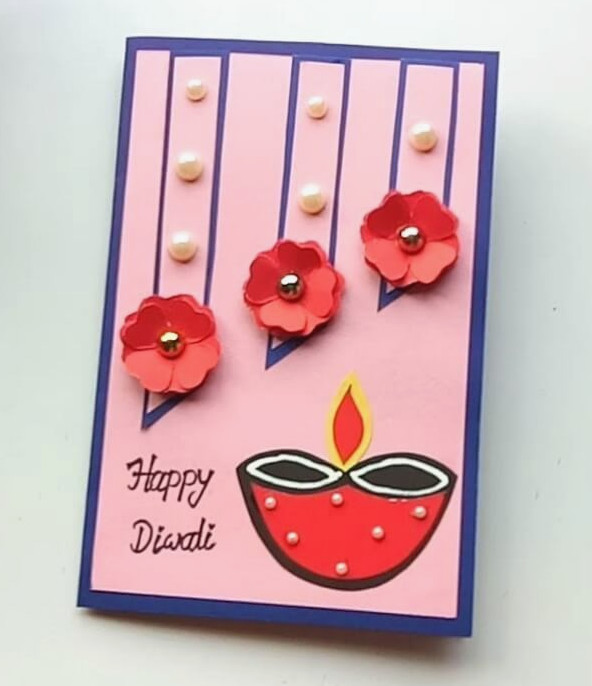
A floral greeting card is a timeless choice that never becomes outdated. This graceful craft, along with your care and effort, is sure to bring happiness to the person who receives it.
If you would like to create a card with craft techniques, this is an excellent option. Follow the steps below to prepare it:
Materials required:
- Colored sheets
- White paper
- Sketch pens and pencil colors or crayons (if desired)
- Scissors
- Fevicol
- Decorative pearls
Instructions:
- Take a rectangular sheet and attach a sheet of another color to it. Fold the sheet in half to form a card.
- On a separate colored sheet, draw around 3-4 two-dimensional flowers. Cut them out and paste them in a row across the center of the card.
- Draw a Diya on white paper, decorate it with sketch pens or pencil colors, cut it out, and place it at one corner of the card. Write “Happy Diwali” on white paper, color and cut it, then paste it near the Diya.
- Finally, stick the pearls on the card in an upward pattern to give it an attractive appearance.
Your card is now finished.
#Candle Cover
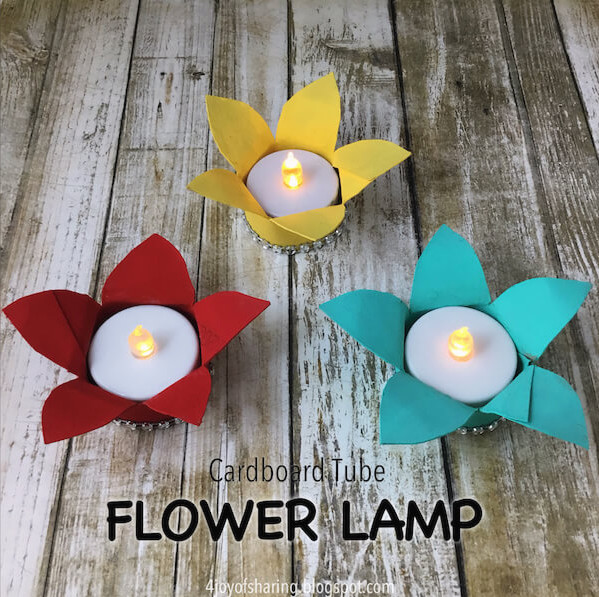
Everything should look bright and beautiful during Diwali. Follow our tutorial to make these floral candle covers and add a colorful touch to plain white candles.
For Diwali, you can illuminate your home by creating a craft called a flower lamp. Trust me, it is very simple and lots of fun to make!
Materials required:you need:
- Cardboard cylinder
- LED tea-light candle
- Scissors
- Paints
- Embellishment stones
- Hot glue gun
Procedure:
- Take the cardboard tube, cut it in half, and then divide each piece again by shaping the cuts like flower petals.
- Next, paint all the pieces in the colors of your preference.
- Once dry, decorate them with ornamental stones or ribbons.
- Finally, place the small LED light inside the center of the cardboard tube.
Your floral lamp is now complete. We hope you had fun creating this craft!
#Ganesha Diwali Greeting
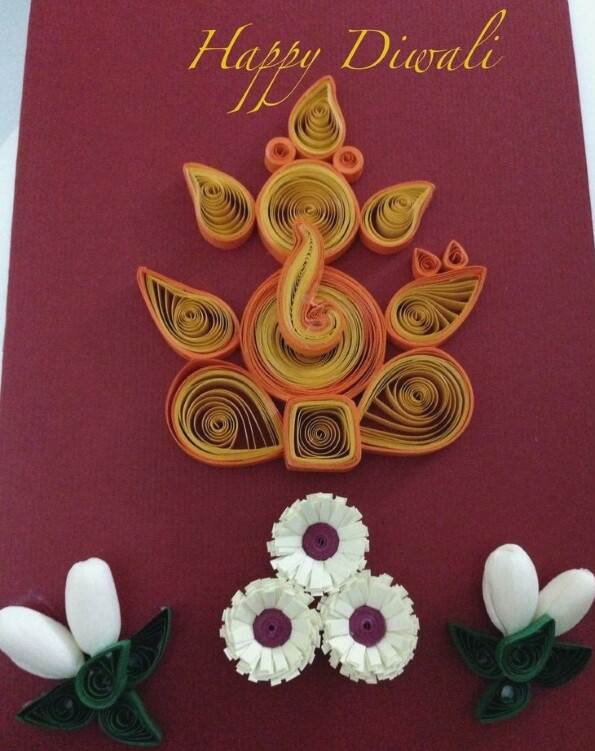
Lord Ganesha is worshipped during Diwali. Showcase your mythology and heritage through this classic greeting, and get ready to earn plenty of appreciation for your creativity.
#DIY Diwali Garland
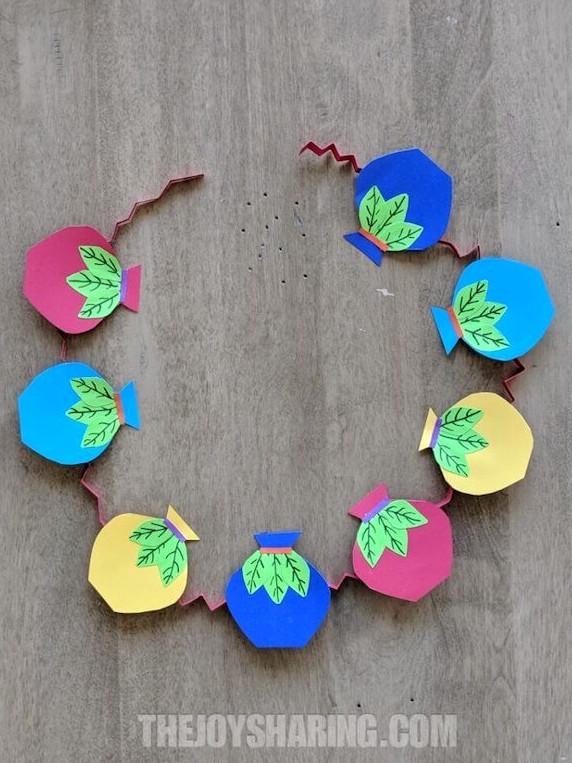
Wouldn’t this DIY garland be worth trying? Follow the link beneath the picture and create your own paper garland.
Through this activity, children can discover details about traditional methods, especially classic crafting techniques.
Suitable age group:
- Colored paper
- Adhesive
- Scissors
- Marker pens
Procedure:
- Take a colored sheet and draw the outline of a Kalash on it. Decorate the Kalash with patterns made from various colored papers.
- Next, use another sheet to create a semicircular zigzag pattern and cut it out.
- Paste the Kalash shapes onto the semicircular zigzag design, and your paper garland will be ready to display.
#More Diwali Greeting Cards
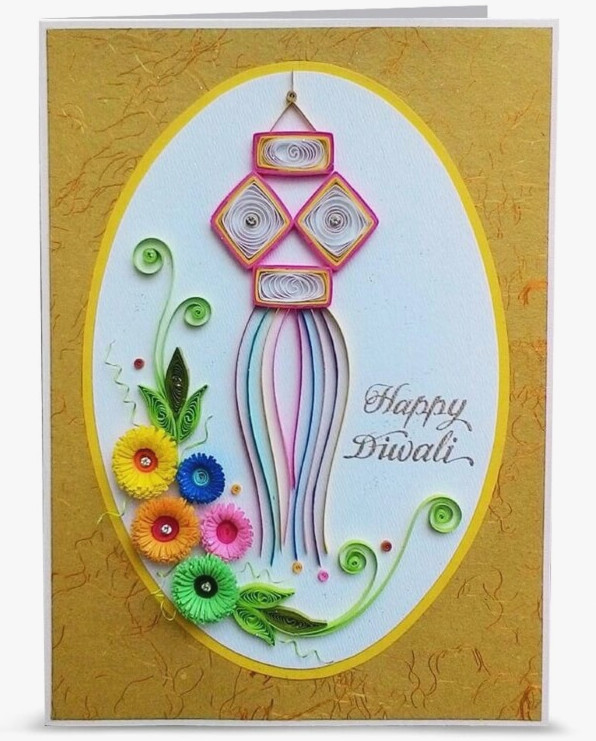
#Simple Diwali Card
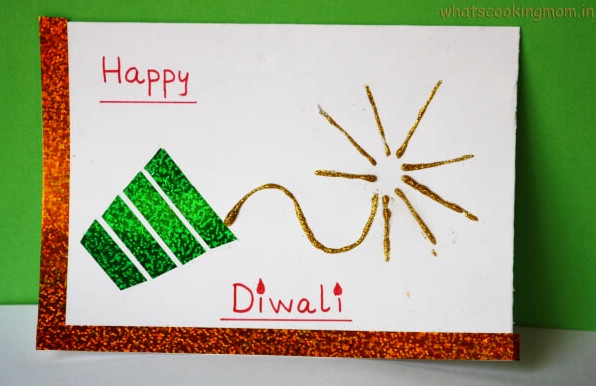
This craft introduces you to card-making techniques and offers an easy method for creating greeting cards.
Supplies you need:
- White paper
- Colored adhesive tape
- Glitter
- Scissors
- Marker pens
- Adhesive
Procedure:
- Gather the white sheet and colored tape. Use the tape to form a double-sided border around the card.
- Take a different colored tape and attach it to the card in the shape of a firecracker. Add glitter to create the cracker’s burst.
- Then, write “Happy Diwali” on the white card with marker pens.
Following these steps, you can create a card that is both attractive and uncomplicated. Share it with your friends to brighten their day.
#3D Diwali Card
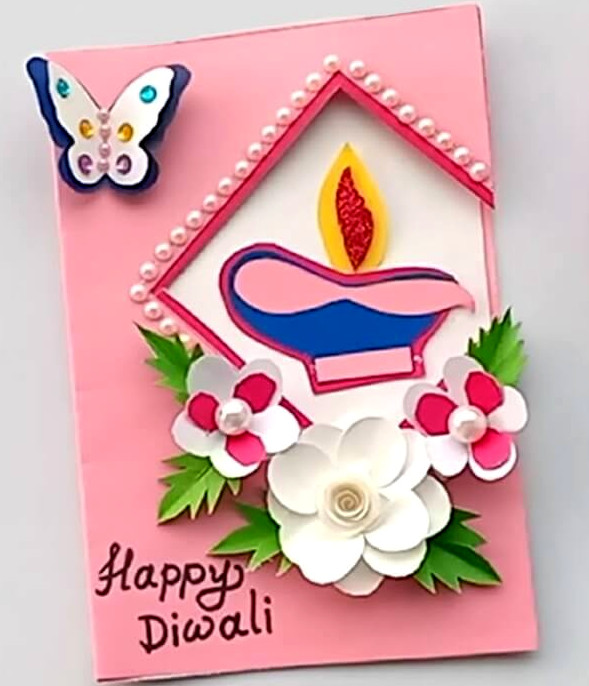
We know you may be searching for several greeting ideas to share with everyone you know. That is why we have gathered many additional designs that are enjoyable, stylish, and creative. Select the links below the pictures to access tutorials for making these lovely greetings.
If you wish to present a beautiful card to someone special, this is an easy and excellent option. This craft also teaches you how to create 2D flowers and other decorations.
Supplies you need:
- Colored cardstock
- White sheets
- Marker pens
- Adhesive
- Pencil
- Embellishment stones
Procedure:
- Fold the colored sheet in half. Cut one side of it into the shape of a kite.
- Cut flowers and leaves from white paper, color them, and arrange them on the card.
- Draw a butterfly on colored paper, cut it out, and attach it to one corner of the card.
- Finally, place decorative stones on the card’s front. Add some to the flowers and butterflies as well.
With this method, you can create a lovely 3D card and delight your friends by presenting it to them.
#Diya Wall Hanging for Your Wall
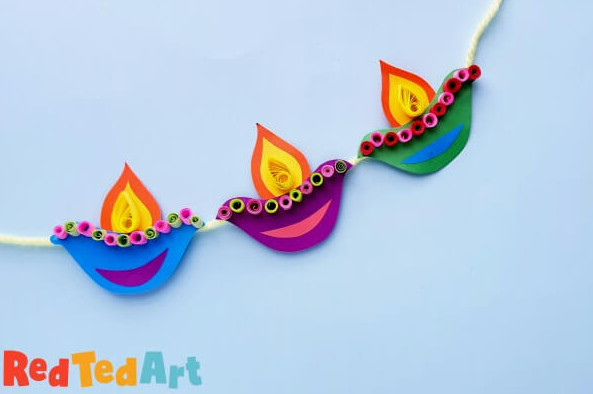
This classic decorative item can quickly bring a bright festive atmosphere to your home. Give it a try by selecting the link beneath the image.
To adorn your wall, consider making a paper Diya garland. It beautifies your home while also allowing your creativity to shine.
Supplies you need:
- Colored paper
- Quilling strips
- Wool thread
- Hot glue gun
- Scissors
Procedure:
- Begin by cutting Diya shapes and their flames from colored paper. Select the shades you prefer.
- Attach the flames to their base pieces with the glue gun.
- Next, roll the quilling strips into coils and glue them onto the Diyas just beneath the flames.
- Take a wool thread and fasten the Diyas along it in a row.
Your paper Diya garland is ready in this way! Place it on the wall to enhance your home for the Diwali celebration.
#DIY Paper Leaf Garland
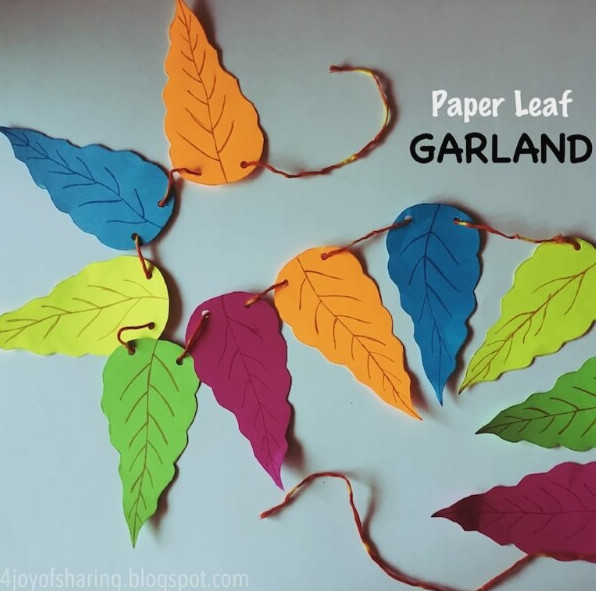
Ordinary traditional garlands fade shortly after the festival ends. This handmade garland, however, can decorate your space for as long as you like. Bring out your artistic side with this graceful traditional craft.
If you are looking for a simple way to beautify your wall, this decoration is an ideal choice.
Materials you needyou need:
- Colored sheets
- Scissors
- Glue gun or Fevicol
- A slim colored cord
- Marker pens
Procedure:
- Draw leaf shapes (5-6) on various colored papers and cut them all out.
- Use sketch pens to add details to the leaf sections.
- Next, take the colored thread and attach the leaves to it.
Your paper leaf garland is now ready to use! It is simple and lovely.
#Origami Greeting
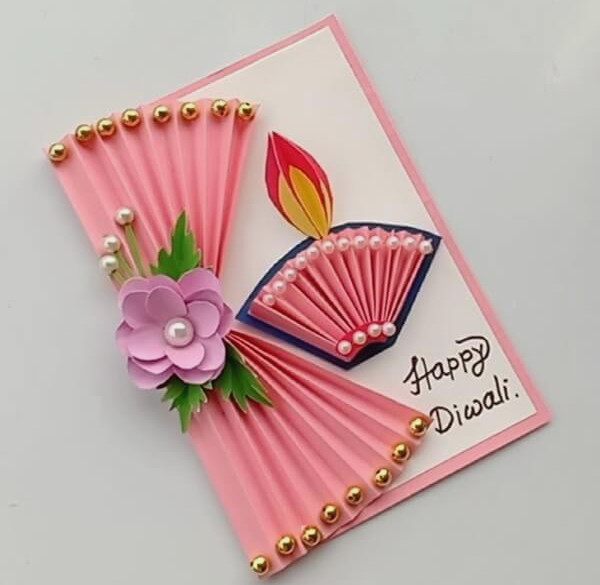
While creating origami paper fans, have you ever imagined turning them into a graceful greeting card? Follow this easy guide to create this beautifully decorated craft.
#Paper Plate, Pumpkin Seed, and Paint
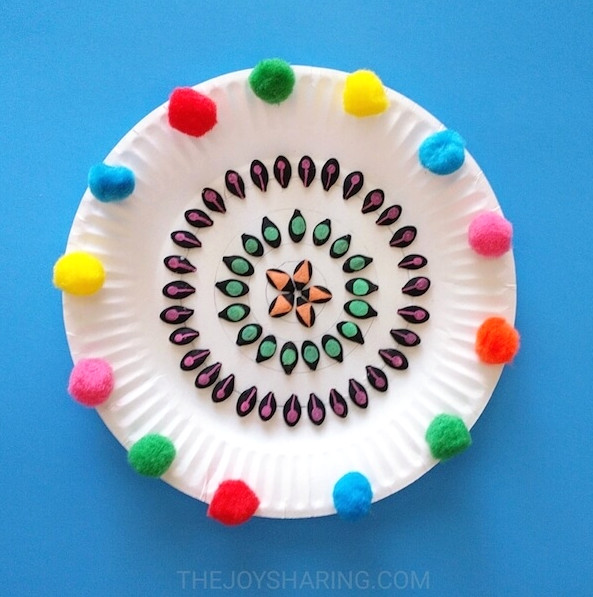
Reuse an old paper plate and pumpkin seeds to create this attractive rangoli. Drawing inspiration from traditional mandala artwork, it beautifully combines classic and contemporary styles.
#Quill Candle Holder
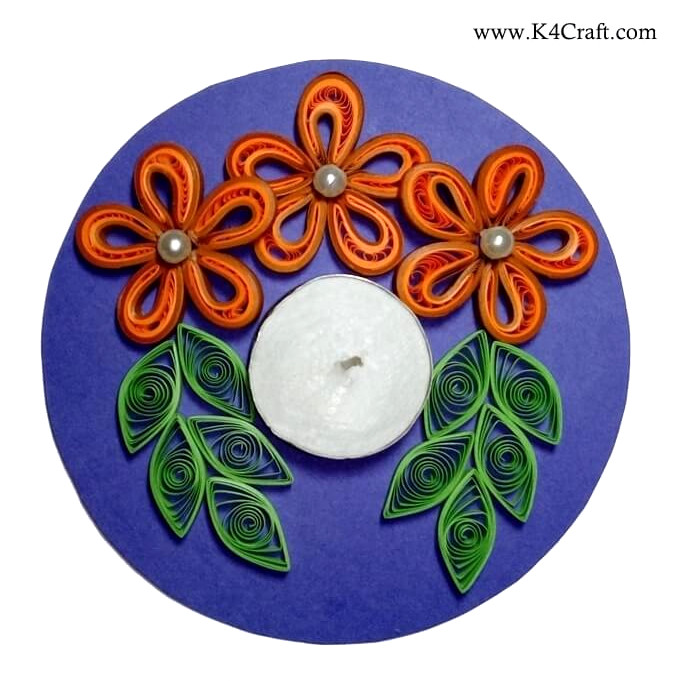
Slice colorful paper strips and roll them artistically to decorate the pooja thali. The more vibrant, the better. The brighter the colors, the cooler the look.
If quilling interests you, this method can make your celebration extra special. Create this craft to practice and learn quilling techniques.
Supplies you need:
- Bright-colored paper
- Quilling strips
- Decorative gems
- Glue gun
- Scissors
Procedure:
- Choose a colored paper and cut it into a circle, selecting the size as needed.
- Shape the quilling strips into flowers and leaves.
- Now, attach them to the round colored paper. You may place a small lamp in the center.
Your paper quilling garland is complete!!
#For Tiny Tots (Printable)
For preschool children who have recently entered the enchanting world of colors, here are several printable designs ready for coloring. Use these coloring pages to introduce children to the festival’s mythology and important features.
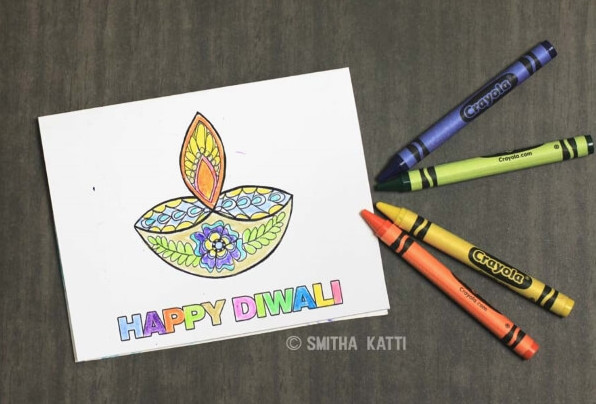
This offers an easy method for creating a card for Diwali.
Supplies you need:
- A white sheet
- Crayons
- Pencil
- Black marker
Procedure:
- Place the white paper in front of you and draw a Diya shape on it.
- Next, fill it with suitable colors using crayons.
- Write a greeting on your card, such as happy Diwali. Then use the black marker to trace the outline of your drawing.
Your card is complete. This is an uncomplicated way to create a Diwali card. Hope you had fun making it.
For plenty of additional craft ideas, visit here. Happy crafting!!
#Pictures related to DIWALI
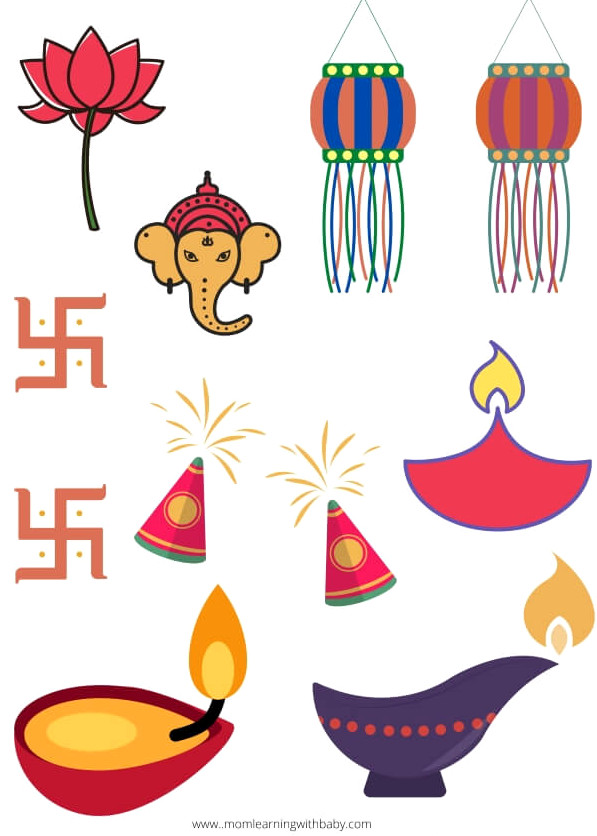
f you would like to get creative, design a Diwali-themed card. Simply illustrate a few objects associated with Diwali.
Supplies you need:
- A white sheet
- Pencil
- Paints
- Marker pens
Procedure:
- On the white sheet, draw Diyas, crackers, Ganesha’s face, Shubh Labh, a lotus, and a wall hanging.
- Paint all the drawings and add details with sketch pens.
Your easy card is finished!!
#Drawings of Rangoli
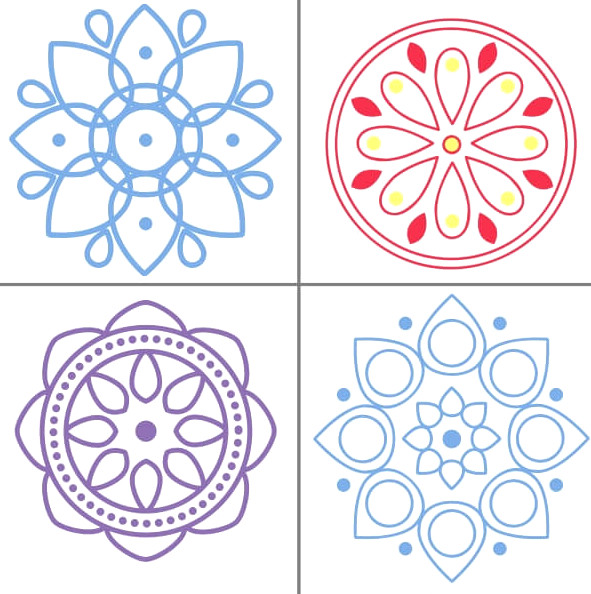
To create a Rangoli, gather your colors and draw the designs simply. This is an easy method for making Rangoli.
Supplies you need:
Procedure:
- Take the white sheet and draw lines across it to divide it into 1/4 sections.
- Use your imagination to create different Rangoli patterns in every column.
- Draw the designs with assorted sketch pens.
You may use it as a Diwali card or attach it to the floor.
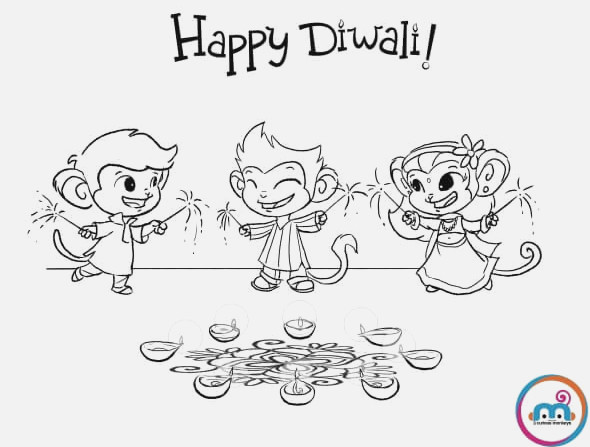
Use your artistic drawing skills to create a Diwali-themed card. Follow these steps to make one.
Supplies you need:
- White paper
- Pencil
- Black marker
Procedure:
- Draw cracker-themed cartoons on the white sheet to display Diwali’s excitement.
- Create Rangoli patterns with Diyas to represent Diwali’s radiance.
- Then, write a greeting on the card, such as ” happy Diwali”.
- Finish the design by outlining it with a black marker.
At last, your card is ready to share happiness with everyone!!
#Rangoli for Diwali
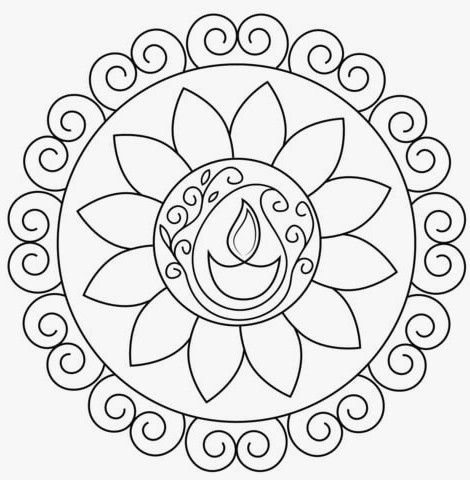
If you wish to make Rangoli for Diwali without Rangoli powders, try this alternative method. Simply use paint colors to create the Rangoli and place it on your home’s floor.
Supplies you need:
- White paper
- Pencil
- Black marker
- Colors (if needed)
Procedure:
- Using a pencil, sketch a circular Rangoli on the white sheet. Then, trace its edges with a black marker.
- Draw a Diya at the center of the Rangoli.
- If you wish to add color, decorate it with your paints. Afterward, place it on the floor to beautify your home.
#Sketch of goddess Laxmi

Those who are skilled at drawing can create a picture of goddess Laxmi for Diwali. This activity will also help improve your sketching abilities.
Materials required:
Procedure:
- Begin by sketching the image of goddess Laxmi with a pencil.
- Next, add 2 Diyas on either side of the goddess and write a greeting such as “happy Diwali” or “Shubh Dipawali” in Hindi.
This artwork reflects both your devotion to God and your imagination.
#Sketch of Ganesha
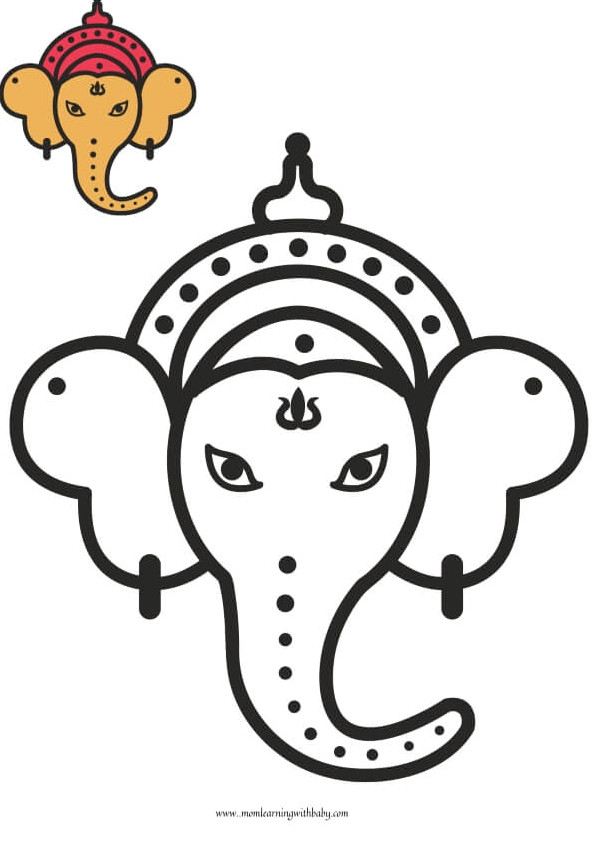
Diyas, Rangolis, Lord Ganesha, and Goddess Laxmi – encourage your children to fill each sketch with imaginative colors while explaining the story behind them. This learning approach helps children form memory connections, allowing the stories and details to remain with them for a long time. The result may not be an artistic masterpiece, but there is no need to worry, since every expert began as a novice. Their cheerful faces will brighten with color, making your Diwali more joyful and vibrant too.
On Diwali, simply create a drawing of Ganesha.
Materials required:
Procedure:
- Use a pencil to sketch Ganesha’s face, including his ears and crown.
- Add the eyes.
- Trace the drawing with a marker.
- Finish the picture by adding paint colors if desired.
#DIY Diwali Candles
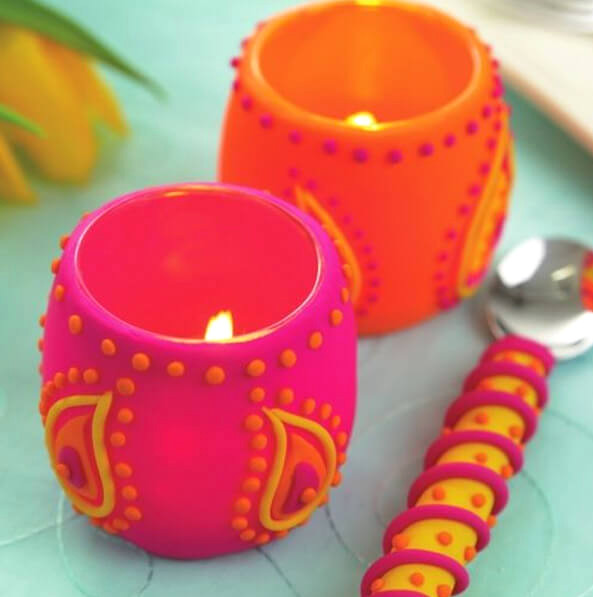
Why settle for plain candles when you can create these charming clay versions? Follow our guide to discover how and design personalized pieces with a little imagination and creativity.
If you would like to adorn your home with tiny lamps during Diwali, give this craft a try.
Recommended age group: 9-12years
Materials required:
- Plain colored cup
- Colored paper
- Clay
- Glue gun
Procedure:
- Cover the cup with colored paper, securing it in place with a glue gun.
- Shape the clay into small stones and attach them to the cup. Add more patterns to embellish it.
- Place the candle inside the cup, and your little lamp is complete!!
Prepare at least 5-10 lamps to adorn your home.
#DIY Paper Rangoli
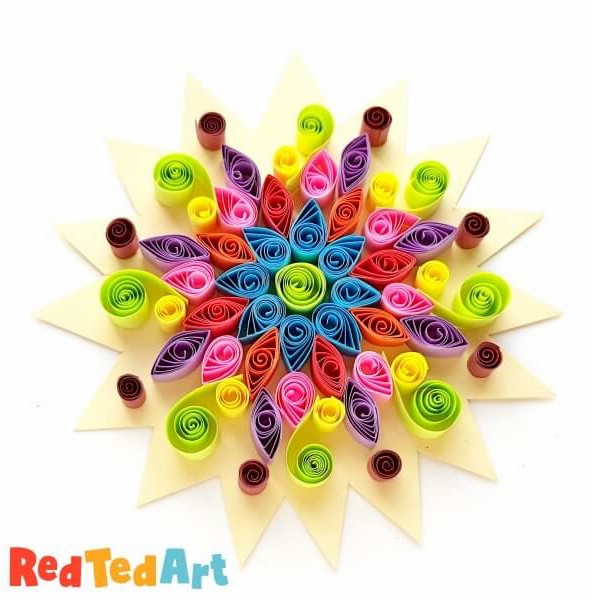
This Diwali, skip the tiring task of creating a traditional Rangoli. Instead, try a fast and artistic paper Rangoli made with the simple quilling technique. Select the link beneath the image to learn more.
If you enjoy creating crafts with quilling strips, this is an excellent opportunity to display your skills. Gather your quilling strips and get started.
Recommended age group: 10 to 15 years
Materials required:
- Quilling strips
- Colored paper
- Scissors
- Glue gun
Procedure:
- Cut the colored paper into a large circle. Then, trim around its edge into small triangle shapes. This will serve as the decorative base.
- Collect quilling strips in various colors and roll them into flower shapes.
- Attach the quilled pieces to the base with a glue gun.
Your wall decoration is ready to display!! Use it to give your wall a more attractive appearance.
#Candle Wall Hanging
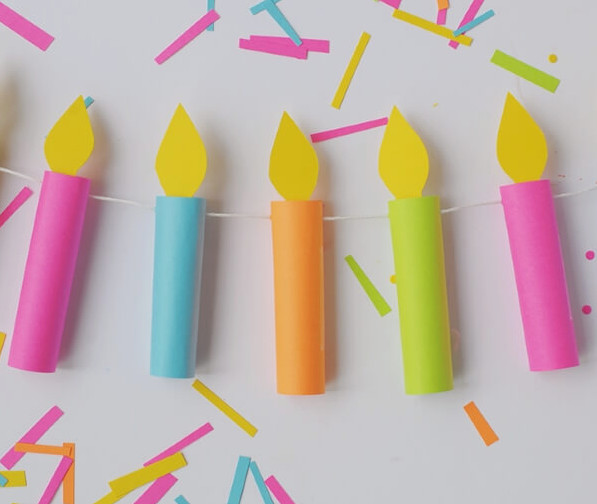
Brighten the Diwali mood with this distinctive wall hanging. This craft requires little time and effort while adding instant charm to your Diwali decorations.
For Diwali, you can beautify your home by crafting paper candles. Children can follow these steps to create them.
Recommended age group: 9-12 years
Materials required:
- Colored paper
- Scissors
- Glue gun
- Long thread
Procedure:
- Cut the colored paper into rectangles measuring 10*5 cm.
- Roll each piece into a cylinder and join the edges with a glue gun.
- Using the yellow paper, draw and cut out a flame shape. Attach it to the top of the cylinder.
- Repeat the steps to create at least 5 candles.
- Glue the candles onto the thread with a hot glue gun to form the wall decoration.
Display it on your walls to make your home look lovely.
#Safe Color Poppers
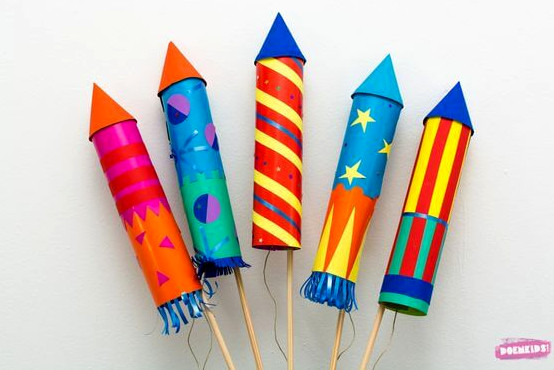
Protect yourself and the surroundings by firmly rejecting firecrackers. The celebration can still be enjoyable, so try these colorful poppers for a combination of entertainment and safety. Follow the easy tutorial and create a few of your own.
During Diwali, children often ask for crackers to enjoy. Instead, assign them a creative project to make craft crackers. They will have fun while learning something new as well.
Recommended age group:9-12 years.
Materials required:
- Colored paper
- Glace paper
- Scissors
- Glue gun
- Sticks
Procedure:
- Cut the colored sheet into a rectangle measuring 15*4 cm. Fold it into a shape ofa hollow tube.
- Additionally, create small cones from colored paper.
- Next, use the glace paper to create various patterns and paste them onto the rocket.
- Attach these rockets to a slender stick. Make more by following the same method.
#Hang In There!
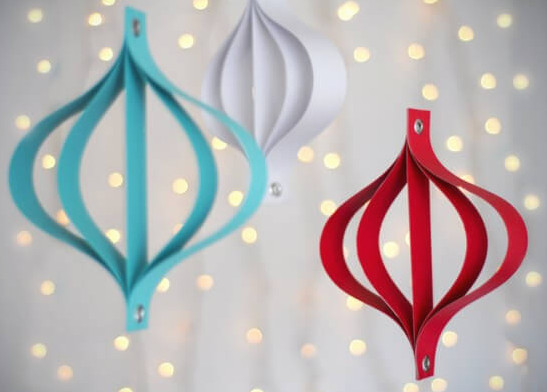
While the outside of your house sparkles with LED decorations, do not allow the interiors to remain dull. Create these simple and charming hangings to beautify your indoor spaces. Combine different shades to complement your home, and your customized hanging will be ready to amaze everyone.
A wall hanging is an excellent decoration that can be created with colored paper. Learning how to make this wall-hanging ornament is quite easy.
Supplies you need:
Procedure:
- Cut 5 strips measuring 20*2 cm from the colored paper. Keep the central strip straight and curve the others slightly. With a glue gun, attach their ends to each other.
- Craft this wall hanging with paper in a variety of colors.
#Colorful Lights
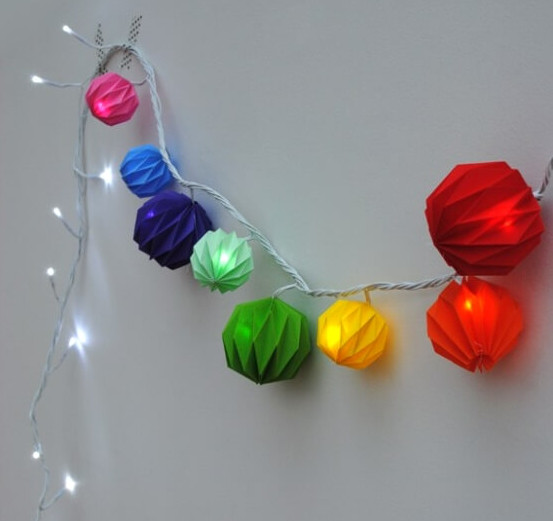
Looking for vibrant lights? We have the perfect idea for you!
Create these bright covers for your LED string and watch them shine beautifully.
#DIY Paper Chandelier
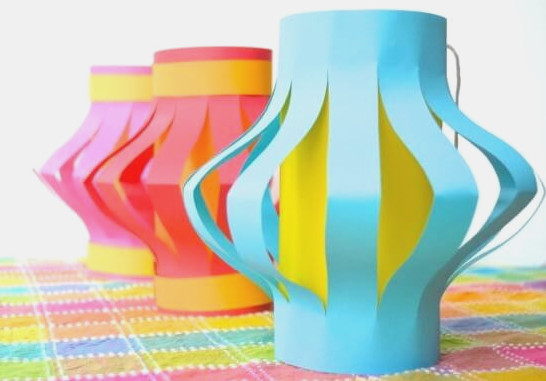
Can Diwali truly be complete without a few handmade chandeliers?
Follow the link below the image to discover how to create lovely chandeliers using only a few paper sheets.
A paper lamp is among the finest Diwali craft ideas. It is also very simple to create.
Supplies you need:
- Colored paper
- Scissors
- Stapler
- Thread
Procedure:
- Take an A4-sized colored paper and fold it into a rectangular form.
- Then, divide it into two from the folded edge.
- Unfold the paper to reveal the pattern you cut. Hold it by the rectangle’s width and staple both ends together.
- Fold another colored sheet to form a hollow tube, then place it inside the center of the first one.
Hang it on the walls with thread.
#Cube String Lights
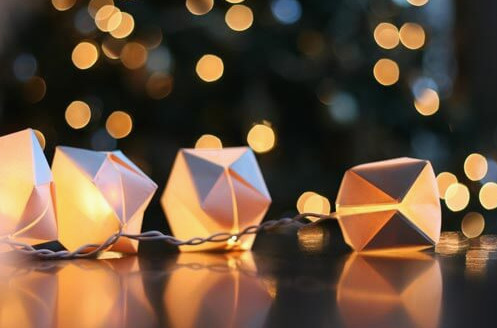
There are truly no limits to creativity. Give your string lights a stylish and elegant appearance with this easy craft. You will surely appreciate this idea.
#DIY Cloth Marigolds
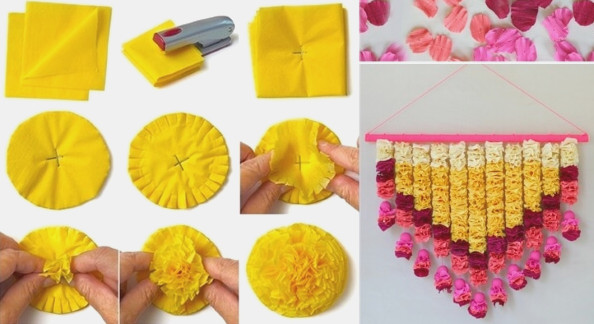
Allow flowers to bloom where they naturally belong. Although picking them for decoration may offer brief happiness, it harms nature. However, beauty does not have to be sacrificed. Use preferably shiny synthetic fabric to create marigolds and as many garlands as you like. They will not wilt or fade, and you can wash and reuse them whenever needed.
Old fabric pieces can be transformed into attractive wall decor. You will discover how to create a flower from cloth scraps.
Supplies you need:
- Fabric pieces
- Stapler
- Thread
- A stick
- Glue gun
Procedure:
- Cut the fabric into squares measuring 4*4 cm. Prepare at least 5 squares.
- Stack the squares together, then staple them at the center.
- Trim the square fabric into a circular shape and make cuts around its edge.
- Starting with the top piece among the 5 stapled cloth sections, fold it into a flower shape. Repeat this with the remaining pieces. Follow the same method to create more flowers, using various fabric colors.
- Prepare at least 40-50 flowers for the wall hanging. Use a glue gun to join them into lines, placing one over another. Make the center line longer while keeping the side lines shorter.
- Cover the stick with fabric, then attach all the flower strands to it. Tie thread to the stick and hang it.
Your floral wall hanging is ready to be displayed!!
#Bangles Decor
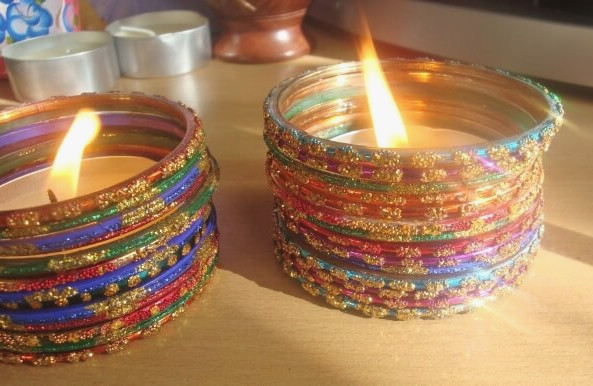
Crafting is not difficult. All it takes is an artistic approach and a willingness to think differently. This easy project, for instance, can transform your decoration from plain to elegant and sparkling. It carries a traditional feel while adding a creative twist.
Repurpose old bangles to create home decor. This is an easy method for making a little lamp from used bangles.
Supplies you need:
- Used bangles
- A plastic or wooden foundation
- Candles
- Glue gun
Procedure:
- Place the bangles around the base to form its border.
- Using the glue gun, stack the bangles on top of each other.
- Finally, position the candle in the center of the bangles.
This is the easiest way to create bangle decor. Place it near the entrance of your home.
Visit here for more posts like this. We hope you enjoyed them and discovered fresh crafting ideas.
#DIY Organic Rangoli with Sacred Grains
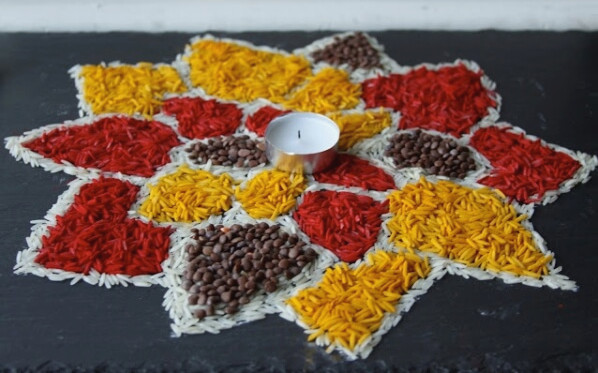
Rather than spending money on harmful Rangoli colors, choose this organic alternative inspired by the traditional craft’s ancient knowledge. Dye rice with natural spices and use black lentils to create this auspicious Rangoli pattern.
Supplies you need:
- Colored rice grains(in vermillion and turmeric separately)
- Uncolored rice grains
- Black soybeans
- Candle
Procedure:
- Design a Rangoli pattern according to your preference.
- Fill each Rangoli section with the ingredients listed above, keeping the arrangement symmetrical.
- Use plain white rice grains to trace the figures.
- Finally, place an ornamental candle in the Rangoli’s center and light it at night.
#Clay Rangoli
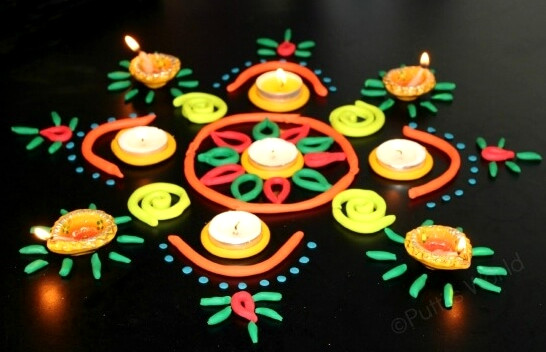
Would you prefer your Rangoli not to leave marks on the floor?
Make one from clay instead; after the celebration, it can be gathered up and will not leave any stains behind.
Supplies you need:
- Clay dough in assorted colors
- Clay rolling pin
- Diyas
- Ornamental bangles
Procedure:
- Roll the dough into slender, lengthy, cylindrical strips.
- Use two strips to create leaf shapes.
- Form small spheres from the dough in the contrasting color.
- Twist the remaining strip into a spiral.
- Arrange all the pieces together in the designer pattern described above.
- Set the Diyas along the outer edge and position the candles within the inner circle. Illuminate them after dusk.
#Flower Rangoli
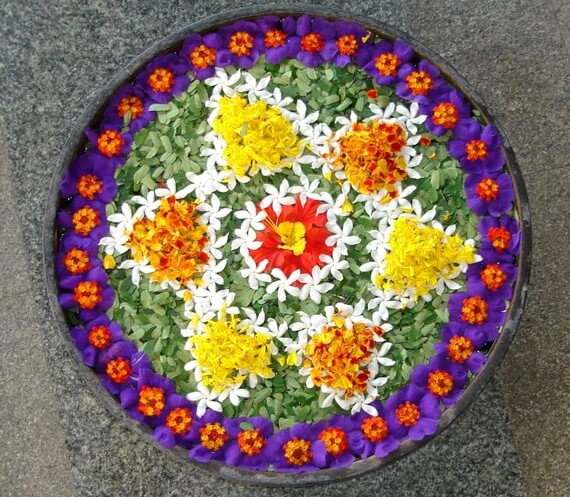
If flowers are your favorite, make the most of them for decoration. Create a floral Rangoli to fill your surroundings with positivity.
Supplies you need:
- A variety of flowers in different colors
- Foliage
- A glass bowl filled halfway with water
Procedure:
- Separate all the flowers into small pieces, leaving the larger ones whole.
- Gently scatter the leaves across the water’s surface.
- Arrange alternating yellow and orange marigold petal triangles.
- Partially immerse the hydrangea blossoms along the border.
- Use crepe jasmine to trace the patterns.
- Allow a red hibiscus to float in the middle.
- Keep the bowl on the center table in your drawing room.
#Glitter Rangoli
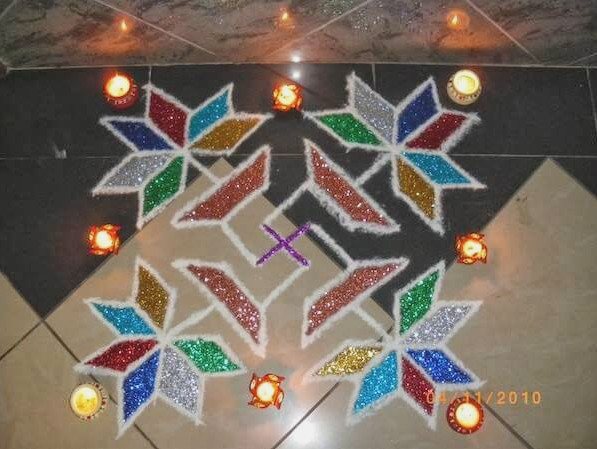
Add a joyful sparkle to your home with this glitter Rangoli. Its stylish, contemporary look is perfect for your personality!
Supplies you need:
- Glitter dust in assorted colors
- White Rangoli powder
- Ornamental candles
Procedure:
- Sketch a graceful, uncomplicated design.
- Trace over the outline with white Rangoli powder to make it prominent.
- Cover the shapes with glitter powder.
- Finish by arranging illuminated Diyas.
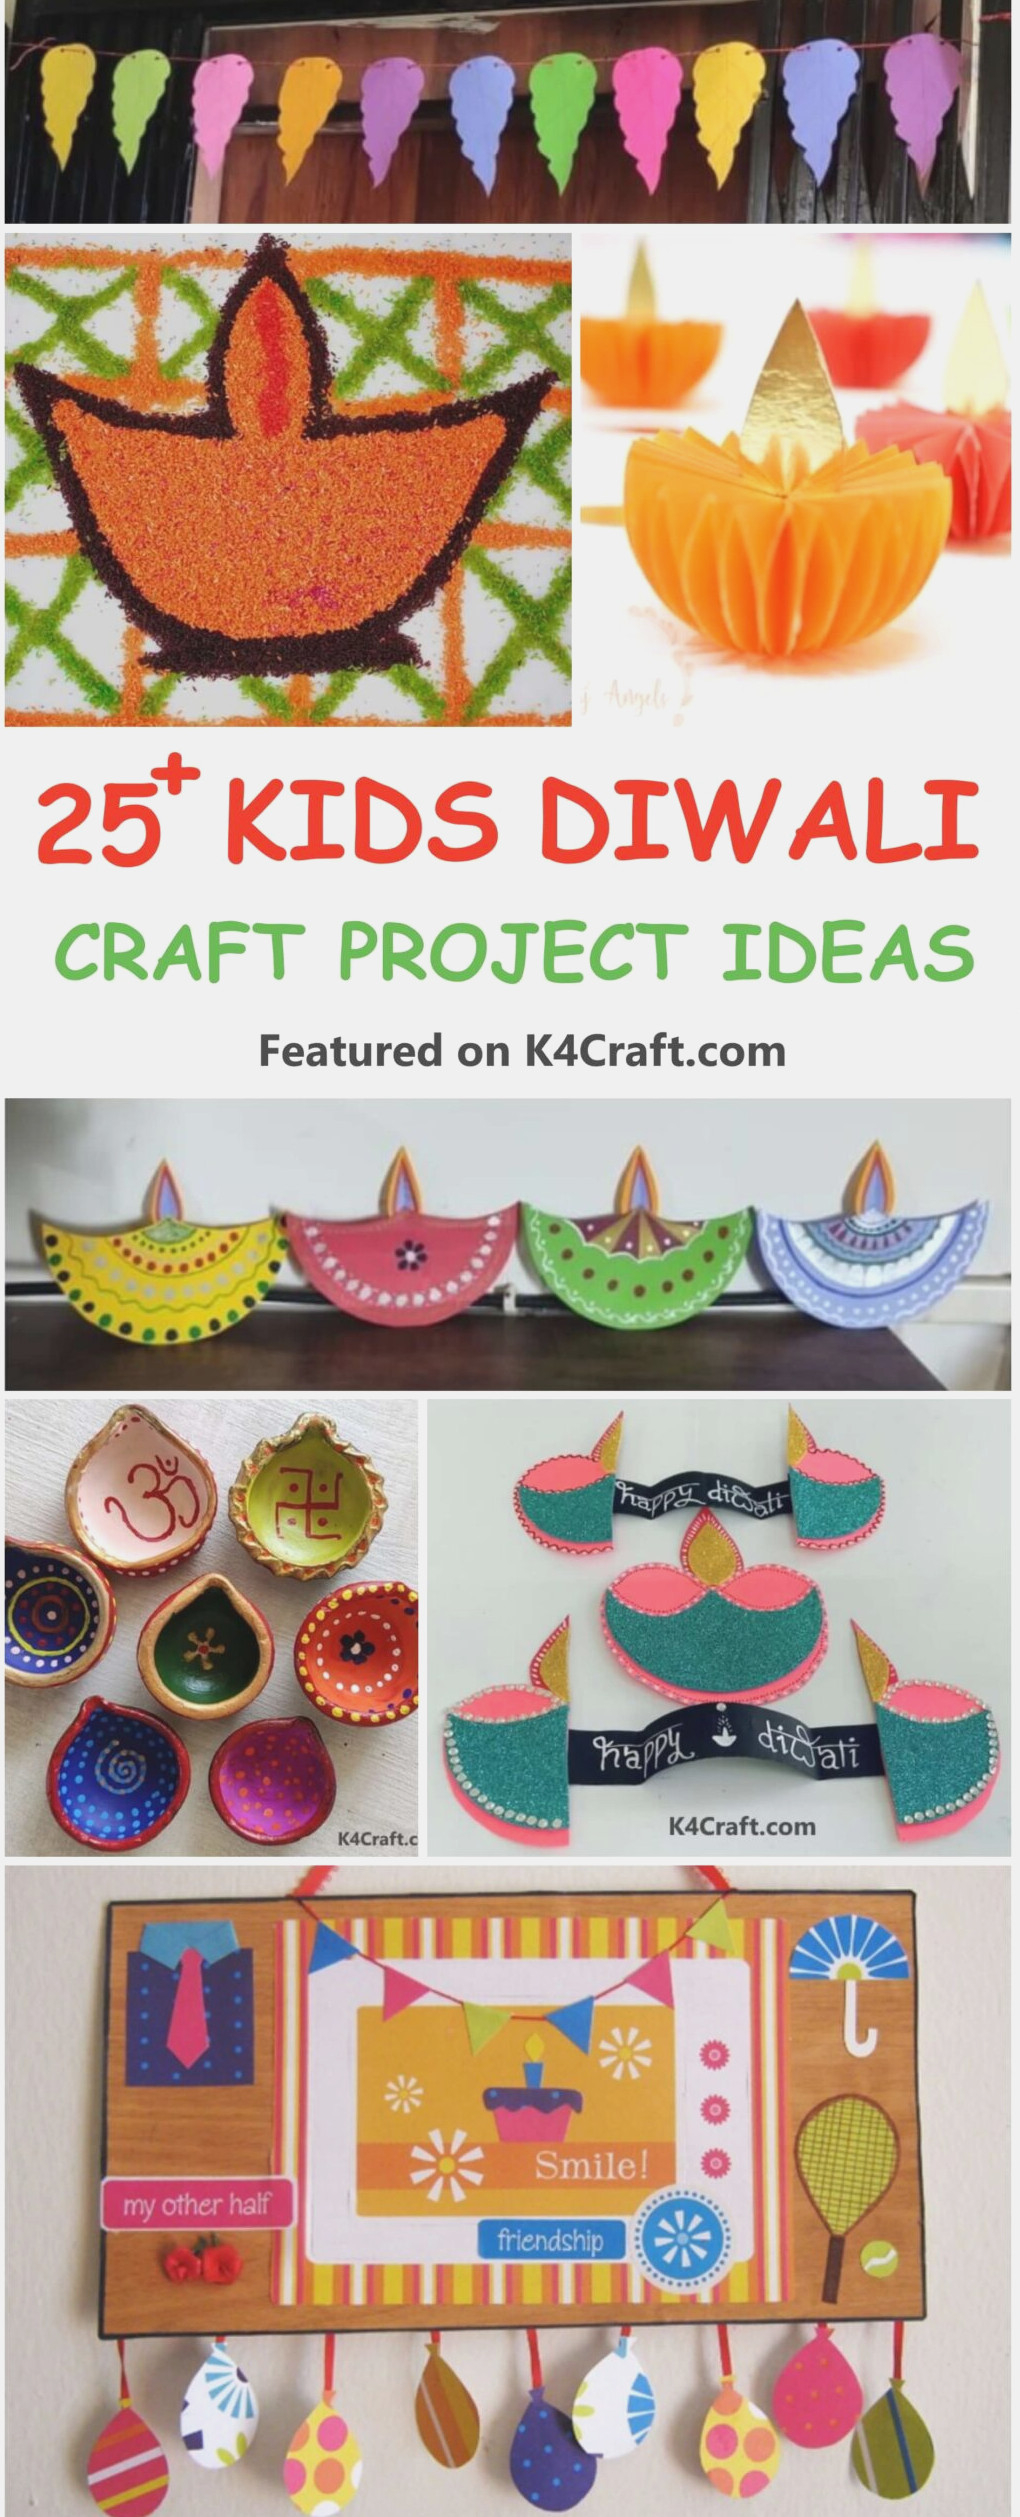
For children, we have gathered over 25 simple and imaginative Diwali projects, including gifts, cards, charts, and more.
Quick and Easy Diwali Decoration Videos
Thereis plenty of fast and easy decoration that you can prepare in less than an hour. We have collected several simple and budget-friendly Diwali decorating ideas for your home to help you celebrate the festival.
Brighten your surroundings with these effortless home décor suggestions during Diwali. We often encounter Best from Waste projects, and this time we can enjoy a similar activity with a touch of imagination.