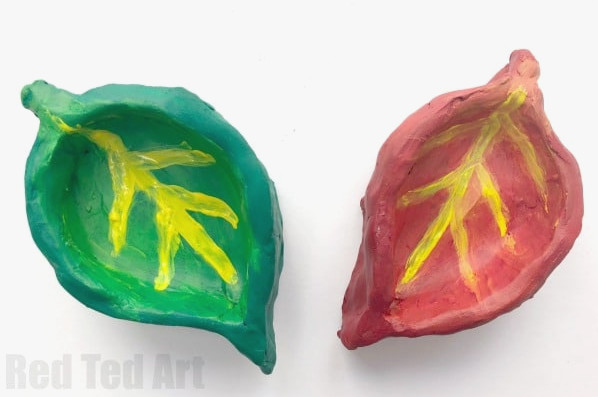
Today, I’m bringing together two of my favourite Autumn Crafts for Kids so far: the Apple Pinch Pot and the Leaf Clay Bowls…. and voila, we now have simple Leaf Pinch Pots!
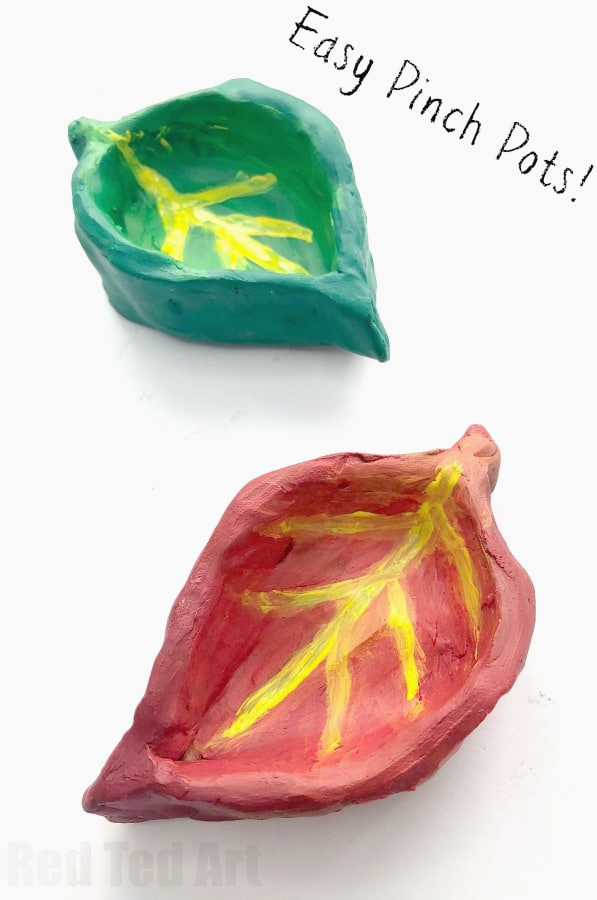
Pinch pots are an excellent craft for introducing children of any age to air drying clay (or kiln clay, for that matter). They are incredibly simple to create, help strengthen little fingers and turn out wonderfully cute. Today’s Leaf Pinch Pot is especially straightforward to make. I prefer concentrating on “simple shapes”, which means children can create them independently and still achieve fantastic results. I hope you agree!!
This Leaf Craft is a lovely Autumn Craft for Kids, as well as a beautiful Thanksgiving Craft and decoration!
A little older children might like to try our Leaf Clay Bowls – this fantastic method uses REAL LEAVES to form the shape and patterns! I absolutely love them.
Leaf Pinch Pots – Materials
- Air drying clay (we particularly love natural air drying clay)*
- Acrylic paints (although they also look beautiful left plain.. especially when using brown air drying clay)
- Paint brushes if you plan to paint
* Air dry clay can be found in any decent craft shop or, naturally, online. Make sure you choose the natural variety, which comes in very large bags and offers excellent value. Avoid choosing the smaller, heavily branded packets.
How to make Leaf Pinch Pots
As usual, I have an autoplay video tutorial for you, along with the step-by-step photos below. You can also scroll down to find a link to the YouTube video, complete with voice-over.
Leaf Pinch Pots Step By Step Instructions
Creating pinch pots is simple and enjoyable, making them a brilliant introduction to pottery – whether you use air dry clay or kiln-fired clay! They are suitable for both beginners and more experienced potters.
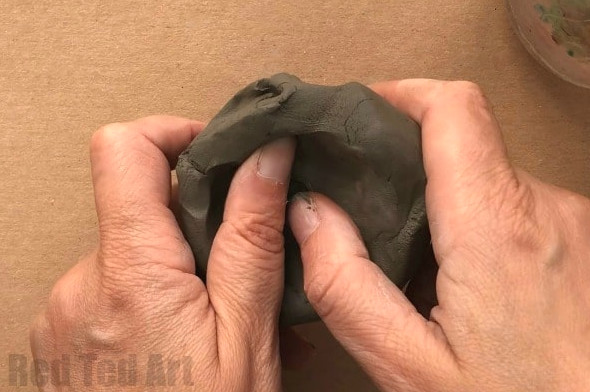
Begin with a “handful” of air drying clay – enough to form a ball that rests comfortably in your hand. Press your thumbs into the clay to create an opening and begin shaping the rim. Continue moving your thumbs around the middle of the clay ball.
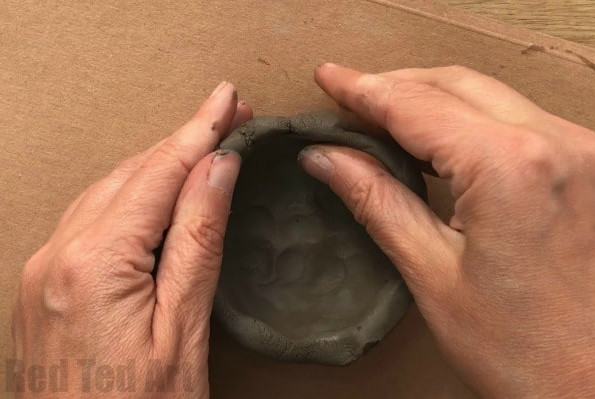
Press into the centre of the ball with your thumb and index finger, then begin turning it into a small, rounded bowl. Work your way around the lip, smoothing out any uneven areas and lumps. Should cracks appear, add a small amount of water and smooth them as you continue!
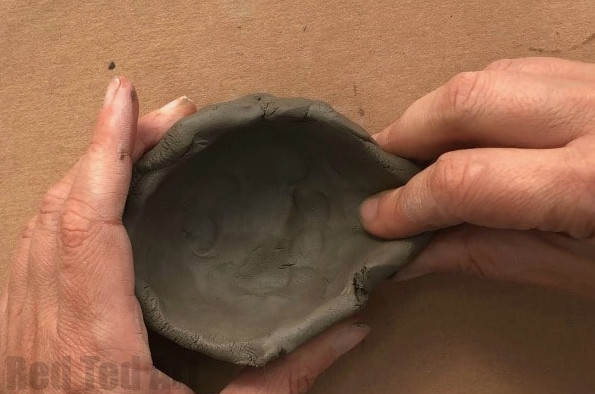
After creating a simple round bowl shape, smooth away any cracks on the surface of your pot with a little water. Next, pinch one end together to form the front of the leaf…
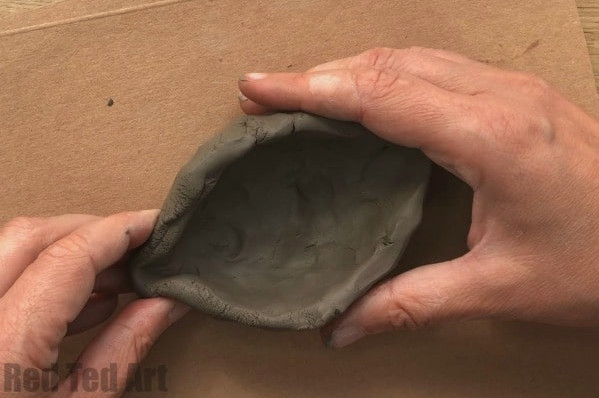
..then pinch the other end to create a stem. Keep smoothing the rim and removing any bumps and lumps until you are pleased with the pot’s shape.
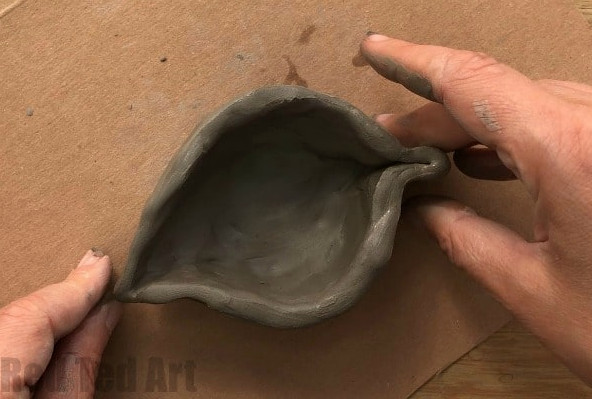
Use a little water to continue softening the edges and surfaces of your Pinch Pot until the texture is smooth and crack-free. If you are making these in a classroom, remember to mark your initials on the base of the pot using a wooden tool.
Now leave it to dry completely!
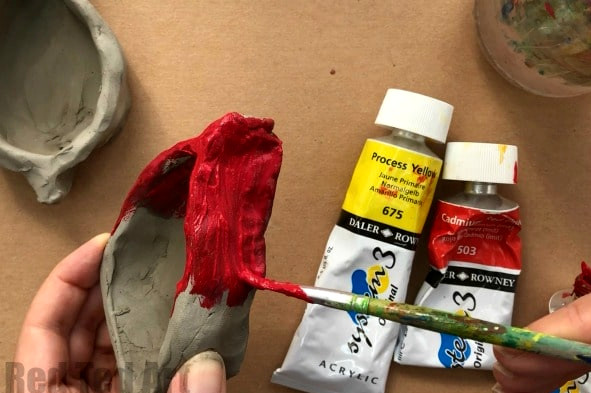
When it has dried, paint it in the colours you prefer. I chose yellows and greens for one leaf, then reds and yellows for the other! As noted, we painted our leaf pinch pots with acrylic paints, which lightly seal the air dry clay. Using kiln clay with a glaze would also create a gorgeous finish! Make sure the entire pot is covered in paint!
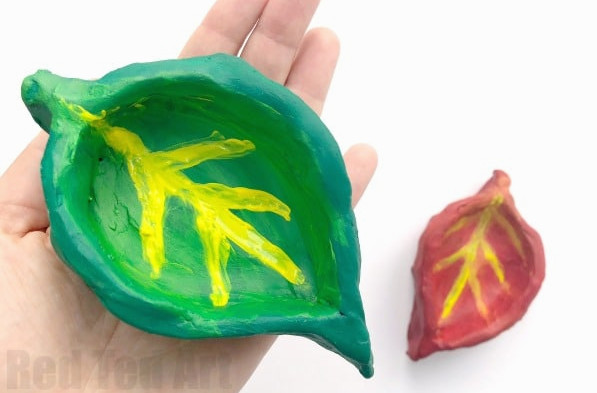
Allow it to dry once more, and your Leaf Pinch Pots will be ready to use!!!
You can find more fantastic Air Drying Clay Projects for kids here, along with plenty of other clay pinch pot ideas:

Find more beautiful Autumn Crafts for kids here:
The video guide can also be watched on my YouTube channel.