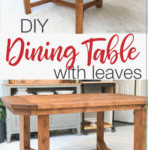
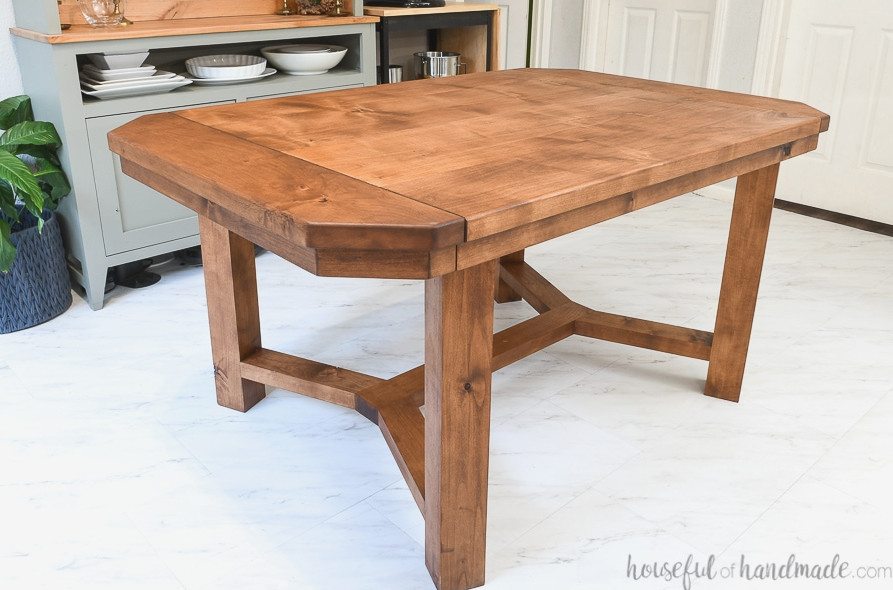
Create the ideal dining table with 2 leaves, offering ample space for hosting guests with these construction plans.
One of the things I miss most about our previous home is our enormous dining table. However, it was far too large to transport across several states, and we knew it would not work in our new house.
That is why one of the first projects I wanted to tackle for our new home was a dining table. Because we do not have enough space for a large table all the time, I designed one with 2 leaves. Now we can create extra room whenever guests come over!
I also collaborated with Waterlox to protect our new dining table using their new TrueTone Color Infused Tung oil finish.
The buff-colored stain and sealer are ideal for completing a beautiful dining table while maintaining a non-glossy surface.
Matte Unfinished-Style Sealer
My favorite feature of Waterlox’s new TrueTone formula is its matte appearance. This tung oil finish penetrates the wood and provides a waterproof seal while preserving a contemporary unfinished look.
TrueTone does more than seal the wood—it also comes in 11 shades that can be used to stain it. Apply it to enrich or transform the color of your wood.
I enjoyed experimenting with three of the 11 shades on the alder wood I selected for the dining table before ultimately choosing Chestnut.
Chestnut was excellent for intensifying the alder’s color and giving it a wonderfully rich appearance.
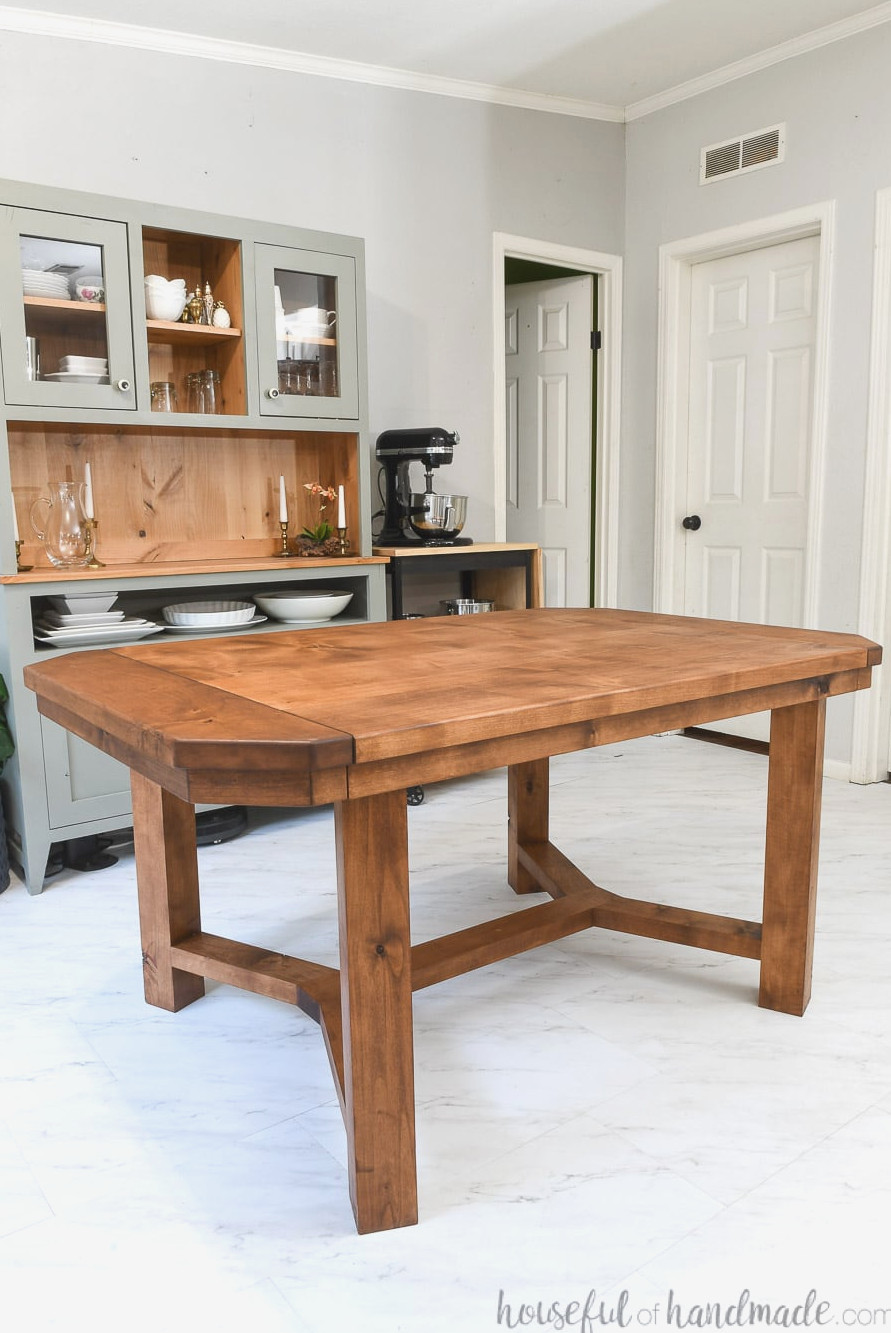
At the same time, it retained the lovely alder tones and matched beautifully with the alder hutch that came with us during the move.
The other two shades I tried were lovely too: Natural and White.
Natural did not noticeably change the alder’s color because the wood already has such a deep tone, though it would provide a subtle tint to a paler wood.
White created a softer, nearly bleached appearance. It was a genuinely gorgeous contemporary stain, but it was not the style I wanted for our dining room. I am eager to try it on another project, though!
One pint of the TrueTone color-infused tung oil covers approximately 300 square feet. It is also available in a smaller 2-ounce container, which covers about 37.5 square feet.
The alder wood absorbed the color quite readily, so I ultimately used 5 ounces to coat the tabletop and leaves.
The finish absorbed considerably less because it was the second coat. I only needed 3 ounces to seal the complete table.
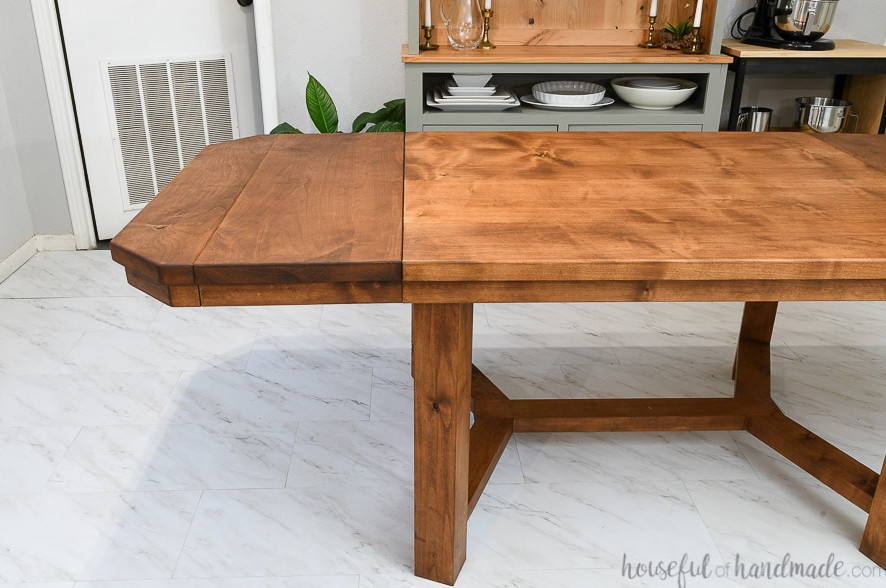
Update: People frequently ask how this finish has held up. I am pleased to say that it still looks fantastic 3 years later.
I have not put on another coat, and we use our dining table for family meals every night.
Because I worried that the children might scratch the tabletop, I used tablecloths during the first year. Now we dine directly on it, with spills and everything, and it continues to look wonderful.
Breadboard End Table Leaves
Since our dining room is considerably smaller than the one in our former home, we needed a more compact dining table. Still, I enjoy hosting and inviting people over for dinner, so the concept of building a table with leaves came to life.
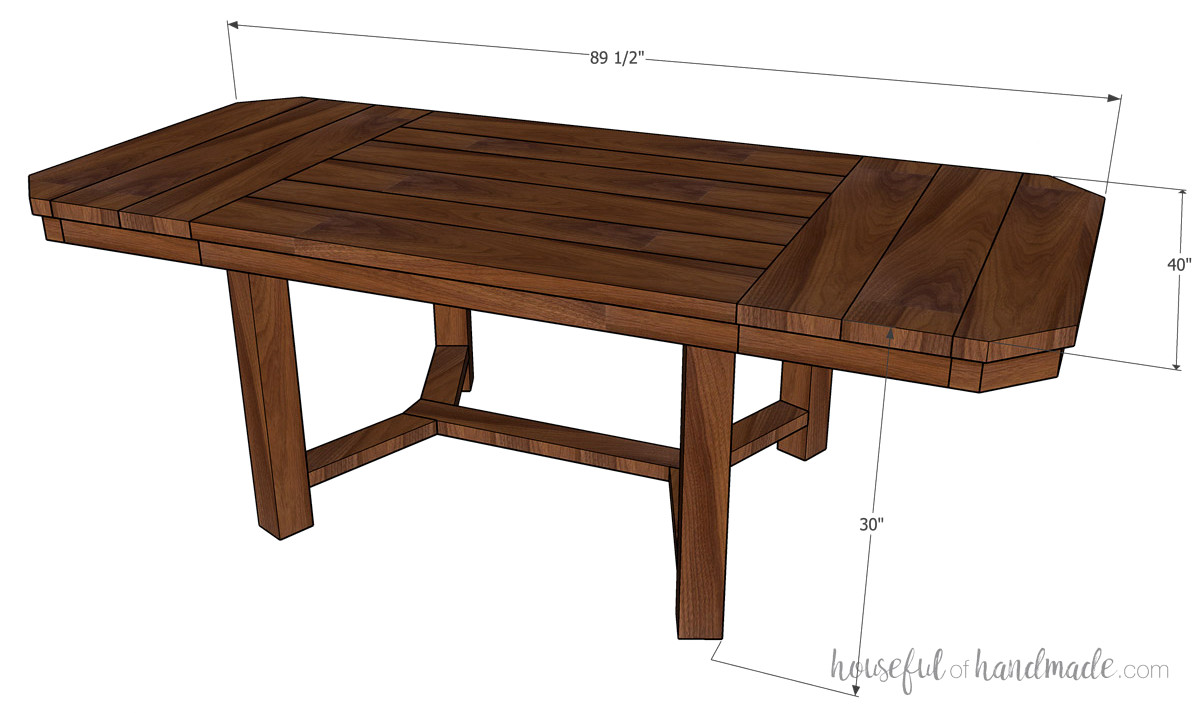
With the leaves removed, this dining table comfortably accommodates 4-6 people. It measures 40″ wide and 60 1/2″ long.
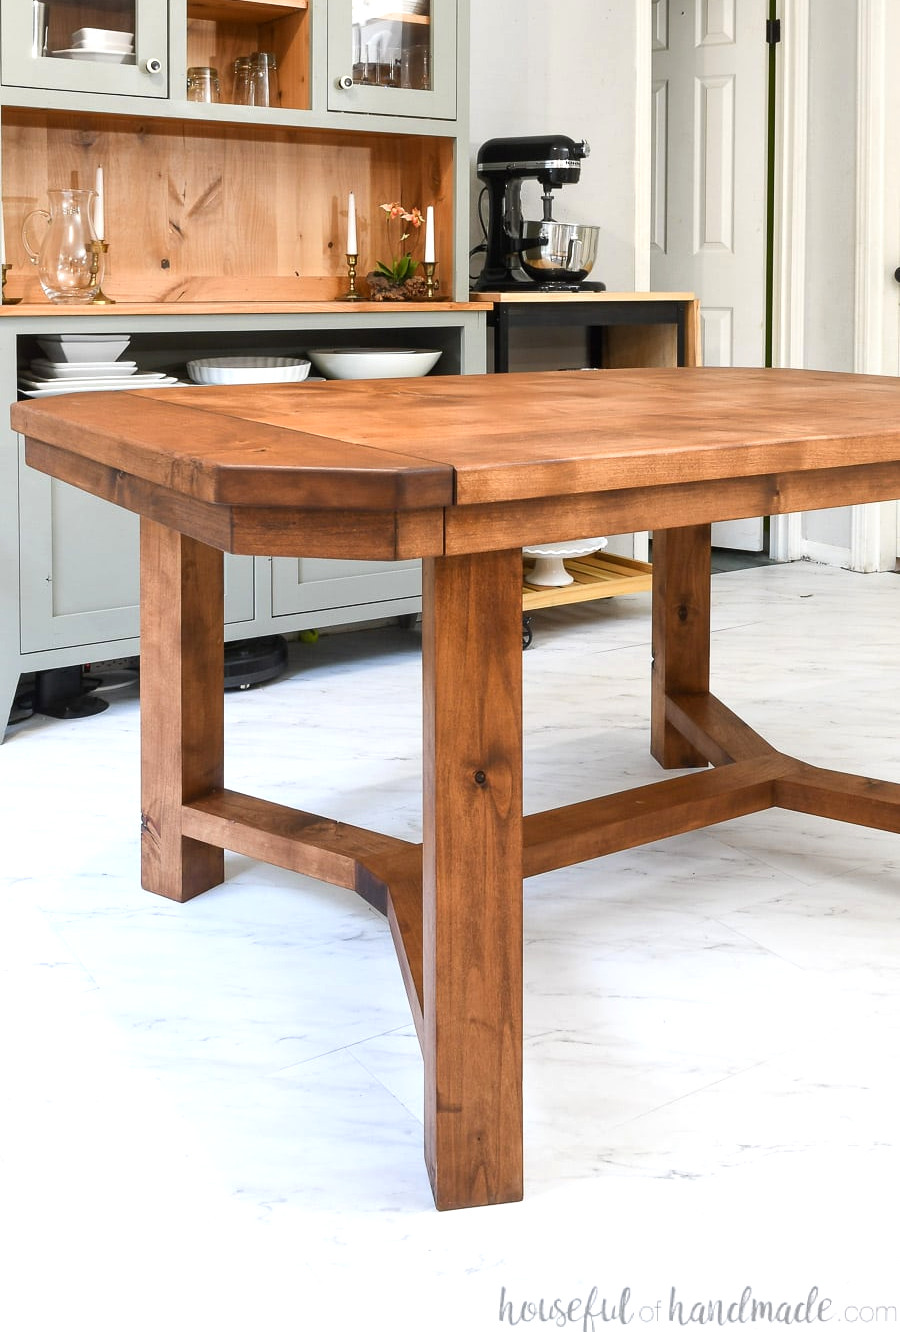
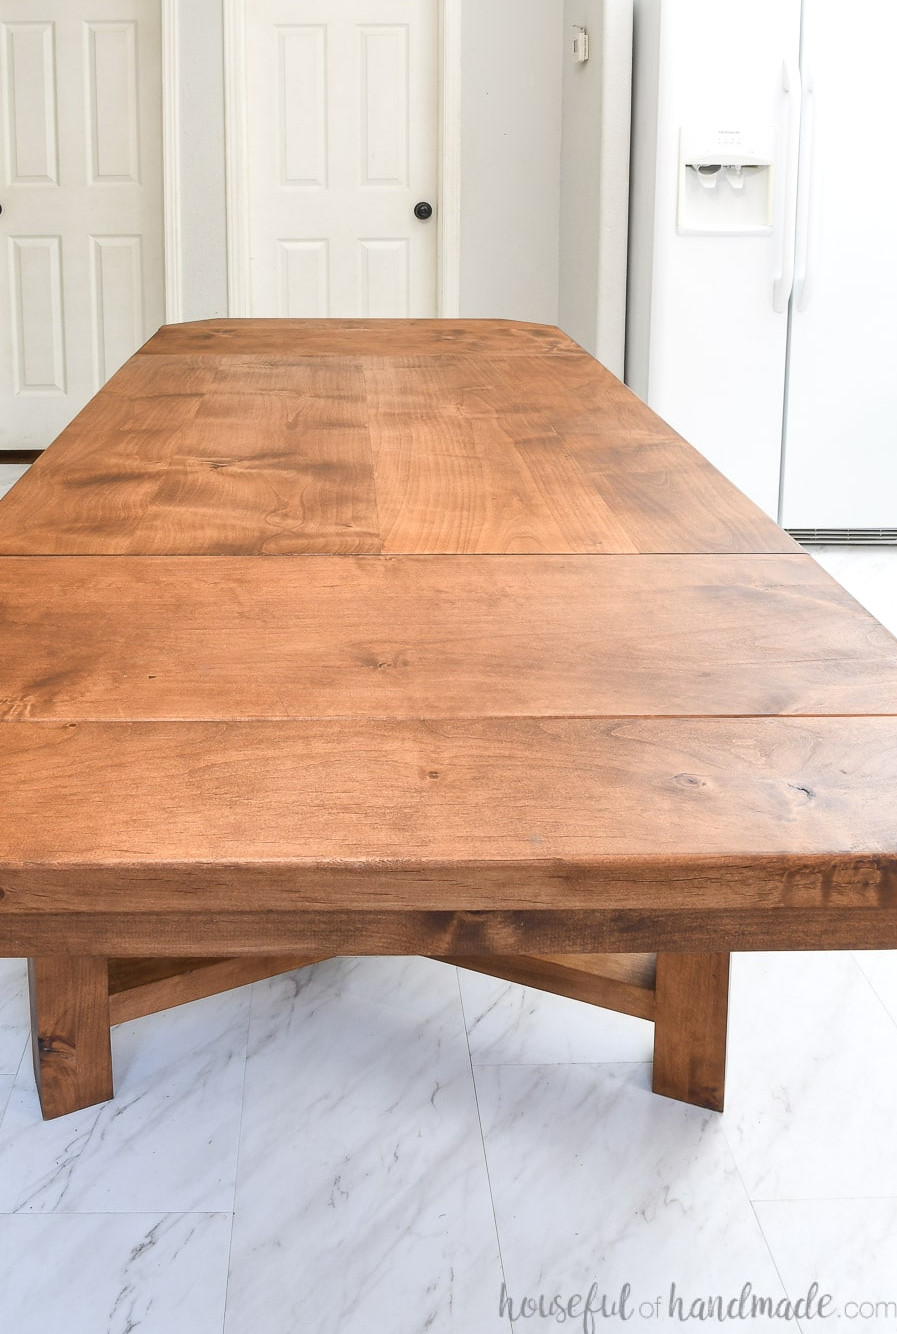
When guests arrive, we can attach two 14 1/2″ leaves, one to each end. The breadboard ends slide outward, allowing the leaves to fit inside. Once both leaves are installed, the table measures 89 1/2″ long!
We should comfortably fit 10 people around the fully extended table, and potentially more when children are included.
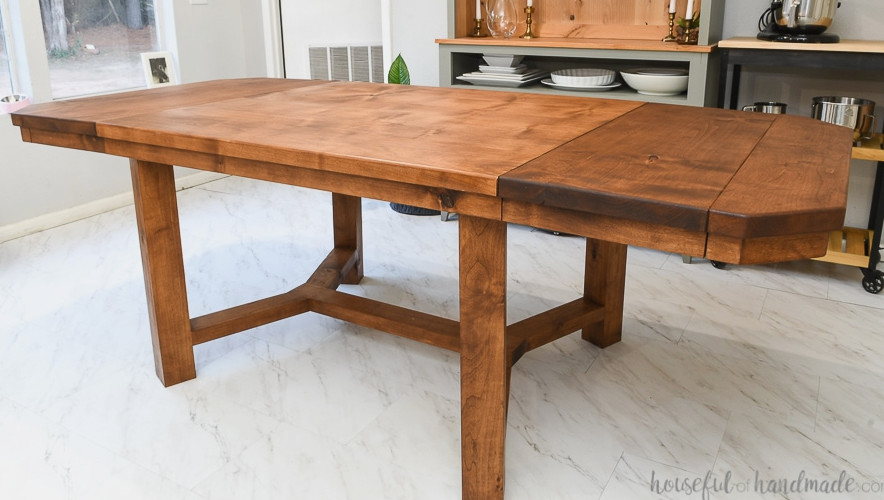
I will be honest: building this dining table was somewhat more challenging than I first expected. Achieving the precision required for the leaves to align flawlessly demanded time and patience.
Still, the finished piece is a stunning heirloom table, and I am excited to create many more family memories around it!
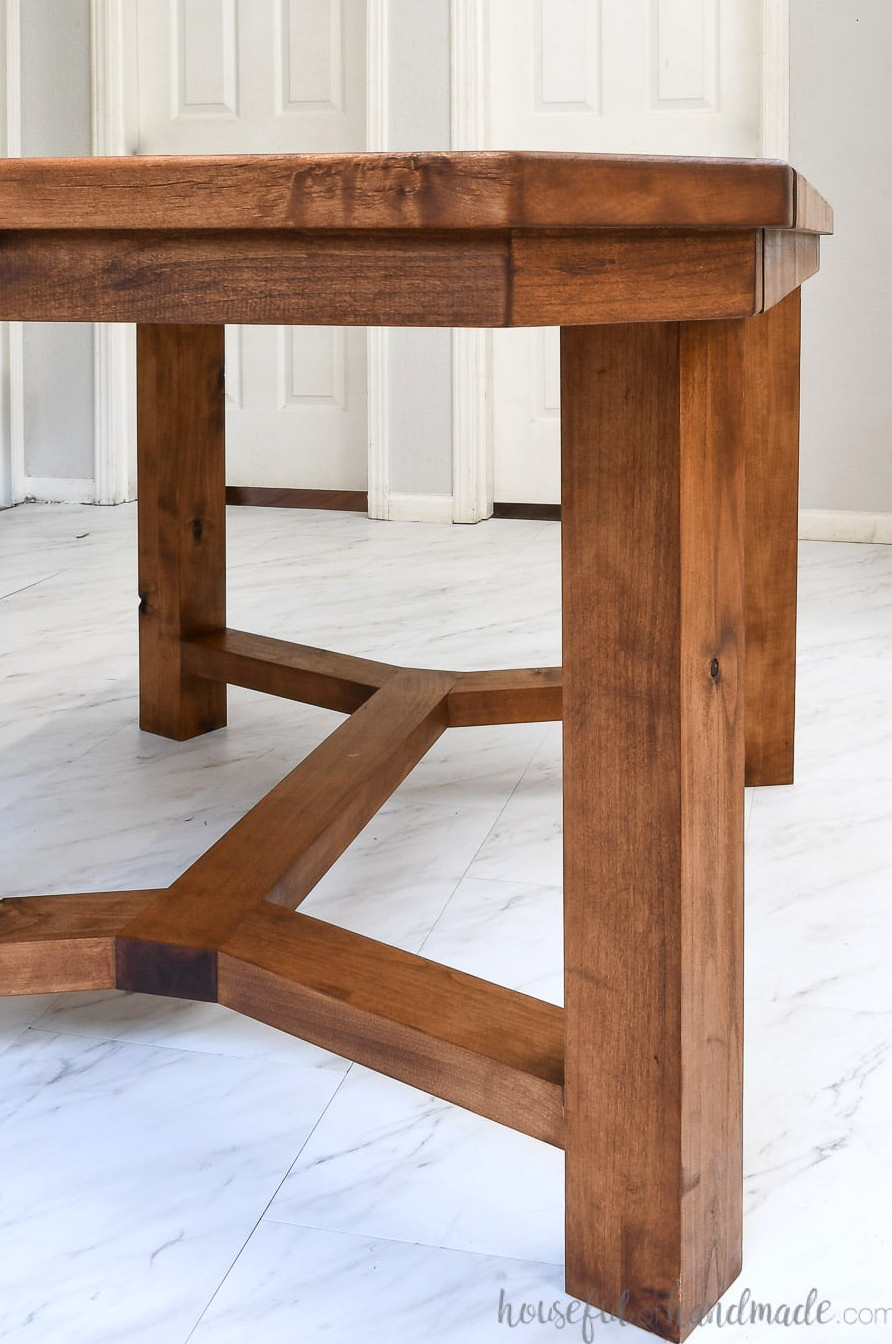
How to Make a Dining Table with 2 Leaves
Tools & Supplies
Overall Measurements
Once completed, the dining table measures 40″ wide, 30″ tall, and 60″ long without the leaves attached.
When the leaves are added, the dining table reaches 89 1/2″ in length.
Would You Rather Watch? View the Video Below
Cutting List
Prepare the components based on the cut diagram provided in the PDF plans.
Get the Premium PDF Woodworking Plans
PDF plans contain- Clearly Organized Cut List, Shopping List, Suggested Tools, Detailed Instructions with 3D drawings, & Useful Resources
BONUS- 3D SketchUp Model
STEP 1- Construct the Tabletop
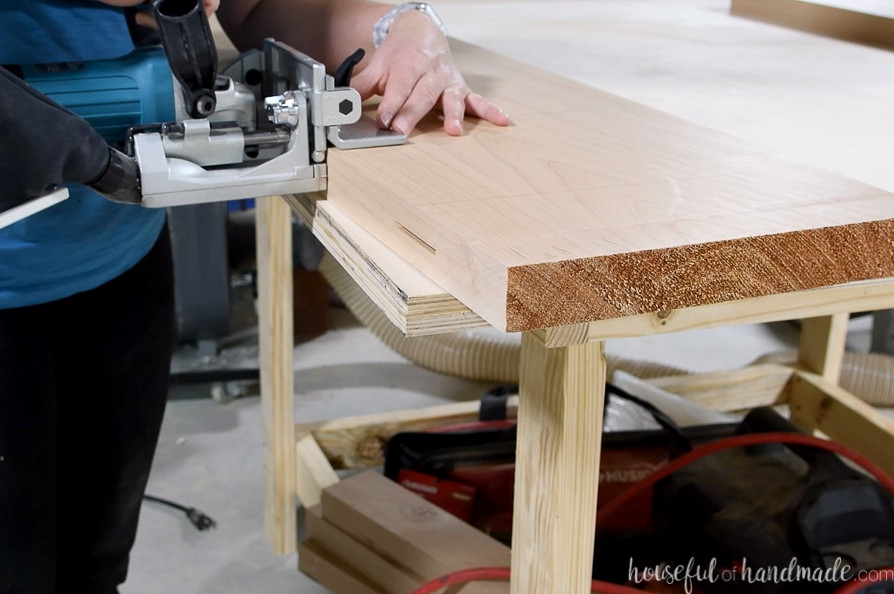
Several boards placed lengthwise make up the tabletop. I connected mine with biscuits, though pocket holes are another option because they are underneath and will remain hidden.
I purchased lumber from a lumberyard (you can find my advice for selecting lumber from a lumber yard in this DIY wood kitchen countertops post).
Still, I have provided dimensions for standard dimensional lumber, allowing you to build this table with materials from a big box store as well.
Put Together the Top
The completed tabletop, excluding the breadboards and leaves, measures 40″ wide by 46″ long. Cut the boards a little beyond 46″, then square the tabletop once they have been glued together.
For a tabletop made from dimensional lumber, join (4) 2×8 boards with (2) 2×6 boards.
Arrange every board as shown in the construction plans. On each board, indicate the locations for the biscuits or pocket holes.
- When using biscuits: make biscuit slots every 6-8″ along both edges of the center boards and only along the outer sides of the middle boards.
- When using pocket holes: create pocket holes for 1 1/2″ thick material every 6-8″ along one side of each board except the final board.
Spread wood glue along the board edges and insert biscuits if you are using them.
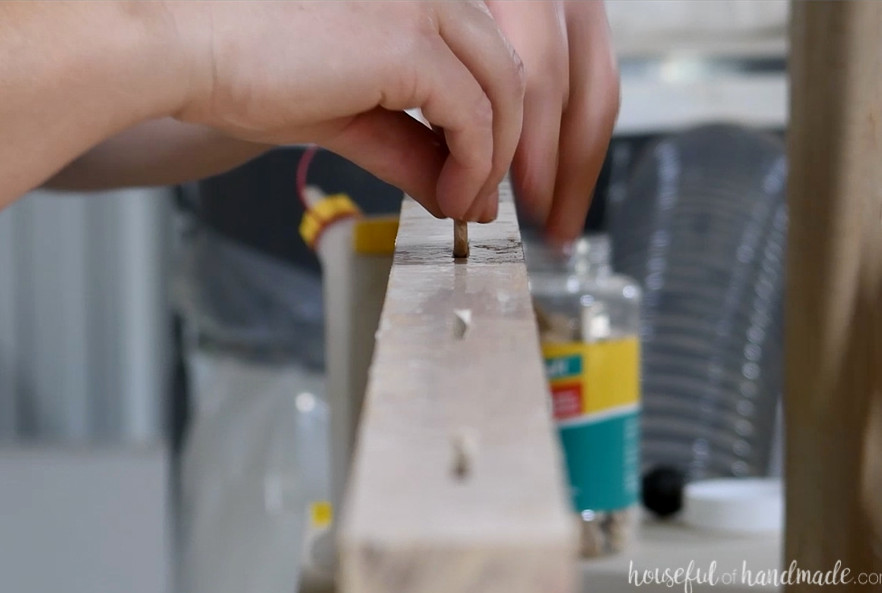
Tighten the boards together with clamps.
For pocket-hole construction, fasten the boards using 2 1/2″ pocket hole screws. Allow the assembly to dry.
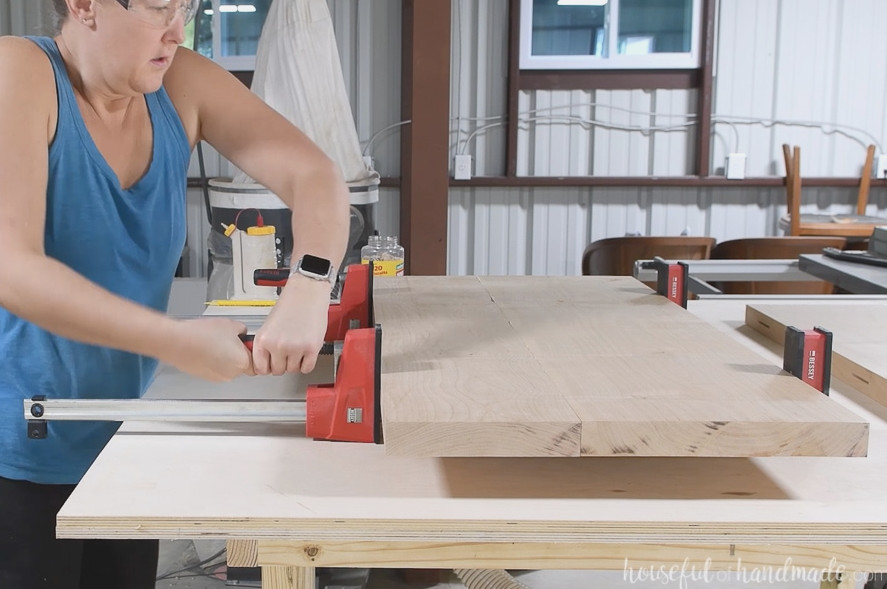
Because my tabletop consisted of 4 boards, I first connected the two outer boards with plenty of wood glue and biscuits.
I allowed them to set for a few hours.
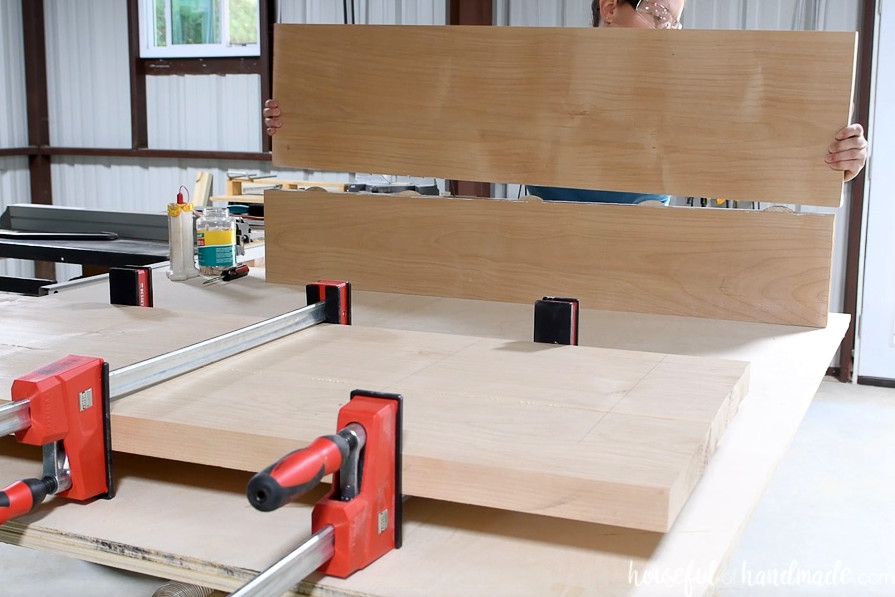
After that, I connected both sections.
This step proved somewhat difficult because we lacked clamps long enough to span the 40″-wide tabletop.
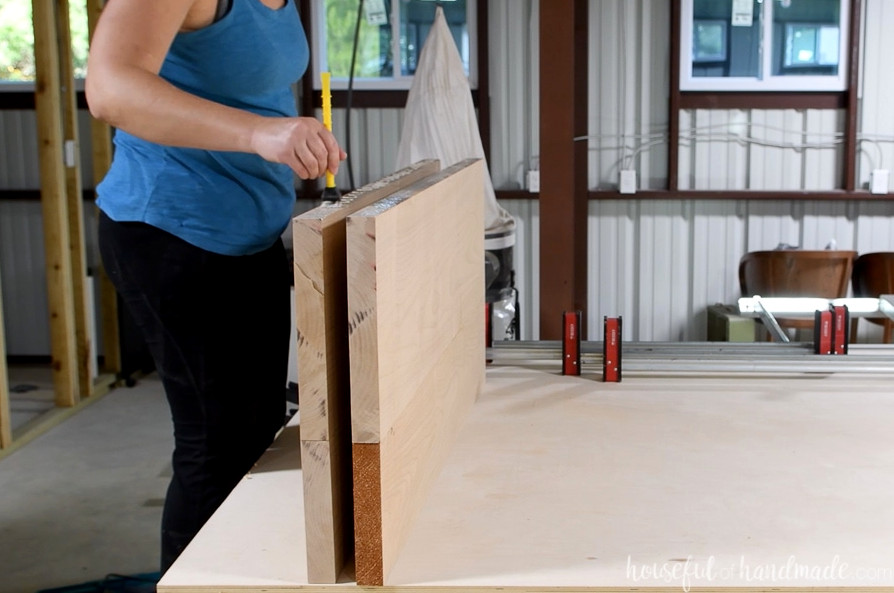
My husband came up with a clever solution, and ratchet straps gave us enough pressure to clamp everything securely.
Alternatively, you can place several pocket holes along one side to draw the boards together without clamps.
I also positioned a few clamps from end to end to increase the pressure. This created a tighter squeezeother than using the ratchet straps alone, which gave me a stronger connection.
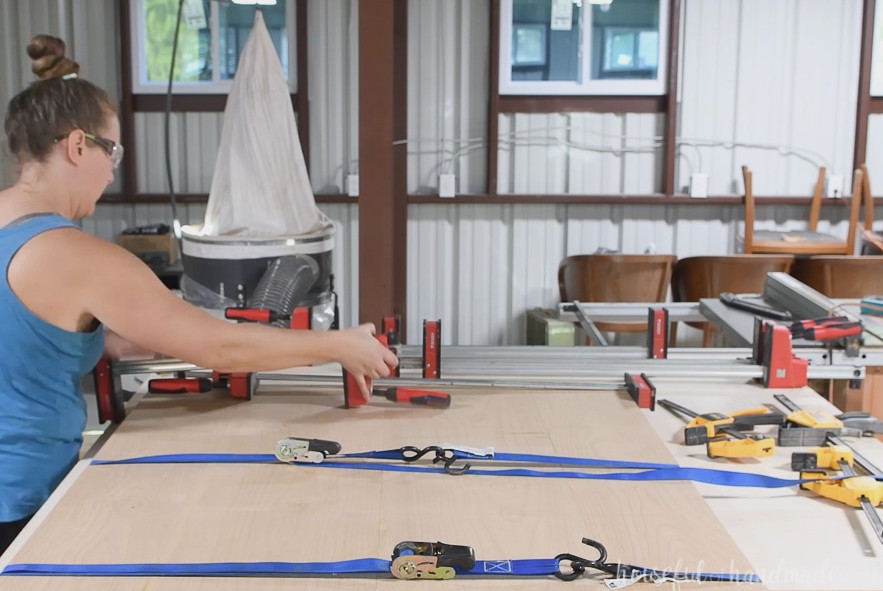
Square the ends of the tabletop by trimming it to 46″ in length.
Install the skirt
Next, add the skirt to the tabletop. Besides concealing the leaf extension slides, the skirt also provides a way to fasten the legs to the tabletop.
According to the PDF plans, cut the skirt pieces from the 1×3 boards at 46″ long.
Because I own a table saw, I ripped the skirt boards down to 2″, matching the width of the extension slides. I preferred the narrowest skirt possible because I like crossing my legs while seated.
However, you can use standard 1×3 lumber, which measures 2 1/2″ wide, without a table saw. Ripping the boards only saved me 1/2″.
To secure the skirt, make 1″ deep holes in the center of its edge. I used a self-centering dowel jig and indicated the drilling depth with a strip of blue painter’s tape.
Using a 3/8″ drill bit, make one hole 2″ from each end and additional holes every 7″ along the skirt. Next, choose a drill bit slightly smaller than your 2″ wood screws and predrill completely through the skirt board to avoid splitting.
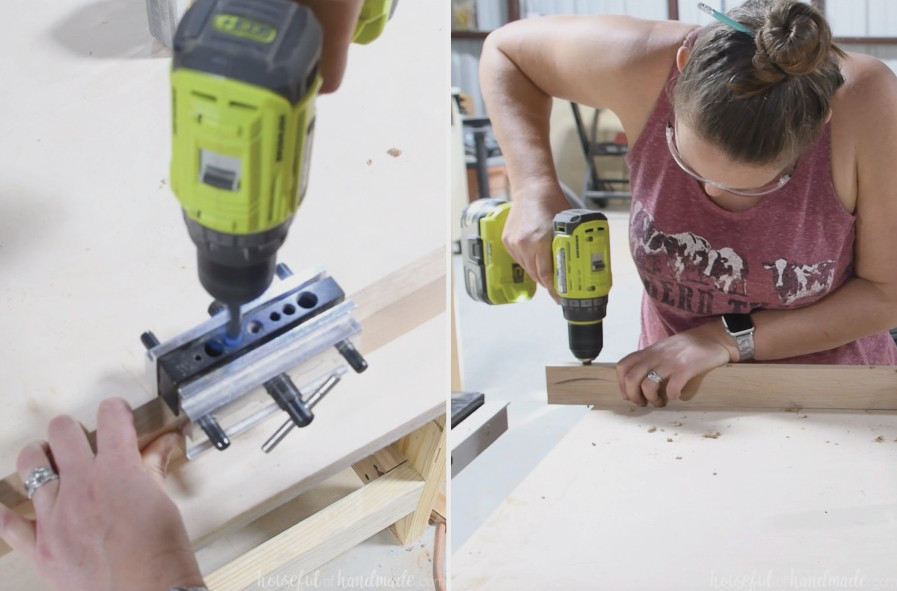
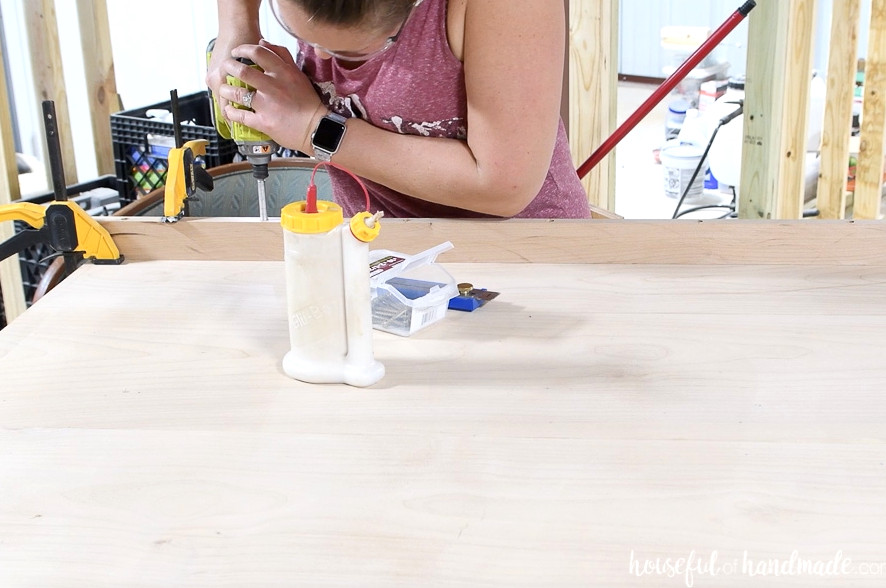
Position the skirt against the side of the completed tabletop, setting it 3/4″ inward from the edge, then fasten it with wood glue and 2″ wood screws.
Do the same on the opposite side of the table.
STEP 2- Construct the Base
To make the base, cut the legs from the 4×4 board at 28 1/2″ long.
Next, cut one 31 5/8″ base center and two 14 5/8″ base sides from the 2×4 board. Cut one end of each base side at a 22 1/2″ degree angle.
Place two pocket-hole sets, sized for 1 1/2″-thick material, at both ends of each of the four base sides. Mirror their placement so that every pocket hole faces downward once the base is assembled.
Take care when drilling the pocket holes on the angled ends, ensuring they cannot be seen from the side or accidentally break through the end.
I used the two inner pocket holes (A & B) on the angled end to prevent this issue.
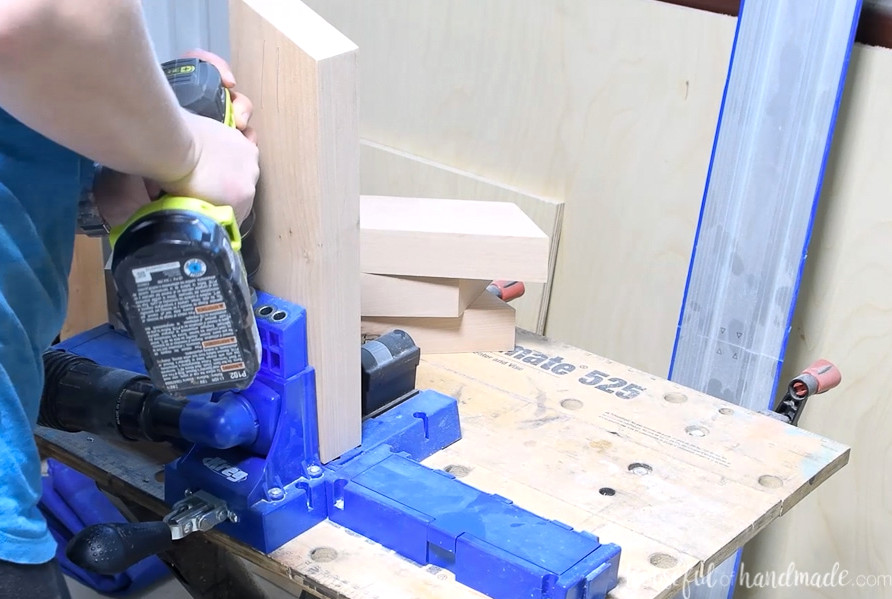
Now you can assemble the entire base.
I first connected the base sides to the center and then fastened the completed assembly to the legs, but aligning everything on the legs was difficult because of their turn.
Instead, attach the legs to the side bases first, followed by connecting the side bases to the center base. The premium PDF plans show this recommended sequence with 3D diagrams.
Position the side bases 4″ above the floor when securing them to the legs. You can raise or lower this height as desired.
I chose this measurement so my Roomba vacuum could clean beneath the base without difficulty.
Use wood glue and 2 1/2″ pocket-hole screws to fasten the 90 degree angle side of each base side to the legs.
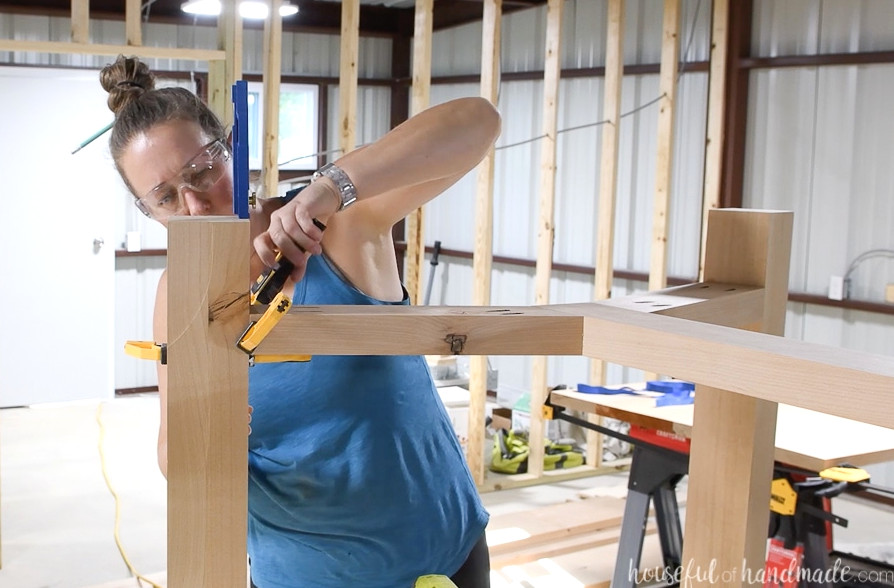
As you fasten the side base pieces to the legs, position the angled edge so it remains flush with the side of the center base piece.
Secure the pieces using wood glue and 2 1/2″ pocket-hole screws.
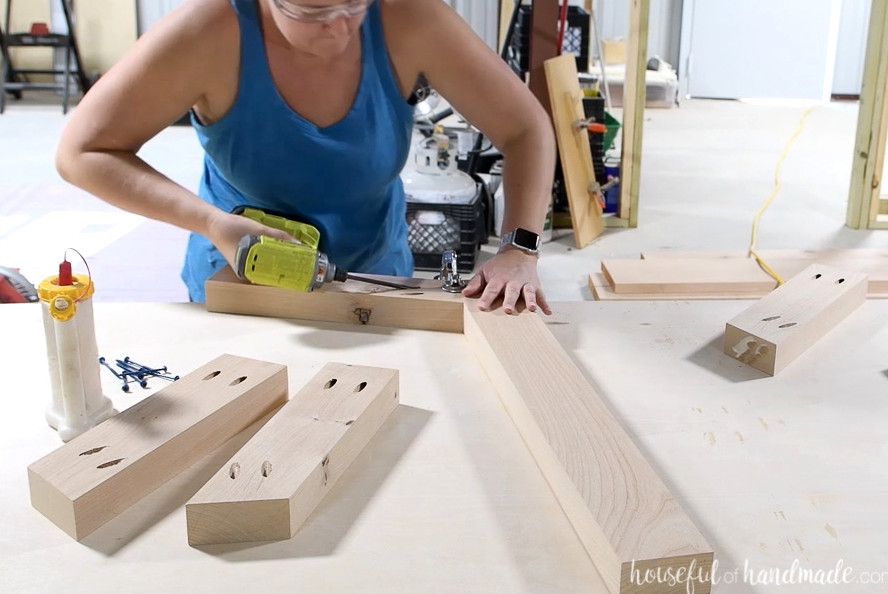
Install the remaining side so it mirrors the first one.
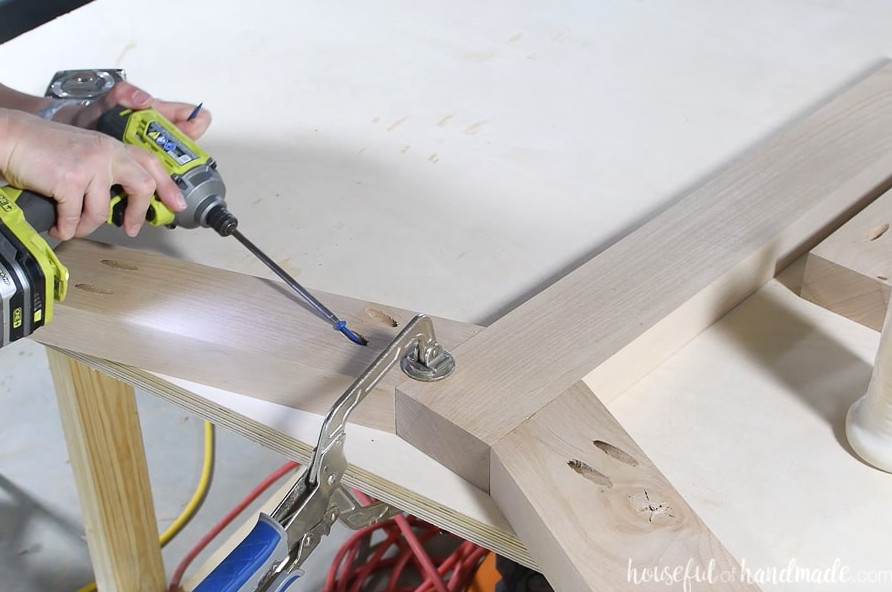
STEP 3- Fasten the Base
To begin attaching the legs and base to the tabletop, install two figure 8 fasteners on top of each leg. Place the fasteners on the leg sides that do not extend along the skirt sides of the table.
With a Forstner bit slightly larger than the figure 8 fastener, drill a hole just beyond the edge of the leg’s top side. Fasten one side of a figure 8 connector into the hole.
Repeat this process on every leg.
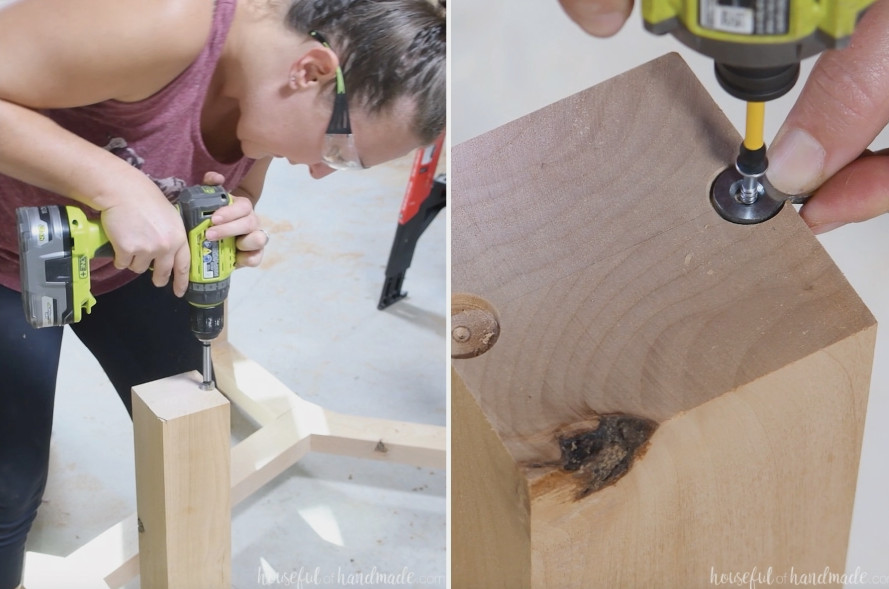
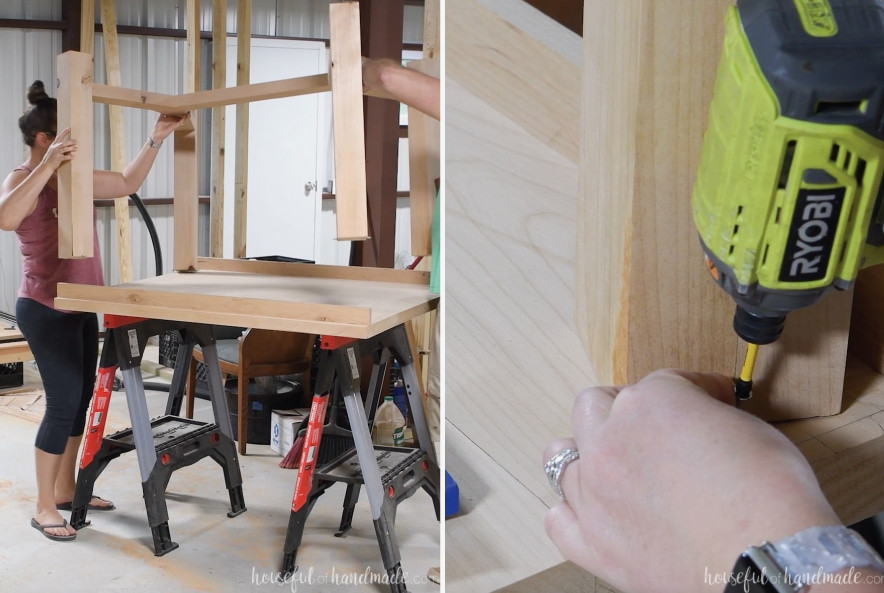
Turn the tabletop upside down on your work surface, then position the base over it. Set the legs so they form a 22 1/2 degree angle against the table edge.
Fasten the legs to the tabletop using the opposite end of each figure 8 fastener. One corner of every leg should rest against the skirt, while the other needs to be 3/4″ from the tabletop edge.
Next, install an interior skirt to provide the legs with additional stability. Cut one end at a 67 1/2 degree angle.
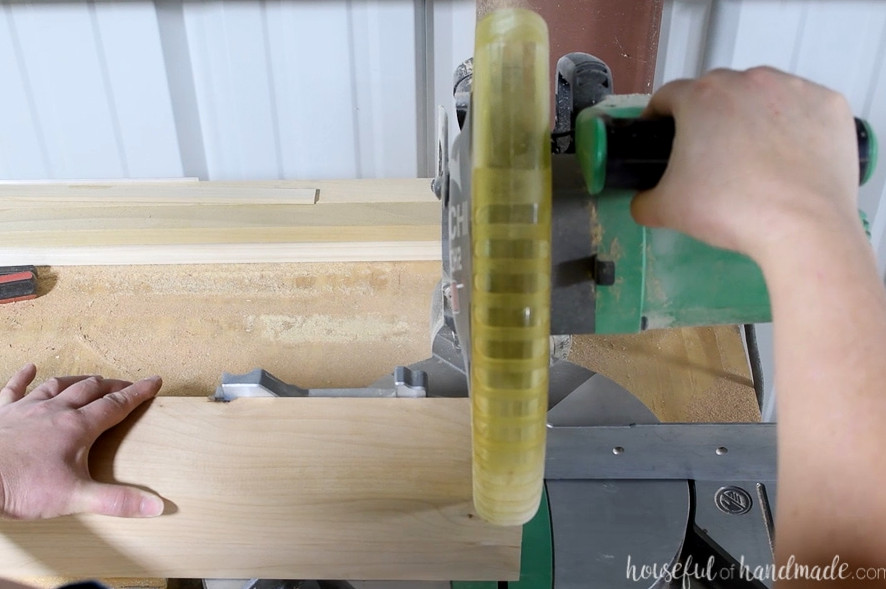
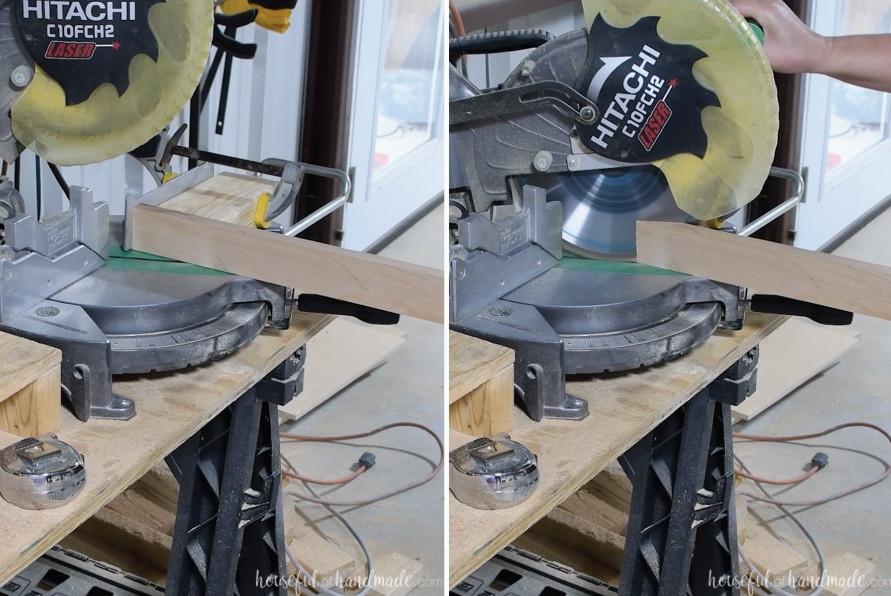
Making this cut on a miter saw can be difficult, so I created a temporary jig for the task. Set the miter saw to a 22 1/2 degree angle, then clamp a piece of 2×4 onto the saw fence far enough from the angled blade to avoid cutting it.
I could then hold the 1×3 board against both the 2×4 and the fence for support while cutting the sharp angle.
Hold the cut board against the inside of the table skirt, then mark the cutting line along the table leg’s edge.
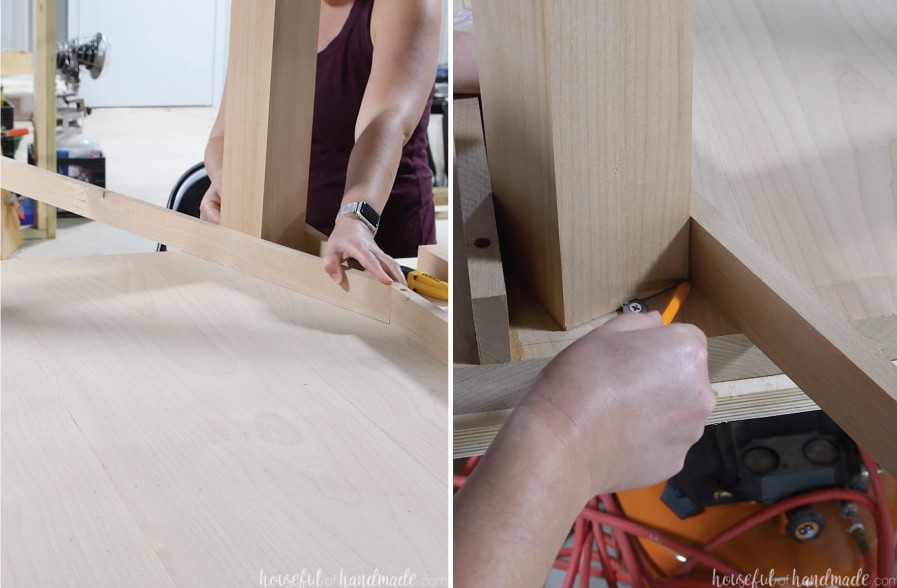
Trim the board to size. Bore (2) 1″ holes in its side, as you did for the table skirt, and predrill completely through it. Next, secure it to the table’s interior.
Spread wood glue along the board’s side that meets the tabletop and skirt, but leave the section connecting to the leg unglued. This allows the legs to be removed later for transportation or storage.
Fasten the skirt to the tabletop using 2″ wood screws. Secure it to the leg with additional 2″ wood screws, then attach it to the inside of the skirt with 1″ wood screws.
Do the same for all 4 legs.
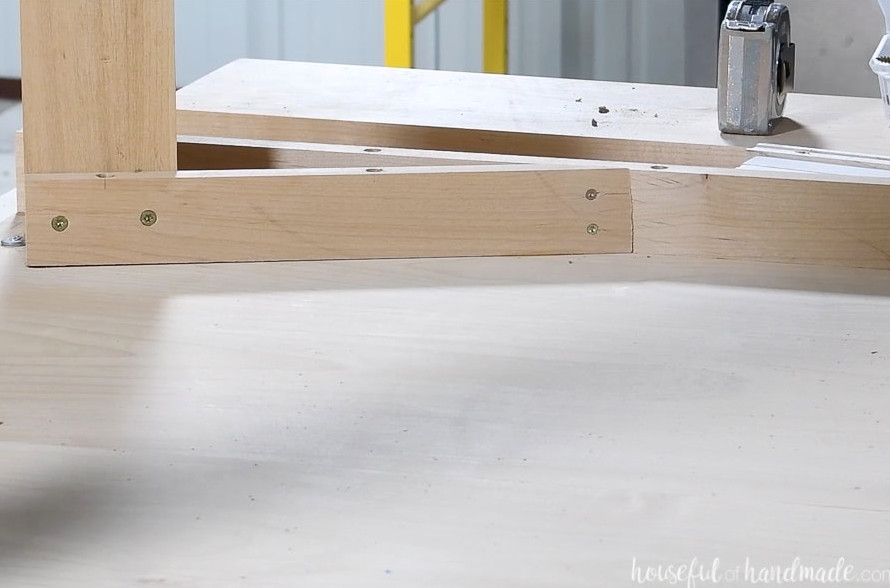
STEP 4- Construct the Breadboard Ends
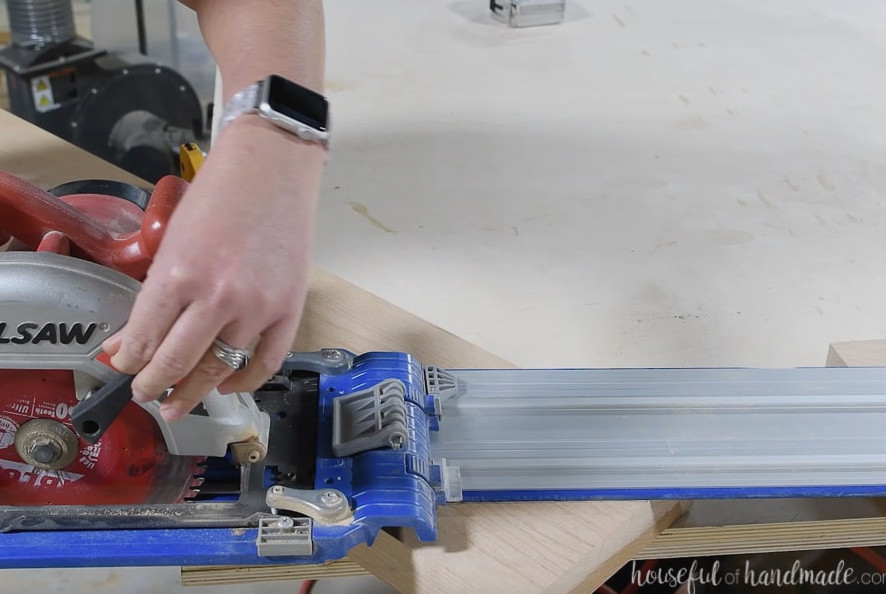
From the 2×8 boards, cut pieces measuring 40″ for the ends. Measure 5″ from the top and 5″ down from the side, then draw a connecting line.
Use a circular saw and guide track to remove this section.
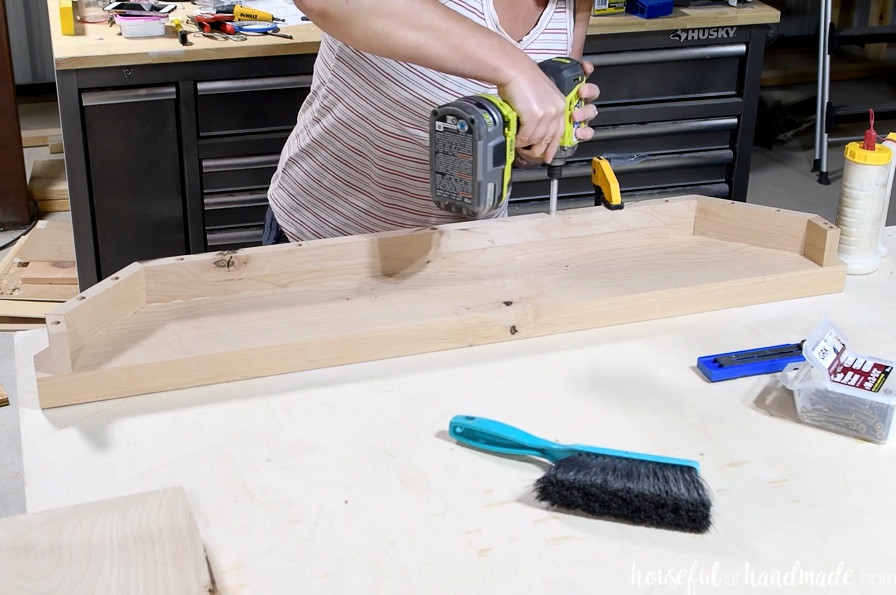
For each breadboard skirt, cut 2″ pieces with a 22 1/2 degree angle at one end, along with 6 3/8″ pieces featuring a 22 1/2 degree angle at both ends.
In the center of the shorter piece, drill one 1″ deep 3/8″ hole, and make 2 holes in the other piece. Then predrill completely through for the screws, just as you did with the remaining skirt sections.
Check that the holes are positioned on the proper sides so the parts mirror each other after installation.
Position the 2″ piece 3/4″ from the breadboard end and even with its side. Fasten it with wood glue and 2″ wood screws.
Install the remaining pieces with the angled edges aligned and the front positioned 3/4″ behind the breadboard’s angled cut. Secure them using wood glue and 2″ wood screws.
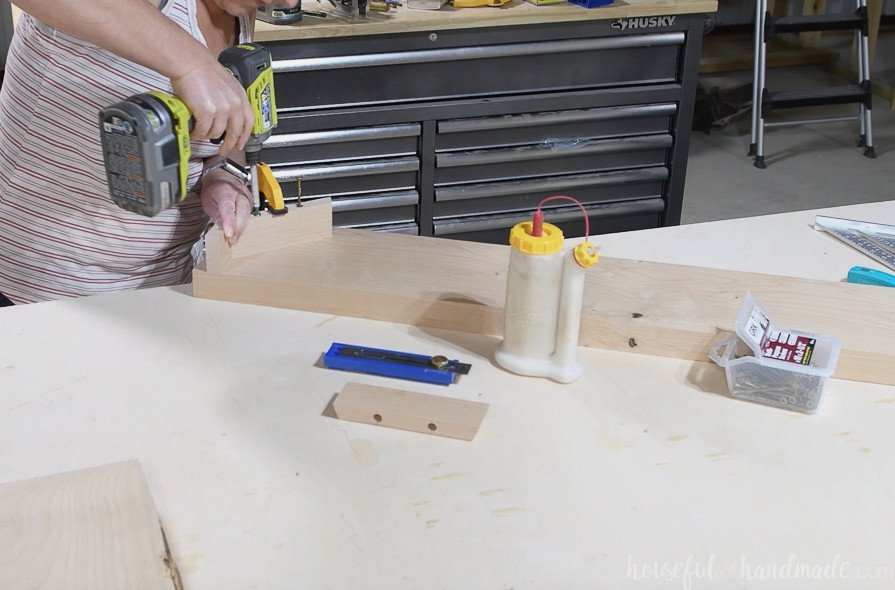
Measure the gap between the two sides, then cut the last skirt piece to match. This section also requires a 22 1/2″ degree cut at both ends.
Drill the holes and make the screw pilot holes. Attach the piece with wood glue and 2″ wood screws.
Repeat the process for the second breadboard, mirroring the layout because it will be installed at the opposite end of the table.
STEP 5- Assemble the Leaves
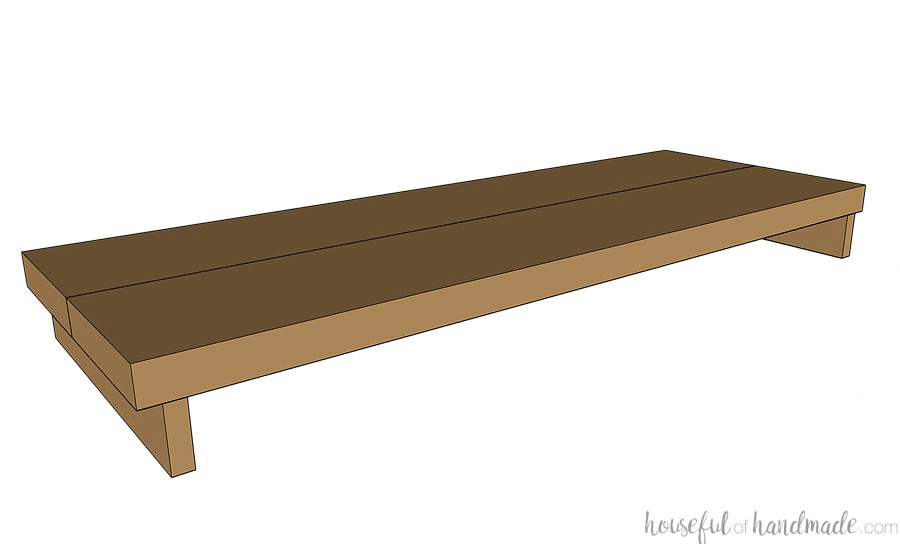
To make the two leaves, cut 40″ pieces from the 2×8 boards. Each leaf consists of 2 pieces.
Join the two pieces along their long edges with wood glue and biscuits or pocket holes.
Next, cut the 14 1/2″ skirt sections from the 1×3 board for each leaf. Install them using the same method as the other skirt pieces. Position them 3/4″ inward from the leaf edges.
STEP 6- Connect the Ends and Leaves
It’s now time to assemble all the components. This stage demands accuracy, so grab a very sharp pencil and ensure the area is well lit enough to see the fine lines clearly.
From this point forward, I used the rigid foam kept in my shop for cutting plywood with a circular saw on the shop floor as my work surface. It shielded the tabletop and made kneeling beside it more comfortable.
Measure and draw a line 11″ from both sides of the tabletop. Be certain that each line is exactly perpendicular to the tabletop’s edge. If the slides are crooked, they may not move smoothly or could push the ends sideways, preventing everything from aligning properly when opened.
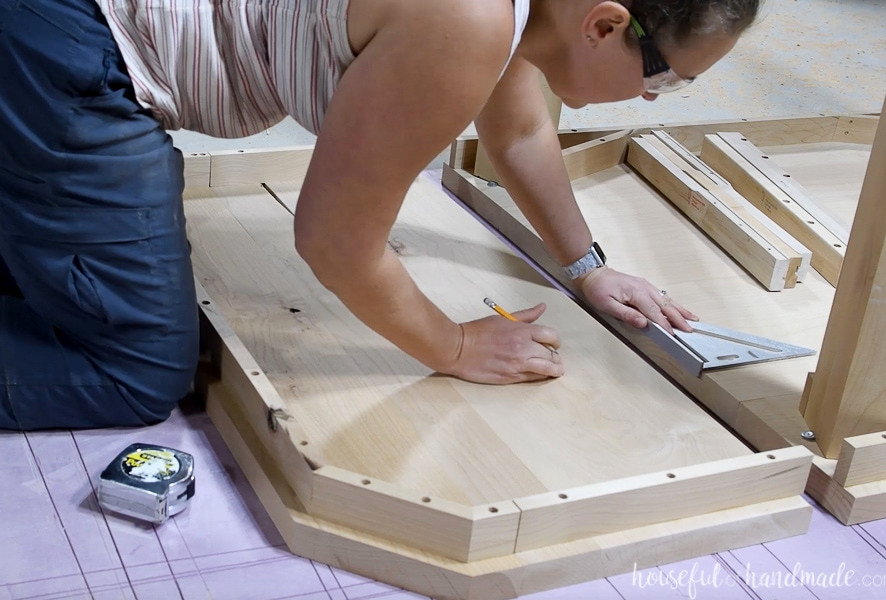
Position the table slides with their sides aligned against this line. Follow the hardware and screw recommendations for the particular slides you purchased. Secure them to the tabletop and the breadboard ends.
Because my slides had designated right and left sides, inspect yours to see whether they are the same and install each one on its correct side.
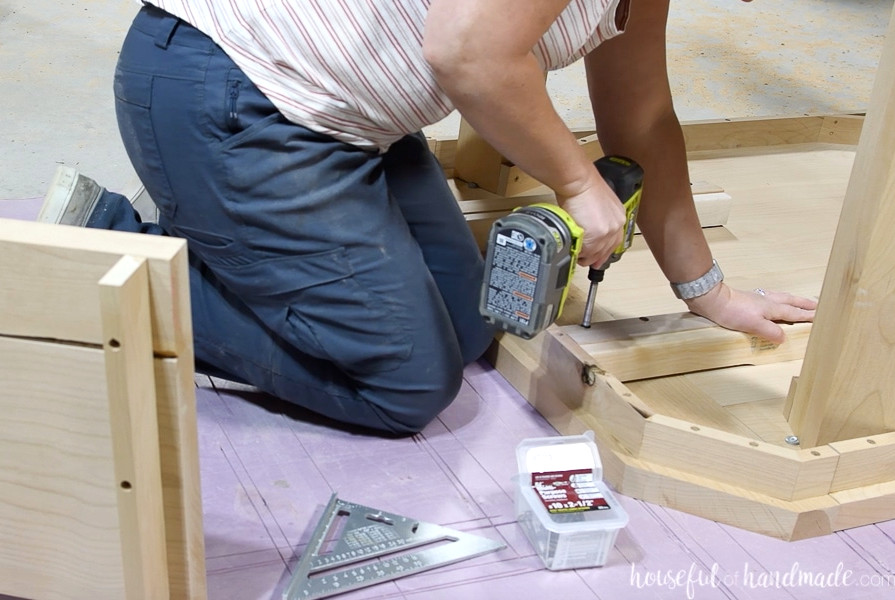
Get someone to help you turn the table over. Place the leaf into the table’s side, resting it on the slides. The surfaces may not align exactly yet, but the pins will help correct this.
Align the sides as closely as possible, keeping in mind that you’ll sand the ends later for an even better fit once everything is assembled.
Indicate the positions where the shelf pins will go. They will assist in aligning the leaves and breadboard ends during installation while also providing additional support.
Although this step is optional, it gives your DIY dining table a more professional finish.
I installed 4 pins along both sides, marking a position every 8″.
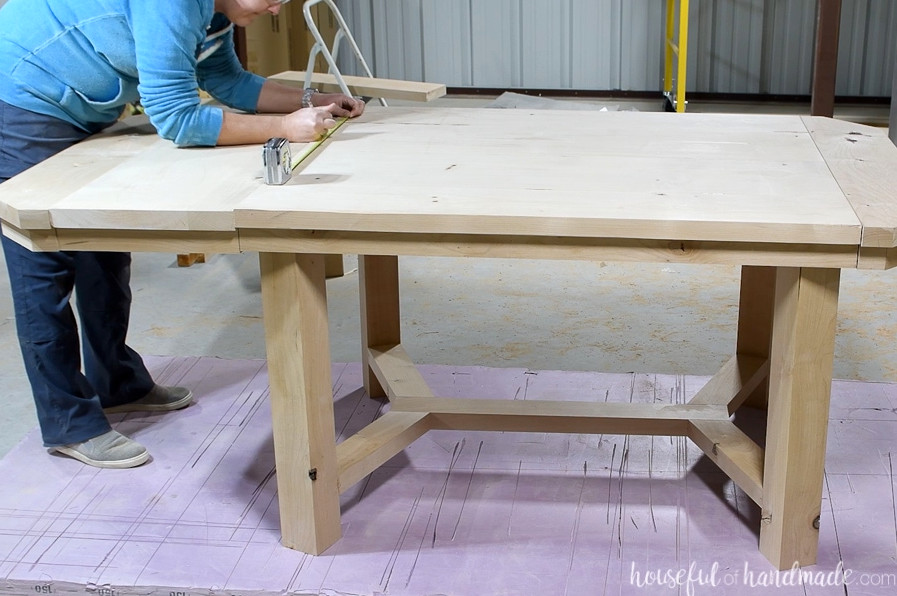
Using a square positioned flush with the table’s end, mark a line across the joint between the tabletop and leaf, as well as the leaf and end. Check that the mark aligns when the leaf is removed between the tabletop and end.
Next, use the square to carry this mark over to the side of the opening.
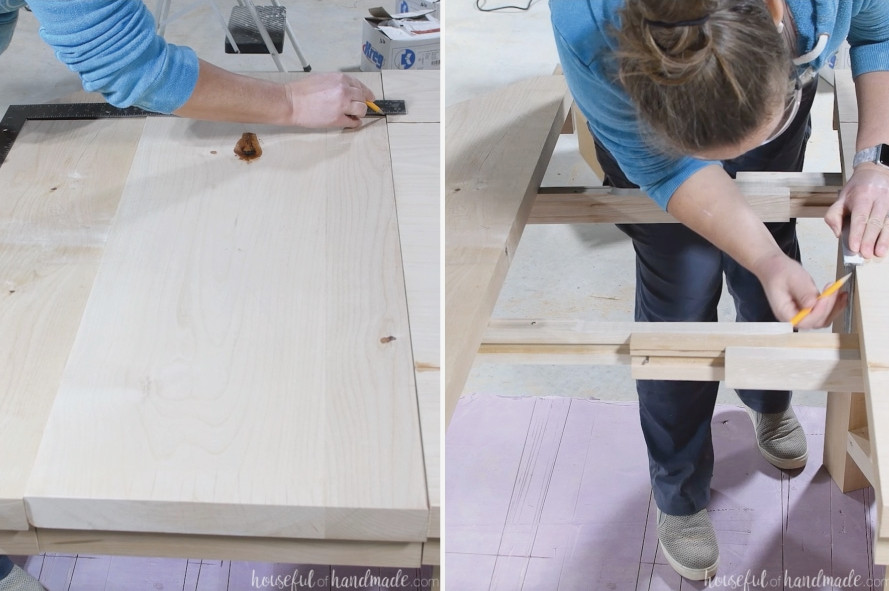
With the self-centering dowel jig, carefully align the 1/4″ hole mark on the jig with the line you made for the pin. Bore a 1/4″ hole slightly deeper than 1/2″ of the shelf pin’s length.
Make these holes on both sides of the leaf, as well as on the inside of the end and tabletop.
Tap the shelf pins into the tabletop side with a hammer. If, like mine, your shelf pins feature a small ring around them, drive them in until the ring sits inside the end of the tabletop.
Using a 9/32 drill bit, which is only 1/32″ wider than the 1/4″ bit used previously, drill the remaining holes where shelf pins were not installed. The larger openings will make sliding the sides apart to insert the leaves easier.
Repeat this process on the leaf. The side joining the tabletop should receive the slightly wider holes, while the side connecting to the breadboard should have the pins hammered into place.
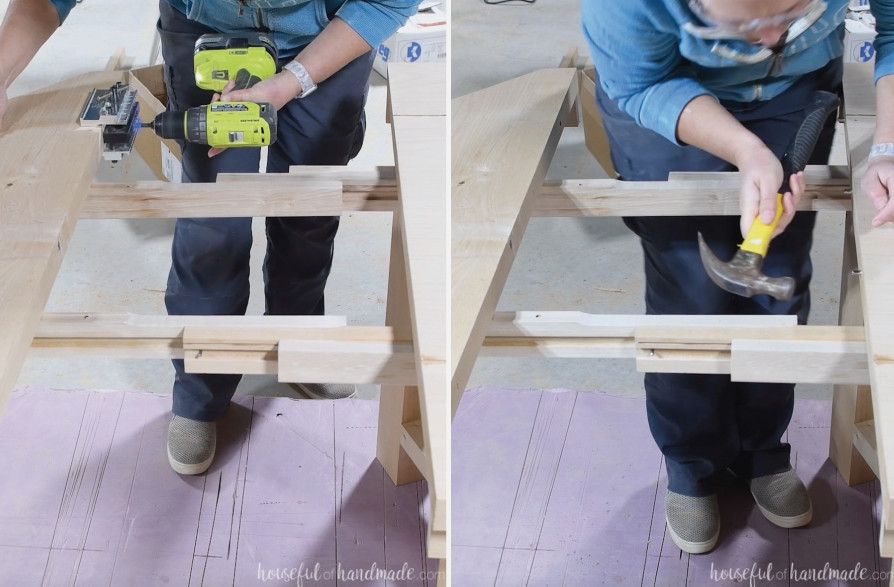
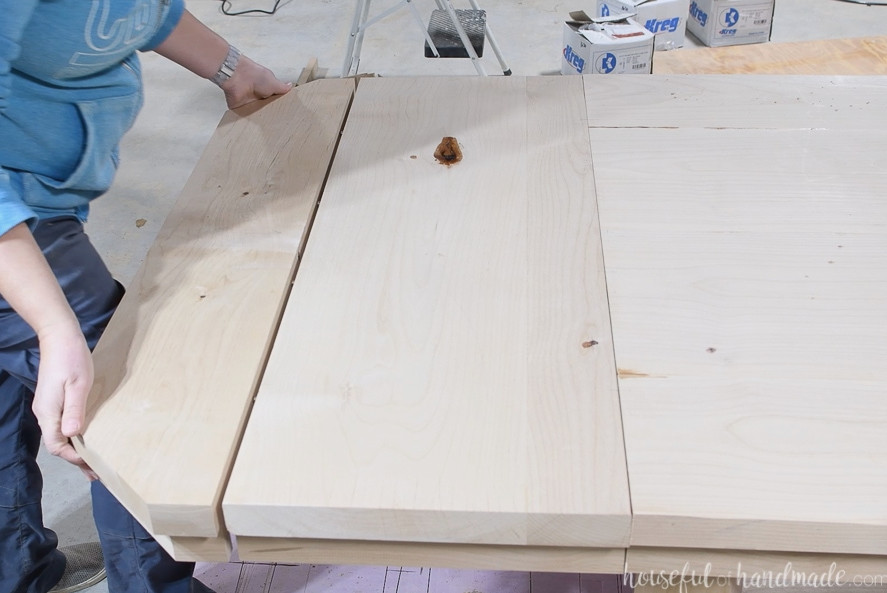
Now check the pins by pressing all the pieces together. It may take some slight shifting to get everything aligned, but the parts should fit together tightly.
STEP 7- Premium Finishing Details
Once both leaves are in place, sand the whole table. This gives you the opportunity to smooth out any high spots between the leaves, tabletop, and ends.
I began with 150-grit sandpaper to level the raised areas, then completed the entire table with 220-grit sanding.
For an especially polished appearance, use a palm router to add a small chamfer along the edges of the leaves, tabletop, and ends.
This helps disguise minor imperfections once everything is assembled, and it also creates an attractive finished look.
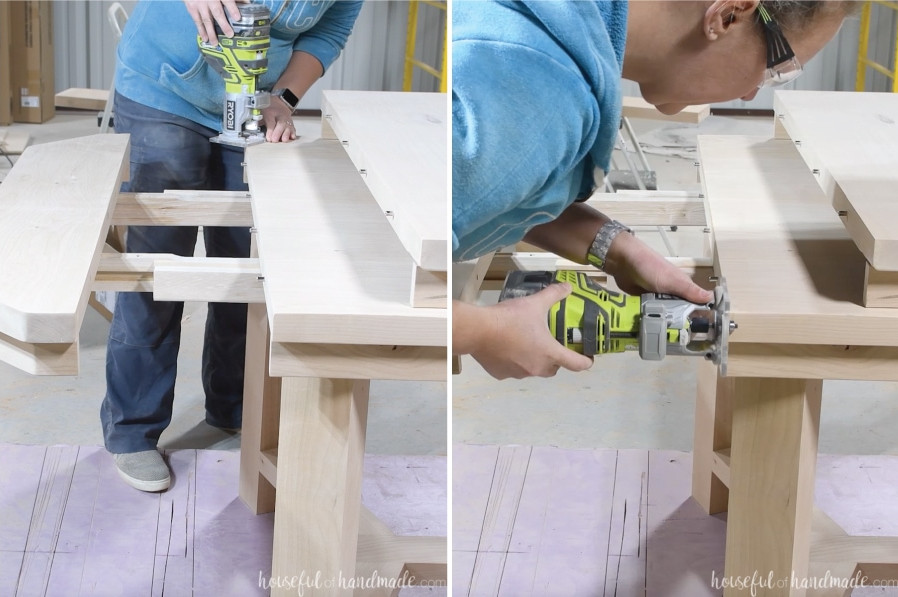
After installing the leaves, use the router to create a round-over, or another decorative profile, around the entire tabletop.
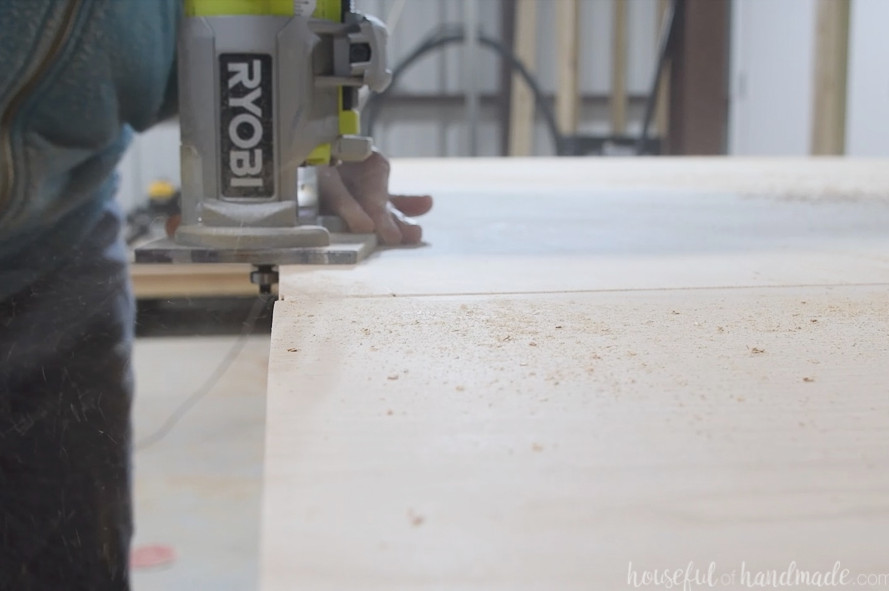
Perform any additional sanding touch-ups where necessary.
STEP 8- Apply the TrueTone Finish
Now it’s finally time to apply the TrueTone finish. It’s the ideal way to complete all your hard work!
Before applying the finish, vacuum dust from the entire table. Follow up by wiping it down with a tack cloth to remove any remaining particles.
If preferred, you can take off the breadboard ends while finishing. However, because TrueTone is rubbed in, applying it around the table slides was simple.
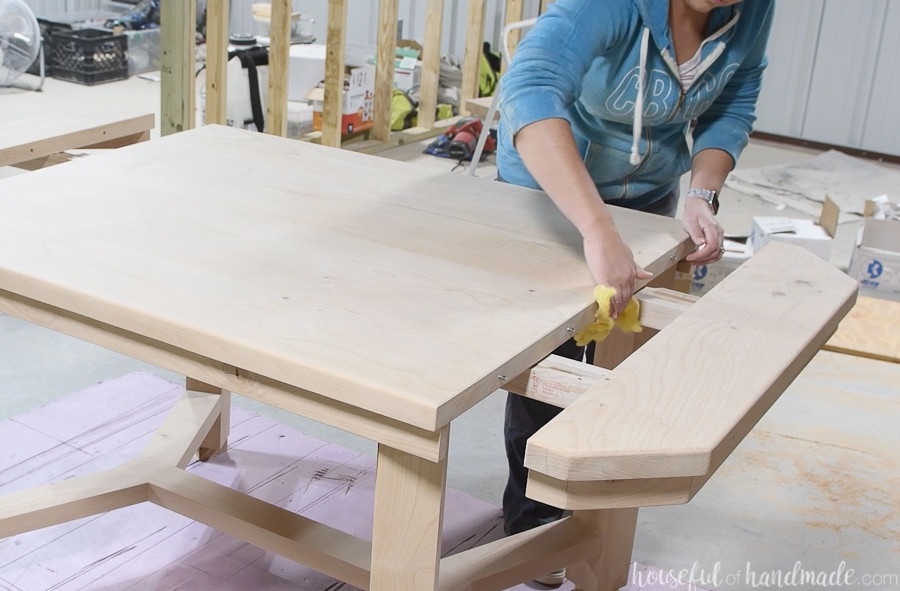
When applying the TrueTone color infused tung oil, be certain to wear gloves. Next, buff the finish into the wood with a clean, lint-free cloth.
You may pour a small puddle onto the surface or dip your rag directly into the color. For the color, I found the dipping method easier.
With the small containers, I covered the opening with the rag and turned the bottle upside down. I then used the rag to work the finish into the wood using circular motions.
This method also kept the color blended while I worked, so I didn’t need to stop and shake it repeatedly.
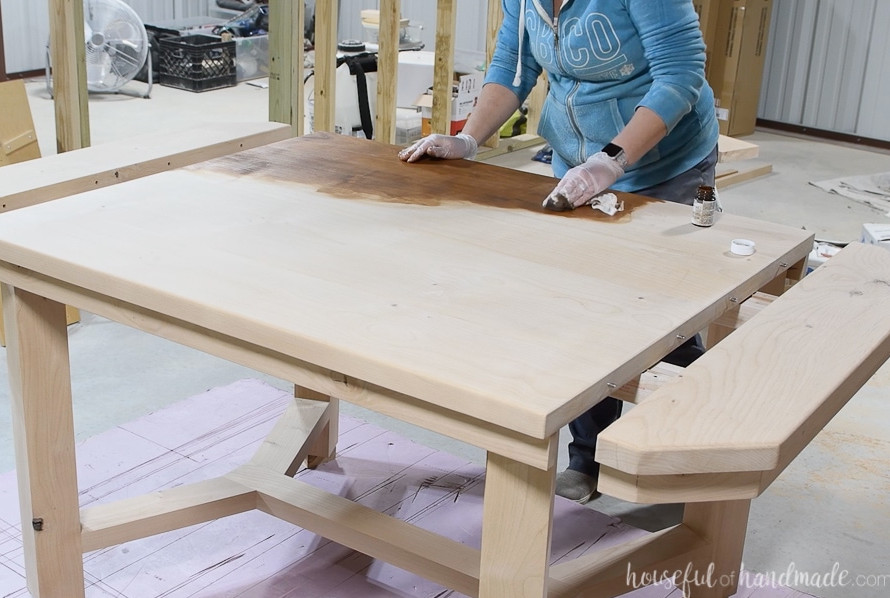
Applying the buff in finish is quite simple. Continue rubbing until the color looks even throughout.
Do not allow excess tung oil to remain on the surface for an extended period. Instead, use a fresh rag to buff away any extra glossy areas.
Knots, splits, and softer sections of grain can release extra tung oil as the finish dries. Simply wipe away any visible spots with a clean cloth.
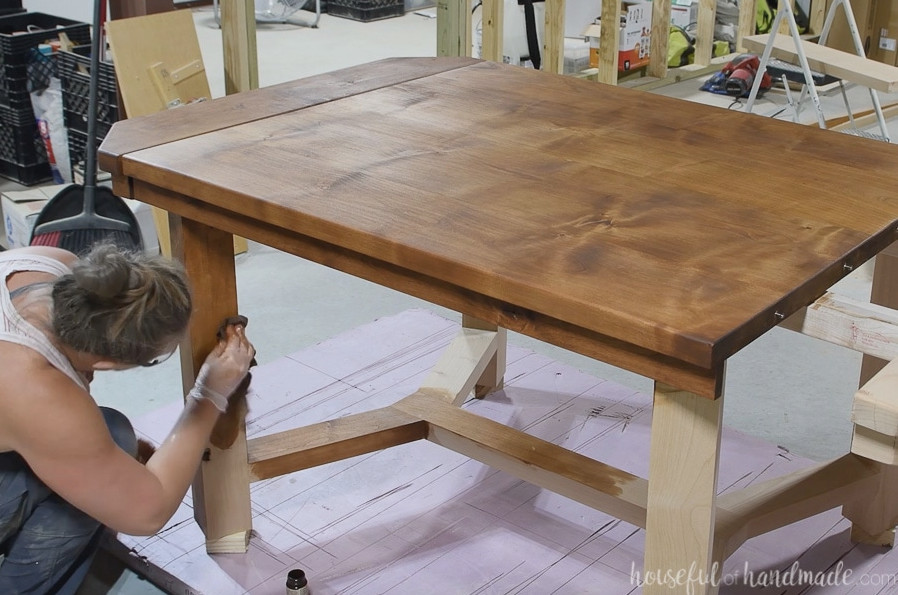
Allow the color infused coat to dry for 24 hours before adding the finishing coat. Since Waterlox cures when exposed to oxygen, open some windows or use a few fans to improve air circulation and support proper drying.
After it has dried, apply the Tung oil finish. This transparent coat covers the color layer. Because the color coat alone does not provide waterproofing, it needs a sealing layer.
If you prefer a more polished appearance, you can use other Waterlox finishes over the TrueTone color infused tung oil.
For our dining table, however, I wanted a natural, matte appearance. That is the look achieved with the TrueTone Tung Oil finish.
To use it, place a small puddle of sealer on the dry tabletop. As with the color coat, work it into the wood using a clean, lint-free cloth.
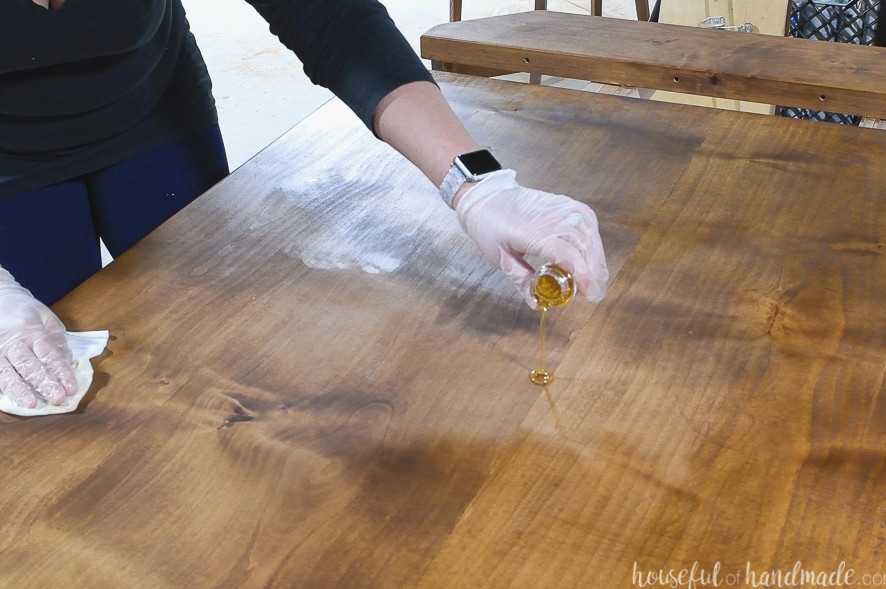
Keep rubbing it in with circular movements, adding more finish whenever necessary. Unlike other finishes, the wood surface should not appear wet.
This product soaks into the wood and leaves only a subtle sheen.
After 15-30 minutes, inspect the surface for glossy areas and buff them away with a fresh rag. Do not let extra tung oil remain on top of the wood.
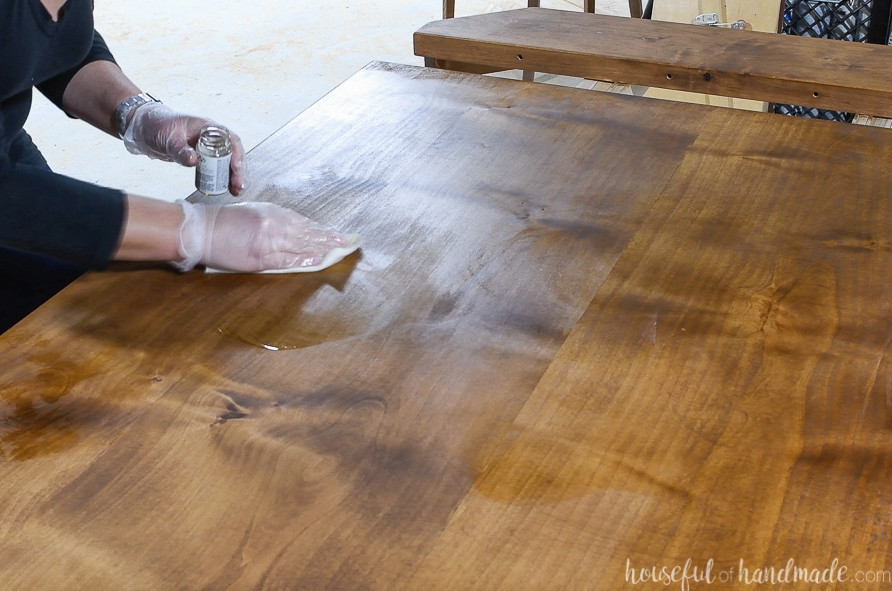
Allow the TrueTone finish to dry in the same manner as the color coat. Keep the air moving by opening windows and running fans.
If you want, apply a second coat. Be sure to allow 24 hours between applications.
TrueTone will not resist water until it has cured for 7 days. During that period, provide plenty of ventilation and keep the table protected from moisture.
STEP 9- Add Final Hardware
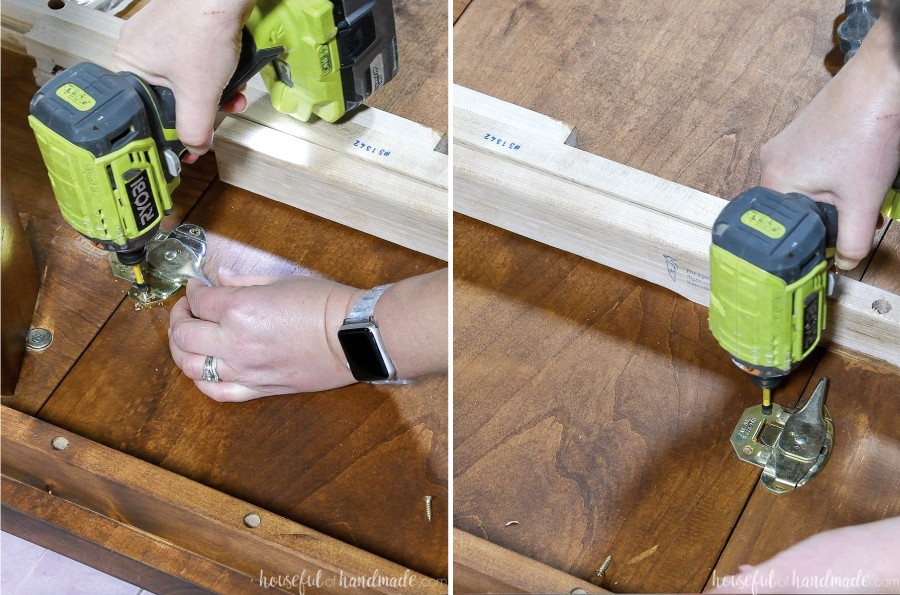
The last task is installing the table leaf locks beneath the tabletop.
They secure the ends/leaves in position while also tightening the seam to help stop food from getting into the gap.
Begin by holding the breadboard end tightly against the tabletop. Install the table leaf lock as directed in the instructions.
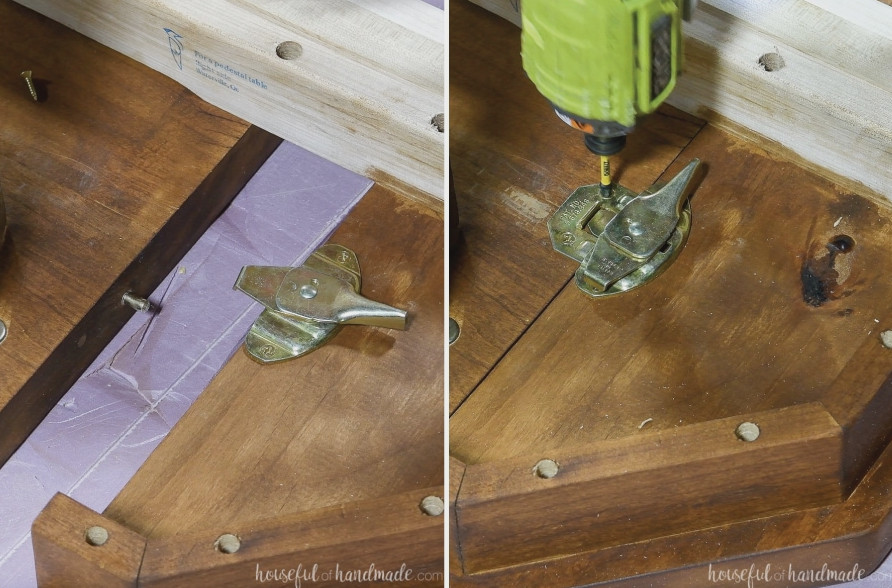
Next, release the locks and slide the leaf into position. Press the pieces firmly together.
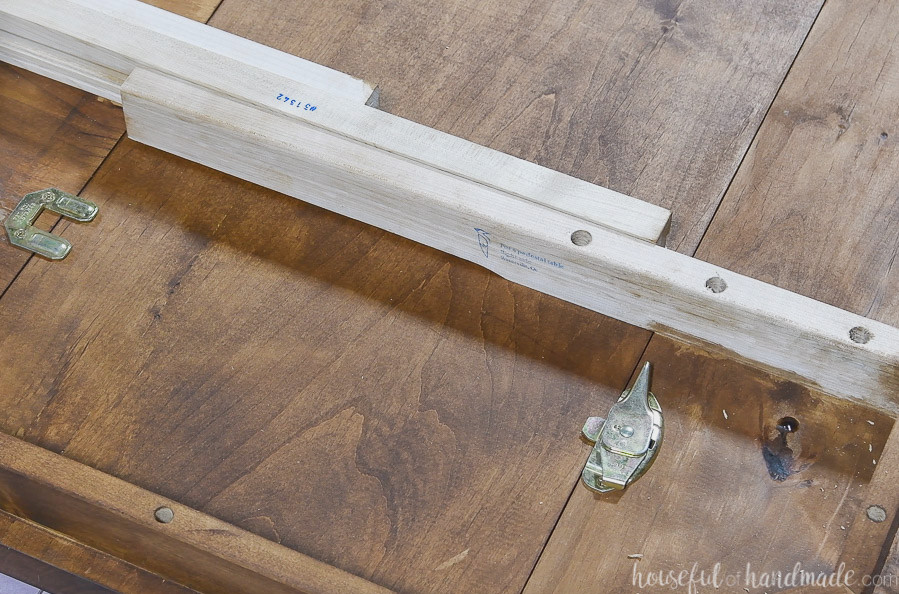
Install the remaining leaf locks so they connect with the pieces already in place.
Do the same on the opposite end.
You’ve completed it!
Don’t Forget to Grab the Printable PDF Plans Here!
Premium plans feature:
- Suggested tools
- Grocery list
- Clear, easy-to-follow cut list chart
- Cutting diagrams
- Detailed instructions with 3D illustrations
- Useful resources
- BONUS: 3D SketchUp model
And just like that, your table is finished!!!
This beautiful dining table with leaves is certainly a more ambitious DIY project, but taking the extra steps was absolutely worthwhile to create an impressive table that competes with pieces from upscale furniture retailers (move over, Pottery Barn!!!!).
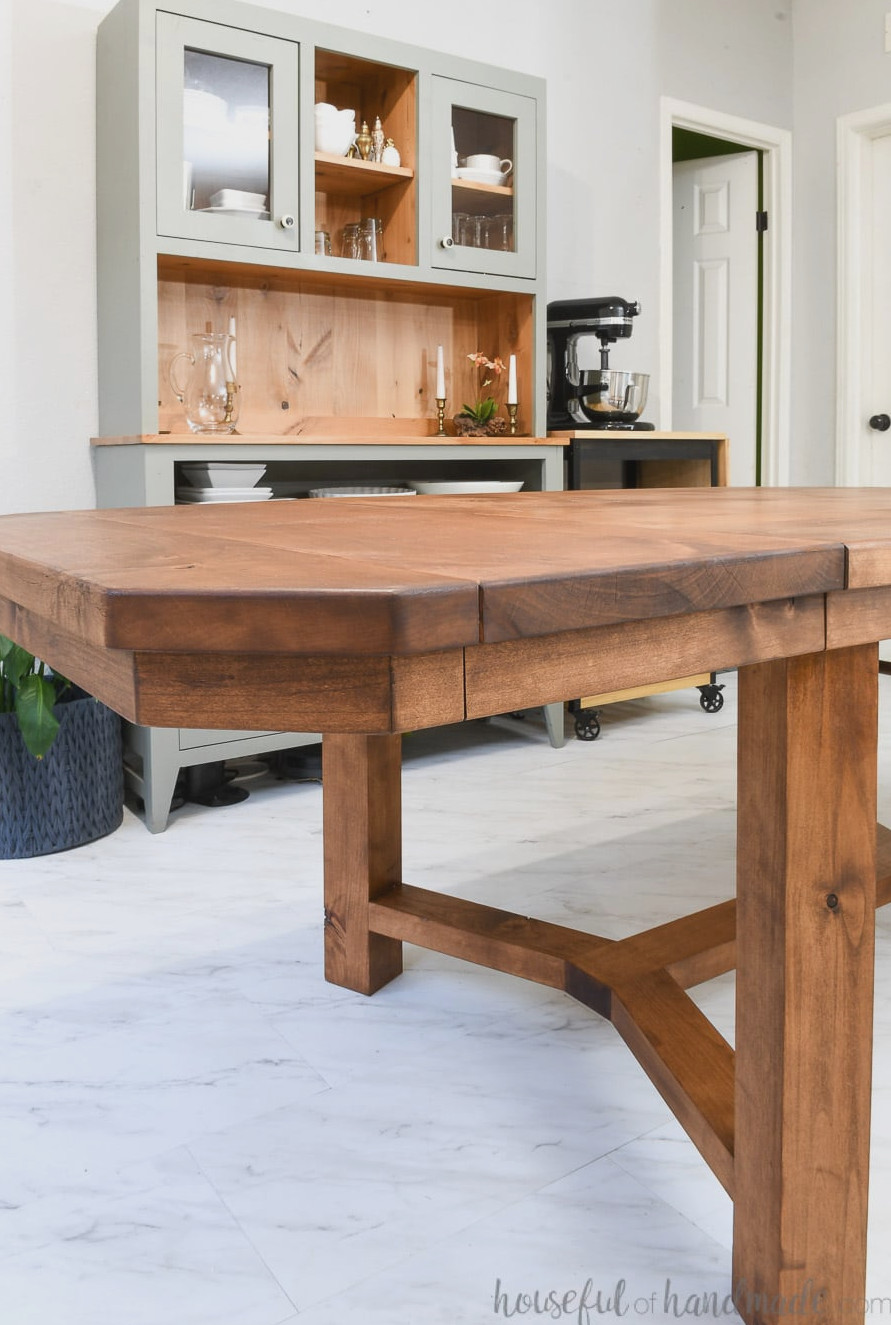
For now, my next project is finding seating. I think two compact benches paired with two bigger chairs at the ends would be ideal for our smaller room while still giving it an elegant look.
In the meantime, I’m excited to enjoy dinner at our brand-new dining table, even if folding chairs are still our seats 😉
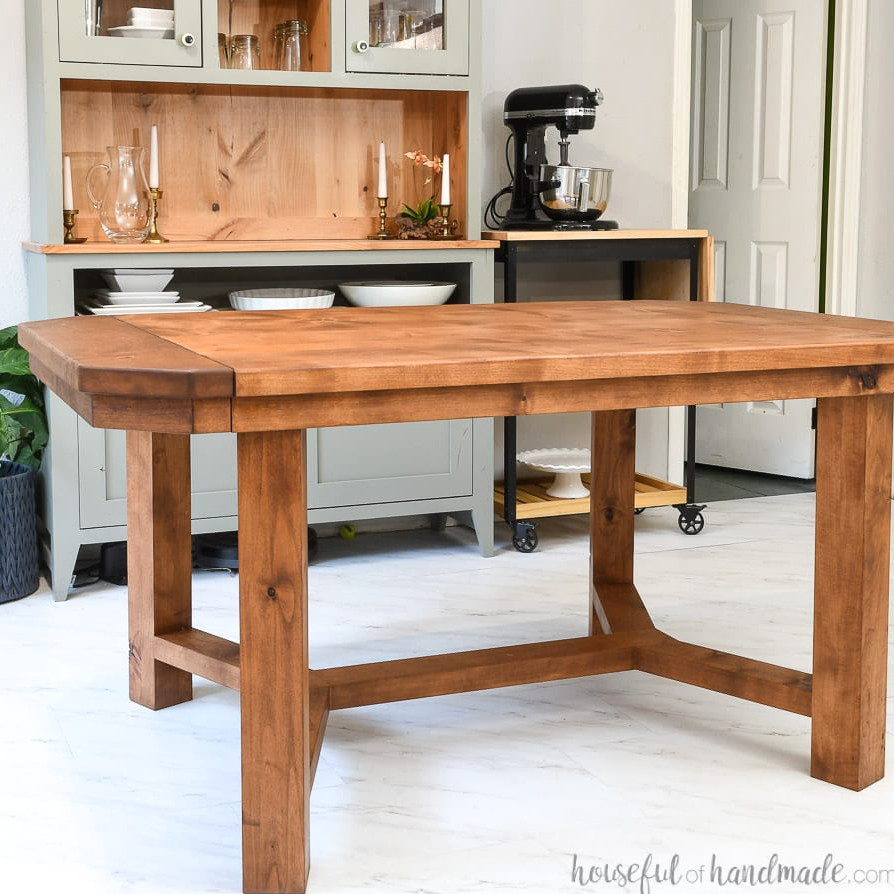
Enjoy building!