
Bring extra organization to your entryway or mudroom with these lovely storage lockers.
Today’s project has me incredibly excited!!! I never understood how much I appreciated having a coat closet until we no longer had one.
At the moment, we have a fantastic modular entryway organizer for all the small items, but now there is an ideal spot for everything else we need to put away.
So I teamed up with Kreg Tools and used their latest pocket hole jig and straight edge guide to create the ultimate mudroom storage lockers. Now I have more storage space than I actually need. That feels great!
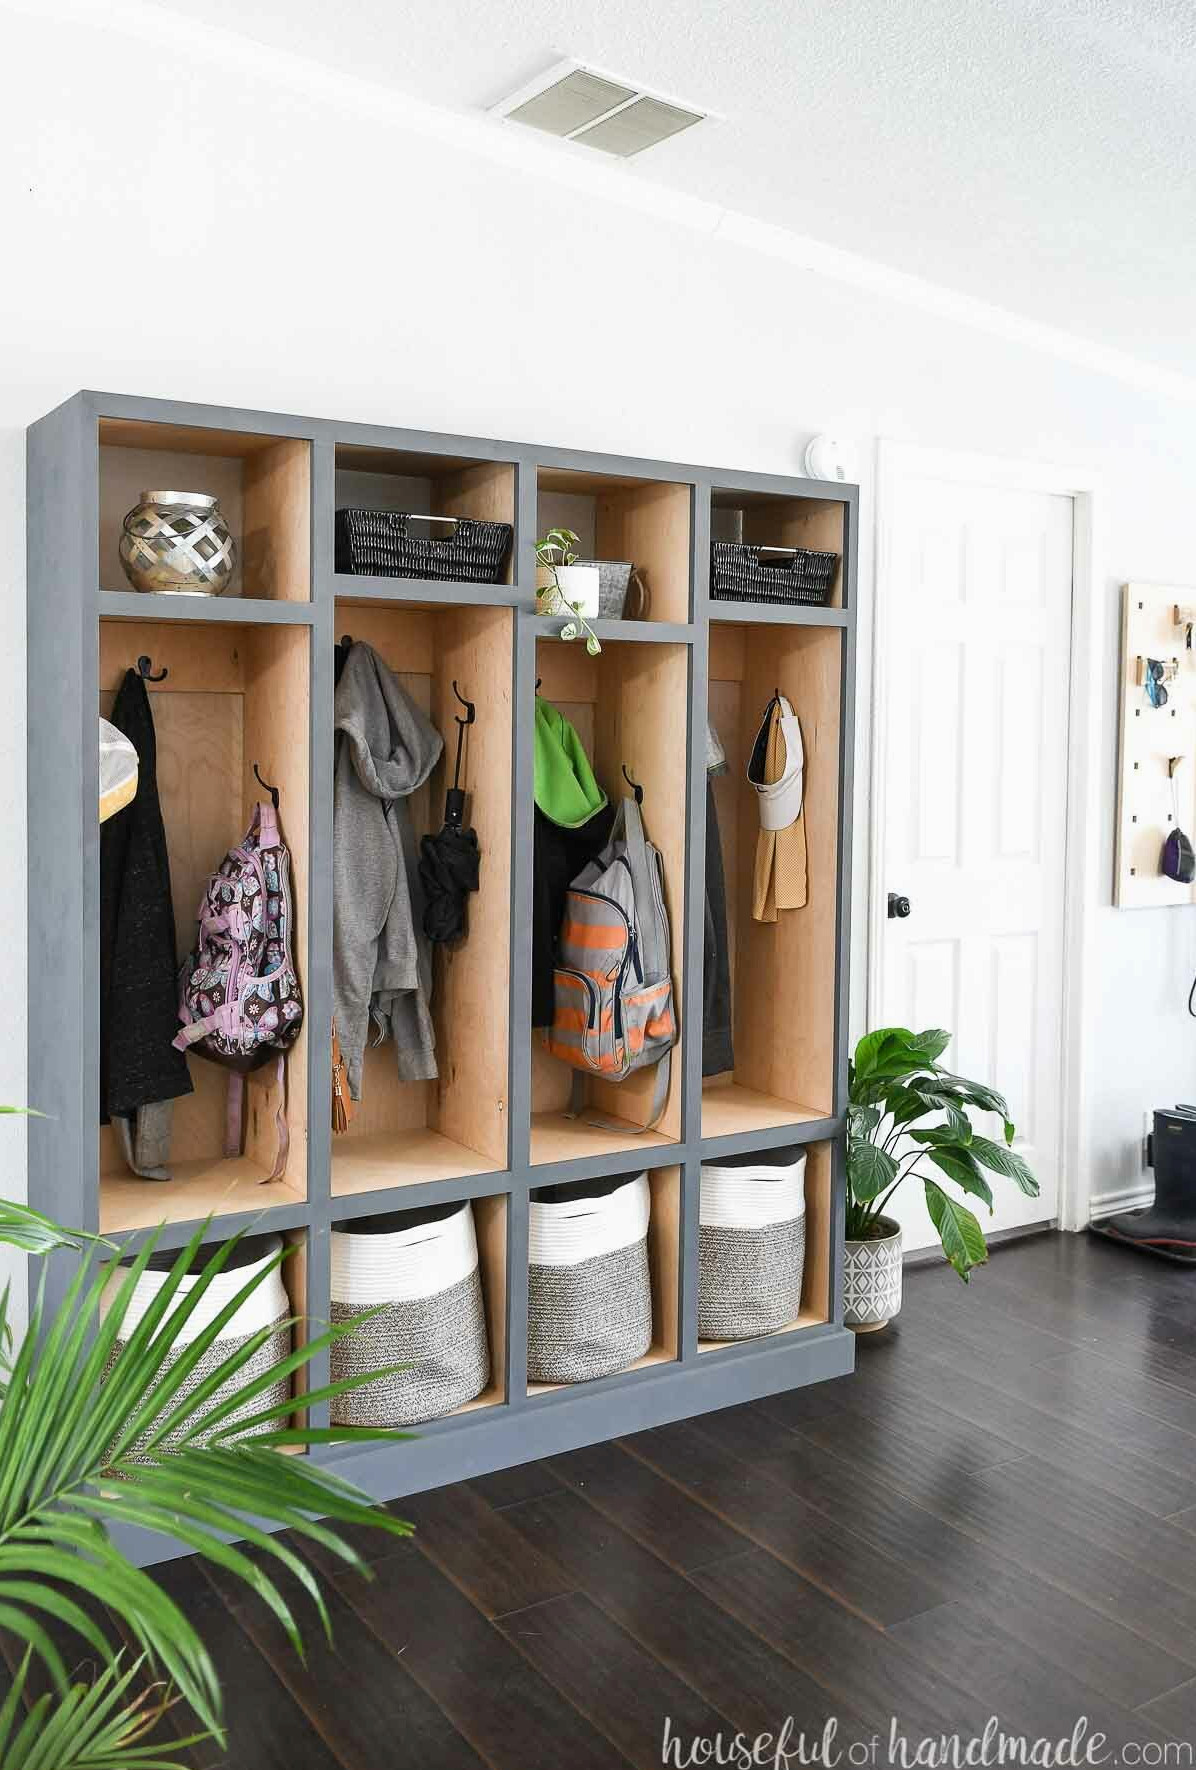
Using the DIY bookcase construction plans, I made a customized mudroom storage cabinet with ample space for our family of four. You can make one too!
Storage Locker Design
Because we do not have a mudroom, our lockers need to look especially appealing! They are positioned just inside the front door where everyone can see them.
I created these mudroom storage lockers as an attractive cabinet rather than merely practical lockers. Their design is modeled after the dining room hutch I built several years ago.
Still, the hutch and the mudroom lockers are not perfectly identical. The hutch is made from alder wood, while its exterior has been painted a green-gray shade.
The mudroom lockers are constructed from birch plywood. Their exterior is painted a blue-charcoal color, which coordinates better with the nearby living room furnishings. Together, though, they give our home a unified, contemporary look!
Room for Coats, Backpacks, Shoes, and More!
A family of four comes with plenty of belongings. The huge mound of shoes filling the entryway was already making me crazy, and that was before adding jackets, backpacks, hats, gloves, and everything else.
Since we lacked a coat closet, we relied on the folding mudroom shelves I built whenever we needed more seasonal storage. Those folding shelves worked well as extra storage, but they were not ideal as our family’s sole storage solution.
The new mudroom storage lockers offer considerably more room!
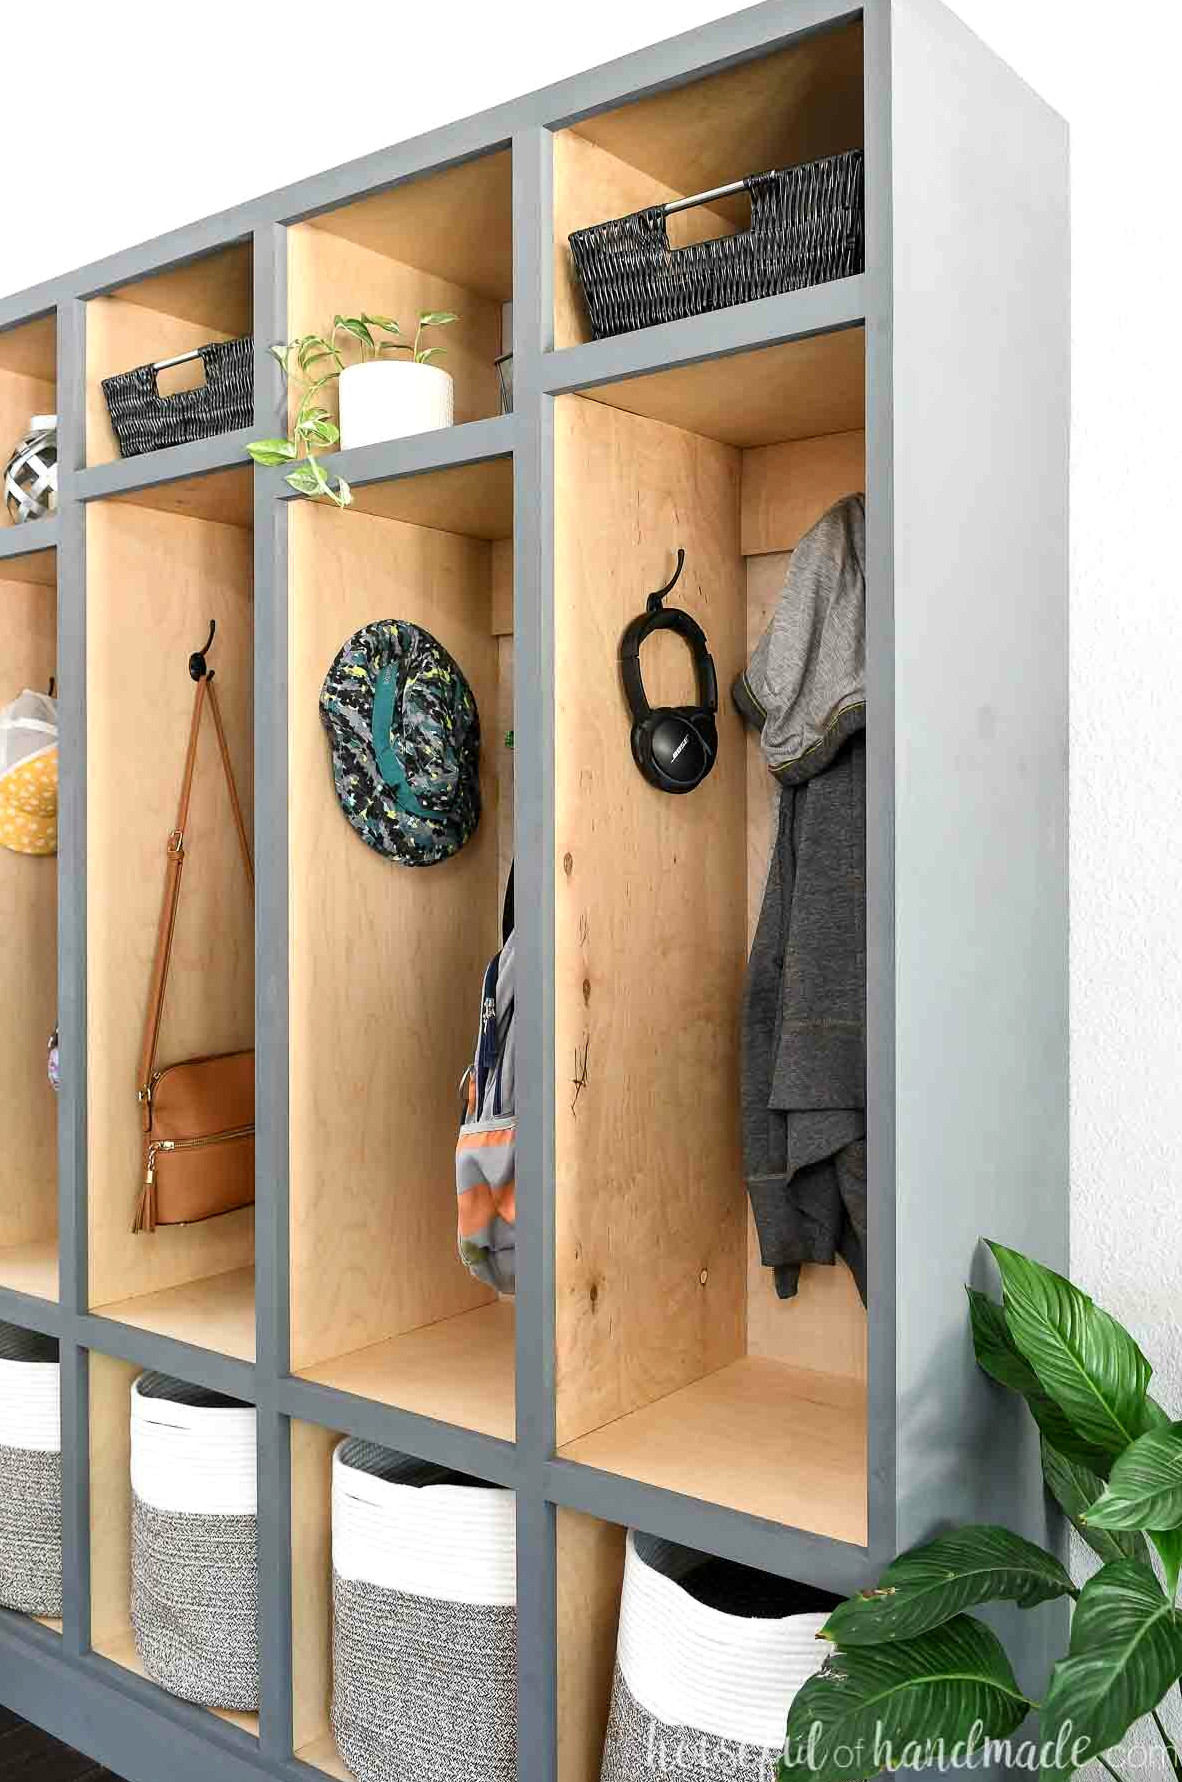
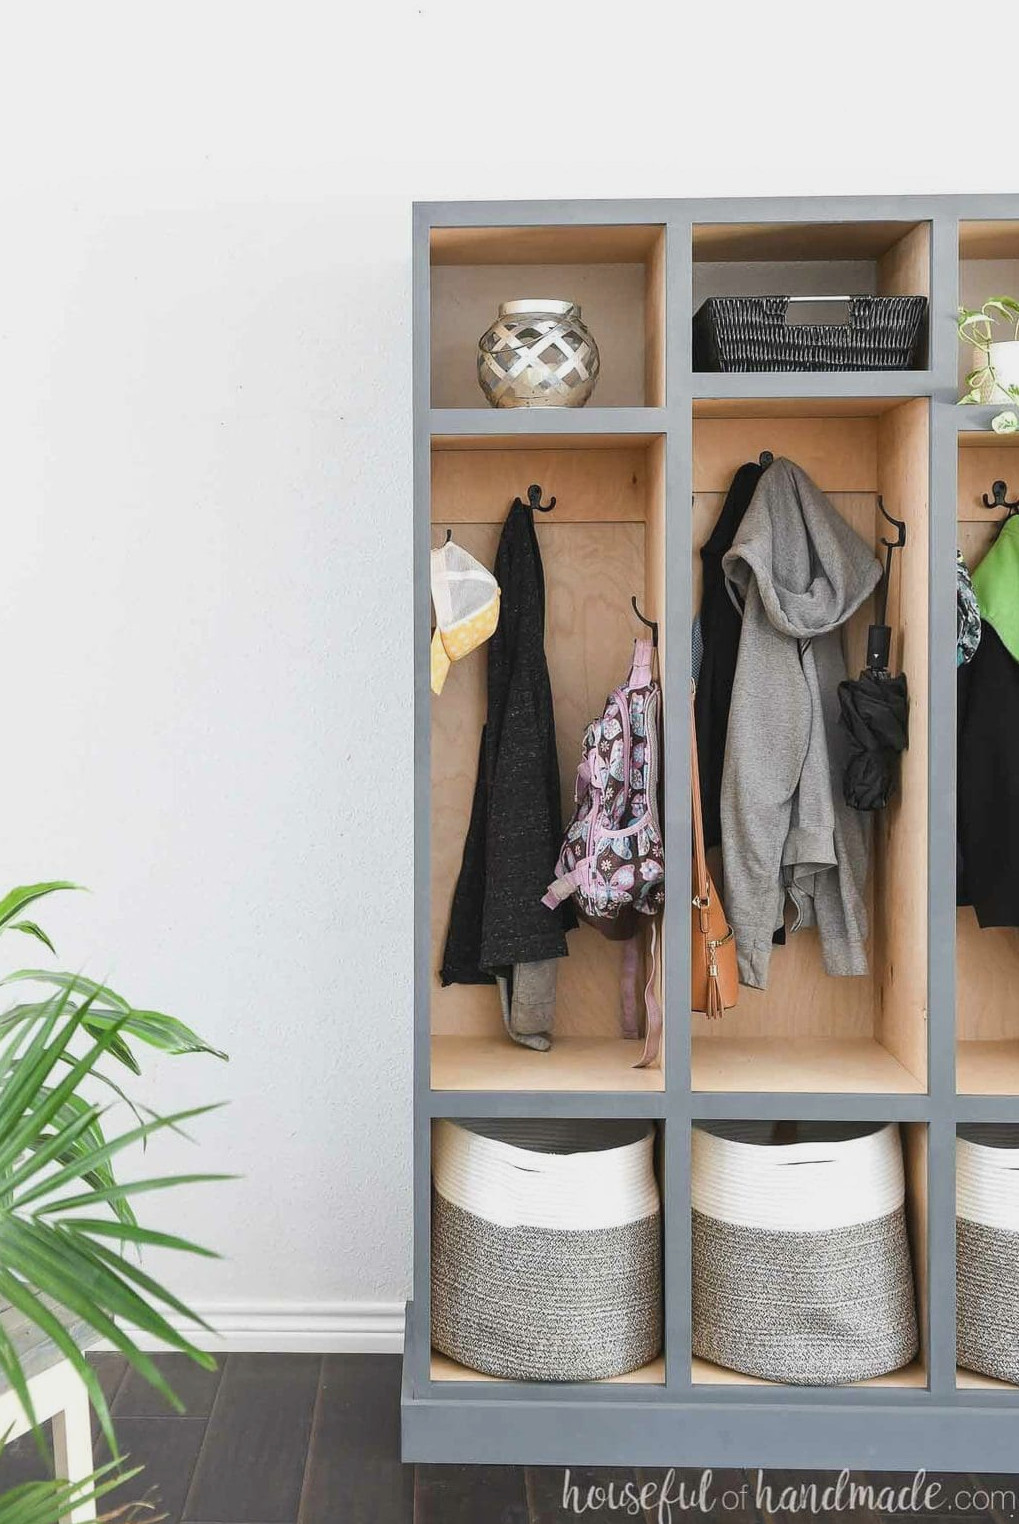
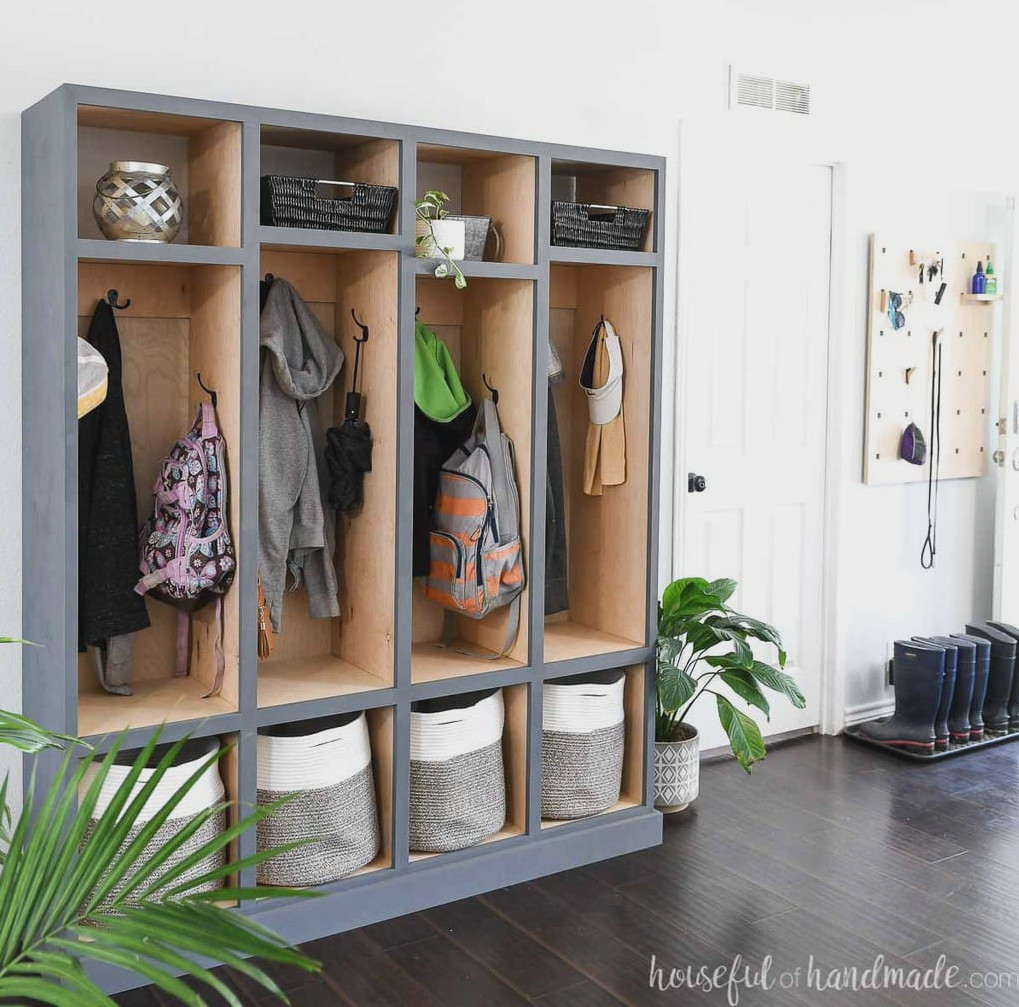
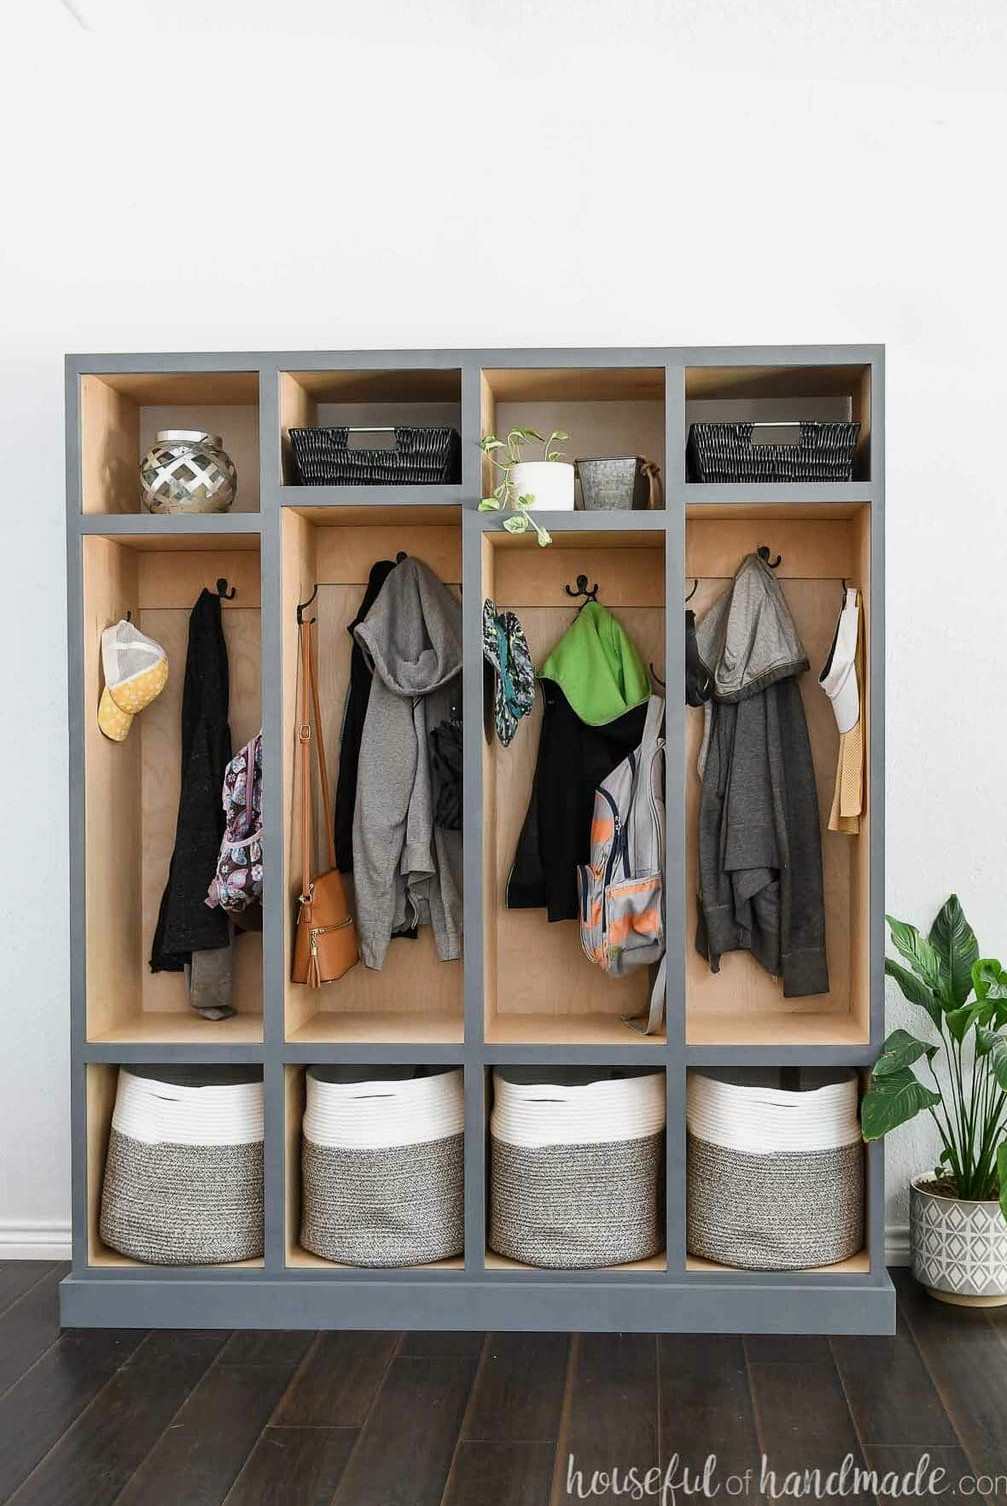
Each locker’s lower section accommodates a roomy shoe basket. I ordered these woven baskets and was amazed by how much they hold!
You could also make a few straightforward DIY drawers to increase the storage capacity of this locker system.
Now every member of the family has an individual basket for shoes. I am hoping this will finally resolve the “Where are my shoes?” issue we have dealt with.
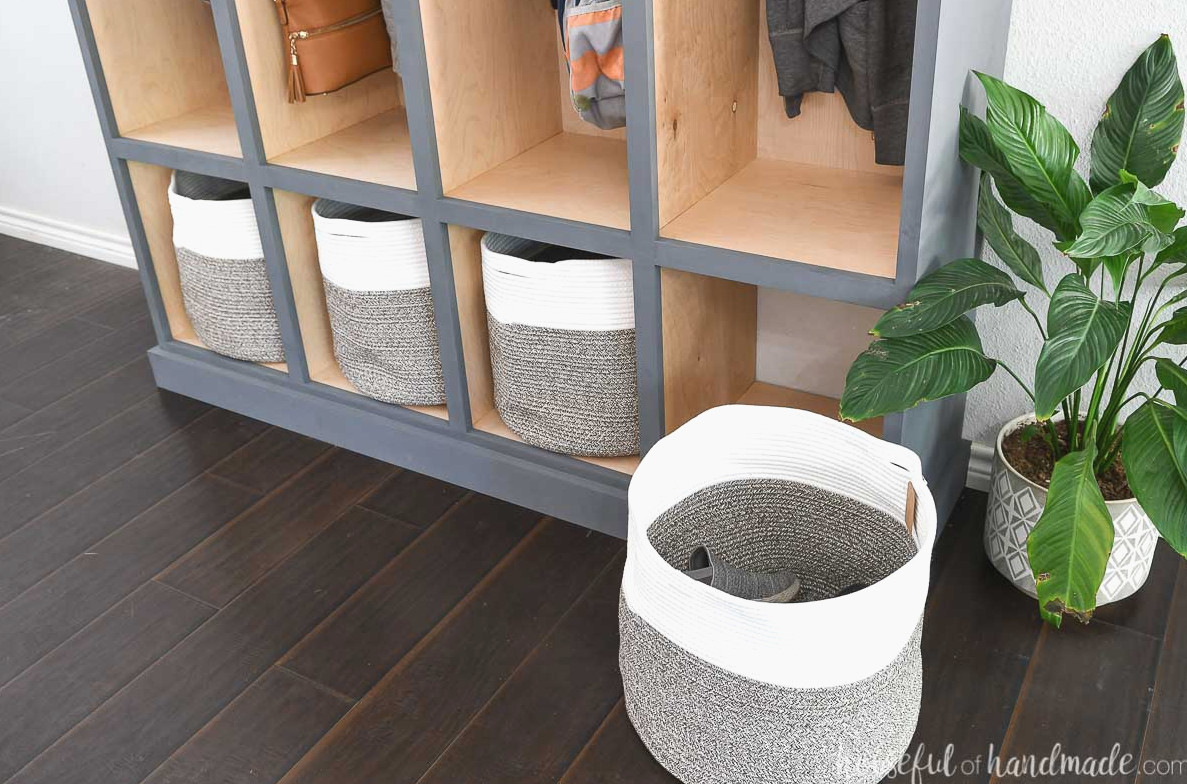
The middle section of each locker includes 3 coat hooks! Each one also features 2 hooks. Can you imagine how much can be placed on 6 hooks?
Thankfully, we still have not discovered the maximum capacity because we were accustomed to having just 1 hook per person.
The kids now have a specific place for their backpacks and jackets, with additional room for more hanging items!
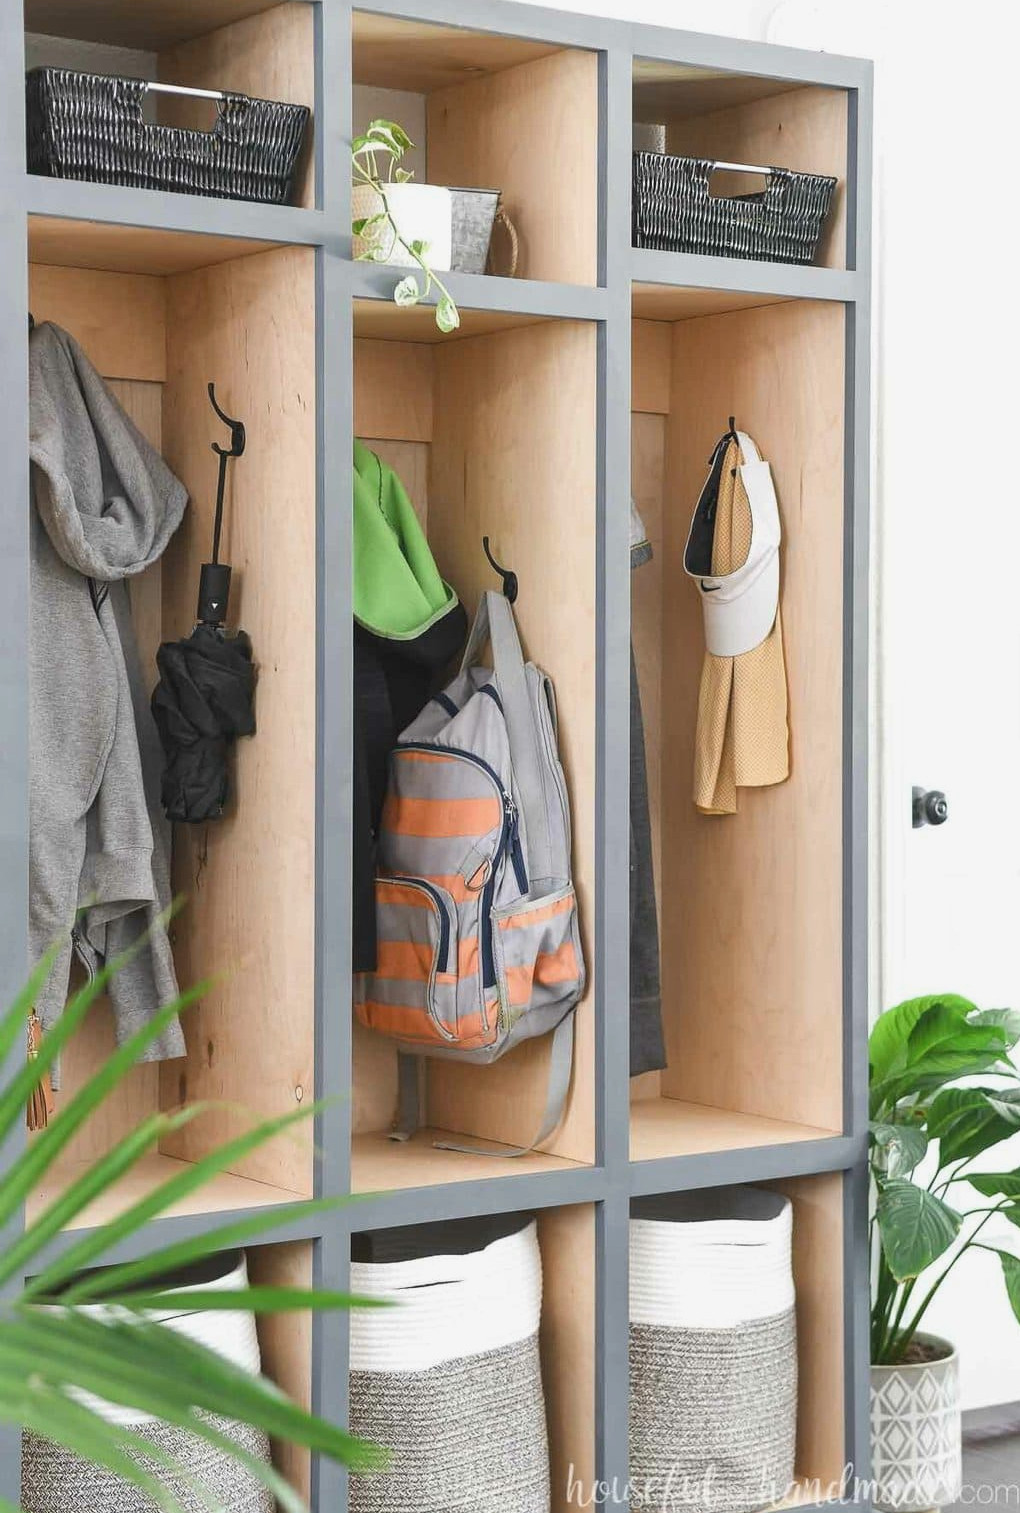
Finally, the upper section provides even more storage space. The kids cannot conveniently reach the area above their hanging storage, so I am using it for decorative items. However, if we require additional room, there is still space to expand.
Above my husband’s and my hanging storage, I placed bins for gloves and dog supplies. I love keeping these items hidden away while still having them organized and accessible whenever we need them!
You may also notice that the top of the lockers is uneven. I offset the upper shelves for two reasons: it added visual appeal to the cabinet and made two of the hanging sections larger.
Thelarger sections are designated for adult-sized jackets, while the smaller hanging areas allow young children to hang their belongings independently.
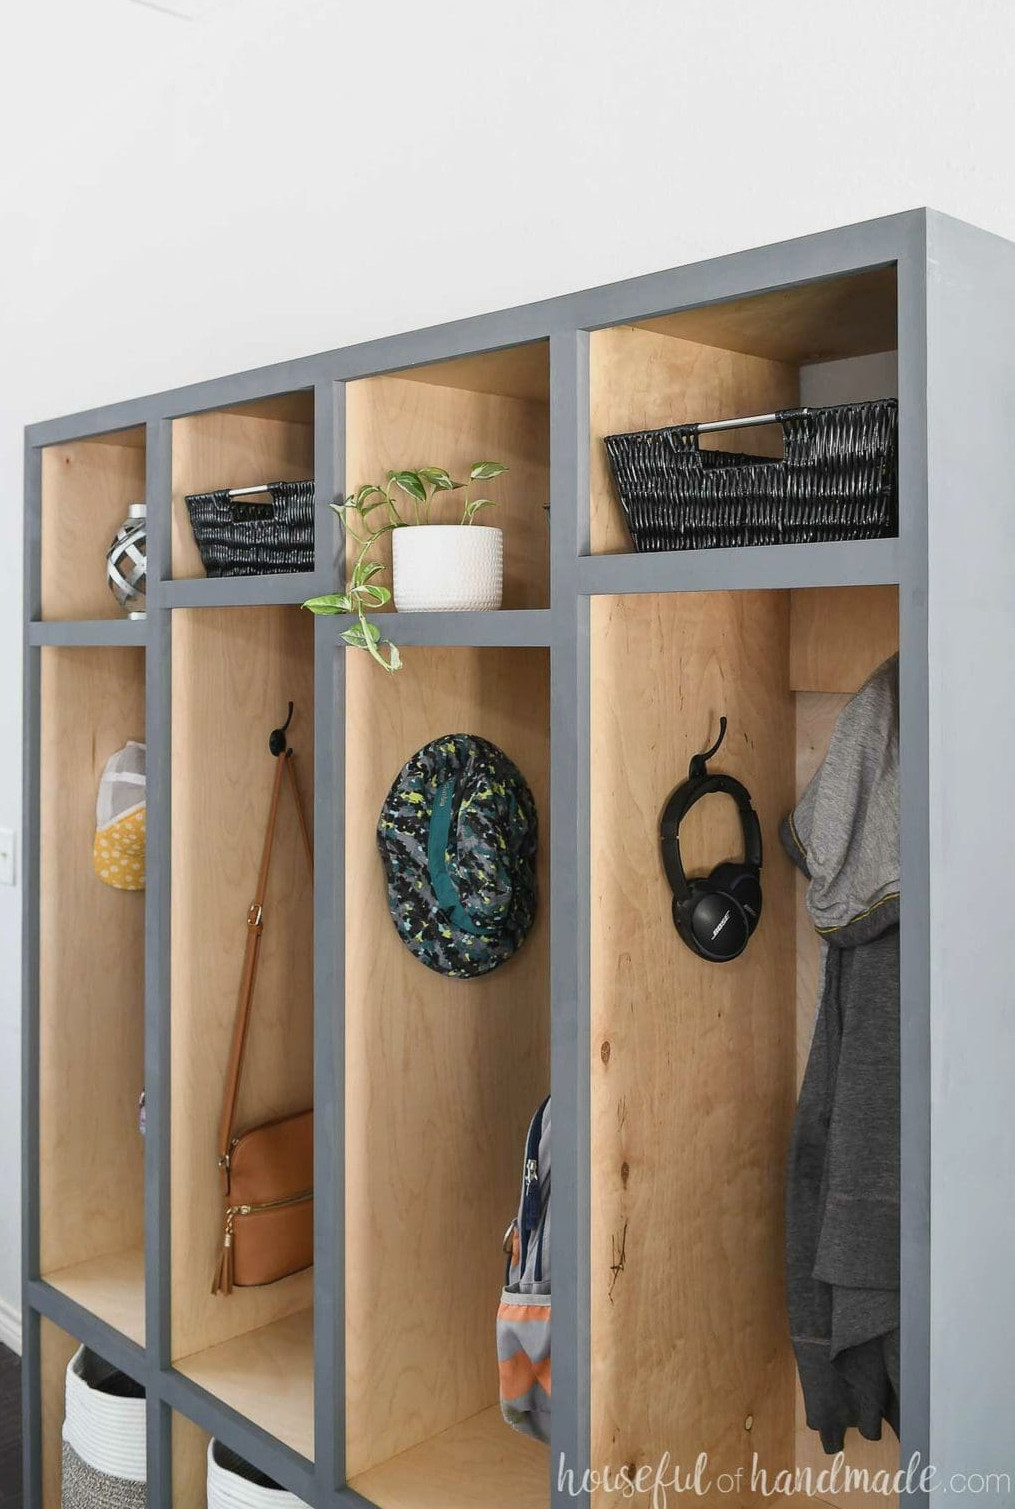
Four Mudroom Lockers
The DIY mudroom storage locker plans create one cabinet containing 4 locker compartments. This arrangement was ideal for our family of four.
Need additional storage? No problem! I also offer plans for mudroom cabinets with 3, 5, or 6 lockers.
How to Construct a Mudroom Storage Cabinet
Tools & Materials
Overall Dimensions
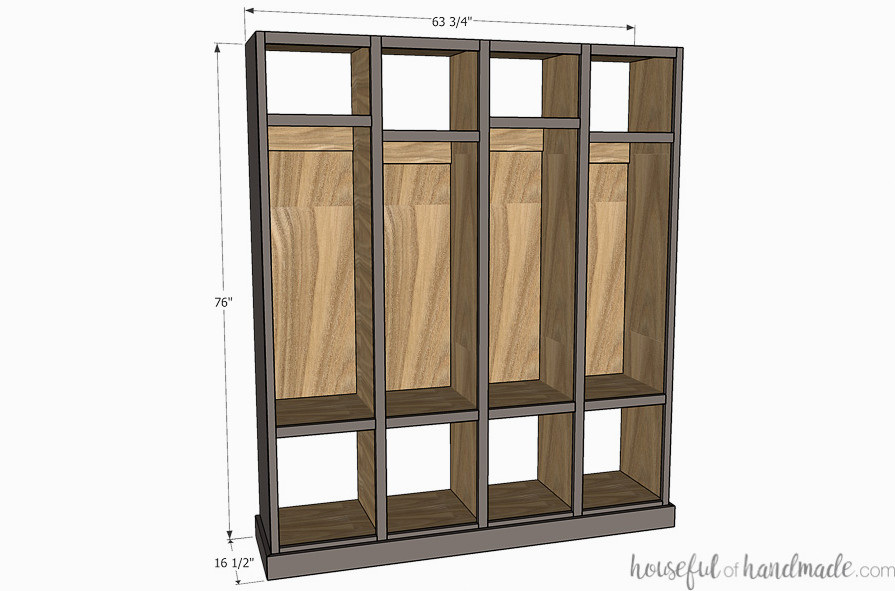
The completed mudroom cabinet measures 16 1/2″ deep and 76″ high. Each unit has the following width:
- 3 locker unit measures 48 3/4″ wide
- 4 locker unit measures 63 3/4″ wide
- 5 locker unit measures 80 1/4″ wide
- 6 locker unit measures 96″ wide
Cut List
For the 4-locker cabinet, cut the components based on the construction plans available at Kregtool.com.
For cabinets with 3, 5, or 6 lockers, use the clear cut chart included in the PDF plans to cut the pieces.
Purchase the Premium PDF Woodworking Plans
PDF plans contain- Easy-to-Follow Cut List, Shopping List, Suggested Tools, Detailed Instructions with 3D illustrations, & Useful Resources
BONUS- 3D SketchUp File
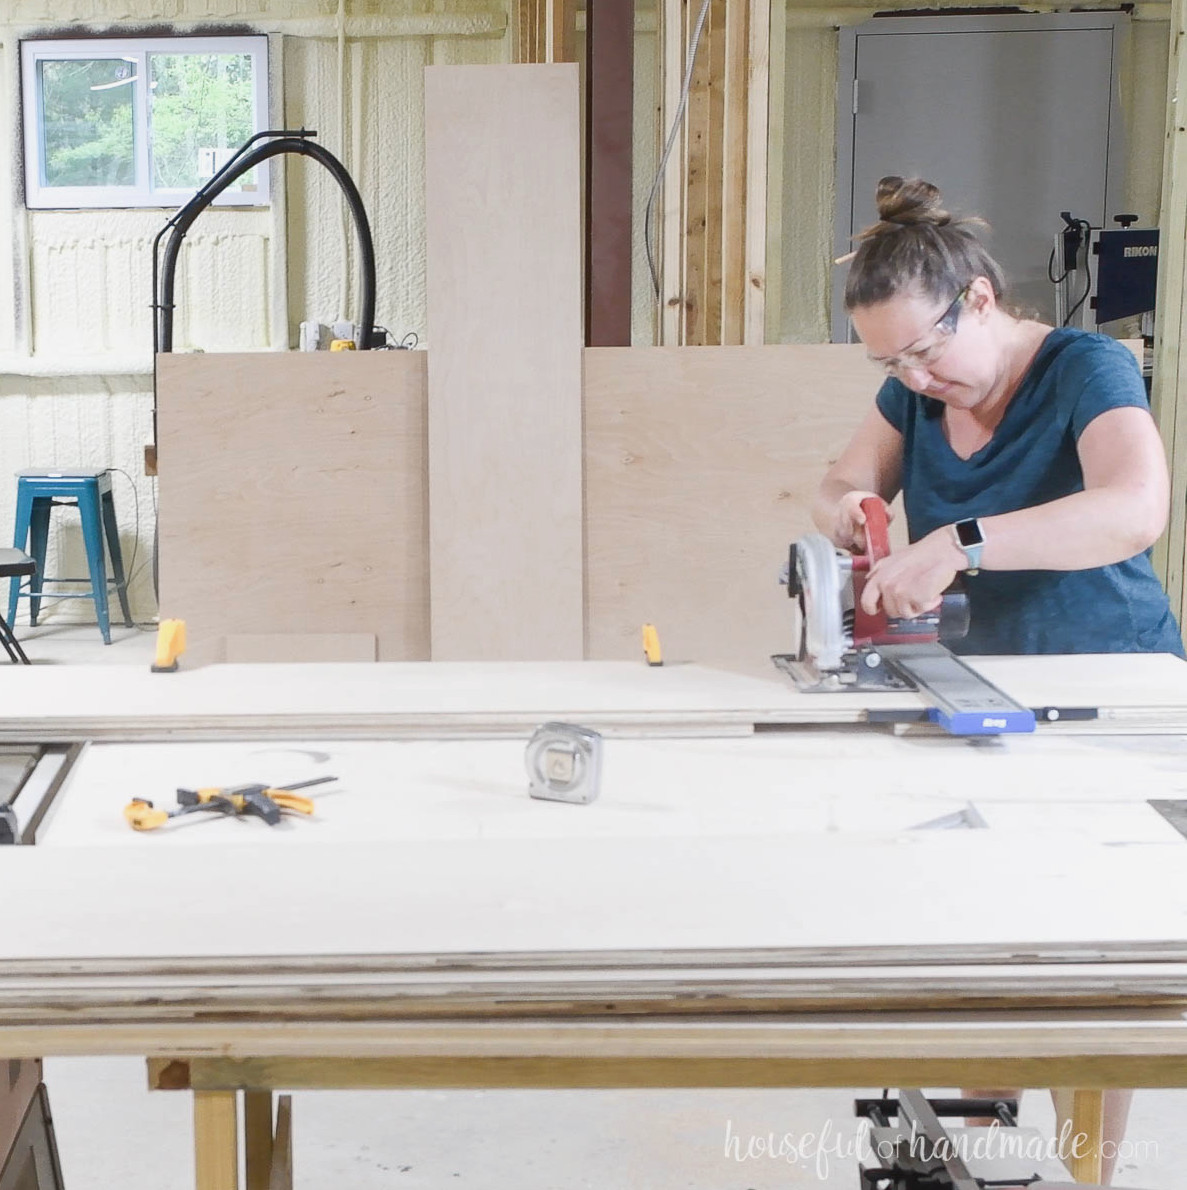
Begin by ripping the plywood into strips, then crosscut each piece to its finished size. I prefer cutting plywood over a sheet of rigid foam insulation so the material remains fully supported.
Find all of my circular-saw plywood-cutting advice here.
STEP 1- Cut Router Dados
Indicate the locations for the first set of dados on 4 of the 5 side panels.
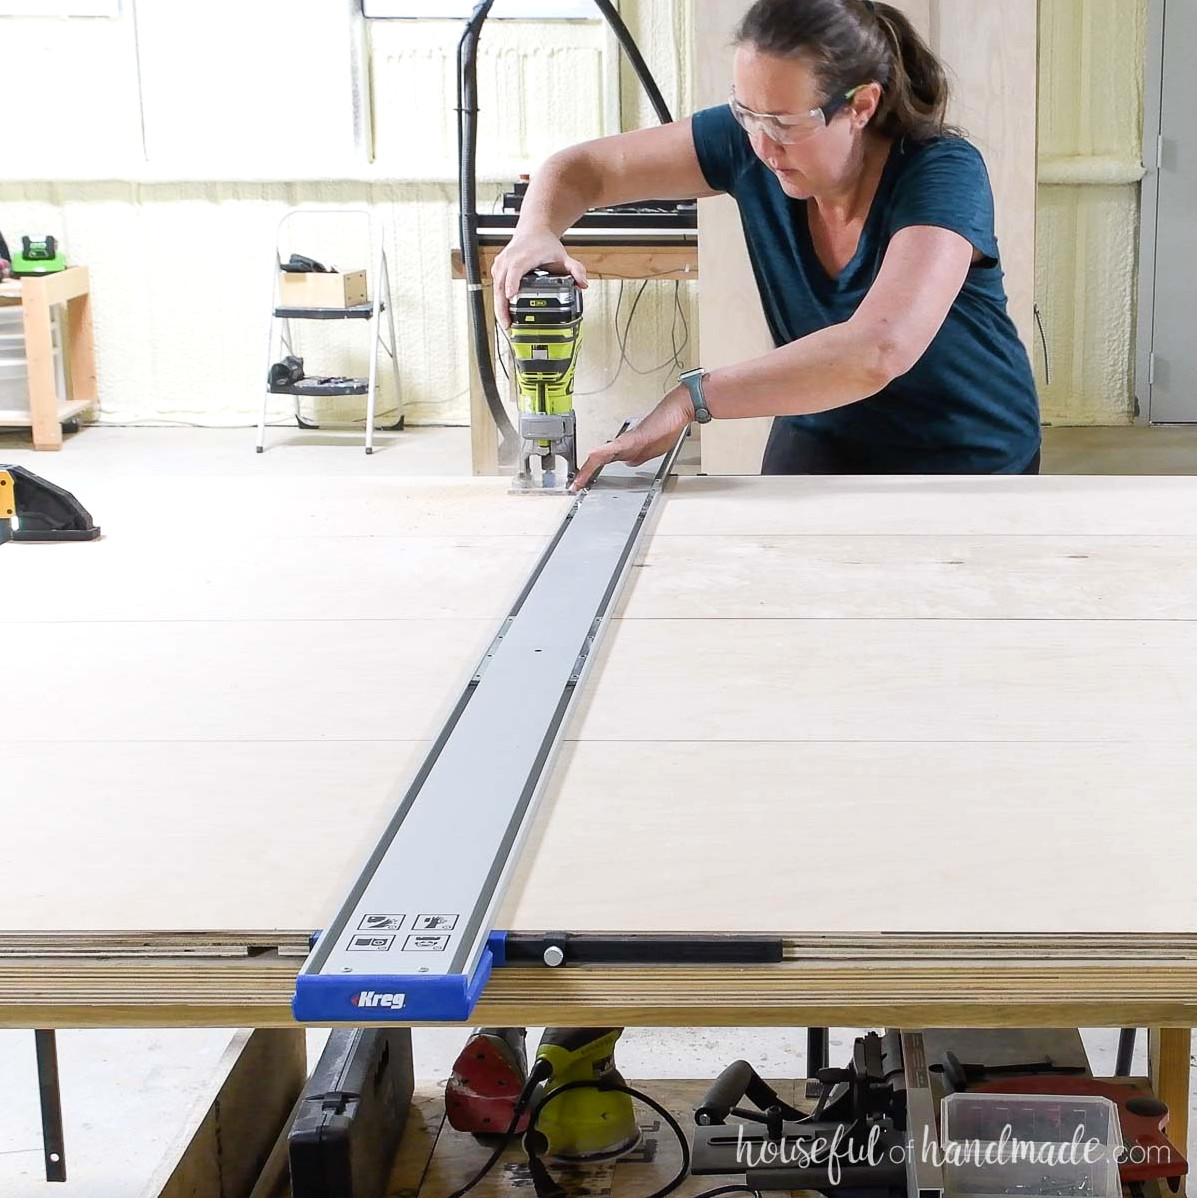
Secure the Kreg Straight Edge Guide to the panels, aligning it with the marks. With a router, cut a 1/4” deep dado across each board.
I arranged all 4 pieces together and clamped them as one group. With the Kreg Straight Edge Guide XL, I could route the dado across every board in a single pass.
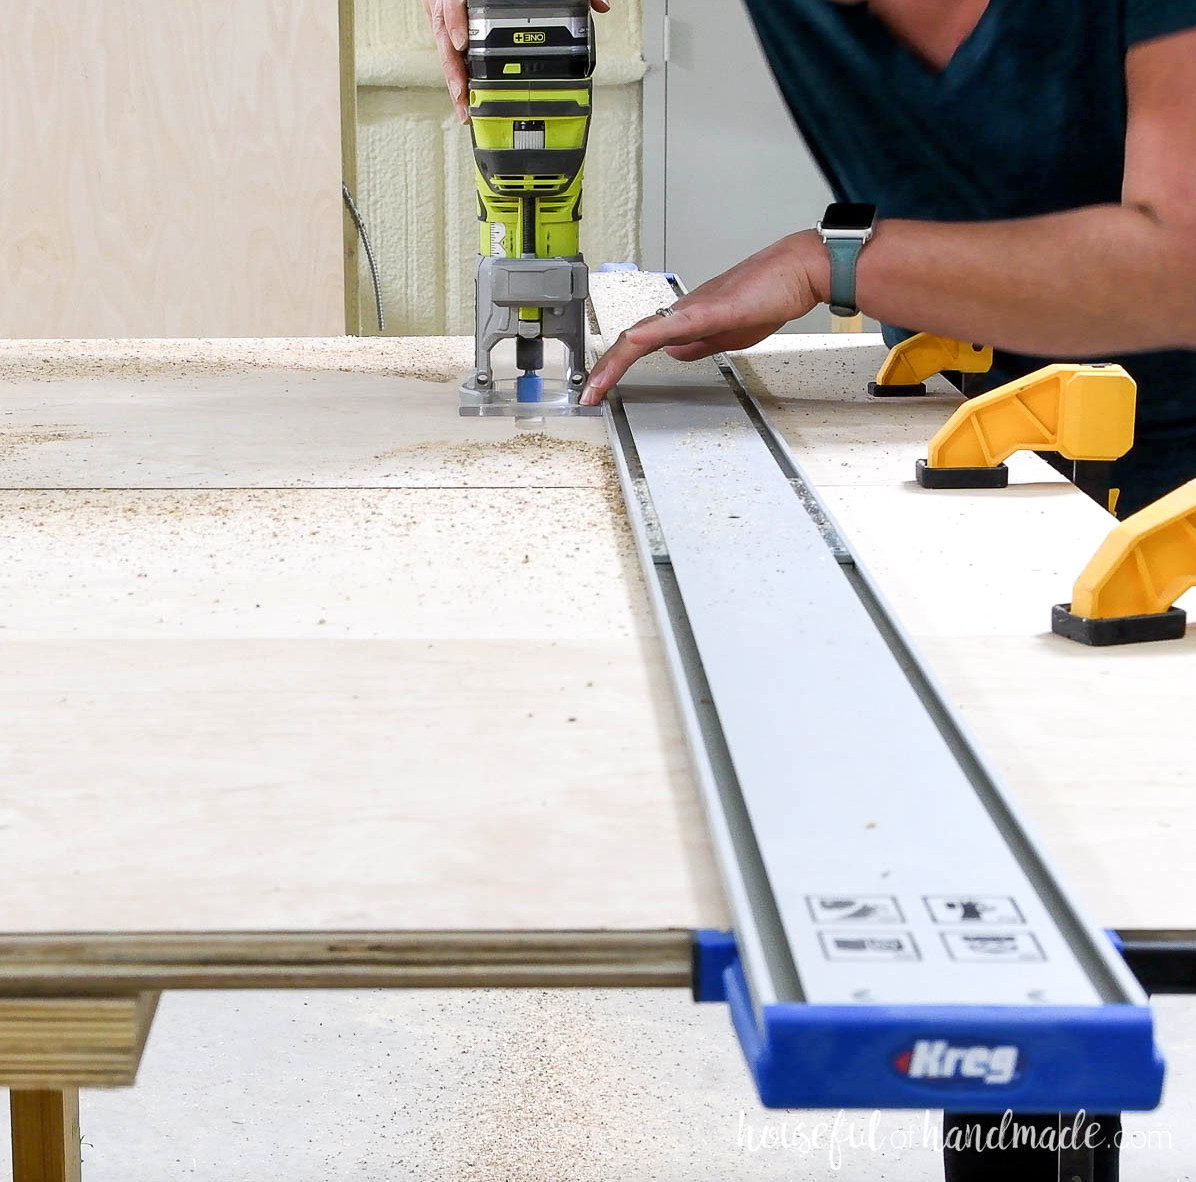
Take out one board that already has dados routed and substitute the 5th side panel. Turn over the other 3 dadoed boards.
Route the second group of shelf dados into these 4 panels. When finished, 3 panels will have dados on both sides, while 2 will have dados on only one side.
EXPERT TIP:
Use caution when handling boards with dados on both sides, because the lower grooves create a fragile area until the shelves have been glued in place.
STEP 2- Put the Cabinet Together
Adjust your pocket-hole jig for 3/4″-thick material.
Make 3 pocket holes at each end of all 8 top and bottom components. Then add pocket holes to both ends of all 4 upper supports and 4 lower supports.
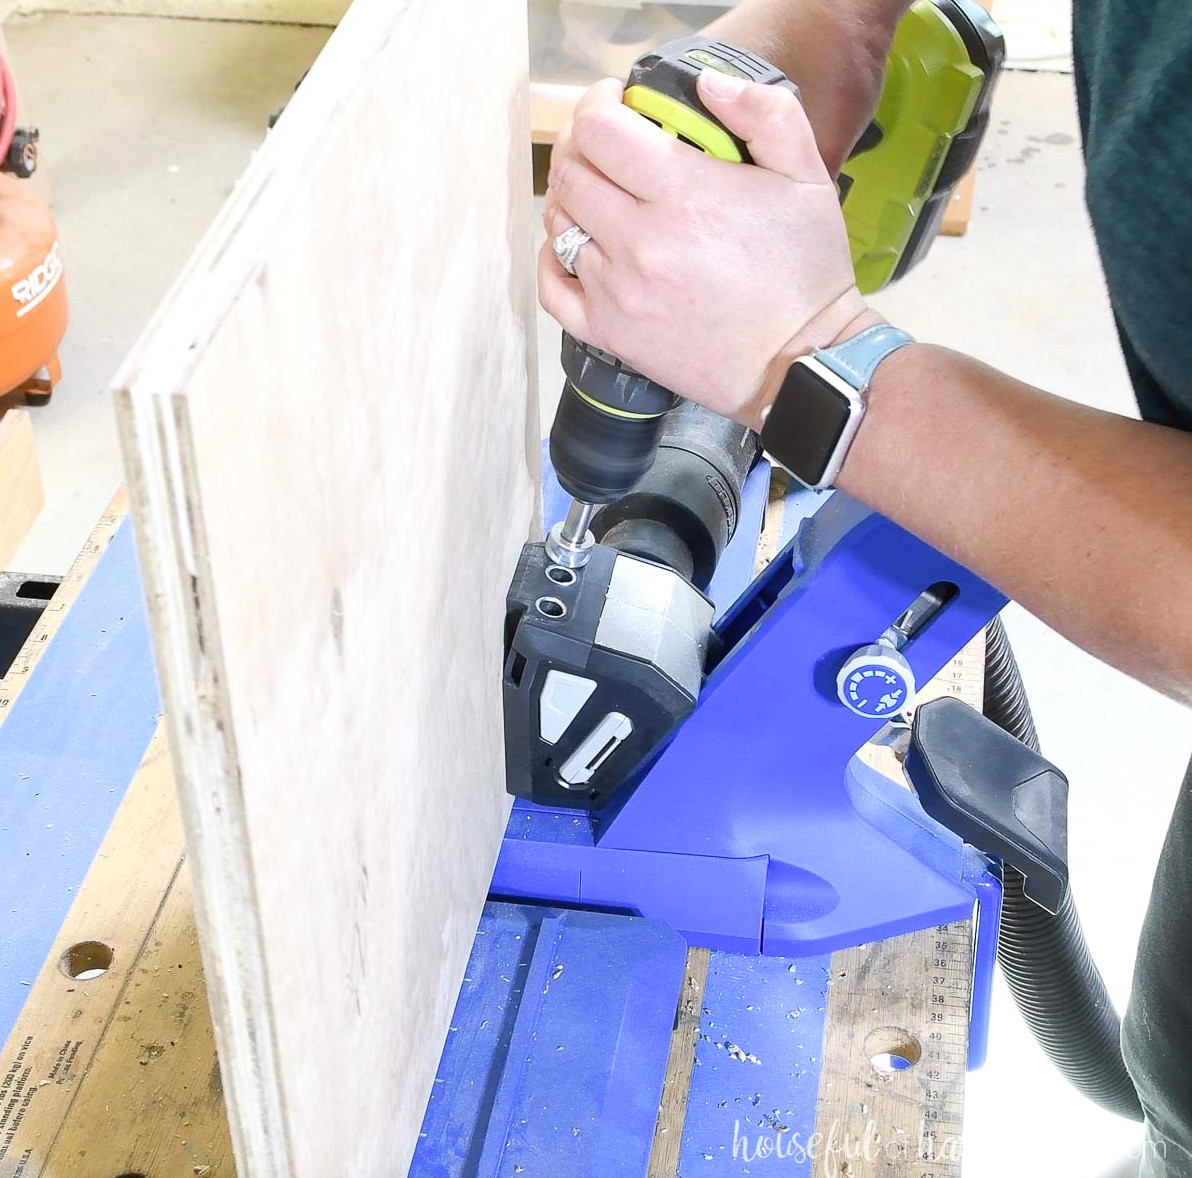
Take one side panel with dados on a single side and another with dados on both sides to build the first compartment.
Begin by fastening a top and bottom panel to one side using 1 1/4″ pocket-hole screws and wood glue. Align the top with the upper edge of the side panel, and position the bottom panel 4 1/4” above the base.
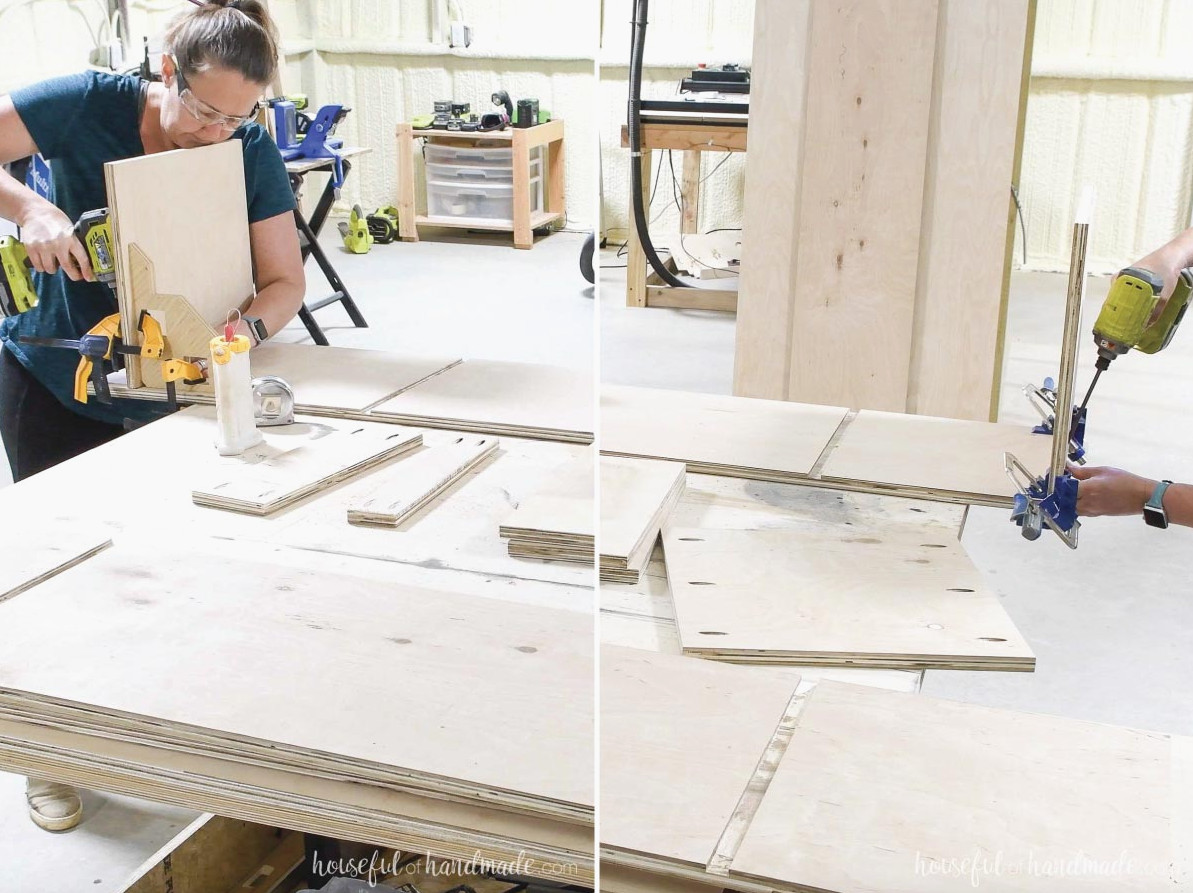
After that, install the two support panels directly beneath the shelf dados. Place the larger support at the top to leave sufficient space for mounting a coat hook.
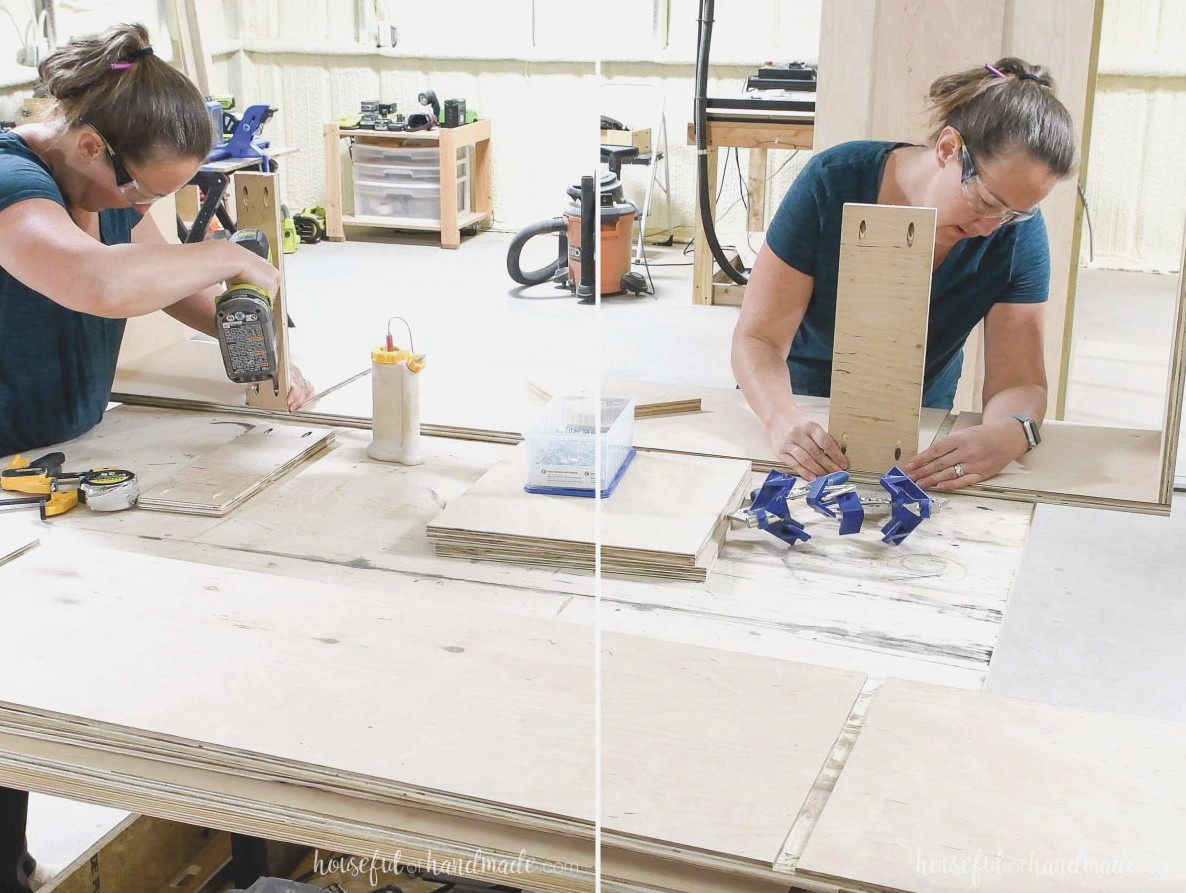
Apply wood glue inside the shelf dados, then set the shelves into their grooves.
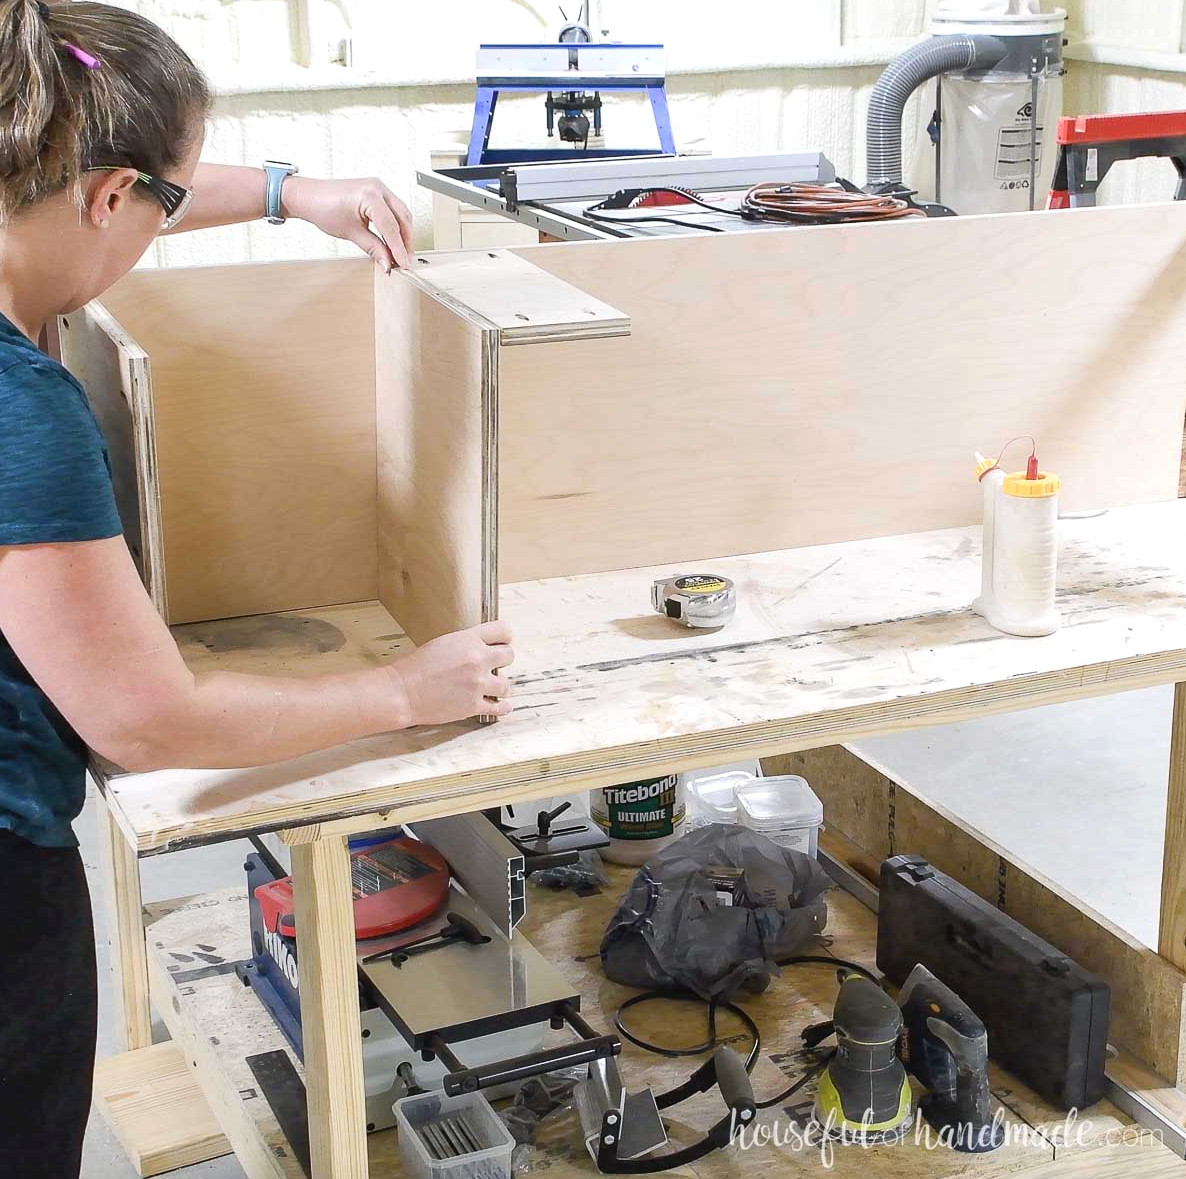
Secure the opposite side piece to the locker using 1 1/4” pocket hole screws, ensuring that the top, bottom, and shelves are properly squared.
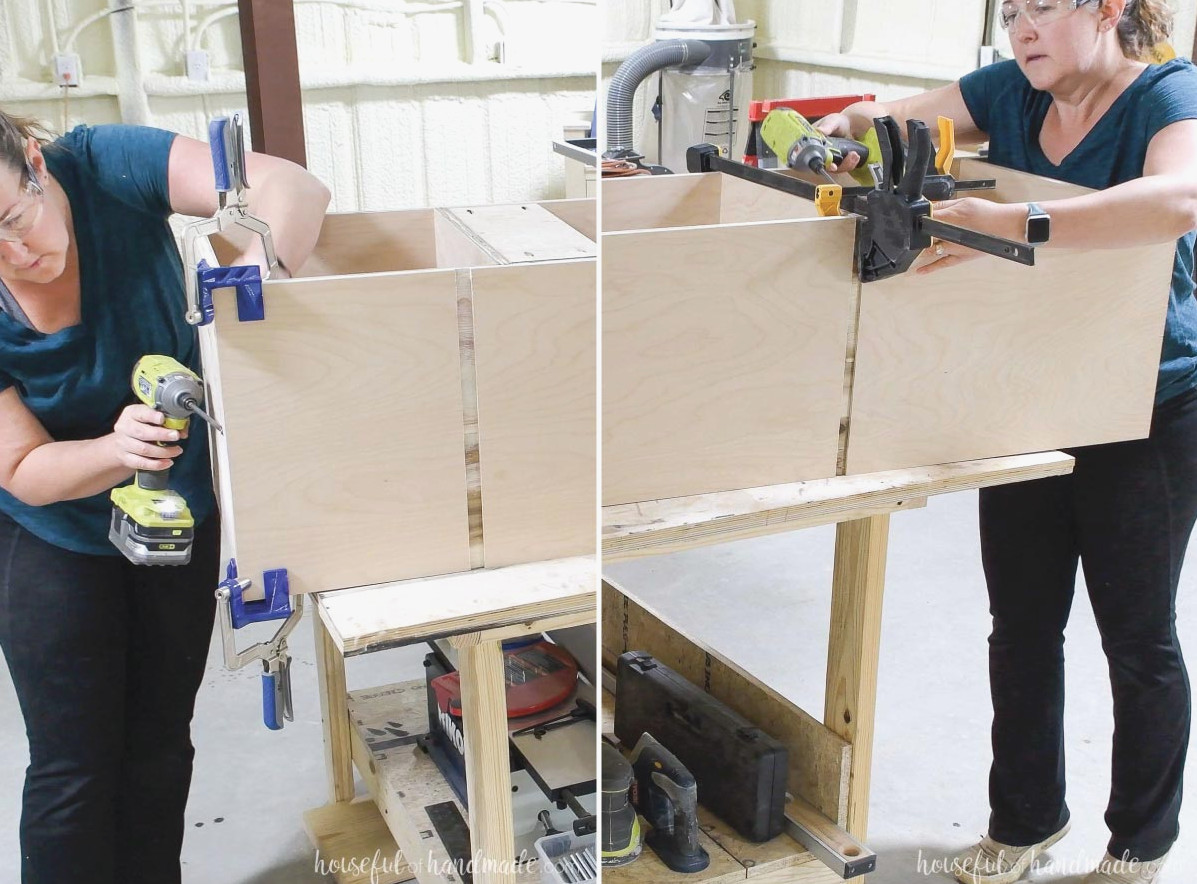
Using dados on both sides, fasten the top and bottom pieces to the next side panel. Pay close attention to the upper dados so the top shelf alternates.
Next, install the upper and lower support pieces. Secure them with wood glue and 1 1/4” pocket hole screws.
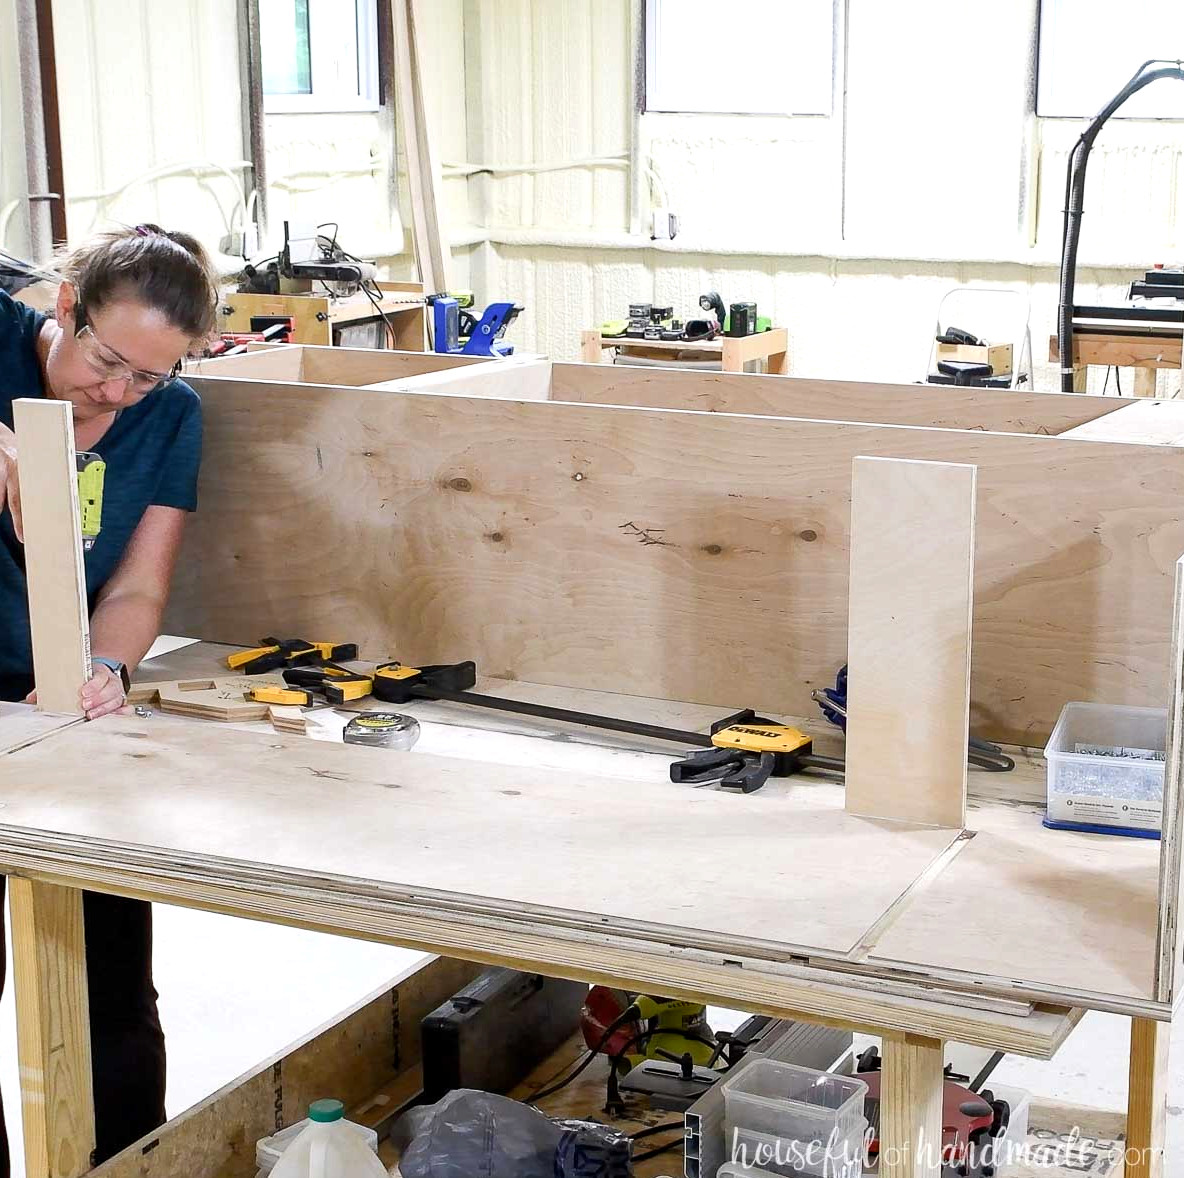
Apply glue to the shelves, align the section with the dado end of the completed locker compartment, and fasten it in place.
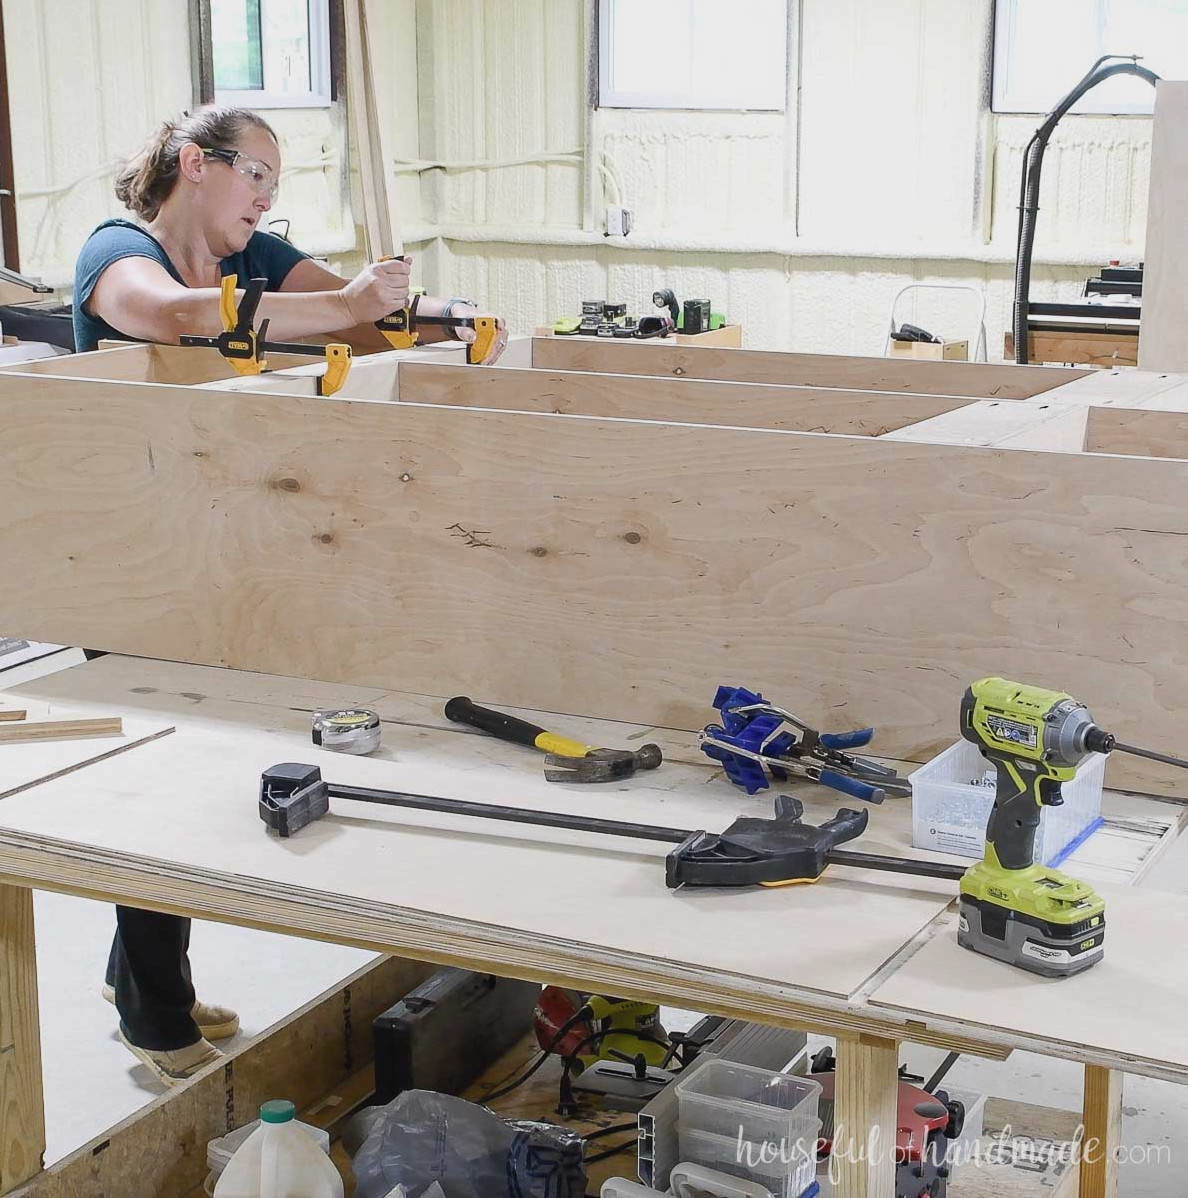
Repeat the process with the remaining locker compartments until all 4 have been installed.
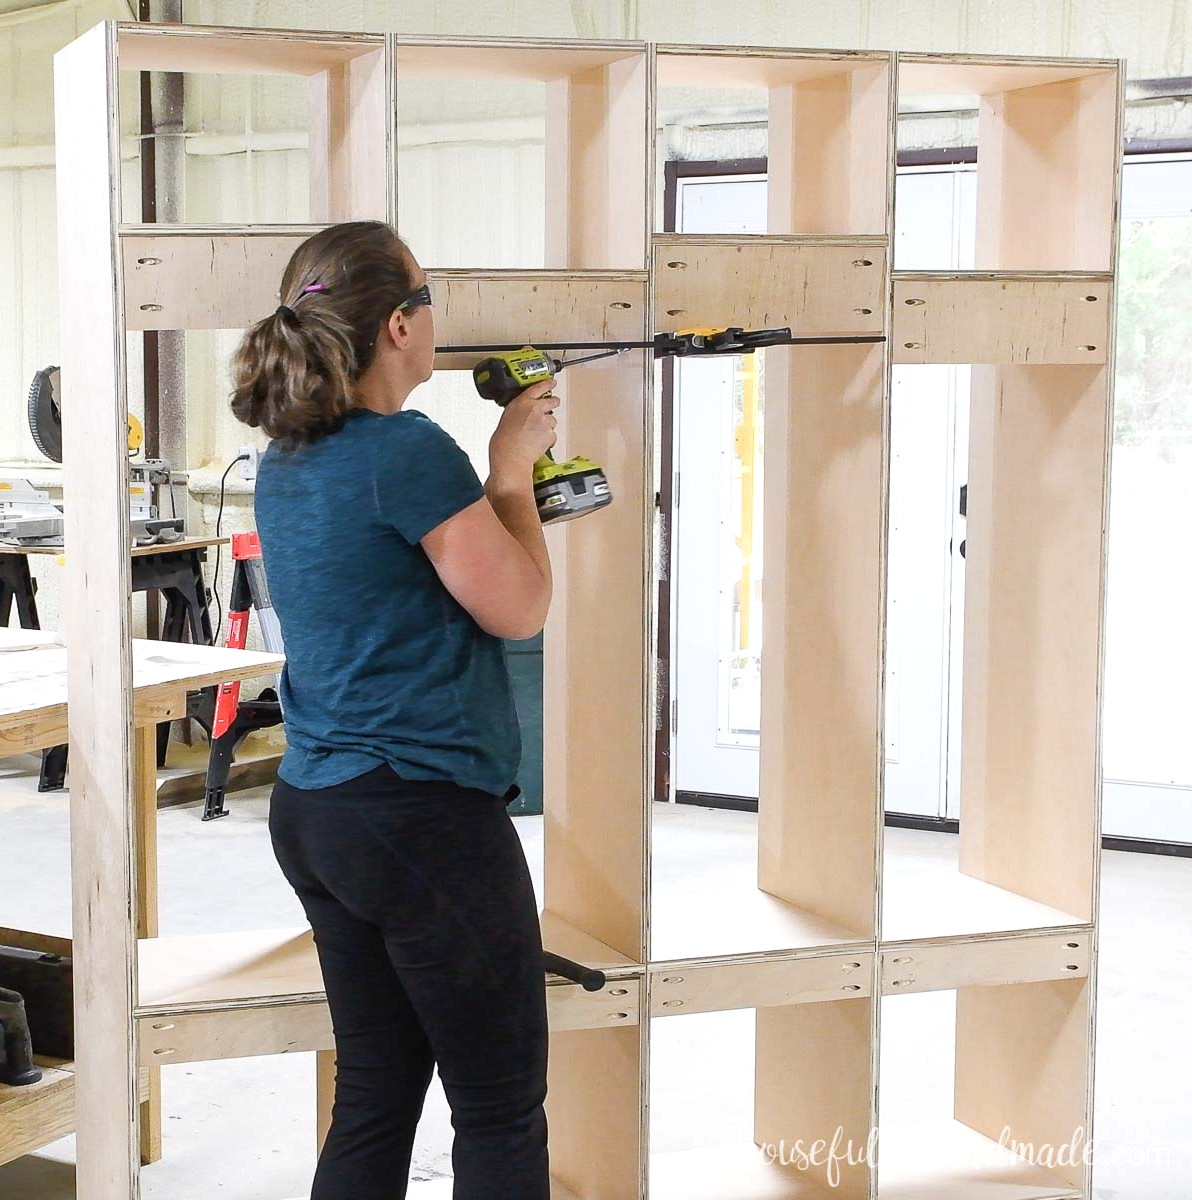
STEP 3- Install the face frame
Drill pocket holes sized for 3/4” material into both ends of every face frame rail.
Following the plans, secure the rails between the face frame stiles so they conceal the plywood’s front edges.
Raise the rail above the upper shelf by 1/4”, while raising the rails above the middle and lower shelves by 1/8” so the plywood front remains fully hidden.
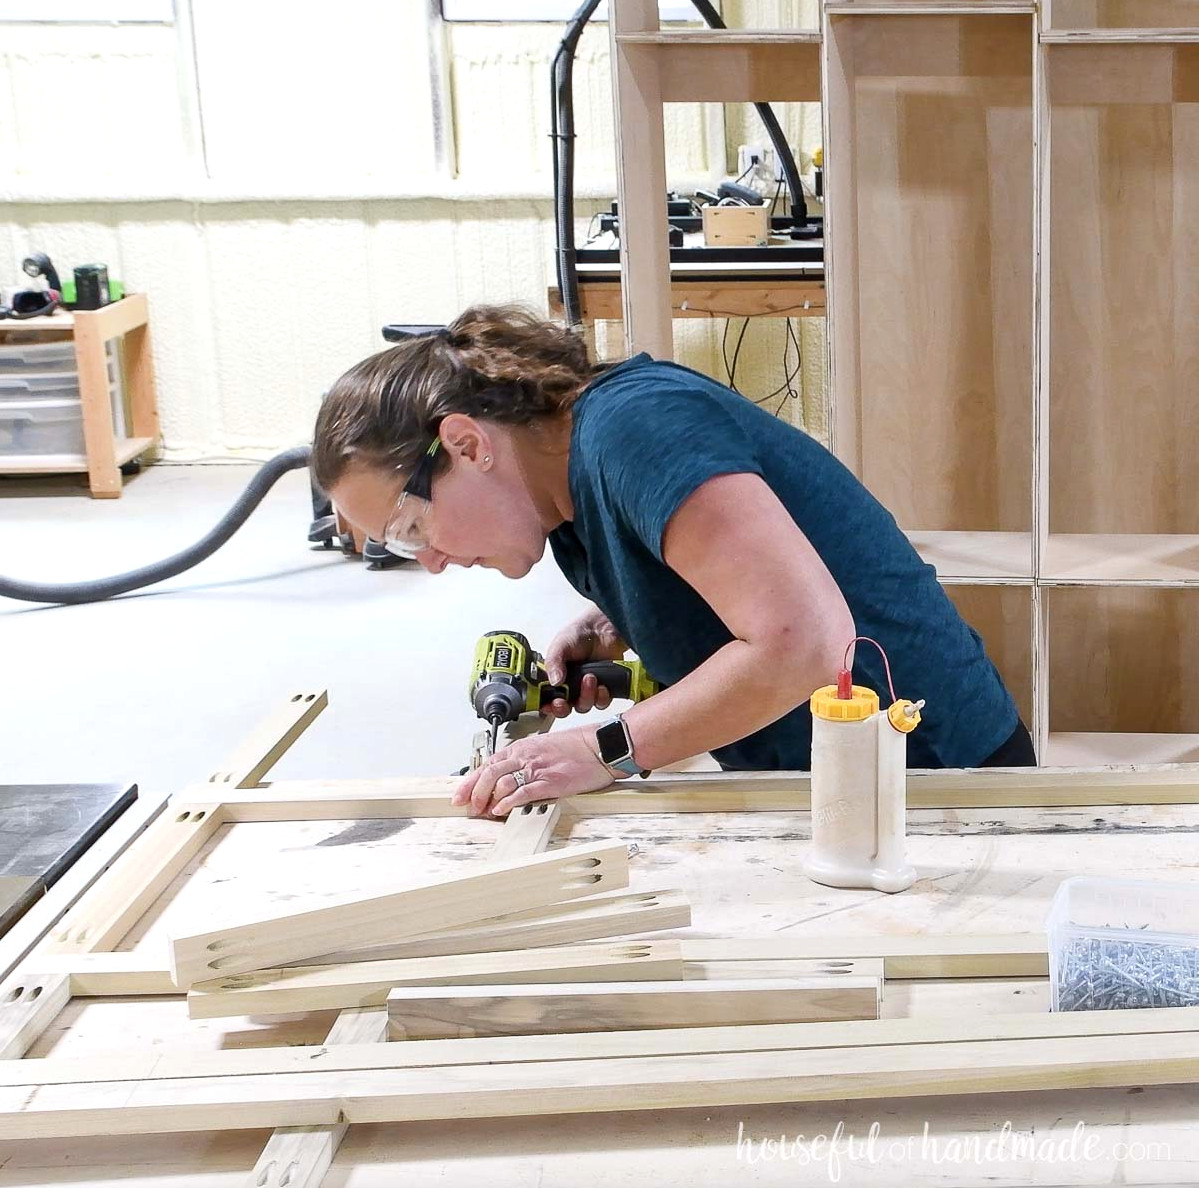
EXPERT TIP:
I planned to paint the exterior of my mudroom lockers while leaving the interior with a sealed wood finish, so I painted the face frame before installing it. This made painting easier because no masking tape was needed.
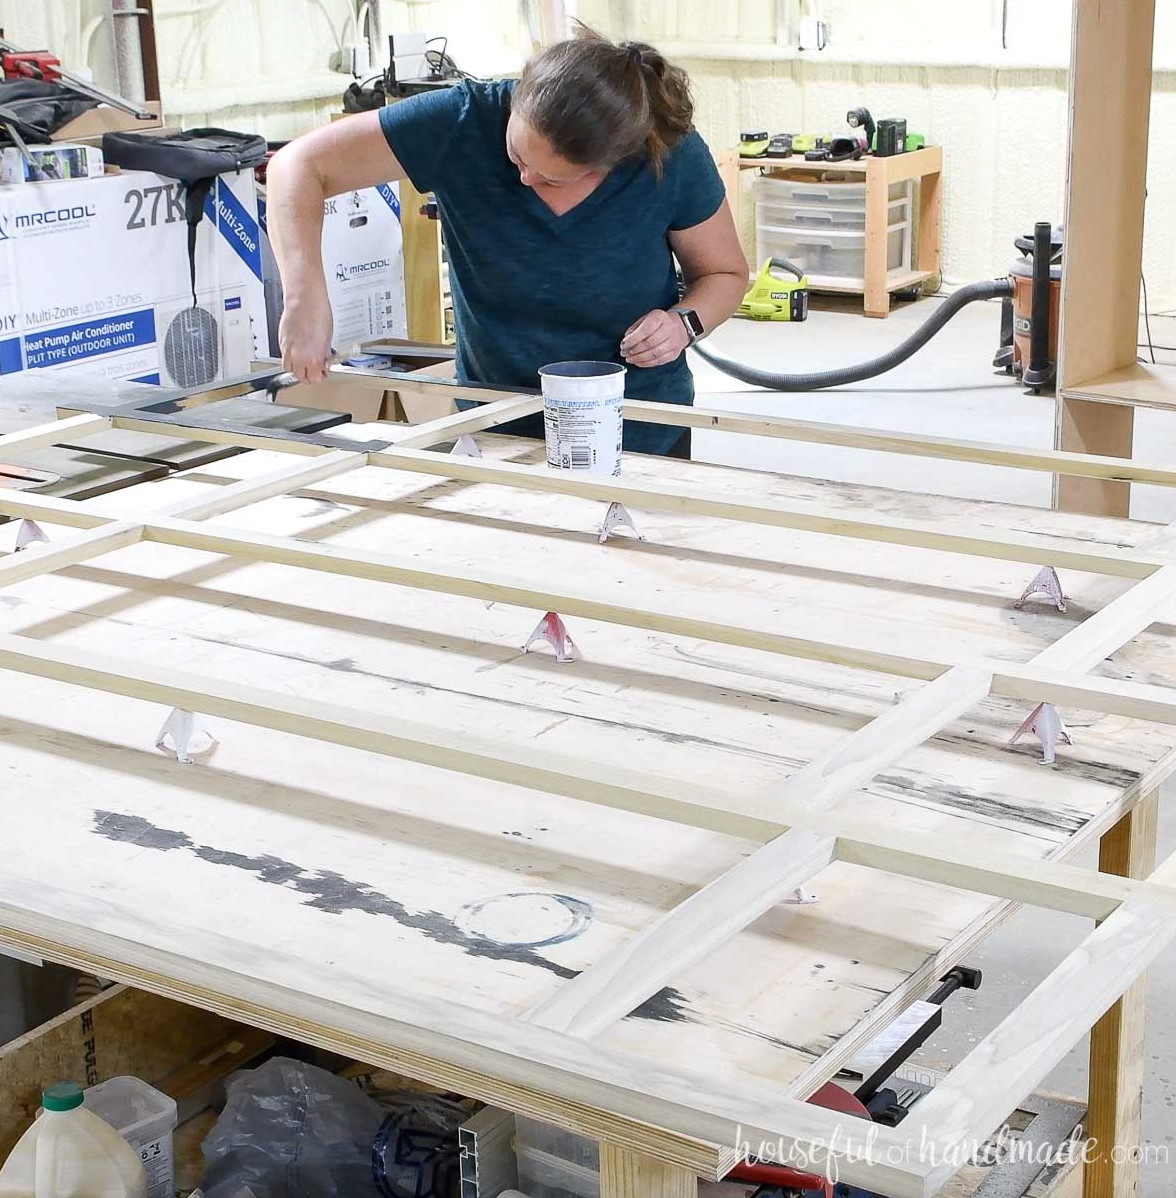
Position the face frame against the cabinet. It should sit even with the top and bottom, while extending beyond the sides by about 3/8”.
Fasten it using wood glue and 1 1/4” brad nails.
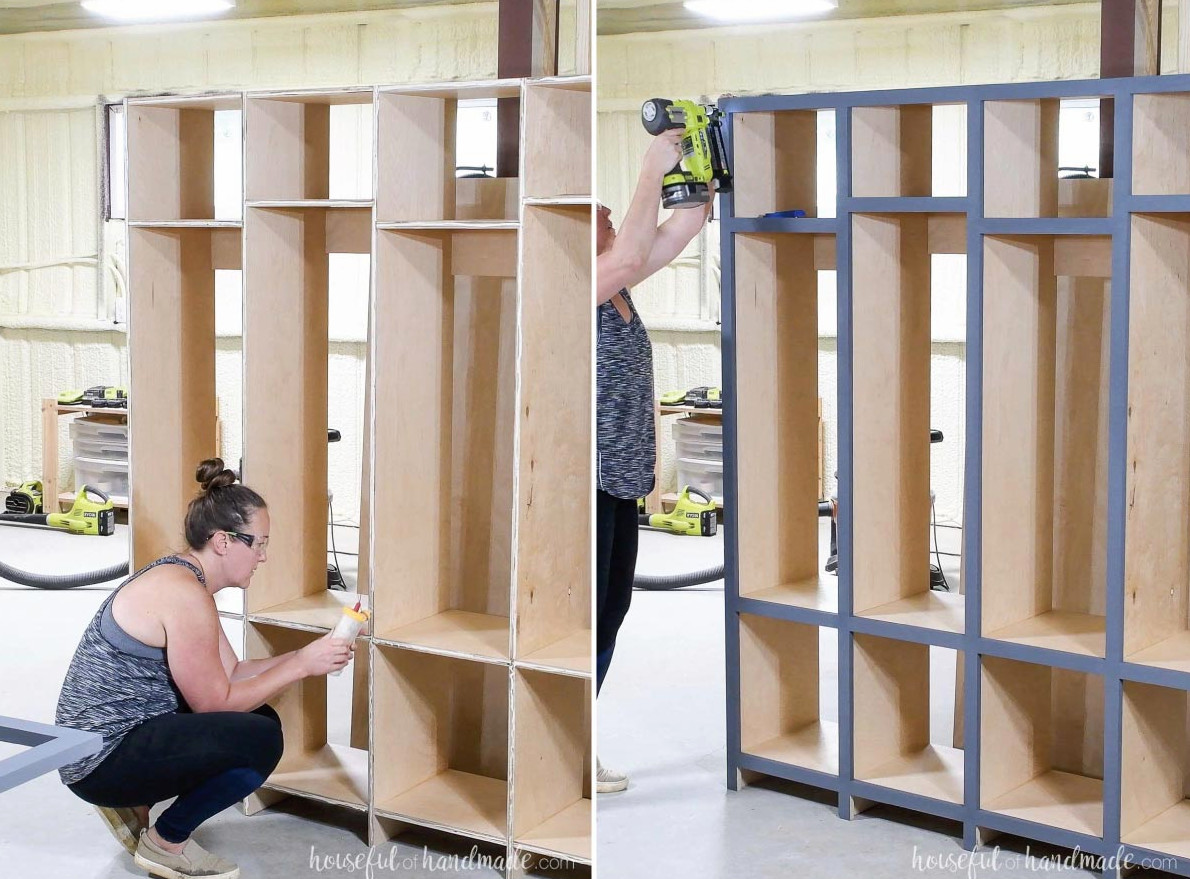
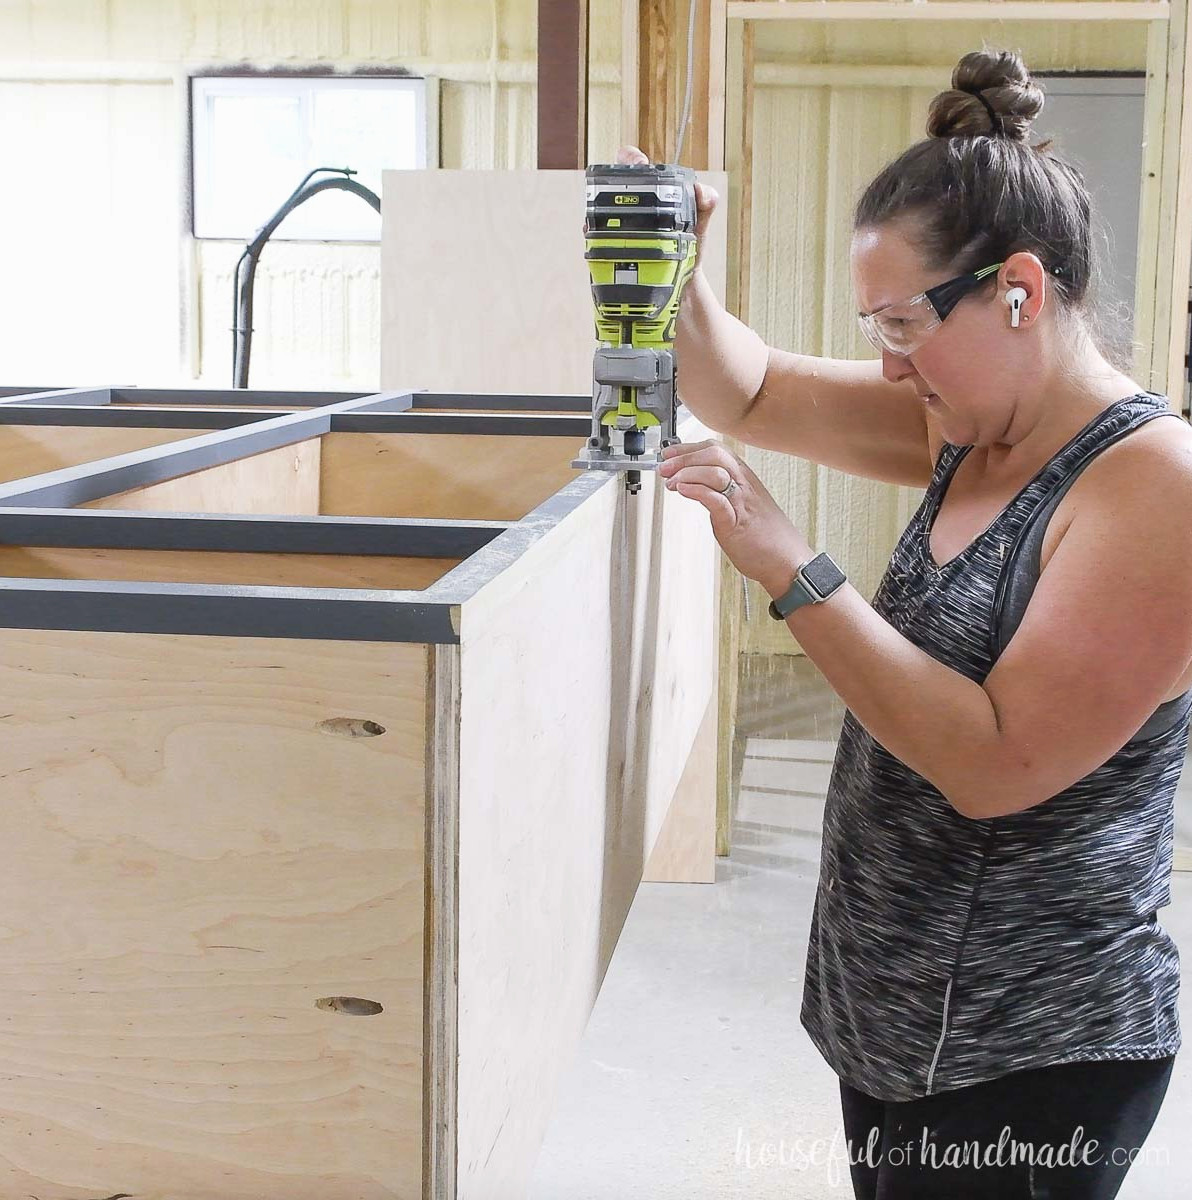
Next, use a flush-cut router bit to trim away the excess on both sides, bringing the face frame level with the cabinet.
Because approximately 3/8” must be removed, make several passes and shave off a little material with each one.
STEP 4- Install the base and back
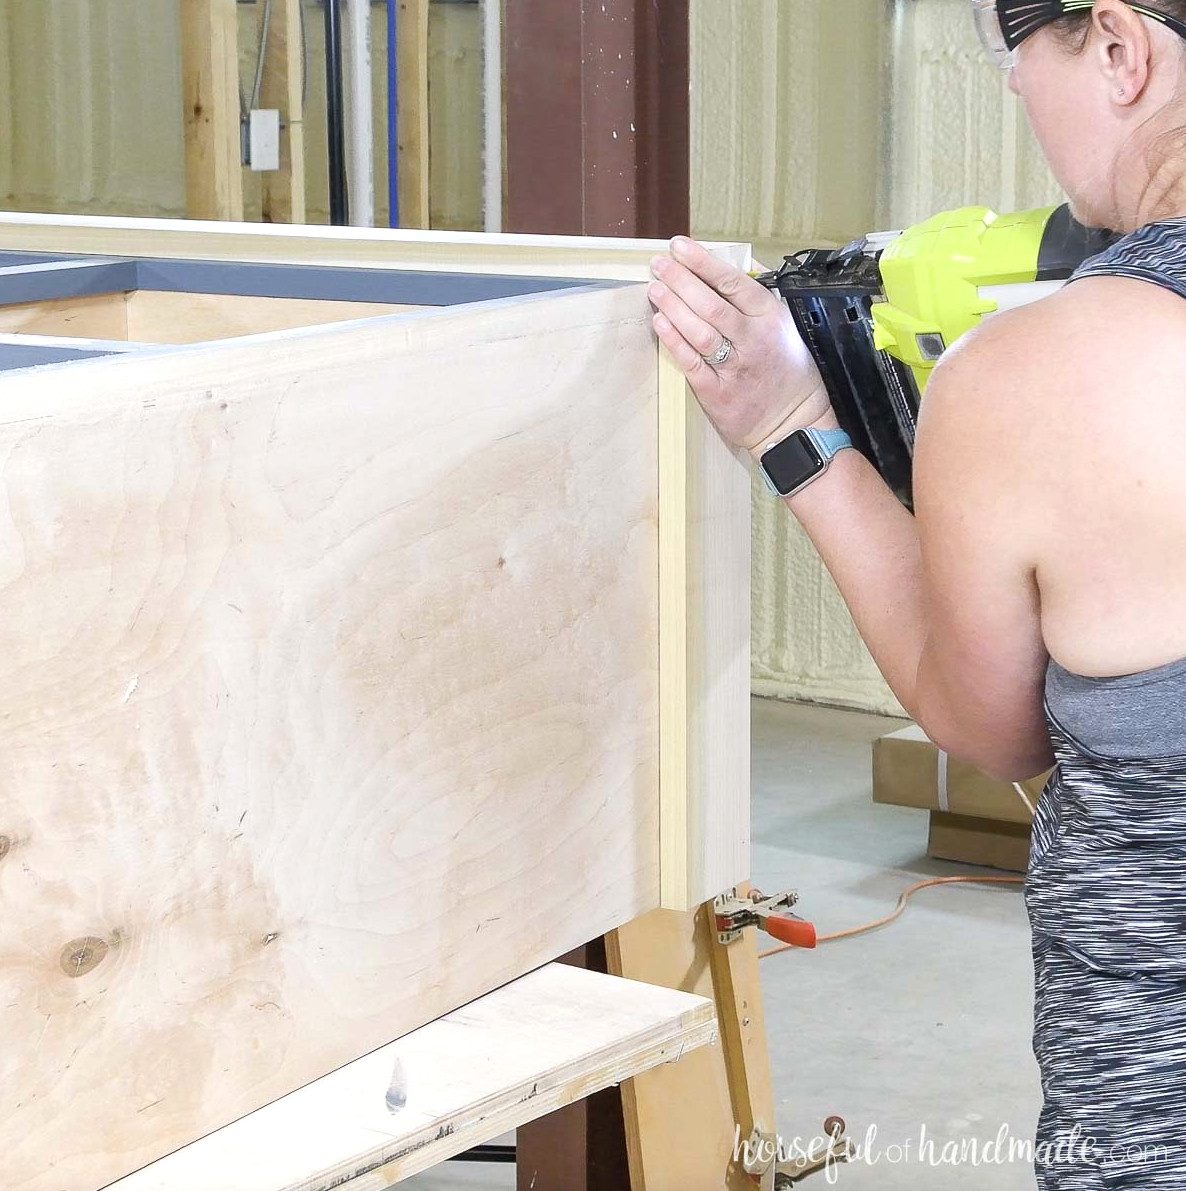
The cabinet base cut list uses an actual 1/2″ dimension, although most plywood is a little thinner. For that reason, assemble the cabinet first, measure its front, and then cut the base for an accurate fit.
Cut the two ends of the base front at 45-degree angles. Cut one end of each base side at 45 degrees as well to create a mitered corner.
Secure everything with wood glue and 1 1/4” brad nails.
Installing a back on the lockers is optional. If you plan to paint the cabinet, leave off the back, mount the unit to the wall, and paint the wall behind it to coordinate.
For a stained or wood-finished cabinet, add a back panel to the lockers’ hanging section.
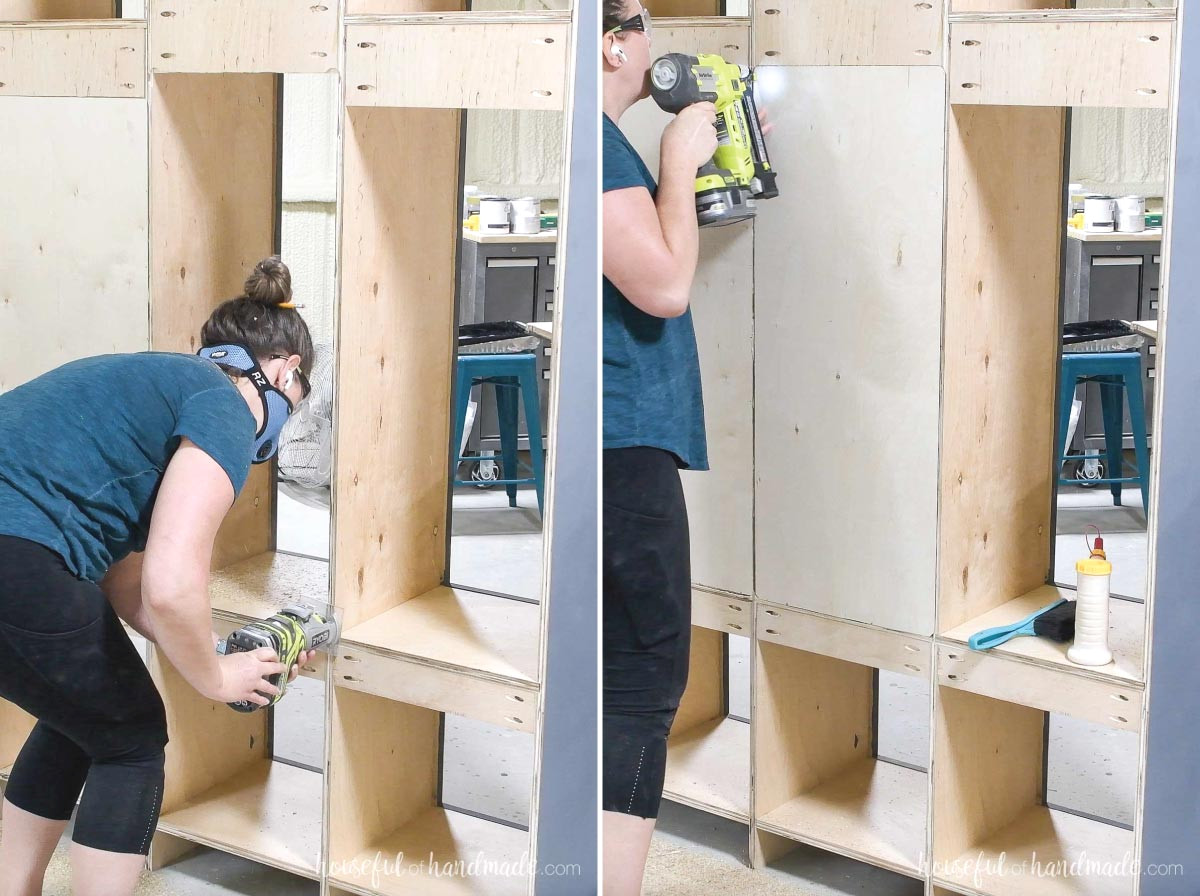
Use a router to create a groove around the center openings on the back that is 1/4” deep and 1/4” wide. Insert the back panels into the grooves, then fasten them with 5/8” brad nails.
STEP 5- Apply the finish and install
Cover the nail holes used for fastening the face frame. Afterward, sand and finish the mudroom lockers.
Because the face frame was already painted, I only needed to touch it up and paint the exterior after trimming the sides flush.
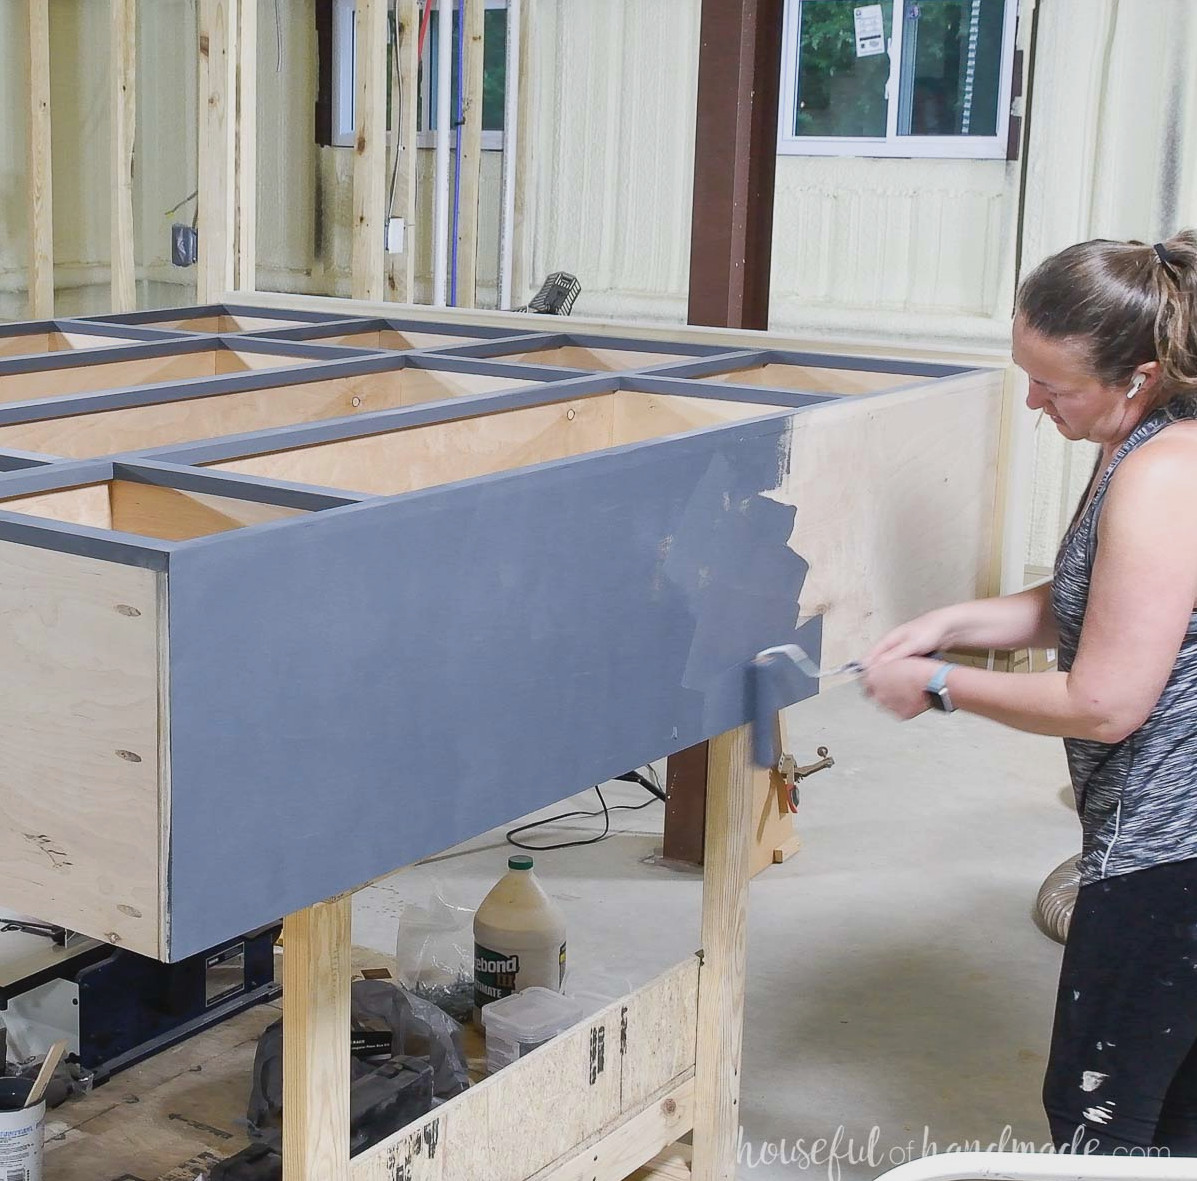
Before mounting the lockers to the wall, remove any baseboards from the installation area. Then drive fasteners through the rear support pieces and into the wall studs.
Remember to Get the Printable PDF Plans Here!
Premium plans feature:
- Suggested Tools
- Materials shopping list
- Clear cut list chart
- Cutting diagrams
- Detailed instructions with 3D renderings
- Useful resources
- BONUS: 3D SketchUp model
You’ve finished!
Place boxes and bins inside to conceal clutter, then enjoy your newly organized storage.
For additional advice as you prepare to build, watch the complete YouTube video!
Enjoy building!