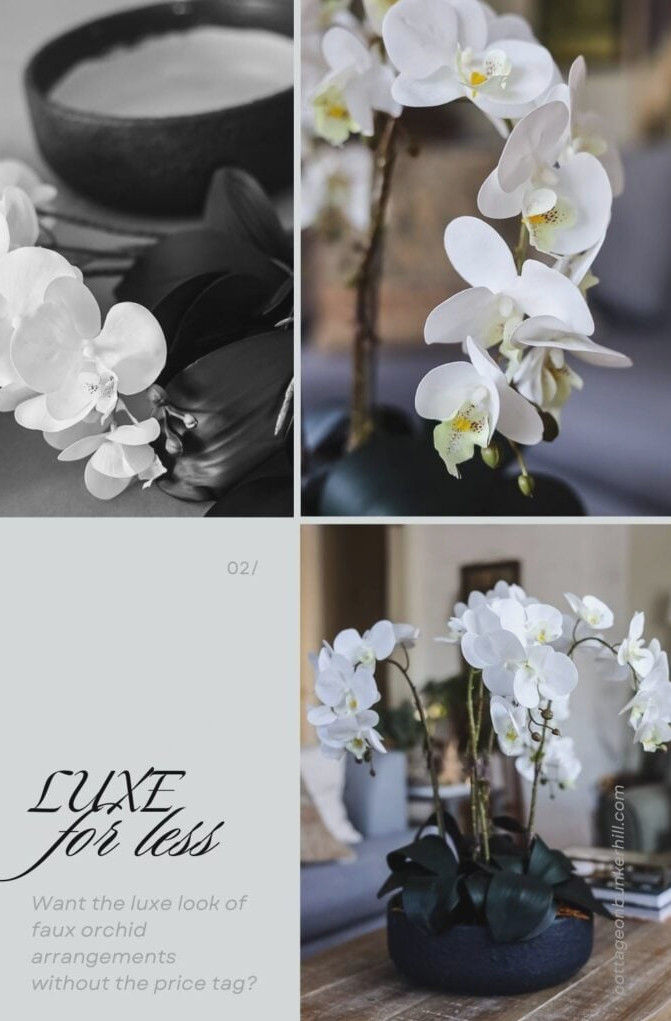
Love the elegant appearance of faux orchid displays from Pottery Barn, Ballard Designs, and Williams Sonoma but not the $400 cost? I’m going to show you how to make a beautiful DIY alternative—including a thrifted planter transformation!
Affordable Spring Luxury: DIY Orchids & Stone-Finish Planter
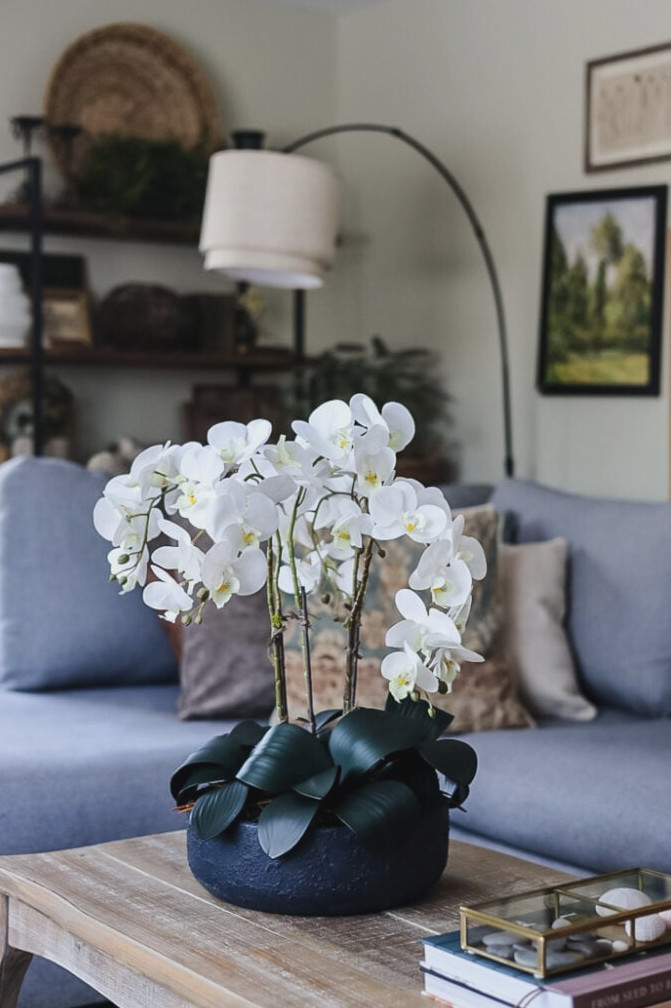
This Spring, I’ve been admiring the beautiful faux orchid arrangements sold by upscale retailers such as Pottery Barn, Ballard Designs, and Williams Sonoma. Their full, sophisticated displays are truly gorgeous—but with prices between $300 and $450, I knew there had to be a more affordable way to recreate that refined style at home. So, I made my own DIY faux orchid arrangement, including a thrifted planter makeover, for less than $30 (if you don’t already have all the supplies, yours may cost a bit more, but it will still be far less than $400!!)
The best part? I turned a simple white thrift-store planter bowl into an attractive, stone-inspired accent with an easy technique I’m thrilled to share. Combined with budget-friendly faux orchids, the finished project has the same upscale feel as the catalog designs—without the luxury-store cost. Today, I’ll guide you through each stage, from updating the planter to positioning the orchids, so you can make your own gorgeous Spring centerpiece!
Supplies Needed for This Project
DIY Planter Makeover with a Stone-Like Finish
I picked up this generously sized planter bowl at a thrift store for only $5, although it needed some updating to achieve the polished appearance I wanted. I chose to experiment with a new method for creating a stone-like surface, and I’m so pleased with the result! Here’s the process:
Supplies for Creating the Stone Finish
How to Make the Stone Texture
Take a look at the gallery below for detailed photos showing how I achieved the stone-like texture. I’ve used stone-effect spray finishes before, but this technique feels even more realistic—and costs considerably less than the $20 spray-paint alternative!
- Prepare the Texture:Stir Mod Podge and play sand together in a bowl until the mixture becomes thick and gritty
- Spread the Mixture:Apply the mixture to the planter with a foam brush. I began with a thin, smooth coat, then returned to dab additional mixture over the surface to build up the texture. Allow it to dry fully (I left mine overnight).
- Add Paint:After the surface has dried, cover the planter with dark navy/black chalk or matte paint. Pottery Barn’s latest Spring collection inspired me, and this shade suits the season beautifully.
- Seal: Although this is optional, I recommend finishing with a matte topcoat or an additional layer of matte Mod Podge to protect the paint.
- Finish the Look:The textured surface creates a sleek, upscale appearance that complements the faux orchids wonderfully.
Putting Together the Orchid Centerpiece
With the planter finished, you can now assemble the centerpiece’s main feature—the faux orchid arrangement! Here’s the method I used to achieve a luxurious, designer-inspired result.
Collect Your Materials:
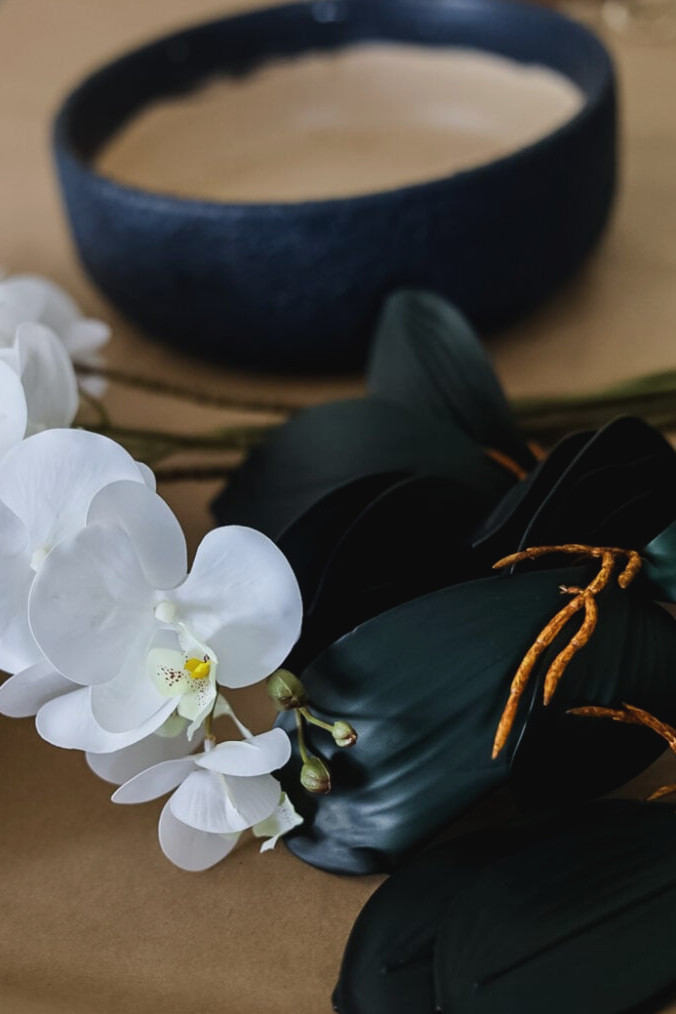
Gather everything you’ll need before starting this project. If you purchased faux orchid stems as I did, you may find that they arrived slightly curved from being shipped. Spend a few moments carefully reshaping them by hand so they’ll appear more lifelike and refined in the finished arrangement.
First, thoroughly clean your thrifted or newly purchased planter bowl. I washed mine with warm, soapy water to eliminate dust and residue, then allowed it to dry completely. Should your planter require an update, you can spray-paint or brush-paint it in a neutral shade such as white, gray, or black for a unified appearance. I selected a dark navy/black influenced by Pottery Barn’s newest Spring collection—it’s an incredibly adaptable and contemporary color!
Fit the Floral Foam:
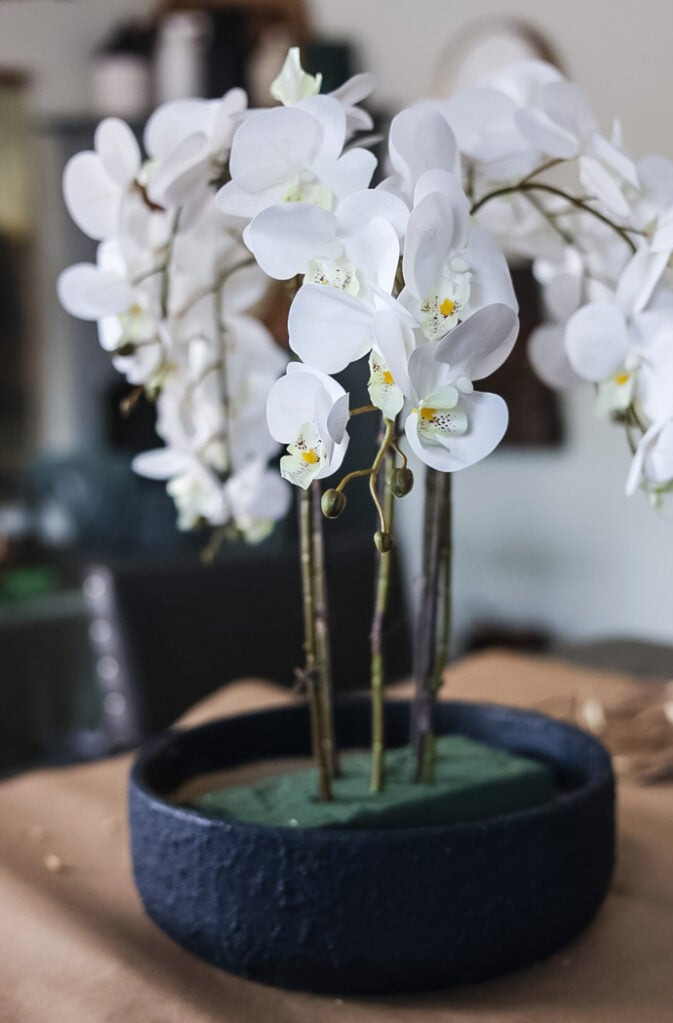
Now prepare the floral foam. With a serrated knife or floral foam cutter, trim the foam block so it fits securely inside the planter bowl. I’m using a full block of foam in my large planter, and it’s big enough to support 5 orchid stems, if I were using
more stems for an especially full arrangement, I would add a second block of foam to fill the planter.
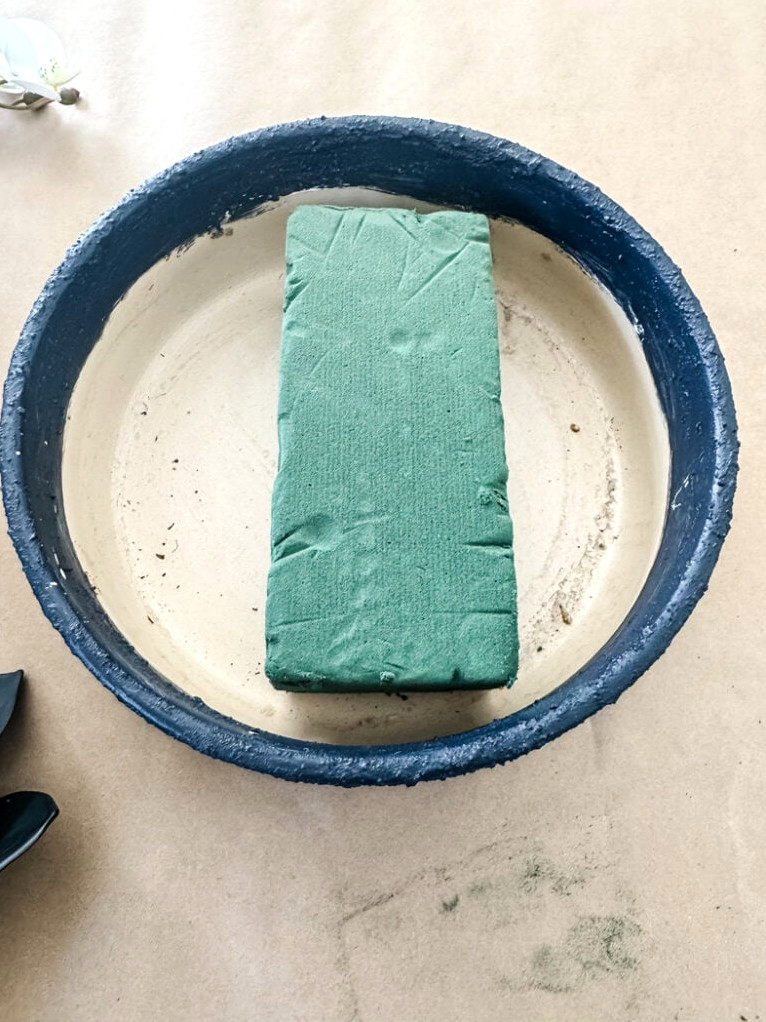
If the foam shifts around, secure it to the planter’s base with a small amount of hot glue, as I did, or floral tape. This step is essential for ensuring your arrangement remains steady and looks professionally finished.
Trim and Support the Orchid Stems:
Next, prepare the faux orchid stems. Use wire cutters or utility scissors to cut them to your preferred height, keeping a bit of extra length for adjustments after placing them in the planter. The orchids I’m using measure 32″, and I removed approximately 3 inches.
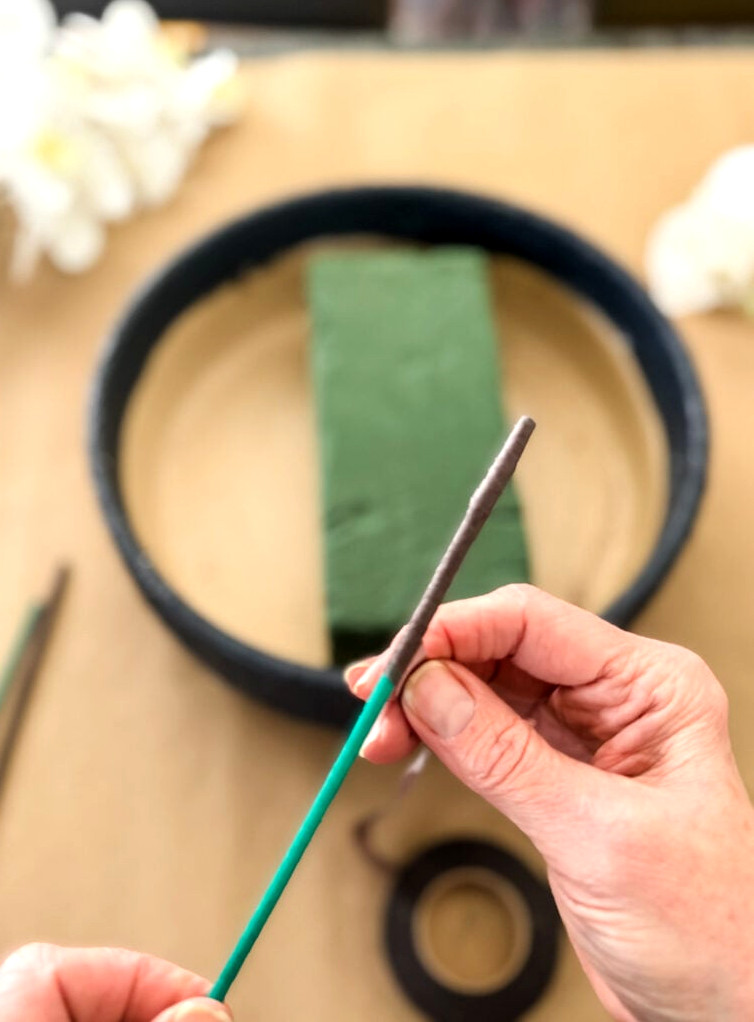
To create a more natural appearance, we’ll add floral stakes to the stems. They provide additional stability and replicate the upright form of genuine orchids. The floral stakes I had available were vivid green, so I covered them with brown floral tape so they would blend smoothly with the orchid stems.
My top suggestion for this part? Hold the floral tape hand steady while rotating the stake with your other hand. Doing it this way keeps the process simple and speedy!
The stakes pictured here, which are from Amazon, already come in brown. If you don’t have either option, wooden skewers or slim dowels can work as well. Cut costs by working with supplies you already have at home—it’s all about using what’s on hand!
Arrange the Orchids:
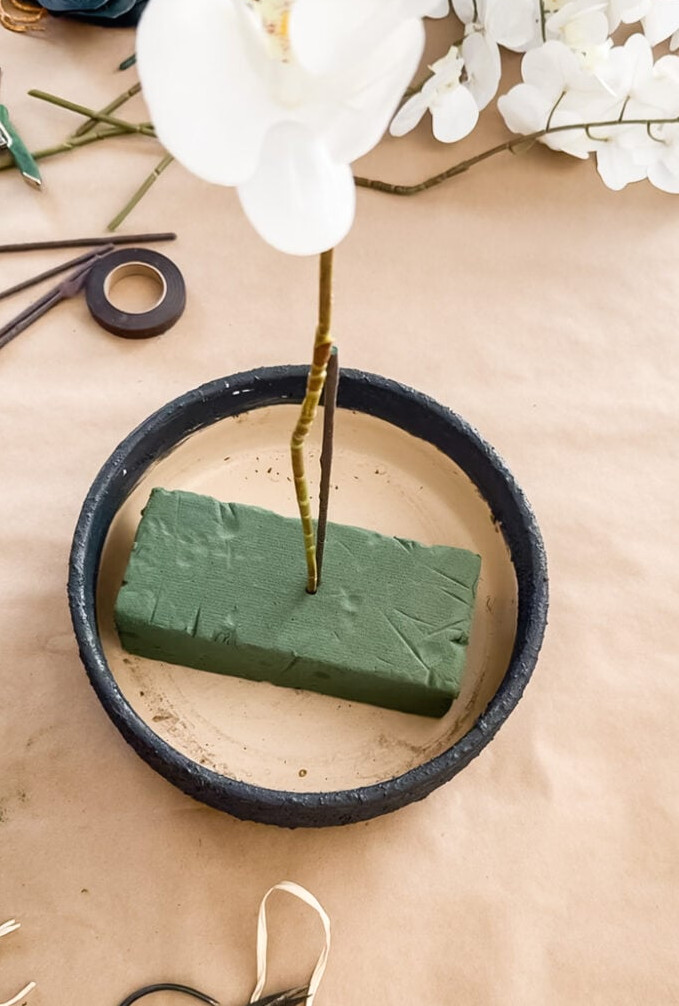
This is where the arrangement really comes together! Begin by placing one orchid stem in the middle of the floral foam, then work toward the outside to achieve a balanced, natural appearance. I’m using 5 stems, but if you’d like to include more, I recommend choosing an odd number. There’s no need to fluff or curve the orchid stems just yet.
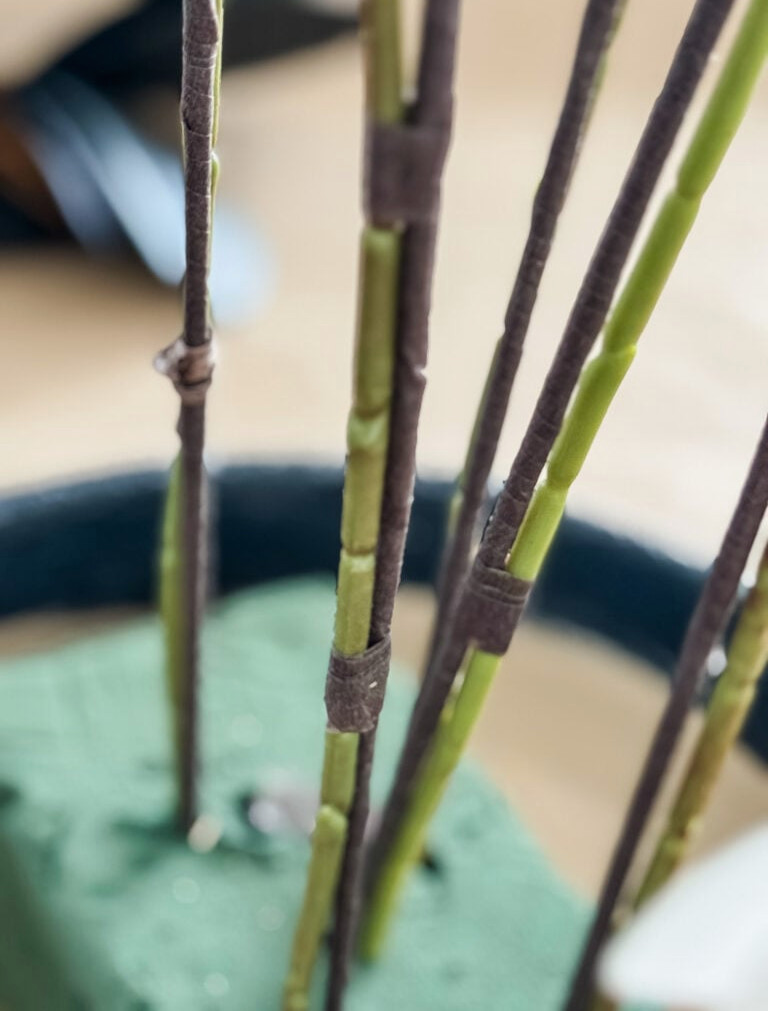
Using brown floral tape, I fastened floral stakes to the back of every stem in two locations: roughly one-third of the way down from the top and again close to the stems’ base.
Insert the Orchid Leaves
Can you have an orchid without its iconic glossy leaves? The leaves included with my orchids looked somewhat flat, so I spent a few minutes reshaping them to achieve a more genuine, lifelike appearance. Carefully bend and bow the leaves to imitate their natural growth pattern—this little detail makes a significant difference in creating a luxurious, upscale look.
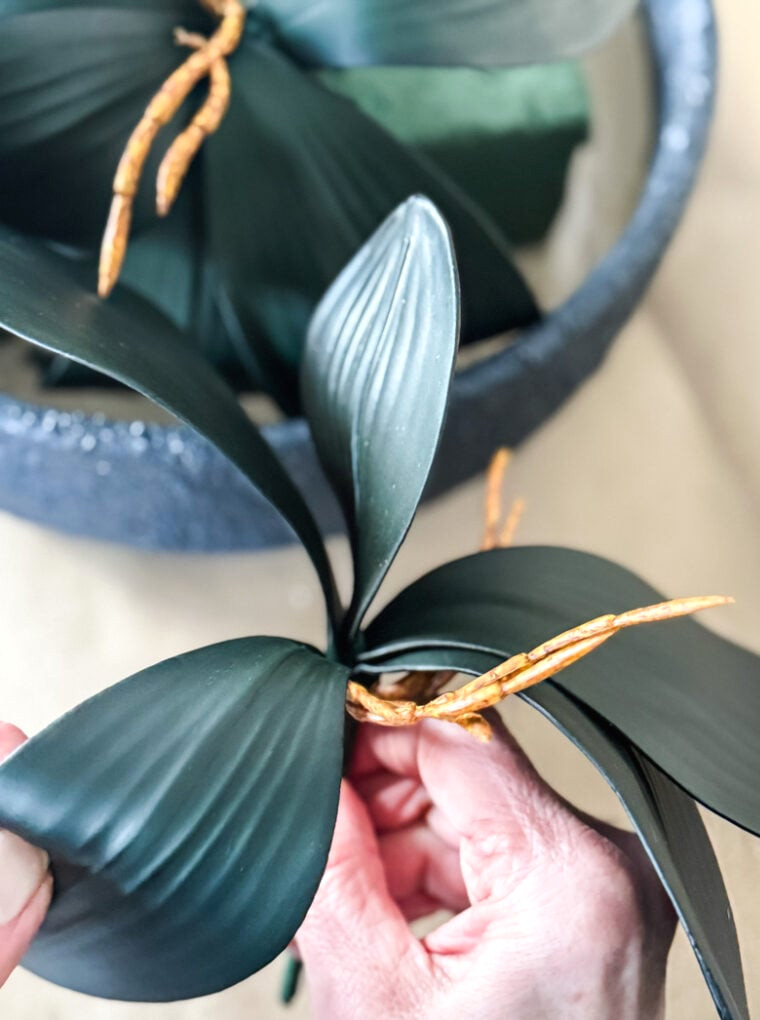
After shaping the leaves, I placed them around the planter at varying angles until they appeared naturally arranged.
Finish with Raffia:
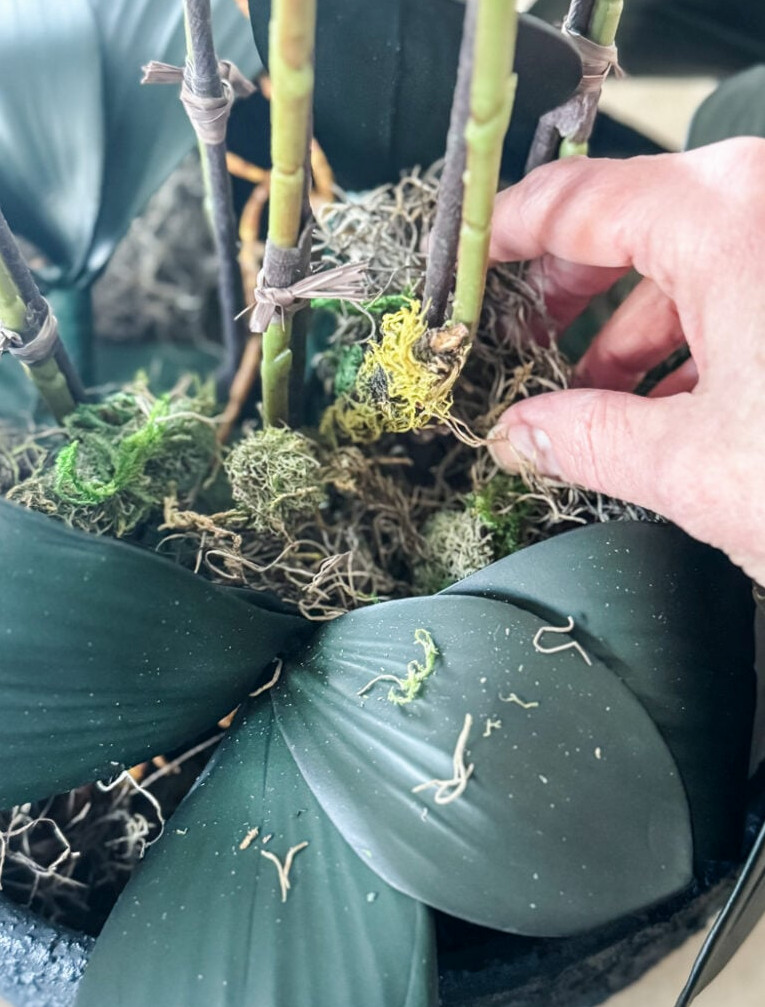
To add one last rustic detail, I wrapped brown raffia over the floral tape around the orchid stems and trimmed the ends near the stem. It brings a natural, earthy touch that pairs beautifully with the orchids and moss. It’s also a simple way to make the entire arrangement feel cohesive! For an extra “real” orchid detail, you could add orchid clips as well.
Add the Moss:
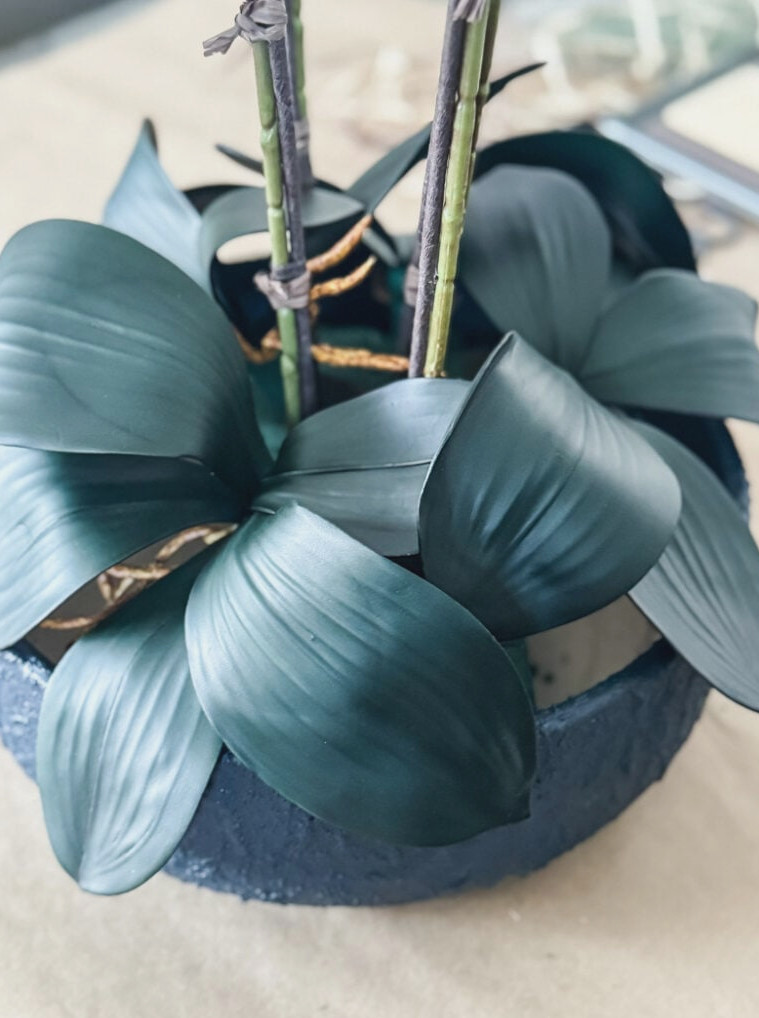
Now, finish your arrangement with moss to create a refined, natural appearance. I combined green moss with Spanish moss to add variation and dimension. Tuck it around the orchid stems’ bases, ensuring the floral foam is completely concealed. Besides hiding the arrangement’s mechanics, this final step gives it a luxurious, polished look and brings all the elements together.
Molding the Orchid Stems for a Realistic Appearance
To create that luxurious, designer-inspired appearance, take time to shape the faux orchid stems and blossoms. Begin by softly curving the stems so they spill naturally across the planter’s edge, as real orchids might. Next, gently reposition each bloom and leaf, bending them just enough to recreate the loose, organic form of living orchids.
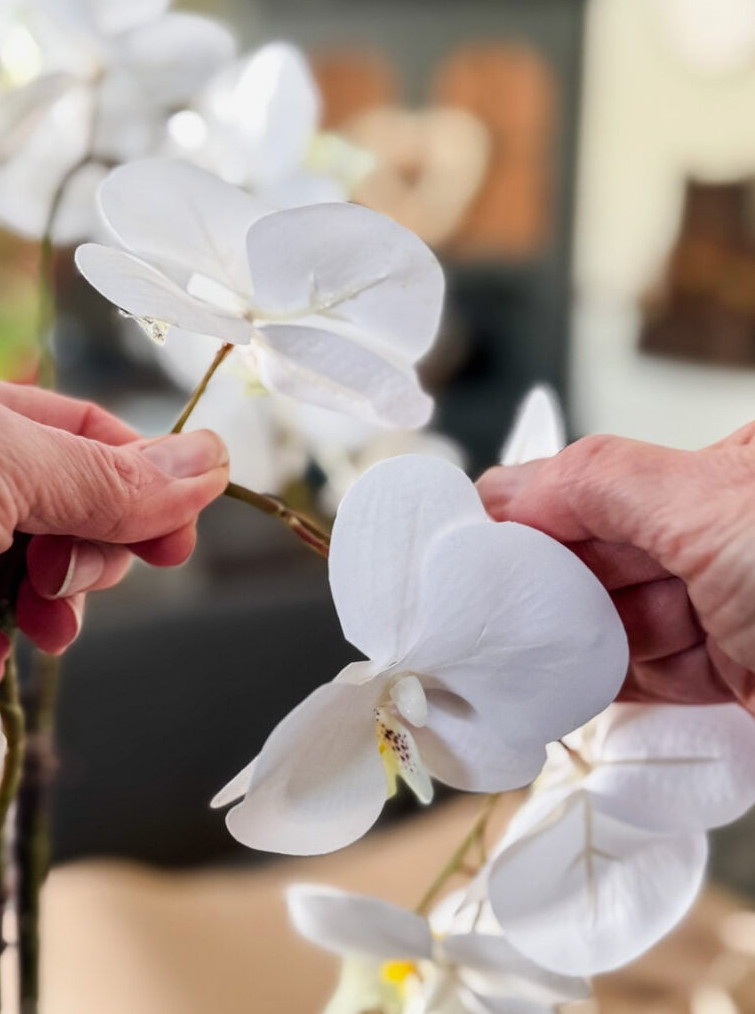
Getting the placement perfect may take several minutes, yet that careful finishing touch is what distinguishes a homemade arrangement from a premium version. When the stems and blossoms appear convincingly natural, you’ll have an impressive, lifelike display that can stand alongside even the priciest catalog designs.
Arrange and Admire:
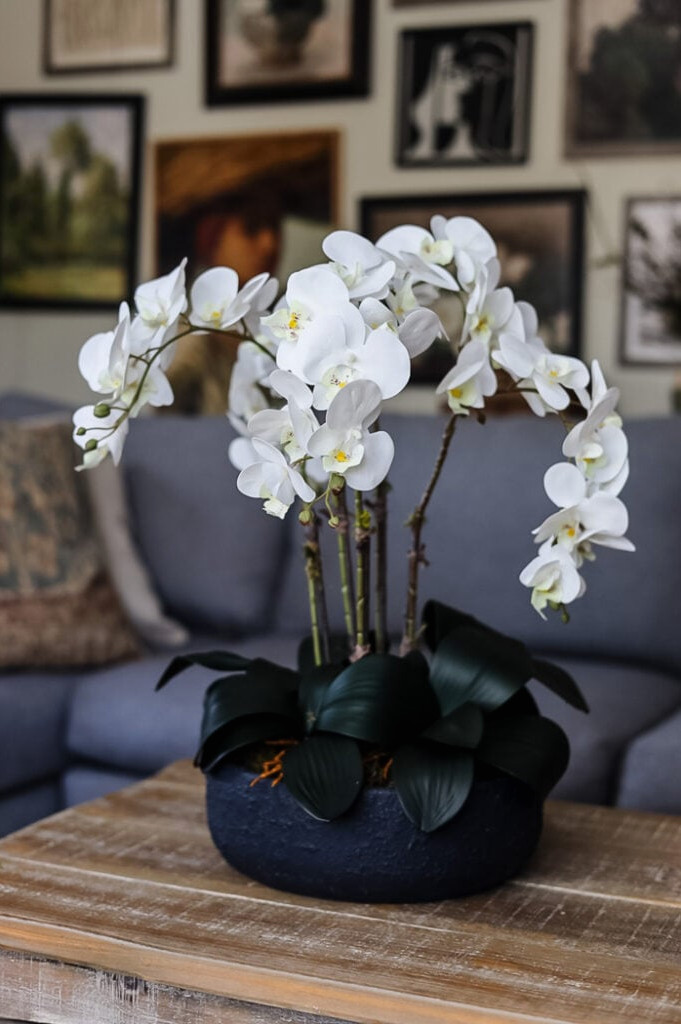
Your handmade faux orchid display is now finished! Set it on a console, dining table, or mantel to immediately enhance your interior. Combine it with organic accents such as woven baskets, candles, or a pile of books to create a warm, layered effect. Its adaptable style suits modern, farmhouse, and traditional rooms alike. Take a step back to appreciate your creation—you’ve achieved an upscale look without the upscale price!
DIY Gallery Wall with Free Art Print Download
Instructions, Step by Step:
- Get the Planter Ready:
- When using a secondhand planter bowl, clean it carefully. If it could use an update, paint it or experiment with the stone-effect method I used.
- Fasten the Floral Foam:
- Trim the floral foam block until it fits securely inside the planter bowl. If necessary, hold it in place with hot glue or floral tape.
- Cut and Reinforce the Orchid Stems:
- Use wire cutters to shorten the faux orchid stems to your preferred height. For a more lifelike finish, secure floral stakes or slender dowels to the stems with brown floral tape. This provides support, keeps them upright, and suggests the natural growth pattern of real orchids.
- Position the Orchids:
- Place the orchid stems into the floral foam at different heights and angles. Continue adjusting the arrangement until the proportions and movement feel balanced.
- Layer in the Moss:
- Conceal the floral foam with a combination of green moss and Spanish moss. This finishing layer creates a refined, upscale appearance.
- Add a Raffia Accent:
- Circle raffia around the orchid stems’ base, or fasten it around the planter bowl, to introduce a rustic, earthy detail.
- Arrange and Enjoy:
- Display the completed arrangement on a console table, dining table, or mantel. Add other Spring accents, such as candles, books, or woven baskets, for a coordinated look.
Add Upscale Appeal to Your Home
Making this DIY faux orchid arrangement was an incredibly satisfying project, and it demonstrates that bringing designer style into your home doesn’t require spending hundreds of dollars. With a bit of imagination, a thrifted planter, and a few budget-friendly supplies, you can create a sophisticated look comparable to even the costliest catalog arrangements.
And the greatest benefit? You can tailor every part of this project. Whether your taste leans toward a sleek monochromatic style or a more earthy, natural atmosphere, it can be modified to reflect your preferences. I hope this guide encourages you to make your own beautiful orchid arrangement. Believe me, the work is worthwhile once you see the finished piece displayed and gracingyour residence!
Here’s to adding a touch of elegance to our homes—while staying within budget!
Have your projects showcased! If this project or any of my other DIY creations sparked your inspiration, I’d be delighted to see them and feature you in the Reader’s Spotlight gallery. Email a photo to jennifer@cottageonbunkerhill.com
xo, Jennifer
shop materials
DIY Orchid Display
browse my amazon shop