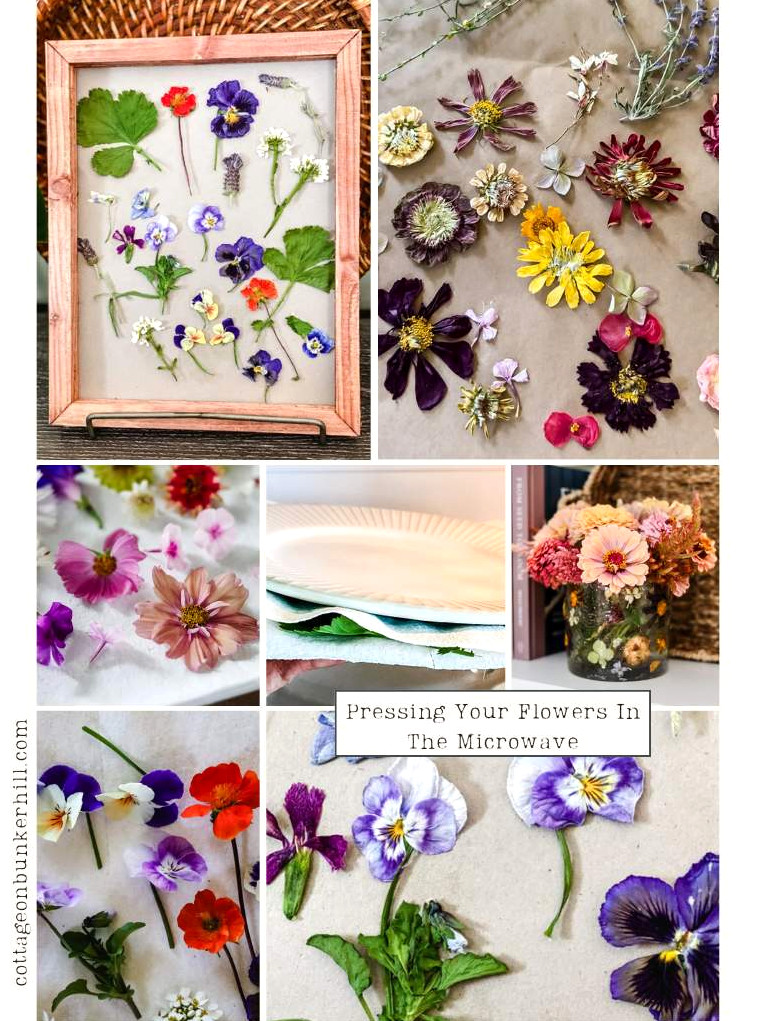
Fast & Simple Microwave Flower Pressing: Save Blooms in No Time!
Let me share 2 easy techniques for pressing flowers in the microwave within minutes. We’ll begin with plates and paper towels, then try a microwave press kit. I’ll show you the outcomes and give my sincere thoughts on which approach I prefer.
I’ll be honest: when I first watched someone press flowers in a microwave, I was a little skeptical. After experiencing plenty of Pinterest disasters, I tend to question anything that seems unbelievably easy. Still, this experiment wouldn’t cost anything, so I headed into the garden, gathered a small bunch of violas, and just two minutes later, I was completely convinced. There was no towering pile of books or three-week delay—only vivid, lovely pressed flowers ready to become something special for your home.
Ever since I originally published this, many of you have wondered if a microwave flower press kit is genuinely worth purchasing, so I eventually picked one up to compare with my traditional plate-and-paper-towel technique. Spoiler: I enjoyed using it far more than I anticipated. I’ll explain both methods so you can choose the best option for your project.
In this guide, I’ll demonstrate two straightforward ways to press and dry flowers in the microwave in only a few minutes, offer my candid comparison of plates and a kit, and suggest some enjoyable DIY ideas for displaying your blooms.
Hello! I’m Jennifer, and I’ve always felt that nature provides the loveliest art materials. For many years, I’ve preserved New England’s flowers and greenery by pressing, drying, and crafting. Let me teach you how to preserve a small piece of the season and bring it inside—easily and beautifully.
Method 1: Plates & Paper Towels (No Press Kit Needed)
There’s a special kind of charm in transforming flowers you grew yourself into something you can preserve and enjoy. The quickest method I’ve discovered? A couple of minutes in the microwave. Forget heavy books piled across the dining table for several weeks—this requires no complicated setup, just a few garden blossoms (or flowers from the supermarket), two smooth paper towels (I use Viva brand-don’t use anything that is printed or super textured), dinner plates, and the microwave already sitting in your kitchen. Today, I’ll guide you through the entire easy process, along with a charming framed craft for displaying your pressed flowers.
Step 1: Collect Flowers for Pressing
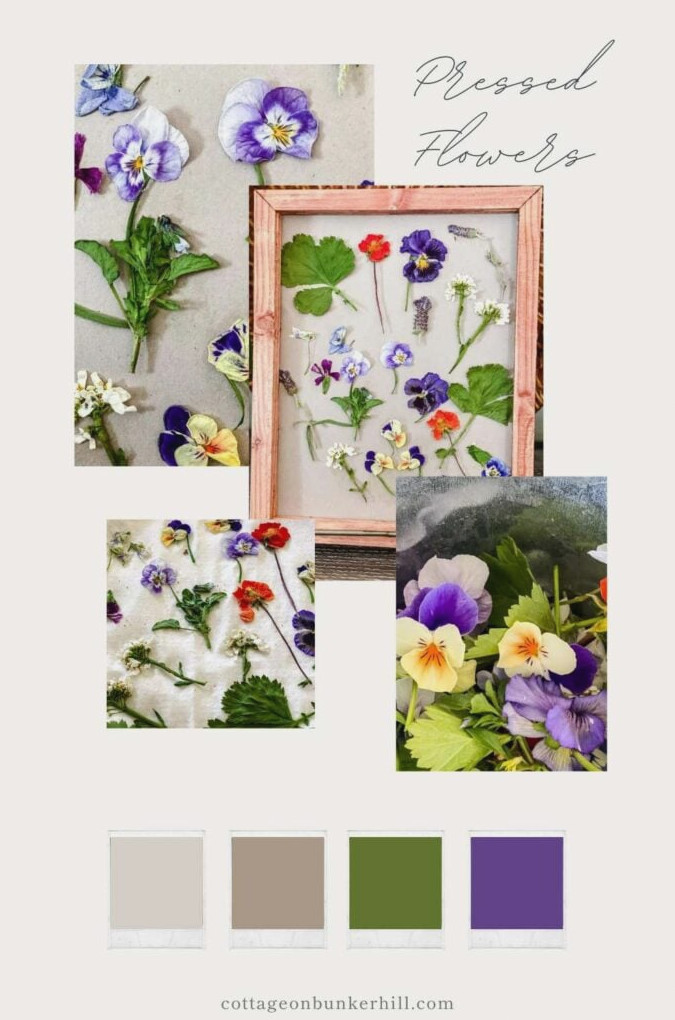
When I first tested this technique, it was spring, so I went outside and gathered whatever was available, mainly violas, pansies, geum, and lavender. I thought it made sense to begin with smaller blossoms that would also press nicely using the traditional approach (you know, inside a large, weighty book).
Popular flowers suitable for pressing:
- Daisies
- Pansies
- Roses (small)
- Marigolds
- Petunias
- Larkspur
- Zinnias
- Cosmos
- Verbena
- Ferns
Step 2: Get the Flowers Ready
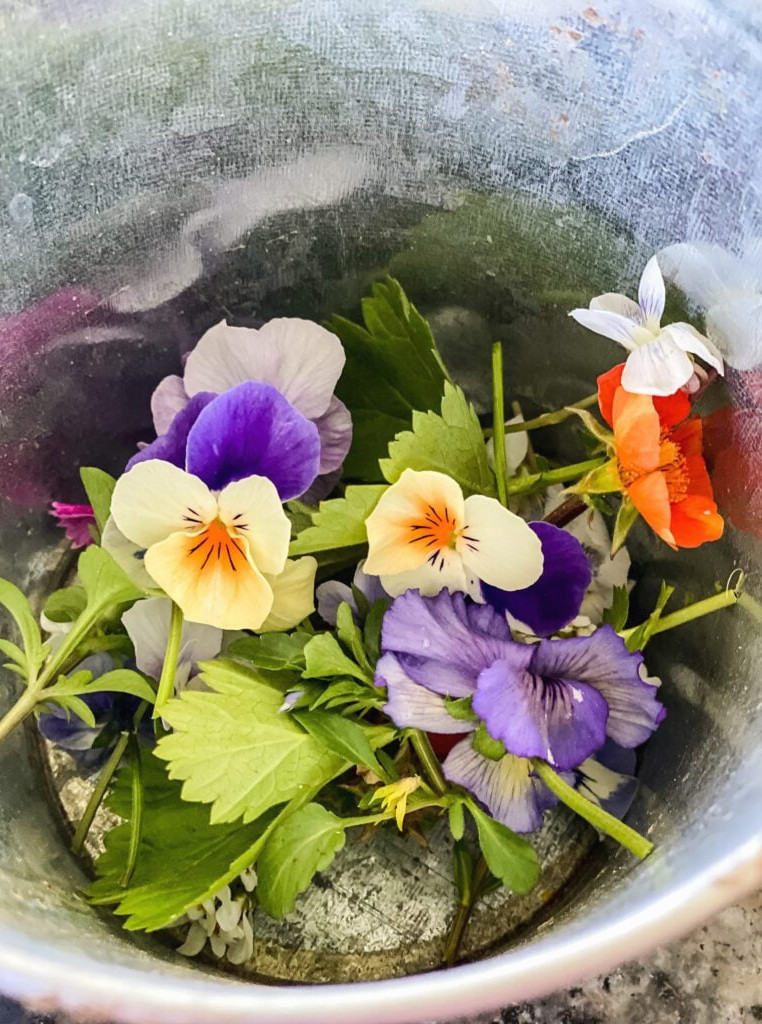
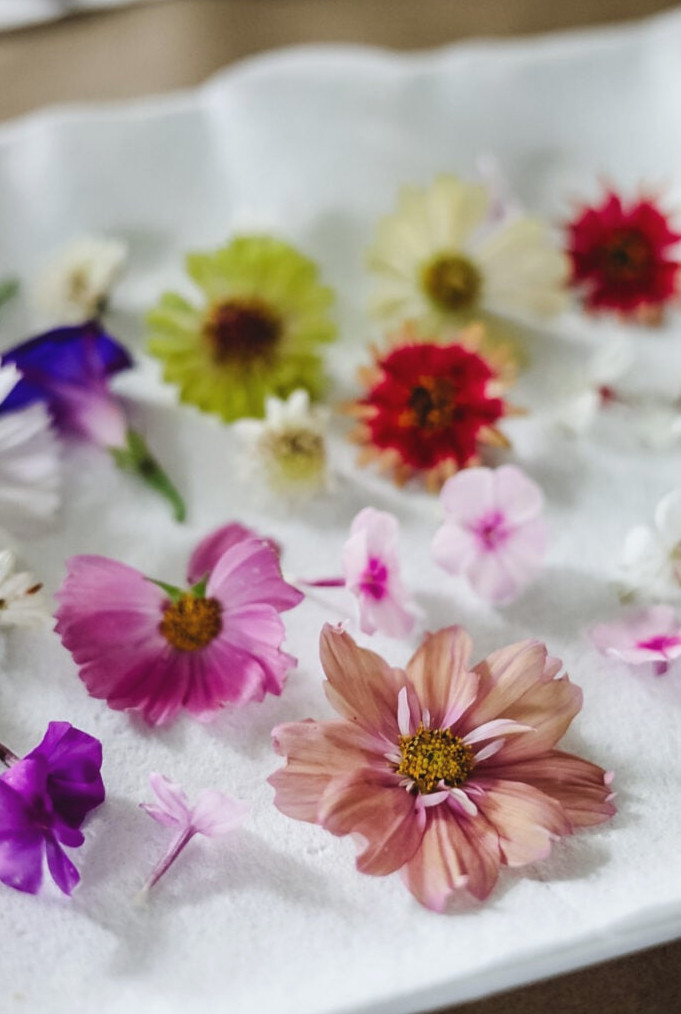
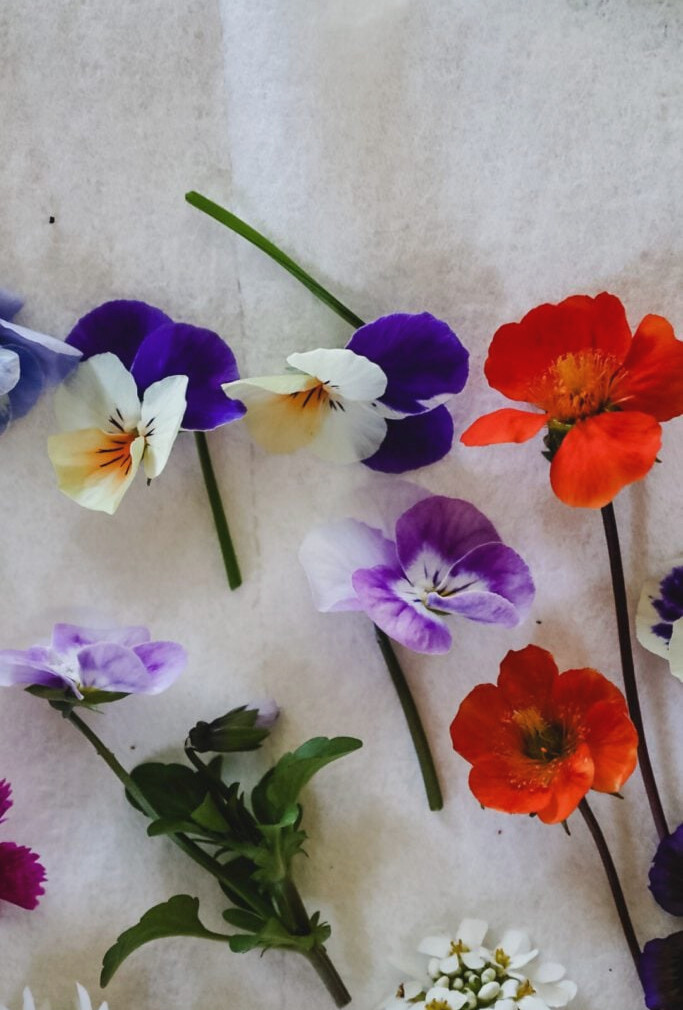
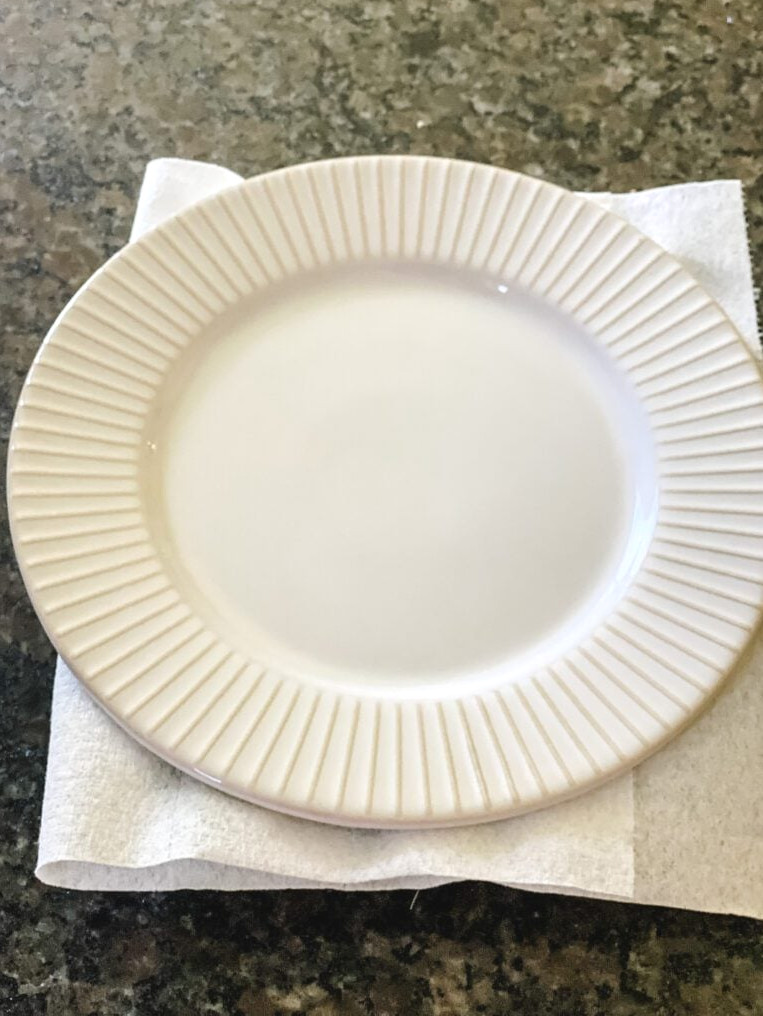
Begin by taking off any extra leaves from the flowers you plan to press. Cover a dinner plate with a Viva brand paper towel or another smooth variety, then arrange the flowers on top, ensuring they do not touch one another.
I lightly pressed the flowers to flatten them a bit while protecting their fragile faces. After that, I placed a second paper towel over them.
To finish, I placed another dinner plate on top to apply weight to the flowers. This assists with the speedy microwave pressing
Fast Instructions:
- Trim away any extra foliage from the flowers you plan to press.
- Place a dinner plate with a flat paper towel and arrange the flowers on it, ensuring they do not touch one another.
- Press the flowers lightly so they flatten a bit without harming their fragile surfaces.
- Lay a second paper towel over them.
- Place another dinner plate on top to add weight; this assists with the speedy microwave-pressing process.
Step 3: Heat the Flowers in the Microwave
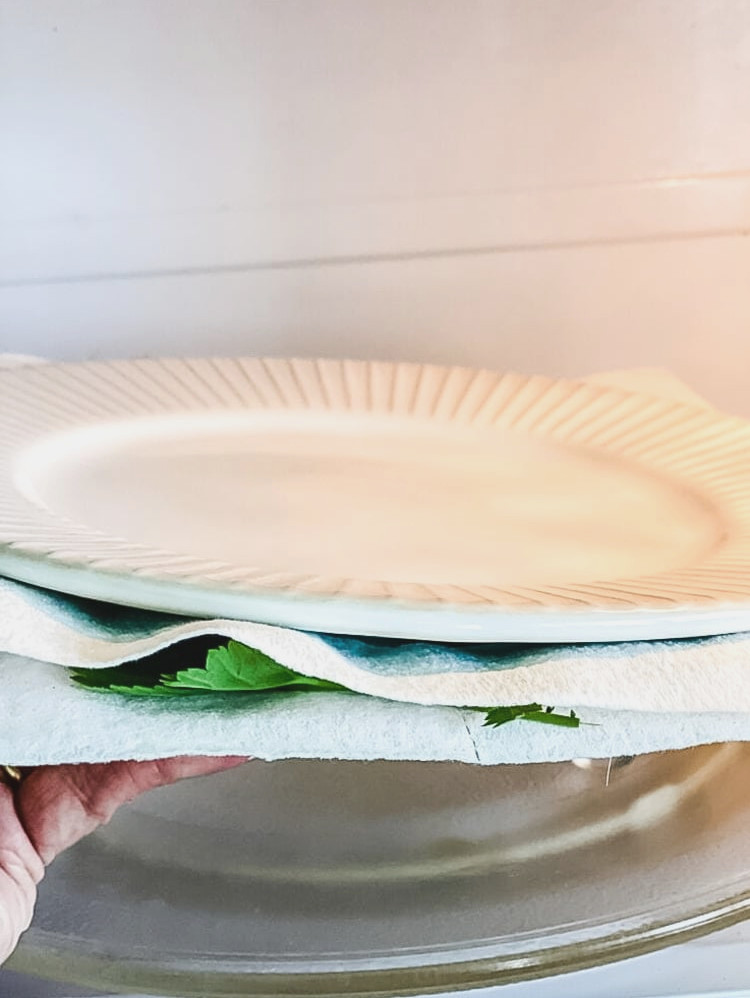
Honestly, sliding a plate filled with flowers into my microwave felt incredibly strange!!
This is the important part: avoid heating them at maximum power. Adjust your microwave to roughly 50% power and heat in 30-second intervals, inspecting the flowers after each burst. A gentler, slower approach prevents them from browning or burning.
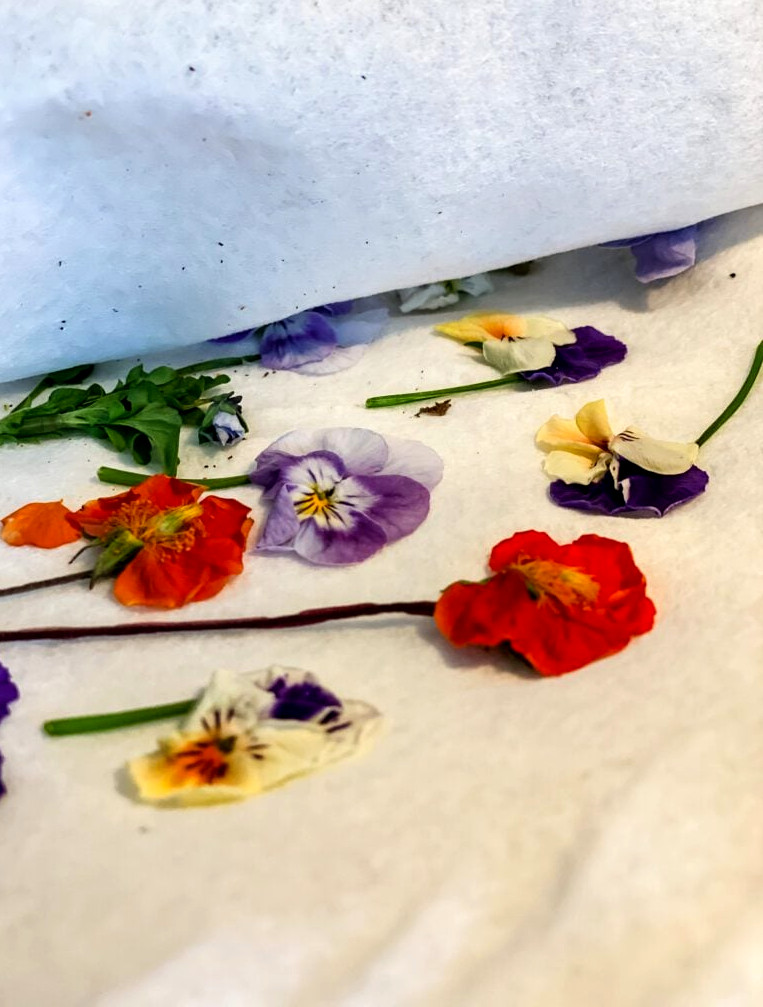
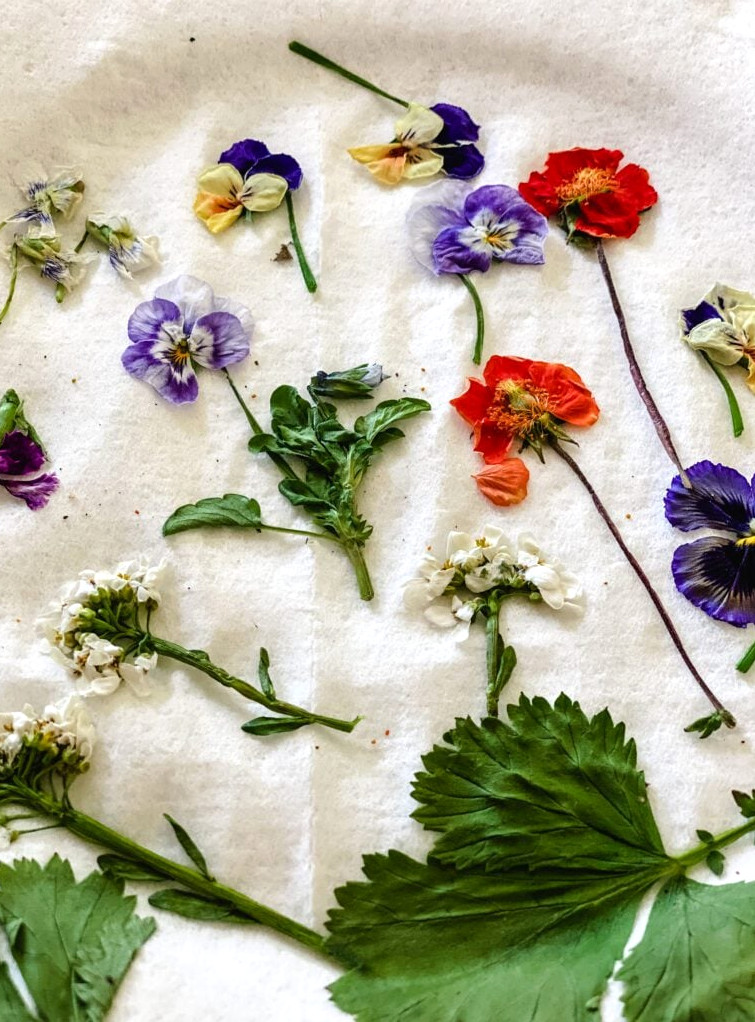
My microwave dried the flowers in 2 minutes. The duration will vary according to your microwave’s strength and the type of flowers you’re pressing, so inspect them every 30 seconds. Their readiness will be obvious; they should feel dry, papery, and pressed. (When I checked them for the first time at 1½ minutes, they still needed more time.)
Fast Instructions:
- Adjust the microwave to approximately 50% power.
- Heat the flowers in 30-second intervals, checking them after each round. Continue until they feel dry and papery — mine required about 2 minutes altogether, though the exact time depends on your microwave and flowers.
- Remove the plate carefully (the flowers will be hot and moist!) and transfer them from the wet paper towel to a clean paper towel or parchment paper.
- Allow them to cool fully. During this stage, they become firm and develop that dry, pressed texture. If you won’t use them immediately, let them sit out overnight to dry thoroughly, and wait before placing them in a container or baggie.
One Final Note!
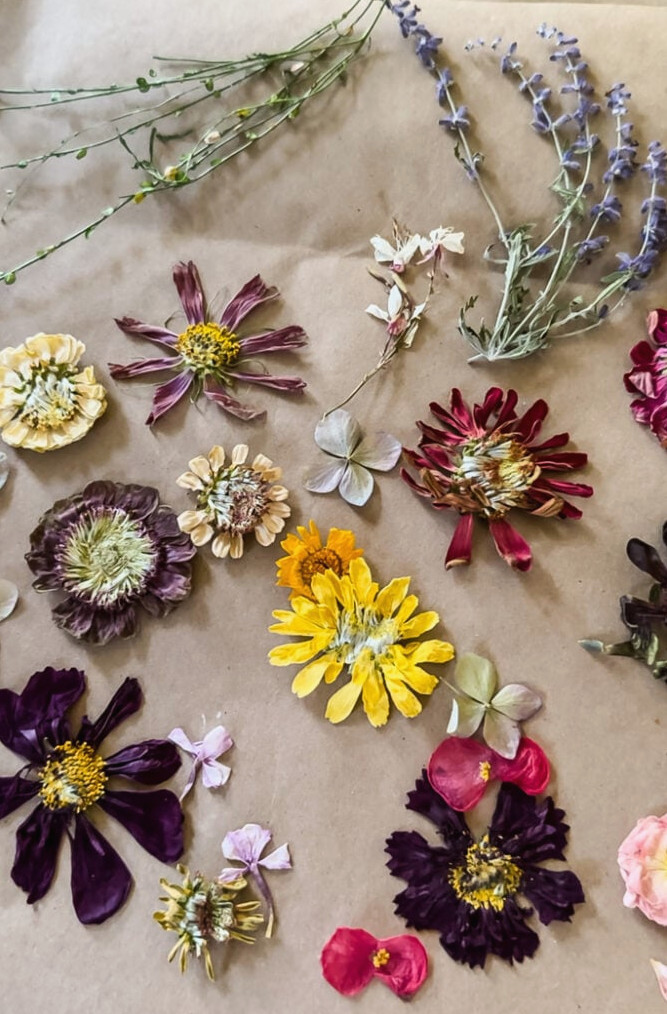
Here’s something worth remembering: once the flowers come out, they’re hot– even steamy- so give them time to cool before handling them. I usually transfer mine from the damp paper towel to a clean paper towel or some parchment paper. While they cool, they become firm and develop that dry, papery texture.
When I don’t need them immediately, I let them remain out overnight so they can dry completely. At this point, avoid storing them in a container or baggie; trapped moisture can leave you with soft, potentially moldy flowers rather than neat, crisp pressed ones.
Method 2: Microwave Flower-Pressing Kit
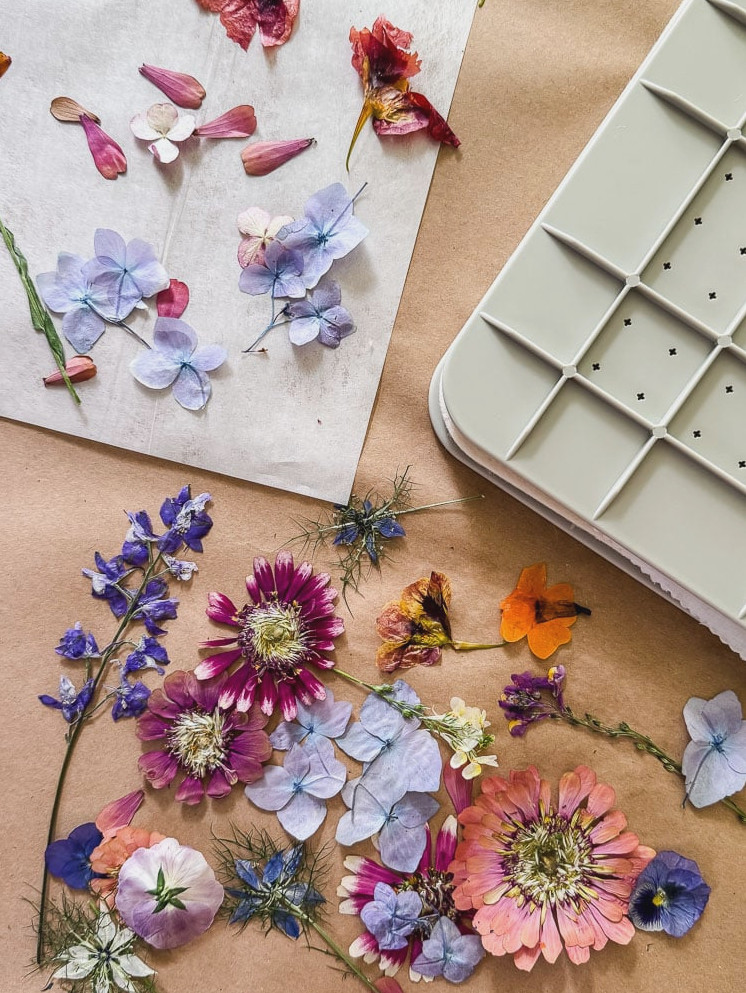
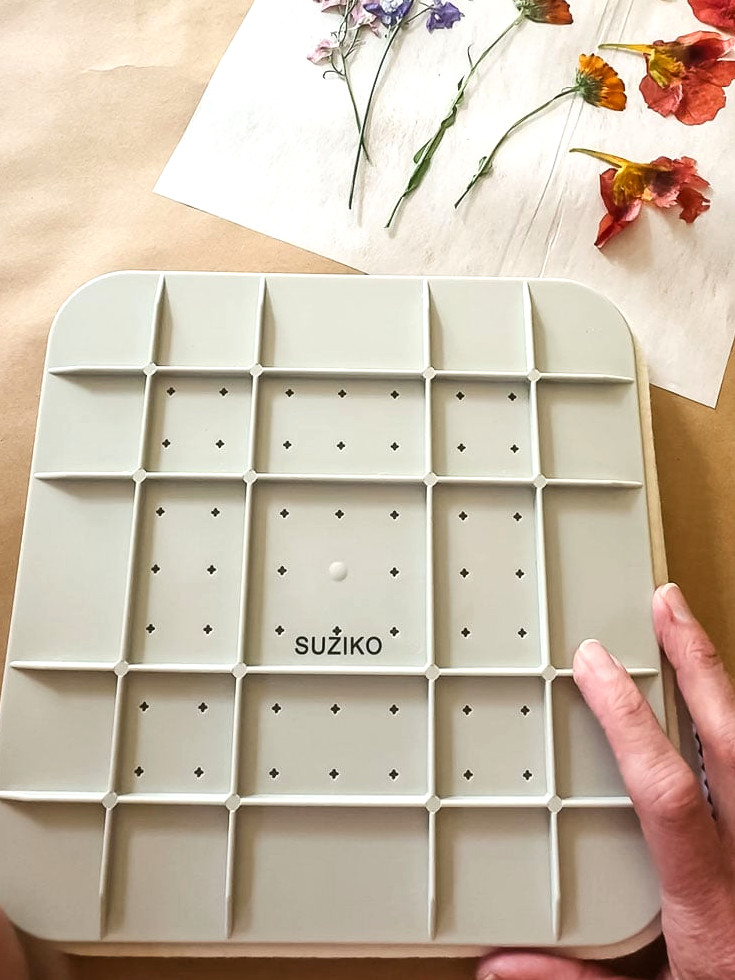
After so many of you asked about trying a microwave press, I purchased the 9″ Microwave Flower Press, which falls somewhere in the middle of the available price range.
How It Differs From The Plate Method
Rather than placing flowers between paper towels and plates, you arrange them between the reusable felt and fabric layers, then fasten everything closed like a small sandwich. It goes into the microwave in the same manner: heating it in brief 30-second intervals.
My Candid Opinion
To be honest, I thought this might be a “cute but unnecessary” purchase. I was wrong. The flowers turned out beautifully! They were flatter and more uniform than with my plate method, while the reusable felt created less cleanup and eliminated the need to pull out the paper towel roll each time. If you press flowers with any regularity, I truly believe it’s worth the cost.
How To Use A Microwave Flower Press
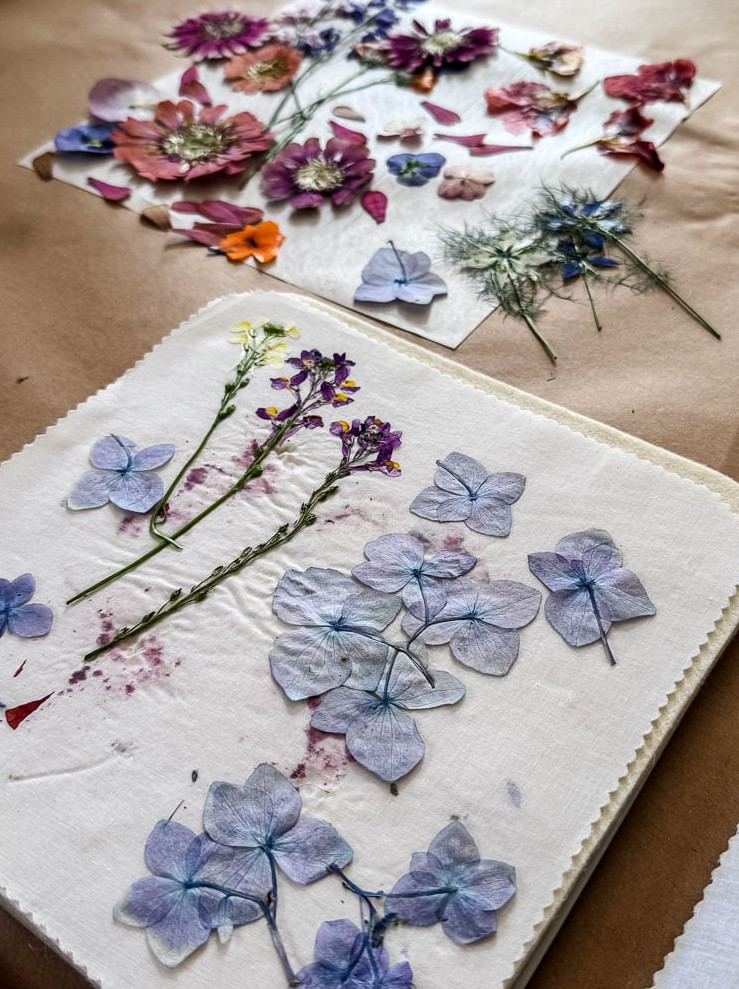
Because each kit varies slightly, be sure to read the instructions included with yours. The general arrangement, however, remains the same: two plastic exterior shells, a pair of thick wool felt pads, and cotton blotting sheets.
As with the plate method, you’ll assemble it in this order: plastic shell, wool pad, cotton sheet, fresh flowers, another cotton sheet, wool pad, and the second plastic shell. My kit included four clips, one for every side, which kept the contents firmly secured.
I began with a 1-minute interval, then removed the press, unclipped it to inspect the flowers and release the steam and warmth, and clipped it closed again for an additional 30 seconds. At that point, most of my flowers were completely dry.
The Results For The Flowers
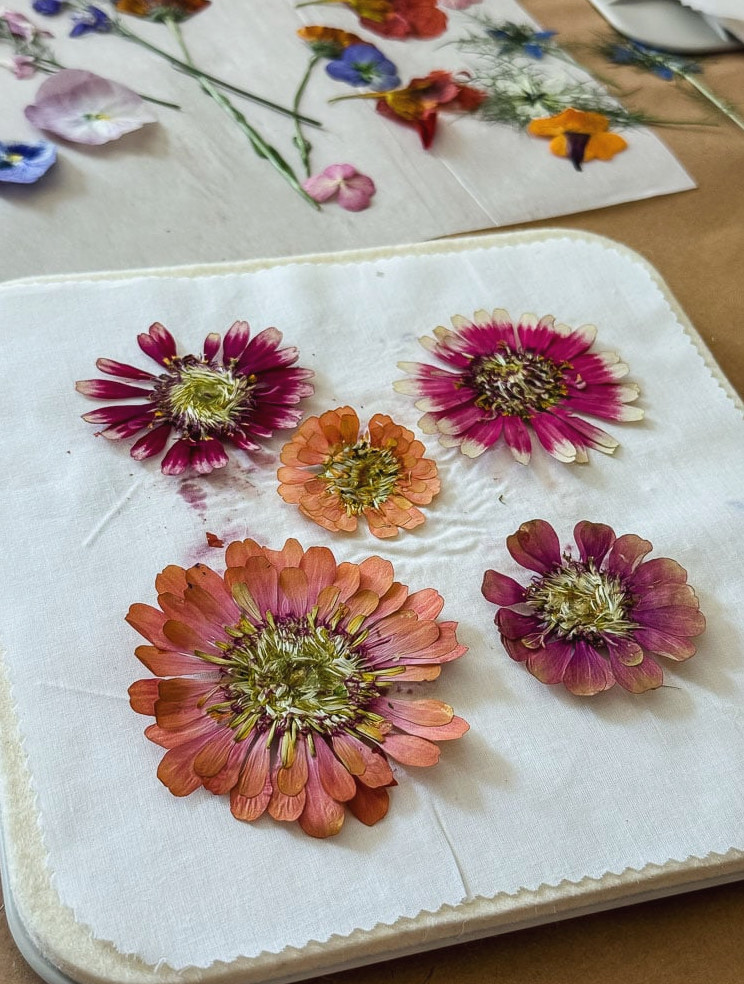
The flowers are ready when they have a papery texture, just as they would after being placed in a traditional flower press.
I was amazed by how flat these turned out, including the zinnias, which are famously thick and difficult to press. When using the plate method, bulkier flowers like these generally require more time and extra attention to flatten properly. In this kit, they became significantly flatter with almost no additional work.
My 2¢ On Both Microwave Techniques
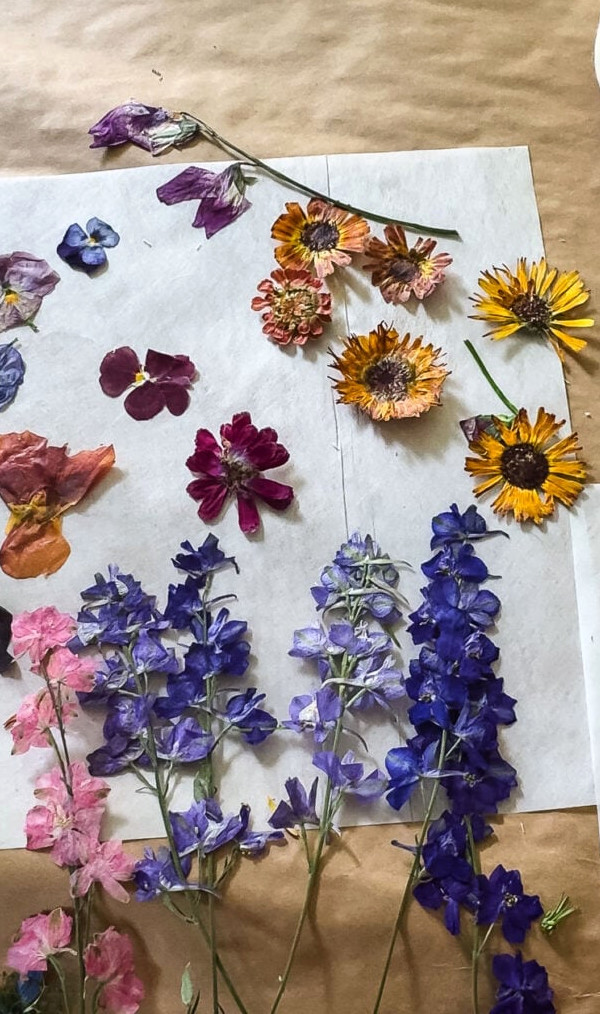
I put both techniques through a direct comparison, and the press was the clear winner. The flowers turned out flatter and more even each time, making it my preferred option from here on out.
Still, the plate method costs nothing, so it remains an excellent starting point if you’re new to flower pressing or only expect to do it occasionally. Since I work with flowers so often, though, I’ll be choosing the press from now on.
My Genuine Opinion: Classic Pressing vs. Plates vs. a Kit
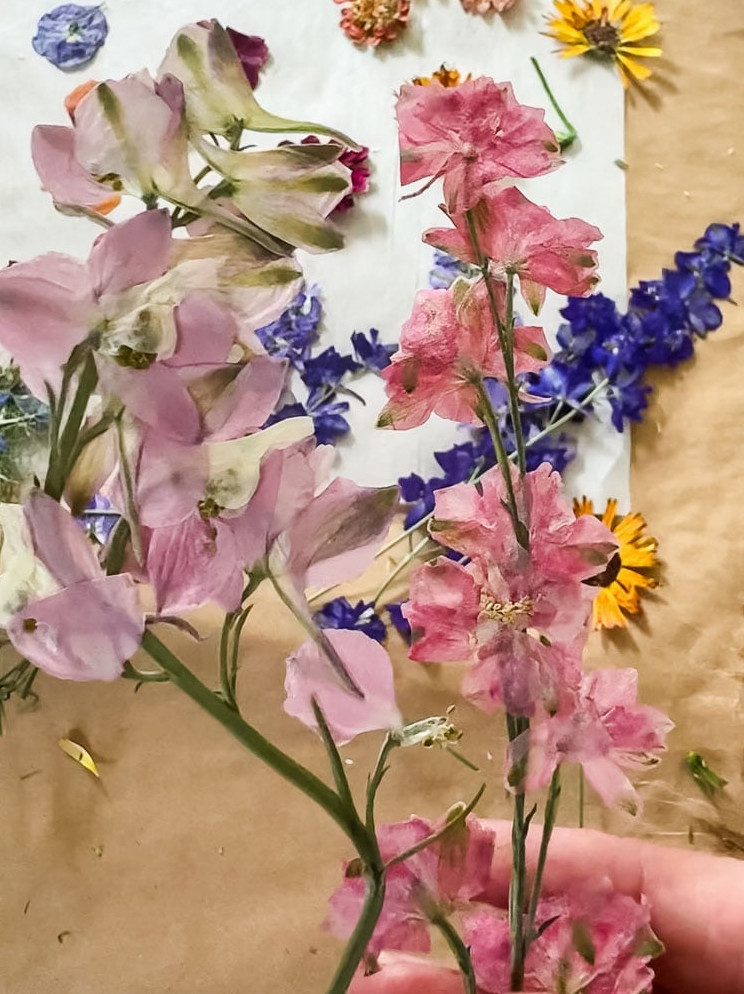
After experimenting with all three techniques, this is what I discovered. Traditional pressing (using a flower press for 1-2 weeks) produces the flattest, most delicate flowers, though some color brightness fades and patience is required.
Both microwave techniques preserve color significantly better than traditional pressing. Of the two, the kit produced flatter, more uniform results with less cleanup because of its reusable felt layers. The plate approach costs nothing and works perfectly well; it simply takes a little more effort to get the process just right.
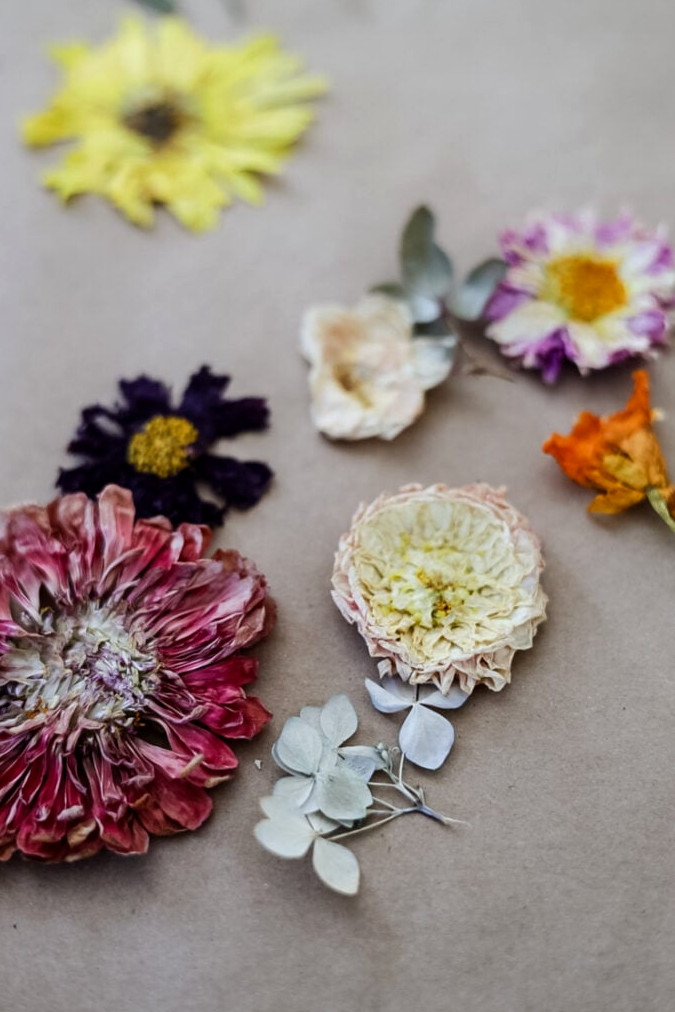
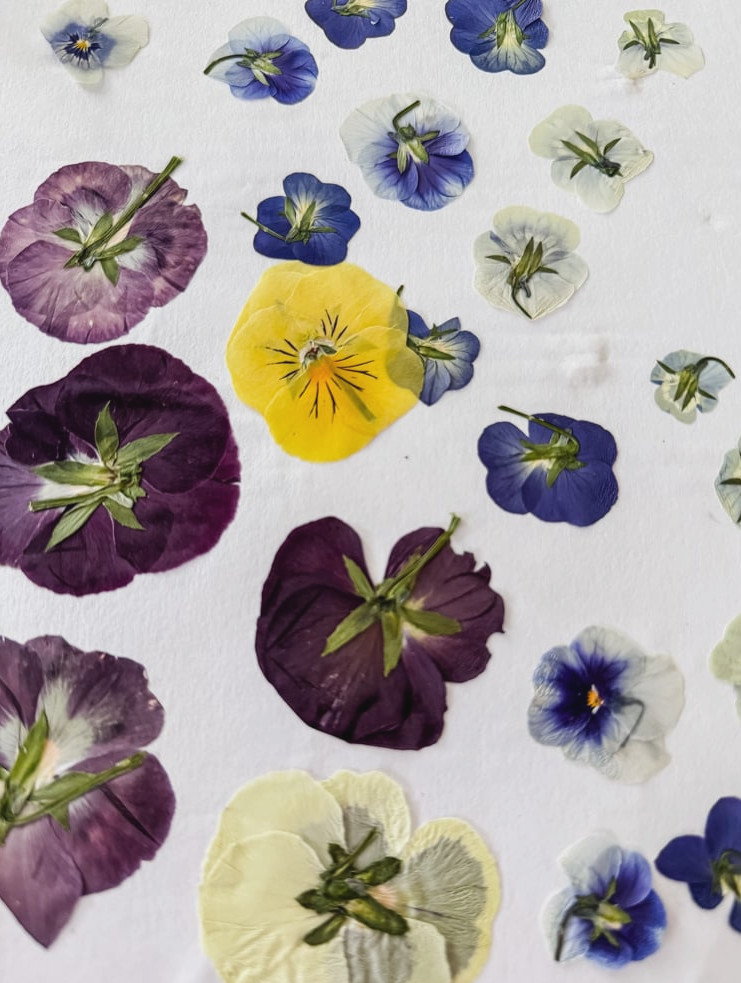
My recommendation is this: to experiment without spending money, begin with plates and paper towels. If flower pressing becomes a regular hobby, a kit is a modest purchase that simplifies the process and improves the outcome. However, if your goal is an exceptionally flat, delicate finish and you’re willing to wait several weeks, traditional pressing remains the best choice. (Interested in the slower approach? Here’s my beginner’s guide to using a flower press.)
DIY Project Ideas for Microwave-Pressed Flowers
After pressing your flowers, you’ll probably be ready to create something enjoyable with them. Below are several beginner-friendly ideas
Project 1: Transforming Them Into Artwork
Skill Level: Beginner
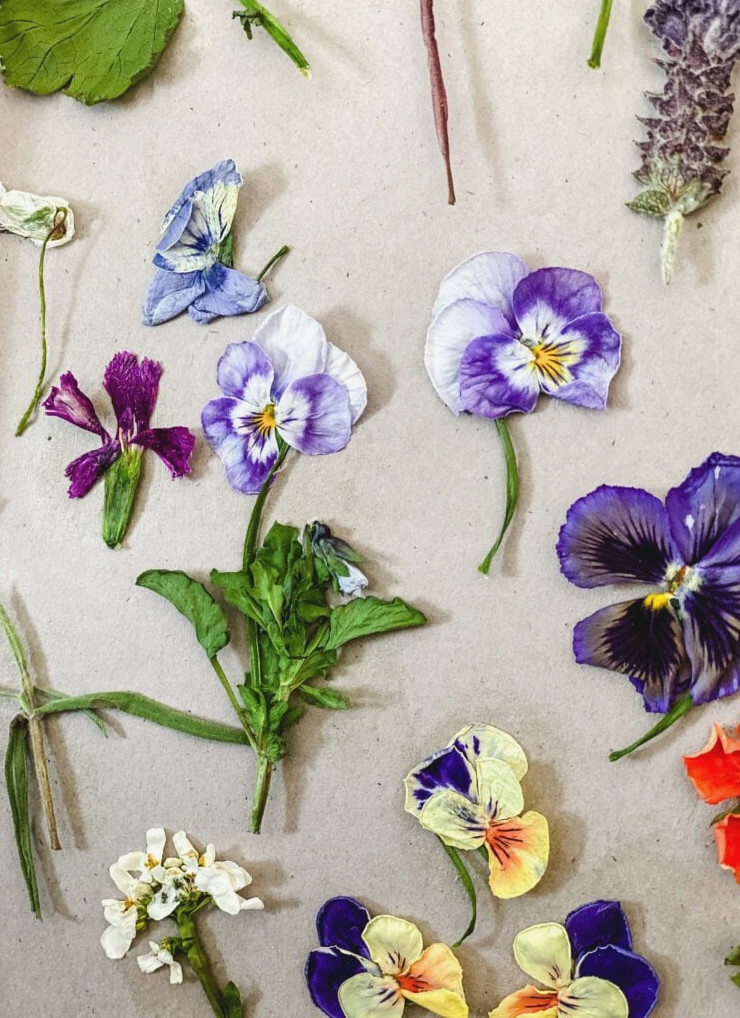
Now comes the enjoyable part: transforming those pressed flowers into a charming little artwork. I placed mine on natural cardstock and shifted everything around until I was happy with the arrangement, then held each bloom in place with a tiny dab of UV craft glue (a toothpick is ideal for the smaller flowers). I dismantled a dollar-store canvas frame and attached the paper to the canvas using a thin layer of spray adhesive, carefully smoothing it down without moving the flowers.
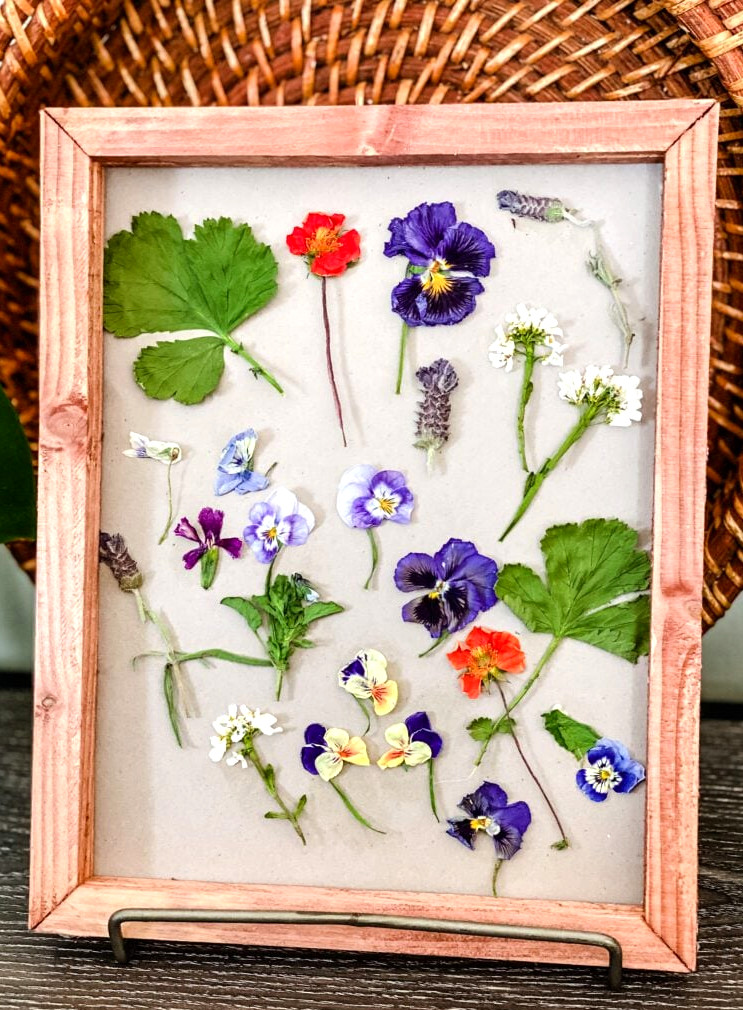
Rather than staining the frame, I went with one of my favorite shortcuts: dark brown RIT fabric dye. All it takes is hot water, several tablespoons of dye, and roughly 10 minutes for the wood to absorb that deep color—without the unpleasant smell of stain. (I’ve also used this technique for my Wood Bead Wreath and these Christmas Ornaments.)
After the frame had dried, I glued it right onto the canvas above the flowers, and the project was complete. It’s easy, affordable, and wonderfully pretty—I’ll certainly be creating more.
Project 2: Decoupaged Vases with Pressed Flowers
Skill Level: Intermediate
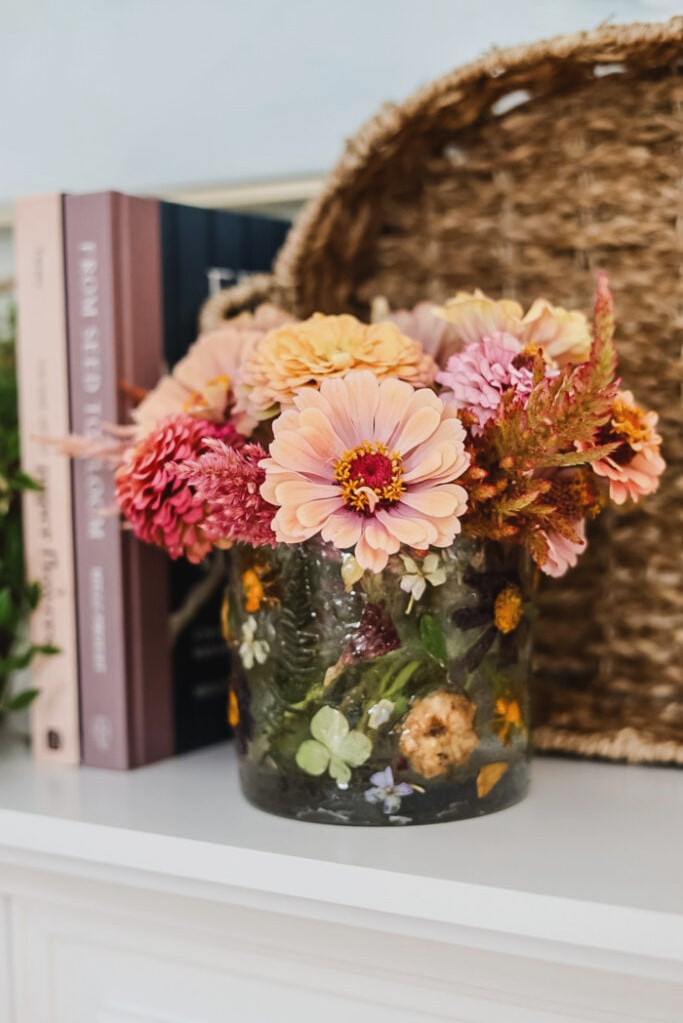
Artwork in frames isn’t the only project possible with microwave-pressed flowers. One of my most-loved ideas is decoupaging them onto a simple glass vase. It transforms a $3 thrift-store or craft-store vase intosomething that appears to belong in an upscale boutique.
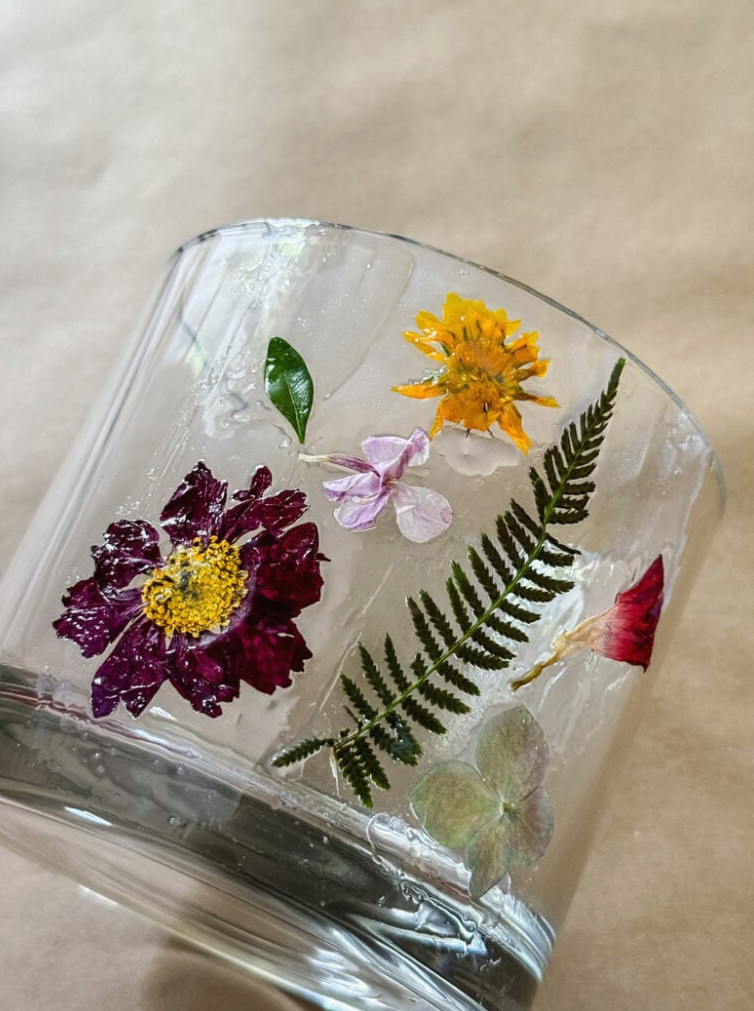
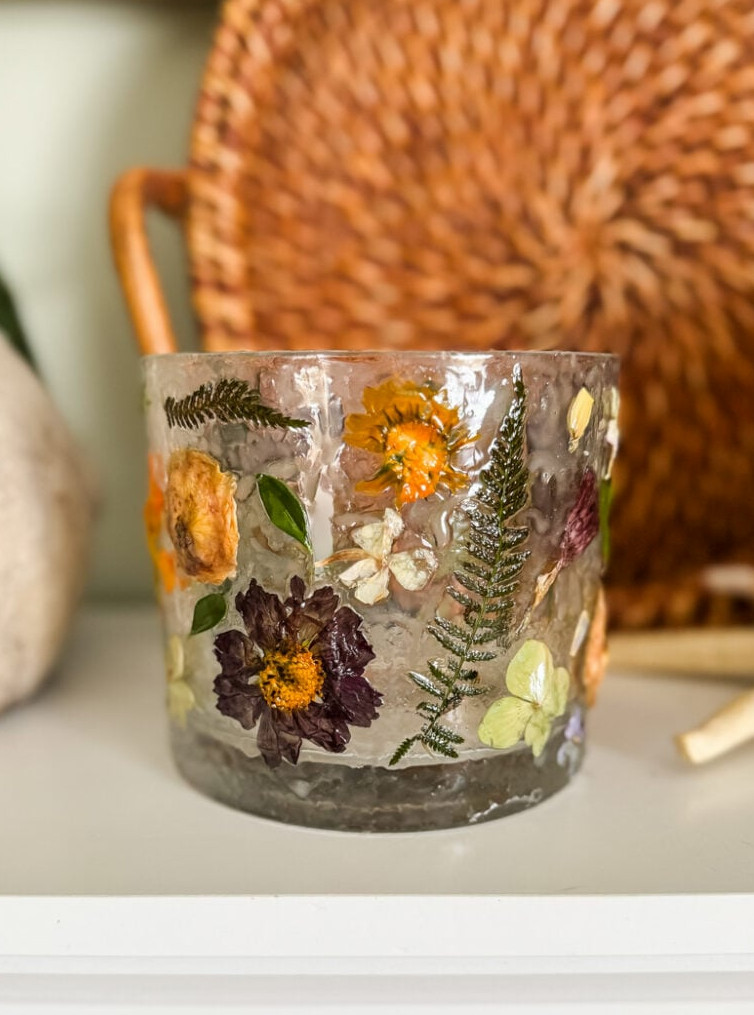
Here’s the condensed version:
- Begin with a clean, dry glass vase—any shape will do.
- Apply a thin coat of Triple Thick Glaze to a small area of the vase.
- Carefully place a flower into the glaze, using tweezers or a toothpick to arrange the more fragile ones.
- Spread another delicate layer of glaze over the flower to secure it.
- Continue around the vase, and then allow it to dry fully.
That’s the basic idea! In the complete tutorial, Pressed Flower Decoupage Vases, I share all my suggestions—including ways to stop the flowers from shifting and techniques for layering them to create a fuller appearance.
Project 3: Pumpkins with Pressed Flowers
Skill Level: Intermediate
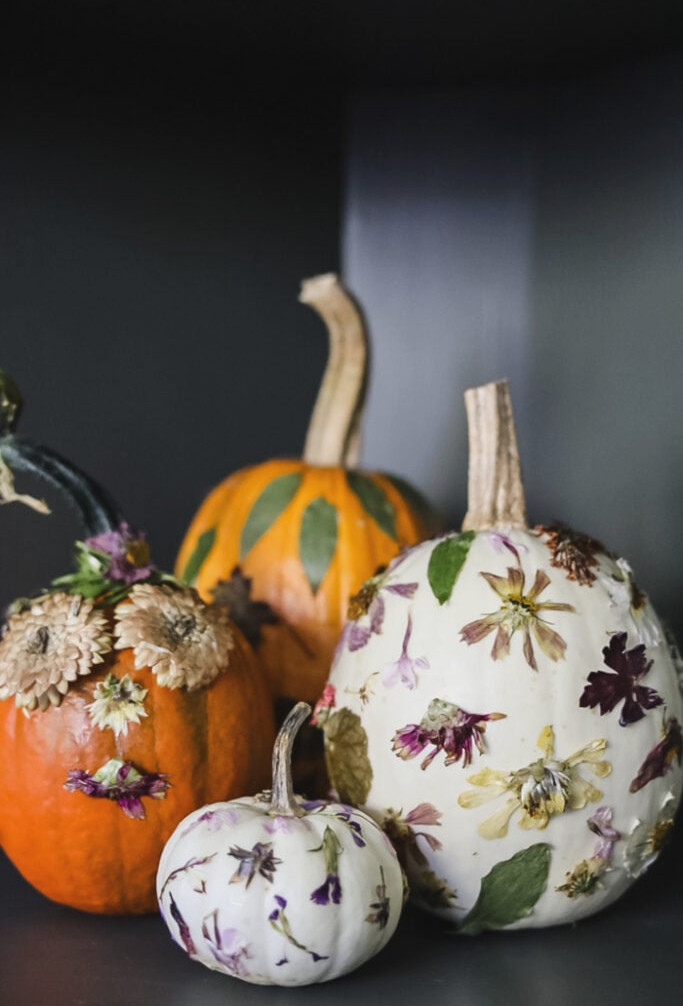
Here’s a delightful idea for the change of seasons: use those same microwave-pressed flowers to create beautiful no-carve autumn pumpkins. Rather than dealing with a knife and the resulting mess, simply decoupage pressed blossoms and leaves onto the surface for a gentle, cottage-inspired approach to pumpkin decorating.
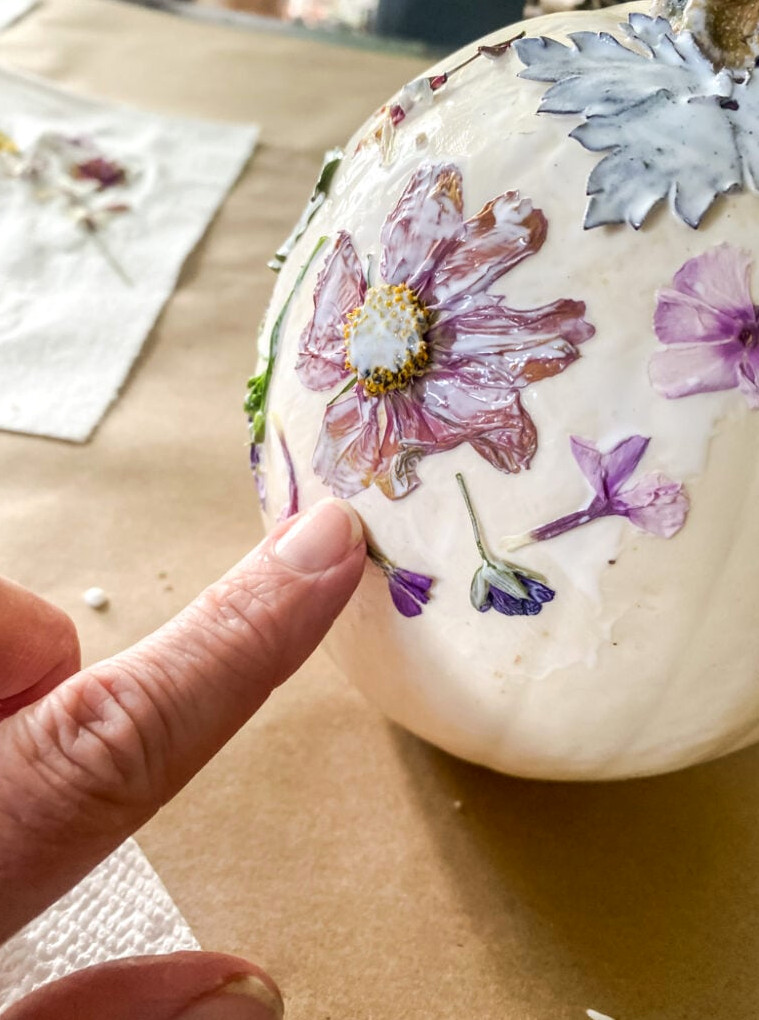
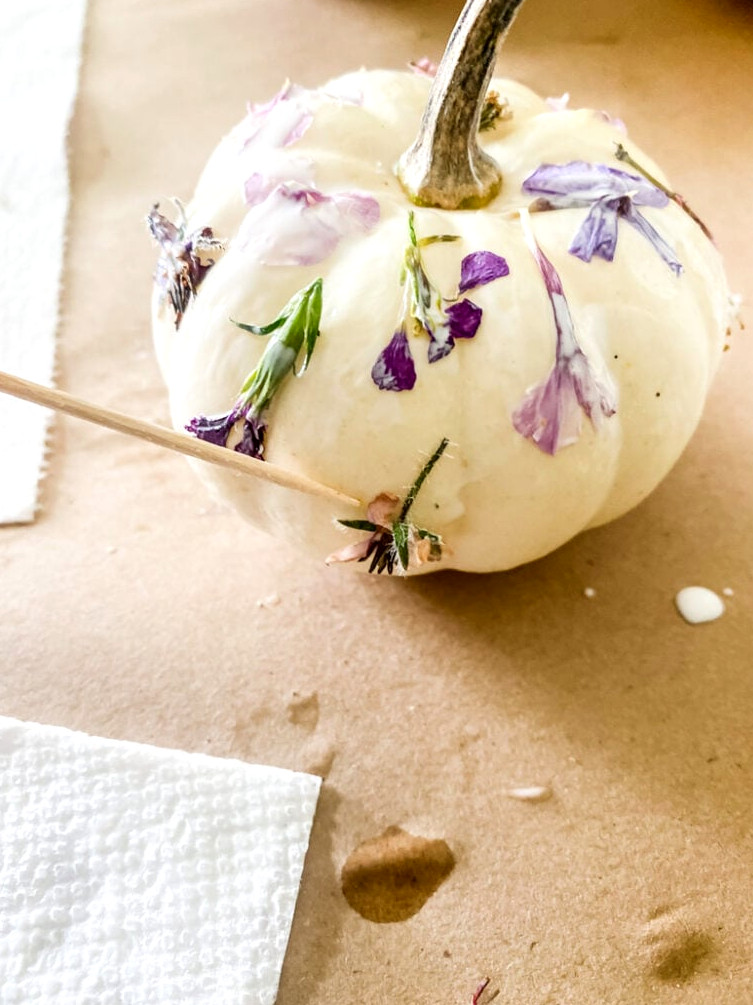
The condensed steps:
- Choose a clean, dry pumpkin—either artificial or real will work.
- Coat a small portion of the pumpkin with a thin layer of Mod Podge.
- Carefully place a pressed flower or leaf on top, using a toothpick to gently position delicate pieces.
- Apply another light layer of Mod Podge over the flower to hold it securely.
- Continue working around the pumpkin, then leave it to dry completely.
The full tutorial, Decorating a Pumpkin with Pressed Flowers, covers every step, from selecting suitable pumpkins and planning your arrangement to helping the finished designs last.
Frequently Asked Questions About Microwave Flower Pressing
•Does microwave pressing work better than the traditional method? That depends on your priorities! From what I’ve found, flowers pressed in the microwave retain their color far more effectively than blooms flattened in a book. The compromise is that they aren’t quite as flat. Therefore, if rich color and quick results are most important, choose the microwave method. If you prefer an especially flat, delicate finish and can wait several weeks, traditional pressing is the better option.
•What You’ll notice it more by touch than by sight. When they change from tender and fresh to dry and papery, they’re ready—like a flower tucked inside an old book. They don’t have to become crisp or fragile. If you’re uncertain, remove them slightly early; they’ll continue drying while they cool.
•Should I leave them out after microwaving? I usually place mine on a blotting sheet, parchment paper, or even a cooling rack. If they’re still just a little soft, allowing them to air-dry for an hour or more does the trick.
•How long will microwave-pressed flowers keep? For quite a while! Mine have lasted for years when protected from direct sunlight and humidity. Sunlight is the biggest culprit here; it fades the color more quickly than anything else.
•Do they need to be sealed? For a framed project like this, sealing isn’t necessary. However, if you’re creating something that will be handled frequently, such as a bookmark or card, adding Mod Podge or a quick laminate helps prevent them from breaking apart.
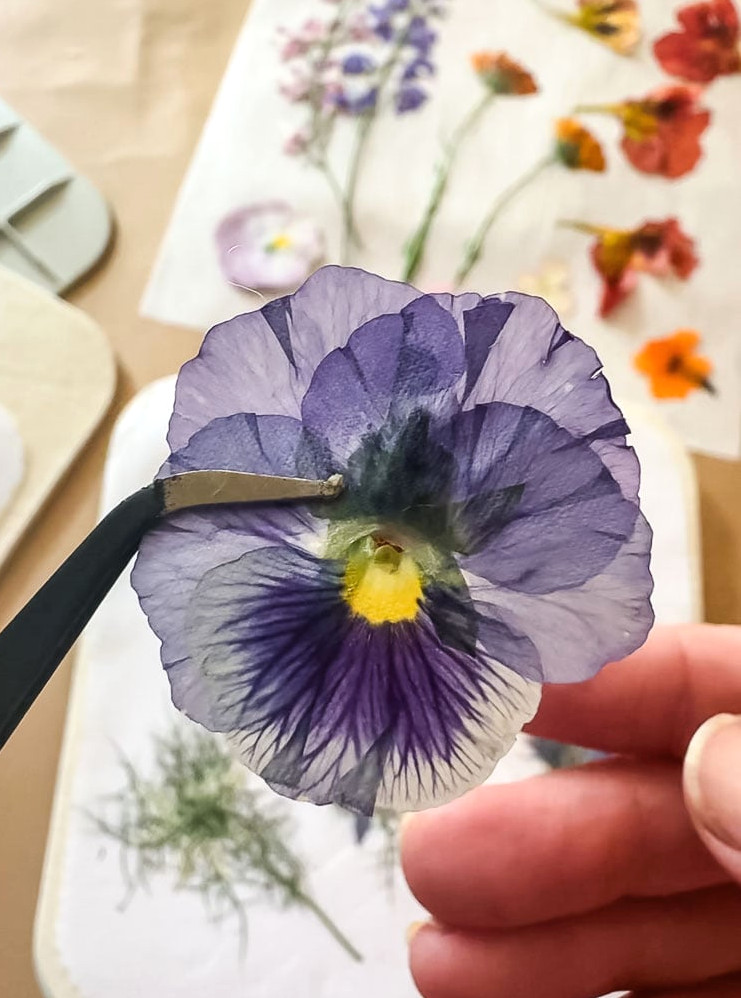
•Are some flowers unsuitable for the microwave? Yes, and I learned that through experience! Thick, moist blooms such as large roses, mums, or flowers with bulky centers retain too much water and may turn brown or remain damp. Choose flatter, more delicate blooms like violas, pansies, cosmos, and larkspur for better results. I’ve also successfully pressed small drift roses.
•Why did my flowers become brown? In most cases, they received too much heat at one time. Microwave strength can differ considerably, so heat them in 30-second intervals and inspect them often instead of microwaving them continuously. A browned flower was either too thick initially or was slightly overcooked.
•Is a special microwave flower press kit necessary? Not at all! Plates and paper towels work perfectly well and won’t cost anything extra. Still, if you press flowers regularly, I’ve found that a kit produces flatter, more even results with much less cleanup because you aren’t using paper towels over and over.
Now It’s Your Turn!
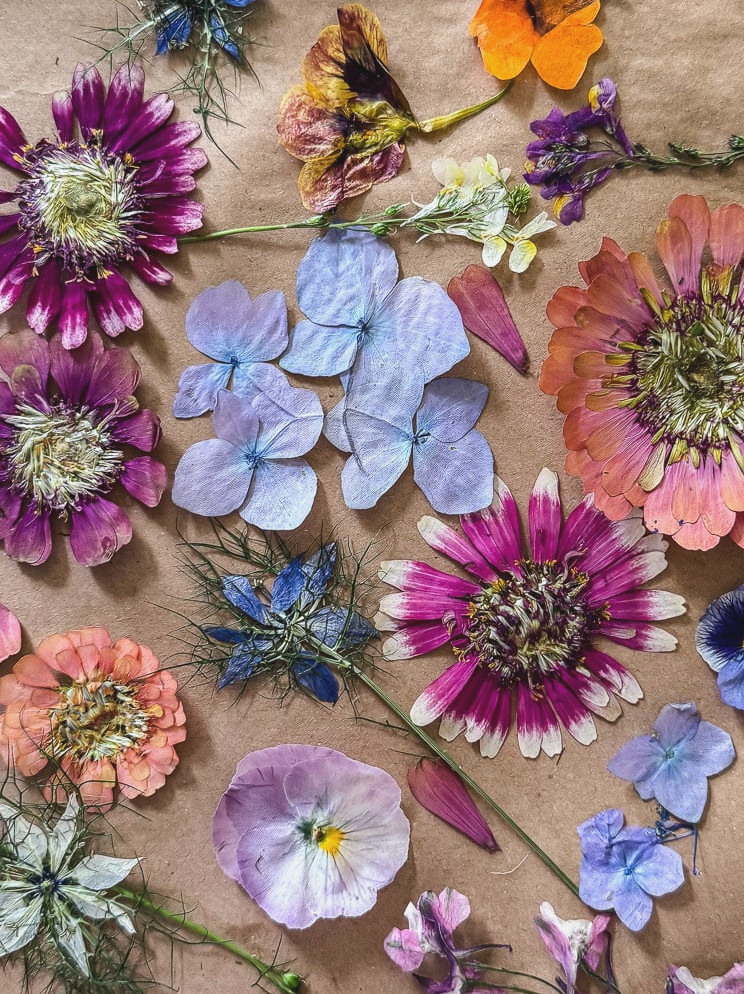
That’s all there is to it—proof that preserving a small piece of your garden doesn’t require expensive supplies or weeks of waiting. Really, the toughest part is stopping yourself from microwaving every bloom in the yard (don’t tell me I didn’t warn you).
Once you’ve collected a supply of pressed flowers, the creative possibilities begin. They look beautiful displayed in a frame like this, but they’re equally charming decoupaged onto a thrifted glass vase, placed inside a handmade greeting card, or layered over a fall pumpkin when the season arrives. And if preserving flowers becomes your new hobby, my guide to several flower-drying methods will keep you occupied all season.
If you try this project, I’d be delighted to hear how it went. Leave a comment below and let me know which flowers you pressed!
xo, Jennifer
Pressed Flower Ideas To Try
Featured
Discover 4 Ways to Dry Flowers
simple methods to explore
Materials
- Fresh Blooms
- Viva Brand Paper Towels
- Dinner Plates
- Microwave
Instructions
- Gather the flowers you’d like to dry
- Take a dinner plate and cover it with a paper towel.
- Place the flowers on the paper towel, making sure they do not touch
- Place a second paper towel over the flowers
- Set another plate on top to apply pressure
- Microwave at 50% power in 30-second intervals, checking the flowers each time. Most blooms are ready within 2 minutes.
- Allow the flowers to cool before using them. As they cool, the blooms will become firmer and drier.
25 DIY Projects Featuring
flowers & botanicals
Check out our newest projects!
Save for later!