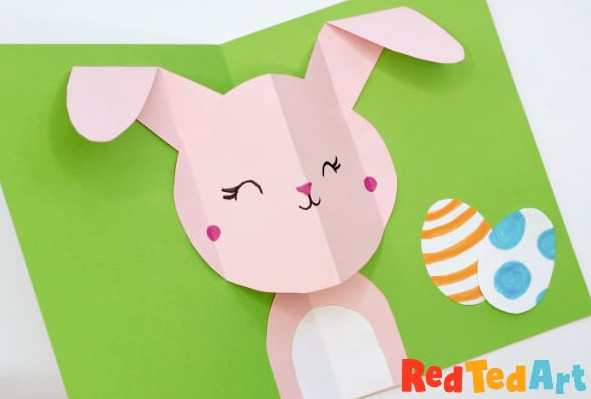
It’s time to create our cute floppy-eared bunny card! Children will enjoy crafting this incredibly easy Pop Up Easter Egg & Bunny Card! All you need is paper and cardstock (decorative paper is an added bonus! You can also create your own Easter Egg designs). We adore making pop-up cards throughout the year, and Easter is a wonderful occasion for creating personalised cards as well!
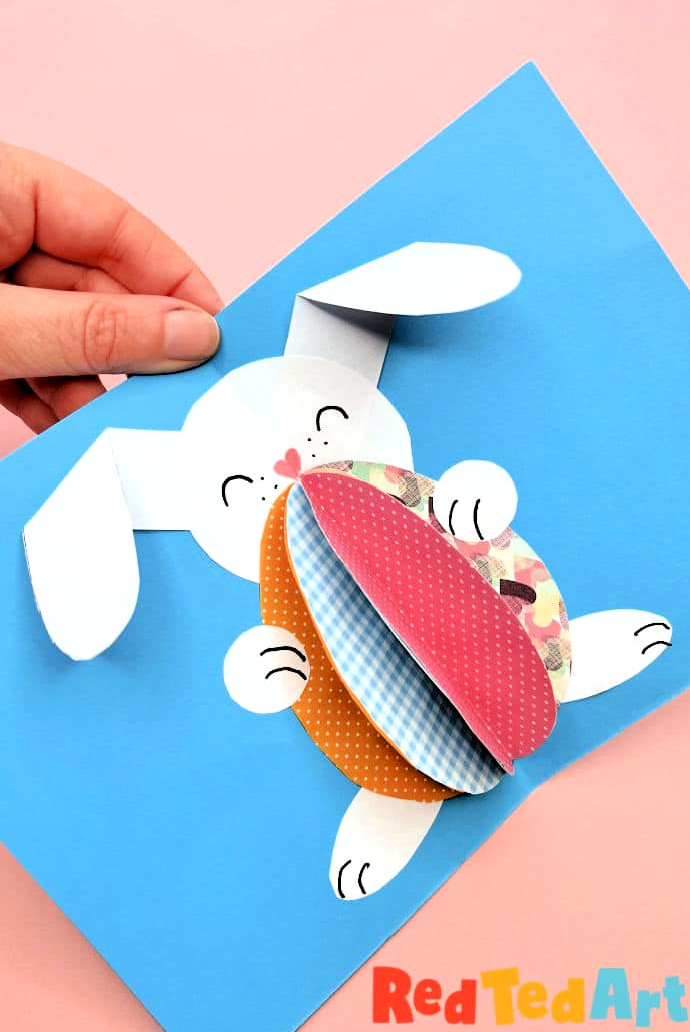
Creating a pop-up card is always enjoyable. This worksheet explains how to make an especially easy pop-up mechanism using the “paper bauble” method. Paper baubles are simple and entertaining for children to create, making them perfect for this pop-up card. This project centres on forming an egg-shaped 3d bauble and pairing it with adorable Easter bunny outlines.
This cheerful seasonal project is ideal for filling gaps in any lesson plan. It also gives students the opportunity to bring home beautiful Easter cards for family and friends. Handmade Easter cards are certainly the best! Explore all our Easter Card Ideas here.
Learning Goals for Creating Seasonal Handmade Cards
- Improve fine motor abilities & precision
- Practise reading & following directions
- Explore symmetry & shapes
- Enjoy seasonal creativity
Materials required for making your 3d Easter Egg & Bunny Card
- Card stock (an A5 sheet folded in half)
- Paper in your preferred colors or attractive origami pattern paper
- Pens, markers, or crayons to decorate the bunny face and Easter eggs (when using plain white paper for the Easter eggs)
- Scissors
- Glue stick
When using today’s printable, you will find 3 available options:
- A template to print on white paper, allowing students to cut the shapes from colored paper – 2 template sets for convenient student sharing
- A collection of shapes for students to decorate on their own – no extra paper required. One set is included per sheet
- An additional set featuring full color eggs and bunny shapes
The printable worksheets are available in my teacher’s pay teacher’s store, or you can purchase the BUNDLE OF THREE (which includes a patterned egg printable). Buying this not only makes crafting more convenient, but also helps support the maintenance of this website! You can absolutely complete this craft without the printables; simply create your own very simple shapes to use. You’ll see how in the instructions below…
I frequently offer a ONE WEEK freebie “special”…. to make sure you don’t miss them, please sign up through my newsletter form in the sidebar! The freebies are EXCLUSIVE to regular Red Ted Art readers!
Until then, you can download the Pop Up Card Templatese here:

How to create a Pop Up Easter Egg & Bunny Card
Cut the basic Easter Egg & Bunny Shapes
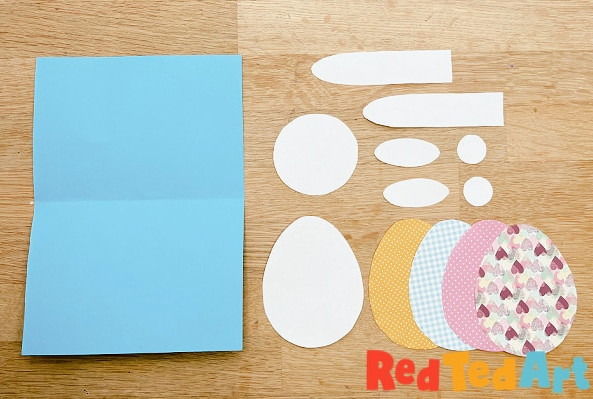
Sketch your own shapes or use the supplied templates to prepare the basic pieces for this card. We printed on white paper, then used the egg shape to cut out 4 eggs from colored patterned paper!
You will require:
- 4 eggs
- 1 circular head
- 2 ears
- 2 rounded paws
- 2 oblong feet
Create the 3d Egg Shape
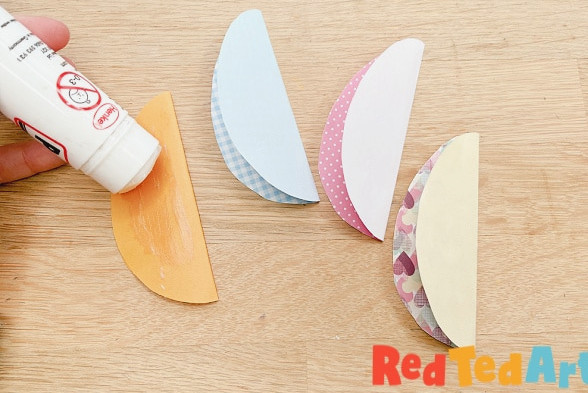
Carefully fold all four egg shapes in half. Locate the centre first so each one folds evenly.
Apply glue to one side of one folded egg shape.
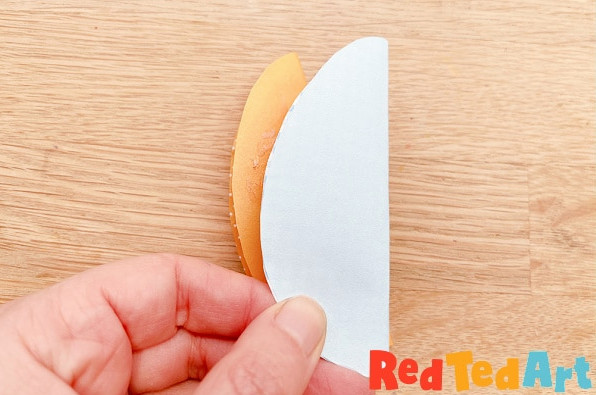
Position the second egg shape over the first, placing it where the glue has been applied.
Spread glue onto the second egg, add the third shape, and continue the same process with the third and fourth eggs.
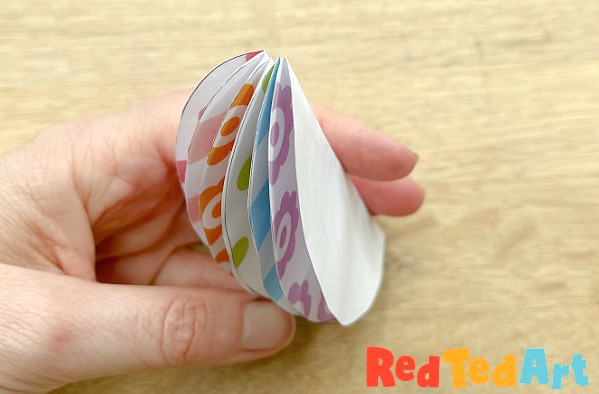
At this point, you should have a pile of eggs folded in half.
Opening the stack will reveal your 3d egg fan shape.
Pair the Easter Egg shape with the Paper Easter Bunny
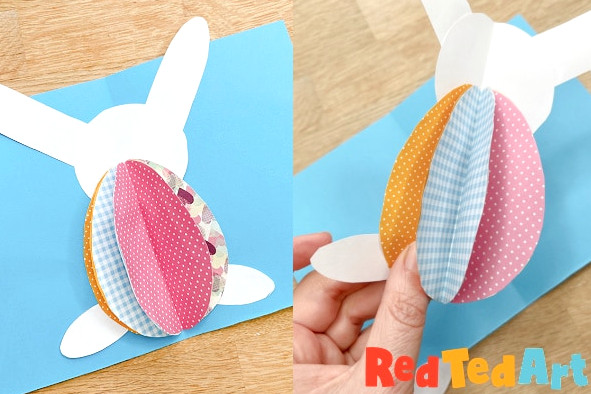
Place all the paper bunny pieces behind the egg, then glue them securely.
- Position the ears behind the head, and the head behind the egg.
- Put the feet behind the egg (the paws will be added later)
Attach the Easter Egg and Bunny to the pop-up card
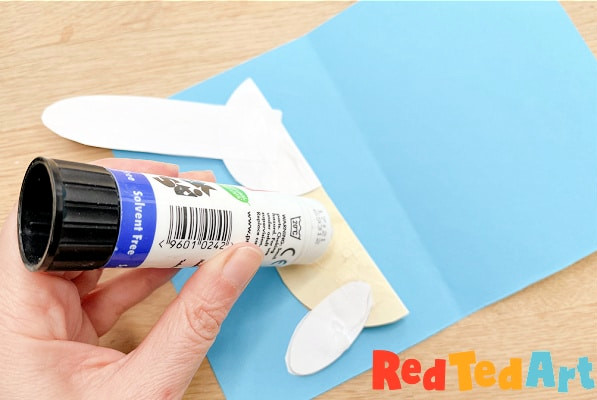
Fold the bunny and egg in half, then apply glue to one side.
Match the bunny’s centre fold with the fold in your card and glue it into place.
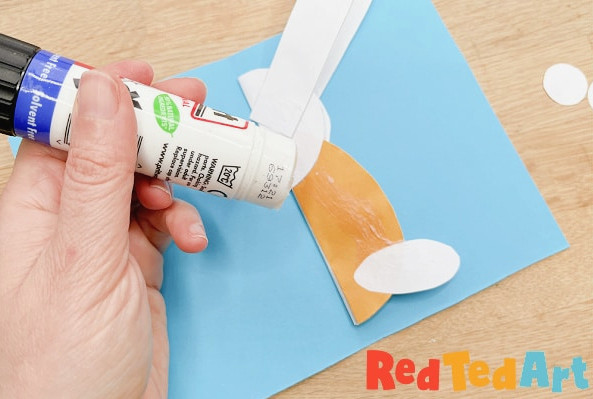
Spread adhesive over the visible side.
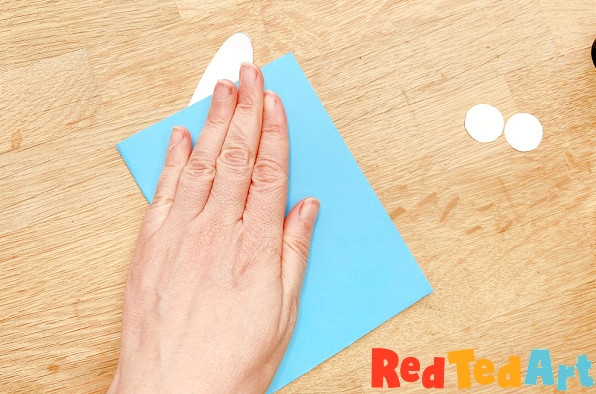
Once you shut the card, the glued side will be held securely in position.
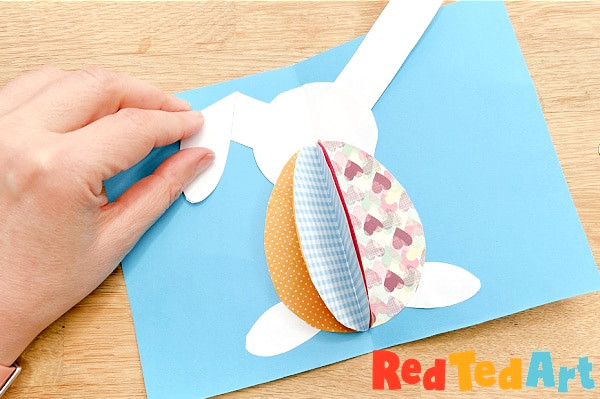
Unfold the card, then bend one bunny ear downward to create the “floppy ear” and help it sit inside the card. Do the same with the second ear!
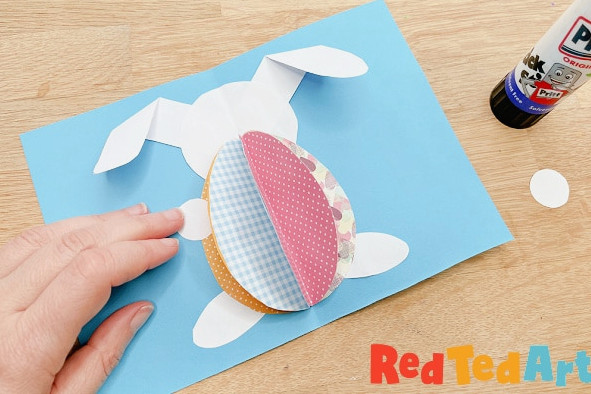
Secure the paws with glue. Position them “on top” of the egg so the bunny appears to be hugging it.
Give your pop up Easter Egg and Bunny some final details!
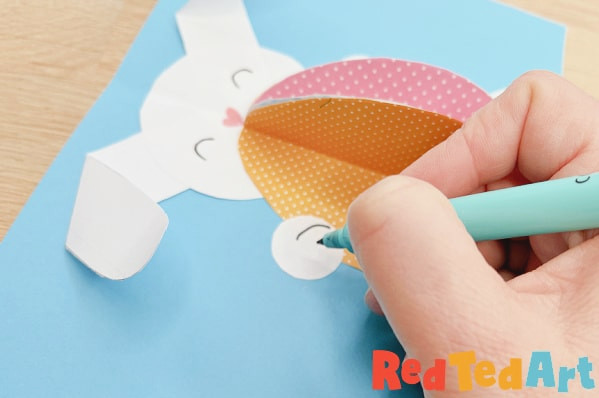
Illustrate your bunny’s features, including the eyes, nose, and whiskers if desired.
Decorate the paws and feet with extra details.
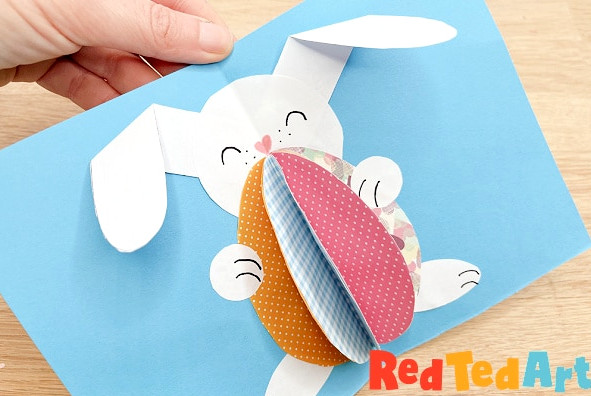
All done! Wasn’t that an Easy Pop Up Easter Card? I adore the 3d Easter Egg design paired with the incredibly cute and simple Paper Easter Bunny! And those floppy ears are just too sweet.
Next, write your Happy Easter wishes, place the pop up card inside an envelope, and send it to someone special! Personalized handwritten notes are always wonderful!
Ideas for extending the project:
- Take a bit of extra time to decorate the card’s interior first – for instance, cut out some paper Easter grass and glue it to the card’s base before attaching the egg and Easter bunny.
- These adorable 3d bunny and egg designs could also become Easter decorations. Create two pieces and join them back to back. Wouldn’t they look charming?
- Alternatively, create a “large” bunny from construction paper as an art activity rather than placing it inside a card.
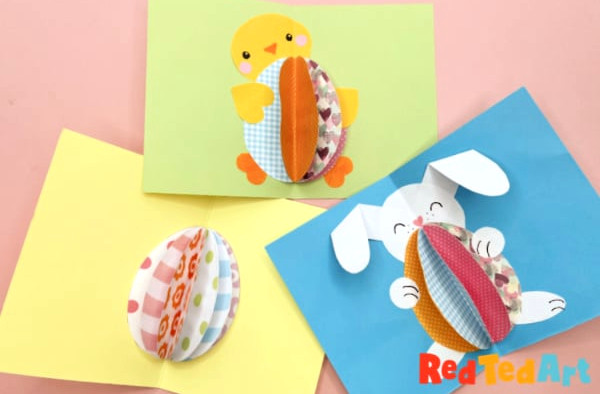
More designs using the same method – a chick card and an egg card!
Using the wonderfully cute and easy Pop Up Easter Eggs as a base, we created 3 different designs! There’s even a printable collection of full-colour eggs to make your Easter crafting easier!
You might also enjoy these pop up bunny Easter cards:
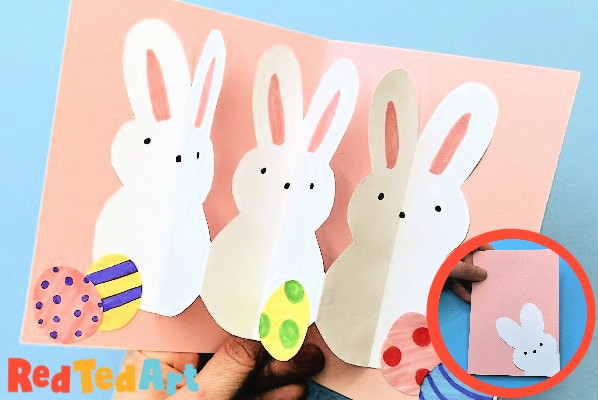
Classic Peeps Bunnies Pop Up Easter Cards
Oversized pop up bunny card!
Explore the rest of our handmade Easter Cards today. This collection features our highly popular pop up chick Easter cards, along with some charming and easy cotton wool bunny cards for younger children! Also, be sure to see those ADORABLE chick paper-weaving egg cards..
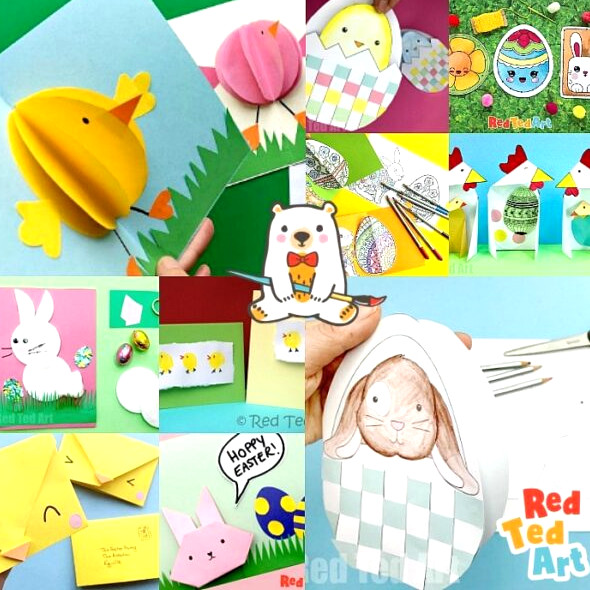
And while I have your interest… would you like to see more BEAUTIFUL Paper Easter Crafts? Paper crafting is incredibly enjoyable: