Discover beginner wood-burning advice and learn to operate a wood-burning tool safely and with confidence. Ideal for anyone trying it for the first time!
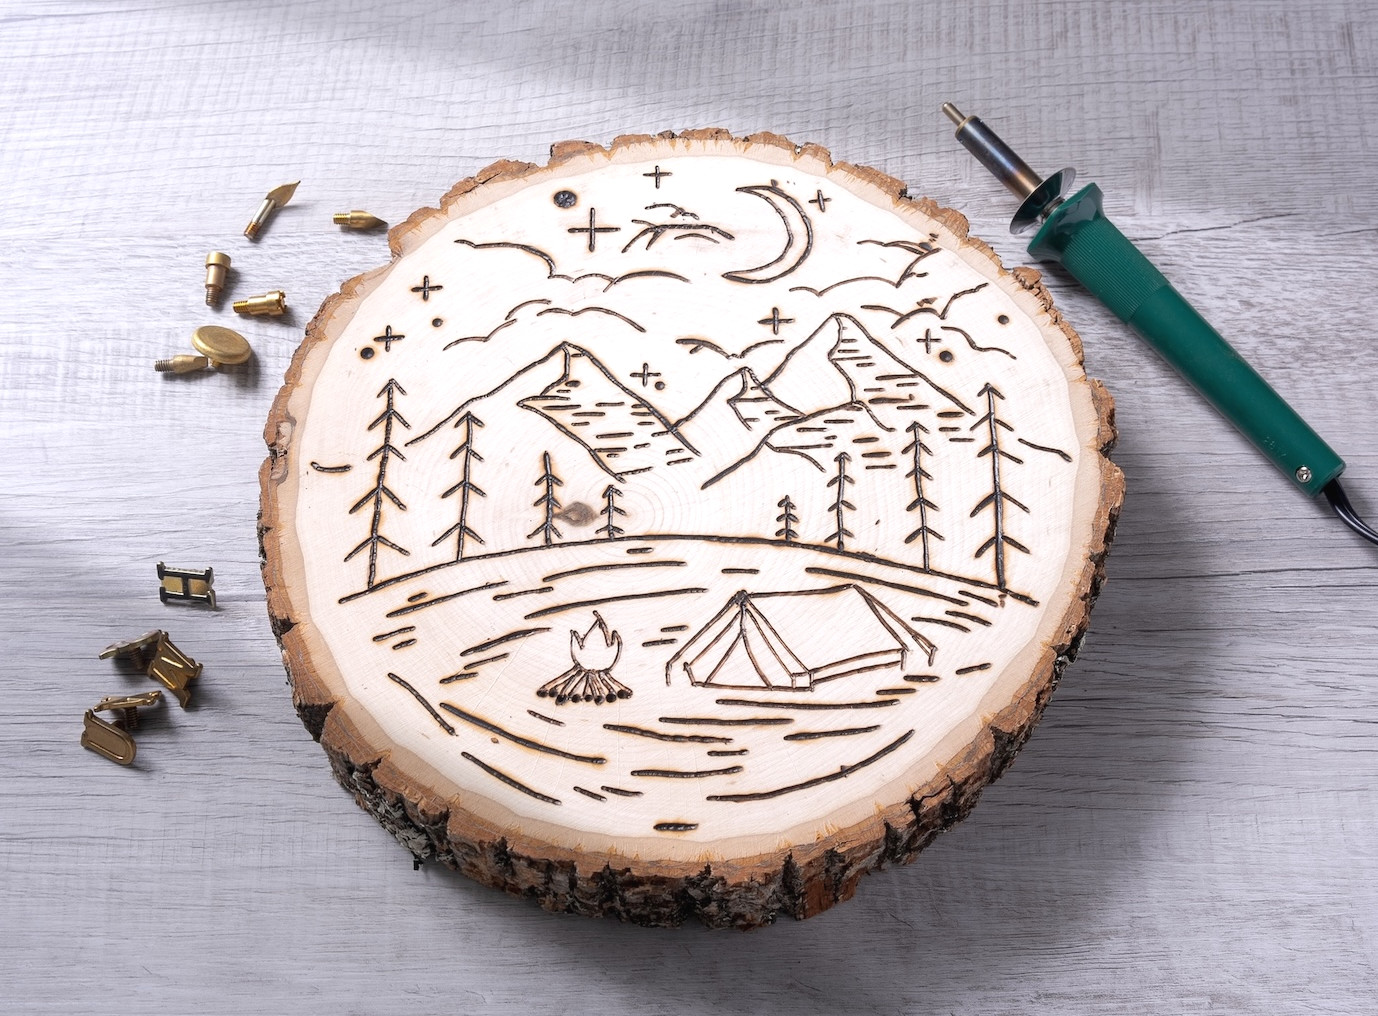
Thinking about giving wood burning a go? Before you imagine accidentally scorching the dining room table, let me put your mind at ease: this hobby is far simpler than it appears.
With wood burning, you make lasting designs with a heated tool rather than paint or ink. It requires some patience, yet drawing ability, costly gear, and years of practice are not necessary.
Simply trace a design, work at a steady pace, and create something that looks wonderfully handmade – in the best possible way.
This guide covers the essentials beginners should understand, from tools and safety to suitable wood and frequent errors. Afterward, you can apply what you have learned by creating the outdoor scene featured here.
I’ve also included a free pattern, meaning your first project does not need to start with you anxiously facing an empty piece of wood.
What Is Pyrography?
Pyrography is the formal term for decorating wood and other surfaces with carefully controlled heat. Its name basically translates to “writing with fire,” which sounds wonderfully dramatic for an activity you can enjoy at your kitchen table.
A heated pen marks the surface by burning the wood. By adjusting the tip, temperature, pace, and pressure, you can produce lines, dots, patterns, and shaded sections.
While skilled pyrography work can contain remarkable detail, beginners can begin with uncomplicated outlines. That is precisely our approach here.
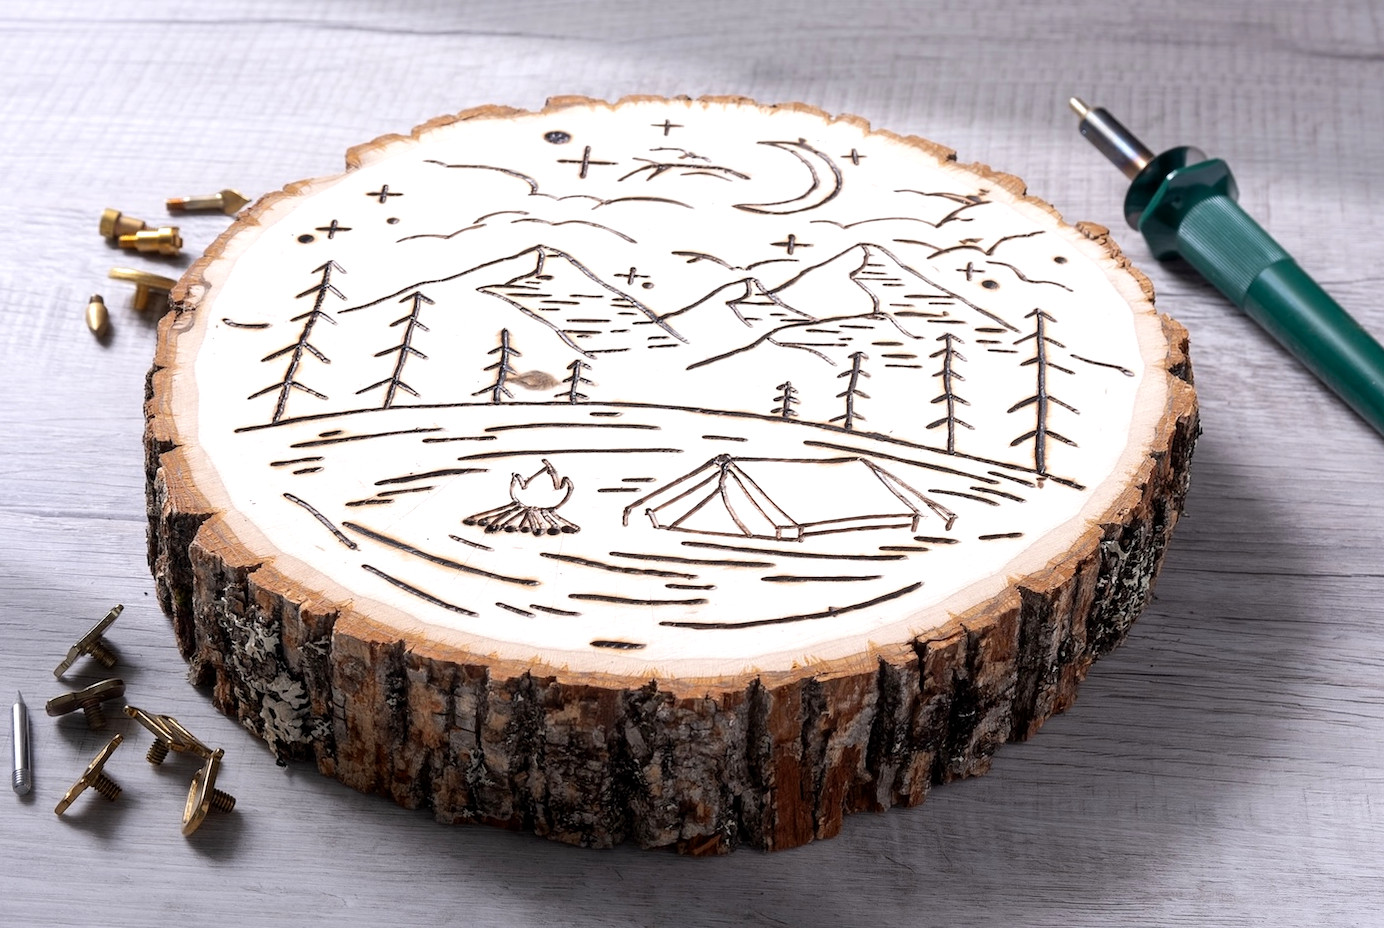
Wood Burning Tools and Supplies
There is no need for a complicated arrangement when starting your first project. Collect the following:
Confirm that your wood is entirely unfinished. Never burn through paint, stain, sealer, glue, or unidentified coatings.
Solid-Point Burner vs. Wire Nib Burner
Two primary types of tools are available.
Asolid-point burnerresembles a soldering iron and works with replaceable brass tips. It is budget-friendly, sturdy, and completely adequate for beginner projects. Although the tips require more time to warm up and cool down, the tool is commonly available in craft shops.
Awire nib burnerworks with slender wire tips and generally offers quicker heating, more accurate temperature adjustment, and greater precision. Serious pyrography artists often favor it, particularly when creating fine details and shading.
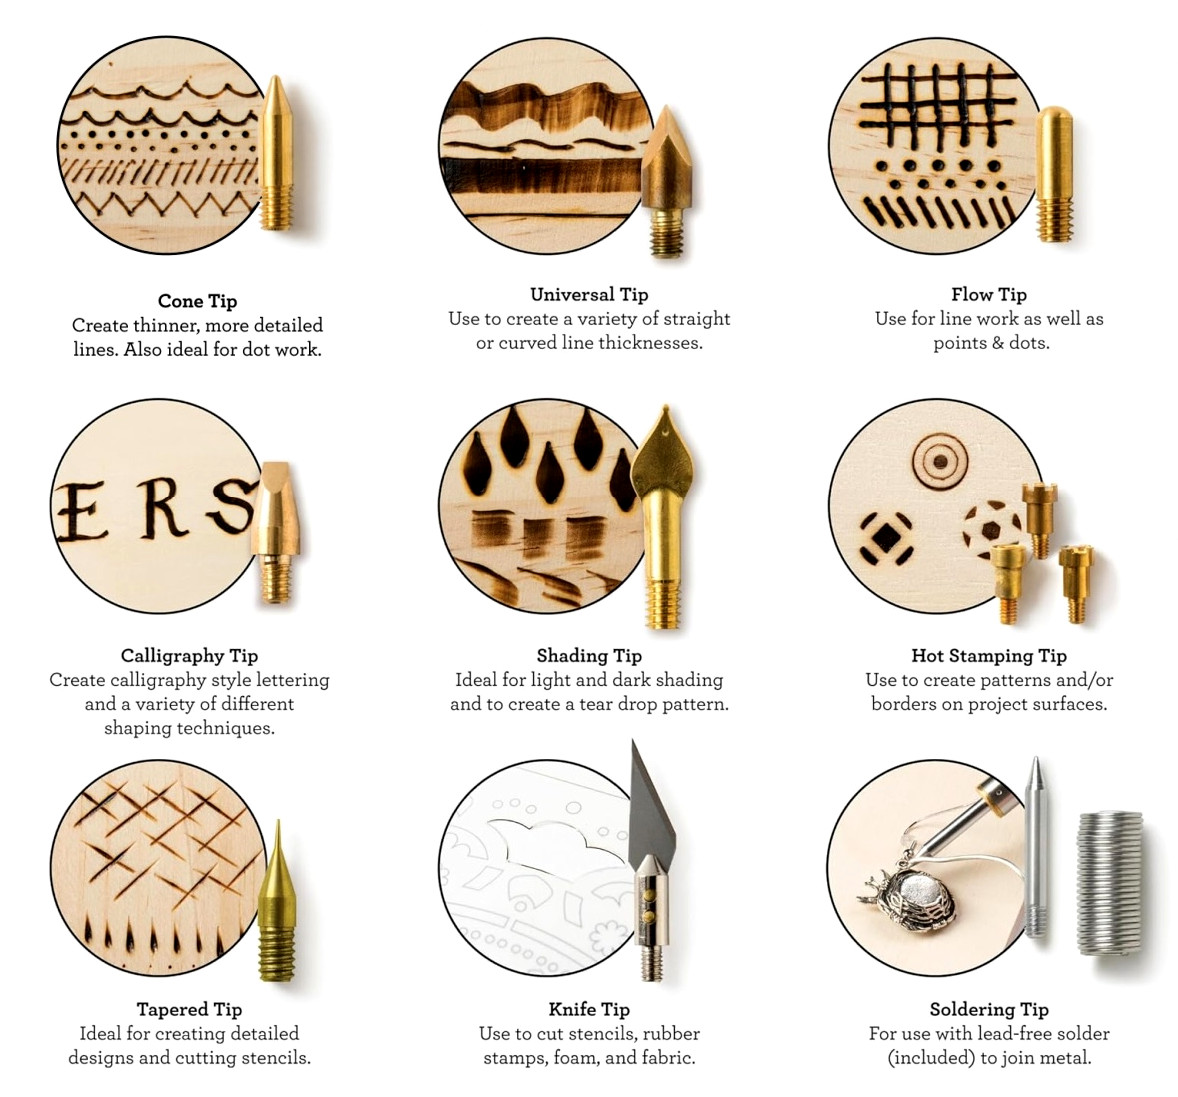
For this project, an entry-level solid-point burner will work perfectly. Professional-grade equipment is unnecessary for burning an adorable mountain scene.
What Is the Best Wood for Wood Burning?
Choose a surface that is light-colored, smooth, unfinished, and reasonably soft. Pale wood creates noticeable contrast with burned marks, while consistent grain allows the tool to travel more evenly.
Suitable options include:
- Basswood:Light, smooth, and especially suitable for beginners
- Birch:Fine-textured and ideal for sharp details
- Poplar:Inexpensive and comparatively simple to burn
- Maple:More rigid, though still manageable
- Pine:Easy to find, but sap and inconsistent grain may create irregular lines
For beginners, basswood is my preferred option. Rounds from craft stores are practical, affordable, and suitable for many different projects.
Stay away from pressure-treated lumber, MDF, plywood, painted timber, and stained surfaces. They can include glue, preservatives, or other substances that may release harmful fumes when heated.
Wood Burning Safety
Choose a well-aired workspace and aim a fan so it carries smoke (there’s usually only a small amount) away from your face. Even untreated wood may produce smoke that bothers your eyes and lungs. This is especially important for more sensitive individuals.
Whenever the burner is idle, place it in its stand. Shield the table, keep cords from becoming tangled, and move children, animals, paper pieces, and combustible materials away from the tool.
I suggest securing the burner base to the table with tape as well. Otherwise, snagging the cord can send the whole tool flying from your workspace. Believe me, I know.
Before replacing tips, always switch the tool off, disconnect it, and wait until it has cooled completely.
My Best Tips for Beginners
Begin by practicing on a scrap board. Try straight strokes, bends, dots, and circles to observe how the wood responds.
Smooth the surface with sandpaper until it is even to the touch. Coarse grain can grab the tip and leave skips, lumps, and inconsistent marks.
Give the tool enough time to reach full heat before you start. Use a medium setting initially, raising it only if required.
Work gradually and let the heat perform the task. Extra pressure will not improve the line; instead, it may gouge the wood or harm the tip.
Whenever practical, draw the tool toward you rather than pushing it forward. This feels more natural, like sketching, and generally results in cleaner lines.
Use a gentle touch at first. A faint mark can always be darkened, whereas a deep scorch is considerably more difficult to correct.
Common Mistakes to Avoid
Skipping the practice piece.Since each wood type burns in its own way, check your temperature and pace beforehand.
Pressing too hard.The burner does not function like a pencil. Keep your grip light and allow the heated tip to slide.
Ignoring the grain.Youmay need to slow down when moving across tougher areas of wood.
Rushing the process.Working too fast can produce light, uneven marks. Pyrography is a craft that benefits from patience.
Using treated wood.Paint, stain, finishes, and glue can give off harmful chemicals and poisonous fumes.
Leaving the tool stationary.Stopping in one spot may create a dark mark or indentation. Keep the tip in motion.
Now that we’ve gone over the essentials, let’s create something!
Easy Wood Burning Project for Beginners
Make a simple outdoor scene burned into wood with a printable template and an unfinished basswood round.
Makes: 1 project
Estimated Cost: $15
-
Print and download my free outdoor scene template (or choose any artwork you prefer). Because of the size of my wooden round, I printed the design across two pages and joined them with tape.
-
Set the transfer paper over your basswood round, followed by the printed pattern. Secure everything with tape, then trace the design lines using a pencil or tracing tool.
-
Connect your wood burning tool and allow it to reach full heat. I began with the biggest tip required, the flow tip for making the circles. Begin at medium-high temperature and increase it later if necessary.
-
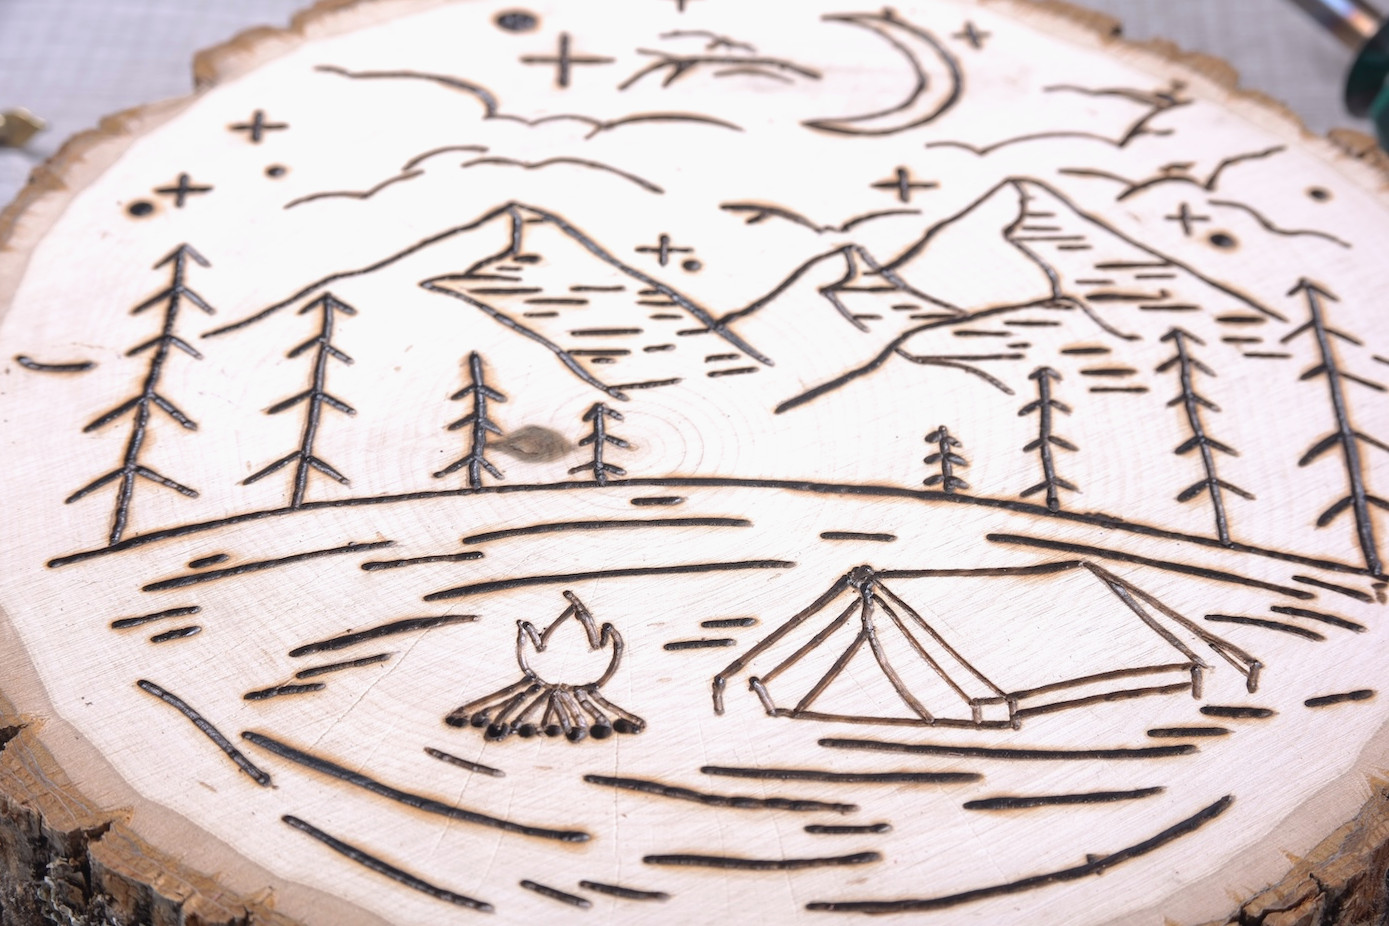
Slowly and steadily follow the transferred lines with your tool. Avoid pressing firmly, since the heat will naturally burn into the wood beneath the tip.
-
Whenever you need to replace a tip, shut the tool off entirely and wait for it to cool down. Unplug it before changing tips, and never handle a tip while the tool is connected.For the medium-sized details, I chose the cone tip.
-
After burning the primary lines, add the finer details. I changed to the tapered tip for the tiniest sections.After finishing, allow the wood to cool completely before touching it or putting it on display.
Secure the base to the table with tape. If you trip over the cord, your tool could go flying off the table. Believe me, I know . . .
Honestly, I worked for roughly 20 minutes at a stretch, took a break, and returned to the project afterward.
Because the tip stays hot, your marks can become darker, so vary your pace instead of applying extra pressure.
Set the completed plaque on a shelf or install hanging hardware on its reverse side.
Your first piece does not have to appear factory-made. Small imperfections add character to wood burning, and each mark teaches you more about handling the tool.
After you feel confident with outlines, experiment with lettering, shading, ornaments, spoons, signs, and plenty more. For the moment, print the design, pick up a wood round, and try this outdoor scene. I believe you’ll be happily surprised by what you can create.
Are you ready to begin? Download the template and let’s get started! Be sure to comment if you try it—I’d be excited to see your projects! You may also enjoy these other ideas:
Cork Trivets • Glue Gun Projects • House Number Sign • Twig Candle Holder • Wood Slat Doormat • Wood Slice Coasters • Wood Slice Ornaments • Wooden Wall Art