
Add storage to any room with built-in bookcases featuring doors and drawers.
I regret waiting so long to begin this project because these built-in storage cabinets in my office have completely transformed the space!
One reason for the delay was figuring out the final design. My goal was to maximize the storage available in the room.
I also needed to find the motivation to take on such a large project, especially since it would disrupt my office.
A project this substantial may feel overwhelming, but I teamed up with Kreg to simplify the process! They offer several cabinet jigs that make each stage of constructing these storage cabinets much easier.
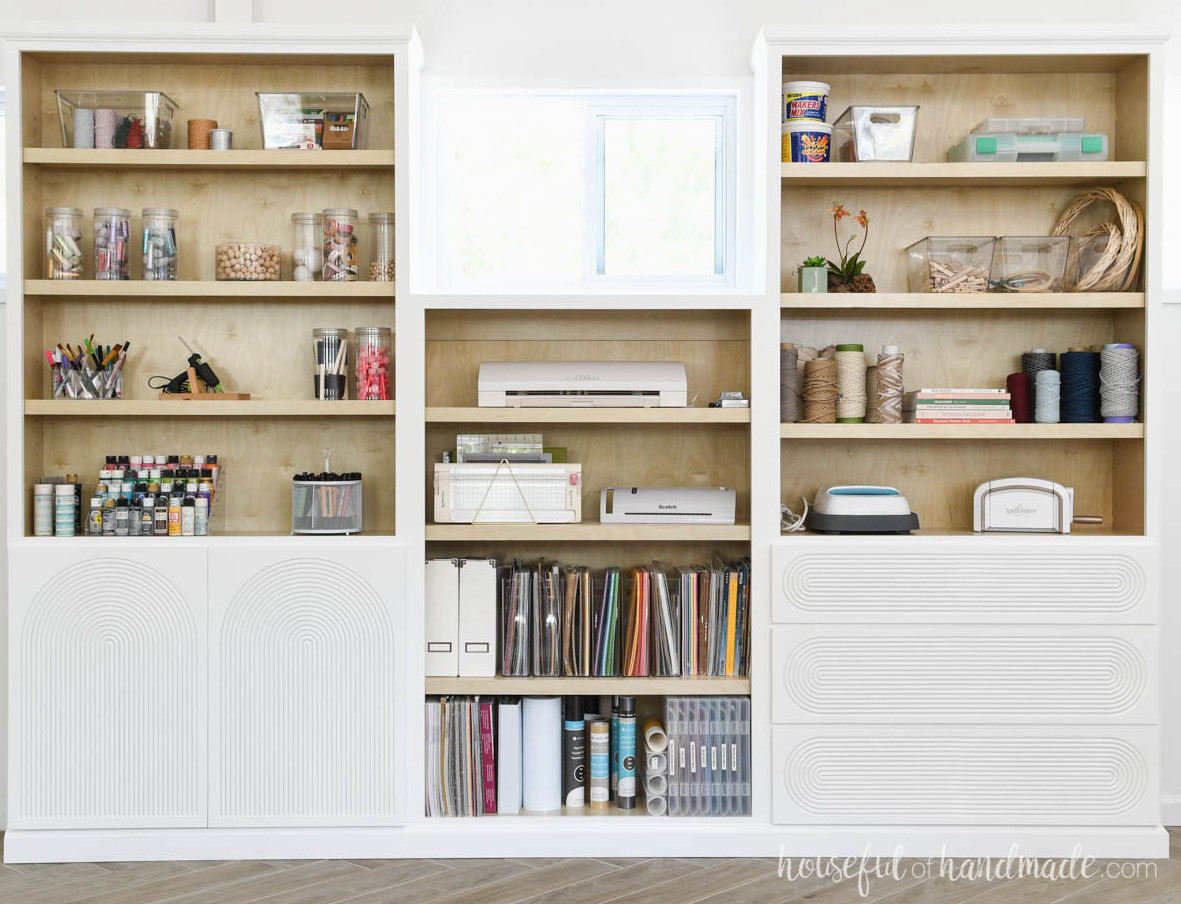
Built-in Bookcases with Doors and Drawers
I enjoy giving basic bookcases additional purpose. That is precisely what I did with these built-ins, which is why I refer to them as storage cabinets.
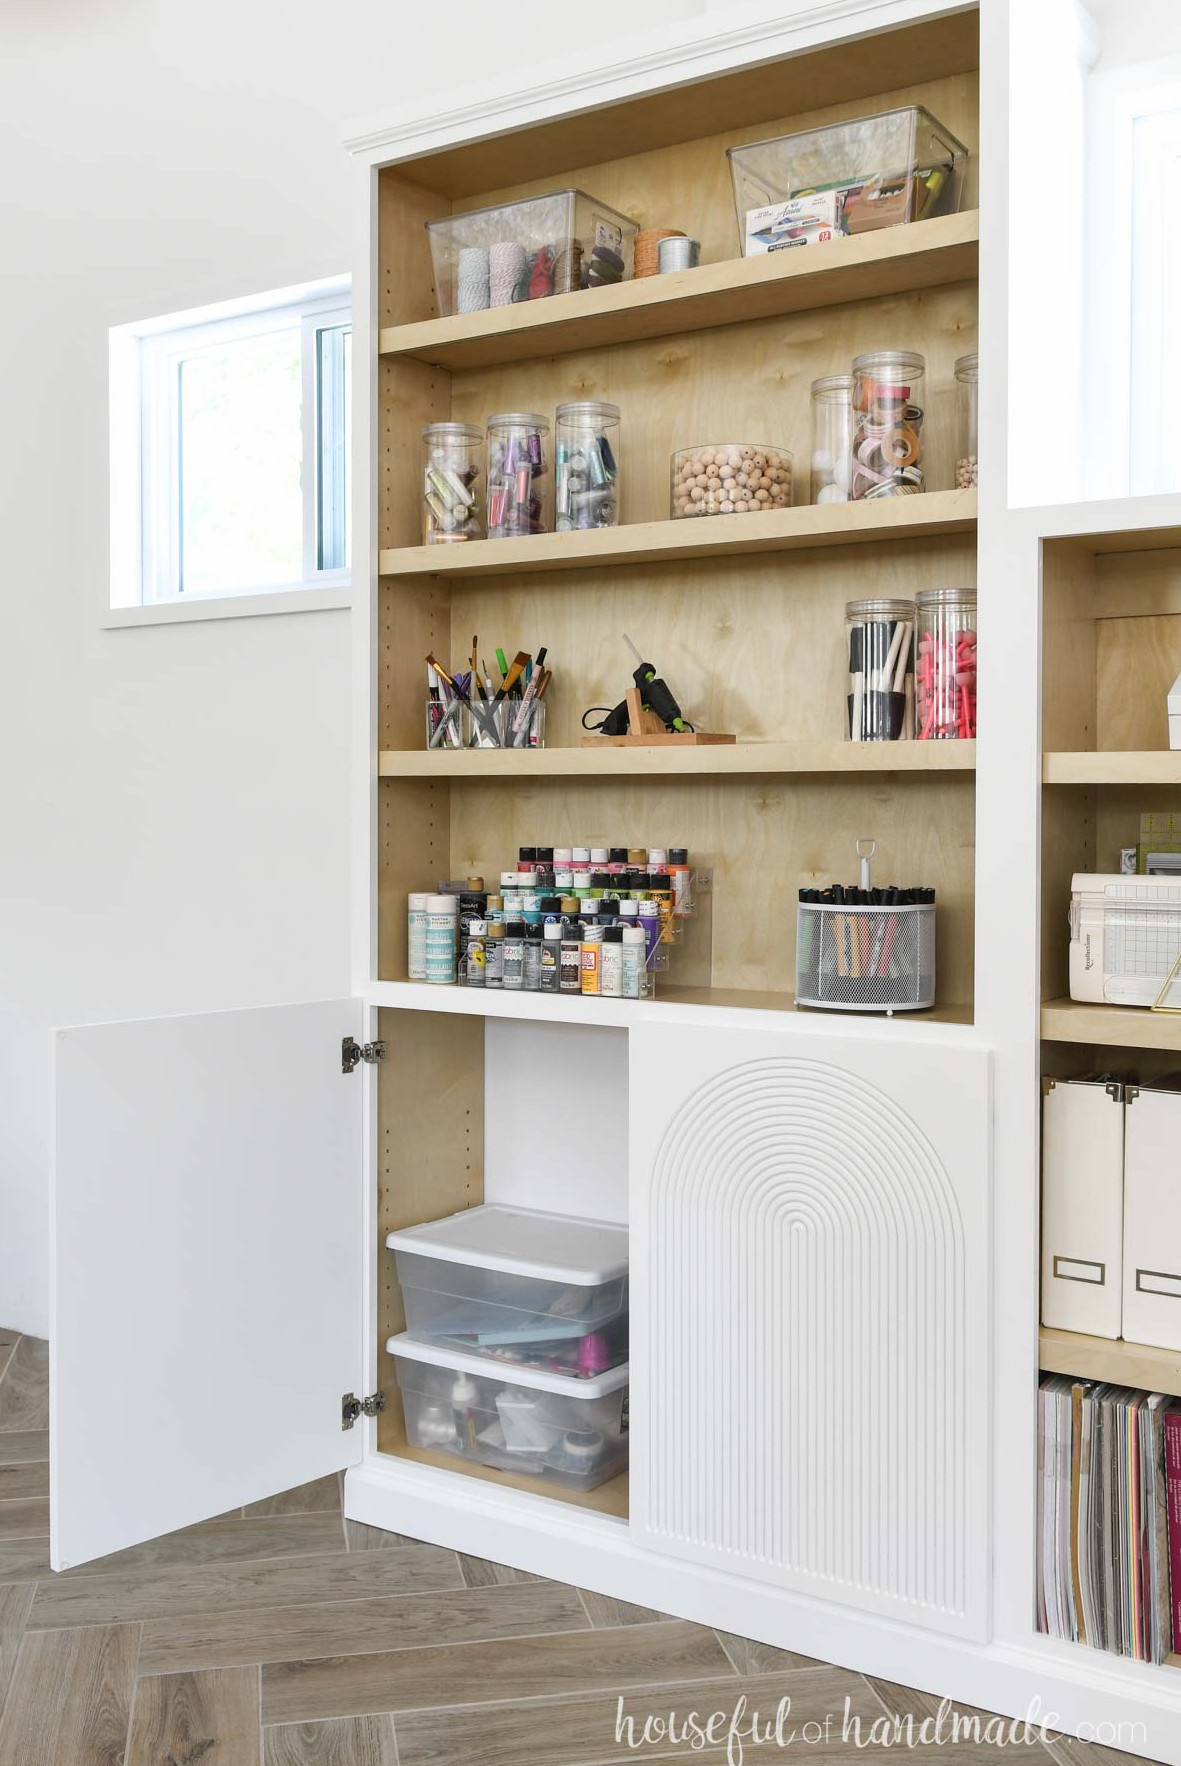
The bottom portions of the tall bookcases are enclosed to provide concealed storage. One side includes doors with room inside for shelves.
A large metal I beam is located behind this cabinet. The backing on the upper portion conceals it, while the doors underneath hide it as well without sacrificing too much storage space.
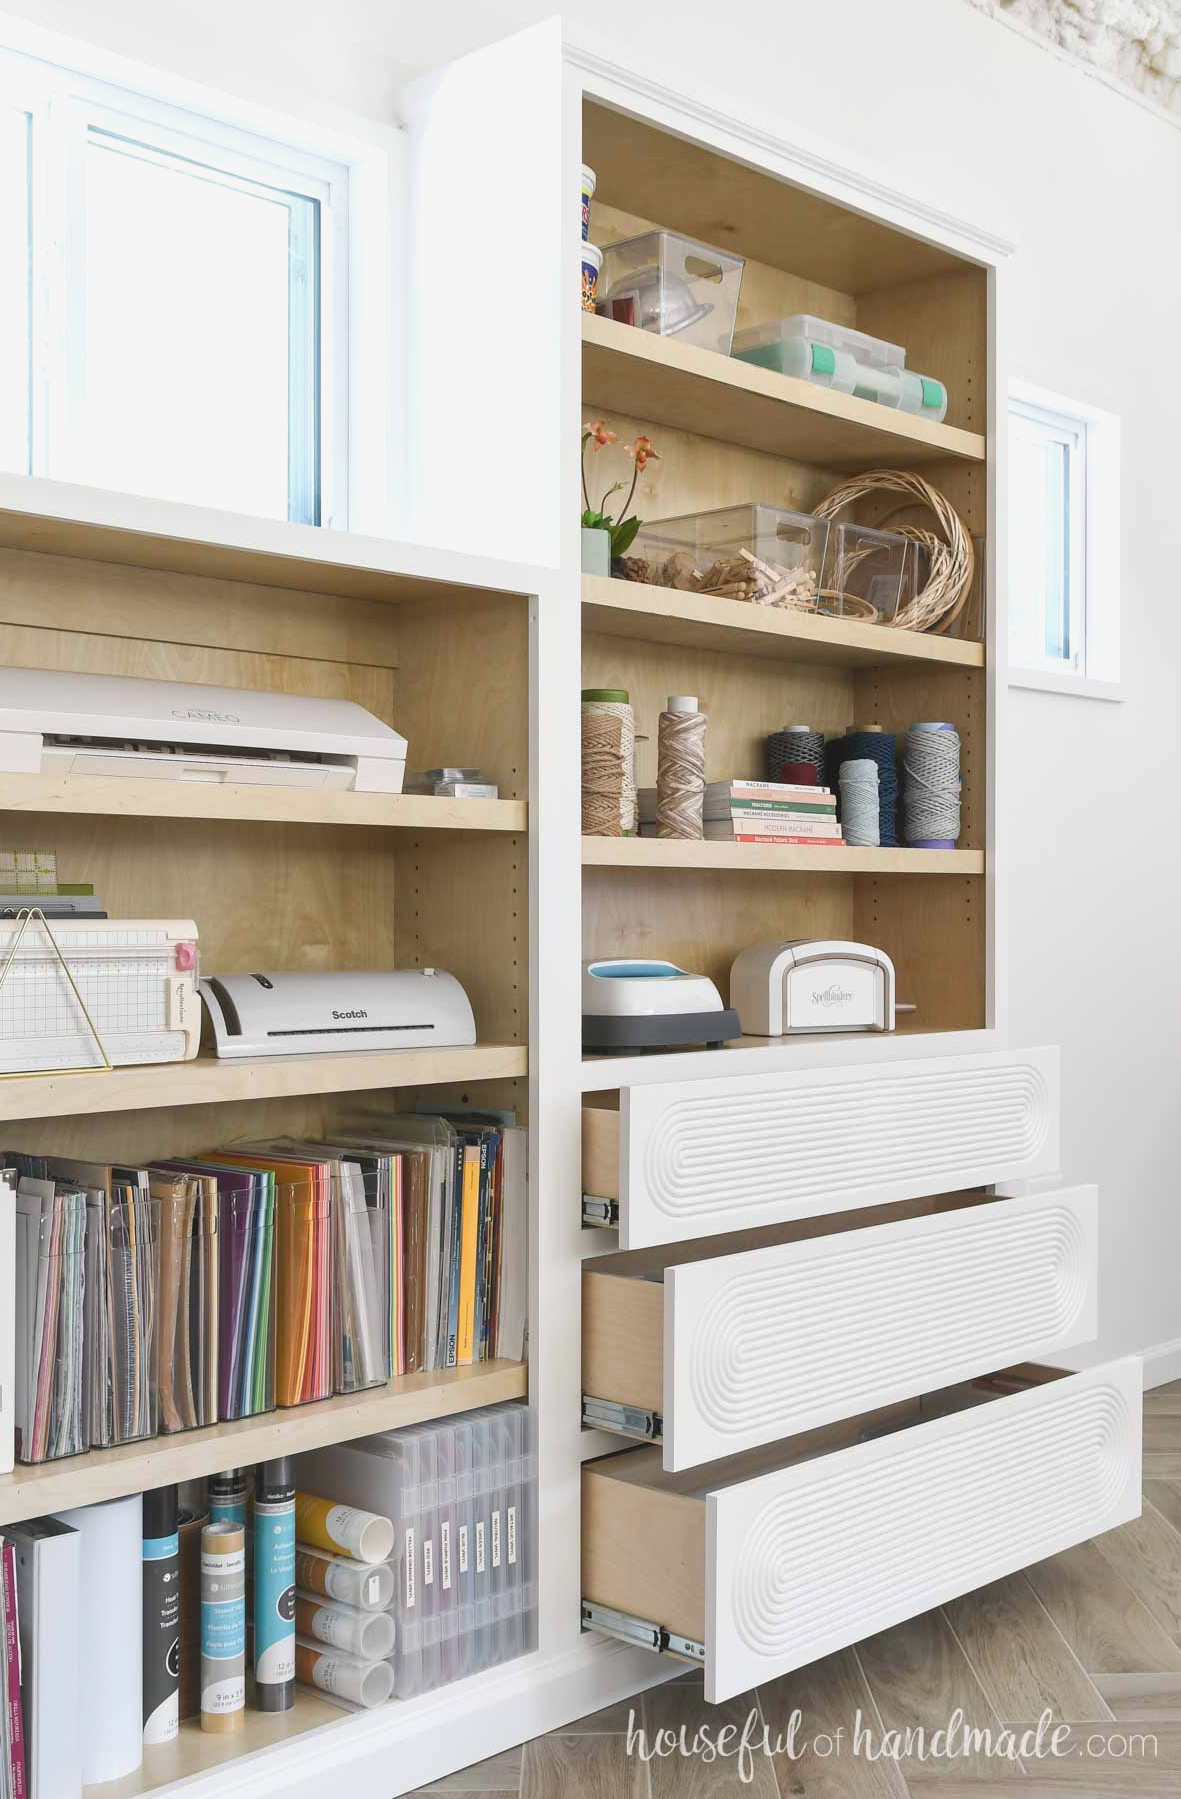
The opposite side features 3 spacious drawers. Although they are not especially deep, they are useful for keeping items that are difficult to store on a shelf.
Because there is an outlet on the wall behind this cabinet, I intend to make the top drawer an ideal charging station for all of my camera equipment.
The doors and drawer fronts also provided a fun opportunity to bring visual interest to the wall of built-ins.
I experimented with the doors and came up with a distinctive design. What do you think?
More Storage Cabinet Ideas
There is no such thing as too much storage! Plus, storage can be stylish and interesting.
Take a look at these other attractive storage projects you can build.
How to Build Built-ins
Tools & Materials
Overall Dimensions
I designed my bookcases specifically to fit between and beneath my windows. That is one of the biggest advantages of DIY!
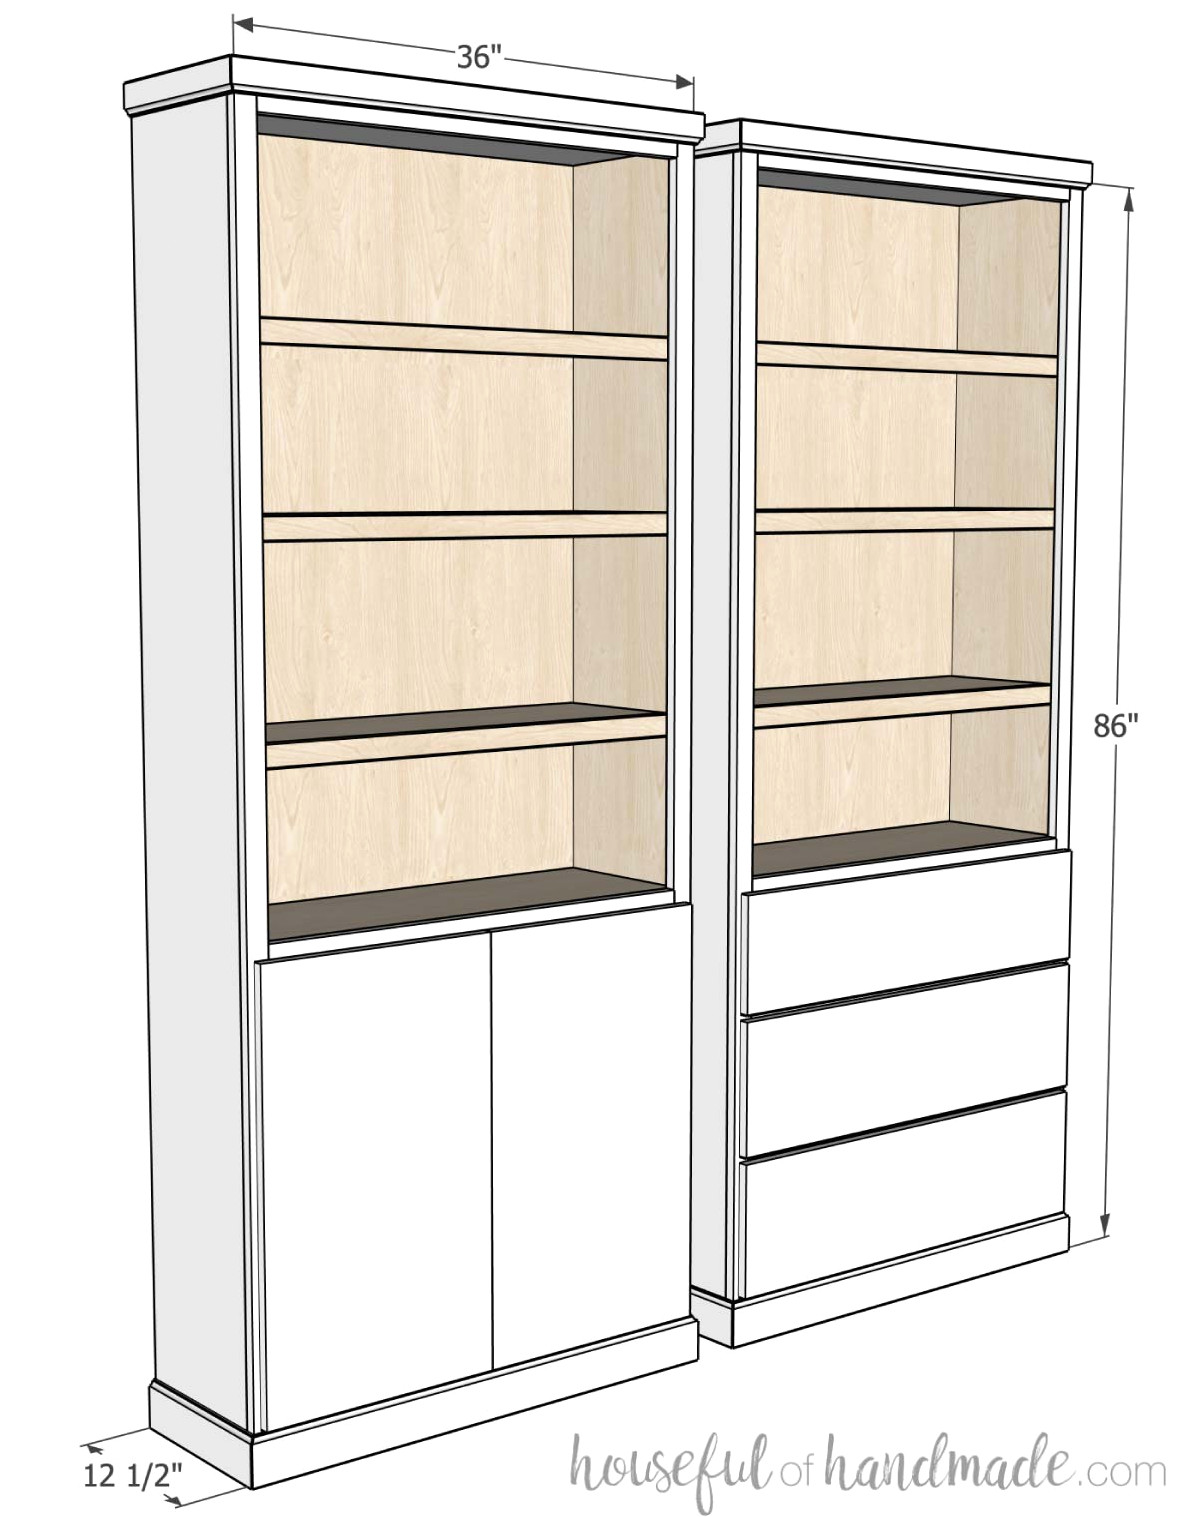
I put together building plans for a 36″ wide x 12 1/2″ deep (without trim) tall bookcase to provide for you. These bookcases stand 86″ tall before the moulding and feature either doors or drawers along the lower portion.
Use a single bookcase as a compact built-in, or make several and place them side-by-side to create an entire storage wall.
Cut List
Prepare the components by following the clearly organized table in the PDF plans.
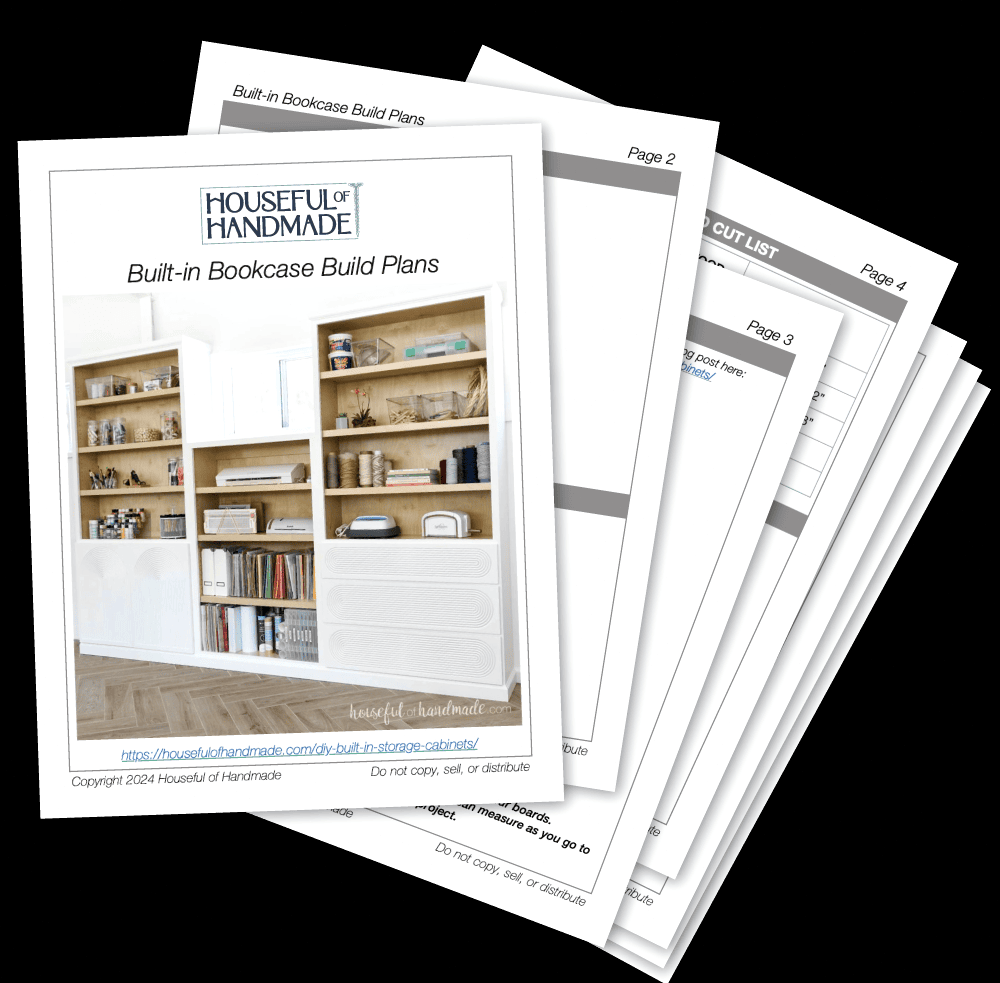
Get the Premium PDF Woodworking Plans
PDF plans include- Easy to Read Cut List, Shopping List, Recommended Tools, Step-by-Step Instructions with 3D drawings, & Helpful Resources
BONUS- 3D SketchUp File
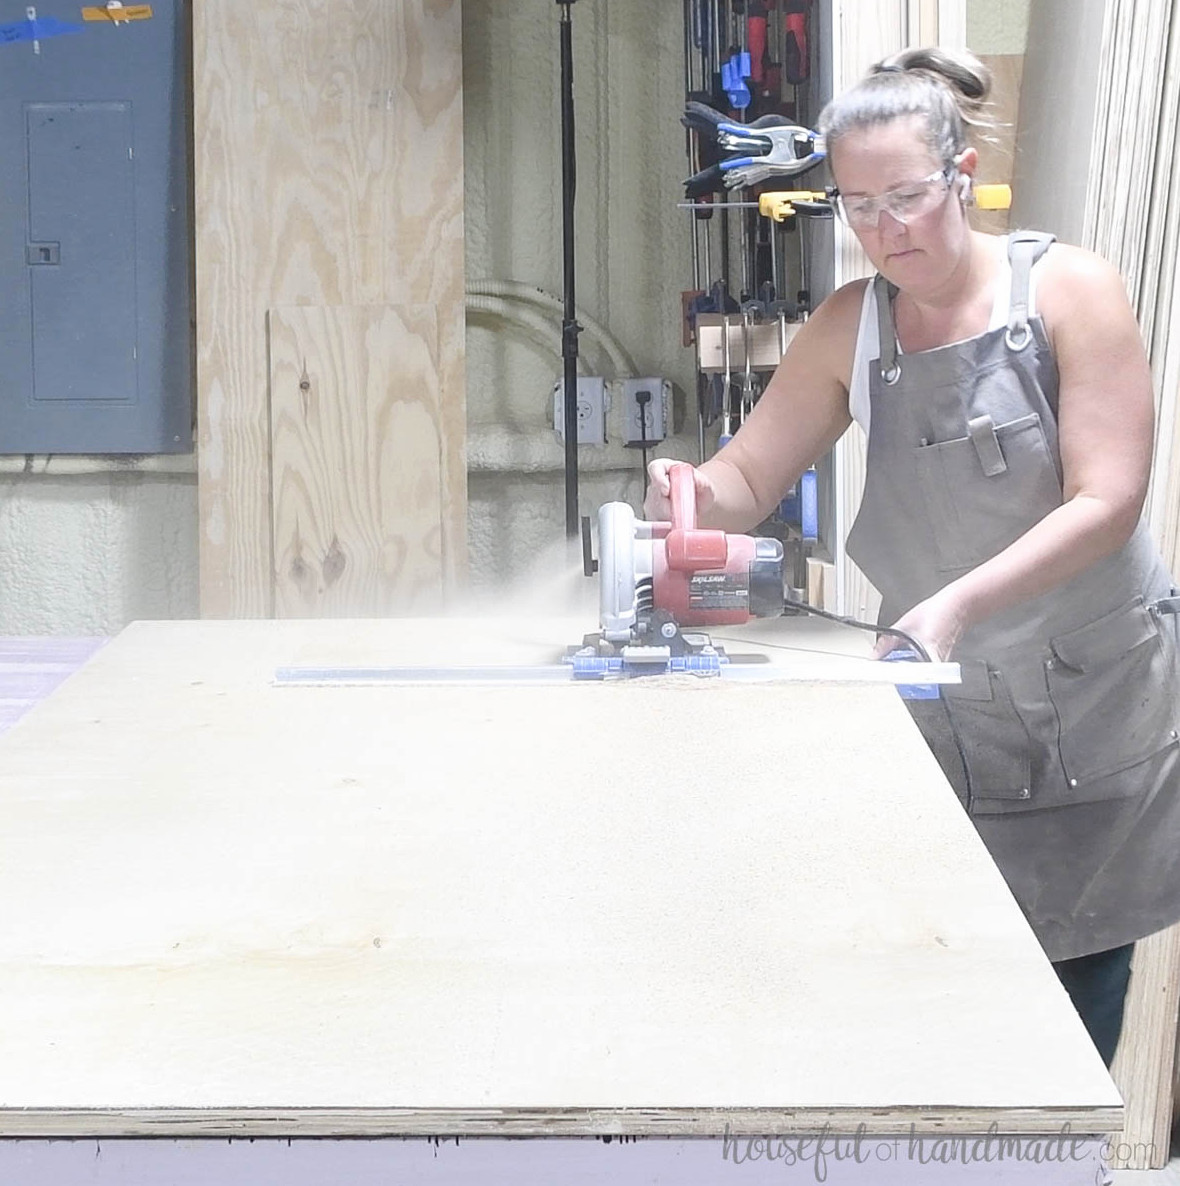
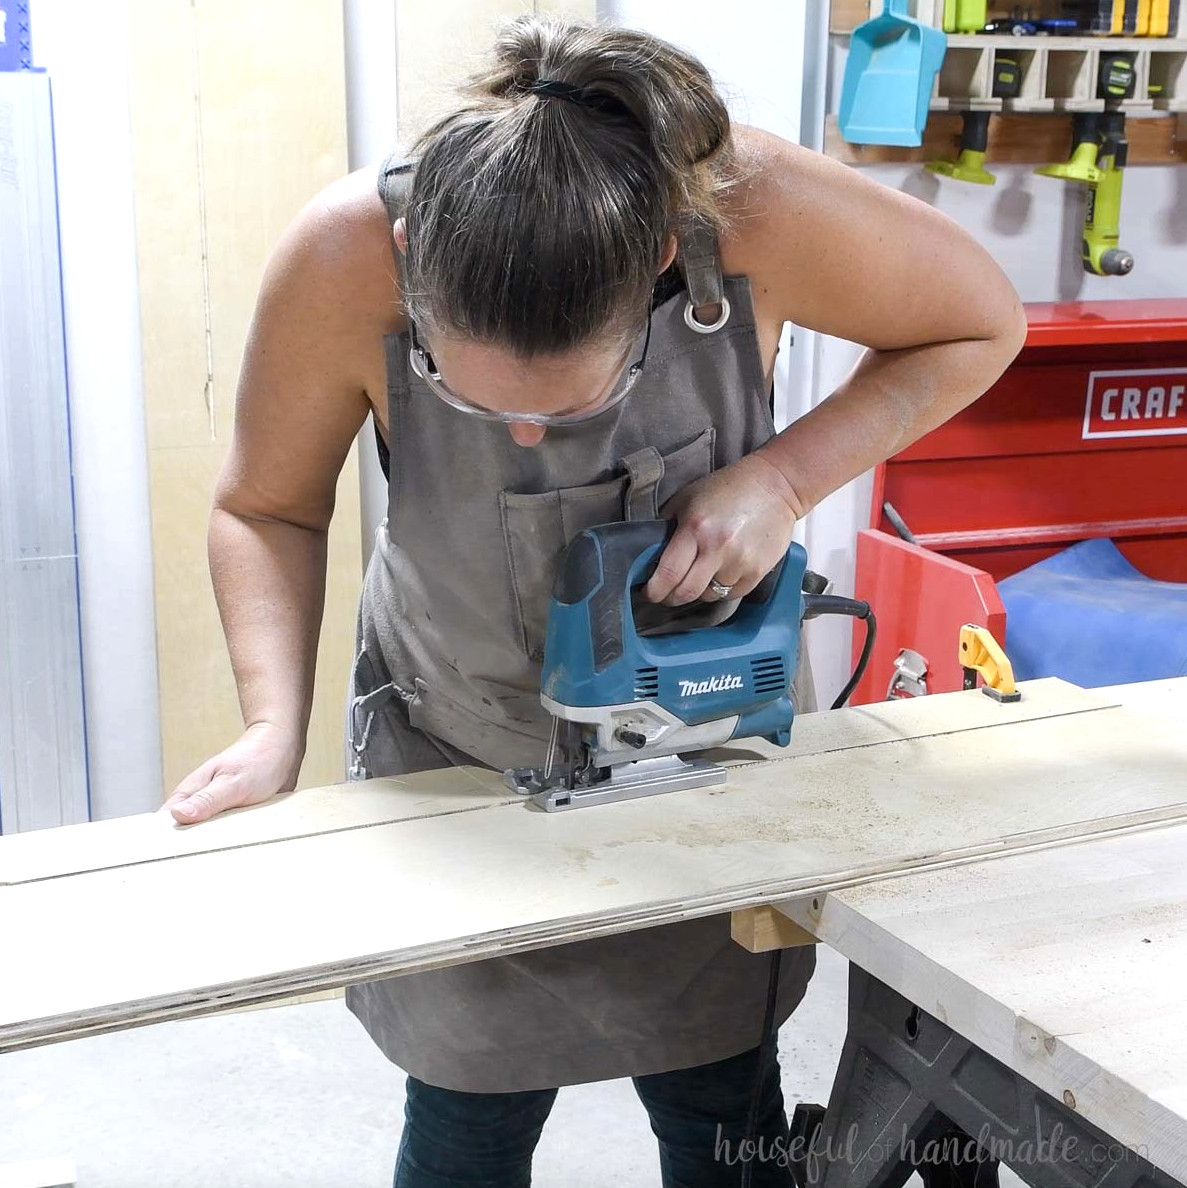
I used the Kreg Rip Cut to divide my plywood sheets into 4 strips for the bookcase sides, tops, and bottoms.
When breaking down plywood, I prefer setting it on a piece of rigid foam insulation. I place it on my workbench, though the plywood can also be cut directly on the foam while it rests on the floor.
Find all of my helpful tips for cutting down plywood sheets with a circular saw here.
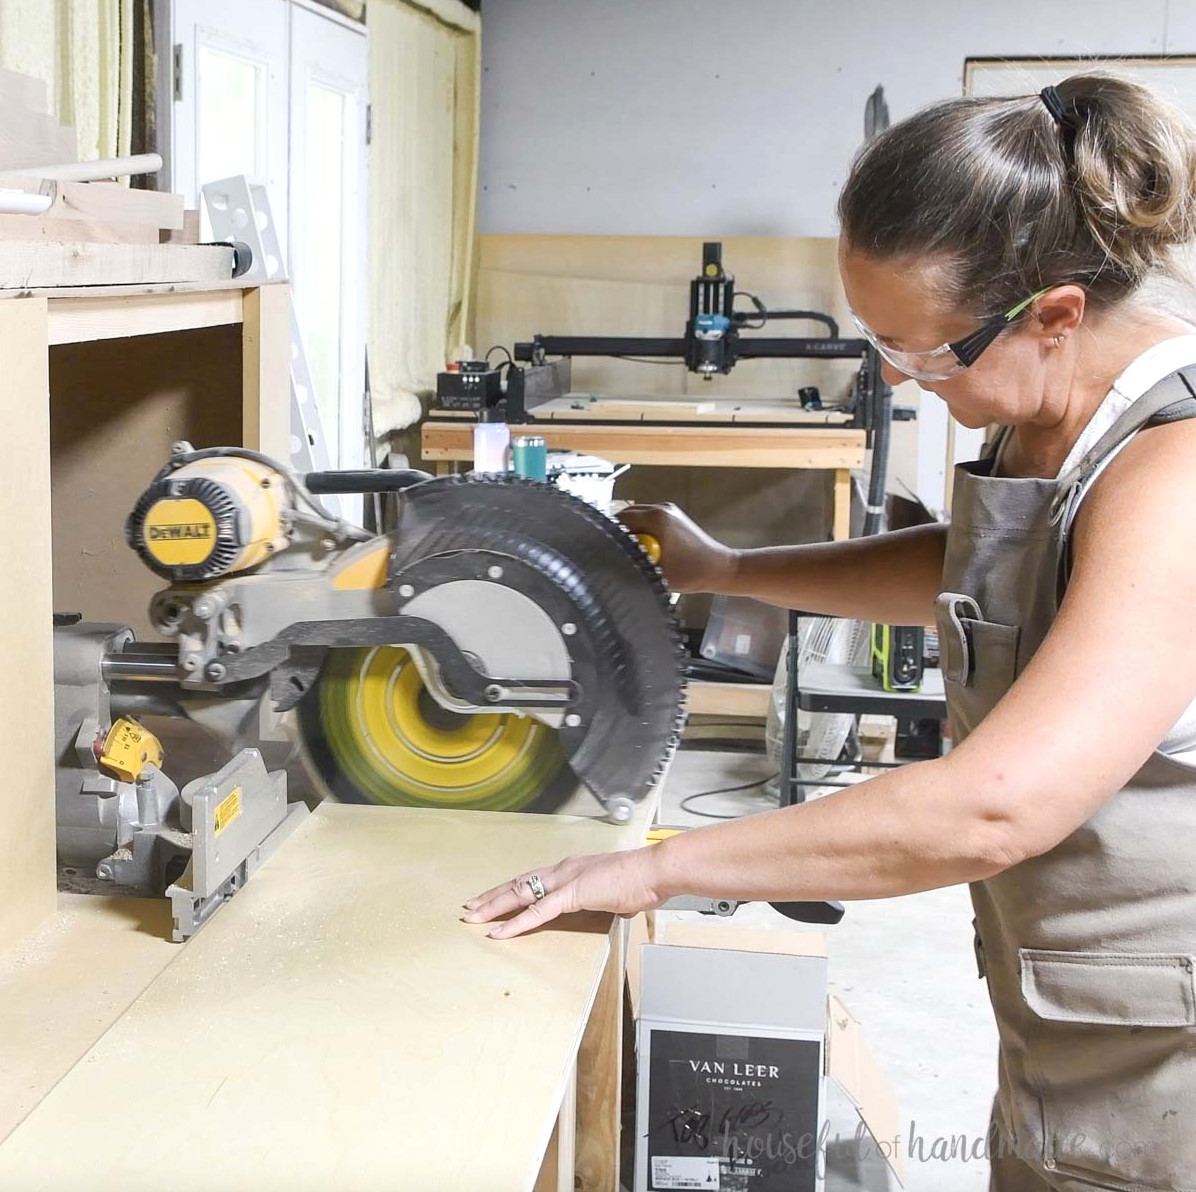
After that, I used my miter saw to cross-cut each piece to the required length. If you do not own a sliding miter saw, the Kreg AccuCut makes cross-cutting the pieces easy.
For every cabinet, I cut 2 sides, one top, and one bottom. I also cut a fixed shelf for the taller bookcases.
STEP 1- Build cabinet boxes
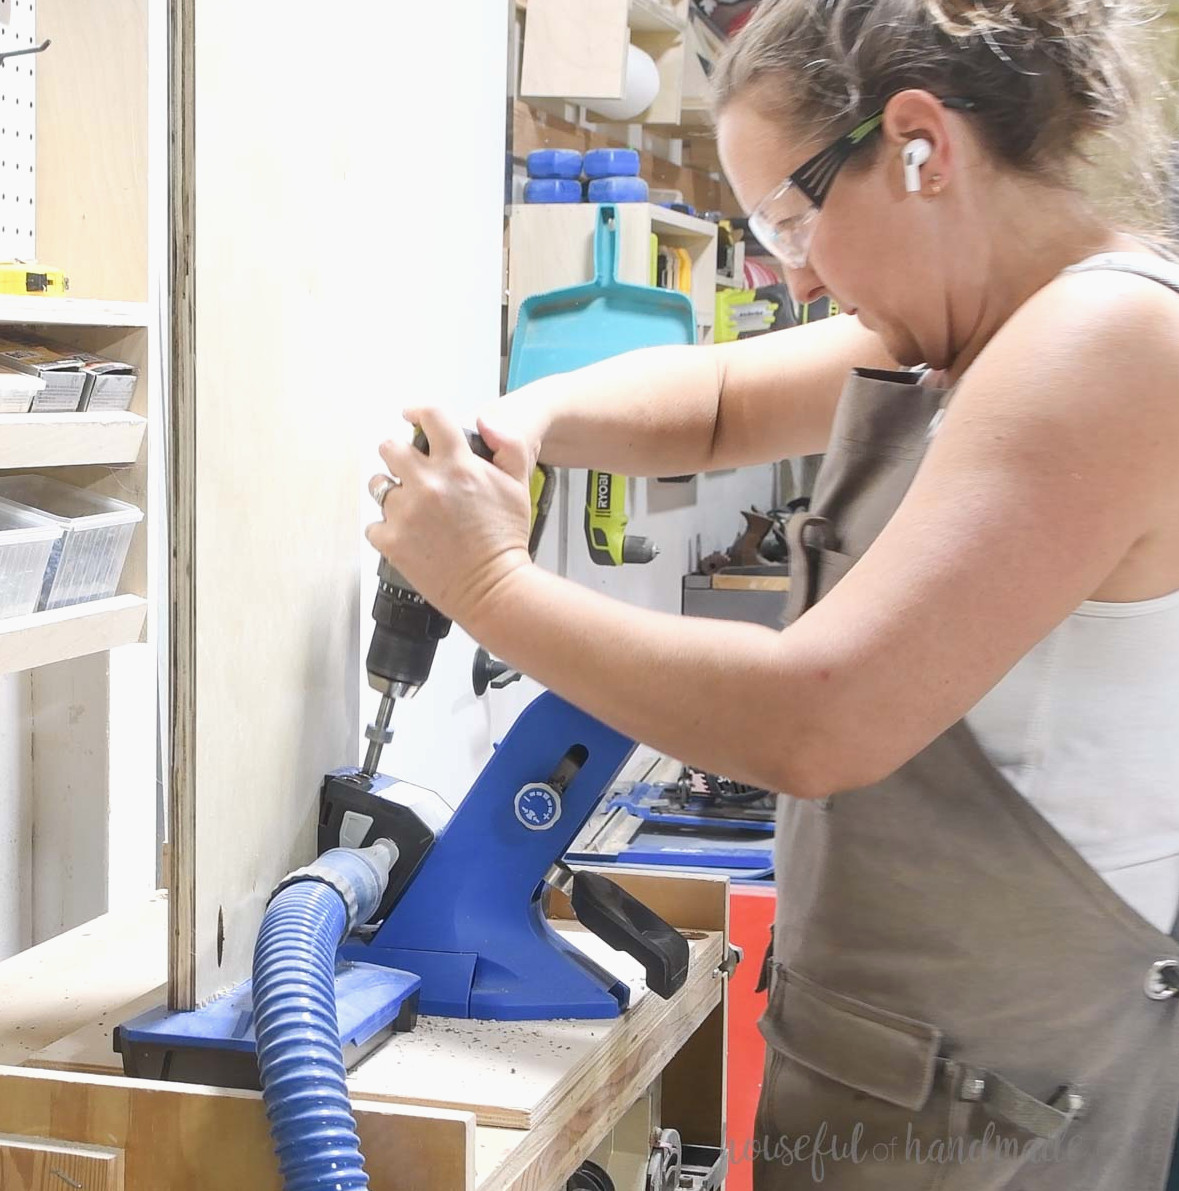
I chose pocket holes to create strong, durable bookcases.
Set the pocket-hole jig for 3/4″ material, then drill holes into both ends of the top, bottom, and shelf boards for each tall bookcase.
Tall bookcase assembly
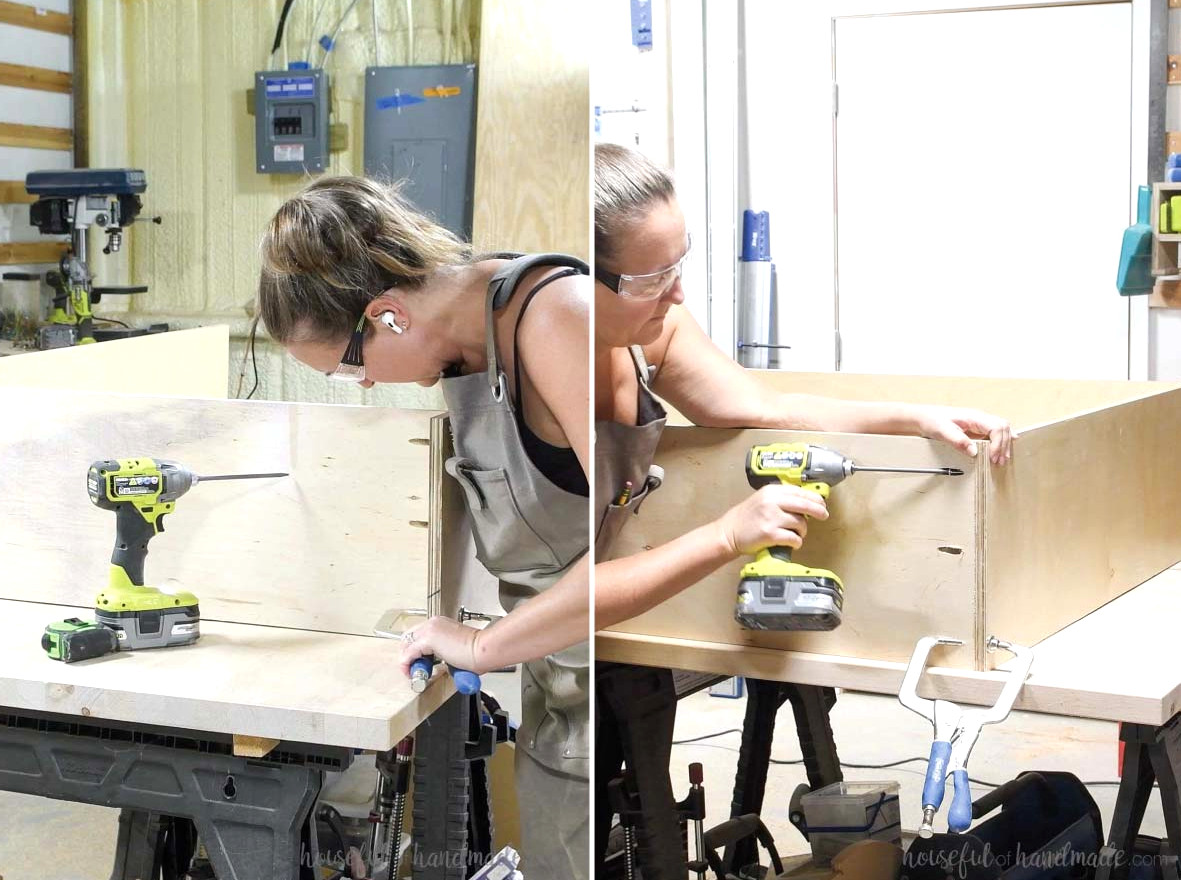
Begin by fastening the top board to one side piece, keeping it even with the top edge.
Next, position the bottom board above the lower edge so there is enough space for the baseboards around the built-in bookcases.
Use 1 1/4” pocket-hole screws and glue to secure everything. Because I am working with pre-finished plywood, I chose Roo Glue rather than standard wood glue.
EXPERT TIP:
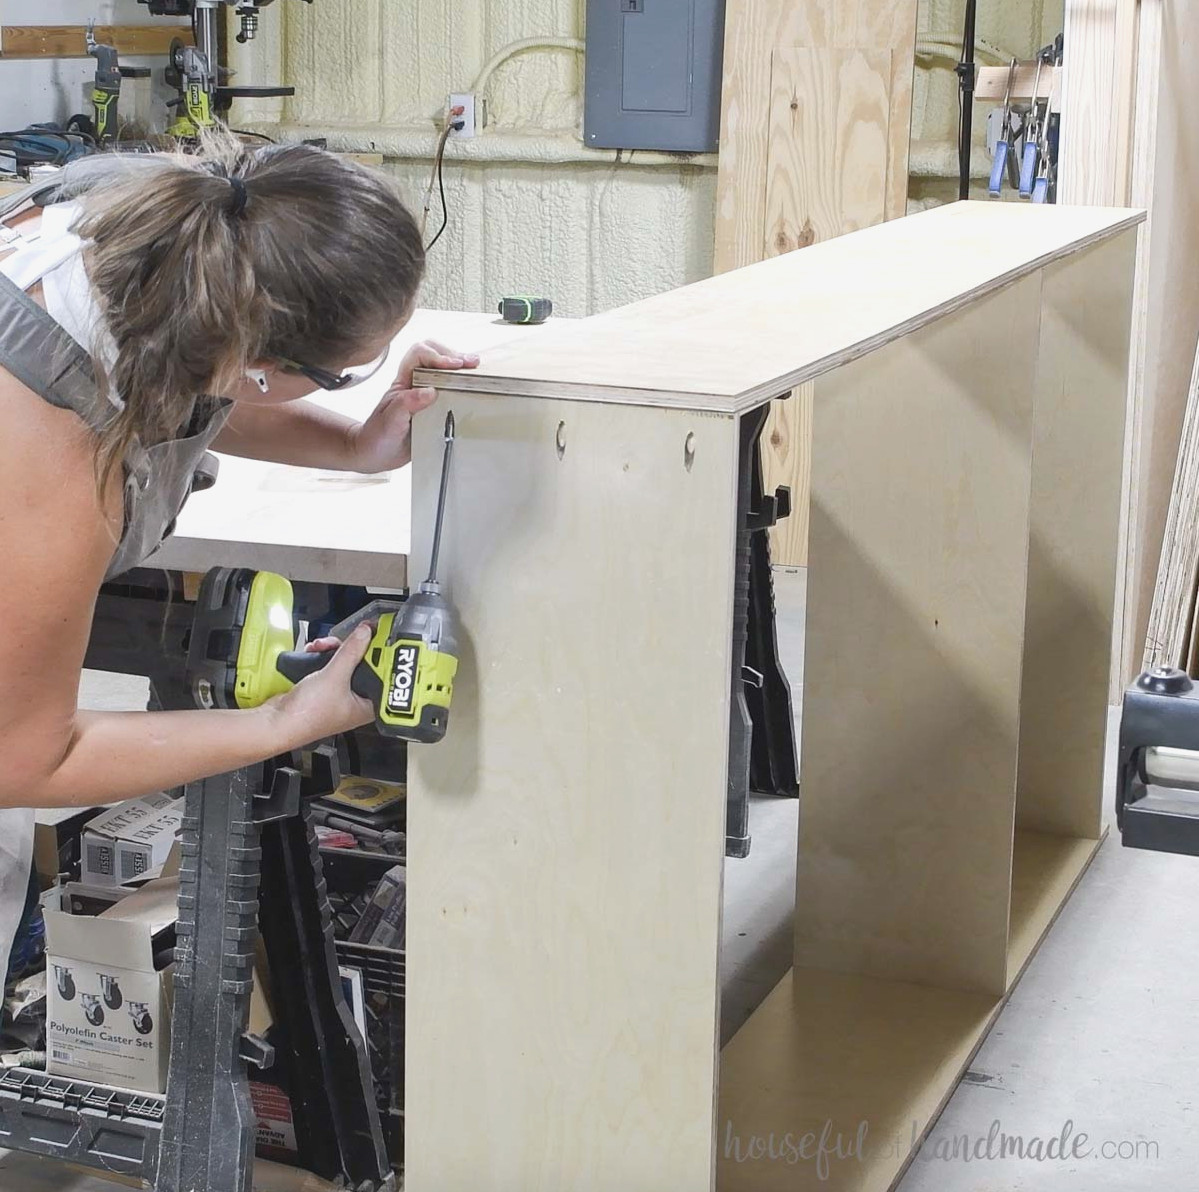
Position the pocket holes for the top board toward the top of the bookcase so they remain hidden after installation.
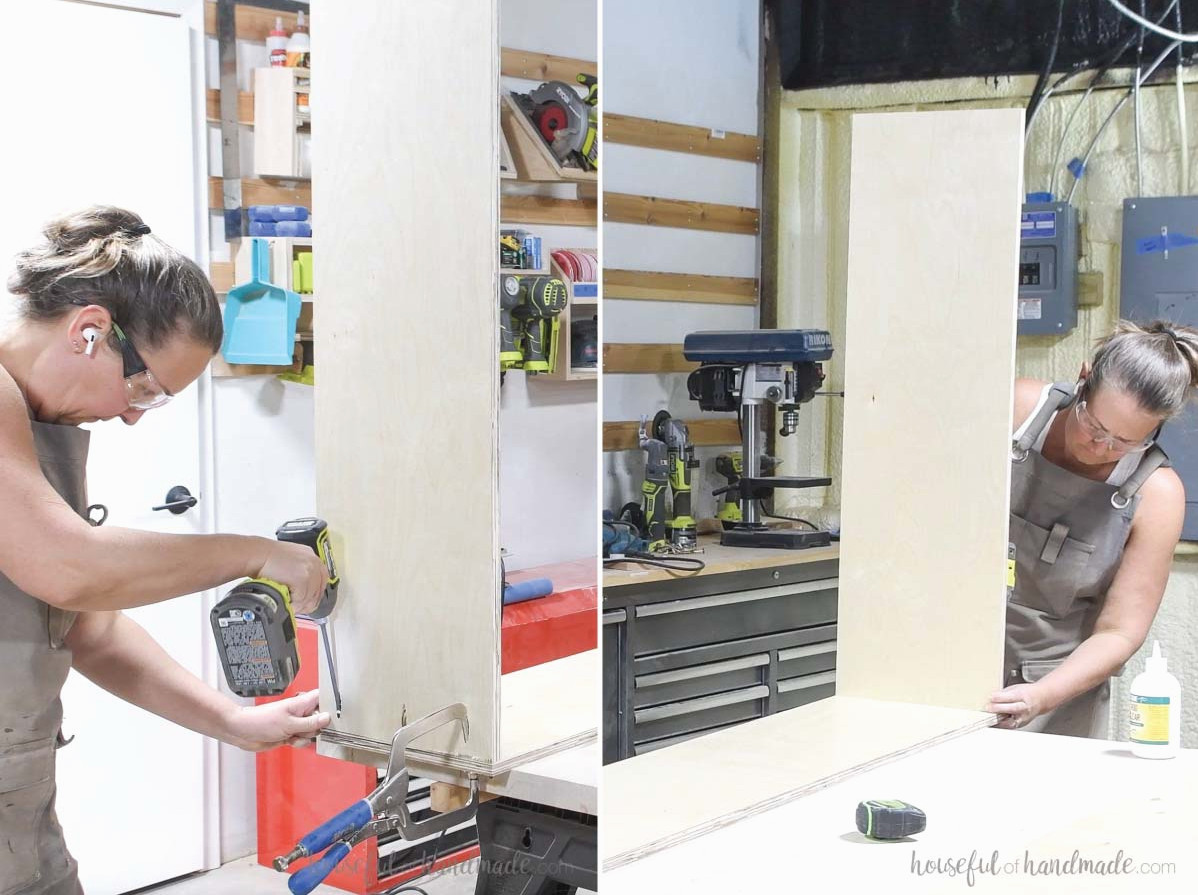
Then fasten the permanent shelf boardbased on the diagram included in the plans.
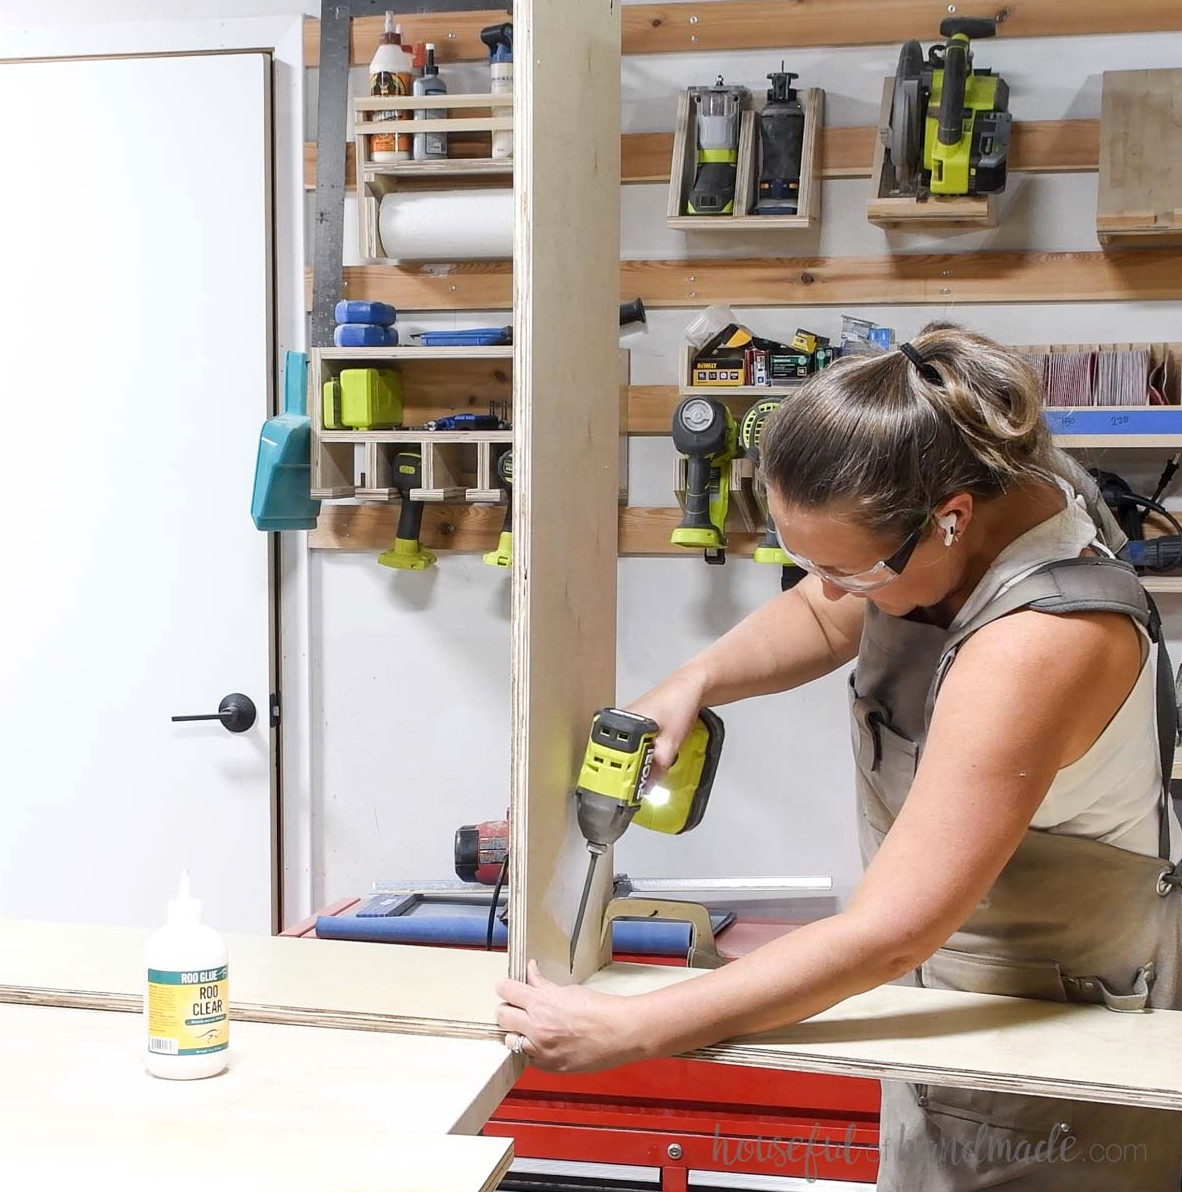
Fasten the second side panel to the opposite sides of the top, bottom, and shelf boards.
Align them just as you did on the first side. Apply glue, then secure everything with 1 1/4” pocket hole screws.
Adjustments to cabinet to hide beam
For the other tall bookcase, I chose to position the back in front of the metal beam inside my wall so it would conceal it.
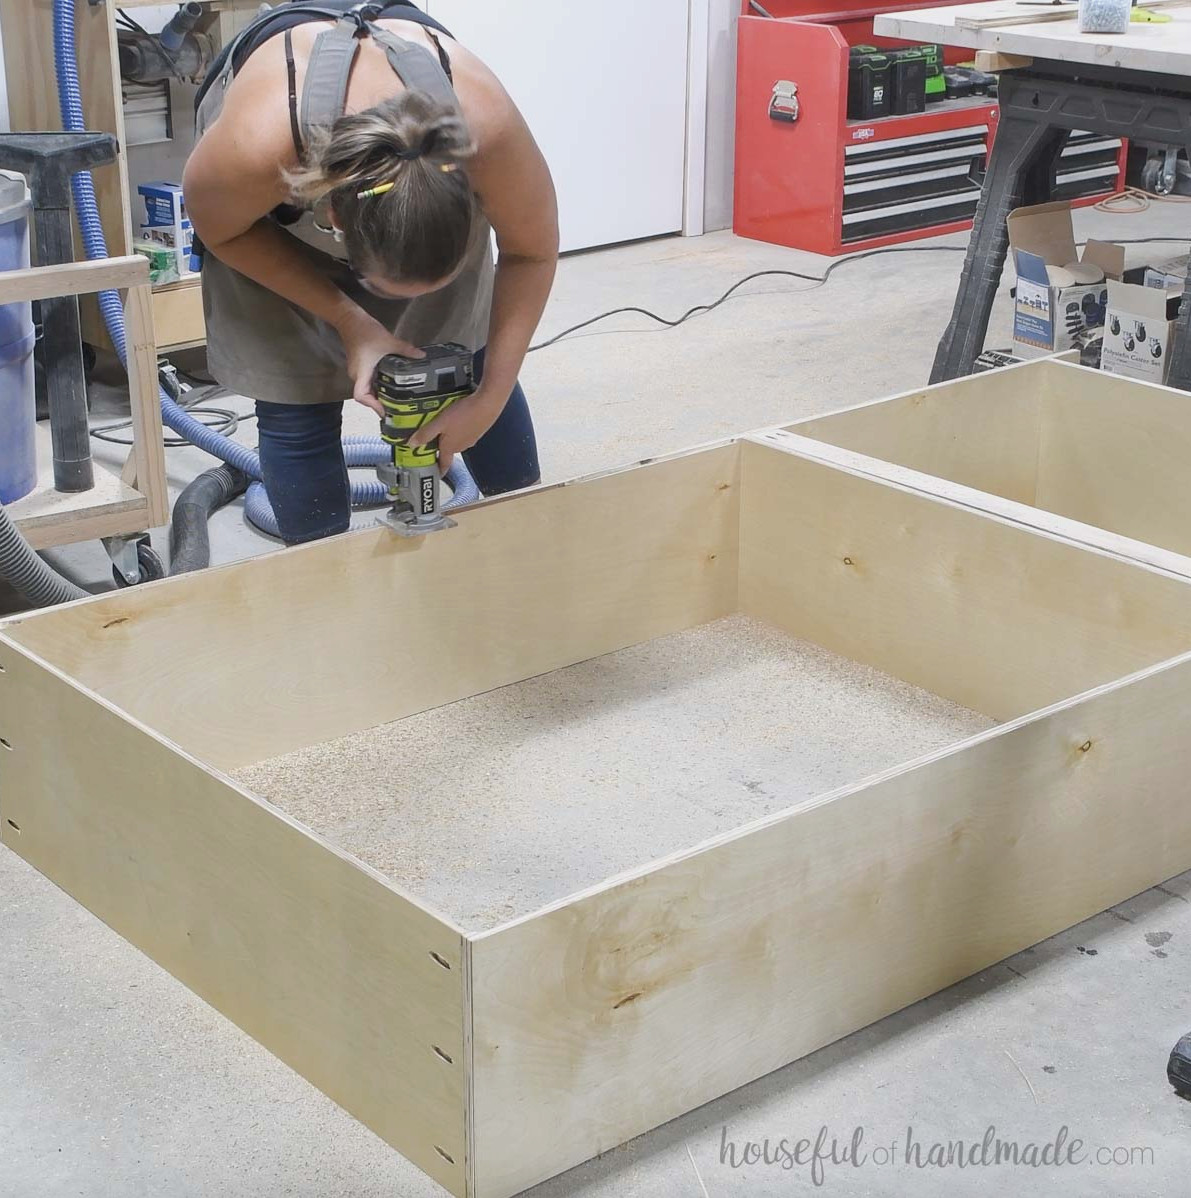
Before putting the bookcase together, I used the Kreg straight edge guide to rout a 1/4” x 1/4” channel into the sides, shelf, and top pieces.
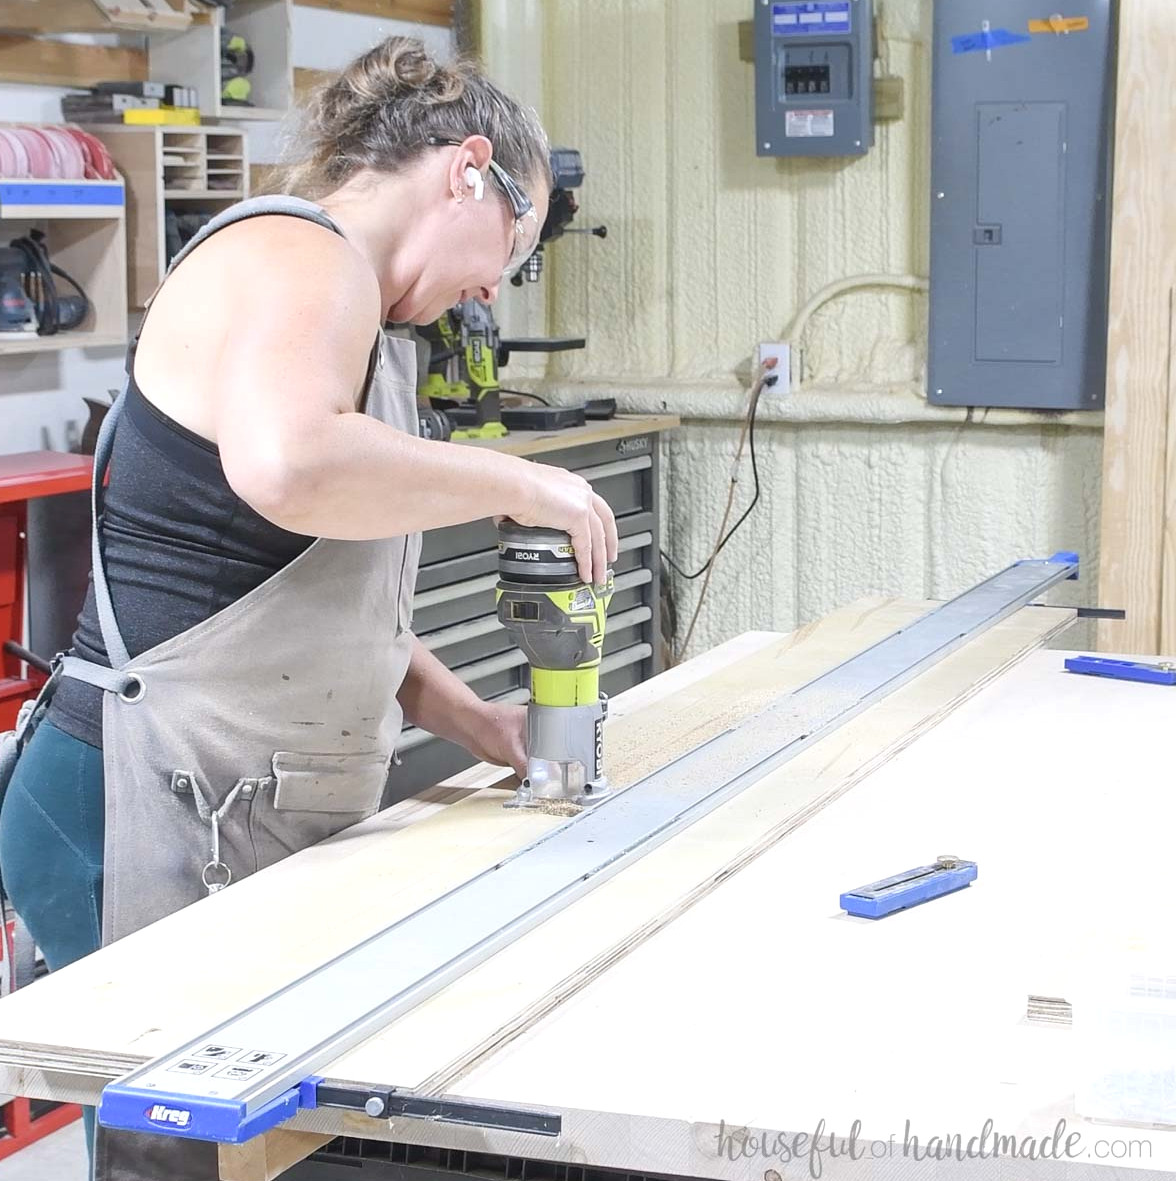
I also needed to make a notch in the top, bottom, and shelf boards so they could fit around the beam.
The front edge of the notch aligns with the rear of the groove.
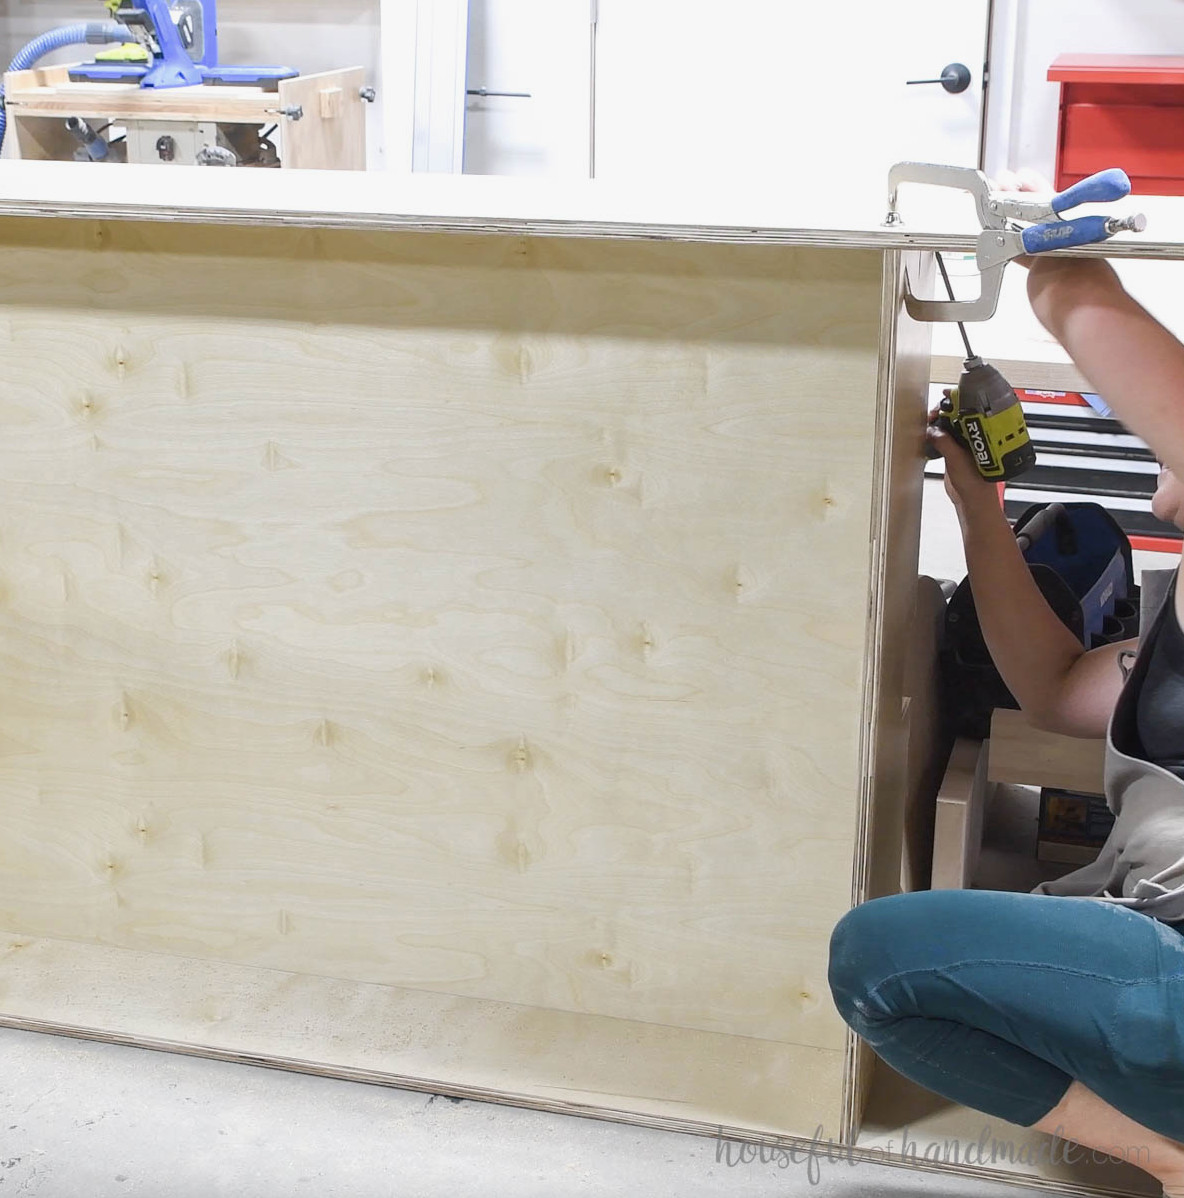
Build the box using the same process as the other tall bookcase, but slide the back into the groove before installing the second side panel.
I placed a back only on the upper portion of my bookcase. Since the lower portion will have doors, I wanted to preserve as much storage room as possible.
Center smaller bookcase
After completing both tall bookcases, I brought them into the room and test-fitted them to confirm that my measurements were accurate!
Despite all the planning and repeated measuring, I still needed to modify the notch around the beam so the bookcases would fit.
After positioning them, I measured the opening for the third cabinet that would sit between them.
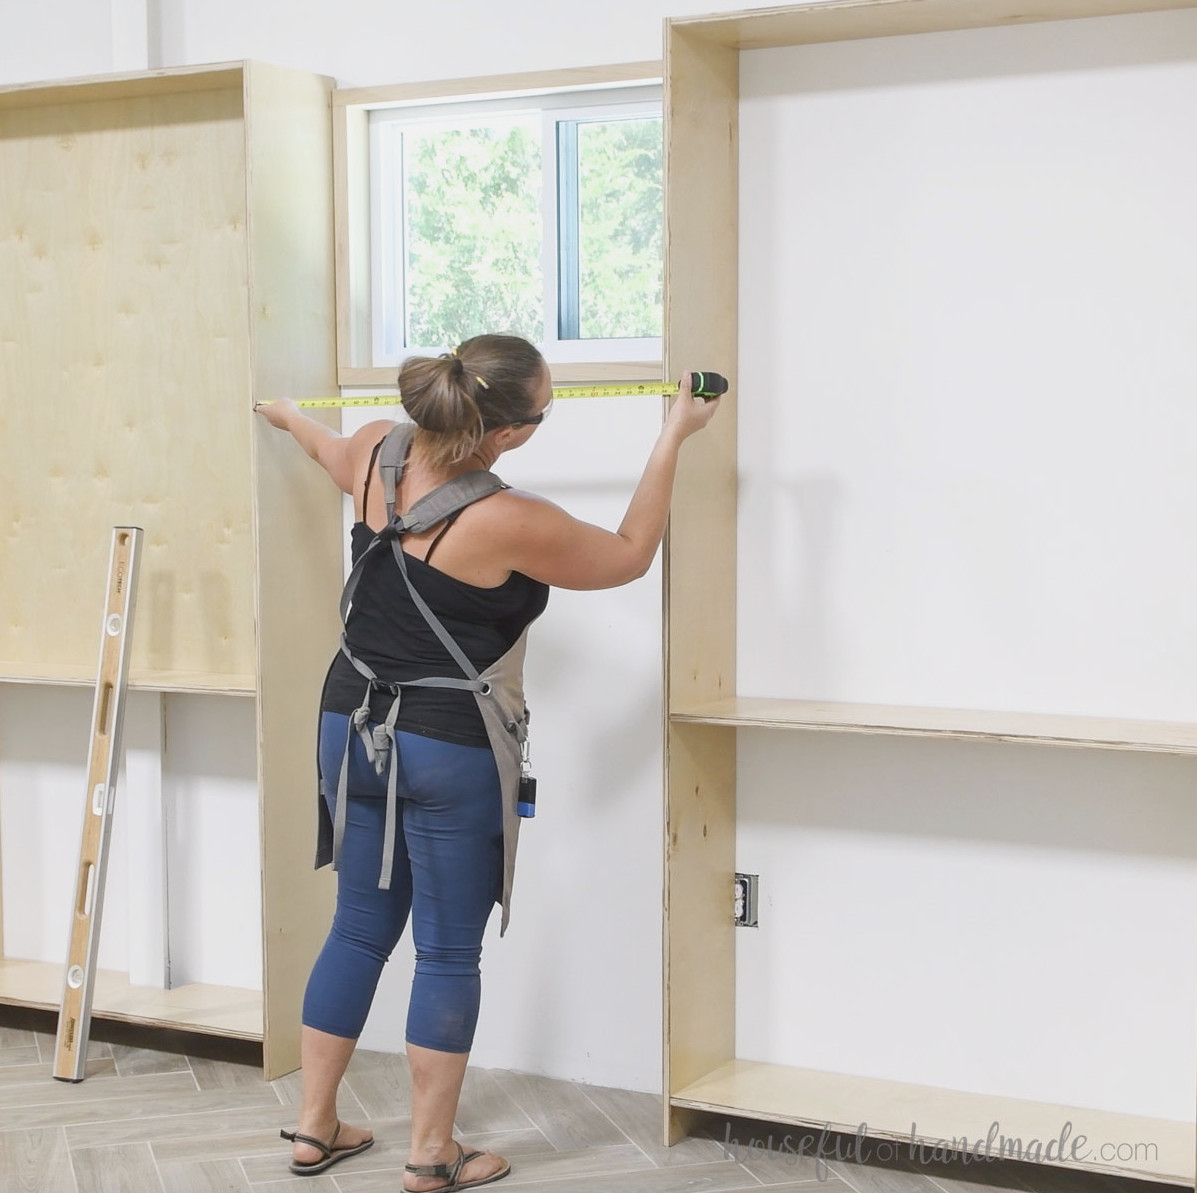
The center bookcase is lower than the other two because it will be placed beneath the window. Since I intend to use its top as a shelf, I did not want pocket holes showing there.
For this cabinet, I attached the bottom in the same manner as the others, but I added pocket holes to the tops of the side panels to secure the top.
Next, I cut the top so it would rest above the side panels rather than fit between them as it does on the taller bookcases.
Once all three bookcases are joined, the pocket holes in the sides will be concealed.
Prep for back
On the tall bookcases, I installed a brace beneath the shelf so I could fasten them to the wall.
I made this piece from plywood scraps, and it measures approximately 3″ wide.
A brace was also added to the top of the shorter bookcase for stability and wall attachment.
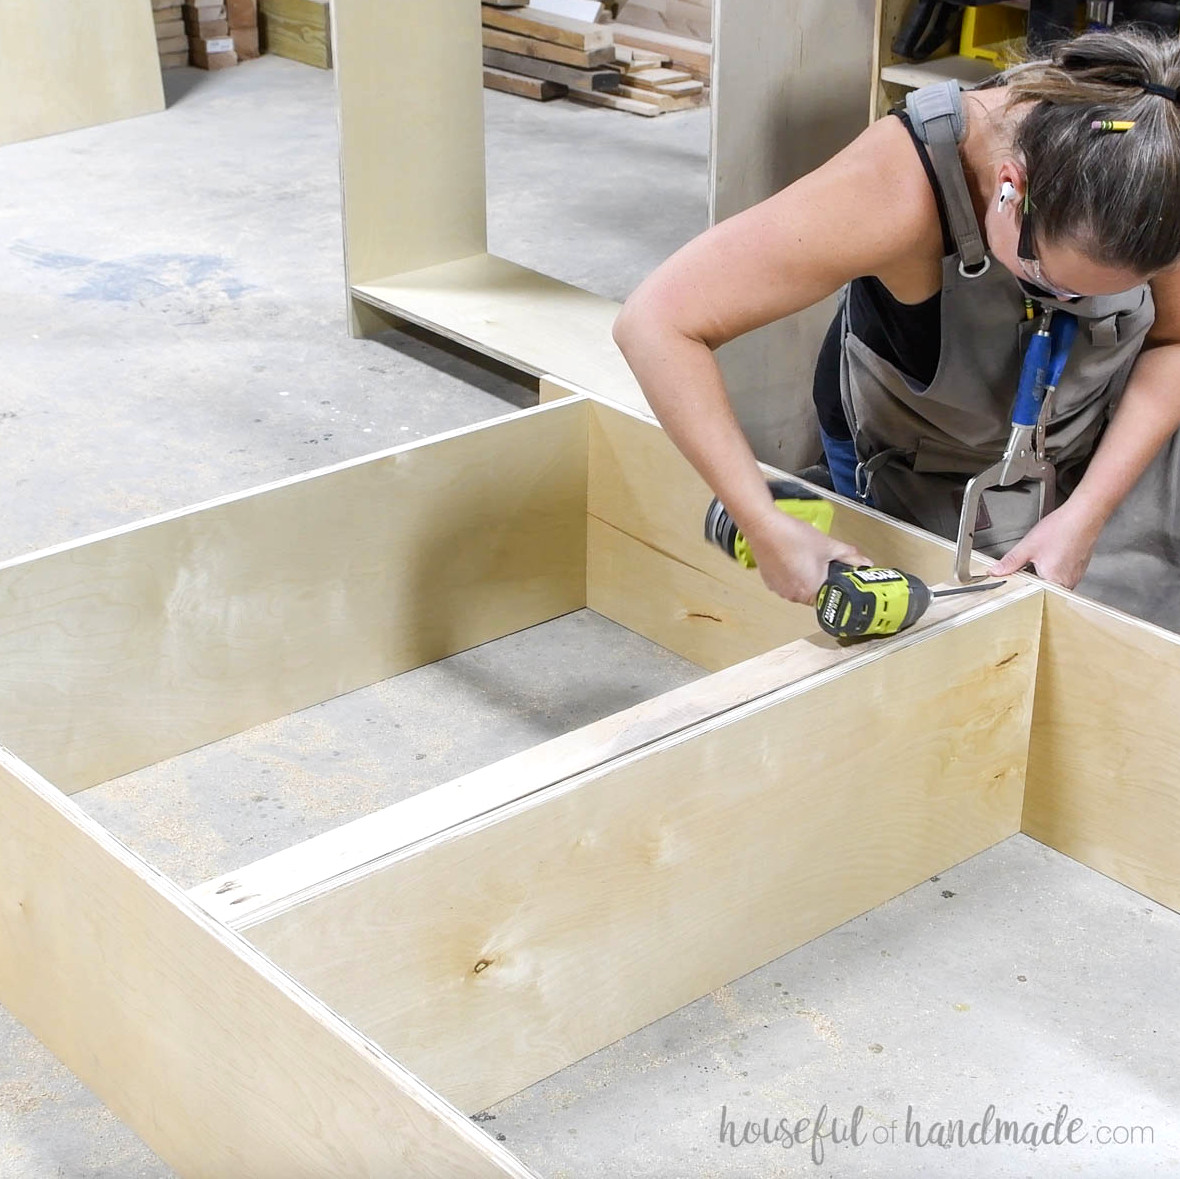
Afterward, I used a trim router to cut a channel for the plywood back in the upper portion of the tall bookcase and throughout the shorter bookcase.
I left the lower portion of the other tall bookcase open because I plan to install drawers there.
EXPERT TIP:
Leave the back unattached for now. Install it after carrying the unit into the room, since transporting it without a back is considerably easier. Attaching the back afterward only takes a short time.
STEP 2- Build and attach face frames
Create pocket holes sized for 3/4” material at both ends of the face frame rail boards.
According to the plans, position the rails between the stiles so their surfaces are flush.
When assembling face frames, I like using the Kreg project clamp because it holds the boards even while I fasten them with 1 1/4” screws and wood glue.
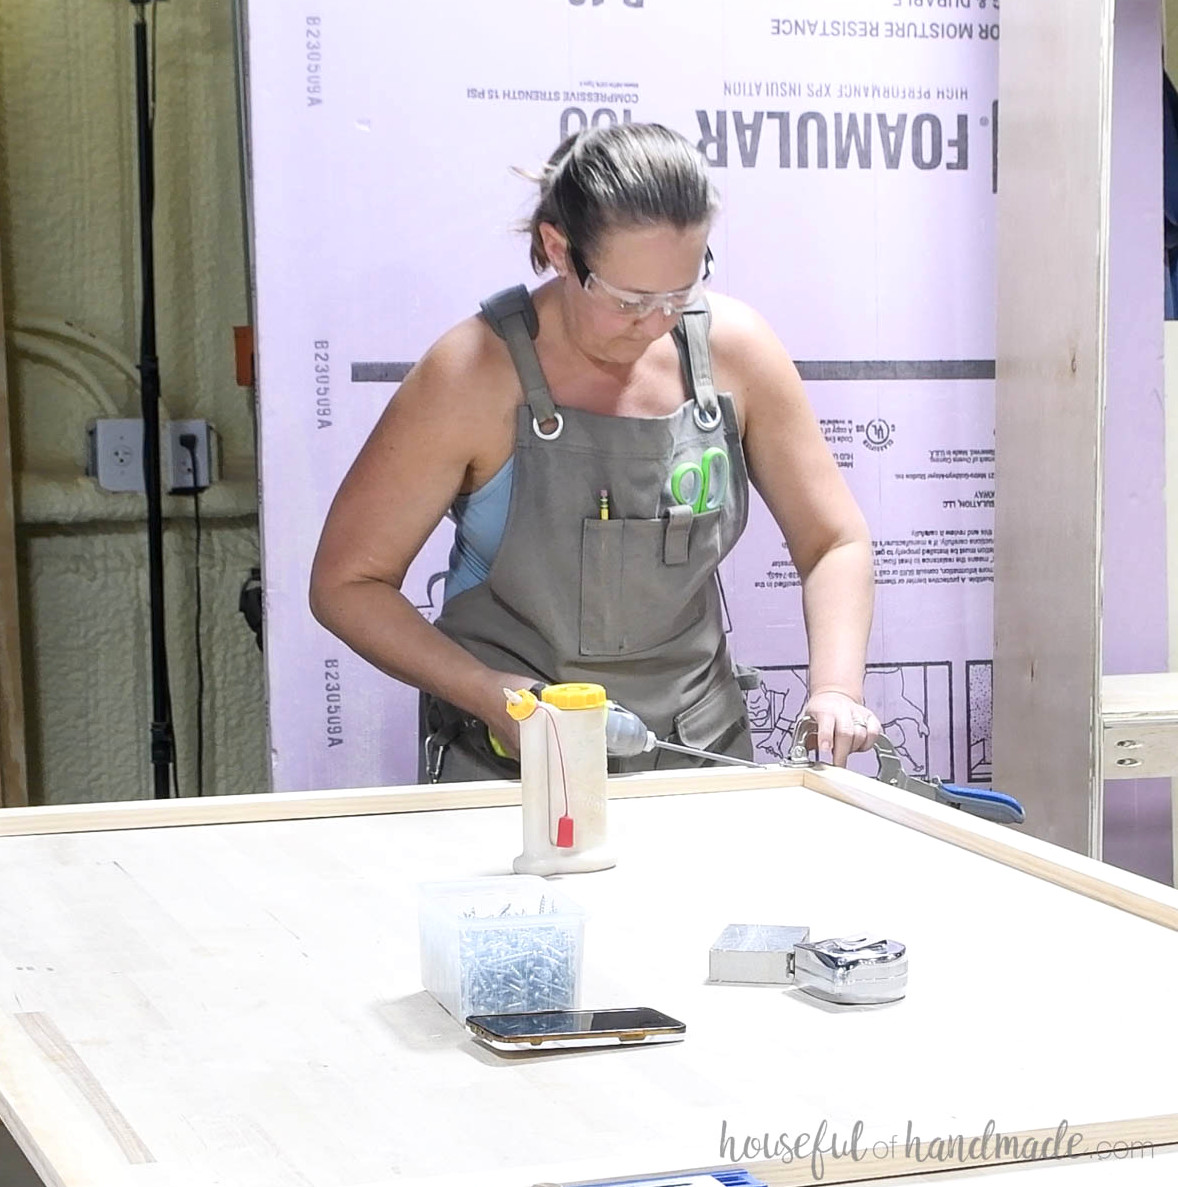
For the cabinet that will contain drawers, I installed extra rails to divide the drawer openings.
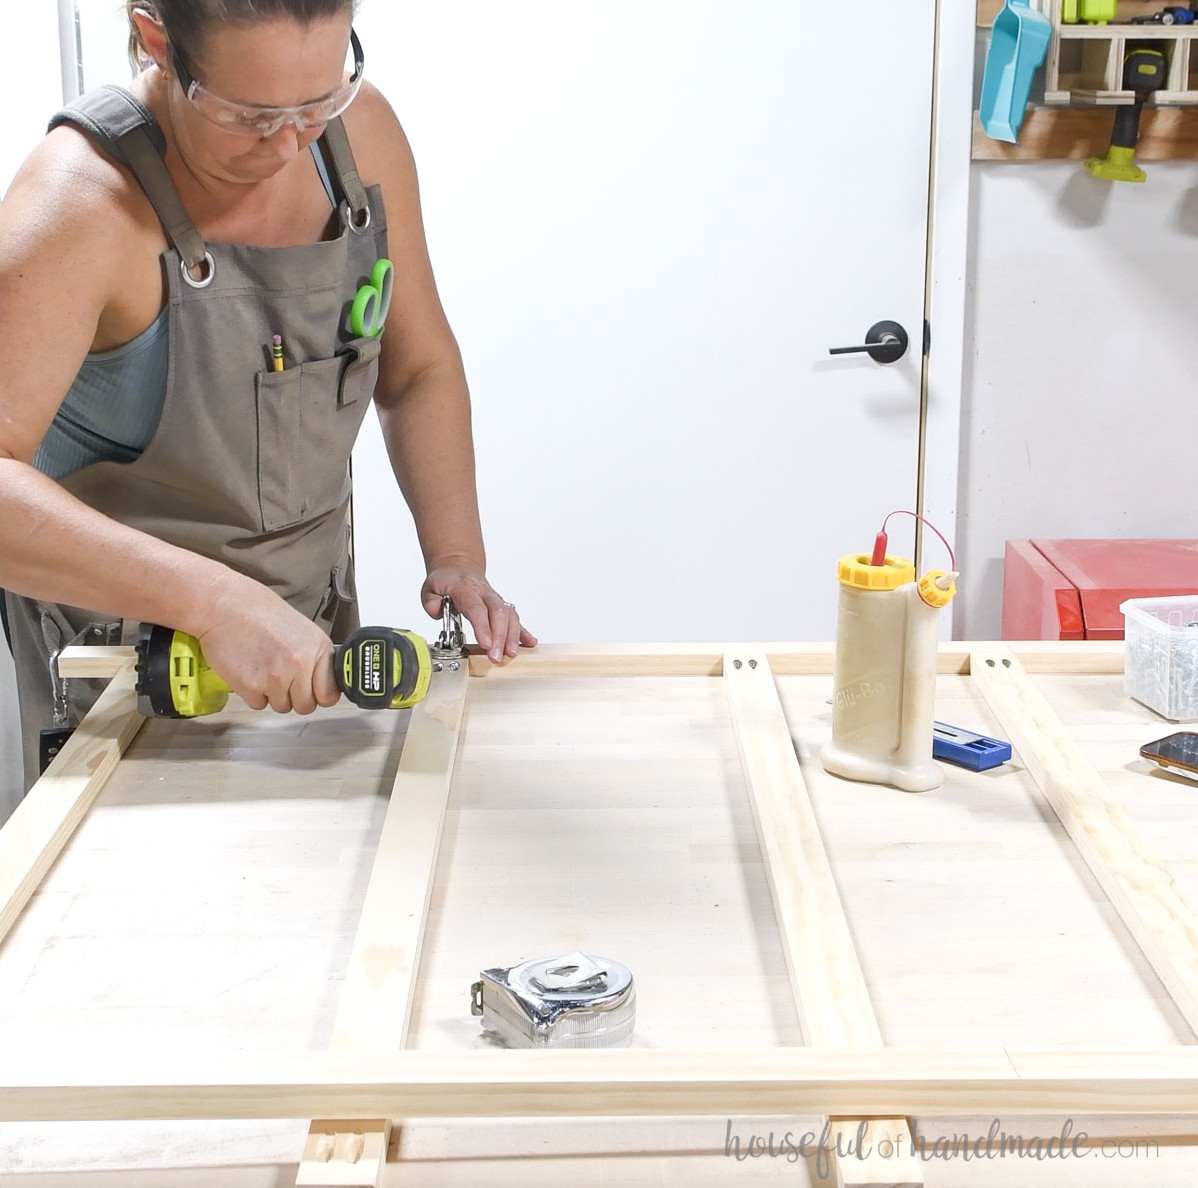
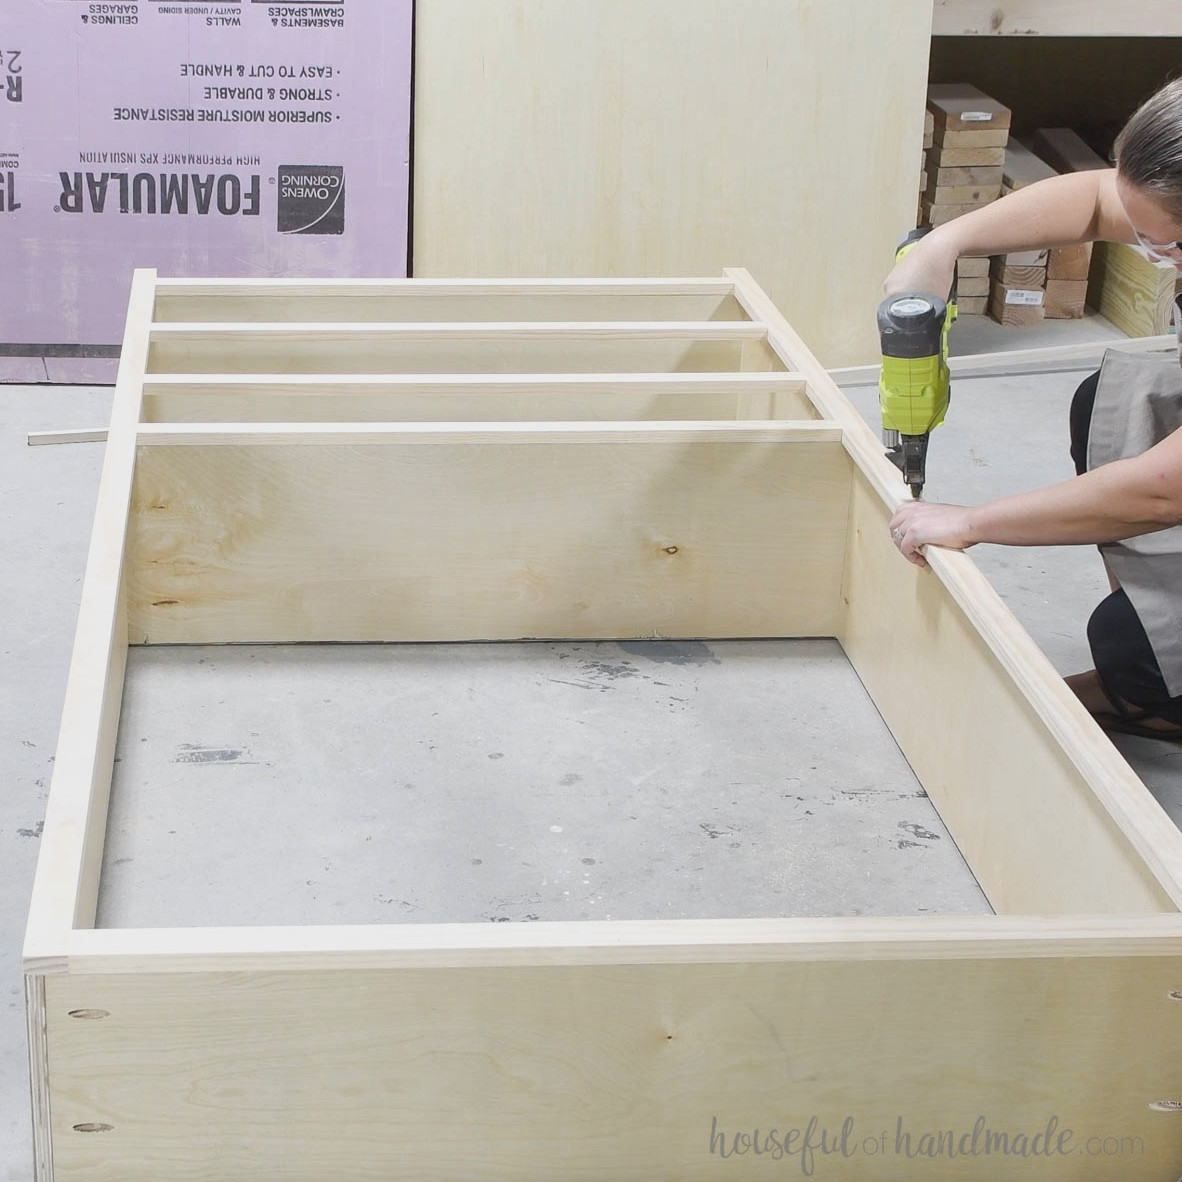
To secure the face frame to the bookcase, position it flush with the sides, top, and upper edges of the shelves.
Fasten it with wood glue and 1 1/4″ brad nails.
STEP 3- Install bookcase cabinets
Move the cabinets into the room, then secure the backs in place.
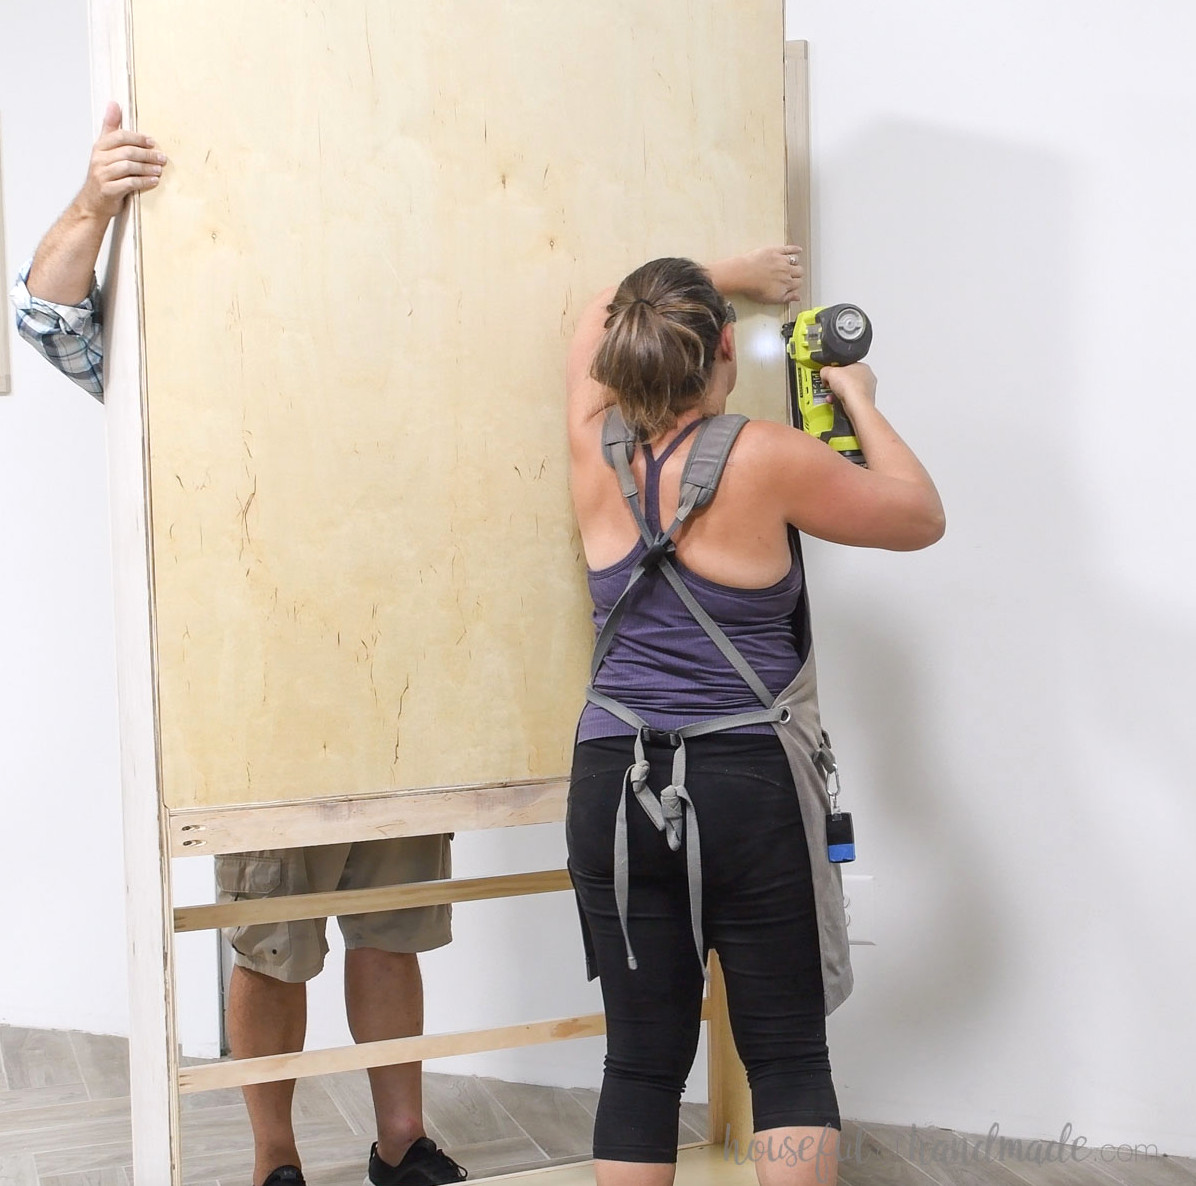
Now comes the moment of truth!
Position all the bookcases in place and verify that they fit correctly.
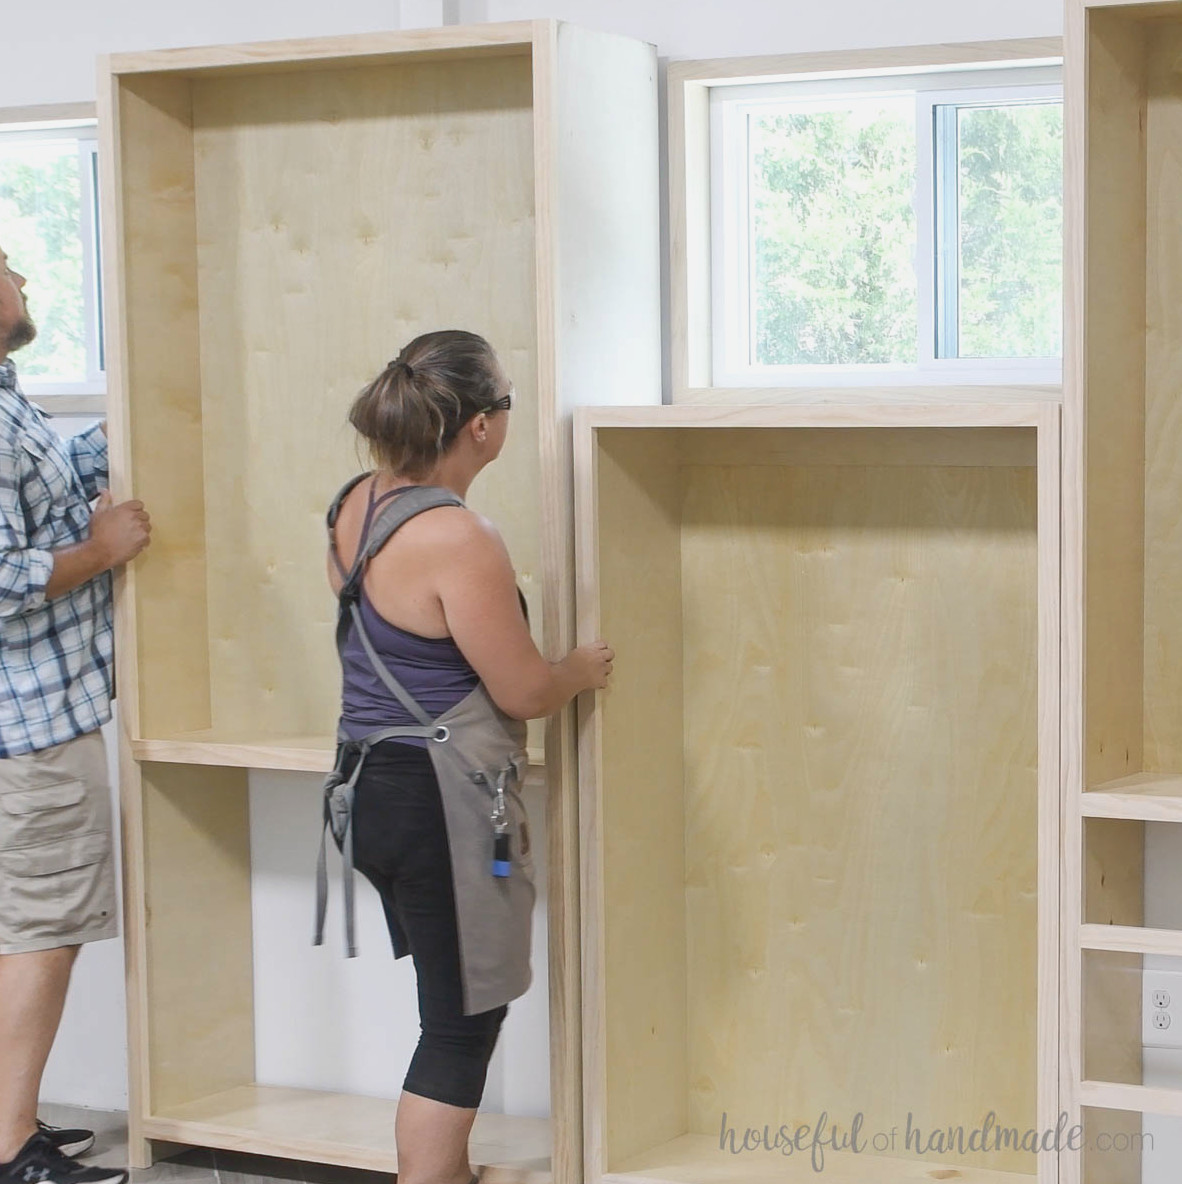
Before fastening the built-ins to the wall, join them together first.
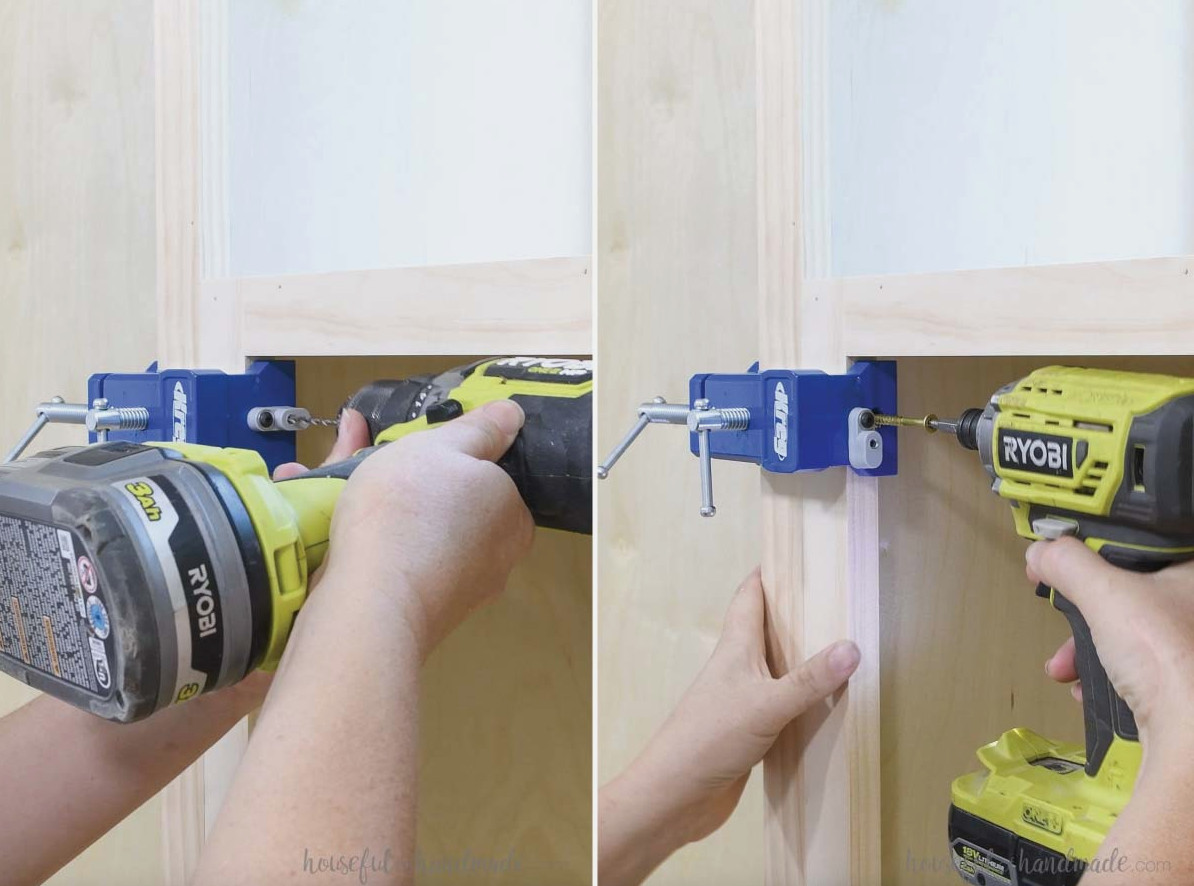
Kreg recently introduced a new cabinet clamp that simplifies connecting face frame cabinets. It’s called the Cabinet Face Frame Clamp.
It uses three-way clamping to draw the face frames tightly together from side to side while keeping the fronts even.
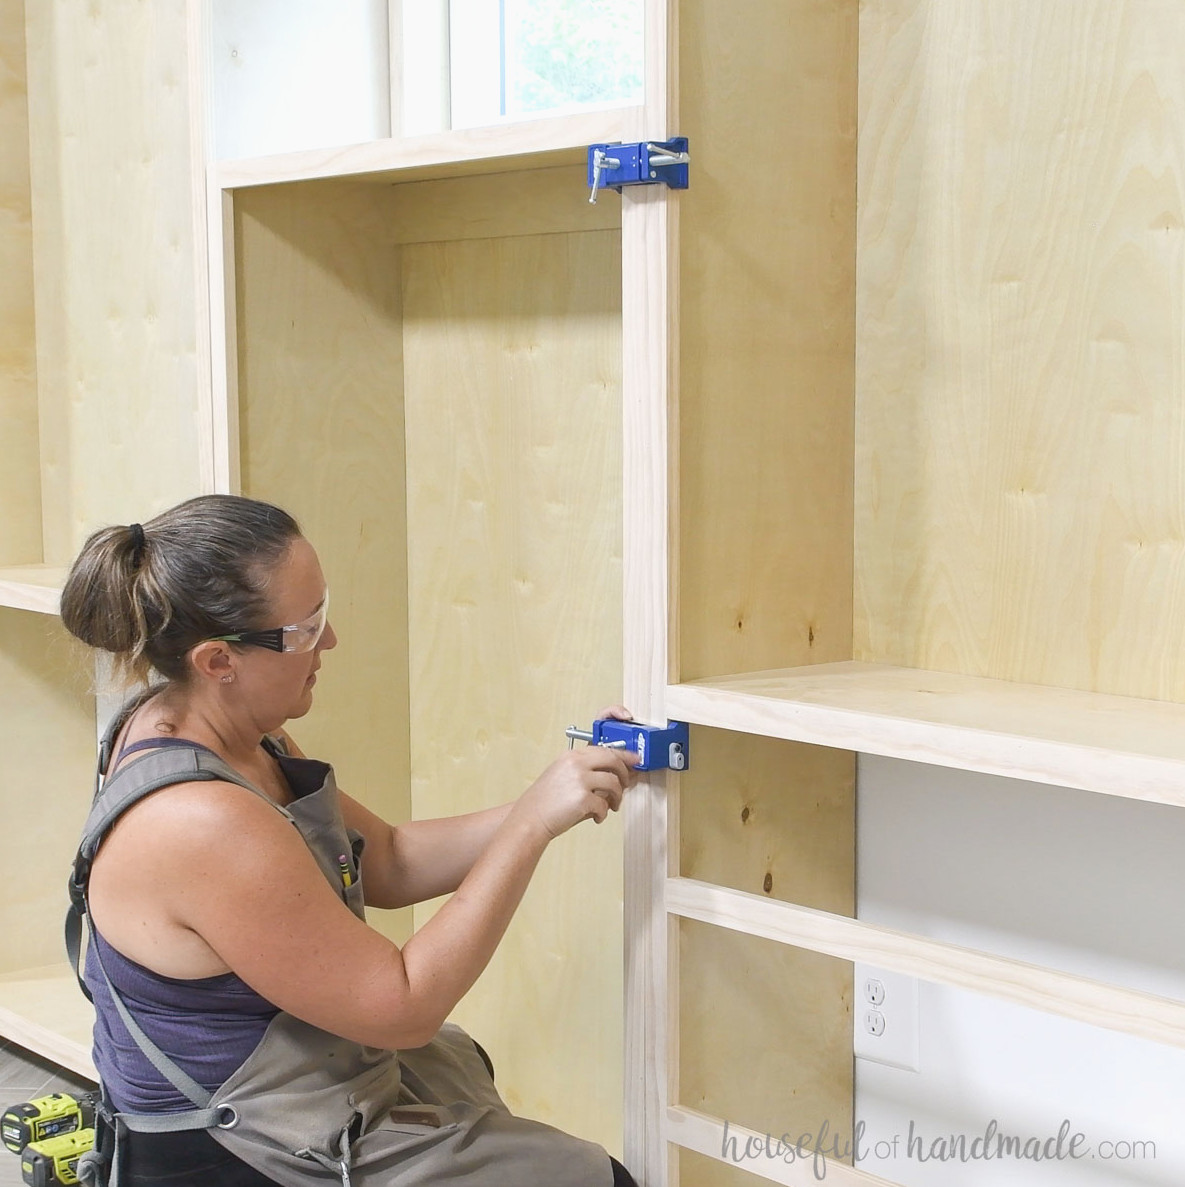
Next, pre-drill a hole for the screw. This step is essential since you certainly don’t want the wood to split at this stage.
Afterward, rotate the drill guide out of the way and fasten the two cabinets with a 2 1/2″ wood screw.
I joined the bookcases at three locations:
- the upper section of the middle bookcase
- directly beneath the fixed shelf
- just above the bottom.
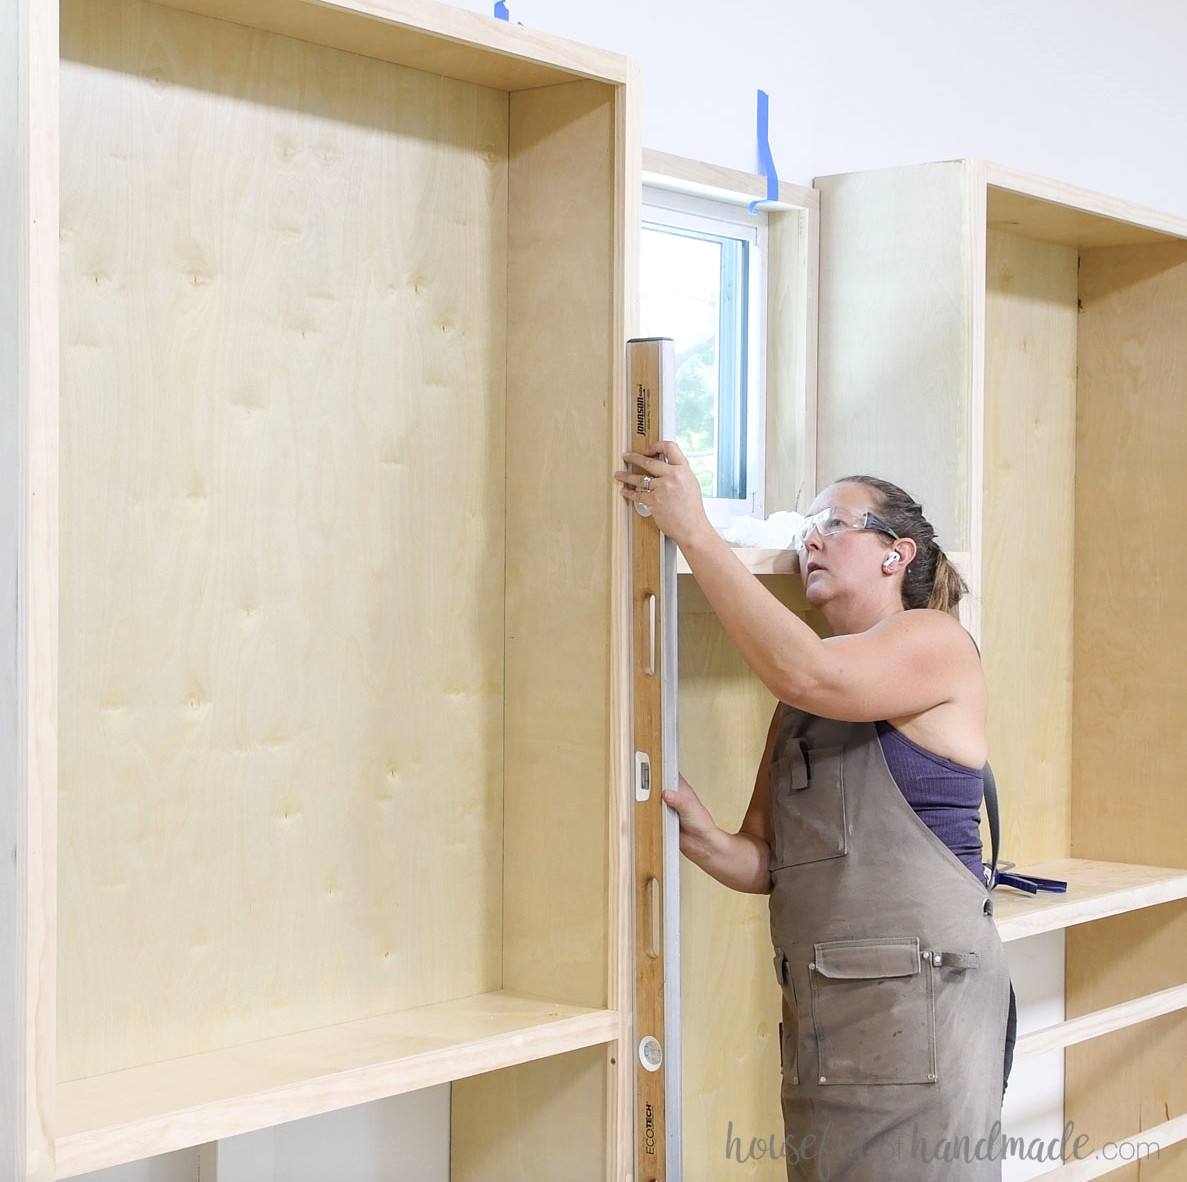
Inspect every bookcase section to ensure the front and sides are plumb. Add shims wherever necessary.
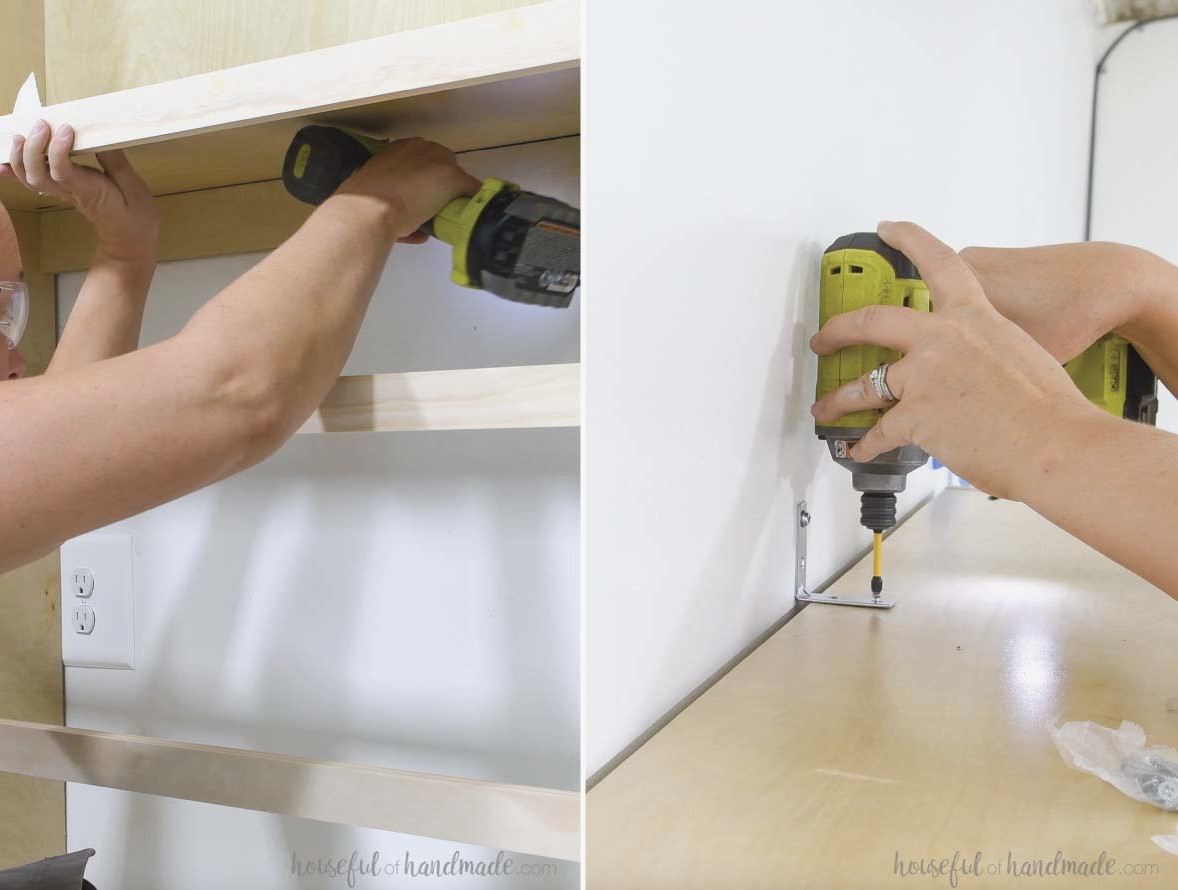
Next, secure the cabinets to the wall through the studs.
I fastened them with 2 1/2″ wood screws driven through the rear supports.
For the top, I chose L brackets to avoid an exposed support piece. I also made sure to anchor them into the wall studs with 2 1/2″ screws.
STEP 4- Complete and paint
At last, it was time to finish the bookcases!
I filled every nail hole and sealed the side seams where the face frame connects to the plywood, creating a smooth appearance after painting.
After that, I sanded the face frames and sides until they were sleek and even.
Since I am using pre-finished plywood, the cabinet interiors are already complete, yay!
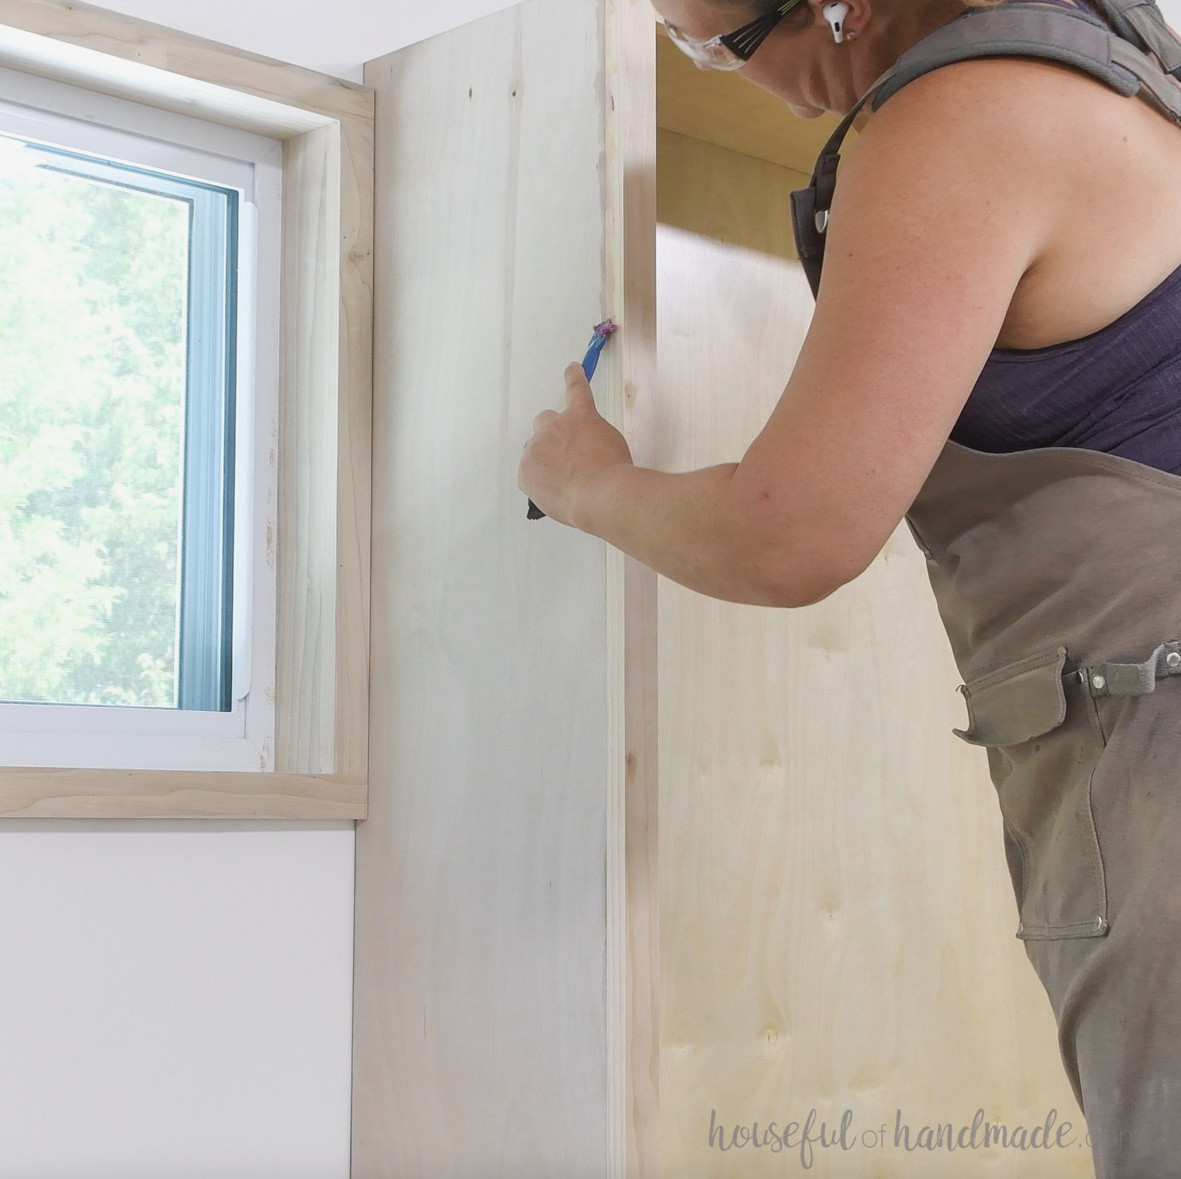
I installed a baseboard on the cabinet to coordinate with the room’s existing trim.
Because I plan to build a kitchenette on the left side later, I left the baseboard off in that area.
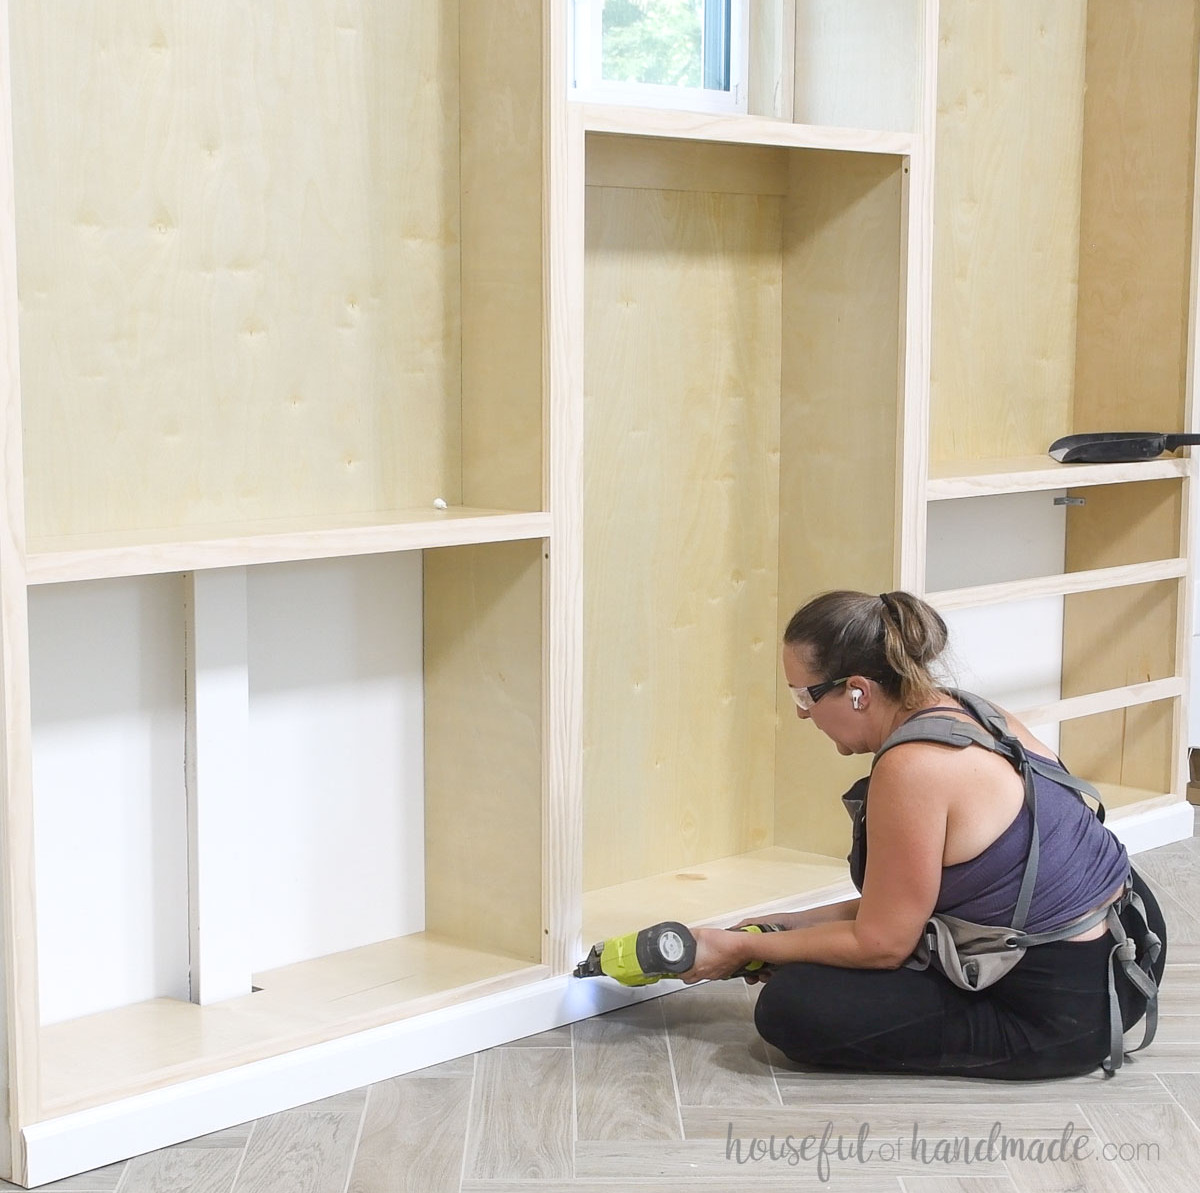
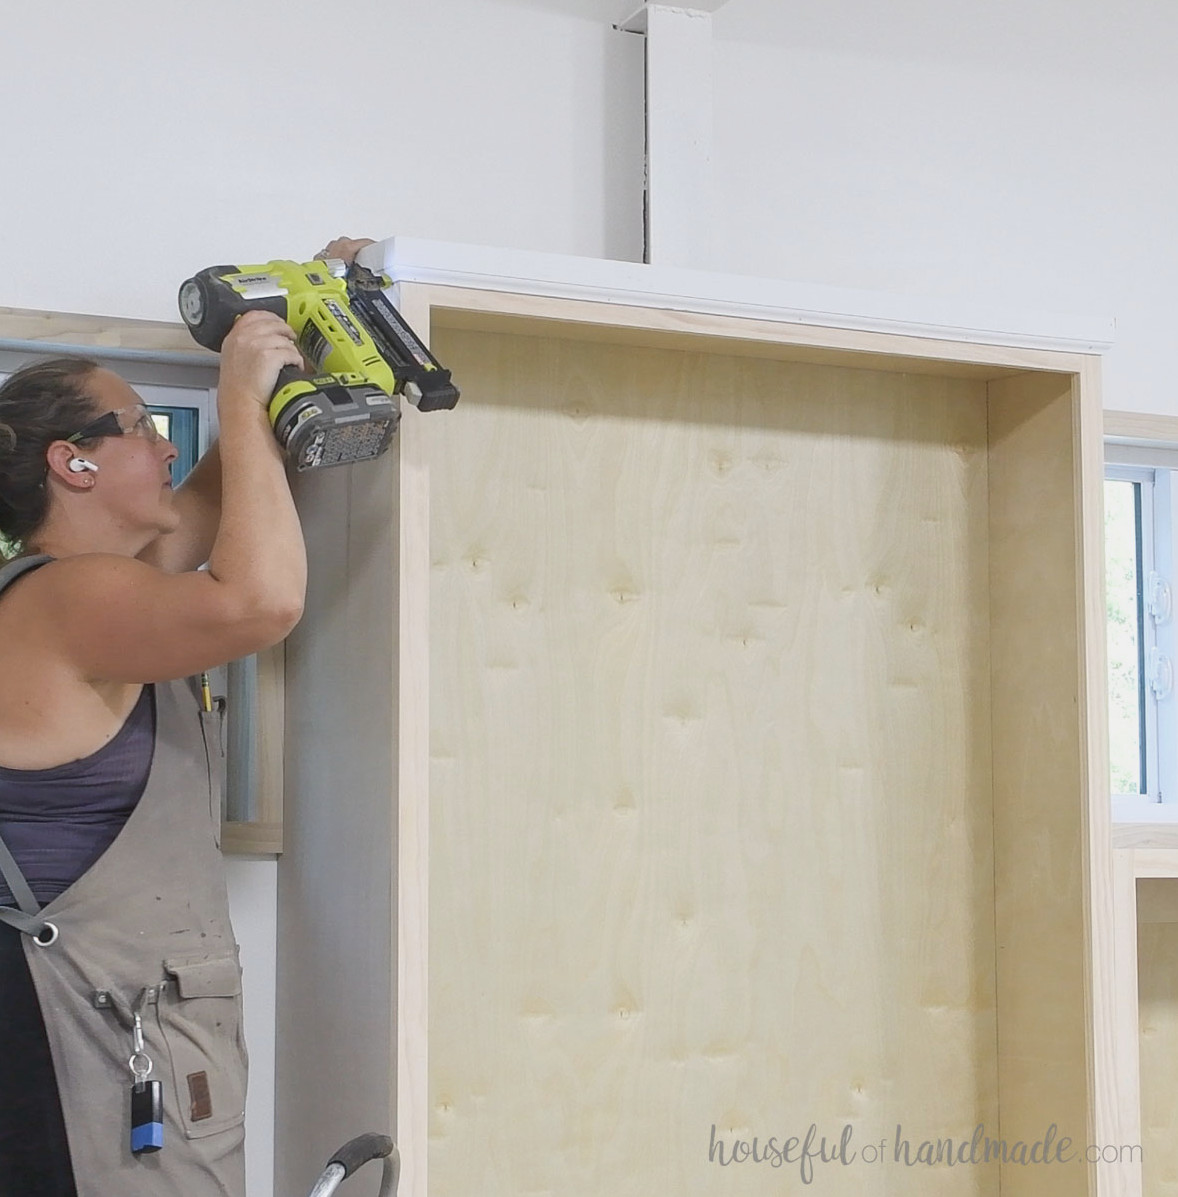
I also installed moulding across the tops of the two tall bookcases to complete the design. It gave them a polished appearance and concealed the L brackets.
Cut the baseboard and moulding at 45-degree angles at the corners, then fasten them with 1 1/4” brad nails.
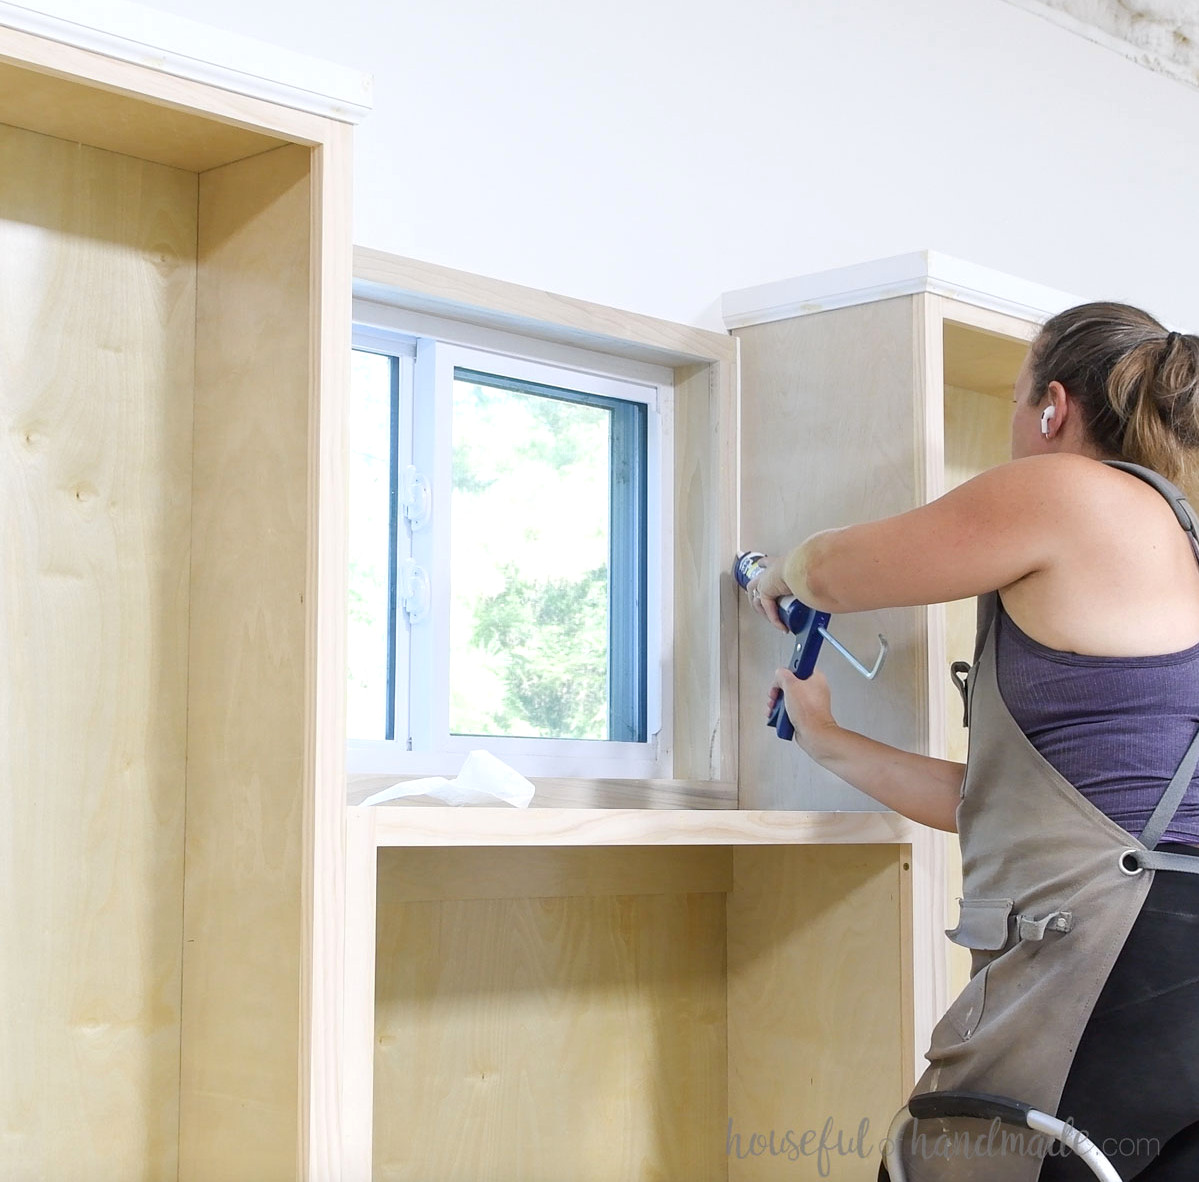
Apply caulk to the seams so the built-ins appear to flow seamlessly into the walls.
I caulked around the window trim, along the joint between the shorter and taller bookcases, and wherever the bookcases touched the wall.
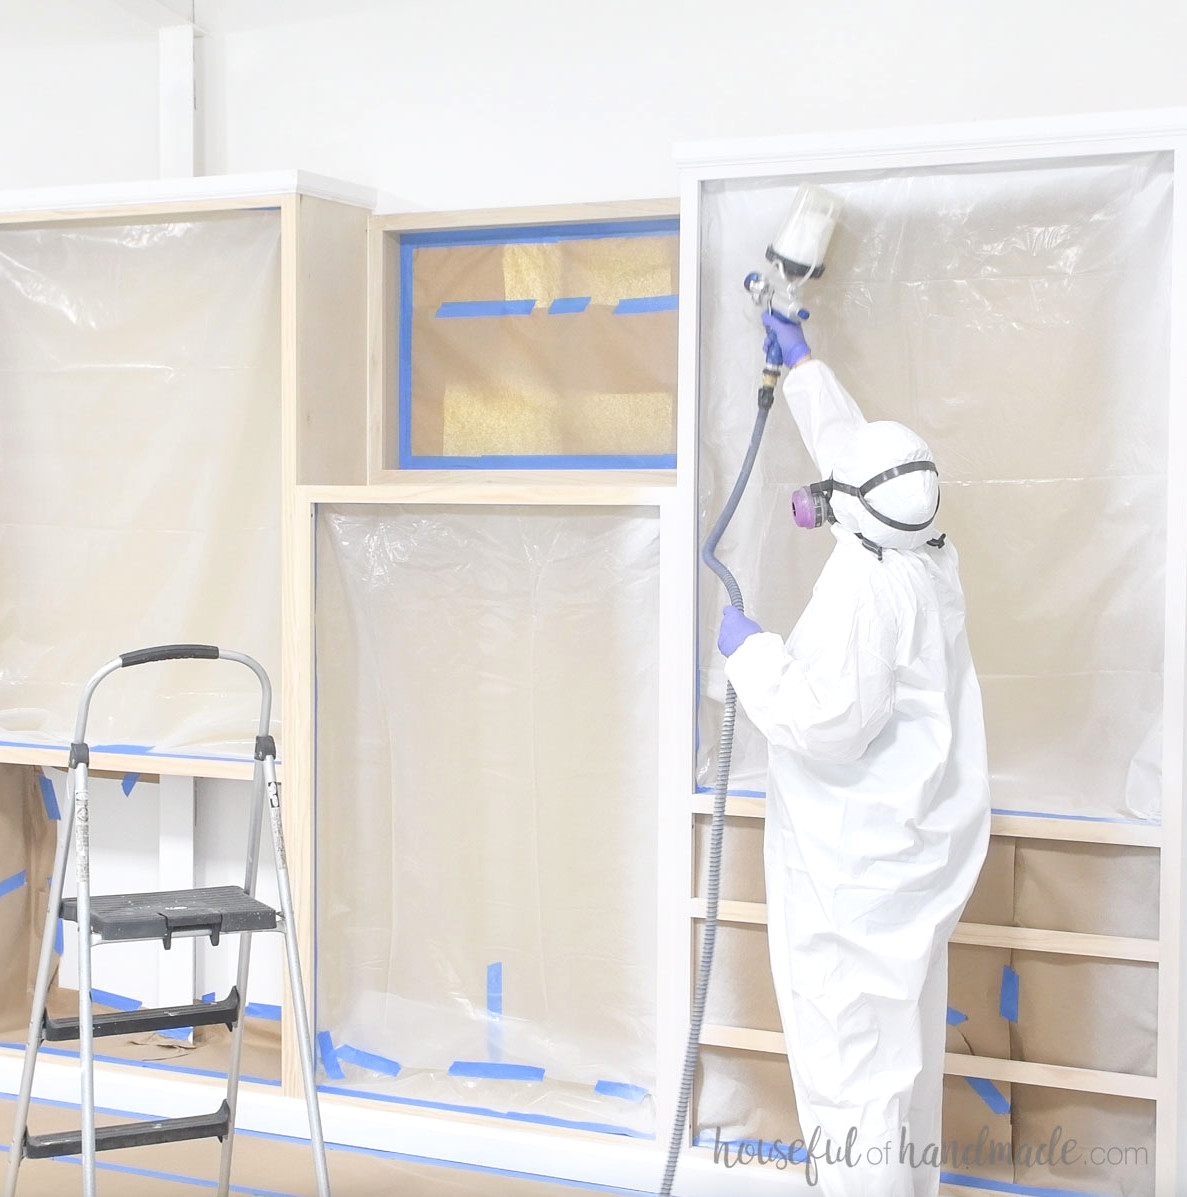
Finally, it was time to apply the paint!
I painted the built-ins in the same shade as the wall, so there was no need to tape that area. However, I did tape the middle sections of the bookcases and the windows.
I used a paint sprayer to apply one coat of primer followed by two coats of paint.
STEP 5- Construct and install doors
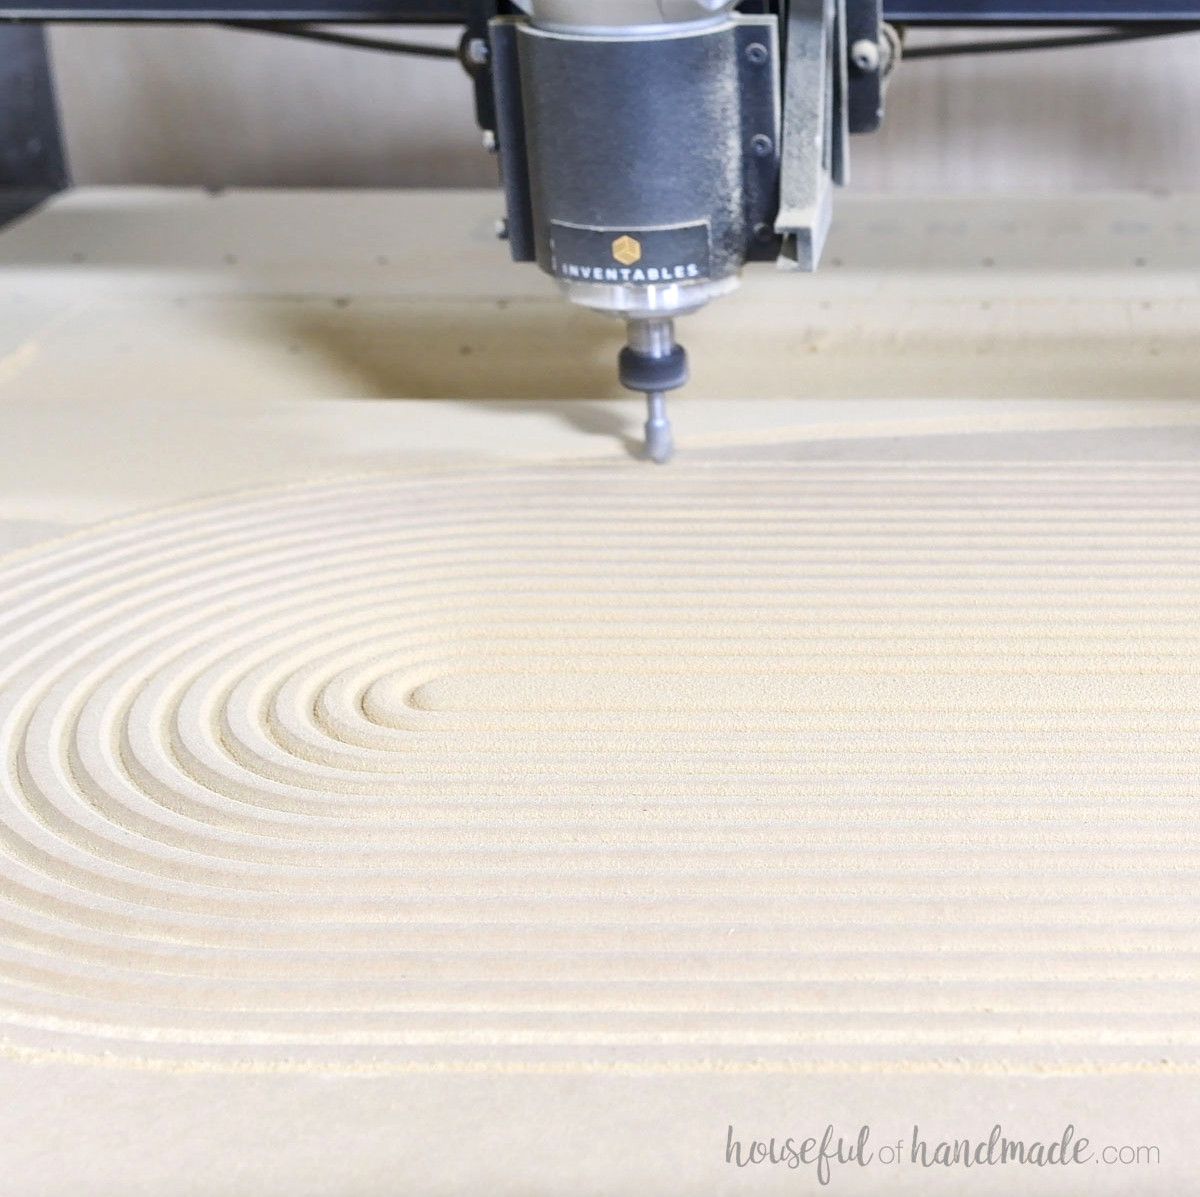
For the doors on my built-ins, I chose to get creative by making an arched design carved to resemble reed.
I cut the doors from 3/4” MDF because they would be painted to coordinate with the cabinet, then used my CNC machine to carve the pattern with this router bit that creates a point at the center of the round over.
You could alternatively make simple slab cabinet doors or shaker-style doors for your bookcases.
After completing the doors, I bored the cup holes for the concealed hinges using the Kreg concealed hinge jig. I then attached the hinges manually.
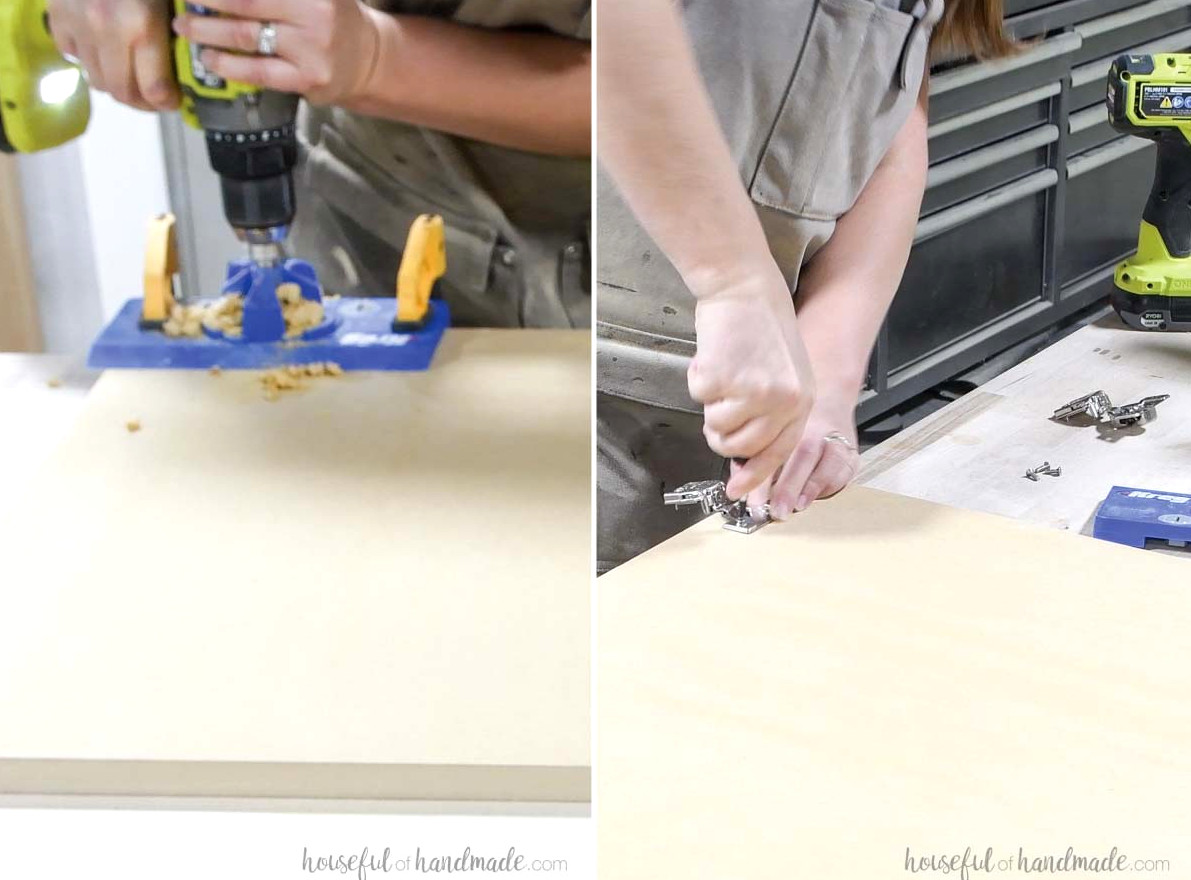
Mount the doors to the lower bookcase section using 1” overlay hinges, which extend over 1” of the face frame’s side.
The doors should also overlap by 1/2” along the top and bottom. Learn how to mount cabinet doors with concealed hinges here.
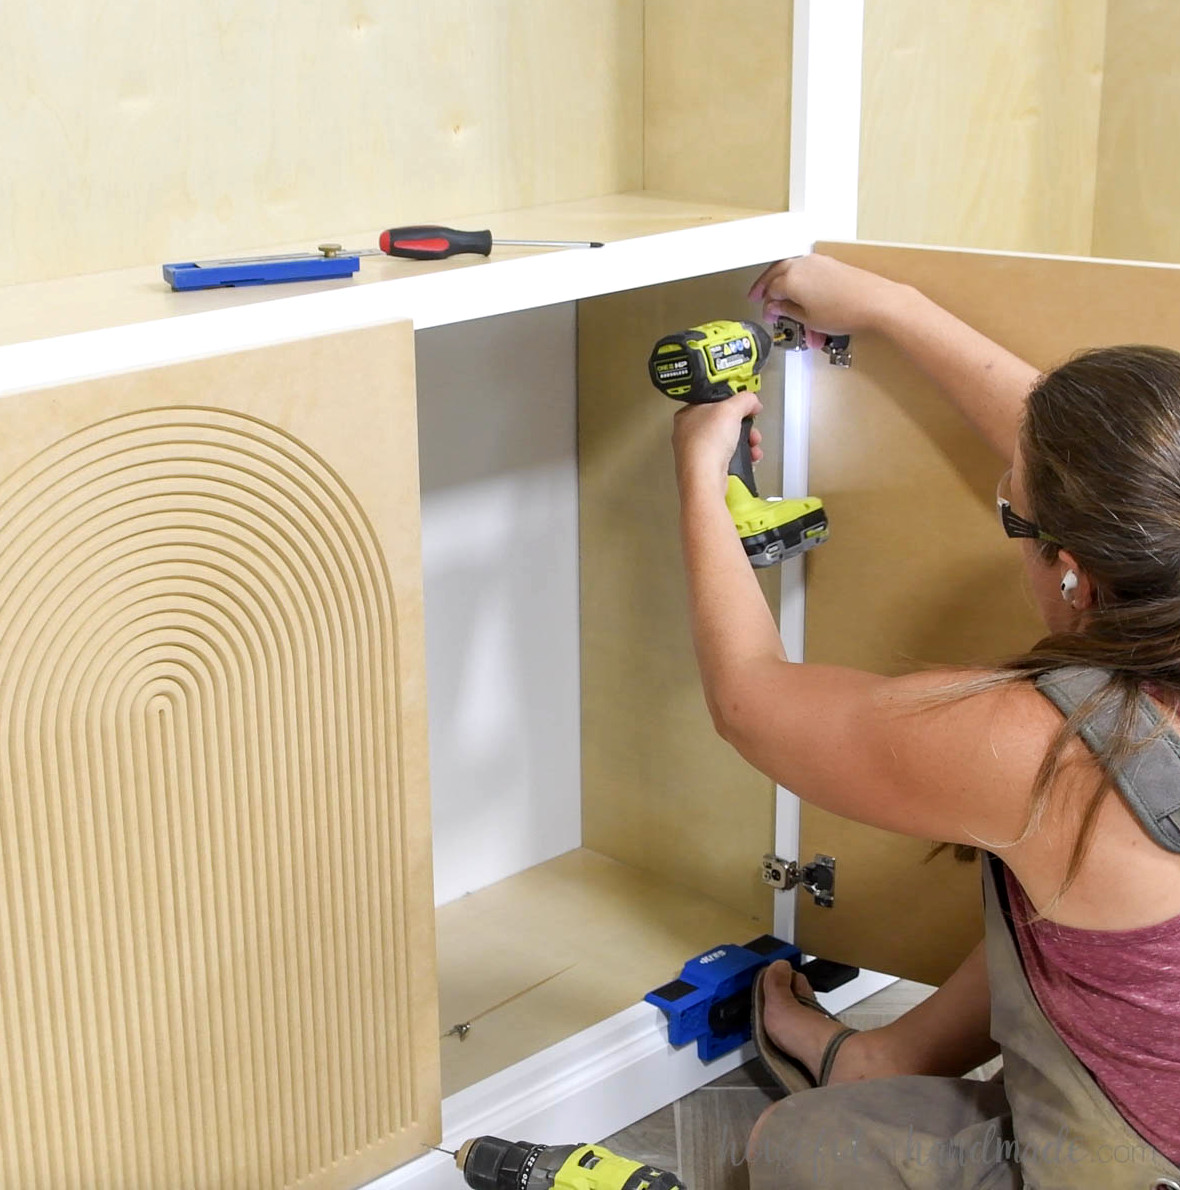
You may spot the Kreg cabinet door mounting jig in the image below. It provides valuable support, acting like an extra pair of hands while fitting the doors.
However, because the installed baseboards prevented me from clamping it to the frame, I held it in position with my foot—and it worked perfectly!
Adjust the doors as necessary, then finish them so they coordinate with the bookcase.
STEP 6- Construct and install drawers
I made the drawers for the bookcase 11″ deep. They are a little deeper than the 10″ drawer slides, but I can still reach everything inside with ease.
The drawer boxes consist of 1/2″ plywood, along with a 1/4″ plywood base fitted into a groove.
Discover how to make simple drawers 3 ways here.
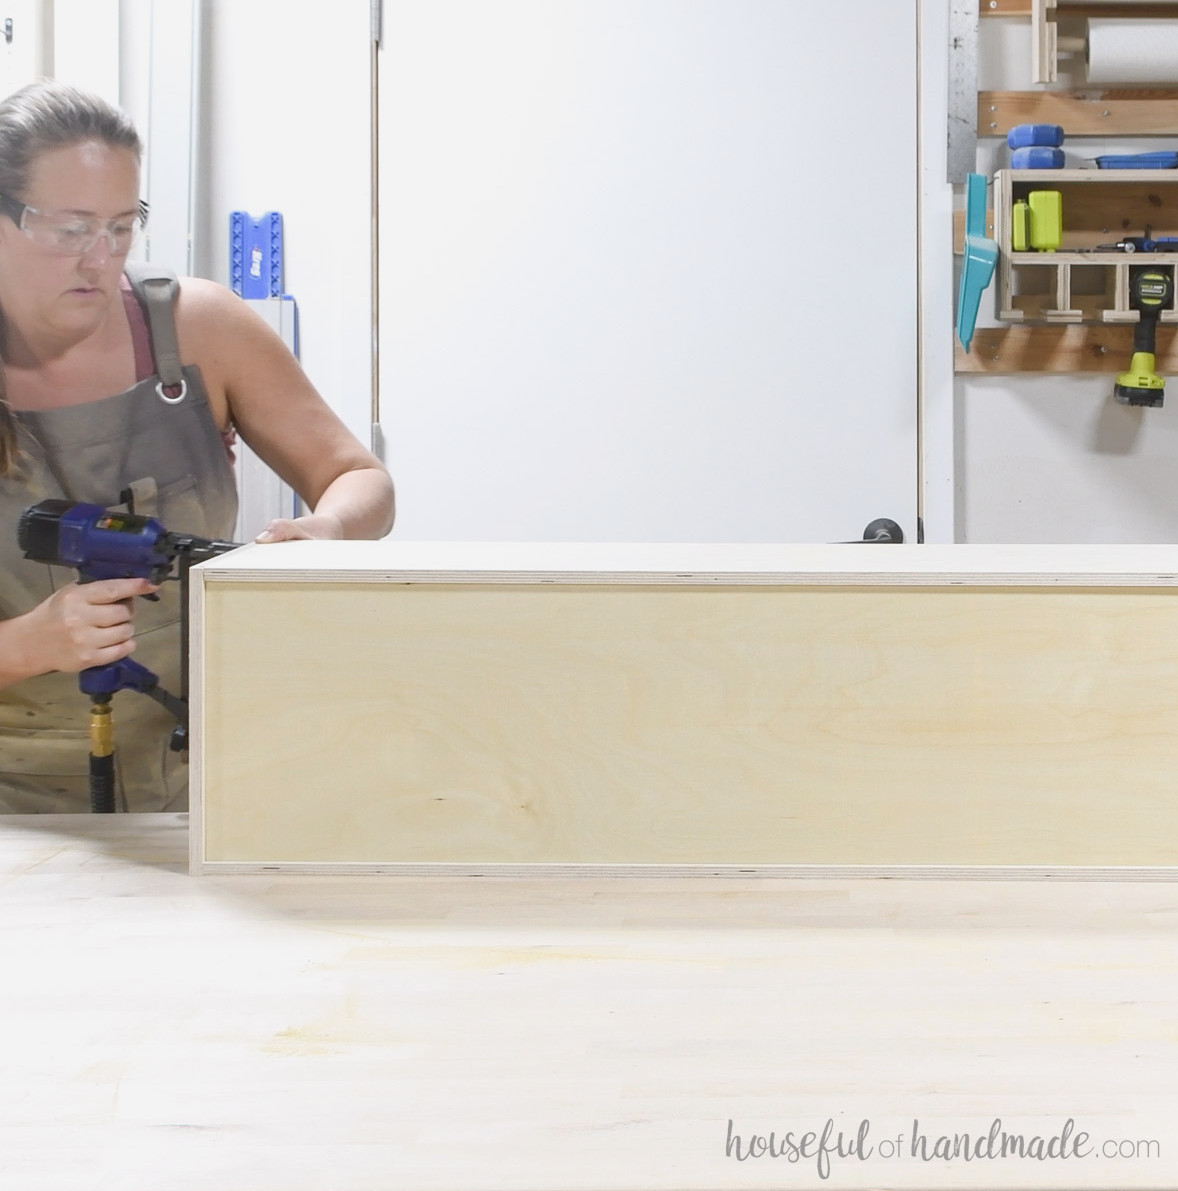
I fastened scraps of 1×2 to the cabinet interior approximately 1/2” above the face frame rails.
This step is required to make the cabinet sides even with the face frame sides before installing the drawer slides.
Next, I installed the drawer slides and boxes. The bookcase was too shallow for the Kreg drawer slide jig, so I used a small level instead.
However, the jig was extremely useful for keeping the drawer boxes positioned while I secured the slides to them.
Find out how to install drawers with side-mounted slides here.
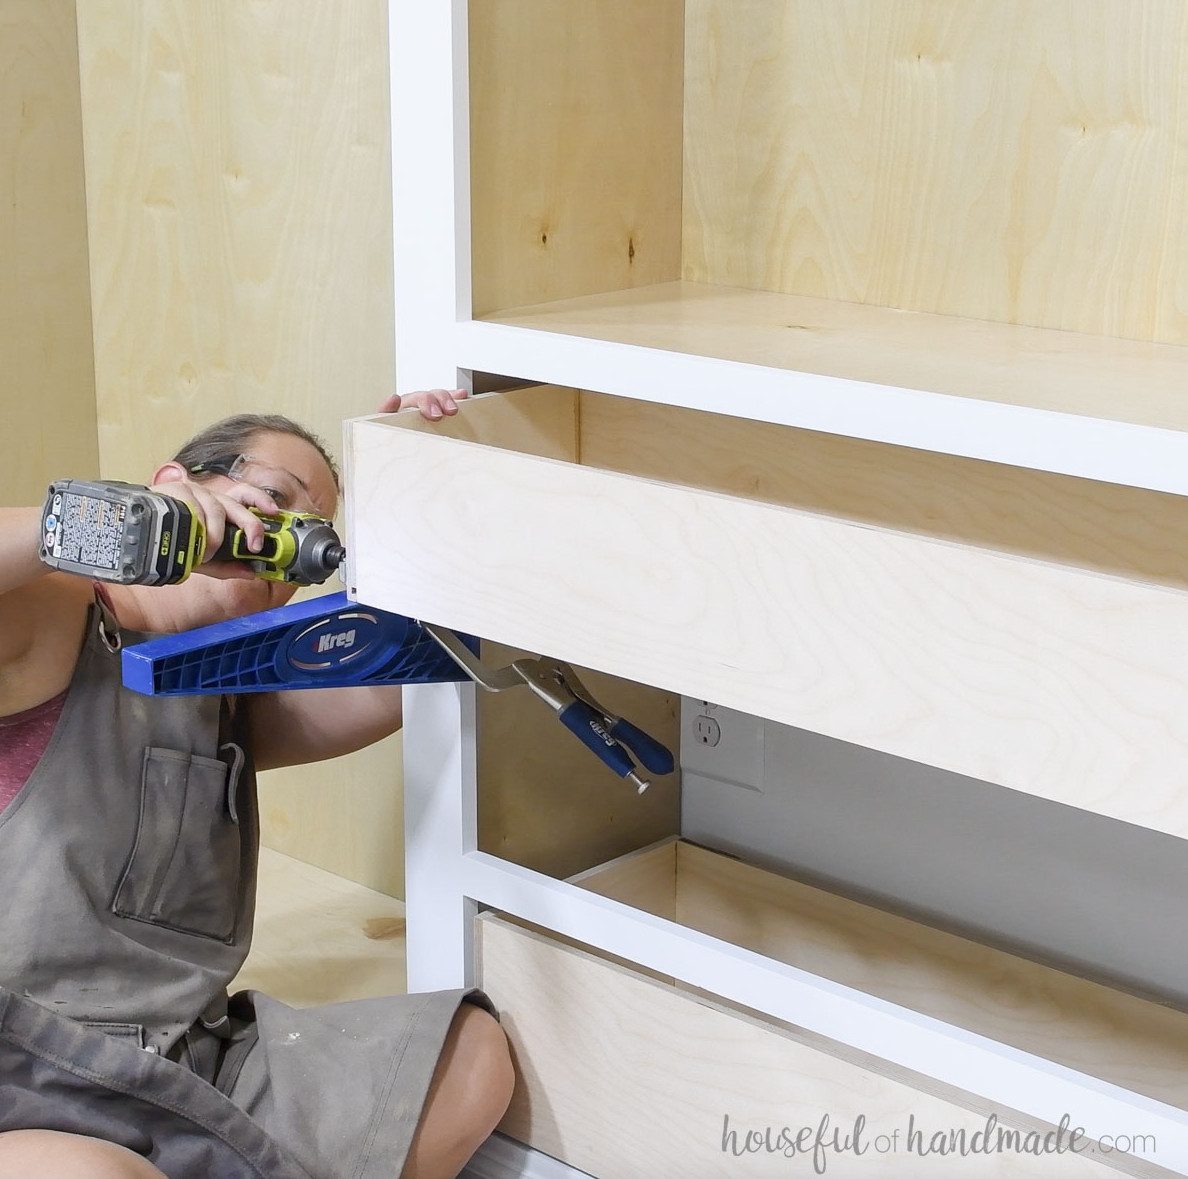
For mounting the drawer fronts, I use the Kreg drawer front mounting system, and I regret not trying it sooner!
The clamps keep the drawer fronts steady and make alignment incredibly simple. They remain secured while you open the drawer and fasten them.
All three drawer fronts were installed flawlessly in under 30 minutes. That time even included transporting the fronts from the shop to the office.
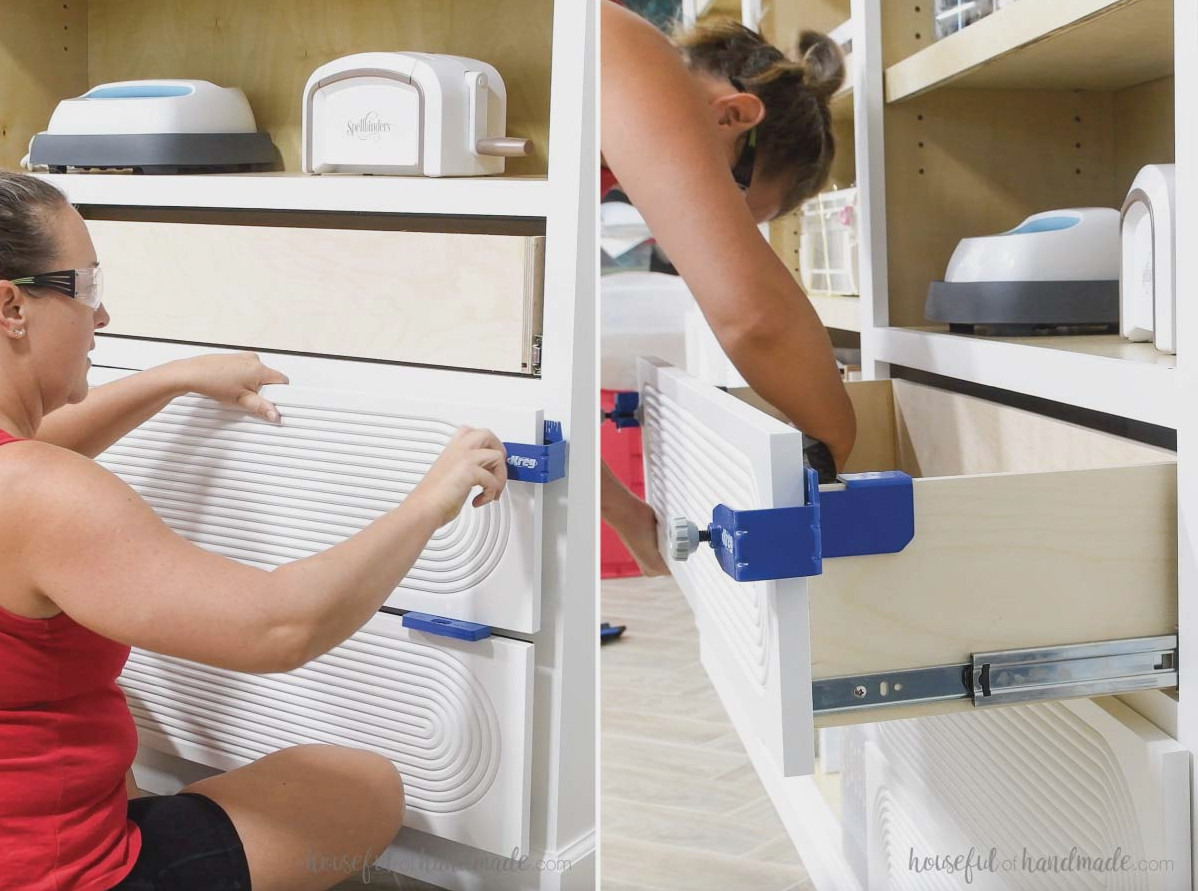
I decided against adding pulls or knobs to the drawer fronts because they looked beautiful as they were.
However, if you would like to install them, I strongly recommend the Kreg cabinet hardware jig pro. It simplifies positioning the holes.
STEP 7- Install adjustable shelves
With a shelf pin jig, bore holes for the adjustable shelves along both sides of the bookcase.
The Kreg shelf pin jig helps you create evenly spaced shelf pin holes effortlessly.
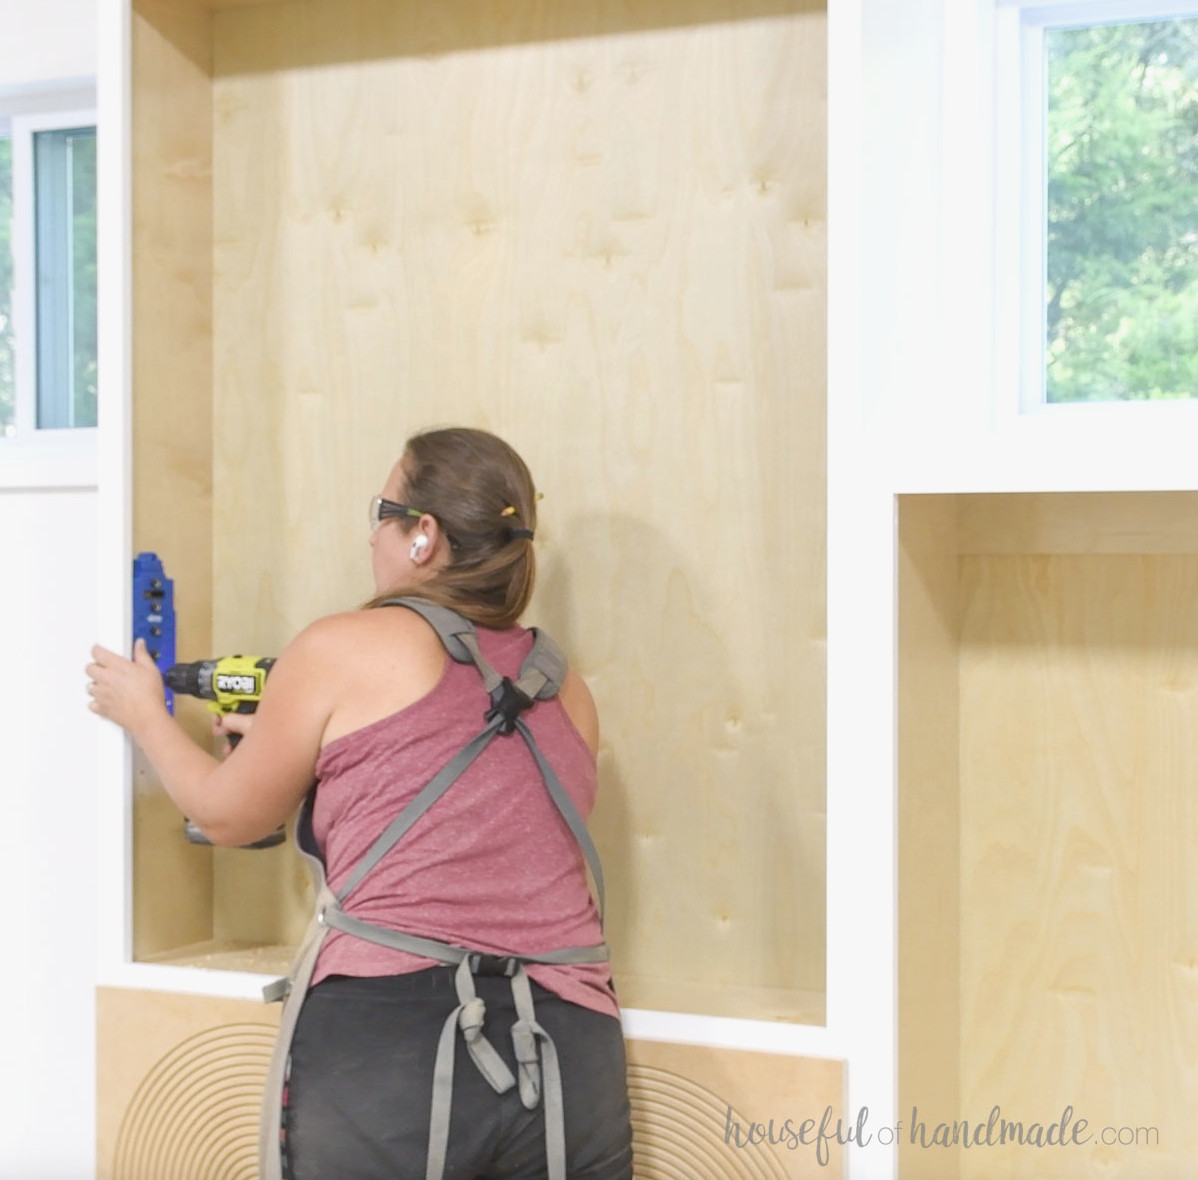
You can now place your shelves and fill them up!
Because the bookcases are broad and I intend to store plenty of items in them, I attached a 1×2 board to the front of every shelf.
This provides extra support to help prevent sagging and gives the shelves a more substantial appearance.
Don’t Forget to Grab the Printable PDF Plans Here!
Premium plans include:
- Suggested Tools
- Purchase list
- Simple-to-read cut list table
- Cutting diagrams
- Detailed instructions with 3D renderings
- Useful resources
- BONUS: 3D SketchUp file
You did it!
I am thrilled with my new built-in storage cabinets! They are ideal for arranging and showcasing all my crafting materials in our office.
Next, I am building additional built-ins for the opposite wall to store all my sewing supplies, so stay tuned.
Happy building!