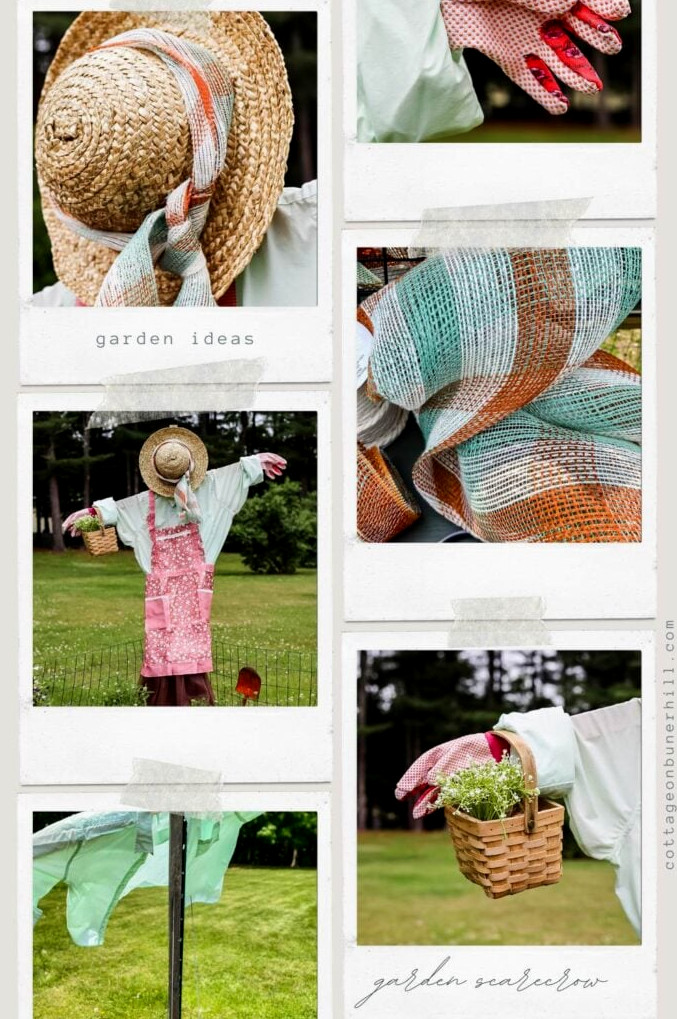
Three years back, I unveiled my first Garden Girl scarecrow—a secondhand, playful protector for my vegetables. Now she returns with a2025 refresh, and I’m offering even more ideas for personalizing your own.
Garden Girl Scarecrow Tutorial – Charming & Simple!
While some garden guardians call out ‘Stay Away!’—mine? She says ‘Come In’ with her flowered apron and straw hat. Three years ago, I brought my first Garden Girl scarecrow into the garden, and now she has grown into an entirecommunityof playful protectors—each one carrying her own character (plus several weatherproofing tricks I’ve picked up over time!).
Whether you love searching thrift shops for treasures or imagining life in a cottage garden, I’ll guide you through creating a Garden Girl filled withpersonalityand perhaps a hint ofcritter control… while leaving lots of space for your personal creative touches!
The first scarecrow came together using gardening materials I already owned, a few thrifted finds, and budget-friendly Amazon accessories. This season, I ordered her clothing online.
Supplies You’ll Need
Supplies for This Project
Step 1: Construct the Frame
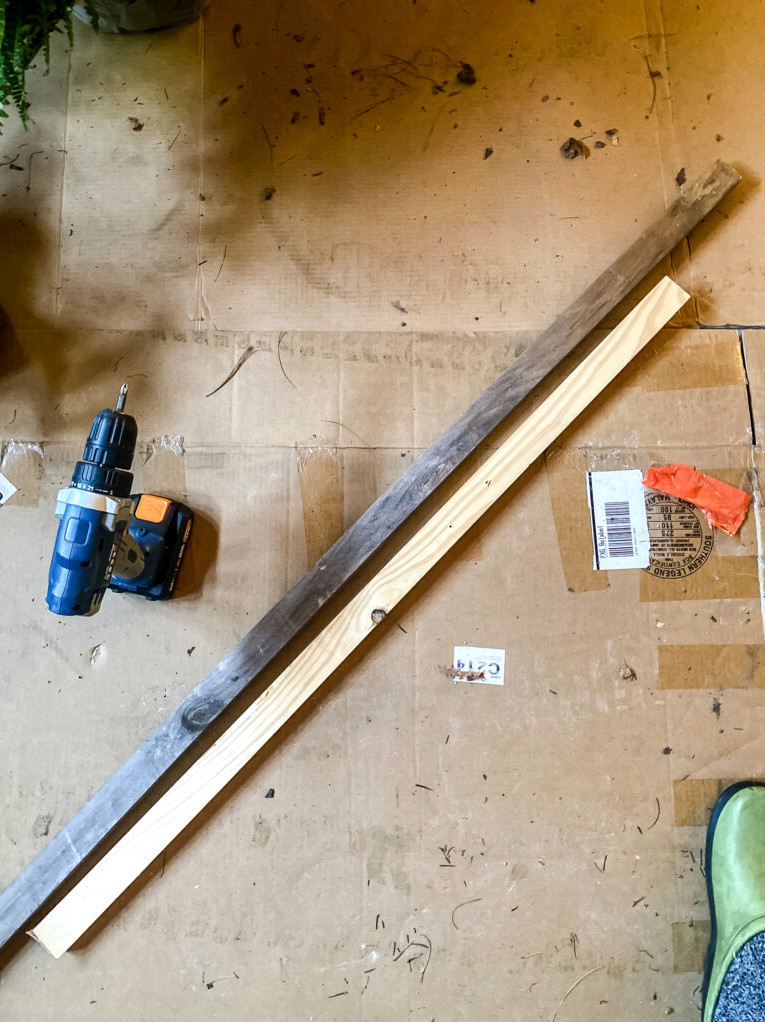
You will need:
- 2 pieces of leftover wood (one long and one shorter for the “arms”)
- 1 wood screw
- Drill or screwdriver
Assembly instructions:
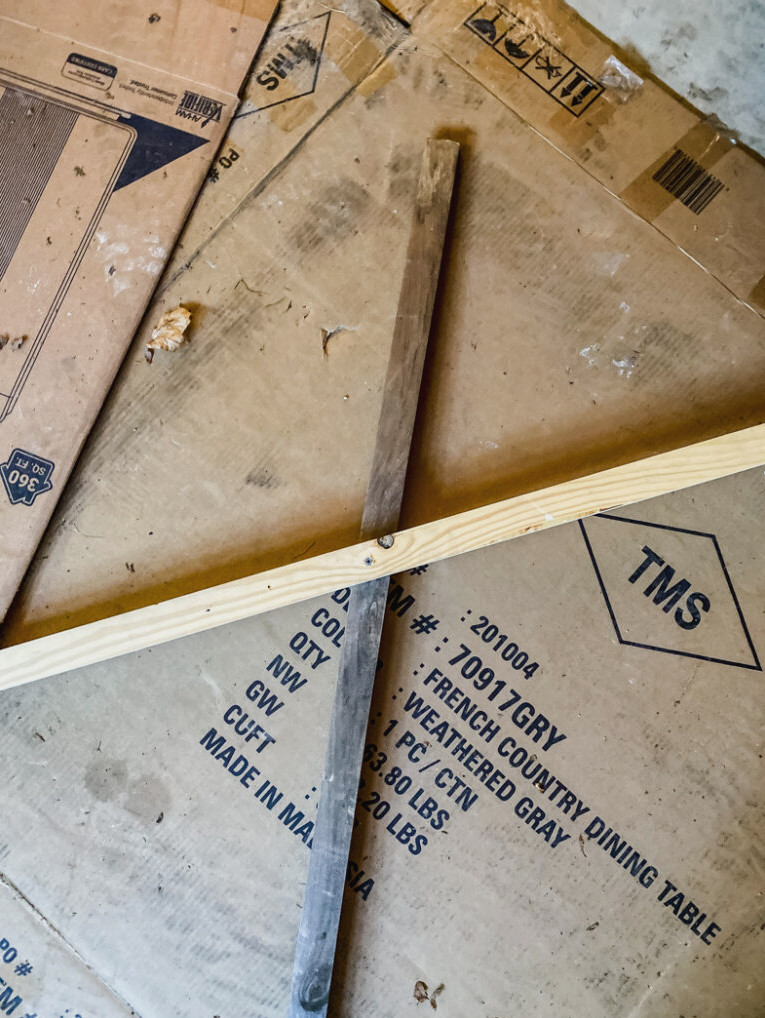
- Determine the height:For the body, select a long piece of wood—mine measured roughly 5 feet, though you can tailor it to suit your garden!
- Form the arms:Attach a shorter board horizontally near the top to create a “T” shape. I inserted onlyone screwthrough the two boards, allowing the arms to move freely (which makes dressing her much easier afterward!).
- Make space for the hat:Set the crosspiece low enough on the body to preserve room above for securing a hat or wig.
Helpful Hint:If the wood feels coarse, gently sand the edges to prevent splinters—particularly when children are lending a hand!
Step 2: Anchor the Scarecrow in Your Garden
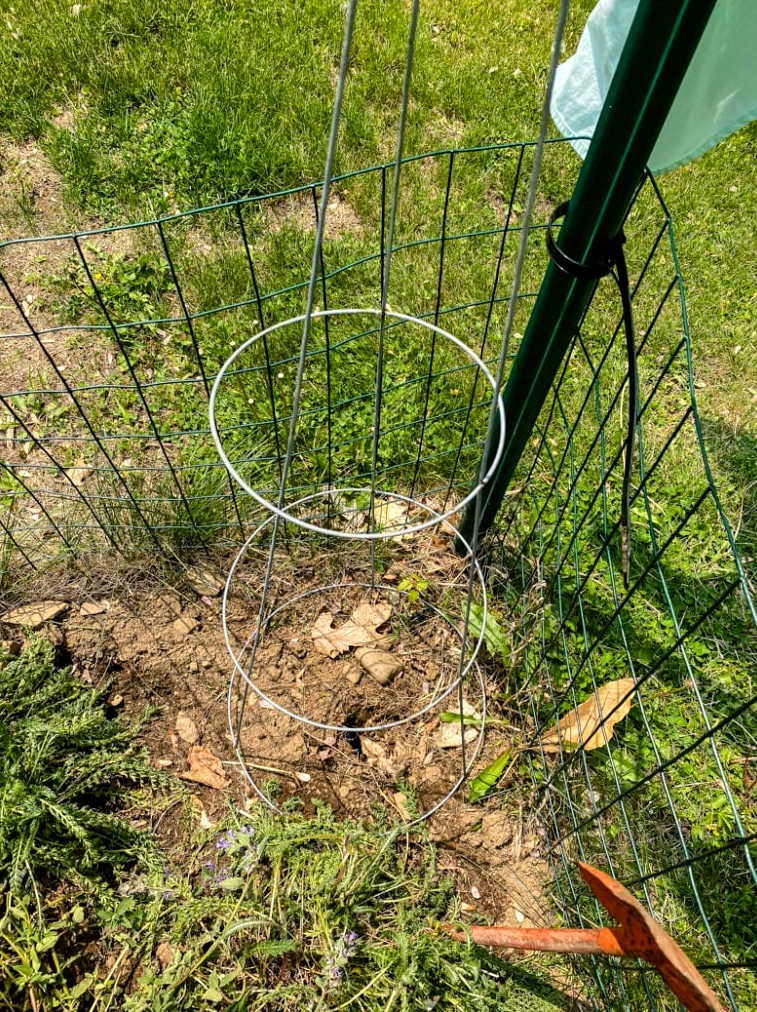
You will need:
- A tomato cage turned upside down
- A decorative skirt (I chose a brown tutu!)
- A mallet or sledgehammer
Instructions:
- Set up the base:Turn a tomato cage upside down in the selected garden area—this steadies the scarecrow and provides a bit of “skirt support.”
- Dress her first:Slip the tutu or cloth skirt onto the cagebeforeanchoring the frame (believe me, putting it on afterward is much more difficult!).
- Secure the frame:Put the wooden structure inside the cage and drive it firmly into the soil using a sledgehammer until it feels stable. Give it a gentle wiggle to check—gusts and garden visitors may be crafty!
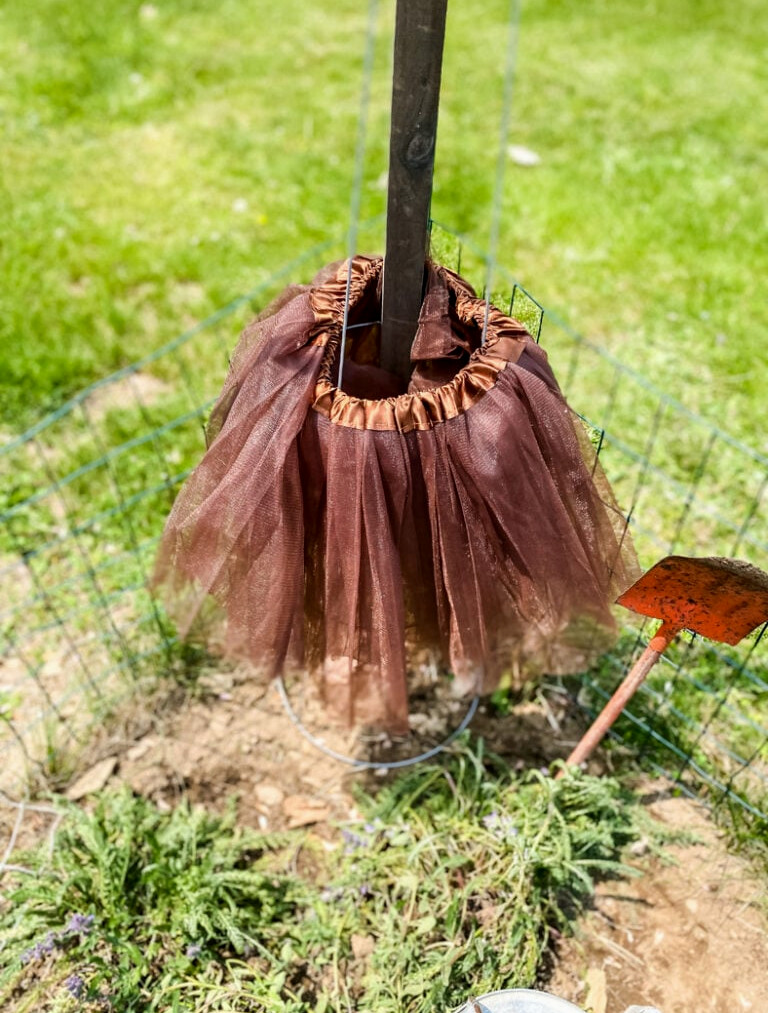
Why This Method Works:
- The tomato cage addsstability and keeps it steady during windy weather.
- Preparing the base beforehand prevents frustration later (I learned that the hard way!).
Pro Tip:For added stability, pair the wood with a metal or wooden stake.
Step 3: Outfit Your Garden Scarecrow Girl
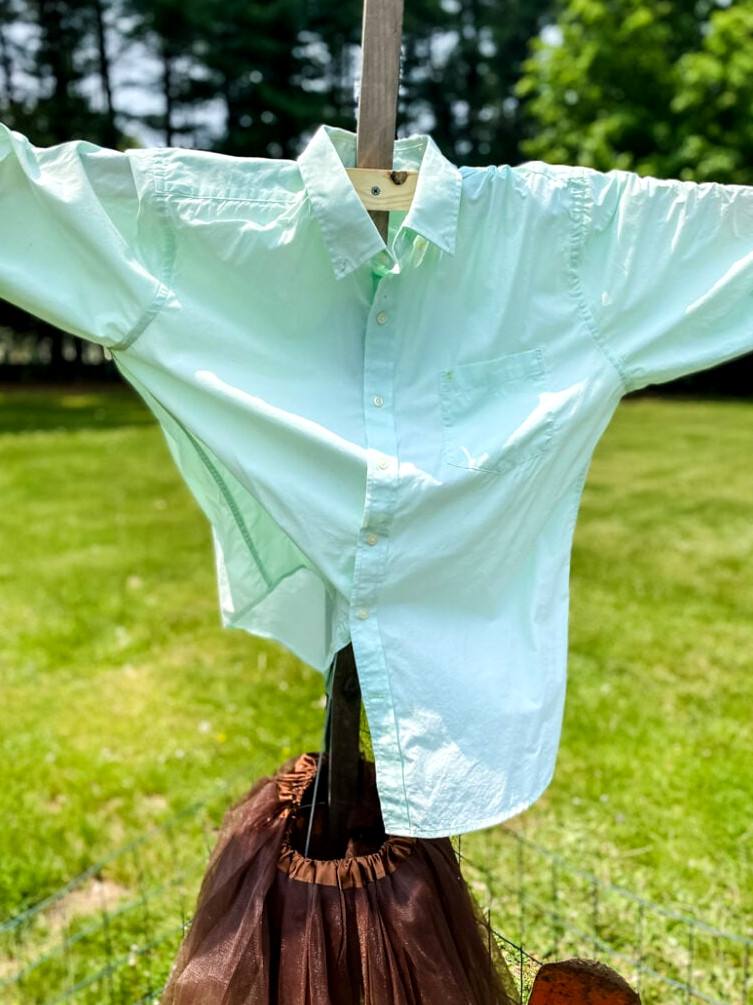
What You’ll Need
Why a Button-Down Shirt Is Ideal:
- Simple sleeves:A button-down shirt makes dressing your scarecrow easy, allowing you to slide the wooden arms through the sleeves with little effort.
- Flexible arms:To fit both sleeves, you might need to wiggle the crosspiece or loosen it briefly—this is where thatsingle screwis useful! (Simply tighten it again after she’s dressed.)
Thrifting Ideas for a Charming Outfit:
- Shirts:My green oxford cost just $3 at a thrift shop—browse the men’s section for loose-fitting, sun-washed pieces full of character!
- Aprons & extras:Since my neighborhood thrift store didn’t have any adorable aprons, I picked up a budget-friendly3-pack of floral cottage aprons from Amazon(a bonus is that I can replace one if it fades in the sunlight!).
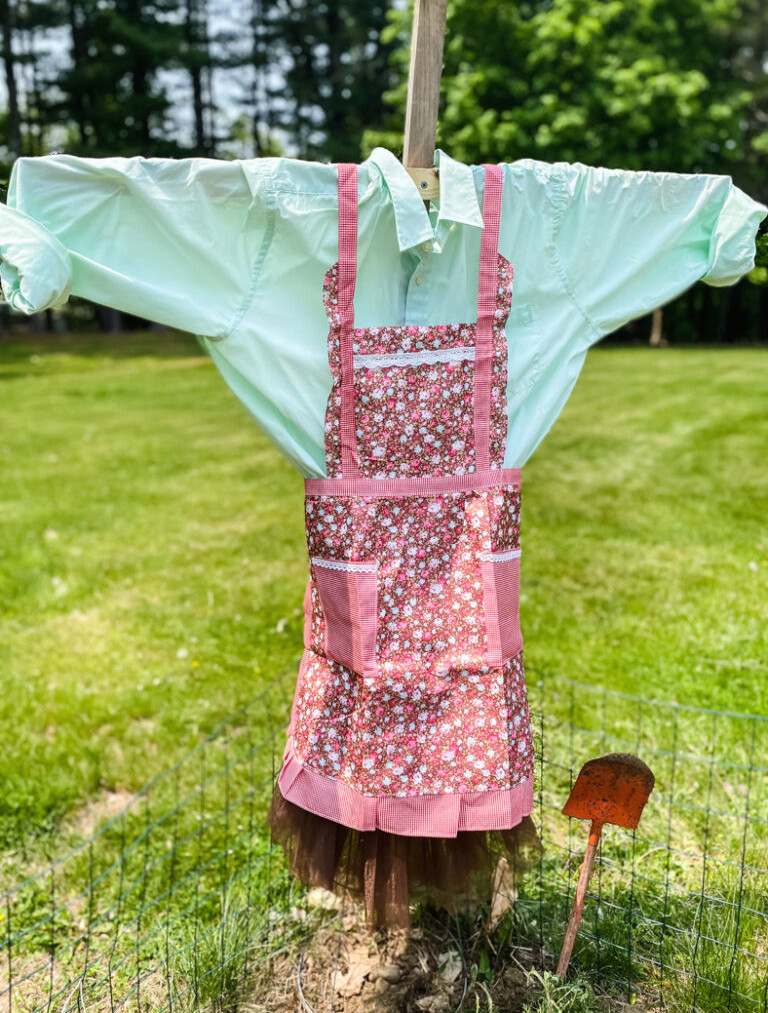
Helpful Tips:
- Weather protection:Apply a light coat of UV-protective spray to the fabric to help prevent fading.
- Layering:Wrap a vintage scarf around her neck or place faux flowers in her pocket to give her even more character!
Step 4: Add Accessories to Your Scarecrow (The Fun Part!)
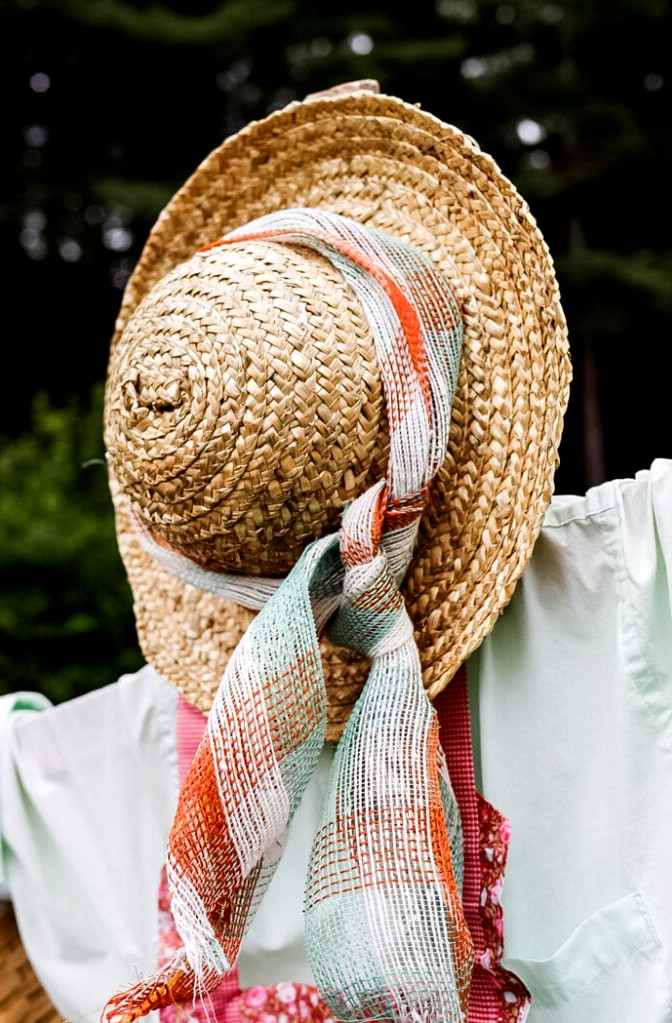
Begin With a Hat
- Straw hat:I discovered mine at a thrift shop! I attached it with asmall nailhammered through the brim and into the wood.(Tip: Position the nail at a slight angle to prevent the wind from blowing it off!).
- Scarf: Rather than use one of my own scarves, I wound crafting mesh ribbon around the hat and tied it securely in place.

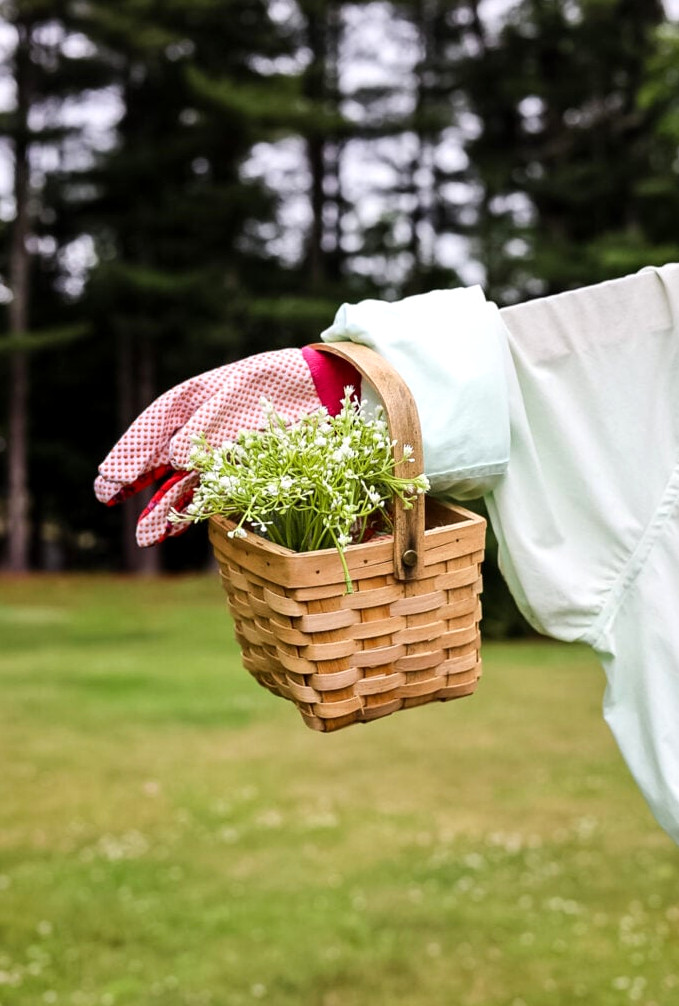
Hands & Decorations:
- Cloth gloves:Place gardening gloves over the ends of the wooden arms to create instant “hands.”(Bonus: Fill them with plastic bags so they hold their shape!)
- Basket detail:I found a petite secondhand basket, slipped it onto her wrist, and packed it withfaux baby’s breath(real flowers would fade too quickly—but you can substitute seasonal items such as mini pumpkins in autumn!).
The Grand Reveal: Say Hello to My Enchanting Garden Girl!
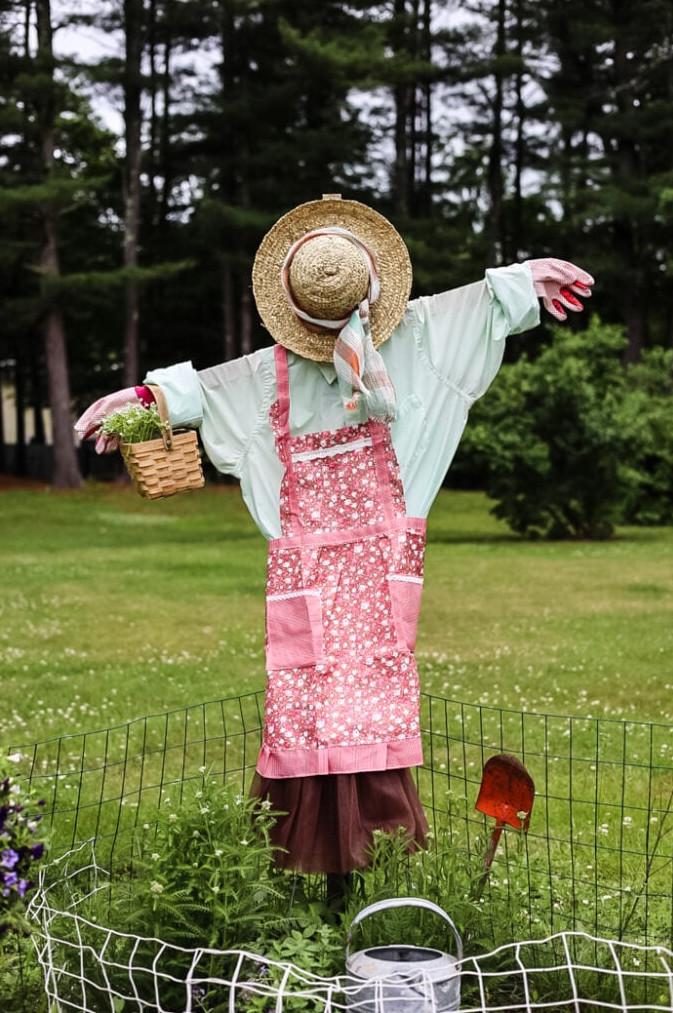
Isn’t she adorable??I’ll be honest—my scarecrow likely won’tfrightena single garden visitor (she’s far too sweet for that!). Still, Ihavepaused for a second while tending the garden, briefly imagining that someone was standing there!Mission:Nearlycomplete.
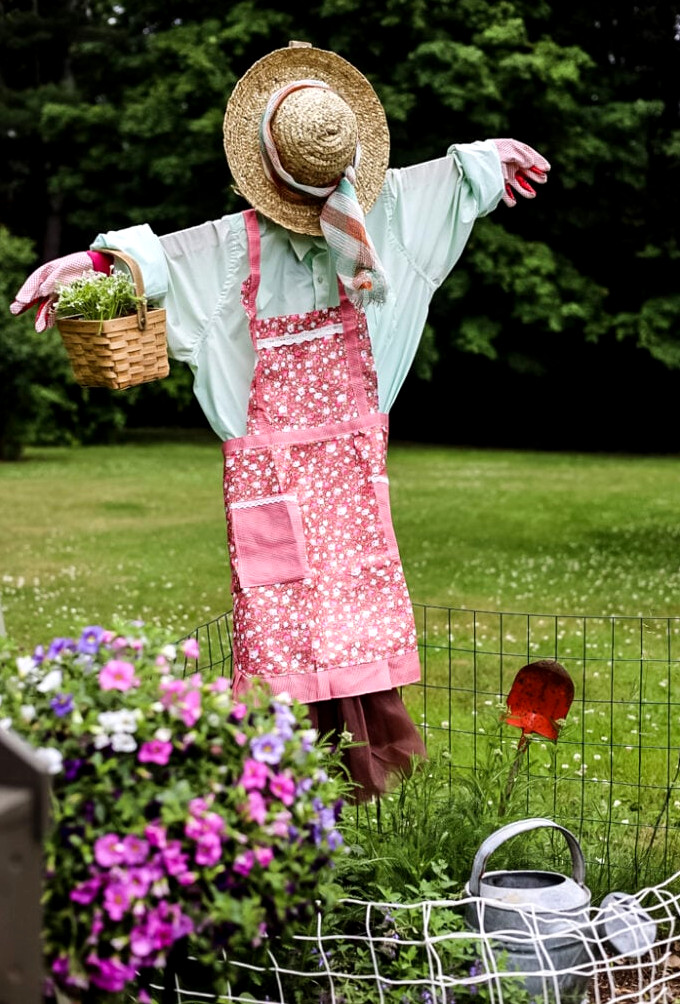
Her Cozy Corner:
I placed her in a small garden nook bordered by a piece ofvintage fencingI found at a market last year. At the moment, it’s a peaceful little space—but just wait! I movedpastel yarrowsfrom last year’s garden, addedcatmintfor gentle purple cascades, and plantedcosmos and sunflower seeds. By the middle of summer, she’ll be nestled among a charming cottage-style display of blooms!
A Look Back at Last Year’s Garden Girl (2024 Edition)
Sometimes, Keeping It Simple Works Best!
Let’s briefly revisit my2024 scarecrow girl—a wonderful example of the beauty found in using what you already own!
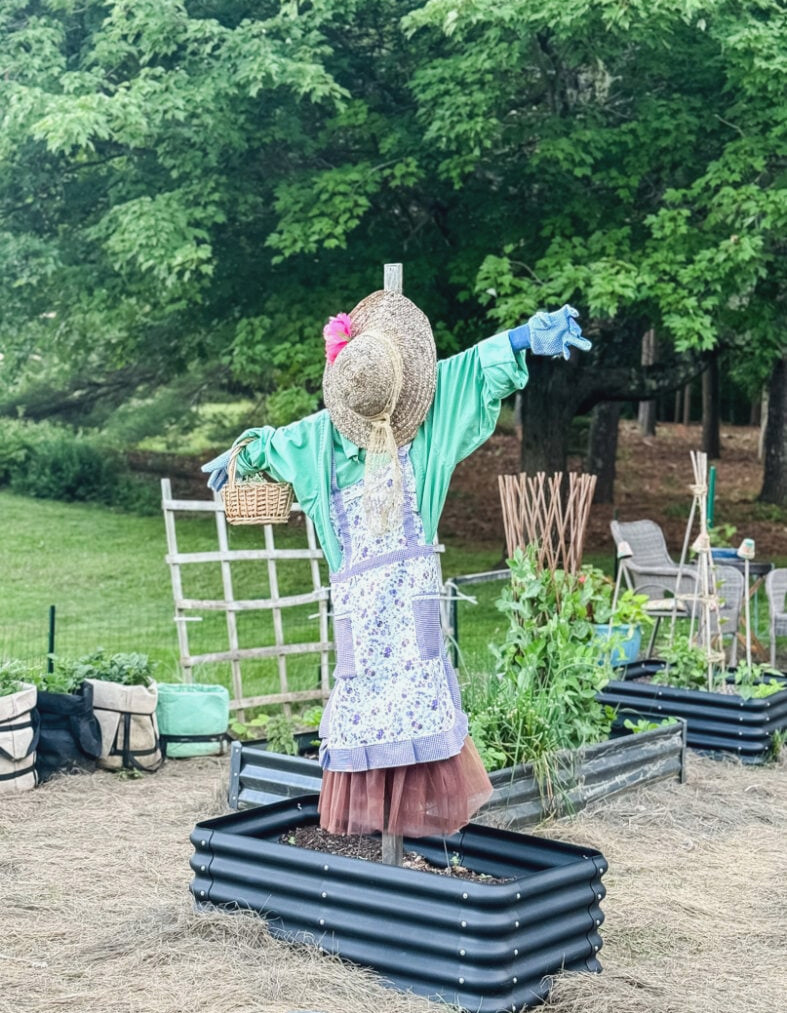
Her Gentle Charm:
- Apron:One of thefloral aprons from the 3-packI had purchased earlier (see? It offers value for multiple years!).
- Hat Accent:The same dependable straw hat, refreshed with awide lace ribbonand afaux pink peony tucked into the band for a touch of romance.
- Thrifty Magic:There was no need for major purchases! A little imaginative repurposing did the trick (that peony remained from a wreath project).
My garden companion moved to a new location this year. After adding several raised beds and enlarging my garden, the spot she occupied last year is now filled with a row of tomatoes!
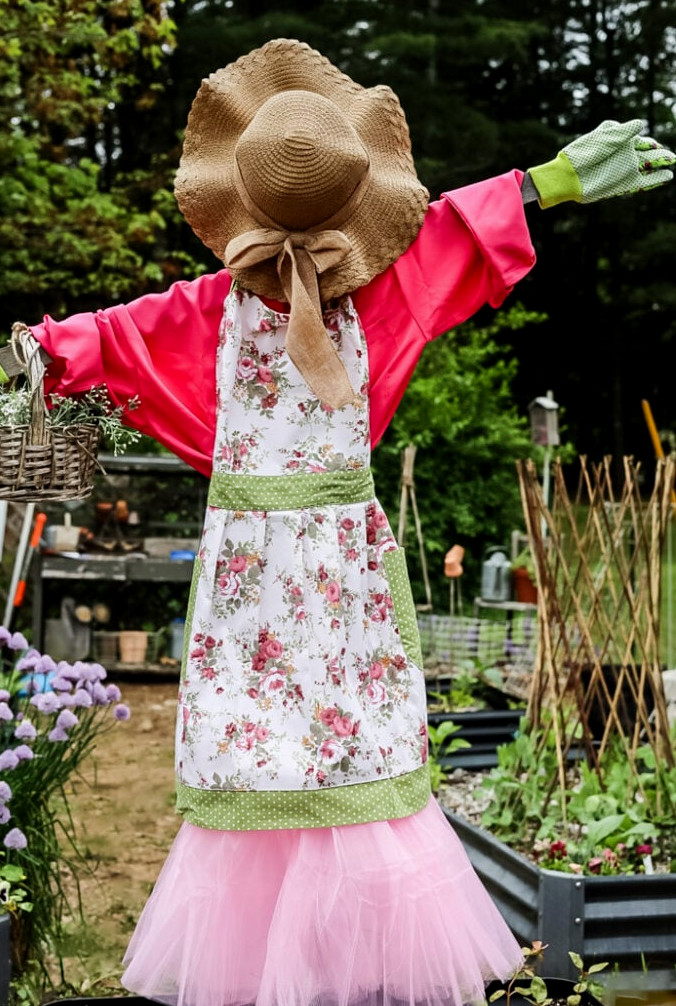
Meet My 2025 Garden Girl: A Splash of Pink & Florals!
She’s Returned—More Striking Than Ever!
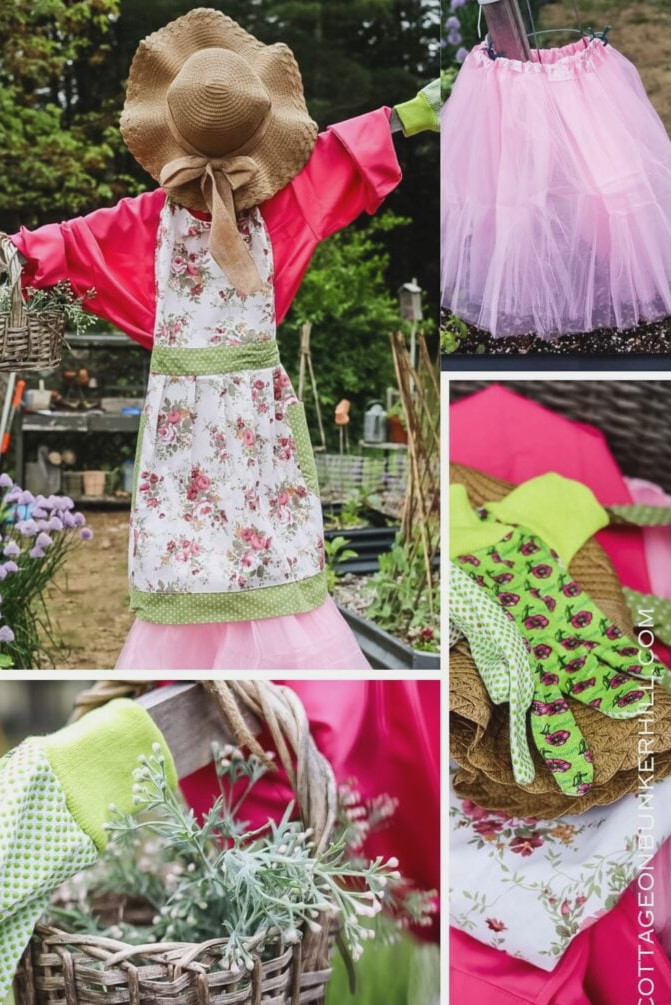
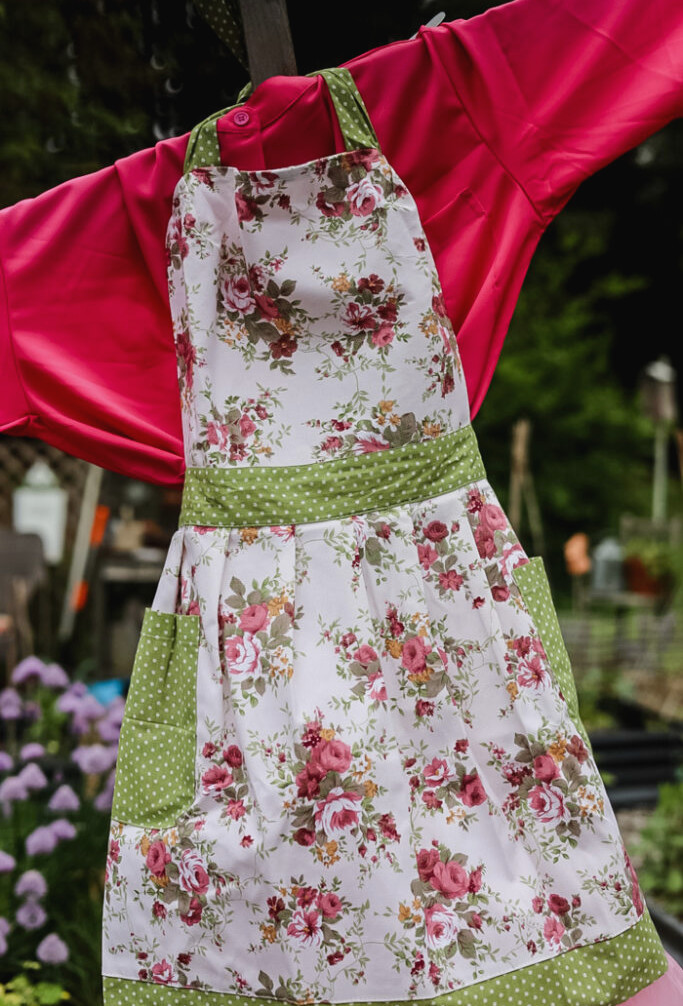
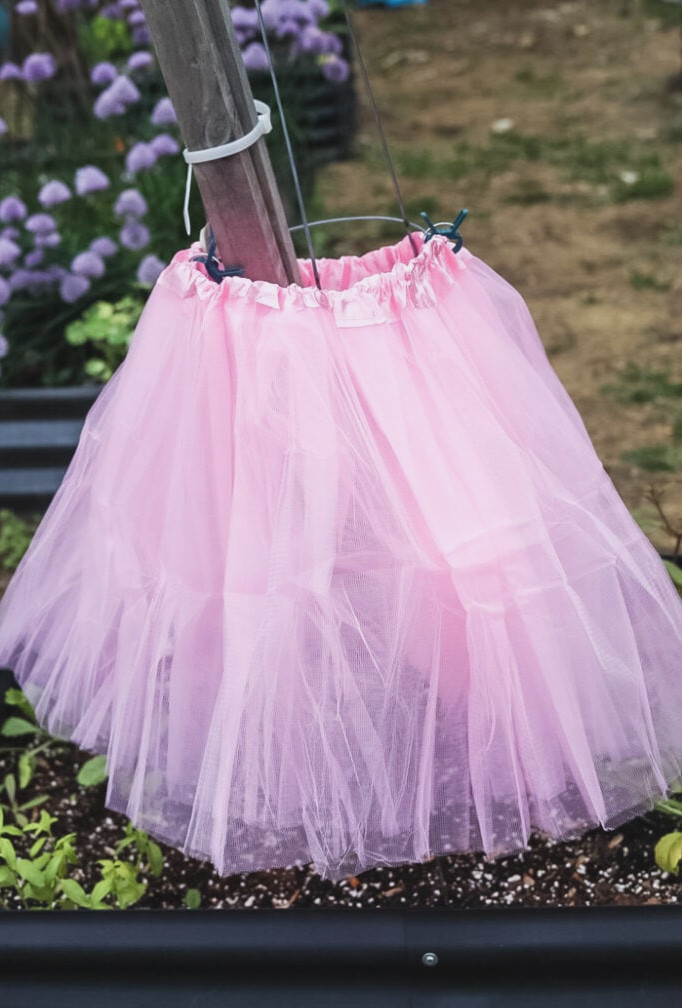
For this year, I chose to give my garden girl avibrant refresh—because flowers shouldn’t be the only ones having fun! I treated myself to agorgeous floral apron(those ruffles! those tiny pockets!), matched it with ahot pink blouse, and finished the look with afresh straw hatand aflirty pink tulle skirt. Watch out, roses—there’s a fresh garden diva in town!
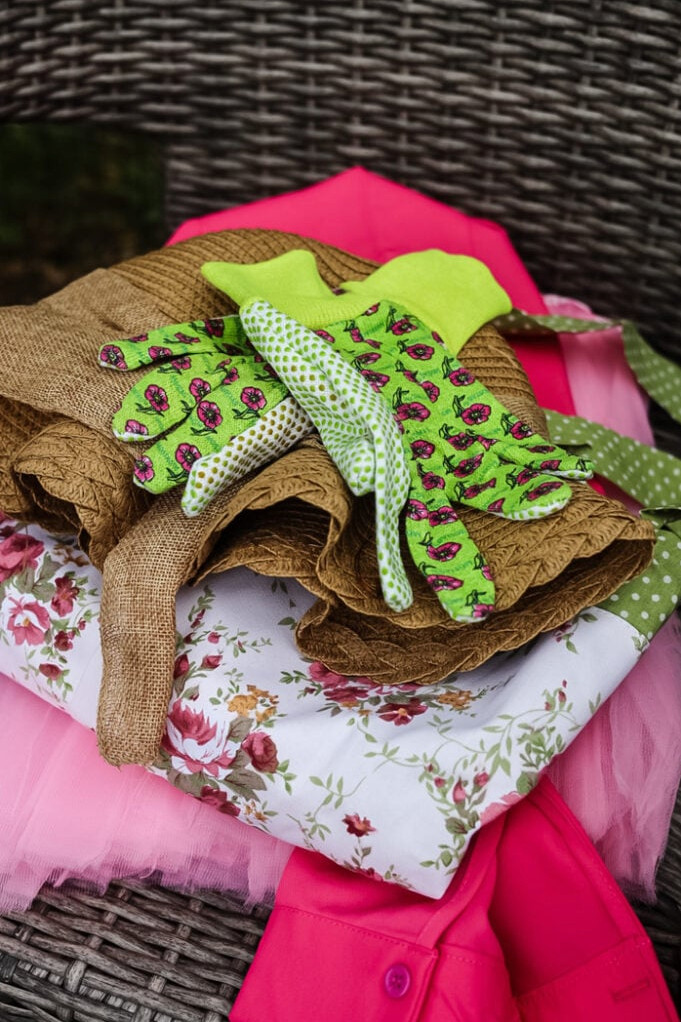
Supplies for this Project
What’s Different This Year:
- The Apron:A floral piece with a vintage feel and lace edging (completely worth the cost—it was $18, and now she looks ready for a garden tea party!).
- The Color Palette:Pink layered over pink, balanced with natural straw accents. It all begins with a hot pink button-down.Pro tip: Vivid shades stand out better against green foliage in photographs!
- The Tutu Upgrade:Last year’s brown skirt had its charm, but thispink tullebrings a fun, flowing touch when the breeze picks up.
- Staw Hat: The previous straw hat had become too worn by the weather to reuse, so a replacement was necessary. I found a child’s hat with a large bow, and it works beautifully!
Coming Soon…
This year, I’ve planteddusky pink snapdragons, small fuzzy sunflowers,andcream-colored strawflowersaround her—they’ll coordinate with her ensemblebeautifullyby July.
A Garden Girl for Every Season
Frommythrifted-and-thriving 2023 scarecrowto last year’speony-adorned 2024 version, and now this year’spink-and-floral 2025 transformation, one thing is certain: A garden scarecrow is far more than a creature deterrent—she’s a whimsical expression of your taste, your thrifting fortune, and even your garden’s atmosphere!
The Best Thing?
There’s absolutely noincorrectway to create one. Whether you invest in one flawless apron (without a hint of remorse!) or put together a complete outfit from pieces in your garage, the charm comes from making something delightfully imperfect.
Your Turn Now!
- Which scarecrow from the years is your favorite?(I’m especially fond of the apron on this year’s garden lady!)
- Share your photos! I’d be thrilled to see your take on these adorable (yet not-very-frightening) scarecrows and feature you in the Reader’s Spotlight gallery. Email them to me at jennifer@cottageonbunkerhill.com
One Last Thought:
No matter how you dress yours, may she proudly preside over your flowers, occasionally surprise you with unexpected “company,” and remind you that the finest garden decoralways carries a story.
Cheers to thrifting, gardening, and creating scarecrows!
(P.S. Keep watching… I’m already dreaming up her 2026 makeover. Fairy lights? A tiny tool belt? The options are limitless!)
Discover more inspiration for incorporating thrift store & vintage treasures into your garden to design your own cottage garden style.
Cottage Garden
Top Products
Browse my gardening essentials! Raised beds, plant supports, & tools to help your garden flourish.
Discover What My Friends Are Sharing Today!
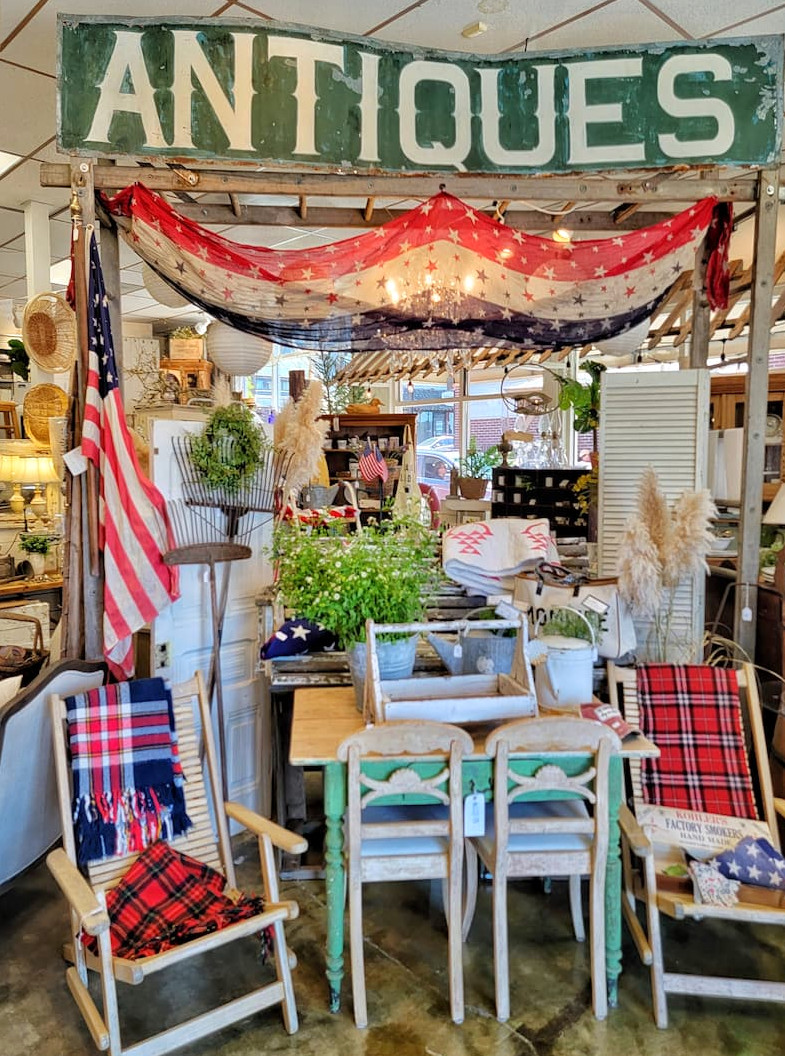
Each month Stacy, Kim, Lora, & I gather to show off enjoyable thrifting treasures or vintage shopping adventures from the past few weeks. Since we all reside in different regions of the country, it’s always exciting to see what they’ve discovered.

Stacy
Bricks n Blooms
Travel to Vermont and explore an outdoor flea market close to Stacy’s holiday residence.
Kim
Shiplap & Shells
Join Kim while she explores vintage shops around Puget Sound.

Lora
Create & Ponder
Lora is sharing a few of her favorite places to hunt for vintage decorations.
More Garden Ideas.