



Arrange all your spices, oils, and more inside one compact DIY cabinet.
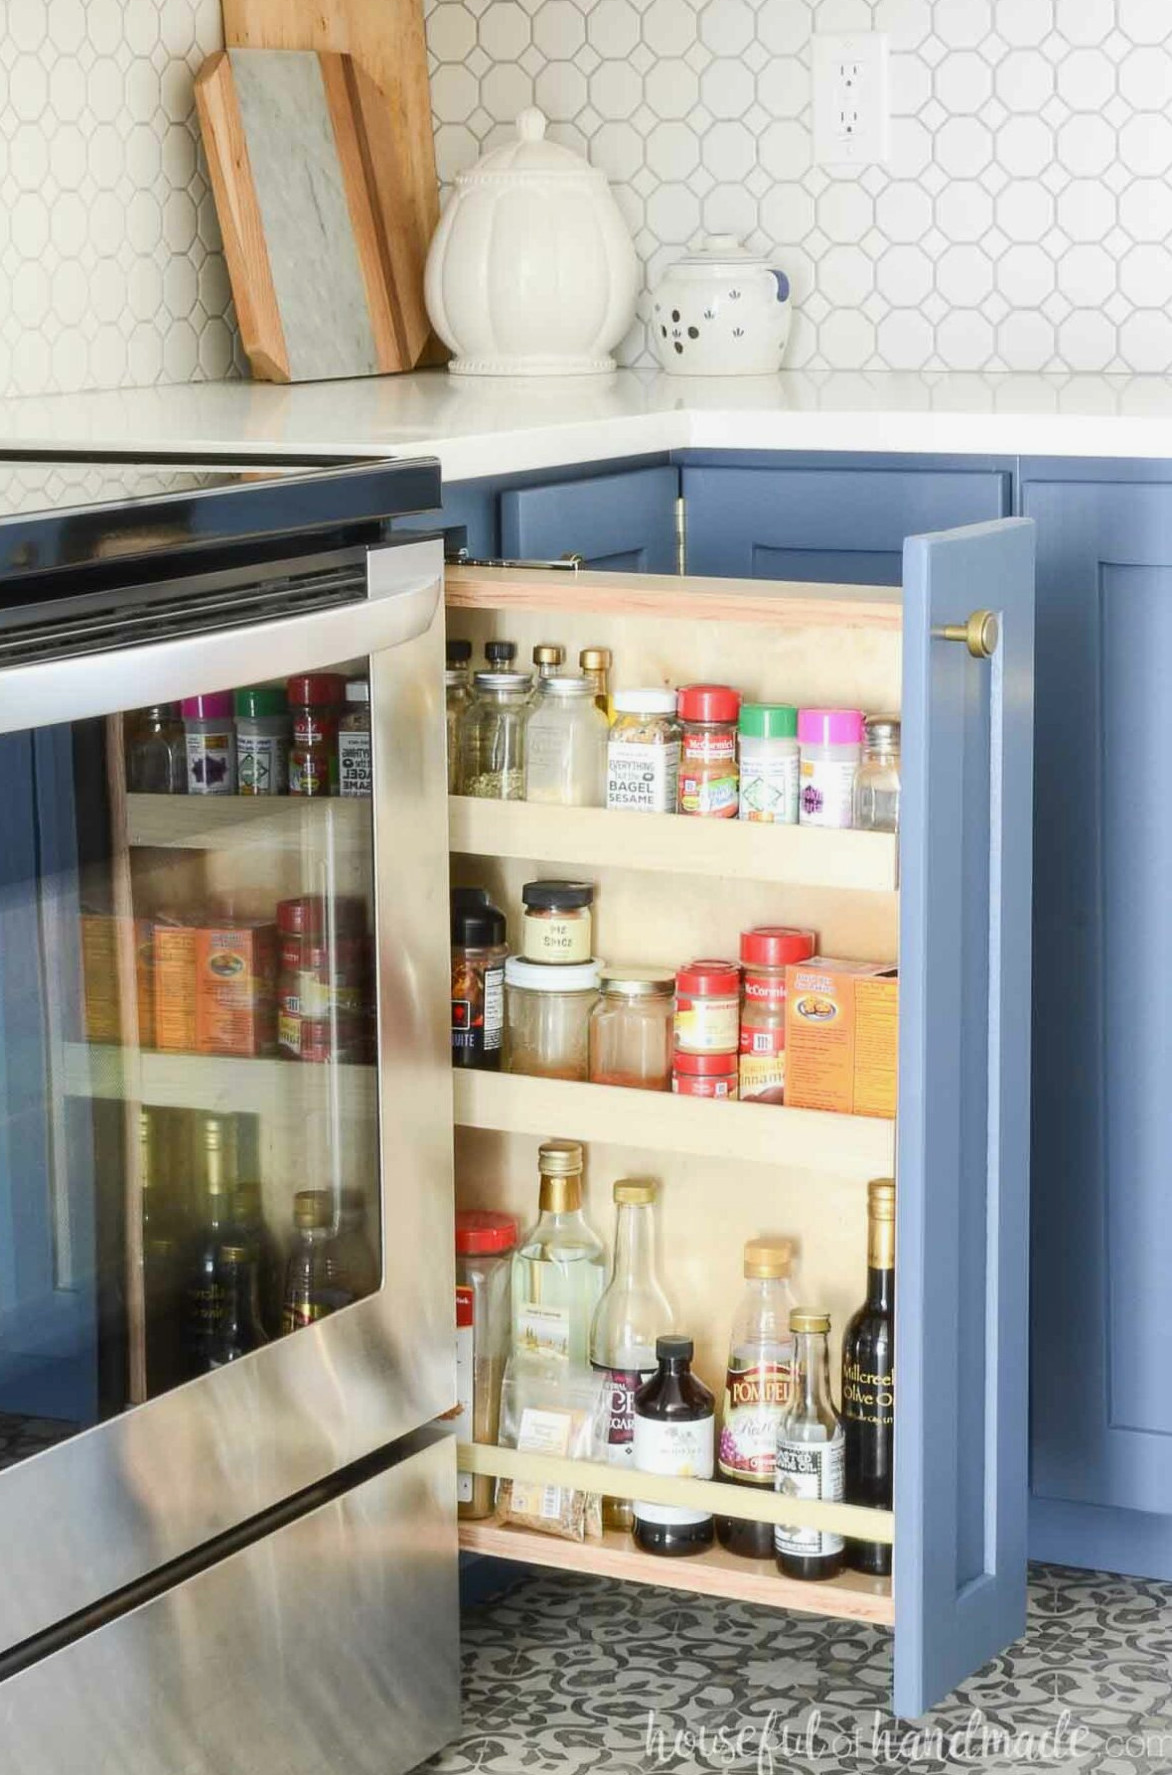
One of my favorite specialty storage solutions in the kitchen is the pull-out spice rack cabinet.
Although this cabinet is only 8-10 inches wide, it can hold a surprising number of spices. It also provides space for oils, vinegars, honey, and marinades.
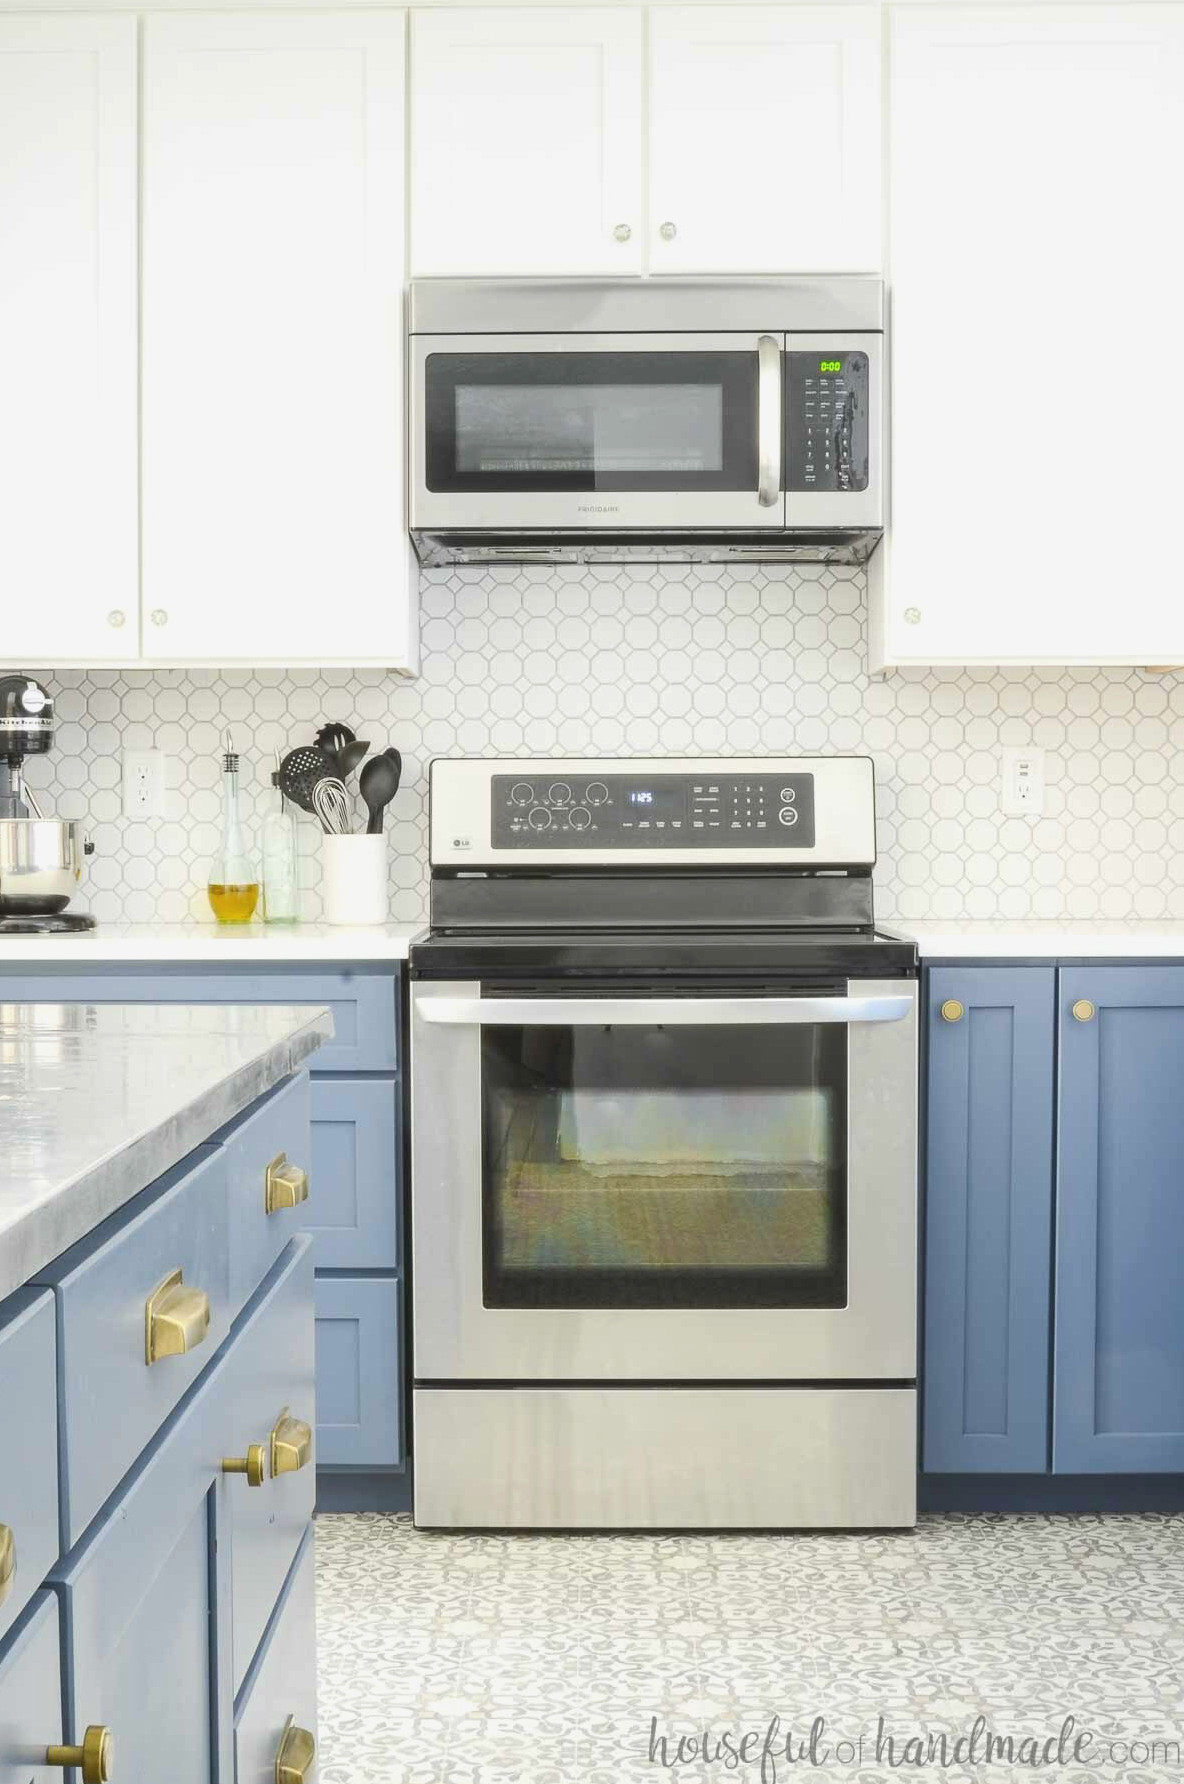
During both of my DIY kitchen renovations, I installed the spice cabinet beside the stove so the seasonings I need are always within quick reach while cooking.
It is an incredibly useful and enjoyable cabinet to include in your kitchen.
Be sure to read the complete guide to building base cabinets in this post so you can determine your toe kick, cabinet height, and cabinet depth. You should also review the distinction between face-frame and frameless, or European, cabinets in the How to Build Cabinets post.
Prefab Spice Rack Compared to Building Your Own
You can purchase many varieties of spice rack cabinet inserts, and they can be installed in either new or existing cabinets.
However, I decided to make my own wooden spice cabinet for three reasons:
- To reduce the cost of our kitchen renovations even further.
- To create a spice rack with the ideal dimensions for the spices and oils I use.
- To have a better-quality spice rack. The drawer slides on prefab inserts I have seen in other people’s homes have not been as well made, particularly considering their price.
Even if you are not constructing your own cabinets or renovating your kitchen, the details in this post can help you install a pull-out spice rack in an existing cabinet.
Very little wood is required to make an insert with 3-4 shelves for spices. I built both of my inserts from plywood offcuts left over after constructing the cabinet boxes.
Plywood is durable and simple to use, although it does leave the edges visible. If desired, you can conceal those edges with edge banding. Another option is to use leftover wood from your face frame to construct the insert.
Which Drawer Slides Are Needed for a Spice Cabinet?
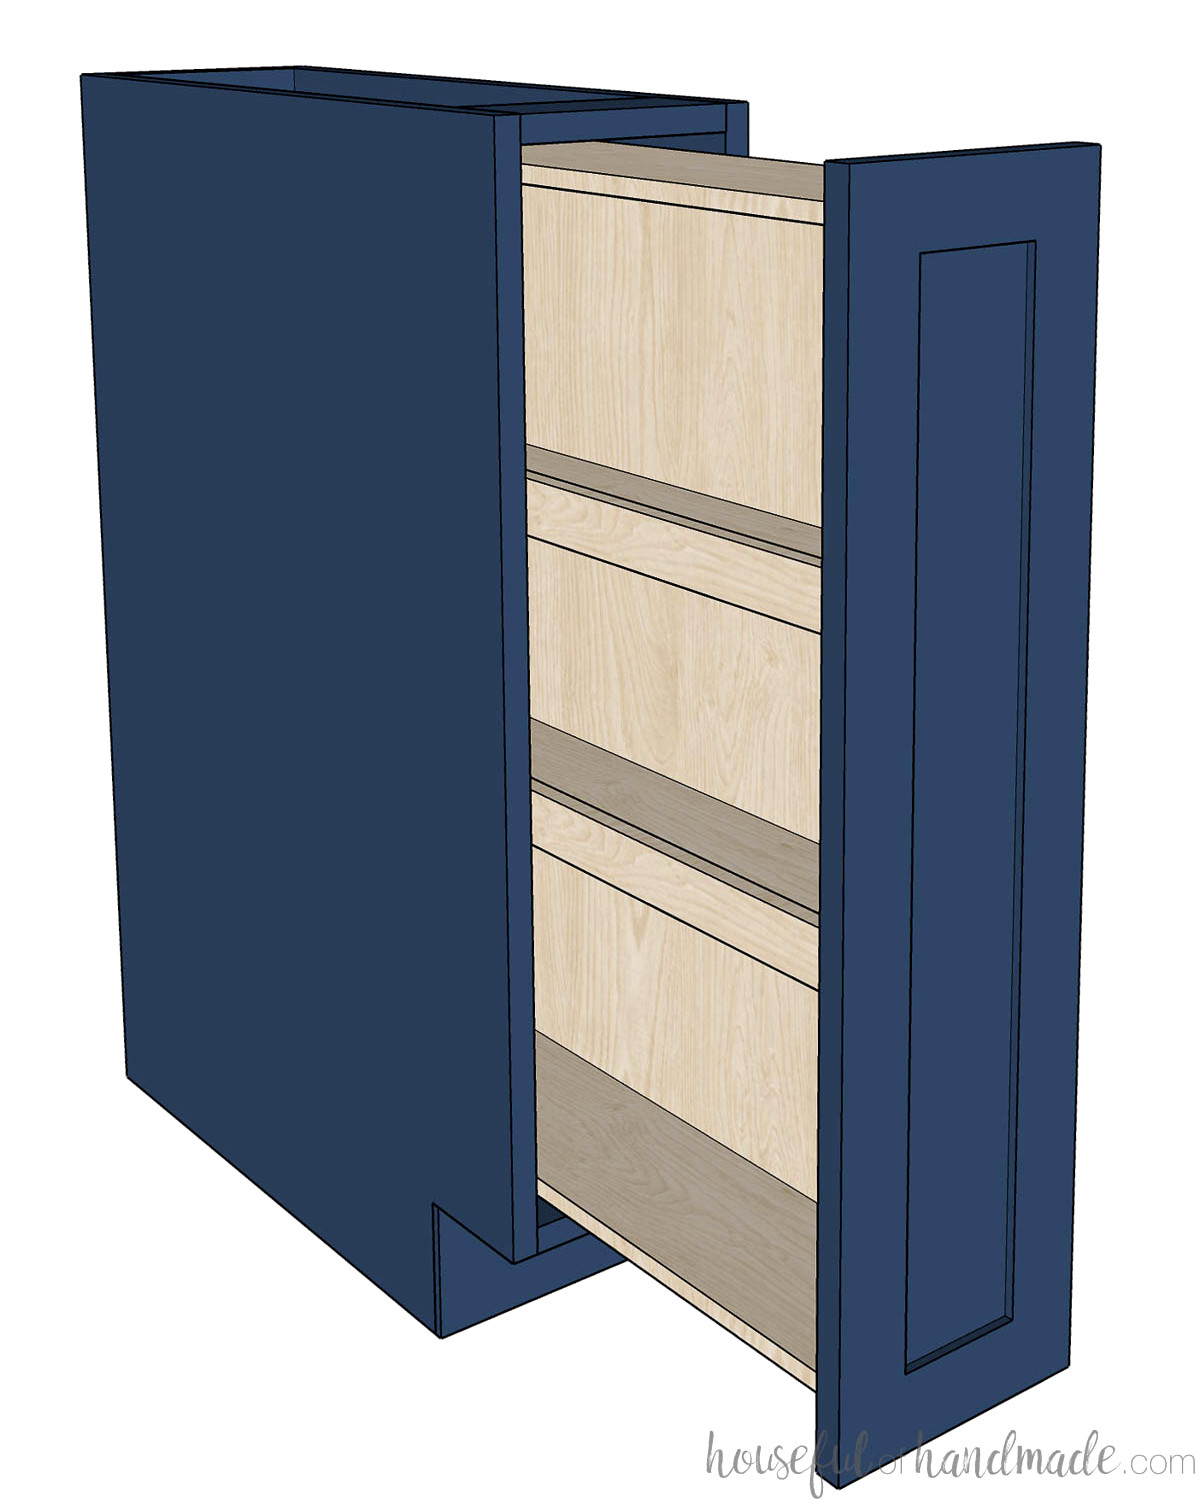
To keep your spices readily accessible, install drawer slides on the spice rack insert. The cabinet front will use a standard cabinet door, but the unit will move in and out like a drawer. I explain drawer slides in greater detail in this How to Build Drawer Base Cabinets post.
Full-extension drawer slides are necessary so you can reach the items at the rear of the spice rack. Even with these slides, the last 3″ or so may be somewhat difficult to access because that section remains inside the cabinet.
Countertops also generally extend 1 to 1 1/2″ beyond the cabinet fronts, which makes the back of the spice rack even more concealed.
If you want every inch of the spice cabinet to be easy to reach, consider over-extension drawer slides. These slides extend as much as 1” beyond the cabinet opening.
Over-extension slides cost a few dollars more than regular full-extension slides, so choose the option that suits your needs and budget.
Personalized Spice Rack Cabinet
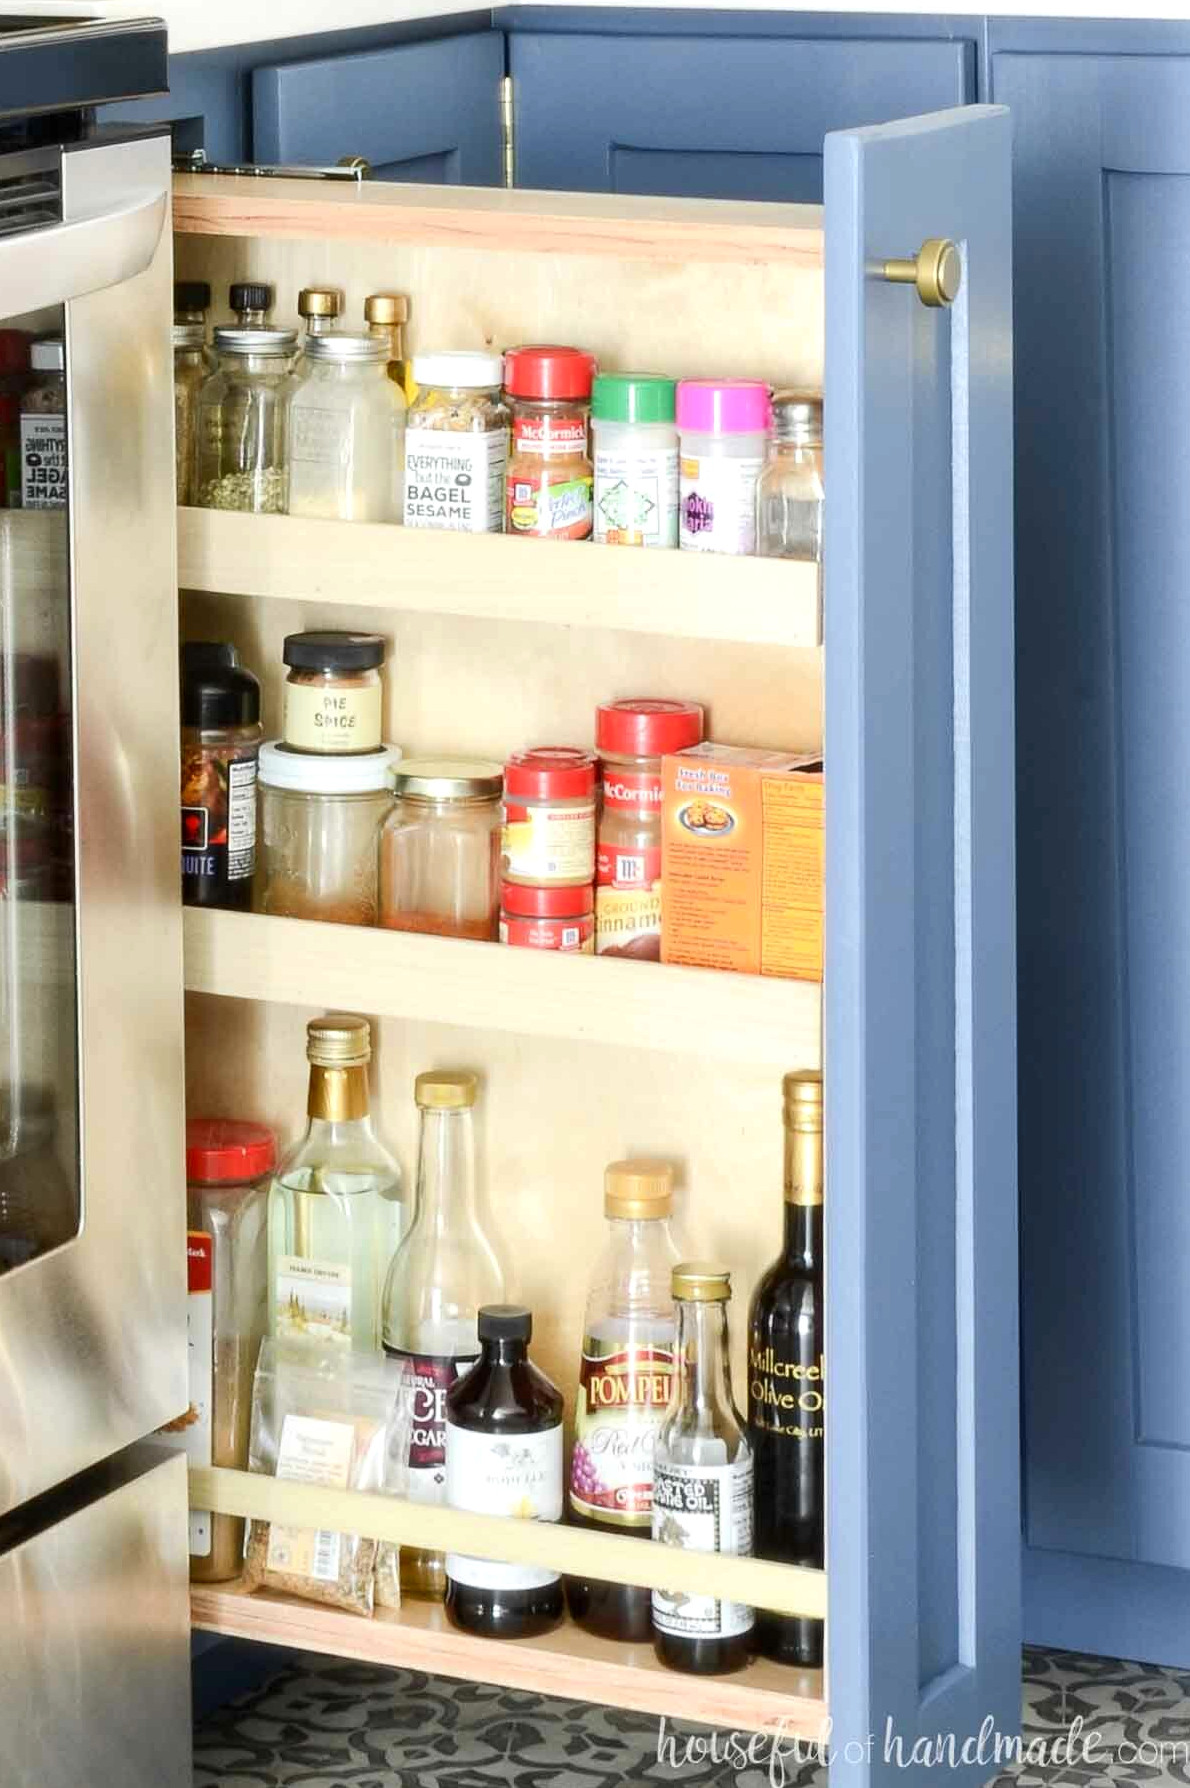
The biggest advantage of building your own pull-out spice cabinet is the freedom to choose its dimensions! Begin by selecting the spices, oils, and other items you want to keep inside, then create a custom rack sized to accommodate them.
If you need to store many spices or other items in the pull-out cabinet, you can make it with two spice racks. Keep in mind that this arrangement will require additional cabinet space.
Your spice rack can include fixed shelves for one specific layout, or adjustable shelves that can be repositioned whenever your storage needs change.
You can also include as many shelves as necessary. I prefer making the bottom section taller for oils, vinegars, and other large containers, while placing the upper shelves closer together for spice jars.
Enjoy designing a spice rack and cabinet that fit your kitchen and complement the way you cook.
Installing a Spice Rack in an Existing Cabinet
If you have a compact cabinet under 12″ wide with a narrow opening, you can transform it into a pull-out spice rack.
To accomplish this, construct a pull-out shelf as explained below, sized to match the opening you have.
For a broader opening of 10-12″, you may prefer to make two spice racks instead of creating deep shelves that conceal your spices.
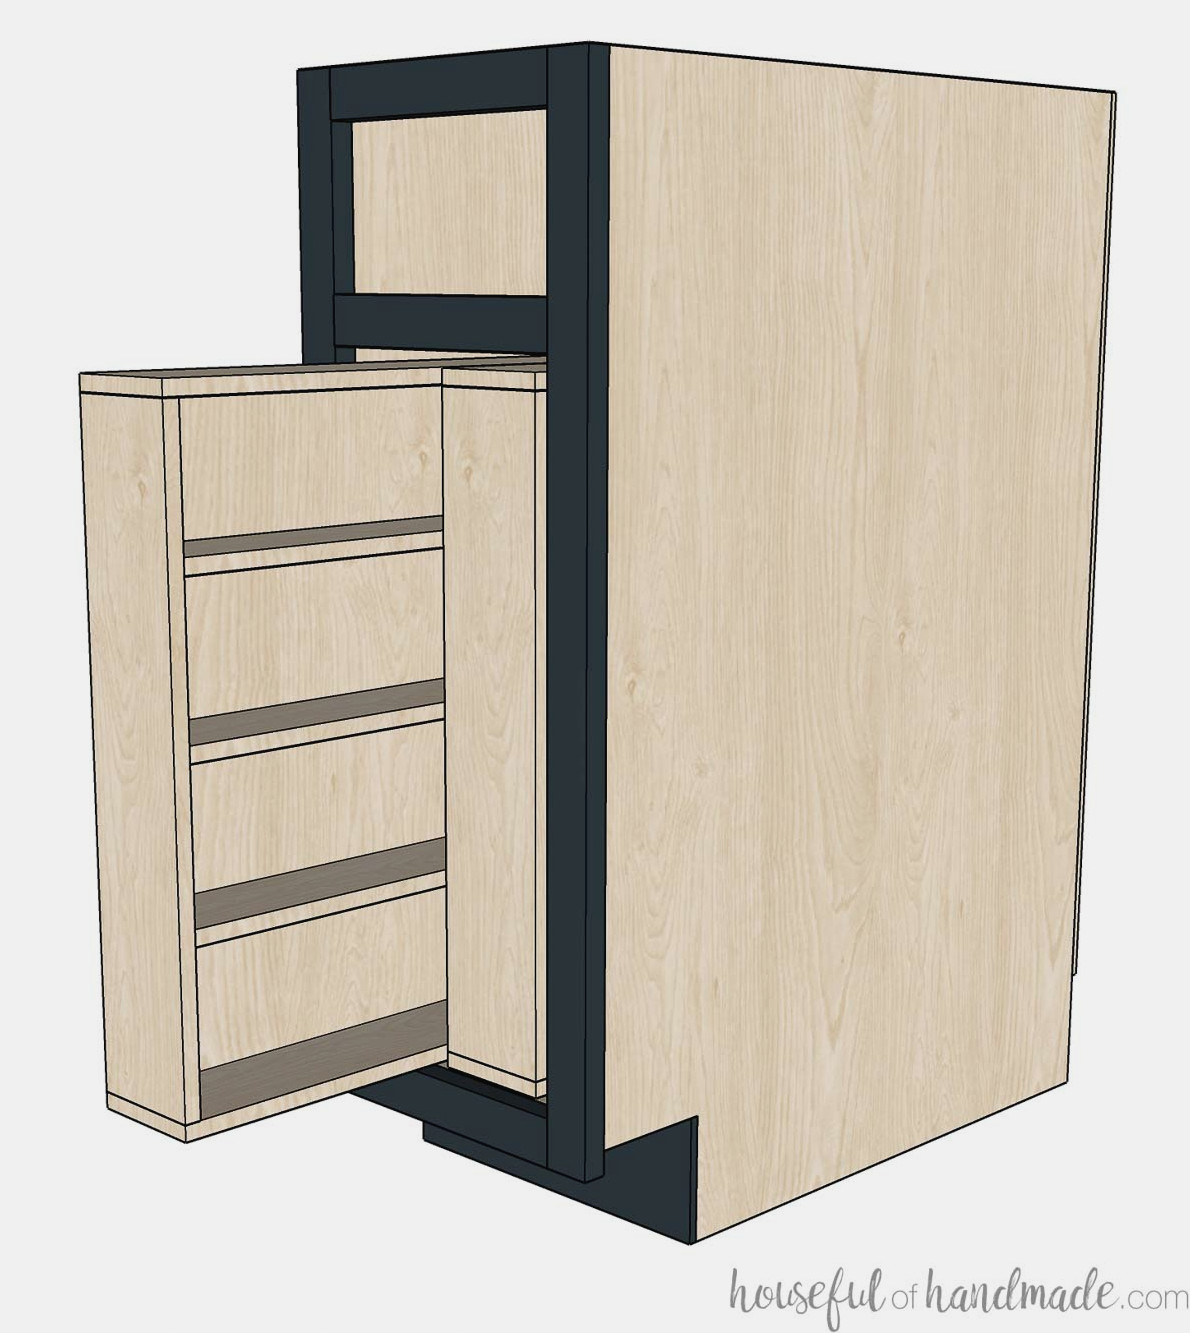
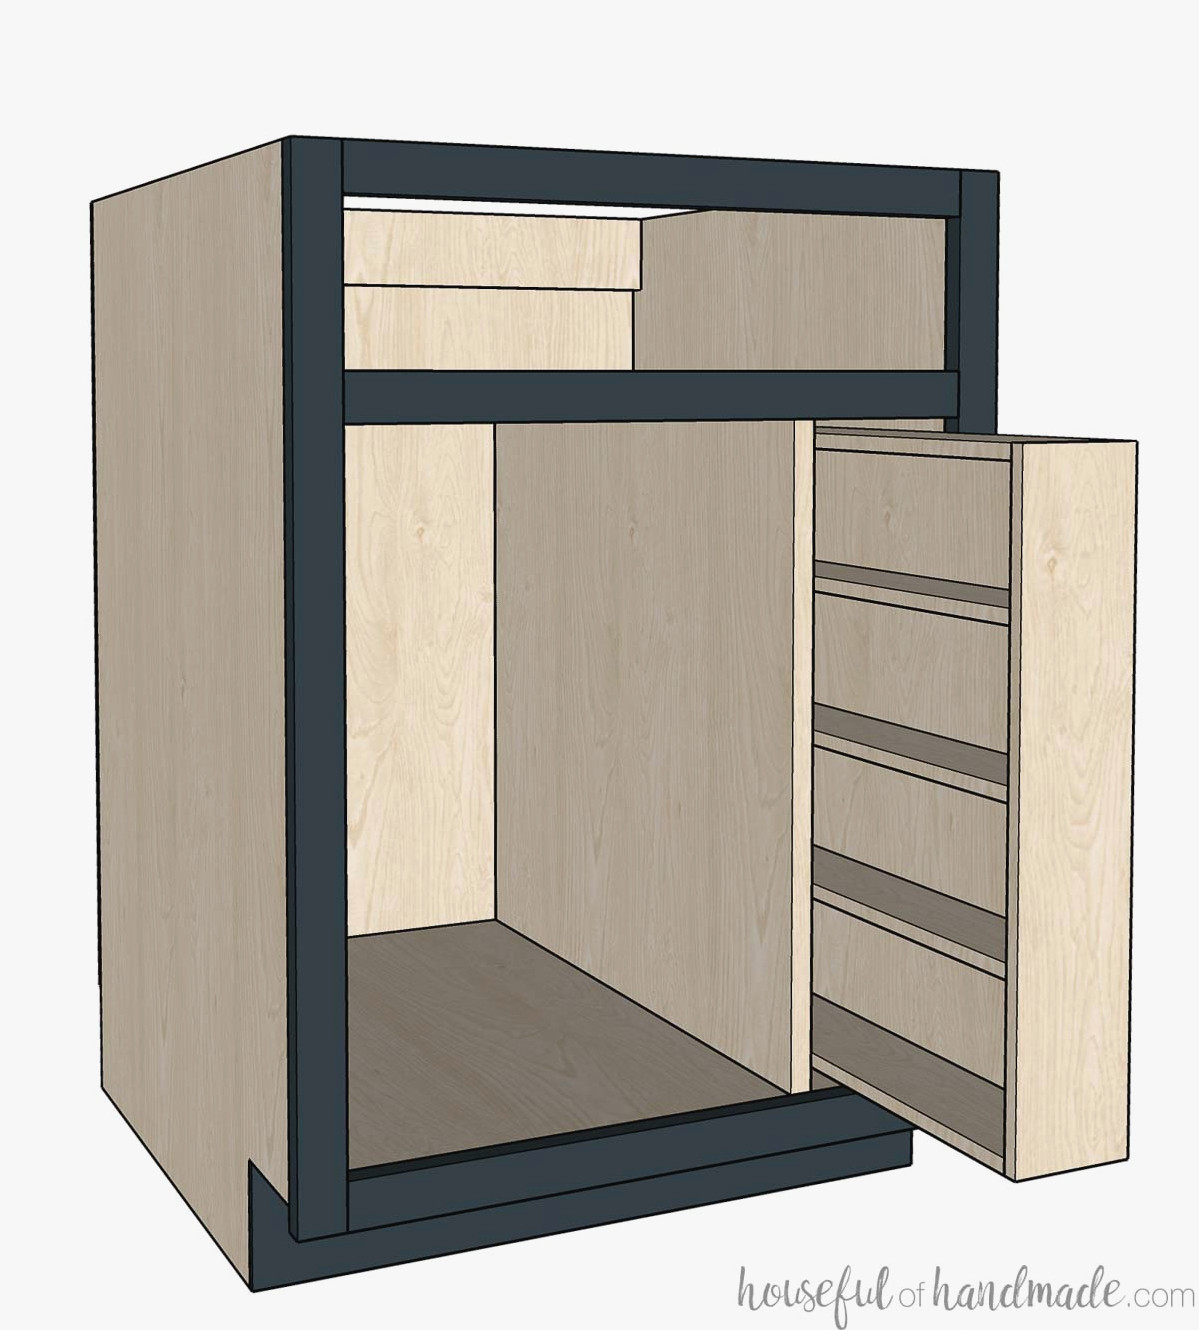
If you do not have a narrow cabinet available for conversion, you can build a pull-out spice rack and attach it to the side of any existing base cabinet.
You will need to build a plywood enclosure for thepull out spice rack to fit inside. And on the side facing the rest of the cabinet, you can add shelf pin holes so shelves can still be used throughout the remaining cabinet.
The front of the cabinet will remain unchanged, but once you open it, you can slide out the neatly arranged spice rack without giving up much storage space.
Pull-Out Spice Rack Cabinet Plans
After deciding how you want your spice rack cabinet arranged, it is time to draw up the plans! I will guide you through creating plans for your custom spice cabinet so you are prepared to begin construction.
Before figuring out the cabinet dimensions needed for your spices, you will first design the spice rack insert.
Each spice rack will include the following components:
- 2 front/back pieces
- 2 top/bottom pieces
- 1 side panel
- 2 or 3 shelves
- Optional: shelf fronts
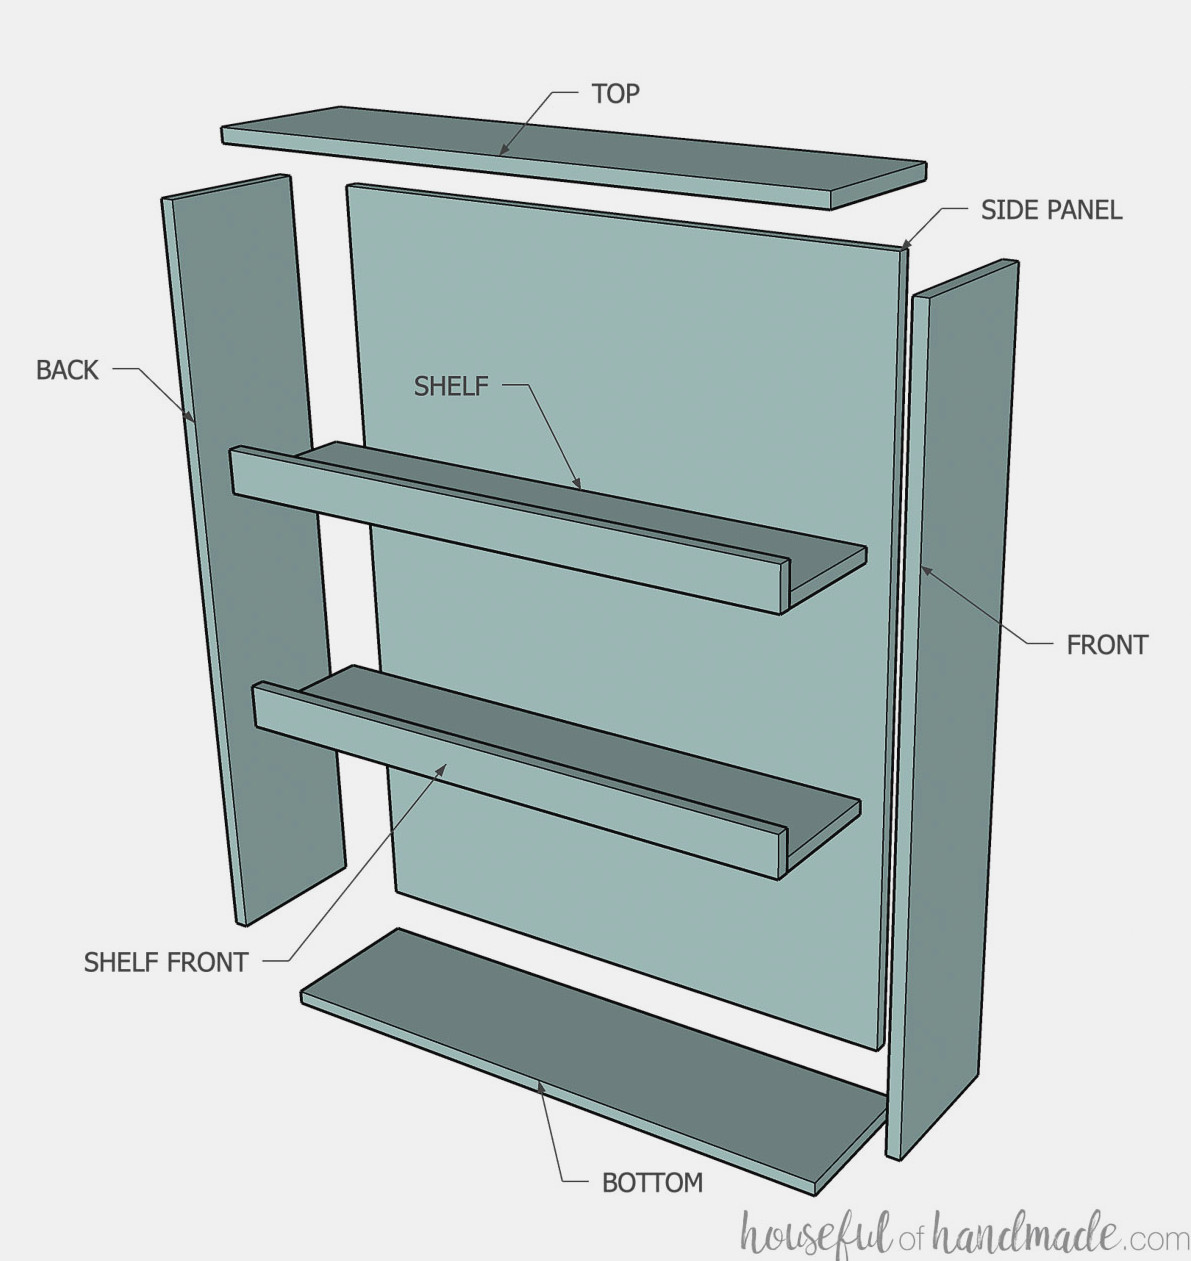
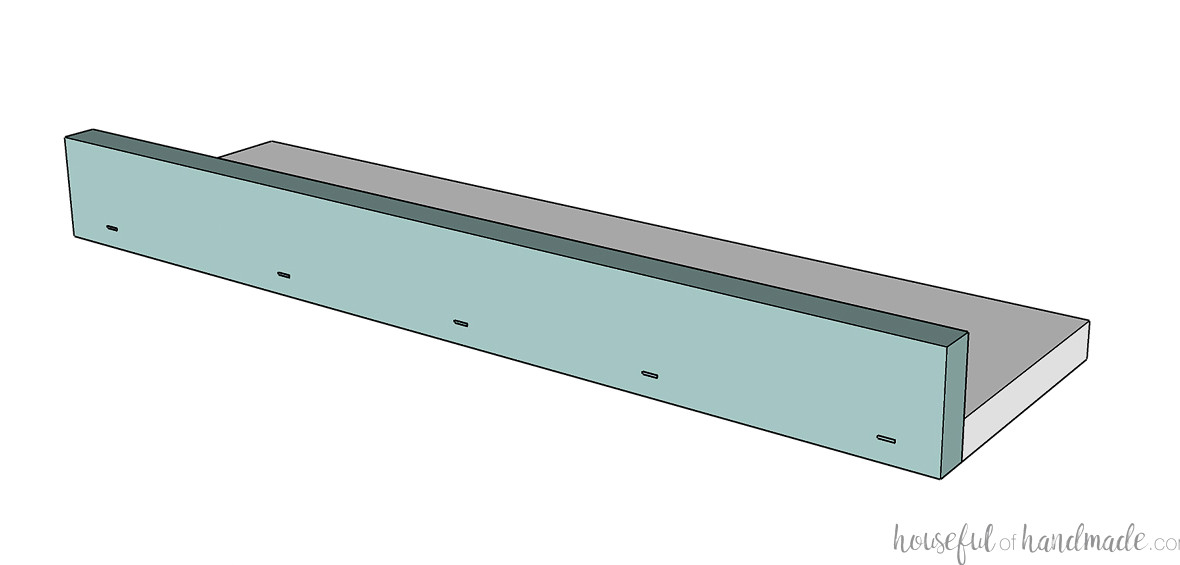
This simple-to-make spice rack is essentially a drawer turned on its side. I constructed the entire box from 1/2″ plywood, including the bottom, which serves as the side here.
The sturdier side panel, which functions like a standard drawer bottom, keeps the pull-out insert square even as it is removed from the cabinet.
I prefer making the top of the spice rack the same full length as the rack. This gives the insert a neat appearance when it is pulled out.
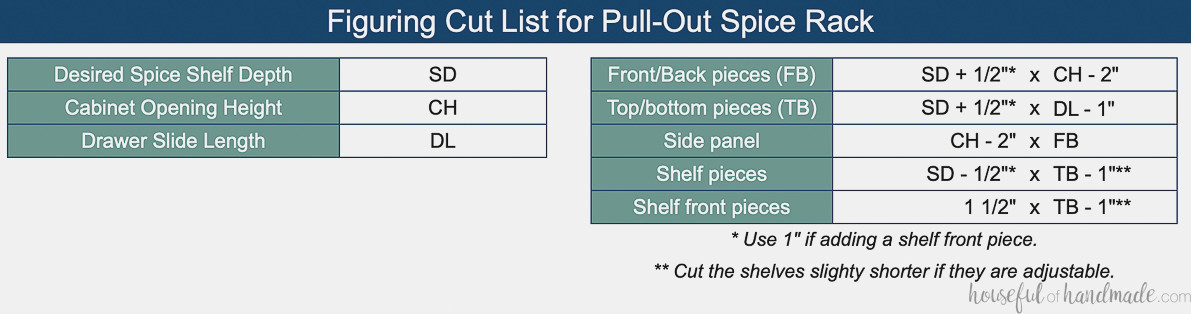
Spice Rack Cutting List
The width of your spice rack determines the depth of your spice shelves. For a shelf that holds only 1 spice bottle, build a narrower spice rack.
When determining the rack width, remember to include 1/2″ for the side panel in addition to the intended shelf depth. If you would like a front edge on the shelves to keep items secure, add another 1/2″ to the width for it.
I prefer racks deep enough to accommodate 2 spice jars. Because my spice jars measure 1 7/8″ square, I built a 5″ wide spice rack. Once the back and lip are accounted for, each shelf is 4″ deep.
The depth of your spice rack insert matches the length of your drawer slides. For a standard 24″-deep base cabinet, 22″ drawer slides are recommended.
The height of your spice rack insert should equal the cabinet opening height minus 1″. This provides 1/2″ of clearance above and below the spice rack after installation.
Refer to the chart below to find the precise cut list for your custom spice rack insert:
STEP 1- Construct the Spice Rack Insert
Cut each component of the spice rack insert from 1/2″ plywood.
Verify that every piece is square. This will help ensure the insert remains square.
EXPERT TIP:
To check whether pieces are square, measure from one corner to the opposite corner. Repeat the measurement between the other two opposing corners. Matching measurements indicate that the piece is square.
The spice rack, also called a drawer box, can be assembled using pocket holes or nails. I favor nails because they are faster, but use whichever method works with your available tools.
See this post for additional details about building drawer boxes.
Position the top and bottom pieces against the side panel, keeping them flush with the edge.
Fasten them with wood glue and nails spaced every 2-3″. Do not leave out the wood glue, since it provides considerable strength.
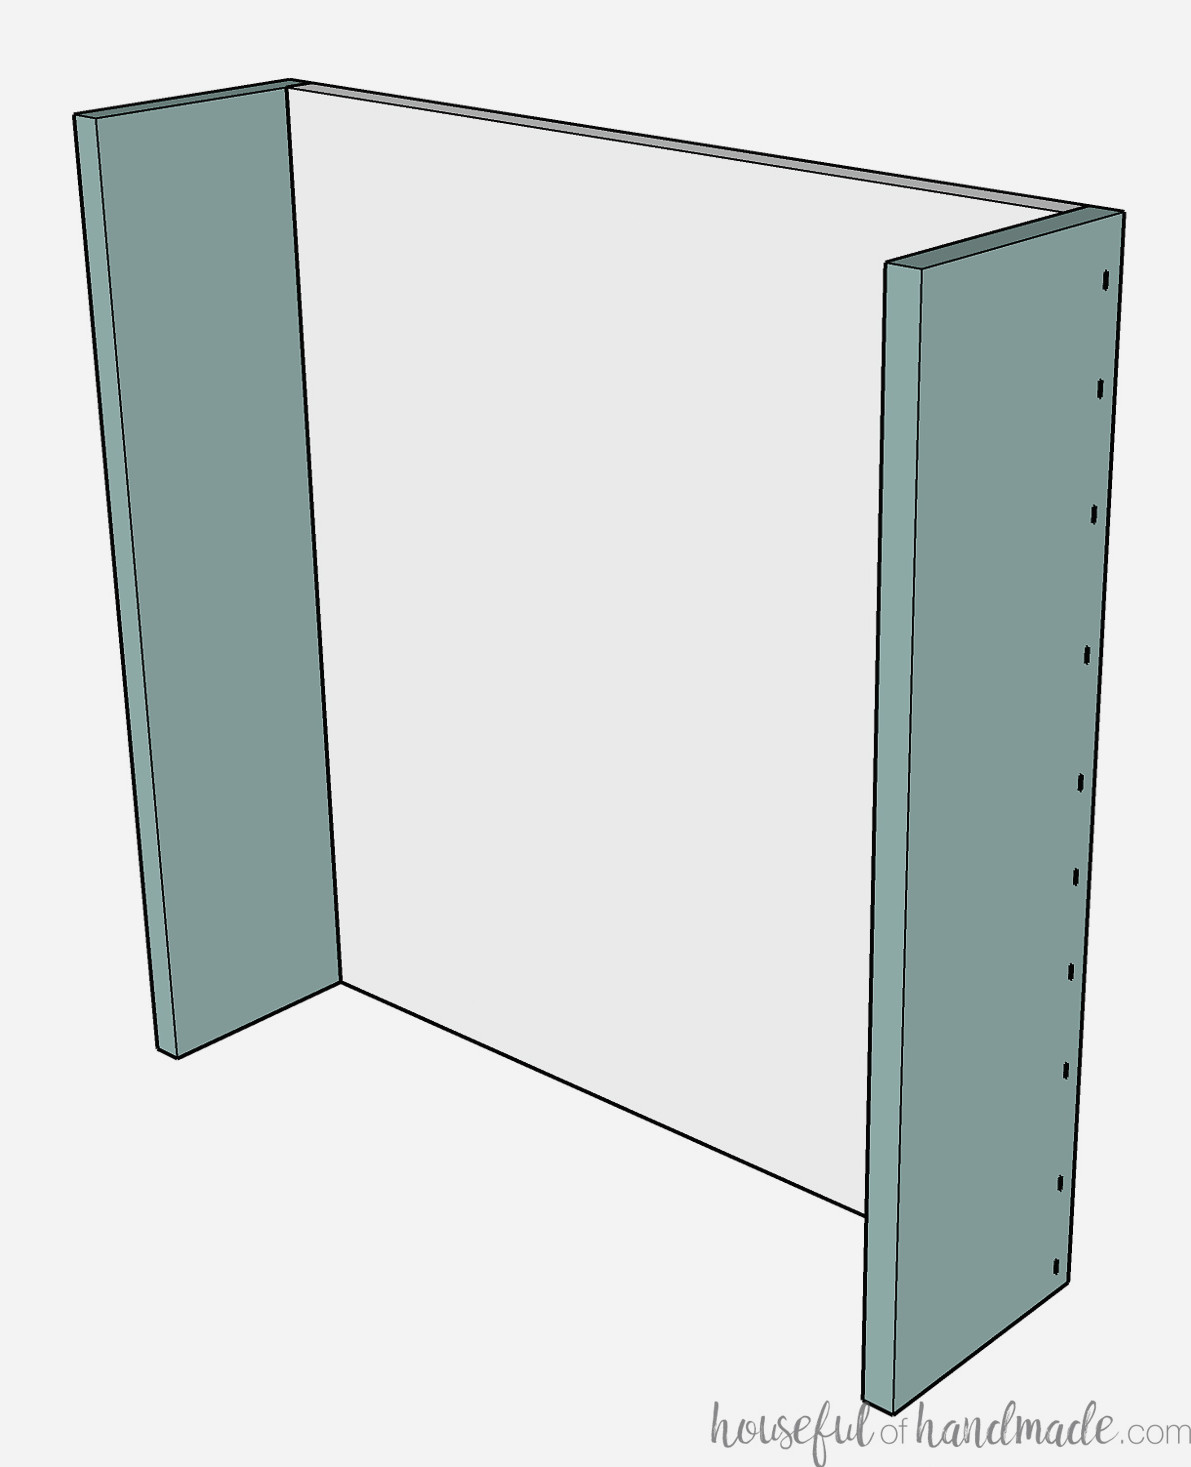
Apply glue to one side, then position the front piece over it. Align it carefully and fasten it with staples or nails every 2-3″.
Do the same with the back piece.
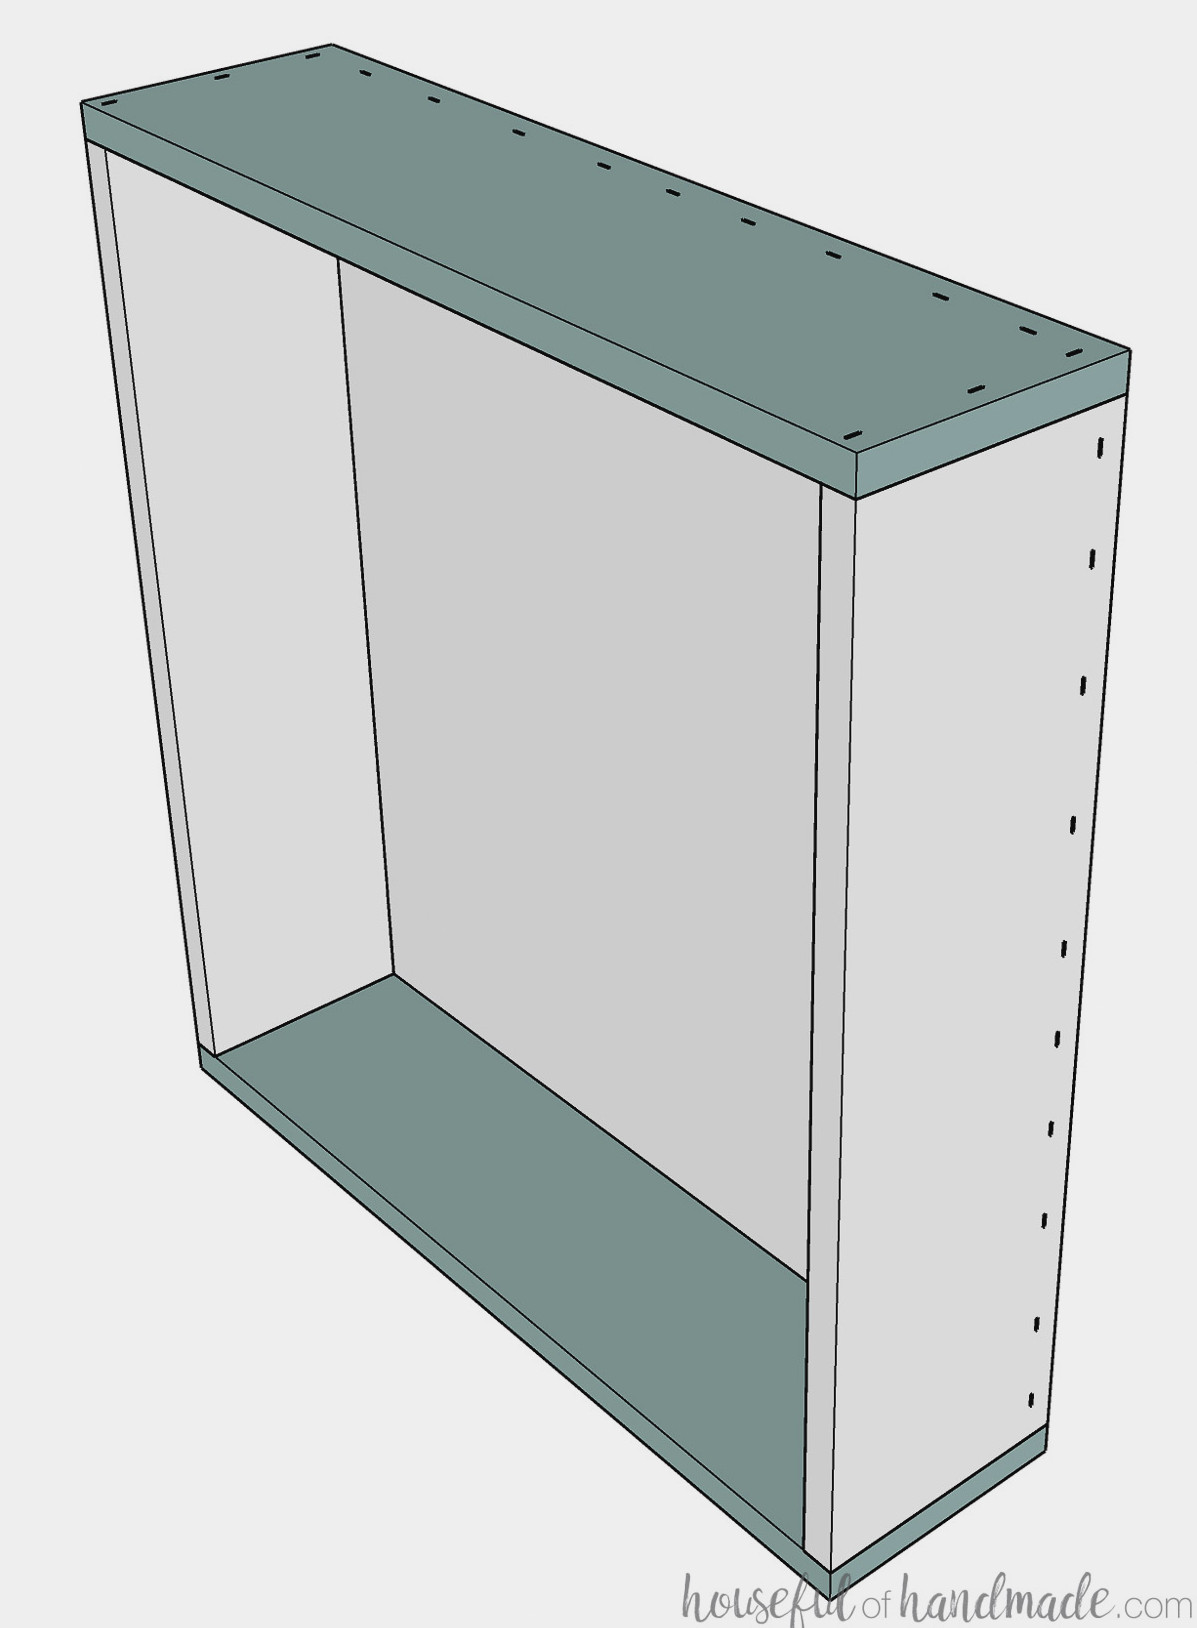
For adjustable shelves, drill shelf pin holes in both the front and back pieces. Two rows of holes will be needed on each piece.
For fixed shelves, mark their desired positions and attach them with wood glue and nails.
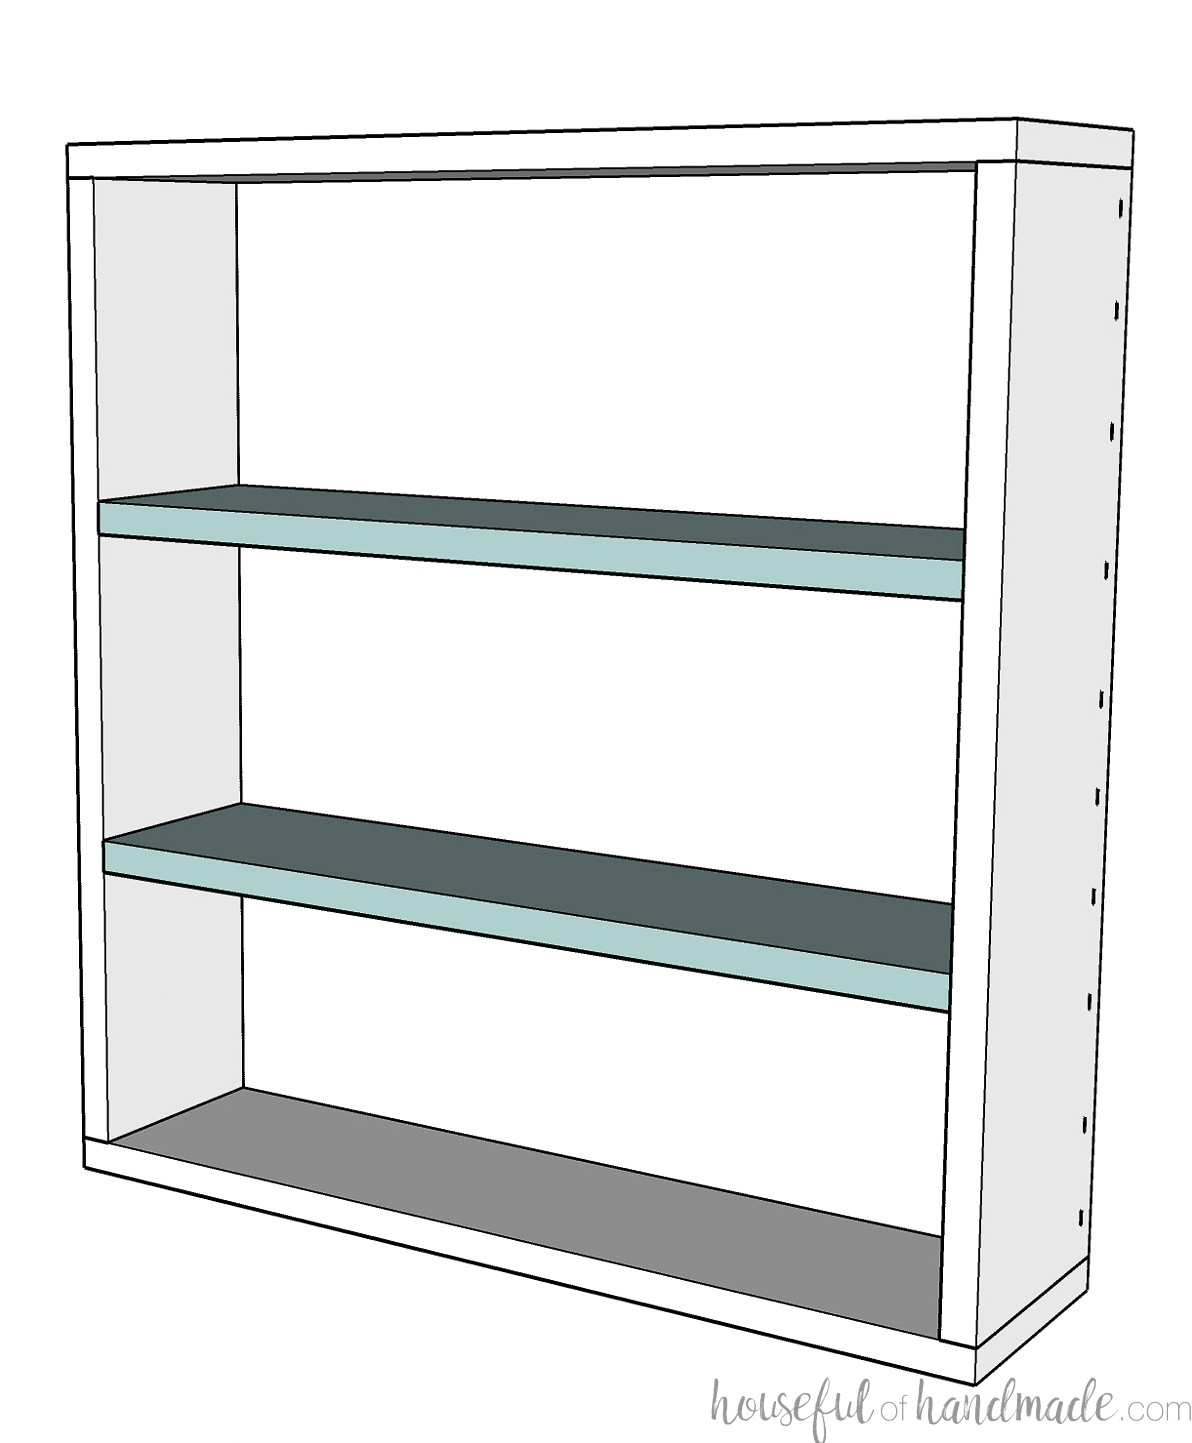
If you are adding shelf fronts, attach each one to the front edge of the shelf boards, keeping it flush with the bottom. This forms a raised edge that prevents items from sliding off.
Fasten the fronts with wood glue and staples or nails. Alternatively, pocket holes are an excellent choice if you want the front to have a clean appearance.
A long bar cabinet pull is another way to keep spice jars secure, similar to the pull on the front of this DIY cookbook stand. These cost more than a small piece of scrap plywood, but they provide an attractive finish.
STEP 2- Construct the Spice Cabinet
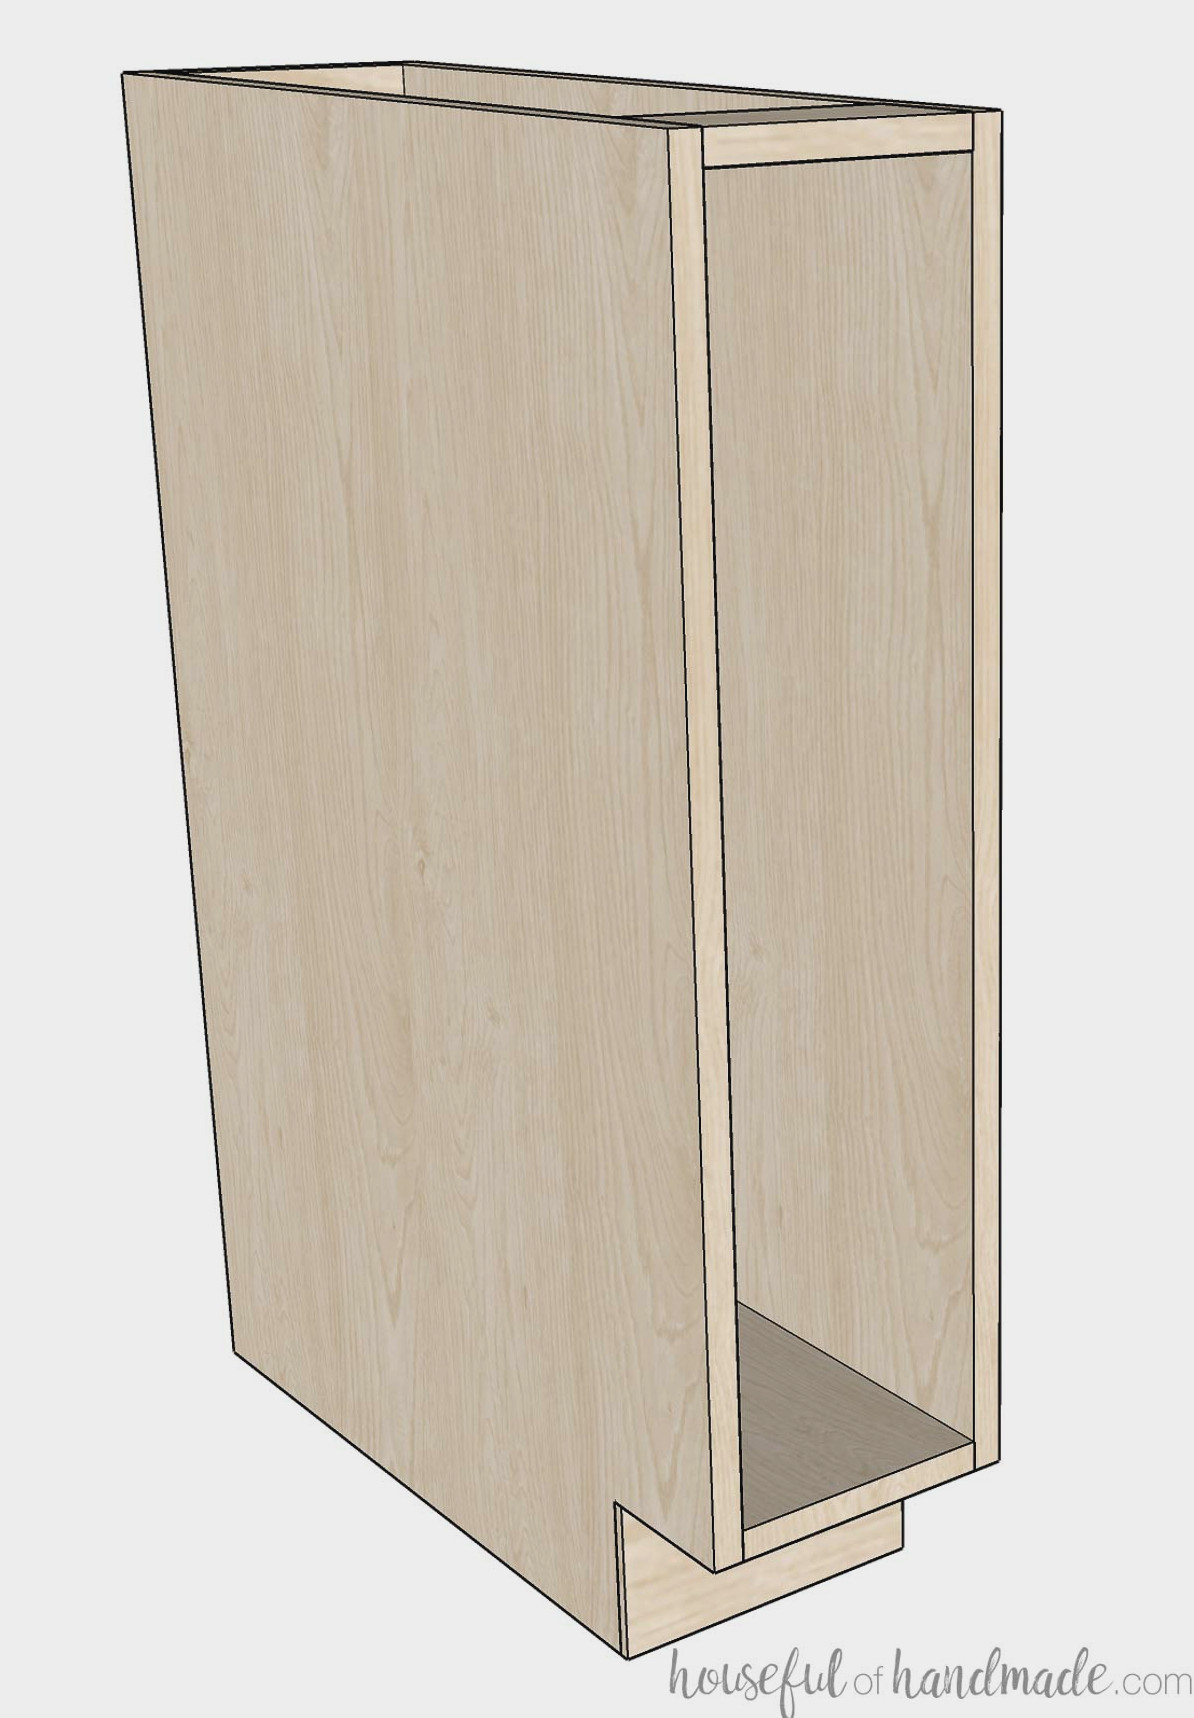
After determining the spice rack dimensions, you can calculate the cabinet size required to hold it. Begin by finding the necessary cabinet opening using this formula:
Spice Rack Width + (Clearance Needed for Drawer Slides x 2) = Cabinet Opening
I installed ball-bearing drawer slides that need 1/2″ of clearance on eachside of the drawer. Therefore, I increased the spice rack width by 1″ to calculate the cabinet opening.
Once you know the required opening, you can determine the cabinet width.
- For face frame cabinets: (Face Frame Width x 2) + Cabinet Opening = Cabinet Width
- For frameless cabinets: (Plywood Thickness x 2) + Cabinet Opening = Cabinet Width
Construct a base cabinet for installing the pull-out spice rack. Use the directions in the base cabinet build plans. This post also provides formulas to help you calculate the cut list for the complete cabinet.
Build this cabinet just like the rest of the base cabinets in your kitchen.
STEP 3- Install the Spice Rack
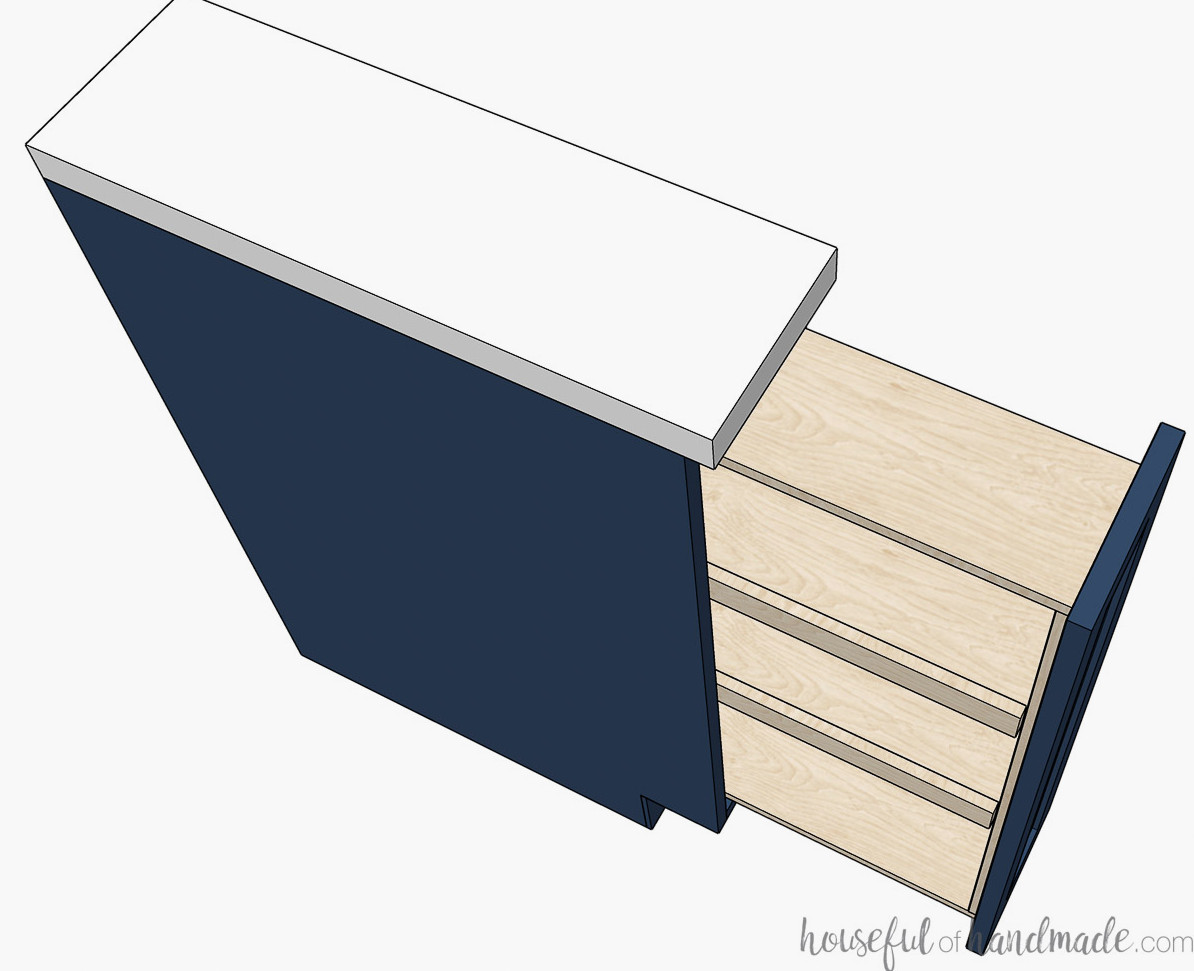
Installing the spice rack is similar to installing a drawer, except both drawer slides will be placed on one side.
For a cabinet with a face frame, add blocking along the cabinet side where the drawer slides will be installed so the slides sit flush with the face frame.
Measure the inside depth of the face frame, then rip scrap boards to that measurement. The pieces only need to be 3/4″ thick and should be roughly as long as the cabinet drawer slide depth.
Add one blocking piece behind each drawer slide. Alternatively, rear drawer slide clips can be used, though they are plastic and received poor reviews, so I have not tested them.
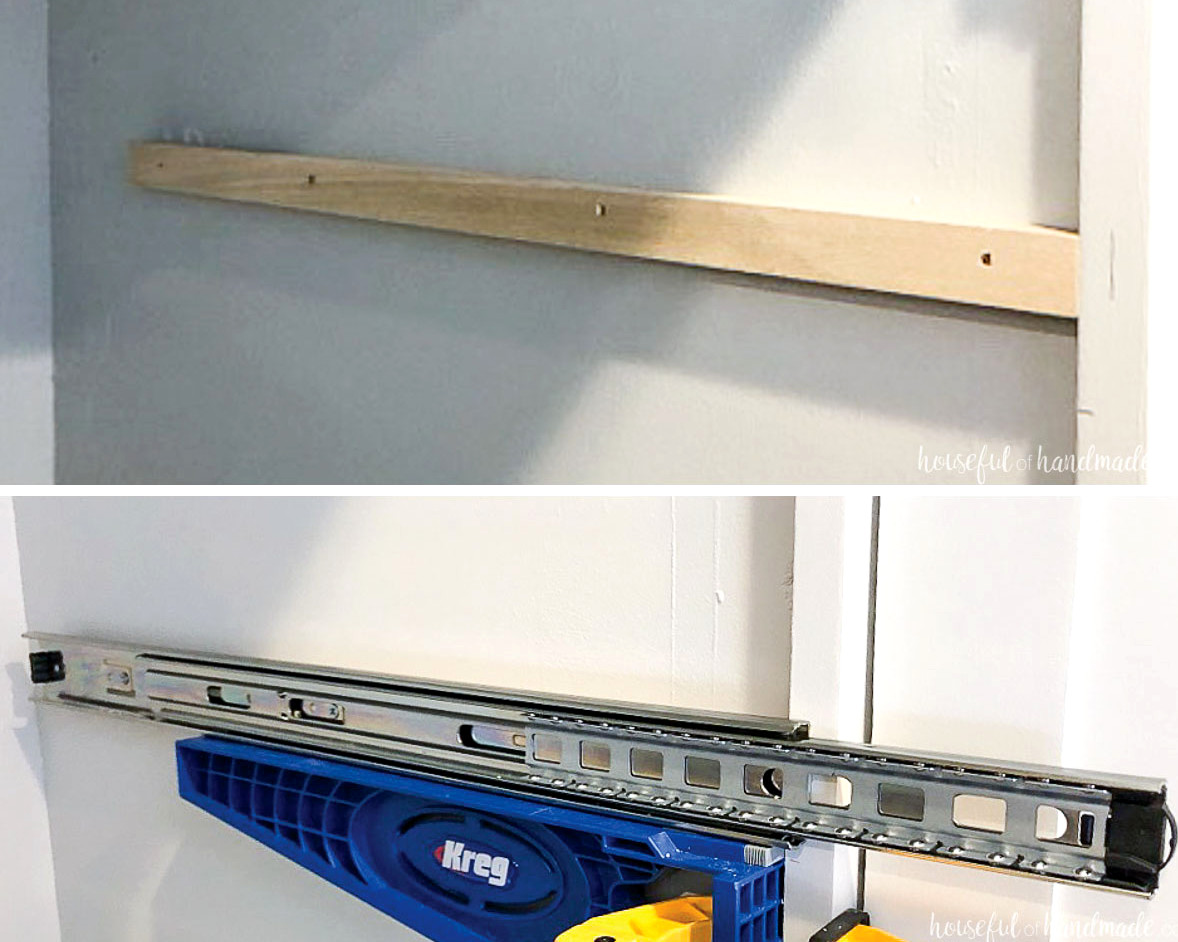
Fasten the drawer slides to the cabinet side against which the back of the spice rack will rest.
Position one drawer slide approximately 1″ above the cabinet bottom. Place the second one approximately 3-4″ below the top.
Mount the spice rack in the center of the cabinet, leaving 1/2″ between it and both the top frame and cabinet bottom.
Learn how to install drawers with ball bearing drawer slides here.
Next, build a DIY cabinet door for the new cabinet. Secure the door to the spice rack by driving wood screws through the insert front and into the door. Use 4 screws to hold it firmly in place and prevent twisting.
Install your cabinet pull or knob, and the project is complete!
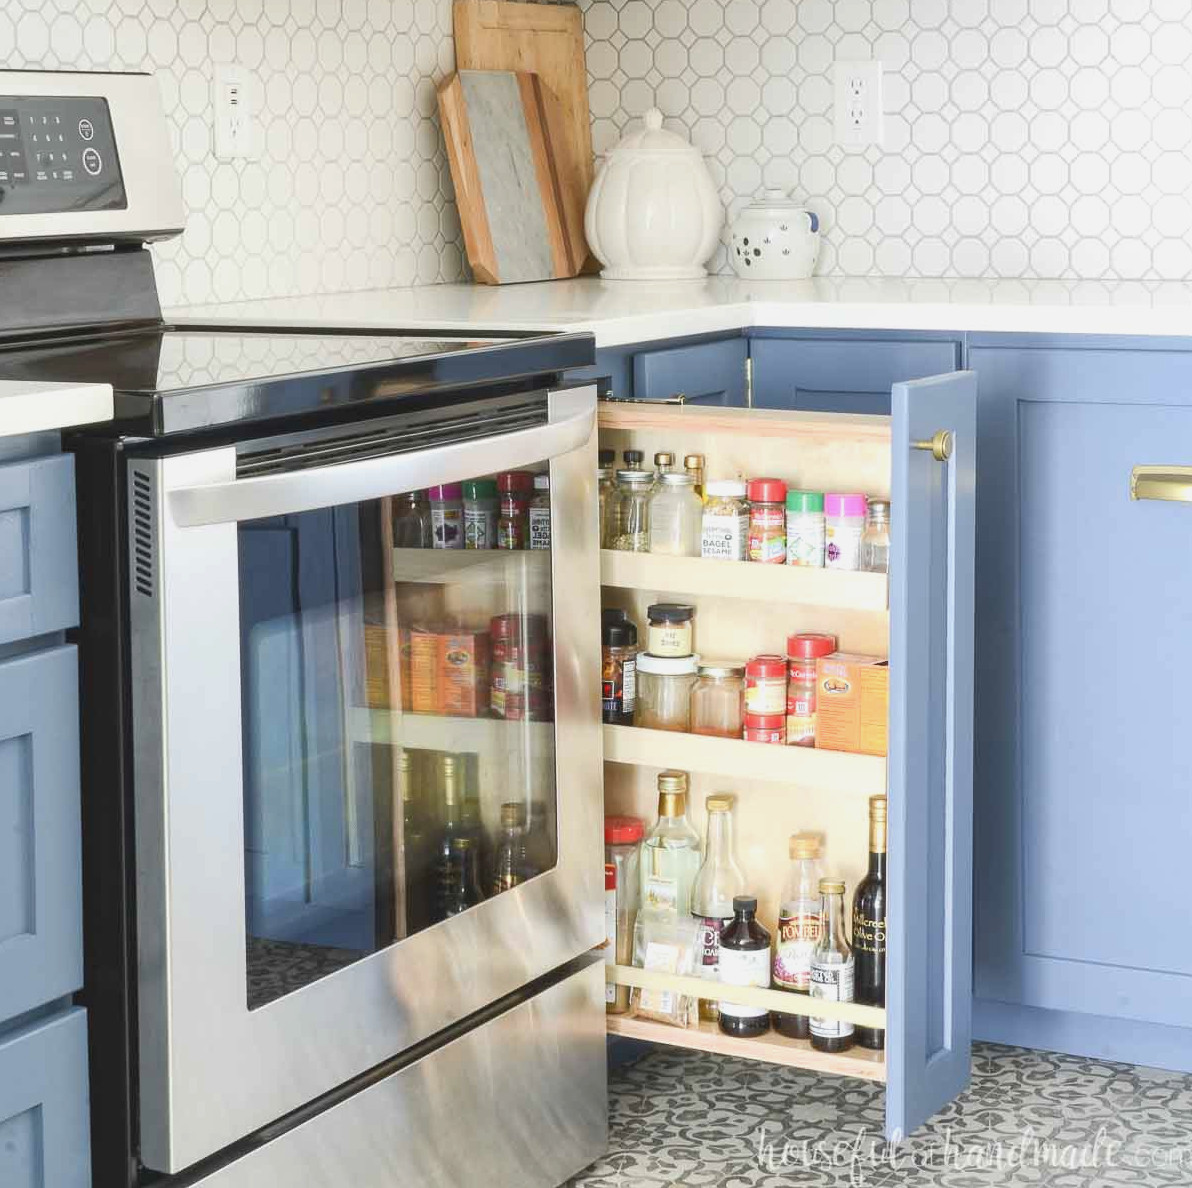
Fill your new spice rack with all your seasonings and enjoy how much simpler they are to locate the next time you cook!
Also, check out this post to discover everything about making your own cabinets for a new kitchen, bathroom, desk, built-ins, and more.
Enjoy building!